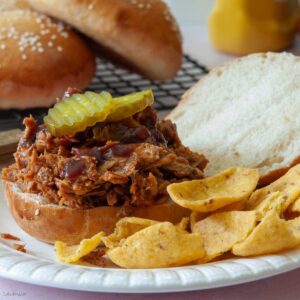
Potato Burger Buns Mixed with a Bread Machine
These potato hamburger buns (mixed in a bread machine) are guaranteed to make your next outdoor party more memorable. They are soft but sturdy buns and flavorful without tasting like dessert. A fresh potato is the secret ingredient.
10
buns
Ingredients
- 1 medium (1 medium) russet potato (7-8 oz)
- ¾ cup + 1 tablespoon (184 g) milk (any fat content)
- 1 large (50 g) egg
- ¼ cup (57 g) unsalted butter (chopped)
- 2 tablespoons granulated sugar
- 1½ teaspoon table or sea salt
- 3 ⅓ cups (400 g) bread flour
- 1 ½ teaspoons instant yeast
Egg Wash
- 1 large (50 g) egg
- 1 tablespoon milk
Instructions
- Place a clean and unpeeled 1 medium russet potato (7-8 oz) into a microwave oven. Cook on HIGH for 3-4 minutes (time may vary according to the size of the potato and the wattage of your oven) until the potato is soft and squishy. As soon as the potato is cool enough to handle, cut the potato in half and scoop out the insides. You will need ½ cup of slightly-mashed potato.
- Add remaining dough ingredients: ¾ cup + 1 tablespoon milk (any fat content), 1 large egg, ¼ cup unsalted butter (chopped), 2 tablespoons granulated sugar, 1½ teaspoon table or sea salt, 3 ⅓ cups bread flour, and 1 ½ teaspoons instant yeast in the order listed. Select the DOUGH cycle and press START.
- Check the dough at least twice by lifting the lid to take a peek. Do this right after the machine starts to see if the paddles are correctly engaged and the dough is starting to form a ball.Recheck the consistency of the dough again 15 minutes into the DOUGH cycle.If your dough is too wet, add flour one tablespoon at a time. The dough should stick to the side, then pull away cleanly.Conversely, if the dough is too dry, add one tablespoon of liquid at a time until the dough looks just right. Find out more about this surprising secret to success with a bread machine here.
- When the DOUGH cycle completes, if the dough has doubled in size, go to the next step. If the dough has not doubled in size, leave it in the machine until it doubles before proceeding.
- Remove the dough from the pan onto a lightly-floured surface. Push the dough down with your palms to remove the bubbles. Shape into a smooth ball.
- Divide the dough into 10 pieces, more or less depending on how big you want your buns to be. (Your buns will be more like slider buns if you divide the dough into 12 or more pieces.) Shape into round balls by pulling the dough from the bottom to the top and pinching it shut to create tension when you turn them over. Watch the video if you want to see how I do it. Place 5 buns on each of two prepared cookie sheets. (To prepare cookie sheets, cover with a silicone mat or grease with Baker's Joy. Parchment paper didn't work for me because it tends to wrinkle during the flattening process.)
- Place each ball onto a cookie sheet. Cover and allow to rest for 15 minutes.
- Flatten the dough balls to less than 1-inch thickness with your palms or a small flat plate. I do this with a piece of wax paper between the dough ball and a flat meat pounder. (See picture above.) Cover with a tea towel to rise one more time.
- About 15 minutes before you think the rolls will be ready to bake (when they are quite puffy), preheat the oven to 400˚F (200˚C).
- Whisk 1 large egg and 1 tablespoon milk together in a small bowl. Brush the glaze over the rolls immediately before you put them into the oven. Try not to leave any unglazed surface. Also, don't use so much glaze that it drips onto the tray.
- Bake the rolls for 12-15 minutes or until the internal temperature reaches 190˚F (or 88˚C) and the rolls are golden brown all over.
Notes
Directions for making bread with a stand mixer or by hand:
- To make this recipe in a heavy-duty stand mixer: Add ingredients to the bowl in the same order. Turn on LOW to mix until all ingredients are moistened. Then, using a dough hook, turn the speed to 2 or 3. Continue beating/kneading until dough becomes smooth and elastic (about 5-10 minutes). Cover and allow to rise in a warm place. Deflate dough gently and shape as indicated in the recipe.
- If making by hand: Combine all ingredients into a shaggy ball in a large bowl. Turn dough out onto a floured surface. Knead with your hands until the dough becomes smooth and elastic. Kneading will likely take 10-20 minutes, depending on your experience. Place the dough ball into a greased bowl. Cover and allow to rise until double. Deflate the dough gently and shape it as indicated in the recipe.
- Please note: If you only have active dry yeast, use 1/4 teaspoon more than called for in the recipe. It no longer needs to be dissolved first, but you can if you prefer.
Nutritional Information
Serving: 1bun | Calories: 248kcal | Carbohydrates: 38g | Protein: 8g | Fat: 7g | Saturated Fat: 2g | Polyunsaturated Fat: 2g | Monounsaturated Fat: 3g | Trans Fat: 1g | Cholesterol: 39mg | Sodium: 429mg | Potassium: 193mg | Fiber: 2g | Sugar: 4g | Vitamin A: 279IU | Vitamin C: 1mg | Calcium: 42mg | Iron: 1mg