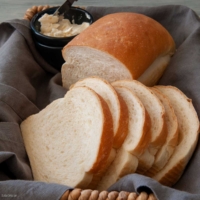
Basic White Bread Machine Recipe
This basic Bread Machine White Bread is a soft and fluffy 1.5-pound loaf with no eggs and not a lot of sugar or fat.
14
slices
Ingredients
- 1 cup (227 g) water - cool
- 1 tablespoon (1 tablespoon) sugar - granulated
- 1¼ teaspoon (1¼ teaspoon) table or sea salt
- ¼ cup (21 g) nonfat dry milk - powdered
- 1 tablespoon (1 tablespoon) butter - chopped
- 1 teaspoon lemon juice
- 3 cups (360 g) bread flour
- 1½ teaspoon (1½ teaspoon ) instant or bread machine yeast
Instructions
Making the dough:
- Add 1 cup water, 1 tablespoon sugar, 1¼ teaspoon table or sea salt, ¼ cup nonfat dry milk, 1 tablespoon butter, 1 teaspoon lemon juice, 3 cups bread flour, and 1½ teaspoon instant or bread machine yeast, to the bread machine pan. Select the DOUGH cycle and press START.
- Check the dough at least twice during the mixing and kneading phase by lifting the lid to take a peek. The first time, look immediately after the machine starts mixing to ensure the paddles are engaged correctly. Look again 15 minutes into the DOUGH cycle to assess the consistency of the dough. For most recipes, the dough should stick to the side, then pull away cleanly.If your dough is too wet, add flour one tablespoon at a time.Conversely, if the dough is too dry, add one tablespoon of liquid at a time until the dough looks just right. Read more about this surprising secret to success with a bread machine here.
- It's important to check the dough at least twice during the mixing and kneading phase. First, lift the lid right after the machine starts mixing to ensure the paddles are working properly. Then, check again about 15 minutes into the DOUGH cycle to assess the dough's consistency. Ideally, the dough should stick to the side and then pull away cleanly. If the dough is too wet, gradually add flour, one tablespoon at a time. If the dough doesn't stick at all, add water, one tablespoon at a time.
Shaping the dough:
- Take the dough out of the pan and place it on a lightly floured surface. Use your palms to push down on the dough to remove any air bubbles. Shape it into a smooth ball, cover it, and let it rest for 15 minutes.
- Roll the dough out into a rectangle, aiming for dimensions of about 10 x 13 inches. Use a rolling pin to gently press down any large bubbles, especially around the edges, to improve the bread's texture and prevent unwanted holes.
- Start rolling the dough from a short side, or from a long side if you're using a Pullman pan. Roll it snugly without stretching the dough. Use your fingers to pinch the seam closed. Then, pull up each end towards the seam and pinch those shut as well. Refer to the process pictures in the post for guidance.
- Turn the dough cylinder over so the seam is on the bottom and gently place it into a greased loaf pan. This recipe is suitable for either a 9x5-inch or an 8½x4½-inch loaf pan. Each size will yield a slightly different loaf shape.
- Cover the dough with a towel and let it rise one last time before baking. This rise can take from 45 minutes to over an hour. Focus on the dough's progress rather than the clock. Start preheating the oven to 350 °F (180˚C) roughly 15 minutes before you expect the bread to be ready for baking.
- When the bread has nearly doubled in size, bake it in the middle of the oven for 25-30 minutes. The internal temperature of the bread should reach between 195-200 °F (90-93˚C) for it to be properly baked.
- After baking, take the bread out of the oven and let it sit in the pan for 15 minutes. Then, transfer it to a cooling rack and let it cool for at least 30 minutes, ideally an hour, before slicing.
Notes
Directions for making bread with a stand mixer or by hand:
- To make this recipe using a heavy-duty stand mixer: Add the ingredients to the mixer bowl in the same order as listed. Start on LOW speed to mix until all ingredients are moistened. Then, switch to using a dough hook and increase the speed to 2 or 3. Continue beating/kneading until the dough becomes smooth and elastic, which should take about 5-10 minutes. Cover the dough and let it rise in a warm place. Once risen, gently deflate the dough and shape it as directed in the recipe.
- If making the dough by hand, mix all ingredients in a large bowl to form a shaggy ball. Turn the dough out onto a floured surface and knead by hand until it becomes smooth and elastic. Kneading might take 10-20 minutes, varying with your experience. Place the kneaded dough in a greased bowl, cover it, and let it rise until it doubles in size. After rising, gently deflate the dough and shape it as the recipe directs. Note about the yeast:
- If using active dry yeast instead of instant yeast, add an extra 1/4 teaspoon to the recipe. Although it's not necessary to dissolve active dry yeast in water anymore, you may do so if you prefer.
- If your bread is taking too long to proof during the final rise, consider adding an additional 1/4 to 1/2 teaspoon of yeast or find a warmer spot for the dough to prove. While using less yeast and allowing for a longer rise can enhance flavor, it may not always be practical. Adjust according to your convenience and needs.
Nutritional Information
Serving: 1slice | Calories: 123kcal | Carbohydrates: 22g | Protein: 4g | Fat: 2g | Saturated Fat: 1g | Polyunsaturated Fat: 1g | Monounsaturated Fat: 1g | Trans Fat: 1g | Cholesterol: 4mg | Sodium: 225mg | Potassium: 70mg | Fiber: 1g | Sugar: 2g | Vitamin A: 47IU | Vitamin C: 1mg | Calcium: 26mg | Iron: 1mg