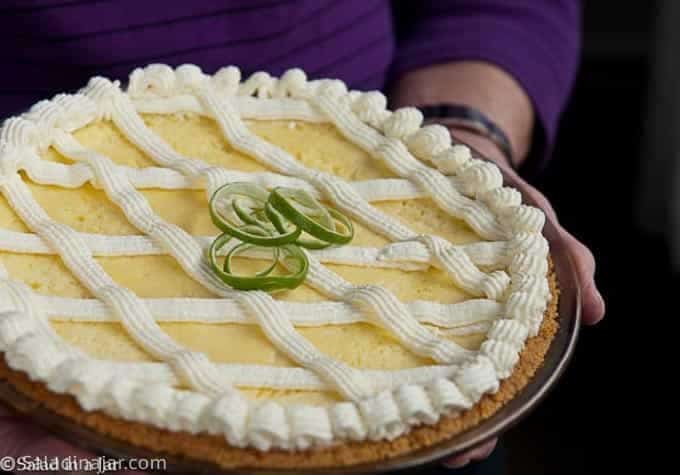
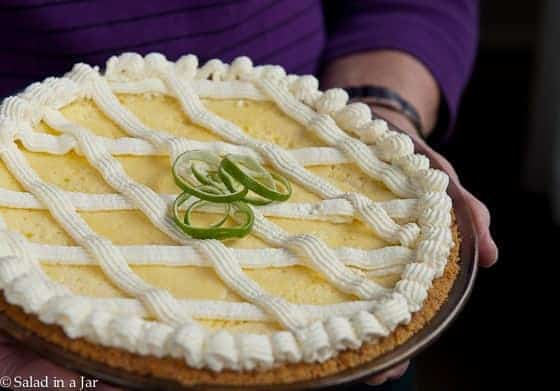
Baked Key Lime Pie (With the Right Way to Squeeze a Lime!)
Sneak Preview: This baked Key Lime Pie features sweetened condensed milk, key limes, and whipped egg whites for a lighter texture. Plus, learn the right way to use a citrus squeezer!
This post contains affiliate links. As an Amazon Associate, I earn from qualifying purchases at no extra cost to you.
Key lime pie always brings back memories of beach vacations and warm, sunny days. While the uncooked version is popular, baking the pie gives it a lighter texture and a mellow, well-rounded flavor.

Ingredients & Substitutions
- GRAHAM CRACKER CRUMBS
- About 20 squares, crushed
- Substitute vanilla wafers
- POWDERED SUGAR
- Substitute granulated sugar
- BUTTER
- Melted
- Substitute coconut oil or margarine
- EGGS
- Large size (50 grams ±)
- Separated, for a light and fluffy texture
- Large size (50 grams ±)
- SWEETENED CONDENSED MILK
- Provides richness and sweetness
- Do not substitute evaporated milk
- KEY LIME JUICE
- Freshly squeezed for the best flavor
- Substitutes; Persian lime juice with a splash of lemon juice
- HEAVY CREAM
- Substitute coconut cream or a dairy-free option
Baked Key Lime Pie + (The Right Way to Squeeze a Lime!)
Ingredients
Crust:
- 1-1/2 cup (23 g) graham cracker crumbs about 20 squares
- ½ cup (60 g) powdered sugar
- ½ cup (113 ½ g) butter, melted
Filling:
- 4 (200 g) large eggs, separated
- 1 14 oz. can (397 g) sweetened condensed milk
- ⅓ cup (76 g) fresh-squeezed key lime juice
- 9- inch graham cracker pie crust purchased or homemade
Topping:
- 1 cup (238 g) heavy cream
- ⅓ cup powdered sugar
- 1 teaspoon vanilla extract
Instructions
Crust
- Crush 1-1/2 cup (23 g) graham cracker crumbs using food processor or blender. Add 1/2 cup (60 g) powdered sugar and 1/2 cup (113 ½ g) butter, melted. Pulse until mixed.
- Press into 9-inch pie shell.
- Bake at 300˚F for 8 minutes, then set aside to cool.
Prepare the Filling
- Increase oven temperature to 325°F (165°C). Beat 3 egg whites in a small bowl until stiff peaks form. Set aside.Using the same beaters, whip egg yolks and one extra egg white in a separate bowl until thick and pale. Slowly mix in sweetened condensed milk, followed by key lime juice. Fold in the beaten egg whites gently—don't overmix!
Bake the Pie
- Pour the filling into the baked crust. Bake for 10-15 minutes until set but slightly jiggly in the center. Cool at room temperature, then refrigerate for 2-3 hours.
Make the Whipped Cream Topping
- Whip 1 cup (238 g) heavy cream until soft peaks form. Add ⅓ cup powdered sugar and 1 teaspoon vanilla extract. Continue beating until the cream holds a stiff peak. Spread over chilled pie.
Nutrition
All images and text ©️ Paula Rhodes for SaladinaJar.com
FAQ About Baked Key Lime Pie
- How do I know when the pie is done?
- The filling should be set but still slightly wobbly in the center. It will firm up as it cools.
- Can I use regular limes instead of key limes?
- Yes! Key limes are smaller and more aromatic, but Persian limes work as a substitute.
- How long does key lime pie last?
- Store it covered in the fridge for up to 3 days.
- Can I freeze key limes?
- Yes. According to Leaf.TV, You can freeze limes whole, wedged, or sliced, or you can freeze the juice. You can even freeze the lime zest for up to 2 months. Thaw in the fridge before serving.
Parting Thoughts:
A special thanks to my sister Kay for this fantastic recipe. Whether you’re on the beach or in your kitchen, a slice of baked Key Lime Pie is always a good idea! The graham cracker crust comes from Helen Corbitt’s Cookbook(paid link).
Need help troubleshooting? Email me: Paula at saladinajar.com—photos welcome!

I adore cooking, but detest cleaning up, so the less mess I make the better. I clean as I cook so that by the time it’s in the oven or on the stove the kitchen looks like I just started. If I don’t do it that way, I get depressed. That’s why I try to get cooking in as early in the day as possible. By 6PM, I’m ready to call it quits, so everything gets set up and cleaned up before then. I specialize in methods and recipes that require very little kitchen disruption.
So funny! I’ve had this same conversation with my husband about a year ago. I conceded that he was right, the lime half needed to be facing downwards when you squeeze it That way the juice goes directly out the holes more easily, hopefully giving you more juice. I was doing it face up and squeezing and the unfortunate side affect is that the lime now sticks (suctions?) to the squeezer making it a touch more difficult to remove.
I love my squeezer so much, I bought them for all my sisters! One decided she hated it and gave it to my neice. She went back to a reamer (!!!)- which I think it just crazy. It’s funny people can be so passionate about squeezing citrus, though it is pretty much the best stuff on Earth!
According to Rick Bayless citrus goes in those presses cut side down, like in the photo on the left
Correct answer is the one on the left. That is what the directions with mine said, and what the site said, when I looked it up. It sort of turns the fruit inside out and gets the most juice out. I deem it true, also, because I have tried it each way.
This Recipe is awesome!! This is same original recipe for key lime pie found on the the Carnation Sweetened Condensed milk can for over 40 years!! Will not find a better key lime pie recipe!!! 🙂
Can’t wait to try the recipe but was surprised to see that I’ve been using my citrus press incorrectly. The cut side should be facing down so the juice goes out the holes and doesn’t squirt upwards. Plus, it turns the peel inside out, extracting every bit of juice. Youtube doesn’t lie: http://www.youtube.com/watch?v=EAlelDEfkUw
I adore cooking, but detest cleaning up, so the less mess I make the better. I clean as I cook so that by the time it’s in the oven or on the stove the kitchen looks like I just started. If I don’t do it that way, I get depressed. That’s why I try to get cooking in as early in the day as possible. By 6PM, I’m ready to call it quits, so everything gets set up and cleaned up before then. I specialize in methods and recipes that require very little kitchen disruption.
I vote for cut-side down because if you do it the other way it blocks the holes which are there for a reason-to let the juice drain out. Sometimes, depending on the size of the fruit, I will do it one way, flip it and do it again the other way just to get more juice. I even quarter grapefruit and squeeze it rather than drag out my electric juicer which would make me have an entire machine to wash.
Henrietta,
Grapefruit??? Why haven’t I thought of quartering them like that? You are a genius. Can’t wait to try it. pr
As for the lime, I’ve always done it with the face up like on the right but on food network I’ve always seen them place them face down like on the left.
I agree with the lime facing down, picture on the left. Mine works really well and leaves the lime turned inside out. Strangely enough, it doesn’t work on lemons or tangerines even though they are the same size.
Picture on the left (lime facing DOWN). BTW love your site!
I do it like the pic on the LEFT But now I’m not sure that’s RIGHT. ha ha
So funny! I’ve had this same conversation with my husband about a year ago. I conceded that he was right, the lime half needed to be facing downwards when you squeeze it That way the juice goes directly out the holes more easily, hopefully giving you more juice. I was doing it face up and squeezing and the unfortunate side affect is that the lime now sticks (suctions?) to the squeezer making it a touch more difficult to remove.
I love my squeezer so much, I bought them for all my sisters! One decided she hated it and gave it to my neice. She went back to a reamer (!!!)- which I think it just crazy. It’s funny people can be so passionate about squeezing citrus, though it is pretty much the best stuff on Earth!
Cut side down. Sorry!
Lovely looking pie, and I vote for the lime cut side up.
Great looking pie! Weighing in on the juicing issue, I vote for cut side down.
Mimi
Cut side facing down (Picture on the left)
Cut side down….
Key lime pie is the best of all things. It’s the only dessert I cannot resist.
Meat side down and peel up! I think you actually get more juice this way! The pie looks wonderful:)
p.s.
congratulations!
Thank you both for this delicious looking recipe. I wish we could get key limes over here.
Oh and your way is the right way of course Paula 🙂
The picture on the left is correct for a key lime. Because the key lime is so small it is inverted when squeezed so you can get most of the juice out; however, for a regular size lime the picture on the right is correct. You turn the juicer sideways and the juice comes out the side instead of the holes.
According to Rick Bayless citrus goes in those presses cut side down, like in the photo on the left
Now that I read all other comments, I agree with Velda, it turns the lime inside out for maximum juice extraction, that’s what happens to mine as well. I’m very curious to know which of you is right hehe
The lime pie looks fantastic, I love lime/lemon desserts!
I have a gadget like that, much smaller, but I guess the same functionality, I use it like the pic on the left. Yes, I know it makes us think the opposite…
However way you squeezed the limes, it worked! This pie looks wonderful.
By the way, I squeeze my limes, lemons and oranges with the peel side facing me.
Mmmm, great-looking pie. I have a two similar juicers–one for oranges and one for smaller citrus, like limes. The instructions say squeeze cut side down (left photo). If you don’t, juice goes everywhere b/c it squirts out of the top part, too. (This has happened to a few unsuspecting kitchen helpers when it’s mojito time!)
Bonnie, Good point about the squirts.
Absolutely one of my favorite desserts if chocolate is not available. Will have to try this! Thanks Kay! And I vote for the picture on the left.
Great photos. I love the idea of using powdered sugar with the graham crackers.
I vote for cut side up, as pictured on the right.
Hello Paula, I love sister time, I never get quite enough! I would put the lime half upside down but I can see the reasoning with the other way too! The pie looks fabulous, I would be nibbling on it all day and it would never last till tomorrow!
I vote for the cut side down.
I vote for the one on the left. I’ve actually never had Key Lime pie, but this looks amazing. I’m going to have to try it out.
Correct answer is the one on the left. That is what the directions with mine said, and what the site said, when I looked it up. It sort of turns the fruit inside out and gets the most juice out. I deem it true, also, because I have tried it each way.
Velda, What website are you looking at? Very interesting. pr
I say the pic on the right – I can’t believe how divided the comments are! I never would have thought about doing it any other way. LOL
Without thinking about I’d probably use the way on the right, but now that you show the picture I’m thinking the one on the left just might give out more juice. Either way, I’d sure like a piece of that pie!!
I vote for the left hand pic, with the cut side facing down. Whichever way you juiced it though, it sure made a pretty pie that I’d love! 🙂
The picture with cut side up is correct. Which is the same way you’d use the older juicers. so the built in reamer goes into the cut area or pulp area of the lime or lemon
Which ever way gets the most juice! 🙂
I was thinking of making key lime pie earlier today! Haven’t had is in so long. And I always do cut side down (left photo)
Yum Key Lime Pie!!! To weigh in on the lime, I vote cut side up, but I’m sure either way works. :o)
Without thinking, I would do it like the photo on the right simply because the lime mimics the shape of the metal squeezy thing. Either way, that is an amazing looking pie!
Mmmm, key lime! I would do it like the picture on the right. (Doesn’t mean that’s the correct way. A chef told me once that with key limes, since they are so small, you just cut it about 2/3 of the way, so there is more to juice in one half of it. If you cut a key lime right in half, you’re not getting much juice out of either one. Make sense?
I always put my lime half with the cut side facing down. The pie looks great – wish I could have a slice!
According to all the food network chefs that use these, the lime peel is facing up with the cut side facing down.
The cut part of the lime should face down, like the picture on the left.
The way on the left is correct.
Fun! Looks yummy! I think the inside of the lime should be facing up like the picture on the right. I also like the way you mentioned the grandbaby on the way:+)