31 Top Questions About Making Yogurt at Home
Sneak Preview: Get answers to your top questions about making yogurt at home! Learn how to fix runny yogurt, prevent slimy textures, and make the thick, creamy yogurt of your dreams.

This post contains affiliate links. As an Amazon Associate, I earn from qualifying purchases at no extra cost to you.
Did your yogurt not turn out as planned? Don’t worry—I’m here to help you troubleshoot and make your next batch creamy and delicious!
If you’re just starting out, it’s a good idea to learn about potential pitfalls ahead of time. Let’s make your yogurt-making journey smooth and rewarding. Keep reading!
I am so glad I found your website! Using the microwave is so much easier and quicker. When I would make it (yogurt) on the stove it would take forever or scald the bottom. Thank you so much for your thorough information and troubleshooting!!—ABBEE
Homemade Yogurt Questions
1. How Do I Make Yogurt at Home?
- Basic Steps: Heat milk to 175-180°F, cool to 110°F, add starter, and incubate at 100-110°F
- Non-Dairy Option: Use special cultures for plant-based milk (paid link)
Get all the details on how to make the yogurt of your dreams.
2. Do I Need a Yogurt Maker?
- Optional: No, but helpful for steady temperature control
- Alternatives: Instant Pot, oven light, or cooler with warm water bottles
- Pro Tip: Ensure temperature stays between 100–110°F
3. How Can I Tell If My Yogurt Is Set?
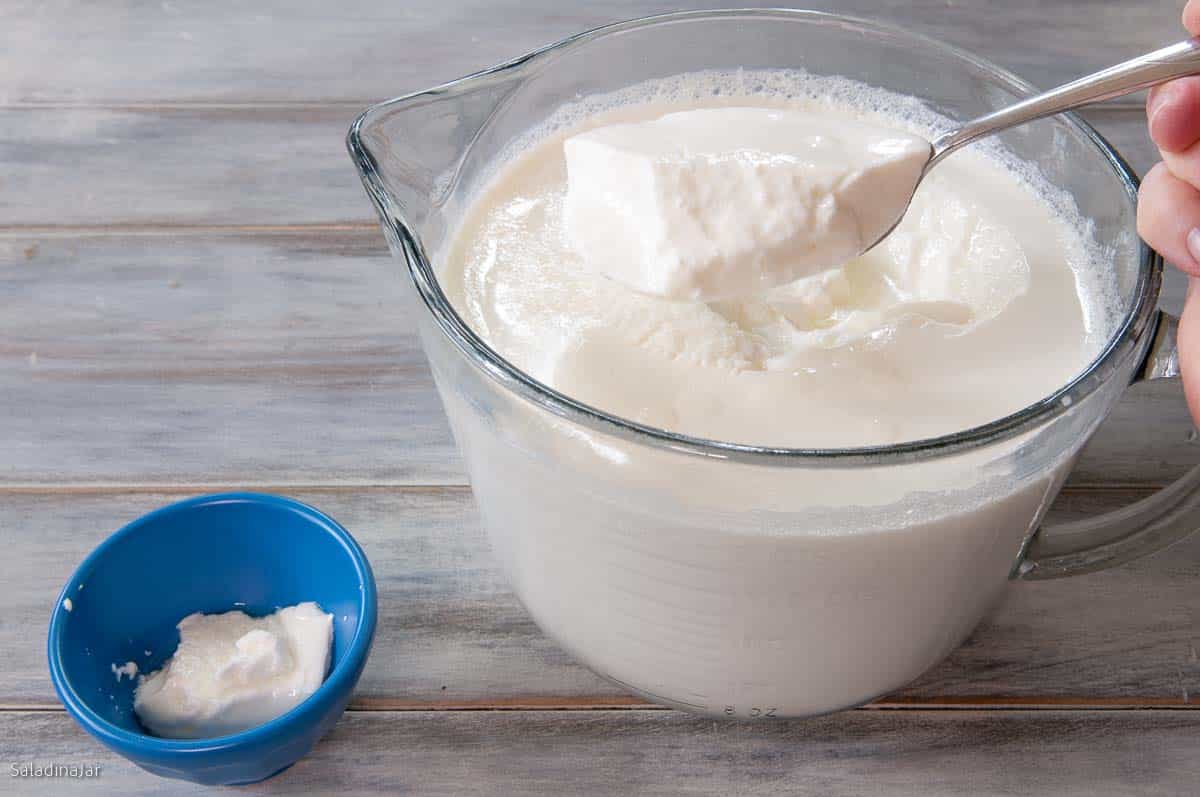
- Visual Test: Jiggles like Jell-O when tapped
- Tilt Test: Bulges gently without spilling
4. Why Does My Yogurt Look Watery?
- Whey is Normal: Stir it back in or strain for thicker yogurt
- Incubation: Longer times release more whey
5. Why Didn’t My Yogurt Set?
- Starter Issue: Ensure it’s fresh and active
- Inconsistent Temperature: Maintain 100–110°F with a thermometer
- Disturbance: Avoid moving or stirring during incubation
6. Can I Try Again If My Yogurt Didn’t Set?
- Safe Milk: If it smells fine, reheat to 100°F (not higher-it might cause curdling), add new starter, and re-incubate
- Other Uses for Failed Yogurt: Substitute for buttermilk or make ricotta cheese
Read more details about yogurt failure.
7. Is Heating Milk to 175-180°F Necessary?
- For Texture: Yes, it improves thickness by denaturing (rearranging proteins).
- Optional: Use the cold start method.
8. Can I Make Raw Milk Yogurt?
- Yes, but it’s thinner: Raw milk yogurt often has a looser texture.
Read more details about making raw milk yogurt.
9. What Happens If I Boil or Overheat the Milk?
- Boiling milk won’t ruin yogurt but it may cause a grainy texture. Regular pasteurized milk needs to be heated (see question 7), but not boiled.
10. Can You Microwave Milk for Yogurt?
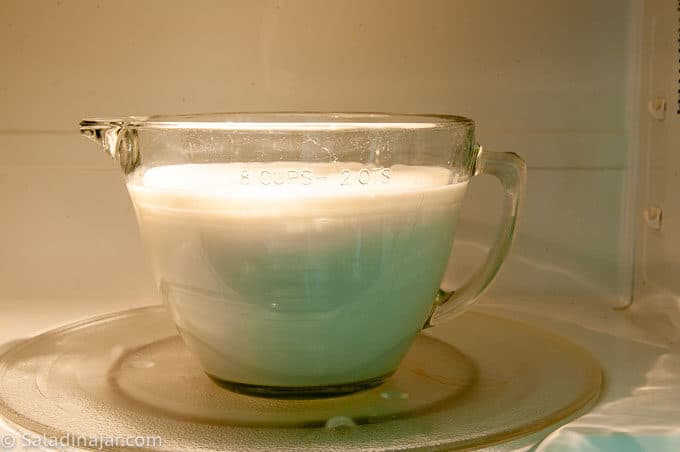
- Yes! It’s quick and prevents scalding.
- Convenient: Requires less monitoring and stirring.
- Use a thermometer: to ensure accuracy.
- Easy clean-up.
Read more about how to microwave milk to make yogurt.
11. How Long Is the Incubation Time?
- Standard Time: 3-5 hours, longer if you like a tangy flavor
- If Not Set After 8 Hours: Check temperature or try adding more starter.
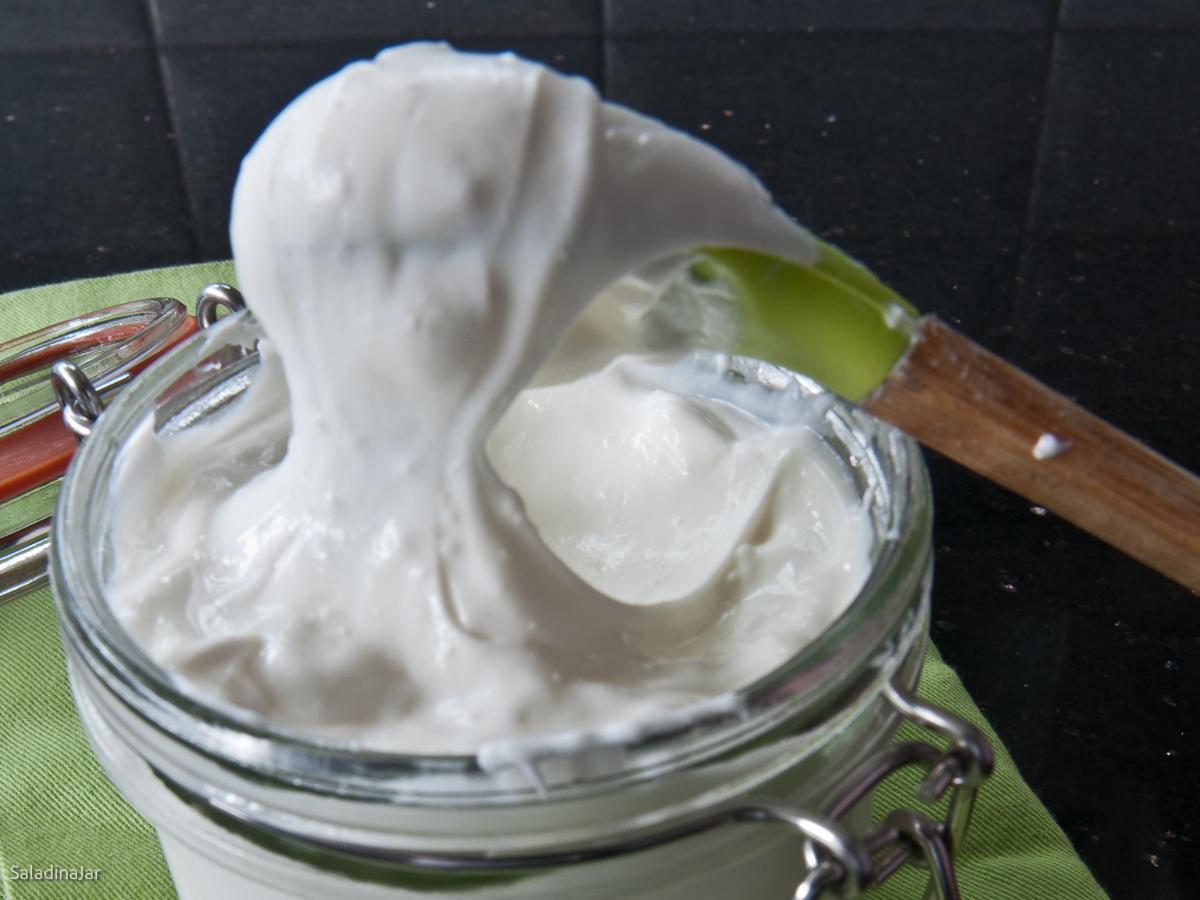
12. How Can I Make Thicker Yogurt?
- Heat and Hold: Heat milk to 180°F and hold for 15 minutes
- Strain yogurt: to remove whey
- Experiment: Try milk with more fat or a different starter
- Additives: Some people use gelatin or dried milk
13. How Do I Strain Yogurt?
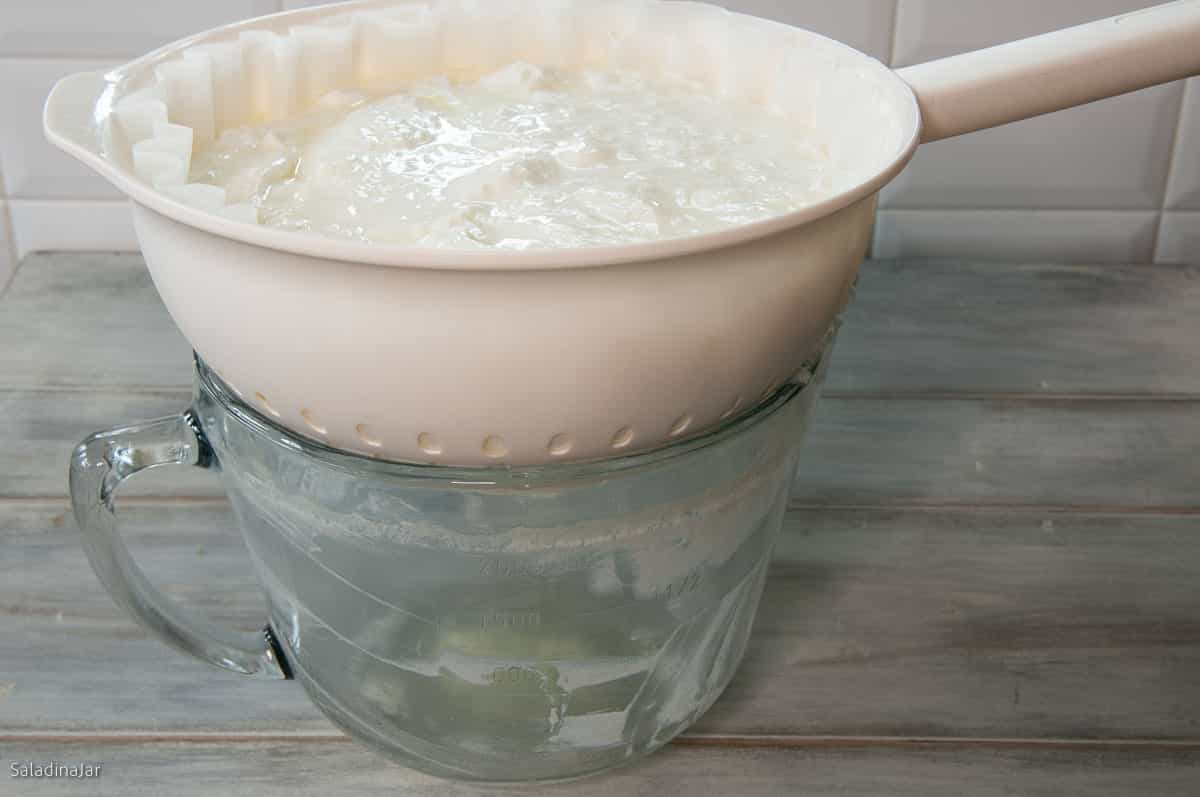
- Cheap and Effective: Use a colander with or without coffee filters or cheesecloth
- Quick and Reusable: A reusable yogurt bag
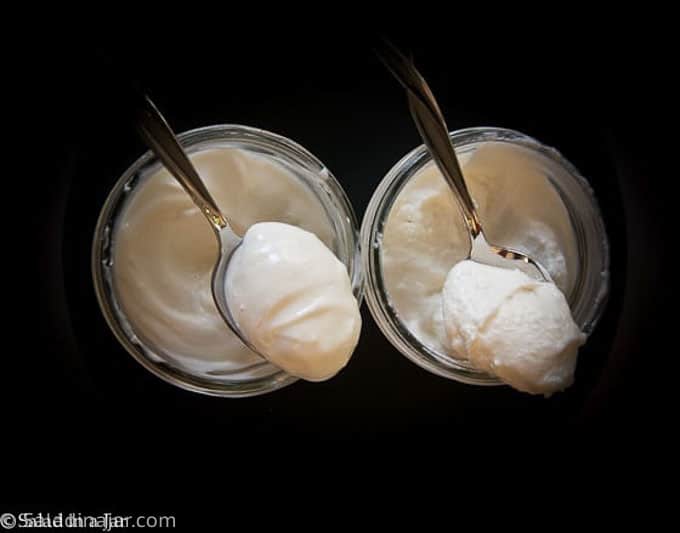
14. What’s the Difference Between Regular, Greek, and Icelandic Yogurt?
- Regular: Unstrained, thinner texture
- Greek: Strained to remove some whey
- Icelandic or Skyr: Thickest, with even more whey removed
15. Does Milk Type Matter?
- Skim, 1%, 2%, or whole milk all work
- Half and half and whole cream (cream fraiche) will work
- Whole milk: Produces creamier yogurt
- Ultra-pasterurized milk: can be hit or miss
16. What’s the Best Starter?
- Plain, unsweetened commercial or homemade yogurt with live cultures
- Freeze-dried starter is reliable for consistent results and can be used for countless generations
See this post about starters for all the information you need to make the best choice.
17. What’s the Best Supermarket Yogurt for Starter?
- Look for fresh, additive-free plain yogurt.
- Pro tip: Cheap yogurt usually has additives to make it thicker. Stick with expensive brands. Those additives can cause your yogurt to be grainy.
18. How Do I Prevent a Skin on Milk?
- Try this: Cover milk loosely while cooling.
- Remove: Use a spatula to remove the skin before adding the starter.
19. Why Is Homemade Yogurt Texture Different?
- Store-bought yogurt often contains additives for consistency.
20. Why Is My Yogurt Slimy?
- Causes: Wild yeast, cross-contamination, or old starter.
21. Why Is My Strained Yogurt Grainy?
- Likely Issues: Additives in starter, overheating, or over-incubation.
22. Why Does Yogurt Look Like Cottage Cheese?
- Too Much: Too much starter
- Too Long: Over-incubation
- Too Hot: Incubating at high temperatures
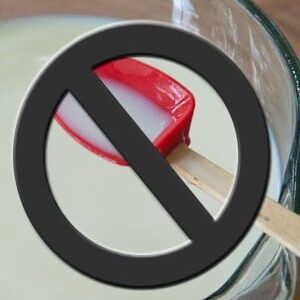
23. How Do I Fix Curdled Yogurt?
- Strain out whey.
- Whisk vigorously (but don’t use a blender or food processor).
24. What Can I Do With Leftover Whey?
- Ideas: Use in baking, smoothies, soups, or salad dressings.
- Substitute for Buttermilk: Not always appropriate but good in many baked goods.
25. How Long Can I Store Homemade Yogurt?
- Up to 2 weeks if stored properly
26. How Can I Tell If Yogurt Is Still Good?
- Check for: Mold, off smells, or discoloration
27. Can I Use Homemade Yogurt as a Starter?
- Yes, for up to 3-4 generations
- Use within 7 days

28. Can I Use Whey as a Starter?
- Yes, if it’s fresh and active.
29. What Can I Do to Make Plain Yogurt More Interesting?
- Add-ins: Add honey, fruit, granola, or cookie crumbs.
- Recipe ingredient: Try in salad dressings and desserts, including ice cream.
29+ ideas for how to make Greek yogurt taste good.
30. Can I Freeze Homemade Yogurt?
- Texture Changes: Separates during the thawing process
- Best Use: Use as an ingredient in baked goods.
31. Can I Freeze Whey?
Yes, but use within a month for most potency if you use it as a starter to make more yogurt.
Final Thoughts
Homemade yogurt is a rewarding, delicious, and customizable treat. With a little practice and some experimentation with your ingredients and setup, you’ll achieve consistent success.
Questions? Email me: Paula at saladinajar.com. Hope to see you again soon!

Can I put a few drops of vanilla in with incubation?
Hi Georgian,
I don’t recommend it, especially if you plan to use some of that yogurt to make another batch. Vanilla is mostly alcohol so not sure how that would play with yogurt bacteria when they are trying to procreate. You can always try it and see what happens.
I made yogurt for the first time that turned out great, even though I realized after making it that according to this and other websites, I did it wrong! After taking it out of the instant pot, my family wanted to try it and it looked and smelled great. So I was looking for information about if we could eat it before putting it in the fridge after incubating. I used greek yogurt that was more than 6 months expired (we buy yogurt frequently at an overstock/shortdated grocery for amazing prices, probably cheaper than what it costs me to make it, and it’s always good!). I also used flavored yogurt since that is all we had. It seems like with the perfect results that there is a lot of misinformation here and everywhere about this. It seems better to say that it is recommended to not using flavored or expired yogurt, but that the results can be great. Nevertheless, a lot of great information here, and I’m super excited to have now learned to make yogurt so easily in my instant pot! Thanks.
Hi Tanya,
If this is truly your first time to make yogurt, congratulations on a good batch! I would not recommend using expired yogurt for anything but if it works for you, OK. Perhaps you already figured this out, but you can eat yogurt immediately after incubation. I think very few people would want to eat it warm, but again, it it works for you, OK.
Just found your blog after just starting to make yogurt at home. I have been making cheese for several years but not yogurt. I have having fairly good success but finding the after chilling, I have thicker yogurt at the top of the jar and then its thinner at the bottom. I am using 1L mason jars (two at a time), and incubate in a sous vide at 105-109 (still fine tuning). I typically use store bought whole milk, heat the milk to 180, chill to 110, then use 1/8tsp of a freeze dried starter and incubate for 8 hours.
Hi Neville,
Glad you found my website. Sounds like you have a good system set up to make excellent yogurt. The only question I have is about your starter. Is it a “one-use” starter or the traditional kind that can be re-used? Another question: Have you tried incubating for less than 8 hours? Maybe 5 or 6? If you have a healthy starter, you probably don’t need 8 hours unless you like your yogurt to be more on the sour side. Let me know the answers to these questions and I’ll dig a little deeper. BTW, your milk is pasteurized. Right?
I forgot to turn off the yogurt maker it cooked for 16 hours instead of 9 hours is the yogurt ok to eat?
Hi Daniela,
So glad you asked. It is most likely OK. If it still smells good and you don’t see any mold (highly unlikely) go ahead and chill it.
Hi, I was wondering what company you buy you yogurt starter from? I just purchased Natrens yogurt starter for the first time and it made a wonderful thick and smooth first batch. Also, I made my first batch with 2 quarts of whole organic milk, and 1 tsp of Natrens yogurt starter. How much of the yogurt from my first batch do I use to to start my second batch? I am looking for a nice thick and smooth yogurt. Thank you
I used the Greek yogurt starter from Cultures for Health. My first batch was kinda thin. They warned me about that. Successive batches were fabulous. Here’s an article I wrote about the amount of starter needed
For two quarts, I use a generous tablespoon or 2 of my own yogurt. You could use up to a 1/4 cup if you want your yogurt to set faster. Too much starter will cause the little yogurt bodies to be too crowded and run out of food, especially if you let them dine all night or all day.
I have made yogurt in my instant pot twice with a lot of success. I don’t have the yogurt setting but used a thermometer and then incubated in the instant pot with the lid on. The last 2 times I’ve tried my yogurt did not set. I used a stater from the store. How do I know if my temperature or the starter was the problem. I’m wondering if I can reuse this milk with a better starter.
Hi Laura,
Frustrating, right? I suspect it’s a temperature issue if your starter was fresh. Is the Instant Pot on at all or are you just depending on residual heat to keep it warm? The last time I incubated with my own Instant Pot on the yogurt setting, it was taking forever to set. So I checked the temperature of the milk and it was only 95˚F. It needs to be warmer. I’m telling you this just to suggest you check the temperature of the milk if it hasn’t set in 5 or 6 hours. Incubation temperatures should be around 100-105˚F.
As far as re-using the milk. If it still smells fine, try again. I wrote a post about failed yogurt that you might find interesting. Good luck with your next batch.
Hi Paula,
I’m glad to have found this site, your information and tips are very interesting and useful!
I did try to look through all the comments to see if my question had been answered already, but there are so many!
Anyway, here goes: I have been experimenting with making my own strained yoghurt over the last few weeks, following a traditional Asian recipe which is to boil the milk first then cool it, etc. I’m putting it on top of a storage heater to incubate so there’s a bit of trial and error which is fine.
I generally use low-fat milk which is what I have at home. I have noticed that it’s producing more and more whey to yoghurt ratio, I’m wondering if that could be due to the type of milk? Have you come across this?
Thanks in advance!
Regards,
Felix.
Hi there, I just read through ALL the comments and more or less got my answer – basically I’m getting half and half, using a cheap own-brand type milk. I’ll keep experimenting! Great to read all the tips!
Hi Felix,
So nice to hear from you. The type of milk you use has a huge bearing on the amount of whey you get. Also, the longer you incubate and the higher the temperature, the more whey you will get. Another factor is how much “starter” you use. Some people use way too much, resulting in a lot of whey.
In my experience, if all these factors are equal, cheap milk from the grocery store releases the most whey. The less fat the milk contains, the more whey you will get. Also, ultra-pasteurized milk (which includes most organic milk) does not release quite as much whey, nor does it get quite as thick. These are just my observations–not based on scientific testing.
Hi, Just found your site and love it! My question – I have been making homemade yogurt for several years now – I incubate it in my small convection oven at 110 degrees. With all that’s going on, I got distracted yesterday and forgot to cover it during incubation. It set up fine, smells & tastes good, but wondering if it’s still ok? I’m not sure if the reason you cover it is to keep the yogurt at a constant temperature or to protect it from unwanted bacteria. Thank so much. Anne
Hi Anne,
I love this question! Your yogurt should be fine. The only reason I can figure out to cover yogurt is to protect it from a cat, an unwanted foreign object, or maybe just dirt, dust, or wild yeast. A cover would help hold in the heat if your incubation system does not hold the temperature on its own. Since you are incubating in your oven, your yogurt is protected. I rarely cover mine since I also incubate in a closed oven.
I guess if you want to make double sure nothing accidentally contaminates your yogurt, you should cover it. But it doesn’t make any difference to the yogurt itself whether or not you cover it as long as the temperature is warm and steady. In the end, I always say, “If it smells good and looks good, eat it!” Thanks so much for writing.
Thanks for getting back to me so quickly Paula, I appreciate it. I think it’s the strange times we’re now living in, but I find my self overthinking everything. I love your calm! Anne
After straining my yogurt to thicken it, it develpoed an odd, dry cottage-cheese texture and lost its creamy consistency. Advice?
Holly, After you chill it, the yogurt will usually come together into a texture that doesn’t necessarily look smooth but feels smooth on your tongue. However, I like to whisk it or use an immersion blender for maximum smoothness. It will look slightly thinner but firms up when chilled. Whipped yogurt feels luxurious and velvety smooth in your mouth.
I brought my yogurt to 180, then down to 120..then down to 100..kept in a turned off oven wrapped in a towel then forgot about it for the night! It seemed fine the next morning I refrigerated it and it is nice and thick..
Is it safe to eat? Being out off refrigerator all night?
Thank you,
Cindy
Hi Cynthia,
If it smells good, I would eat it. Yogurt is acidic so it won’t hurt for it to sit at room temperature for a few hours.
cpkfrezhxhxwlqtzdcinogyfaktmxl
My question is regarding the probiotic content of all types of home made yogurt–slimy, thin, thick (like store bought), tart and very tart. Like all home made yogurts you are going to have varying degrees of success. If the probiotic content varies with texture or tartness could you provide some guidance as to which is the best? Texture or tartness does not bother me……..I want the most healthy!
Atul,
I’m not a registered dietician so I can’t discuss probiotics professionally. All I can say for sure is that you can not make yogurt without live bacteria. You can kill it with temps over 120˚F. Otherwise, any homemade yogurt should have probiotic content when handled correctly.
This is going to sound like a really silly question. During the cooldown process I made an ice bath in my sink. I then put the pot with the milk in the sink. I mistakenly added a scoop of ice to the milk instead of in the water around the pot. Guess I was tired. Ha. I immediately removed the ice with a slotted spoon very quickly. I then proceeded with the other steps of incubation. do you think that small amount of ice that melted will ruin my this batch of yogurt?
Hi, I don’t think it will ruin your yogurt although it might turn out a little bit thinner than normal. If you plan to strain it, it won’t matter at all. We’ve all done crazy things in the kitchen when we’re tired. Welcome to the club!
I’m new to yogurt making and use an Instant Pot Duo. I use organic, lactose-free whole milk, which has a pull date about four weeks out. It seems that the advice on homemade yogurt suggests a much shorter life, so can I presume that one cannot expect homemade yogurt to last as long as the milk from which it’s made? My last batch was fine after two weeks.
Do you have any reliable recipes for non-dairy yogurt, preferably made from almond milk? Mine have been failures, when I followed the Instant Pot recipes. They never thickened. I’d like to avoid thickeners or other adjuncts, it possible. Have you found that a certain type/brand on non-dairy milk makes the best yogurt? Thanks!
Several factors influence how long your yogurt will stay fresh. The type of milk (non-fat, whole, etc) and the freshness of the milk when you made the yogurt are just a couple I can think of right off the top. Best thing is too check the yogurt for mold or a bad smell if you have a question.
I do not have any reliable recipes for non-dairy yogurt since I don’t care for the taste and I get along great with dairy products. The only hint I can give you is to go online and buy starters specifically formulated for non-dairy yogurt. That seems to make all the difference.
I heated my yogurt to 180 and maintained the temp for 30 minutes–I saw that on the internet somewhere and had good results. But when I quick cooled the pot in ice, I got distracted and the milk cooled to 80 degrees. Oops. I will be incubating it in my food dehydrator. Is it necessary to reheat the milk to 115 or can I go ahead and add in my culture and put it in the food dehydrator?
There is no need to warm the milk back up to 100 degrees. (115 degrees is a bit too high for me.) However, the little yogurt babies won’t become active until your milk is warmer. So if you are in a hurry, warm it up a bit. If no hurry, then don’t bother. The milk will return to the right temperature in your dehydrator.
On a side note, I have not seen any benefit in holding the milk at 180 degrees. It’s more trouble and takes longer. If your system is congenial to making yogurt and your starter is vigorous, your chances for good yogurt are high.
I accidentally added starter to the milk before boiling. If I just add more to it once it had cooled and is in the proper stage will it be okay? Thanks for the helpful information!
Hi Ingrid,
This is probably too late to help you. So sorry. You are right. Add more starter and carry on. Hope your yogurt turned out successfully.
My yogurt maker (got at a tag sale) instructions say to boil the milk and then let it cool. Your comment above about “did you boil the milk?” makes me wonder if boiling the milk is unnecessary, maybe even undesirable. Thoughts?
Hi Lisa,
You don’t have to boil the milk but you do need to heat it to 175-180 degrees F. and then let it cool back to lukewarm. I don’t recommend boiling which would make the milk much hotter than 175 degrees.
Hi,
When you stir the yogurt starter into the milk after it cools, if the milk cools to 105 degrees Fahrenheit while you are adding starter, do you need to reheat it or not.
No. Incubating at 100-110 degrees F is ideal. I use my oven turned to 100 degrees F (the bread proofing setting) to incubate and it works perfectly.
Thank you for all your advice and information. Very helpful. I have been making Yogurt in my Instant Pot for a while now. Usually use 1% milk and the Yogurt setting on the cooker. Once heated as prescribed (automatic in the instant pot) I remove the inner pot and place in a cold water bath for a few minutes to lower the temp to just below 115 degrees. It usually has a “skin” on top, but this time it doesn’t. What can it mean if there’s no skin on cooling? I’m incubating some as I type, and hope it comes out! Meanwhile…
The end product still sometimes varies even when to the best of my ability I’ve done everything the same. Once, nothing at all happened during incubation! Because of inconsistent results using different starters, in order to try to get consistency, I have used a couple tablespoons of a store-bought no fat Greek yogurt with live cultures during the incubation stage. Even then, there’ve been failures, or less than satisfactory results. I would like to use my leftover whey or my own successful yogurt to make future batches but am struggling to find THE right combination to get consistently nice and tangy, low-fat, homemade Greek yogurt.
Thanks!
Hi Holly,
It sounds like you are a serious yogurt maker. May I suggest you try a “traditional” starter? You can find it in a freeze-dried form on Amazon. I think it will give you more consistency. Read this post for more information about the difference between using grocery store yogurt and the freeze-dried culture as a starter.
The first batch you make with the freeze-dried starter will not be very thick but it gets thicker in subsequent batches.
I just received an Heirloom Bulgarian fresh yogurt starter from someone that was incubating her batches for 24 hours. I used the starter within 2 days and after 10 hours of incubating it seems to be in the same state as when I started. Does this mean I have to incubate my batch for 24 hours? I have made yogurt in the past by using store bought yogurt for my starter and have been successful.
Hi Nancy,
You didn’t give me too many details so I’m going to assume you made it according to the standard procedure (that’s my way, of course–Ha!). Heat milk to 170, let cool, add starter, incubate at 100-105 degrees F for several hours. Right? I have never incubated yogurt for 24 hours but many do, for alleged health benefits or because they like tart yogurt. Did you talk to the person who gave you the starter? How does she do it? I suppose it’s possible she did not give you the freshest starter but I doubt it. When using the freeze-dried starter, it’s not unusual that the first batch is somewhat thin. But I would think it would be different with a fresh culture. I’m stumped. (How long have you been incubating at this point?) Maybe one of my readers can chime in on your dilemma.
I have been incubating it for 17 1/2 hours at this point. I just checked it and it is firming up pretty good. I did heat up the milk to 180 but kept it on the burner for about 20 min. longer with the temp going down to about 160 at the lowest. (I wanted a thicker yogurt) I brought it back up to 180 before I removed from the burner. The person that gave me the starter said she she had just made a batch the day before & uses 1 TBSP/liter of milk. I also took the starter out to let it get to room temp before adding it to the cooled milk. (115) I use an instant pot (removing the seal) which has the yogurt setting. At 10 hours I was in disbelief that it was almost in the same state. I’m just wondering if I will always have to incubate this long? Thanks for your feedback.
Nancy, Have you checked the temperature of the milk inside your Instant Pot?
I wish you were my neighbor. I would love to get my hands on some of that fresh traditional starter. Paula
Hi Paula – I have NOT checked the temp of the milk in the Pot – didn’t think I would have to check it & also, when would I do this?
I turned the pot off at just over 18 hours & let it rest for 2 hours after which I was able to spoon off 1/2 cup of whey before putting the yogurt in the fridge. (pot & all)
I would gladly give you some starter if you were my neighbour! I hope it tastes good. Is it possible the incubate time will decrease with my next batch?
Thanks again for your input.
I don’t know how long ago you posted this, but I’ve been using Instant Pots for yogurt-making for a few years now. I was also getting inconsistent results until I started checking the temperature got all the way up past 175°. Frequently, the heat setting would stop around 145°-160°. Not sure why — if the milk started colder, if I was slight over or under the recipe amount, something else altogether. I’ve now used three different styles of IPs, and this has happened across all three. Use a thermometer. It takes the guesswork out of it!
Hi Maria,
Thank you for taking the time to leave a comment. You are so right about checking with a thermometer. I’ve had quite a few letters in the last 15 years of writing about yogurt citing instances of temperature inconsistency in both instant pots and slow cookers. That’s always the first thing I ask about when somebody complains that their yogurt not setting. It’s usually problems with maintaining temperature of their incubation “system.” Small electrical appliances are the worst about this but conventional ovens can also become inaccurate over time.
I can’t say it any better than you have. “Use a thermometer. It takes the guesswork out of it!” (Same thing for baking bread.)
I just tried to make yougurt. I heated it up to 180. But I did not let it cool before adding culture. I did put it to bed for 12 hrs. Now it still looks like milk. Can it be saved?
Yes, it quite possibly can be saved. If it still smells fine, add more culture and incubate for 5-8 hours. See this post for more information.
I’ve been making (plain) yogurt for many years and I thought I read that you can only make plain yogurt but I’m now hearing that you can make vanilla yogurt. What are your thoughts?
Jenny, That’s a good question. I don’t do it because vanilla yogurt usually (always?) has added sugar or sweetener. It wouldn’t surprise me if it works, but I honestly haven’t tried it.
I tried making my yogurt with 2 TBS. Of whey instead of using the plain yogurt for my starter. After 15+ hours it’s runny. I made 1 1/2 QTS. Would this be from using the whey? I’m not sure what to do with it now? I even tried straining it, with no luck.
Cindy,
If the milky mixture still smells good, you can try again. No need to reheat the milk, just add new starter and re-incubate.
I’ve used whey infrequently as a starter and it worked fine. But I do hear from people occasionally who couldn’t get it to work. Did your yogurt set up at all, or does it look like plain milk? You could try using a little more whey but at this point, I would try yogurt as a starter.
Can you tell me if my yogurt is ok to eat?
I accidentally left the lids on during the fermentation process in my electric yogurt maker
The directions say to leave the lids off but I forgot and put them on when I loaded them into the yogurt maker and I processed them with the white plastic lids on
Thanks
Liz
Liz,
Does the yogurt smell OK? If so, I would eat it. Without doing the smell test myself, I am pretty certain your yogurt will be just fine.
How fresh does the milk have to be? Can you make yogurt when milk is close to its use by date or should you get new milk?
As long as you wouldn’t mind drinking that milk straight out of a glass, I would go ahead and make yogurt with it. If you heat it and it separates, you’ll know it was too old.
When I make my yogurt in my cuisinart yogurt maker, I always add 1/2 C. Nestle Nido whole milk powder, to my 5 C. of whole milk, before heating to 180*. After heating and setting aside a cup of the milk to mix w/yogurt starter(I always use Stonyfield Plain Whole Milk Yogurt) I always add 1/2 C. sugar and 1 heaping TBS. of coconut extract (I LOVE coconut yogurt). I usually let it cook for about 12 hrs. It always turns out thick and creamy, just the way I like it. My question is, since I add those ingredients before my yogurt has cooked, would it still be okay to strain the whey for my next batch of yogurt? Normally, I just mix the whey into my yogurt, since I’ve heard that it’s good for you. Also, would you happen to know how much gelatin to use for thickening 5 cups of yogurt, and when it should be added? I’m thinking of maybe trying that instead of my usual powdered milk. Thanks so much for all of your information, it’s so helpful!
Hi Cindy,
Your coconut yogurt sounds yummy! To answer your questions: I have never added sugar to my yogurt before incubating it. Not sure about the implications and how that would affect the whey. My mother used to use gelatin to flavor our yogurt, but I never do. I have no idea how much to add. I tried adding powdered milk years ago but didn’t care for the texture. I make thick yogurt by straining it. The longer you strain, the thicker it is. No need for any kind of thickener. Thanks for writing. I’m going to try using coconut extract to flavor my finished yogurt.
Thanks for all your great tips. Since I’ve been making homemade yogurt, I can’t eat store bought yogurt anymore. It just doesn’t taste right, if you know what I mean. I do have a question. When making my yogurt would it be alright if I were to use about a pint of heavy cream mixed with my whole milk. Do you know if it still would turn out alright, or not?
i’ve actually made my yoghurt entirely out of heavy cream and it was divine!
currently, i use 2 quarts whole milk to 1 quart half and half for my yoghurt and it’s super creamy and delicious. 🙂 (i save the uber creamy version for holidays, haha)
I have a question about homemade yogurt. Is it okay if I used a small amount of heavy cream when making it? I think it would be more creamy.
Absolutely. Your yogurt will be richer and tastier.
I incubate my yoghurt in an insulated lunch bag with great results. I made a batch today after a many months break. My roommate was “cleaning up”, took the jars out of the insulated bag and put them away in the fridge. I didn’t discover what had happened till several hours later. As they had only been in the bag for maybe a couple of hours before she did this, I basically just have jars of milk with yoghurt starter in them. Is there any way to still get this to turn into yoghurt?
Hopefully! If the milk still smells good, add more starter and try again. No need to heat the milk to 180 degrees again. Just bring it back to approximately 100 degrees. I wrote about the process here.
Okay, I guess this is what I took a shot at without knowing if it was going to work. Last night after sending the question, I pulled it from the fridge and put it back in the incubator bag with a hot water bottle. It had started to thicken a bit by morning and smells yoghurty so I’m going to leave it incubating for a while longer as it looks like it’s working. Thank you for replying so quickly and for all the great information you’ve shared on here.
Hello,
Please help.. My second time making yogurt-first was great success so I was ambitious and wanted to make a larger batch. However, I forgot to let my milk cool down before adding my starter so I basically killed it! Oh the horror! Is there anyway to fix this or did I just waste all that time and money, two gallons of milk at a local market which meant I over paid on top of that. I will say I don’t think it all died because there was clumps, it wasn’t sour at all, basically tasted like milk.
In my desperation before thinking of asking someone, I brought the milk back up to 105ish added what starter I had left then put it back in the oven….was this another mistake? Should I’ve started completely over with the milk?
Thank you! And thanks for the great recipe and advice on making yogurt-I’m addicted!
Rebecca,
You did EXACTLY the right thing. Don’t mess with it anymore and wait for the magic. Here’s a post I wrote about this.
Good afternoon – I tried to make my yogurt dairy free (my granddaughter has a dairy allergy) I used two cans of coconut milk, one carton of coconut milk and one can of condensed coconut milk with some diary free yogurt as the starter. After 12 hours it did not thicken so I added two more tablespoons of yogurt and a pkg of gelatin and put it back on for another 4 hours. Is it safe to eat (if it thickens). Have you ever made a dairy free yogurt in the instant pot? If so can you share your recipe.
Thanks.
Hi Sandi,
Unfortunately, I have never made a dairy-free yogurt that I thought was worth eating. Came closest to success with soy milk but I detested the flavor so abandoned the idea. Coconut yogurt sounds delicious but it didn’t work when I tried it with the coconut milk available to me. Some say you need a special starter but I don’t know if that is true or not. So sorry I can’t be more helpful.
I forgot to cool my milk before i added the yogurt starter. do I need to throw it away?
Karen
I hope I’m not too late. Don’t throw away the milk. Just let it cool down, then add more starter. It will be fine.
I used the instant pot and after 8hrs it was still liquid, there was a thin layer on the bottom of the pot (that was definitely thicker that the liquid milk) and seemed to resemble what could be yogurt. Other than that it all poured out into jars like milk. I put it in the fridge over night hoping it would thicken – no luck. Smells ok, not funky. What are your thoughts? If I use this same batch to try again, should I start from step 1? Heat to 180, bring down to 110, add (more) starter, incubate for maybe 10 hrs?
So frustrating. THANK YOU FOR YOUR HELP!!
Yes, that is frustrating. I would try again but it is not necessary to heat up to 180 again. Just add new starter (maybe a different starter). Is there a chance the pot got moved or jostled? That will stop the incubation process. Is the room where the Instant Pot is sitting pretty cold? That might make a difference. Your yogurt should definitely make in 8 hours or less. Hope this helps. If still no success, write back with more details about your process.
My yougurt is reducing in quatity.same quatity of milk use to produce like 20 litres of greek yogurt. Now it produces 13 littrs.i havent changed my methed .
Hi Aosha,
Are you using a different brand of milk? Is it possible you are straining longer or incubating a little bit longer?
Hello,
Thanks for all the informative posts etc. I am wondering why yogurt instructions recommend you refrigerate your home made yogurt for 2 hours before consuming it. Is this a caution for something or quite important? I can’t find any other references when this is explicitly said. In my book, it is insistent. Many thanks, Susan
Hi Susan,
I don’t remember seeing or reading that myself, but I’m assuming it’s because most people like to eat their yogurt cold. But it is absolutely safe to eat it as soon as it is done incubating or even after it has been straining on the counter for hours. I do it myself all the time when I lick the spoon after mixing a flavor such as fruit purée or coffee concentrate into my freshly-made yogurt before I pour it into small jars and refrigerate. Yogurt has a high acid content which keeps it from spoiling for a long time.
Chilling also makes it thicker which most people like. Maybe that’s why some people recommend it.
As a general observation, I’ve noticed that making yogurt is a process full of traditions. Many times, people follow a certain method passed down to them by family without really understanding why. These days, people follow directions written by bloggers who have read about it and then, made it once or twice before they give out directions based on that one experience. If you read around the web very much, you will find great diversity in yogurt “recipes.”
Thanks for writing. Happy yogurt-eating. Paula
I hav a question, I cooked my yogurt in a yogurt machine. It was finished at 8:00 pm. Trouble is…I didnt hear the beep, went to bed, woke up at 3:30 am, remembered the yogurt! Put it in the fridge, is it ok or should I start another batch?
If it smells good, it’s probably fine. I wouldn’t hesitate to use it. Yogurt is quite acidic so it can sit out for a long time.
Paula
Thanks for your answers to my question Paula! After your confirming my suspicion that 115º is on the high side, I did some more research on the YoGourmet maker and discovered that the temperature it reaches is very finicky about the climate. The solution that may be helpful for others with a similar problem is to attach a dimmer switch and fiddle with it and your thermometer until you get the desired temperature.
Other than that, I’ve been following all directions perfectly…heating to 180…cooling to 110. And then adding the starter. So far I’ve used REAL as well as Yogourmet and had the same problem with both.
My ordered dimmer switch is on the way and I’ll post back with results…yes, I’ll just stick with milk for now and then branch into my alternatives some more.
Hi Paula,
I keep having trouble but I am not giving up! I bought a YoGourmet 2 quart maker and am following all instructions. I’ve tried non-homogonized whole milk several times, oat and coconut milk mixed, and soy milk. The only luck I had was the oat milk mixture and I think that is because it thickens on its own. Of course…too much oat milk and it becomes gelatinous :0
95% of the time it’s liquid no matter the type. My milk separates into curds and whey. I ended up using a lot of whey to cook rice in! I live in Florida and room temp here is 77º. I checked the incubating temperature of the machine with a thermometer and it’s reading 115º. Is that too hot? Any advice would be much appreciated as my quest for the solution continues.
Hi Liz, I have never used a YoGourmet yogurt maker so really can’t advise you knowledgeably about that. 115 degrees seems on the high side to me. I incubate at 100 degrees F in my conventional oven.
Three things:
1.Are you first heating the milk to 175 F? That is important to rearrange the proteins to make thicker yogurt. After heating, cool back to 110 or so.
2. I recommend you start with a good homogenized milk and stick with it until you consistently make good yogurt. Then you can branch out. I have made literally hundreds of wonderful batches of yogurt but have had no luck with coconut and soy milk. Unpasteurized milk results in a thinner product in my limited experience.
3. What are you using for a starter?
There are some other ways to go wrong but this is a good place to start.
Am I understanding correctly about the yogurt starter?… I buy any greek yogurt at the grocery store for this?
Hi,
You do realize that you torture people with your photos, right?
Hey there. I just made my first batch of homemade yogurt for the first time. When I checked it in the morning after it’s 13 hour incubation it looked and had the texture of regular yogurt but when I smelled it, it didn’t smell like yogurt instead it smelled like mozzarella cheese with a faint hint of tang. Is that normal for my yogurt to smell like this?
I normally make my homemade dahi in a cassarole which is made by steel.I use thick milk and keep that for overnight.Next day my dahi becomes little sticky(chipchipa).Is it bad for health?Is it poisionous?
I’m sorry, but I am not familiar with dahi. Is it similar to yogurt? Sticky doesn’t sound very appetizing but I have no idea if it is poisonous.
I get goat milk yogurt from my CSA every week, but the consistency is very watery. I want a firm greek style yogurt, but there’s no strainer fine enough to get that consistency with my yogurt. Is there anything I can do to turn it into greek style yogurt?
Julie, see this post for something you might try.
Can I use whey as starter?
Yes. For more details, go here.
So this post is pretty old, but I would love an answer to my question. I have a yogurt maker and have been making yogurt for a year or so. I put a batch in and forgot to take it out and put it in the fridge before I went to bed. So it incubated untouched for almost double the time. Is it still good to eat? Or should I just toss it? Thanks in advance!
Hi Amber,
You aren’t the first to do this. Some people even do it on purpose, incubating up to 24 hours for alleged health benefits. Personally, I go for the short incubation periods. The longer you incubate, the more sour your yogurt. At any rate, if it still smells good, I would chill it and eat. Paula
Thank you! I really appreciate you taking time to reply!
Hi Paula
Sorry if I confused you saying vacuum flask. I’m from england n how we call it here! It is the bottle where you can keep your drink hot or cold for long hours.so when I put it in one of them hot water bottles it stay in the same temperature for good ten hours!.good day!
Hi Paula
Can I use the Thomas flask for incubation?
Hi Paula
I found you in Google as well. My first batch came stringy. Then I noticed my starter wasn’t very fresh so I’m going to try again . My question is can I use a thermos flask to incubate it?
I have never made yogurt. Making it for the first time today. My oven only goes to 170. So I preheated to 350, put it in for 1 minute, shut off, turned oven light on, wrapped jar with towel. Using the other incubation methods, how do you know the temperature of the outside environment, crock pot, heating pad, etc.? Hope it works out. I love yogurt.
Thanks
Kathy,
The only way to know for sure is to use a thermometer. Once you get some experience under your belt, you just know.
Hi
I made the cold start version of yogart in my Instapot. For some reason I transferred the yogart into another bowl to refrigerate instead of leaving it in the instapot to chill. Is that going to cause a problem?
Thanks
Whether it’s “ruined” or not depends on whether it was sufficiently set for your tastes at the time you moved it. If you disturb yogurt while incubating, the process is finished. If you stir it, move it to another bowl, jostle it vigorously, or decrease the temperature i.e. putting it in the fridge, the yogurt will not incubate further from that point on. Of course, chilling the yogurt will make it seem a bit thicker. Thanks for writing.
we produced our first batch of 50litres of yoghurt using 5kg of skimmed milk and 45ml of freeze dried starter culture mixed with about 50°c of 50litres of water,and allowed to ferment for abt 7hrs but it has not formed? what could be the cause n wt can be done? this certainly cannot be a waste, thank you ma’am
Hi! I made your yogurt last night, 14 hours later i checked out and it hasnt completely coagulated i think. It is kind of liquid and sticky. What should i do? Strain it to see if it gets thicker?
Malena,
Yes, you could try to strain it. Using commercial paper filters as described in this post is probably your best bet since the yogurt is thin. The reasons for your yogurt being too thin are many. Have you made successful batches in the past?
I have been ‘playing’ around with making my own yogurt for a few weeks now. The first time I made it I used Fair Life milk which is ultra filtered. My yogurt came out so thick and creamy I was so pleased! Then I had a couple of fails. I Googled it and found your web site. One thing in common to all the websites I checked is that the kind of milk you use doesn’t matter. So I bought cheaper milk and ended up with a lot of whey on top and had to strain it. Yesterday I bought and made another batch with Fair Life and I DON’T have to strain it! It is thick and creamy! So, even though the milk is more expensive to start with, I don’t loose volume through straining!
Oh, and I forgot to mention, I didn’t have to heat it. That makes it even easier to make!
Hi Peg,
Thanks for writing. I totally agree with you about the differences in milk. It makes a HUGE difference–what brand and what type. Just as you have discovered, the cheap milk will produce a ton of whey compared to the more expensive stuff. Also, using fat-free or whole makes a big difference. I like Braums but that is a regional product. I have seen Fair Life in the store but haven’t tried it. I will do so the next time I see it. Happy yogurt-eating. paula
Just a comment and observation:
Of all the on-line yogurt advice sites I read I have never heard there’s any difference in what brand of milk is used for making yogurt! I have most often used Kroger’s Simple Truth Organic 1% milk and when straining my yogurt made with 2 qts of it, overnight, I get a Ball jar (approx. 800 mL) of whey. Reading others’ posts I’m now thinking this is a lot of whey. With successful batches, the yogurt has been very nice and creamy but I could stand to have it a bit less firm. I don’t like wasting, but I really have little use for as much whey as I’m producing. Interested if anyone has any thoughts or similar exprience on this.
Again, thank you so much for this very helpful website.
The brand of milk and the way it has been processed can make a difference, for sure. Organic milk has usually been ultra-pasteurized as compared with regular milk which is just pasteurized. In my experience, you need to strain it longer to get the same thickness.
Also, some milk contains more milk solids than the cheaper grocery store brands. They do this through a proprietary process that removes some of the water. I don’t understand the details completely, but milk with a lower percentage of water produces less whey when you strain it. I avoid the cheapest milk at the grocery store for making yogurt because of this reason. Too much whey.
If you want your yogurt to be less firm, don’t strain for quite as long. Or, add some milk back into your yogurt if it’s too thick. Try adding a little cream if you are feeling decadent. Whisking your yogurt will also make it creamier and not quite as firm. Hope this helps.
Looking for ideas for all that whey? Check out this post.
Paula,
Great yogurt blog. My wife and I have been making our own yogurt for about a year now and have tried different starters and different milk ( fat % ) with good results all around . The last two batches we have ended up with smooth thick but stringy yogurt. It tastes great and not a drop is wasted. I was wondering, could this stringy condition be caused from using too much starter. We have used a store bought both times, we use about 8oz of starter for 2 quarts of milk ( TJ’s Greek style full milk, nice thick smooth yogurt ) It still remains stringy after whisking. Any suggestions on how to get rid of the stringy !!
Hi Quentin, In my experience that is a LOT of starter. You can innoculate 2 quarts with a teaspoon to a tablespoon of starter. You might find this post interesting. I’m not sure what causes stringy yogurt for sure. There are so many variables. You might try a different starter. Are you incubating longer than the recommended 6-8 hours? Are you heating the milk to 170 degrees and then cooling? Different brands of milk can also give different results. The possibilities are endless, especially when I don’t know your entire process. Good luck!
I’ve successfully made homemade yogurt numerous time but this time, I got distracted I guess. After heating, then cooling, then adding starter, i put in jars and put them in the fridge instead of letting them sit in the oven to culture. Is there anything I can do to salvage?
i just turn my oven light on and keep it that way, and my oven stays right about 105*F.
Doris,
Oh dear. I’m afraid you may have looked at the directions wrong. You need to heat the milk to 180 degrees and then let it cool down to 100-110 degrees. Then add your starter. The oven should only be heated to around 100 degrees. Any time the temperature goes over 115-120 degrees, the yogurt bacteria will be killed and you will not get yogurt. I think you will have to start over. See this post for how to do that.
PS, one advantage to using Kefir as a starter culture is that due the wide variety of different bacteria present in Kefir it can be used as either a Mesophilic or Thermophilic culture.
Paula,
Four questions for you, if you don’t mind? Love your website! I’m a busy guy on a Texas cattle ranch, and never seem to have enough time in the day. That said I do try to do some things I like, and one thing I do is probiotics when I can (kefir/yogurt/etc). As busy as I am I only have time (yogurt wise) for using a yogurt maker. It’s super easy, and it works fine for me. I use the Aroma Digital Yogurt Maker, which makes about 4 cups of yogurt after you remove the whey, 9 hours to culture (10 min to mix), FYI.
My questions are:
1. I’ve studied about kefir milk, and I’ve made it many times, but I couldn’t find anyone talking about using kefir grains as culture in a yogurt maker. So I decided to give it a try on my own since kefir is so healthy. Low and behold, using 1 teaspoon of kefir grains per batch of yogurt (5.7 cups raw mixture) works very well to culture it. The resulting yogurt is a bit more tart than yogurt made with a standard culture, but then kefir is supposed to be hardier and stronger than regular yogurt culture (if you believe kefir enthusiasts). Have you ever heard of anyone doing this?
2. I don’t drink a ton of milk, so buying milk often means a lot gets thrown out, if not entirely consumed. I hate waste, and driving from the country to town just for milk is another waste of fuel. Instead I buy Nestle Nido Powdered Whole Milk, which is much better tasting the powdered skim milk. I also have a distiller and distil my own drinking water from ranch well water, then use Concentrace or pink himalayan salt to re-mineralize my drinking water, so it’s basically sterile. If using sterile water and powdered milk to make yogurt, do you still recommend boiling it first? I thought boiling milk before hand was just to sterilize it before adding your culture (I did read your post about the boiled milk making thicker yogurt).
3. Since my raw mixture is made using powdered milk, I’ve read of some folks using the whey from straining the Greek yogurt to make your milk mixture, along with a little added sterile water. This supposedly gives an instant bacterial boost to the culture to get the process started all over. Have you heard of this, and what are your opinions? I’m trying it out myself for the first time tonight.
4. (Last question I promise) I culture the yogurt for 9 hours (manufacturer’s recommended time). The yogurt comes out firm, but not too firm. If I culture longer or shorter, what will be the differences? Firmer/tarter yogurt for longer periods? If I try this in what increments do you recommend adding time/shorting time, 1 hour? I like to experiment, clearly.
Those are my questions. I also use the strainer/t-shirt/bowl method in the refrigerator to make Greek yogurt, so excuse my ‘beginner’ tendencies, but as I said before all of this works, mostly on auto-pilot, so I don’t have to invest a lot of time I don’t really have.
Thank you, Ron
Hi Ron,
Here are my answers:
1. I tried Kefir once. Didn’t care for it so can’t answer your questions knowledgeably on that subject.
2. Heating milk is NOT to sterilize it. When heated to 175 or 180 (not boiling), the protein structure is rearranged making it more appetizing for yogurt bacteria, which makes it thicker.
3. I use whey from the straining process all the time to make new yogurt. See this post.
4. There are several variables that make your yogurt thicker/thinner or tart/milder. In general, the longer you culture, the more tart your yogurt. Yes, yogurt will get thicker with longer incubation but only up to a point. Also figuring in the mix is the type and brand of milk you use, the freshness of your starter, temperature of incubation, etc. If you like to experiment, I would shorten the time. I have made yogurt in less than 5 hours with very little starter.
A couple notes: It is not necessary to strain yogurt in fridge. There is enough acid in yogurt to keep it from spoiling for the 2-3 hours needed to strain. Also, when you tire of messing with that t-shirt, try this. Works better and easier. Happy yogurt making!!
Thank you so much for your quick reply Paula! I will definitely try the large coffee filter in the plastic strainer method. That certainly looks less messy than the t-shirt (which I prefer to cheese cloth). The t-shirt is absorbing too much whey, which is wasteful and messy. Yes, I agree you don’t need to refrigerate yogurt while straining (especially with Kefir bacteria, which prefers room temps), but unfortunately I’m often gone for 8-12 hours, after putting yogurt out to strain, so I wouldn’t be back in a timely manner.
After your reply, I read more online about the benefits of boiling milk to denature one of the main whey proteins for better yogurt. Thank you so much for your insight. I plan to add that to my yogurt making process.
On my personal experiment with using whey, versus your post, I did see two differences in my final product versus your outcome. A note: I used 1/3 whey liquid plus 2/3 water (instead of your much smaller amount of whey), still using powdered whole milk to make my raw yogurt mixture.
1. The resultant yogurt was much creamier, and smooth, with a richer taste, and a little less tart than when using straight Kefir grains as the starter culture. (Good point)
2. There was a very, very slight bitter aftertaste to the yogurt (certainly a bad point).
I cultured for 11 hours instead of 9, so at this point I’m unsure if the tiny bitter aftertaste was due to the longer incubation period or if my culture became contaminated in some way. I wash and use a microwave to sterilize equipment/utensils between uses, so I’m thinking it was the timing. I’ll try incubation for 7 hours rather than 9 next time, per your suggestion on a shorter time period, and see what happens.
Since my primary reason for homemade yogurt is geared toward it’s health benefits, rather than for gastronomy, I’m more inclined to make highly bacterial active yogurt regardless of some small disappointments in taste. The science of probiotics is fascinating (the affects of what we eat on our health are still so often misunderstood or simply unknown). There’s even a number of people actually developing patents on the uses of Calcium Carbonate to extend the shelf life and viability of yogurt as well as it’s absorption in the human body. (See link: http://www.google.com/patents/US4797289)
Thank you again for your insight, advice, and your website Paula!
I started the yogurt making process last night with the intention of waking up to stir in the starter (I had just unplugged the crock pot to let the heated milk cool at the time I went to bed). Unfortunately I slept like a rock and woke up this morning to the crock of milk sitting at room temp on the counter! Is it still usable? I put it in the fridge before heading to work. Can I reheat the milk and just start over or have I ruined it?
I’d rather ask around before wasting both a gallon of milk AND my starter yogurt!
Thank you!!
Emily
Hey! 🙂 Do you leave the oven on with 100 degrees F for 9 hours with the milk inside? or do you switch off after a few hours to let the milk turn into yogurt?
I successfully made whole milk yogurt in the crockpot, stephanie O’dea’s recipe 3x, but the 4th flopped. It never thickened. My starter yogurt from prev. batch may have been a little old (7-10 days), but I ate some same day and it tasted fine. The only other thing I can think of is that I get delayed coming home and it sat for 4.5 hours after I turned off the heat, instead of 3. My question is: can I re-use the milk for another bath of yogurt with fresh culture or for some other recipe?(which I put back in fridge, I hate to waste an entire half gallon of whole milk)
I have been making yogurt using your recipes and instructions for more than two years now and love doing it. One if my friends is allergic to cow’s milk and I would like to make her some soy yogurt. Do you do anything differently when using dot milk?
Hi
I made some yogurt, not Greek yogurt, with full fat Jersey milk. After cooling as well as the whey there was s thick layer of cream on top. Should I of mixed this in at the end or removed?
Grrg
Hi, I made regular yogurt in my yogurt maker then used almond milk. I tried twice and it won’t form into solid but separates the almond milk.
Any ideas? I heated the almond milk to the temperature suggested in the recipe book and used milk yogurt as starter.
Wanda,
I have not successfully made yogurt from almond milk myself so I don’t have any suggestions. I suspect it is the way the almond milk is processed that might make a difference but I’ve tried a couple different brands available at my local stores and neither worked. Sorry I can’t help on this one. Good luck!
I got the skin on top and found these routes to reduce it enough to actually get NONE! Wow , right?
1. bring the temp up to 180 slowly, over the process of maybe 30 minutes, while constantly stirring.
2.Don’t cross 190 as the layer will become much thicker after this temp, because of the damaging of the milk proteins.
3. stir almost constantly for your heating process from 110 degrees to 180 and how ever long you hold 180(I do 30 minutes for a nice evaporated milk, but my arms are very tired after that long of stirring)
4. stir as it cools down until about 120
Should have NO SKIN 🙂
I also used to get gritty yogurt, I found it was from over heating the milk(even before you put the cultures in because it damages proteins) and as well as every time I cultured longer than 12 hours it got gritty. I also keep my yogurt maker at 110 instead of 115 because electricity fluctuates and so will the temp in your dehydrator/yogurt maker.
HOPE THIS HELPS! CULTURE ON!!
Hi Paula,
I finally made your yogurt, and I’ll never buy ready made again. I didn’t use dry milk or any milk at the end… my yogurt came out mildly tangy after I whisked back in some of the whey I drained out… it turned into a bowl of velvety milky goodness… I’ve made it twice in one week, because it’s so easy… I microwaved, cooled, mixed in culture, let it sit in the oven and then enjoyed a helping of simply the best yogurt I’ve eaten… ever… the cost? $2.50 for 1/2 gallon of milk at Trader Joe’s…
I subbed the whey for water in the 24hour no knead bread, and will return to using water… the bread stuck to the loaf dish, and was gummy… the water version is about a good a loaf of bread there ever was, so I’ll return to the tried and true…
As for making yogurt… so easy, and doubles the enjoyment having made it myself!! THANK YOU, THANK YOU, THANK YOU!!!
Penny
My neighbor got me started on yogurt making and tried it with a little of her starter. I worked great! Except for the grainy part- which I think I’ll try a tip from one of your previous commenters. But… I forgot to take out some starter for my next batch-ugh! So, I tried greek yogurt from the store as a starter- Fage brand. It doesn’t look like it worked out as well. I followed the instructions you suggested, put it in a crook pot to warm overnight. This morning it looked like milk and so I thought maybe it was not enough yogurt starter. I add more and gave it 5 more hours (after I worked) and came home to more warm milk. I wonder if I didn’t get a fresh starter and wonder if I run to the store and get a new one to add to it, if that would work. Or start over, I hate to throw it out but what could I use my mistake batch for?
Hi Jen,
Sorry I didn’t get back to you earlier. I know it’s frustrating when your yogurt doesn’t turn out. Hopefully, you have figured out the problem by now. As long as the milk smells ok, I figure you can try again with new starter. Of course, the starter may not have been the problem.
Anyway, you could throw it in a smoothie?? if it still smells alright.
Thanks for all the tips…. I line my colander with coffee filters to strain.
You’re welcome Norma. Coffee filters work great as you have figured out, especially if you’re only doing a small quantity.
Wow…I can’t believe this thread is still active after all this time! So here’s my dilemma – hopefully someone can help or shed some light. I used to make yogurt 20 years ago. Never had any problems.
But along came the “smooth and creamy yogurt” craze. Does anyone remember what yogurt used to be like? It had a glassy appearance when you sliced a spoon thru it. It would hold its form and not slump. When I used to make yogurt with this kind of starter, that’s what I got. Solid…not smooth and creamy. I really liked it that way.
Now, when I use smooth and creamy Greek blah, blah for a starter, I just get runny loose yogurt. I can’t prove it but I’m wondering if they now use a mix of different species…and if some of which contribute to the creamy texture/lack of firmness. I only ever remember hearing about acidophilus years ago. Now I see a couple other species listed on the container.
Is it just me? Anyone else out there not looking for creamy texture? I dont mean just an extra thick creamy texture…i mean a firm, glassy texture…almost like gelatin. Is it possible to get just plain acidophilus as a starter so I can test my theory?
Anyway, thanks for your time everyone!
Hello,
Just want to SHARE my experience in making yogurt-first of all I have none! I made it once, today first time and it worked-thanks to this website and some luck I guess as I didn’t have some of the necessary things (like oven that can be set to 100 or yogurt as starter). But my yogurt came out perfect as I wanted it to so I will share my method, maybe it’ll help someone. I didn’t have any starter that I thought I could use at first, but couple days before I made labneh from shop bought yogurt, and also made fermented gherkins week ago, so as a started I decided to use 1 tbs of labneh mixed with 1tbs of juice from fermented gherkins, and mixed it with the milk as recipe says. After adding starter to the milk I have heated it up again to nearly 120(as temp by then went down to about 105) I wrapped the pan with a long clean beach towel and put it into turned off oven(I never switched the oven on!) and left it there. After 4hrs I checked the yogurt and it set! As it was still warm, I decided to leave it for another 4hrs, and it came out perfect. It is straining at the moment as I am big big fan of labneh, but I left cup of it as it was as I like using yogurt with my salads. Hope this helps.
Thank you for helping me making my homemade yogurt rest assured I will never go back to shop bought!
Kamila
My yogurt came out very tangy.I did strain it so what went wrong? It was a batch I made with skim milk and 2%.also not getting it as thick as I used to.Please advise.thanks
Do you cool your yogurt before straining or strain while it is still warm?
Thanks
Hi!. I started this week and surprisingly most queries I do on Google address to you. And guess its not so bad since you do have lots of tips.
As I was raised in a small farm when Portugal was crawling out of Dictatorship, I never had yoghurt. And knew where eggs came from, and milk or cheese. 40 years later, I am discovering that yoghurt does not have to come from a shelf and its so simple it hurts me not to have done it decades ago.
Tried once with a borrowed yoghurt maker but its just a waste of time with so tiny 125ml, since I usually have 330ml or 500ml (half a quarter). So yes, I am following your tips and just tried the owen this time.
To drain the whey, I decided to let the cap untightened and lay the container sideways on the sink. Simple way to have a kind of greek yoghurt…
After bread and mayonaise, yoghurt is my other home made way to eat better, less processed and way cheaper, so important in present economy.
Cheers to you
Thanks Leonel,
I agree about the yogurt maker. OK if you are a newbie and don’t eat much. Otherwise, much more efficient my way. 🙂
Thank you for your feedback, Paula. Much appreciated to have a yoghurt fairy! 🙂
So I am using 1kg (a quarter) buckets. Hard to tune the 82ºC (180f) on the microwave without a thermometer, or the 40 on the owen later. First batch was ok, second batch failed to a sort of milky thing. Since the starter was a white brand low cost yoghurt and only a spoon for a liter, I put it into account of low quality starter.
Now, prime 1st quality yoghurt (Danone), Prime quality whole milk. 50gram starter for a liter yoghurt. Working on some math to get the incubation temperature right without a thermometer. Did it on two batches, and for fun, reused also a liter (one quart) of the failed batch that was 2 weeks old.
I use a thermometer for the owen, that only goes up to 55ºC, but so I manage the 40ºC on the owen, for as long as it takes.
1st quart, 12h extraordinarly perfect. As thick as greek, smoot, wonderful taste. Great hit! I did something very right here.
2nd quart had a lot of water, not well done, extra 8h, and still not very hard. Maybe too much or to low incubation temp. Since it had the same still temperature, I have to putt that into account of incubation temperature… odd as they were soooo diferent end results, on similar conditions.
3rd Quard The reused quart that previously failed worked ok. Its almost cheese with mixed textures, because of the two different starters. I thougt it would be wasted, but I tasted it, and appears ok (lets see my belly in a couple of hours… as its starting to get messy, maybe I did a huge mistake tasting it).
Just wanted to share. Not a lot of DIY enthusiasts, so bear with me 🙂
Maybe this shoes the pic here: http://instagram.com/p/otVdEyDJaX/
or here: http://tinyurl.com/nmeyoux
I didn’t have a 100 degree setting on my oven, so I turned it on just enough so that it came on, but not all the way to the 200 degree mark. I incubated my yogurt for 14 hours. When I realized it was pretty warm when I took it out I checked the temperature… it was at 140 degrees. Did I ruin it by letting it get over 120 during incubation? When I strained it, it looks nothing like the videos I have watched.
Hi Crystal,
At 140 degrees, your yogurt bacteria was surely killed. So sorry. Check out this post for different ways to incubate your yogurt.
Hi, I found your website by using Google. I made a first batch with great success and froze some of it for later use. However, I am not sure how to use frozen yogurt as a starter to make a new batch. Please help. Thank you.
Check out this post. In a nutshell, place about 1-2 tablespoons frozen yogurt into milk that has been allowed to cool down to 110 after being heated to 180 degrees F. Gently whisk the milk until the starter has defrosted and mixed in thoroughly. Proceed to incubate as usual. Hope that helps.
Paula
What happens to the yogurt if you do not cover it during the incubation period.
It set up fine. Temp 110.
Thank you Love your site
Jim
Hello,
I’ve just discovered this and am wondering if this is still active.
I have tried 5-6 batches of yogurt since receiving a yogurt maker 2 weeks ago, but I’m still searching for the perfect yogurt:( Usually my yogurt is runny, sometimes grainy, and sometimes runny and grainy! I am determined to get this figured out, though! I would like to thick yogurt even before straining, like you had on your video–I eat it with my kids for breakfast, so we eat a lot!
I have tried to follow the recipe per my yogurt maker: 5 cups milk microwave heated to 180, allow to cool to 110. Then lightly whisk in 1/2 cup room temp Faga yogurt and 7 Tablespoons powdered milk. Then I pour in in the jars provided and let it set in the incubator for 8 hours . . . With disappointing results every time:(
Can you see any flaws with what I have been doing? I want this to work!
Heather,
How frustrating! What kind of milk are you using? It can make all the difference. I don’t use powdered milk at all. Have you tried leaving that out?
Do you live close to Braum’s Ice Cream stores? Their non-fat milk is the BEST! Makes pretty thick yogurt even without straining but I still strain it because I prefer thicker, milder yogurt.
Usually yogurt makers are pretty foolproof but if you like Greek yogurt, they are impractical. It’s too much trouble to empty each container, strain it and then refill the containers.
I do have a couple observations: 1/2 cup is a lot of yogurt for just 5 cups. You might find this post interesting. Read this post about the grainy texture.
Thanks for such good information! I’ve had a problem with my most recent batch of yogurt and couldn’t find the answer anywhere else on the internet. I hope you can help! I’m on my 4th batch of homemade yogurt ever and I am loving it! However, after heating it up in my crockpot to 180 then cooling it to 115 there is yellow discharge at the top of the milk. This is BEFORE adding yogurt to it and BEFORE letting it sit for 7 hours. It had the regular thick “crust” on top like I am used to but I haven’t read anything anywhere about yellow discharge with the milk. I’ve heard about yellow whey once the yogurt is actually made, but not after just heating the milk. Do you have any ideas what this is? I did add dry instant milk powder like I usually do before heating it up but have never had a problem with it before. Any advice you have would be great! I just don’t want to serve something to my family that could potentially be harmful. Thank you!!
Jessie,
That certainly sounds unappetizing. How fresh was your milk? I’m wondering if heating it caused it to separate. That can happen when the milk is close to going out of date. I no longer add milk powder to my yogurt so don’t have much experience with it . Did you use a different brand that may have reacted differently? If your end product smells OK, I would think it is safe to eat. Thanks for writing.
I just made yogurt in my crock pot – and left it sit out too long. I was going to put it in the refrigerator when I went to bed, and I forgot to put it in. So, in addition to the planned 8 hours of counter cooling time, it was additionally left out overnight. It was in a crock pot wrapped in a towel for about 17 hours. When I checked on it this morning, it had separated and there was clear liquid on the top. The bottom looked like thin yogurt. Did I wreck it? Should I throw it all away and start over? I don’t want to get sick if I eat it!
Hi, I tried yogurt making just last night and was impressed at how easy it was. I even got the temperature wrong because I let it cool to 100F before adding my starter, but I put it in the oven with light on and it worked. I had to strain it for four hours though to get the consistency I wanted, so my question is, is that normal? I like thick yogurt but I used 8 cups of milk to start and only ended up with three cups of yogurt at the end of it. Is there a way to make it thicker so it requires less straining?
Kristy,
It is normal to end up with half or less yogurt and half whey. In my experience, it depends on the milk. The more fat, the softer it is. Fat-free works really well for me. Adding a little whipped cream back in will improve the flavor if you miss the fat. I think this is one reason Greek yogurt is more expensive. It takes more milk to make it. Some of the cheaper Greek yogurts cheat and add gelatin or other additives to make it thick.
I enjoyed reading the above, but I particularly got a kick out of the #8 question. I have eaten homemade yogurt since the 50’s, before Americans knew the product. My Greek grandmother taught my Italian Mother how to make it. It was common for us, back then, to battle over who got to eat the skin on the cooling batch of yogurt! Yes, we ate it. If I am not mistaken, the skin is the milk fat rising to the top. If you use low fat milk, you will have less of it. It is a sweet delicacy. I have only recently discovered that if you take the milk to the boiling point, you get more of the skin than if you raise the temperature to the common 190 degrees. In fact, when I teach folks to make yogurt today, I tell them not to divulge the secret of the skin. I recently taught my granddaughter how to make yogurt, and I told her to keep it to herself, and to enjoy the residue. This way she won’t have to share!! Enjoy
Hi George,
I only make fat-free yogurt so the skin is NOT appetizing. If I ever use whole milk to make my yogurt, I will have to try the skin. Thanks for writing.
What can we do to redeem the failed yoghurt pot.. I have made it before successfully but the odd. Time it fails and I hate to throw it out..
Tina, you can bake with it as a sub for buttermilk. Or how about using it in smoothies? As I often say tongue in cheek, the yogurt gods can be fickle but I’ve noticed as you become more experienced, your “fails” will be less and less.
And thank-you for writing. Your question gives me an idea for a new post because I have received the same question in different forms multiple times. Do you mind if I quote your question in a post? I won’t identify you unless you want me to.
Hi, Paula!
Found your website a couple weeks ago and just wanted to say thank you for all this great information, especially the stuff on making homemade yogurt. I’ve been making yogurt for a few years, but it’s good to have help to troubleshoot sometimes. Keep up the great work!!! 🙂
Hey! I just found your video and decided to make one because yogurts in our country are very very expensive…
After our first batch the consistency is creamy but its really sour.. not like commercial yogurts but we just add brown sugar then mix it with fruits..
My question is we ACCIDENTALLY BOILED THE MILK.. Haha… Is it still SAFE TO USE in our yogurt making, even if it boiled already? Would it taste the same? Would the texture change? TFA <3
I meant TIA.. Thanks in advance. haha.. Hope your answer my question :))
Hi Addicted, yes, your yogurt should still be safe. Don’t know about the texture though. Since I always heat my in the microwave for the exact same amount of time, this has not happened to me.
Regarding the sourness, there could be at least two reasons and possibly more I don’t know about. One is incubating for a really long time–like more than 12 hours. Another is the starter you are using. You might experiment with that and try different yogurts making sure they have no additives like gelatin or cornstarch.
I’ve made yogurt a on just a few occasions but stopped because a red ‘coating’ was appearing on the inside of my yogurt pot. Is this because I was re-using the plastic yogurt tubs? Would you know what this red coating is?
Red coating? YIKES! Sounds like some kind of mold but I honestly have no idea. Maybe somebody else has experience something similar and will leave some good advice.
Why does my yogurt fail to thicken in Denver CO. I used the same recipe, starter, incubator as worked fine for me in NYS?????? NYS thick and creamy, CO thin and watery…… this has happened at least 3x.
Curious…..:}
I heated my milk and ,without thinking, added my starter. Can I continue ? Or dump? Thanks
The last two times I strained my yogurt, the whey was not clear. It is almost like some of the yogurt is straining off with the whey. I strain using a cheesecloth. I’ve reused the cheesecloth and I’m wondering if it is breaking down too much and letting too many particles through. Next time I’ll try the tea towel instead. Anything else I need to do differently?
Hi Stacy,
Have you tried wetting your cheesecloth before you use it? That might help. Personally, I do not use a cheesecloth. Much prefer my fine mesh strainer.
Is your yogurt as thick as before? Are you using different milk or a different starter or incubating it in a different way?
The second to last time I used non-homogenized milk for the first time. Then, I went back to the milk I had been using previously. However, my starter is now from the one batch that was non-homogenized. Would that be making a difference?
This time the yogurt is not as thick, but that is because I tried to strain the whey a second time and didn’t let it strain as long, so I have more whey in with my yogurt (so, in reality, I don’t believe the thickness actually changed because after the first strain it was “normal” for me).
Thanks for your help!
I totally failed at making yogurt today. I used raw milk, warmed it up to 110, stirred in an older starter packet and put it in my yogurt maker. Now I have half whey and half slimy thick cheese like stinky stuff. Do I just need a newer starter? I want to keep it raw. (What a waste of 2 quarts of raw milk!)
I make yogurt with a yogurt maker and it always turns out great.
I start with room temperature milk and it takes 10 hours to have a good thickness yogurt. Typically I set it before I go to bed. Put a note on the maker so if I sleep in, whoever is awake would turn it off. (I have a small baby so nights are unpredictable) anyway. My loving MIL turned it off about 4 hours early because apparently she didn’t see the note. I woke up to find the yogurt completely cool and a little runny.
The question: would reheating the maker again resume the fermenting process at this point? Or is there no hope?
Hi! Your video is wonderful and so easy to follow. Thank you! My yogurt is brewing now. I hope it’s tasty.
A tip I used because my oven does not set to 100 – I turned it on warm and placed a burner cover AND a plate over the back burner. It made the plate just a tad warm- PERFECT.
Thanks for your videos and tips!!
I am a teacher of 7th graders doing a unit on microbiology. In looking for a project for the class I came across your blog. I have watched all the videos and read ALOT. Tomorrow our class will make their own yogurt! Wish us luck. Thank you for all the very helpful information. My plan is to make my own at home on an ongoing basis if all goes well. Again, Thanks.
Hi Paula,
Love all your yogurt making advice, and your video for making
Greek yogurt is great. I really like those little flat glass jars with the white plastic screw-on lids that you put your yogurt in. Who makes them and where can I buy them?
I note in your answers to people you say how you watch your weight. But from your video, it appears you have no need to do that, and you look very healthy. Probably all that yogurt you eat!
Pat,
Thanks for your kind words. I definitely have to watch my weight–that’s why I eat my salad in a jar everyday.
I get the flat glass jars from Target. People who see me carrying those at work think I am about to eat a candle. The plastic lids are purchased separately and are available in some grocery stores and hardware stores where canning supplies are sold.
I accidentally heated the milk to about 195 degrees. Will it still make a quality yogurt or did I just waste almost a gallon of milk?
I gotten addicted to the Oikos Vanilla greek yogurt and decided to start making homemade. I just finished my first batch of and am pleased with the result. I’ve decided to buy a strainer to make it a bit thicker as you demonstrate.
I want to make Vanilla yogurt but how? This first batch I added a bit of honey and pure vanilla extract but the flavor wasn’t right. I think I need to add a bit more vanilla, but the honey flavor was overshadowing the vanilla and the yogurt was still more tart than I prefer.
Any ‘recipes’ for making the vanilla flavored yogurt?
Carolynn,
As you have already figured out, honey has a pretty strong flavor so you might want to try a different sweetener. I use vanilla bean paste and absolutely love it. It’s available from Williams-Sonoma and Amazon and other fine food sources. The better your vanilla, the better the flavor.
Regarding the tartness, you can reduce it in two ways. Incubate the yogurt less time. In general, incubating more than 6-8 hours does not make it thicker, just more tart. Also, when you drain off the whey, you drain away a lot of the tartness. I like to drain until the volume of my yogurt is reduced by 1/3 to 1/2. If it gets too thick, no problem. Just add milk (or cream or vanilla-flavored soy milk, my favorite) until it is the consistency you like.
Hello Paula!
I’ve trying to make yogurt everyday the past week but it seems like I’m making something wrong!
I just don’t understand the temperature! How can I keep it on 100-110 for 7 to 10 hours?! It seems like it always drops and I never get the yogurt texture I’ve seen in your videos. It looks more like a thick cottage cheese.
Do you think is a temperature problem? Or a milk or culture one? (i’m using Chobain plain yogurt as culture).
Can I eat anyway? It tastes a little weird but maybe con honey gets better!
Please I need some advice! I want to be able to get my own batches!!
thank you!!
Hi Caroline,
How are you incubating your yogurt? Have you read this post for ideas? Also look through the comments for more ideas. You must keep the incubating yogurt at 100 degrees for best results. What kind of milk are you using? If your yogurt starter is fresh, it should be fine. How much yogurt are you adding to the milk. Only 2-3 teaspoons are required although many people think you need much more but then their yogurt does not turn out as good.
Thick cottage cheese? I assume this is after putting a spoon into it but before straining it. Once you strain, then whisk, it should be all creamy. Have you seen my video? How does it compare to mine?
the reason i use H & H NO SUGAR i am diabetic.
Hello!
I enjoy your website!
I have tried to make yougurt several times and it seems to fail. I am trying this microwave recipe of yours but I set my microwave at 17 minutes and it got too hot…like a little over 200 degrees! Will this spoil my yogurt again? It is cooling now. Also, I dont have one of those fine strainers to get the whey out, what can I use in place of that? How much do you sweeten or about how much? Thanks so much!
God Bless, Sharon
Hi Sharon,
Heating your milk to over 200 degrees shouldn’t be a deal breaker but I can’t say for sure. Haven’t ever done it myself. If you don’t have a fine strainer you can use a grocery store strainer lined with cheesecloth, a clean t-shirt, or a tea towel. It’s kind of a mess to clean up in my opinion so if you find you really like to make your own yogurt, it’s worth it to invest in a good strainer. See this post.
If I sweeten my yogurt at all, I use a little bit of Torani sugar-free syrup–approx 1 tablespoon per cup of yogurt. I do other things do, like a tablespoon of cream of coconut. That is absolutely yummy if you like coconut.
How long is too long to incubate yogurt? I just did a batch and left it 15 hours on accident. Is it safe? My baby girl loves it, so i want tobe sure i got this batch right before i give it to her!
Hi: I purchasd a cousine yogurt maker w/ the 7 jars, got rid of them amd 2 16oz bell mason jars (collection elite) fit nicely. I used goat milk, poured it in the jar cold and used cold greek yogurt I had made before w/goat milk. Stirred it in, then put it in the yogurt maker for 13 hrs and it was yogurt. It is now in fridge, I will make greek out of it and this is how it works for me. I have made it with half and half and coconut milk and also coconut milk in the can and it worked every time. When i heated the milk i had to do the made greek yogurt twice so now i do not heat it to 180degrees at all and i have a ton of yogurt. I am delighted.
Hi,
I make my yogurt in a yogurt making machine. I made a batch yesterday and forgot to put it in the fridge when it was done. It sat out for about 8 hours, not refridgerated. I assume I should throw it away?
I made yogurt yesterday, using a yogurt maker. i have done it a few times before hand and have been successful, have even tried greek yogurt per your direction. however, yesterday i forgot to put the yogurt in the fridge. it was left out at in room temperature for 24 hours. all the whey has seemed to disappear, why is that?
thanks,
rikki
Rikki,
I wish I had a good answer for you but honestly, I have no idea. For some reason, it was absorbed but not sure why. I suspect it will reappear when you chill it.
I recently started making yogurt and learned much of the process from your site. I don’t have a thermometer (I refuse to invest in new equipment just to try something out) but I learned yogurt is very easy to make without one you just go by touch for everything. I cool the milk down to a comfortable level and incubate at a comfortable level. I’ve had yogurt since the first try. I only had yogurt turn runny once and simply strained it longer than usual and it was perfect. Thank you for sharing your method. I learned a new skill.
Glad to hear it Sabrina. People who are not as confident as you find a thermometer helpful but of course, people have made yogurt for centuries without one. Happy yogurt eating!
Just came across your blog (excellent)…..OK my question. I know Greek yoghurt has more protein then regular yogurt, but if I am using Skimmed milk (or regular. cows or goats) the protein content is quite low in these (only 3.5 per 100g) …so does the protein amount increase after the boiling process?…how does the Greek yoghurt have more protein then regular.
Hi Ray, Check out this post for an explanation.
I have been making yogurt for years and had my first failure. I always make 8 cups skim milk to 2 cups dry milk, heat to 185, cool to 110 before adding my starter. It usually takes my initial heating 15-18 min in the microwave to get the cold milk to 185. I usually stir it at 10 min and check temp. Today when I checked at 10 min, it had turned to milk solids. I tried to blend them in but to no avail. The liquid looks like whey and the solids look like cottage cheese almost. I used 2 cups of organic milk which I had used before (total 8 cups before and everything went fine that time). I added 6 cups of new milk that I have also used before and I believe have milked brands before. I had used this dry milk previously also. Any ideas on what went wrong this time? How can I use this whey and solids in a creative way. Our dog loves whey but is a lots of it.
Thanks for any help you can give me.
Sammie
My thanks for detailed info, and apologies if this question is addressed elsewhere; I’ve read thru and found related posts, but not a direct answer about yield.
From 2 quarts (8 cups) of milk (without dry milk powder addition), how much whey and how much yogurt do you get after straining it?
I realize there are many variables (type of milk, starter, time, heat, straining time and method etc), but it would be helpful to have a guideline. I didn’t keep track when I first started making yogurt a few weeks ago, but it seems to me that I get more and more whey, and less and less yogurt, as time goes by.
I’ve started to keep track of how much I get (current the yield is 4 cups whey, and about 3.5 cups yogurt, after <1 hour straining via a wet cloth)
Marion,
Perhaps I need to write a post about this since several have asked this same question.
My experience is with nonfat milk and I usually drain until the amount of yogurt equals the amount of whey–so about half and half. Sometimes, I will forget about it and I get even more whey-closer to 4-1/2 or 5 cups. I don’t mind it though. I just add milk back until it’s the thickness I want.
Recently, I have started using Braums nonfat milk. Do you live in an area with Braum’s stores? It makes the most fabulous yogurt. Because they “concentrate” the solids (don’t understand the process), it tastes better and I get a lot more yogurt and less whey. I get more like 5-5-1/2 cups of yogurt and 3 cups of whey. The result? I don’t have to make it as often.
Marion,
One other thing I just thought of. If you chill the yogurt before straining, it will usually yield less whey. It takes a lot longer to strain so I don’t like to do it that way but thought I would mention it.
I don’t live near a Braums.
I had the same thought about chilling the yogurt before straining (rather than straining then refrigerating). I will try that, altho I do enjoy the rhythm of waking up to the pot of gold in the microwave and dumping it into the cloth-lined strainer.
Also, I think I will experiment with simply ‘stopping’ the straining process when I have 3 cups of whey, 3.5 cups of whey and 4 cups of whey – and seeing how I like the texture of the strained yogurt in each of those batches. Funny that I’ve become so addicted to this stuff, after years of only eating the store-bought pre-flavored stuff. I started to read and learn about making my own yogurt because, as empty-nesters, we don’t go thru a gallon of milk before it spoils. But now, a gallon of milk isn’t nearly enough to get thru the week!
I processed my yogurt over night, and realized I forgot to add the culture. I used raw milk. Is it ok to go ahead and add in the culture and process again?
I forgot to turn on my yogurt maker. It’s supposed to be on for 12 hours; it’s been 11hours. Is it too late to turn maker on … or could I simply start over re-heating the mixture and going thru the whole process again … or should I throw out?
Hi there!! DO you think i could possibly make this with soy or a nut milk?? Im dairy free and missing yogurt so bad!
Paula: You answered my questions 100%. Thank you. Boyd Rahier
I’ve been making crockpot Greek style yogurt for three or four months now and am having excellent results using whole, low fat or skim milk; cannot tell in the end product one from the other. Basie recipe is for two quarts milk. Question: when I strain the yogurt (I use an old T shirt) for an hour, I get about a pint of whey. Once I followed a suggestion and left it in the frig. for 8 hours. It came out great, but I ended up with well over a quart of whey. Comments please, and can you tell the difference in the end product of Greek yogurt regards how long you let it strain? Boyd Rahier, Minnesota
Hi Boyd,
No matter how you strain yogurt, the longer you let it strain, the more whey you will get. I do not refrigerate mine before I strain and can easily get a quart of whey after only an hour of straining. Chilling slows down but does not stop the process. The more whey you take off, the milder and thicker your yogurt will be. I’m not sure if I answered your question. If not, write back. Nice to hear from you.
Do you ever find that your nicely set and strained yogurt turns runny after whipping? I stopped whipping my yogurt because of this problem. I start with this great batch of homemade yogurt, strain it, but then as I whip it the thickness seems to just “fall apart.” any ideas?
Heather,
I have noticed whipping makes the yogurt a bit thinner, but after chilling, it firms right up. I prefer the creamy smooth texture produced when whipped. I must say the type and brand of milk you use can really affect the texture too. This is something I’m beginning to notice more and more the longer I make yogurt. If you happen to live where Braum’s milk is sold, their fat-free milk makes the most awesome Greek yogurt imaginable. Of course, nothing says you have to whip it if you don’t want to. That’s the beauty of making it yourself.
Hmm. Maybe I’ll try switching milk brands and go back to whipping it to see what happens. I had been content with my “unwhipped” version for the past 6 months or so, but I am oh-so-jealous of your beautiful Greek yogurt pic with the spoon standing up in the jar, and am now on a quest to make mine look as creamy and thick as yours looks!
I followed you from Cote de Texas because your title was intriguing. I have been making my own Greek yogurt for years. I heat to 180 then fill my sink with ice cubes and some cold water and put the pan in bringing down the temp fast while keeping the thermometer in the milk. Once down I put in 1/2 cup of starter yogurt and stir it in. Then, and this is where it is different from all your posts, I put the milk in a double walled container. Lid it and let is sit overnight. I have used lots of different ones but you can purchase a large thermos, like drink dispensers that people take to their kids soccer games full of lemonade. They are quite inexpensive at Walmart and Target. It works 100% of the time. Then I strain with a colander and cheesecloth, which I rinse out and reuse for next time. I usually let it strain while I’m at work and in my fridge over a larger bowl. I admit it can be thick and hadn’t thought about whisking whey or milk back in. I prefer this method to using ovens or slow cooker type devices. I usually end up with about 3 cups of yogurt.
Cheers, Liz
Liz,
So nice to hear from you. Sounds like we make our yogurt in a similar way. Hard to stray too far from nature’s work. I did notice you use a lot more starter. Have you ever tried cutting back. I bet you would be surprised how little you actually need to get the same results. I use only a teaspoon for a half-gallon of milk. Like the idea of a double walled container. pr
I made the yogurt and all i got after very gently straining it was 2 and 1/2 cups of yogurt…The rest was whey…..There were not hardly any yogurt mixed in with the whey…I poured the whey back in the measureing bowel and it said 5 and 1/2 cups. last time I got about 2 and 1/2 cups of Whey…What do you think?
Joan,
Did you end up with something like yoghurt cheese? Just curious, how long did you strain it?
Personally, I like my yogurt very mild, so the more whey I can get out of it, the better. Then I add milk back in to make it the texture of sour cream. But if you don’t want to strain out so much whey, don’t strain as long and try chilling your yogurt before you strain it.
I tried using a crock pot this time ( I put the yogurt in little jars submersed in water in it.) I set it on low like someone suggested to me once but silly me didn’t go back and check things out until 6 hours later and I found that the milk/yogurt had been heating at 180 degrees the entire time. I realize the yogurt is probably dead but is the milk ruined? Will I have to pour it out or is there something else I can do with it now?
Paula, could you please be more specific about the syrups and other things you add to your finished Greek yogurt? As I watched your video, I couldn’t understand the flavor of the first syrup, but did get the almond syrup and vanilla bean paste.
I looked, but did I miss a section on your website that addresses the different things people add to flavor their yogurt?
Hi Rita,
You have given me an idea for another post. My current favorite sugar-free syrups to add are coconut, almond and vanilla. Usually add a dash of all them along with vanilla paste.
Watch for more on this topic in the future.
I’ll be looking forward to your post, Paula. Sounds great! And thanks for the information about the syrups. I have no idea where to look for them, but I’ll be keeping my eyes open..
P.S. Have you tried the radicchio with the romaine? I hope it does (did) as well for you as it does for me.
No, I forgot about it. Thanks for reminding me. Putting radicchio on my grocery list now. 🙂
Rita,
Have you seen my latest post??? Do you have a website? If so, I would gladly link to it in my post. paula
Two yogurt failures after great success the firs time. I carefully regulate temperature with thermometer. the only difference was in my successful try, I used Dannon plain yogurt as starter. In my two failures, I used Dannon Greek yogurt (plain) as the starter. You can use Greek yogurt as starter, right? Can fresh multidophilus capsules (good stuff, kept in fridge from independent health food store) be opened and used as starter?
Hi Wendy,
Yes, you can use Greek yogurt as a starter as well as regular yogurt. Don’t know about the capsules but I am not optimistic. The best starter is your own yogurt because you know it is fresh. I would try a half batch with a different brand and try to find the freshest possible. Recomend small batches until you have success again. Let me know how it goes.
Hi,
I just make some yogurt in a yogurt maker and it turned out like sour milk…Can I still use this in recipes..
Thank you
Dorothy, I probably wouldn’t risk it. But that’s me. Sounds like you starter was no good or your milk was too hot to start with. :-(.
I’ve been making yogurt for years. I bought Greek Gods plain Greek yogurt for my most recent batch (my old yogurt was really old & “flat”). We love the results – almost no tartness & so yummy! But I have begun to worry that maybe the sourness of yogurt is part of the healthiness of it??? Do you think yogurt has to be at least somewhat tart to be effective health-wise?
Elizabeth, I certainly hope not because I don’t like mine to be very tart at all. Either way, I certainly don’t lose sleep over it. Maintaining an appropriate weight will do more for your health than any single food you might or might not eat. At least, that’s the way I see it–but I’m no expert.
I make my yoururt with organic fat free milk. I’m now on a sugarless kick. My fatfree has 14 grams. Has ANYONE tried making it with original almond milk, 40 calories, no sugar ?
Yogurt ! Sorry ~
Tami, I have tried it with almond milk and coconut milk. Neither worked for me.
Thank you Paula, I was thinking the same thing.
Wow looks great! Not too hard either!
Can I use non-dairy substitutes like Rice milk or Coconut milk?
Danae,
I have not tried it with rice milk. Soy milk works great, at least with the brand I buy. Have not had good luck with coconut milk but I see directions on the web. I’m thinking you need some kind of special coconut milk for it to work. Readers? Have any of you made yogurt from coconut milk?
Hi Paula, I’m so happy I found your website while searching for a recipe for homemade yogurt. About a month ago a good friend gave me a gallon of fresh cows milk and I wasn’t sure what to do with it. Now I’m hooked and buying 1.5 gallons of fresh milk every week so I can make your delicious Greek style yogurt. It has been trial and error although every batch has actually turned into yogurt. A couple of times I’ve strained it too long (ends up like soft cheese), once it was very tangy, and another time it had very tiny little curd like particles in it. I have used my own yogurt to start each new batch except for the first one of course. I keep trying and today I think I have a near perfect batch.
One question I have is: When I follow your technique exactly my yogurt is ready after 4 hours of incubation (preheat oven to 350 for one minute, turn off oven, turn on light). Do you think this is enough time? It looks gelatinous just like your picture. I have no problems straining it and the yogurt is quite thick, I’m just questioning if I need to leave it in the oven at least six hours as you state. I don’t really like it very tangy.
Also, when using the fresh cows milk without taking the cream off the top first I find that the cream seperates from the yogurt and I’m wondering if this happens to anyone else. Sometimes I take the cream off first and sometimes I just use it, I know I probably shouldn’t include the cream but I think the whole milk yogurt is so delicious and has good Omega 3’s.
Thank you so much for this great resource, I love your website and all of your fantastic tips.
Terri,
If your yogurt is thick enough after 4 hours, go with it. Leaving it longer only makes it tangier, not necessarily thicker. I do not let my yogurt incubate nearly as long as I used to because I like mine mild too.
Honestly, I don’t have much experience making yogurt with whole milk. Mine usually turns out too soft for me so if you’re happy with it, keep doing it, including stirring in the cream. I’m afraid I would be growing out of my clothes very quickly if I did that but it sounds delicious.
Thanks so much for writing. pr
I love your blog. Thank you. Can you tell me what is the diameter of your bouillon strainer. Thank you in advance.
Paula I recently started making my yogurt using a crockpot and have been very successful w/ this method. So far I have been using a 1/2 gallon of skim at a time but with two kids I go through it so quickly. If I double it and use a gallon does this change the incubation time or the amount of starter I need to use?
So, do you use as starter some of the batch you just made and into which you stirred all those other ingredients? Or do you set some aside as starter before you add the vanilla, etc.?
I’ve never added those things to my yogurt — I’m happy to eat it just with fruit. But I like the idea of adding vanilla and honey as my husband really dislikes unsweetened yogurt. I’ll try it on half the batch next time — maybe he’ll find it more appealing.
I’ve also never tried the microwave — I just keep stirring until it reaches 188 degrees, which is the temperature I was taught, pretty close to yours. (I don’t mind the time, as it’s kind of meditative — then again, I also like ironing for the same reason, so there is no accounting for taste.) But I will give it a go and test how long it takes my microwave to heat it appropriately. (I’m a systems analyst, so I like that sort of thing.)
Guess I’ll need to pick up an eight-cup Pyrex measure, something I’ve wanted for a long time but hadn’t found the right excuse … 🙂
Thanks for the ideas!
Yes, you can use yogurt that has sugar or sweetener (I use Torani sugar-free syrups)in it as starter. I personally do not sweeten with honey so have not tried that. Pr
I have no idea if you’ll see this comment, but i’m wondering if the starter you use …. from your own homemade yogurt is the same yogurt that has the vanilla paste/extract/flavoring & other additions to it. It still works as a starter, and sets up well with those flavorings/additions added to it? — if possible can you respond to my email … if you see this. 🙂 thx!
My boyfriend bought me a yogurt maker (and himself one too, and has made several batches of yogurt already.) Incubating my first batch right now using my favorite locally made yogurt as a starter. I’m excited to see how it turns out. According to the directions though, it says to only use your own homemade batch once for the next, and to use a new commercial yogurt or starter again. But all the Indian people I work with who make their own use their own all the time with the next batch. I don’t get why it tells me not to.
That is a REALLY good question Dione. I don’t really know why the yogurt maker instructions say that. I’m with the Indian people you work with. I use my own yogurt for starter and it works great. Over and over and over. I’ve done it for months, even frozen it and then used after going on vacation.
I made Greek Yogurt as per your recipe and it came out with the right consistency the very first time. However, after two days it became moldy on top. Since the refrigerator temperature is 40 degrees Far., I did not put it in the refrigerator because I was afraid that it would kill the bacteria in the yogurt. Was I wrong to leave it at room temperature?
I have made 2 batches of yogurt with a yogurt maker and both batches had little black specks in the yogurt. I was careful not to burn the milk, and I checked the yogurt starter did not have the specks in it. When I combined them and whisked them up, all these black specks appeared. I would think that I had coffee grounds in my bowl or something but I was very careful to clean everything. Any ideas?
Meagan, How distressing! Did you happen to add vanilla at some point? It’s weird to me that it disappears. I’m assuming you cover the yogurt while it incubates. Is it possible your whisk has become a bit rusty at the top where the wires join the handle? If I think of any other possibilities, I’ll write back. pr
I make yogurt every 5-7 days in my crock pot. It comes out totally delicious and It’s ready when I get up in the morning, and I don’t have to leave anything on. Also, I don’t think I can set my oven to 100. Anyway, the yogurt is great, except it isn’t very thick. I prefer very think Greek Yogurt while my fiance likes thinner, regular yogurt…but this is even thinner than he prefers. We still use it in our smoothies and with our granola, but it just isn’t thick. Sometimes when i am making just a single serving for my granola, I will put it in a coffee filter and that gets it pretty thick. I tried this morning to use cheesecloth following directions on a blog I read, but my yogurt was actually able to get through the small holes! Do you know what I could do to thicken the yogurt better? Also, I’m wondering if the bouillon strainer would work even though I’m having problems with the cheesecloth. Please help me! Also, I love your blog!
Hi Marilyn,
First question: Are you heating your milk to 175-180 degrees F and then letting it cool back down to 110-115 degrees before adding your starter? It will not get very thick if you don’t take the time to do this step. Heat makes the proteins unravel which is a good thing when it comes to yogurt.
Following my method, my yogurt usually (when it comes to live cultures, nothing is guaranteed) comes out so thick that I don’t need a cheesecloth to strain it IF I use a very fine mesh bouillon strainer (these are finer than anything you can buy at the grocery store–see my post about straining yogurt). I personally detest messing with cheesecloth, paper towels, coffee filters, tea cloths, or t-shirts.
I’m sure your crock pot method is good, but, it would involve too many dishes for me. I prefer to heat the milk, cool the milk, incubate the milk, strain the milk, and whip and flavor the yogurt in the same bowl. So in the end, I have only one bowl and one strainer to wash–in the dishwasher. That’s it!
Write me back if you still have questions. pr
p.s. Before I had an oven that would heat to 100 degrees, I set my oven on 350 degrees for one minute, then turned the oven off. I used a bath towel to wrap my covered bowl of milk and stuck it into my oven (now turned off) and turned on the oven light. It would stay warm enough to incubate the yogurt for 6-8 hours.
I make greek yogurt every couple of weeks- I have learned to heat the milk in a rigged up double boiler (an 8 qt stainless pot set into a big lobster pot full of water, on high heat) so I can set the timer and walk away without fear of burning the milk (about 20 min for a gallon of skim). Then, I put cold water and the contents of my icemaker in the sink and set the 8 qt pan of hot milk in there and set the timer again (less than 10 min) and my milk is cooled and ready for the addition of the yogurt. I can have a gallon of yogurt ready to “brew” in a half hour using this method. I have never had a batch fail.
Hi Lisa,
You’ve never had a batch fail??? Wow! I’m impressed. I’ve had a few batches that didn’t set up–usually due to operator error, I’m sure. But 6-8 fails out of several hundred batches isn’t too bad in my book considering we’re working with live cultures.
Your method is fabulous for my readers who don’t want to use a microwave but also don’t want to babysit a pot of milk on the stove. Thank-you so much for writing. pr
Just came across your site while looking for a yogurt-balsamic dressing recipe. I must say I am horrified to find that you actually microwave the milk. You must not know what that does to the proteins within the milk. There is a reason why the doctor tells new parents to not warm milk in the microwave. It makes it indigestible. When we have babies come in with failure to thrive, microwaved milk is the number one cause. I know it must be nice and neat when cooked this way, but health is way more important than convenience.
Hi Chris,
Thank-you for taking the time to write. Obviously, I don’t agree with you (yes, proteins are unraveled during the heating process which is necessary to make thick yogurt but they remain very useful to your body) and I’m not sure where you are getting your information, but since I’m just sharing the way I do it, it doesn’t matter. Seems like we both enjoy yogurt and there are many ways to make it as evidenced by the comments on my yogurt posts.
Since you disfavor the microwave, you must take a look at the comment left just after yours by Lisa Polaske. She tells how she heats her milk on top of the stove in a way that she doesn’t have to babysit or worry about it scorching. It’s genius.
Regards, pr
We were overseas for a number of years and could not get yogurt, buttermilk or sour cream. A friend taught me to make yogurt and gave me a start of hers…almost the same exact recipe you are using. Straining through layers of cheesecloth gave me something that could be substituted for sour cream. Mixing some yogurt back in with whey gave me buttermilk to use for baking. A little sweetener and fruit mixed in was perfect for breakfast or dessert! My biggest problem is occasional graininess with second and third generation batches. It will usually work itself out in the next batch.
It seems I always had a container of “buttermilk”, one of yogurt and a strainer of “sour cream” going in the fridge!
I am hooked on making and eating yogurt, thanks to your site. I have been trying to get more calcium in my diet and this us the perfect way! Thanks so much for your helpful video! I also make the salad in a jar. I think you and I are, as Anne of Green Gables would say, “kindred spirits”! Keep posting things like this for people like me – please!
Any ideas what to do with a failed batch of yogurt please ?
Mine seems to have ‘split’ ; the consistency is “of strands” and stringy rather than anything I could put through a cheesecloth.
Amanda,
I’m so sorry about your failed batch. It happens to me occasionnally too. I just throw it out. Since I’m not exactly sure what you have, I don’t know what to recommend. Sounds like it got too hot or your milk was old. Working with live cultures is not an exact science as you have probably noticed. Better luck next time. Don’t give up!
How do you convert this process to use with a Yogurt maker with built in timer? My biggest confusion using a yogurt maker is, when and how to strain, given the mixure is poured into individual containers. I prefer a more subtle taste, although I like it a more thick consistancy. I will be using skim milk also, along with agave sweetner, which I am assuming I will add after it has chilled along with any other add in’s…right? Thanks, from a Yogurt making newbie. 😉
Susan, You have pointed out one reason I do not use a yogurt maker. It’s nice for beginners but impractical if you want to make Greek yogurt. The time to strain is AFTER the whole process in the yogurt maker is finished. But what a pain to dump out each little jar, strain it and then pour back in the jars. If you want Greek yogurt, I recommend you follow my directions. The yogurt maker is nice to build your confidence in the beginning as long as you’re happy with regular yogurt. You are right to wait to add sweetener and/or fruit after the yogurt if finished.
Your directions with pictures are very helpful and I’m anxious to try making the Greek variety of yoghurt. This would be more healthful and lots of fun. If I used half of the milk in your recipe in making my yoghurt should I still use the same amount of starter that you described in your recipe?
You are very smart to start out with a small amount of milk until you get your system figured out. The amount of starter you use is not crucial but about 1 teaspoon of starter per quart of milk is what I use. Many people use a lot more but I haven’t found it to be necessary.
I am lactose intolerant. Can I use fat free Lactaid for this recipe?
Scott, I have not tried it myself. If you do, let me know how it goes.
Hi Paula,
Your site is so informative, I hope you can help with a yogurt question.
My 2 month old Euro Cuisine auto shut off machine shut off after 3hrs(set to run 11hrs) question, how long can yogurt sit with out heat and still be safe to reheat and continue process. My general rule of thumb is when in doubt throw it out.
Thanks,
glyn
Havaing trouble with my greek yogurt. Milk was heated properly, cooled to correct temp and I opened a new store bought chobani for the starter. After 12 hours it looked solid and I was thrilled, yet when I put it in the strainer, it essentially all ran out. I now have plenty of “regular” yogurt, but WANT greek yogurt. I let it incubate for 12 hours. What am I doing wrong. It comes out right only about a third of the time and the rest of the time, it’s still the consistency of regular yofurt or drinkable kefir…Any suggestions out there?
can the recipe be doubled? If so do you put in 2 times the amount of yogurt for a starter?
Just came across your website last wk. while “Google searching” tips on home-made yoghurt. I’m so amazed my first ever batch came out perfect!! Thank you soooo very much for sharing.
Please help. I have attempted to make Greek style yogurt about 10 times now. The first three times were beautiful. The product looked like a soft white jello with yellowish whey on the top. I strained it, it was fantastic. The following three times, nothing solidified – it was white liquid. The next few times, the white liquid was thicker but there was nothing like the first three times. This last time, it was just sour milk.
I made the first 6 batches exactly the same. The next three I experimented on as the previous ones had not gone well. Am I never to have consistency again? I’m so sad because the first few batches were so fantastic that I figured I would be making this 3 times a week. My kids loved it, we all loved it. Now I don’t know if I can afford to waste another gallon of milk. Help.
Soy yogurt! I love Greek yogurt but gave up dairy so I am going to try making this with soy milk and almond milk. I already make soy yougurt, just have to change the recipe a little bit.
Any suggestions?
I haven’t tried it so can’t really offer any suggestions. However, I drink lots of soy and almond milk too so think I’ll start experimenting. Paula
So I am in the middle of trying to make my first batch…I don’t think it is going well, but I am determined. I use Raw milk and was looking for a way to use up what had soured. (Raw milk just sours, it does not putrefy like homogenized milk) I put it in a bowl and microwaved it. At 14 minutes i stirred it and it had reached 178 degrees. It looked very strange, clumpy with a lot of yellow liquid (not like your picture, did i screw it up somehow) I forged on. cooled it on the counter to 110, still looking like yellow soup with clumps, added 2 tsp of oikos and placed in my dehydrator (set at 100 degrees). It has been16 hours and it still looks the same. ideas anyone?
Tina- I thought my new Kitchen Aid oven would only go to 170 degrees, then I discovered that I had a bread proofing setting and it is 100 degrees. Look to see if you have this feature. Also, I found a great recipe for lemonade that uses the whey in the strained yogurt-http://www.foodrenegade.com/fresh-natural-healthy-lemonade/
Thanks for the lemonade link. Will definitely check it out.
Hi Everyone! I just started my first batch of yogurt yesterday, left it overnight, and woke up this morning to a great batch of yogurt! Perfectly set, and draining it now. I must admit my yogurt looks just like your pic of it draining in the chinoise, which for some strange reason, I happen to own one! It took me a while to figure out a way to incubate it at 100 degrees, and I remembered an electric multi-cooker I had stowed away. It is like a round crock pot, has settings for deep fry, stewing, slow cooking, etc, but no crockery insert. At the lowest end of the “warm” setting, I found my 100 degree mark. Luckily, the bowl I used fit perfectly. I placed the covered bowl in the center of a dishtowel and lowered it in, folded the towel over the top and put the lid on. I put an instant read thermometer on top on the plastic wrap covering the bowl so I could check it, and it stayed constant. This whole process started when I went to by some Greek yogurt, and the price on the 32oz container was $4.99! Sticker shocked by yogurt!!! I apologize for the long post, however, I can’t contain my excitement. Next on the list, Salad in a Jar. Thanks so much, you are wonderful!
It’s exciting to wake up to a perfect batch, isn’t it? I did it myself this morning and I still marvel at the magic. So glad you explained your process. Maybe it will give somebody else an idea.
This is what happening with my yogurt….I boiled the milk to 180 – cool down to 110 add starter – room temperature for 2 hours then place it of refrigerator overnight this morning still have milk not yogurt…..could you help me please? what did I do wrong? can I fix it?
I’m so sorry about your yogurt. Unfortunately, you have missed a very important step. After you add the starter, you must incubate or let your milk mixture sit in a very warm place–a place that is approximately 100 to 110 degrees. (Check out my post about incubation–link in the sidebar.) Room temperature is not warm enough unless you live in Texas and your air conditioner is broke. It usually takes a minimum of 4-6 hours but I often let it sit more like 8-10 or even longer. Then I strain it before chilling or chill immediately if you don’t want Greek yogurt.
As far as fixing it, you could try heating and cooling again and adding new yogurt but if it was me, I would start all over again. Try it with a small amount of milk (maybe a quart-size jar) until you get it to work. Keep trying. It’s worth the trouble if you love yogurt.
I had such good luck making yogurt, and then something happened. One half gallon of mild used to make one quart of greek yougurt. I have noticed for some time now that it makes more like 3 cups of yogurt with more liquid whey. I am not doing anything different than before, I have tried different brands of milk with the same results. The only thing I can come up with is, dairy farmers have really felt the crunch with higher feed prices. Are they feeding their cows something cheaper and it is affecting the quantity of milk solids? Any thoughts on this?
How disappointing and perplexing. Possibillities might include what you suggested or perhaps starter is not as fresh as it could be. To quote one of my readers, “The yogurt gods can be fickle.”
Paula, Thanks for your reply. I am doing everything the same as before. I use the same milk, same incubation period and device. I used the same yogurt starter as before. I took pictures of all of it, as I wanted to get your advice and thought the pictures might help, but I don’t see any way to post those. I am going to try again today and I will let you know how it goes. Thank you!
Thank you for your wonderful blog! I have been making your yogurt for several months now and it has always been good. However, the last two times I’ve made it, it was more like ricotta cheese. I made a liter and a pint and it yielded less than a pint after straining all the whey off. The whey is SO much. I only drained it for ten minutes. The flavor was very good but after whipping, the texture still was not pleasing.
Any suggestions? Thanks so much.
Mom in Korea, I’ve never experienced what you’re describing. Do you add some milk back in? That usually makes the texture very creamy. I would try to think about anything you’re doing differently. Is your incubation warmer that it used to be? Is it possible your “starter” yogurt has somehow become contaminated? Have you changed the type of milk you’re using? If you figure it out, be sure to write back and let me know.
Try “passing” the yoghurt, i.e. pushing the milk through a strainer after draining for texture. Works for me!?
I was wondering if I could use Raw whole Fat milk and still get the same results? Also Can I simmer the milk to the temp suggested without using the microwave?
Thanks
Charisma
Charisma, I have never tried raw milk of any variety so don’t really know the answer to your question. I’m guessing it would work.
Yes, you may heat your milk on top of the stove. Be careful not to scorch it.
Paula,
I’m back again with an update for you. (Remember, I am the one that NEVER responds to blogs?) Since finding your site 4 months ago I continue to make your yogurt. I now make yogurt using 2 gallons of fat free milk every week! We love it here! I heat the milk on the stove to 180. Cool it to 110 and then add from my own made yogurt as a starter. I will then wrap in heavy towel , put in oven for 10 hours with the light only on after a small preheat to take the chill out .. (Sometimes I leave it overnight. Sometimes I do it in the morning and take it out before dinner if I need the oven). Voila! It is done. Before straining I let it rest in the frig for 3-4 hours or until I have time to strain. I have fine tuned the straining to using a large colander (2 of them-each holds 1 gal.) lined with flour sack cloth (tea towel-100%cotton). After straining for an hour or so I then whisk/beat. It is the BEST!! Thank you again for offering this to everyone! I have told all my friends about this. We are forming quick a group of followers.
Your directions are the best!
Hi Nadine, Sounds like you are addicted as I am. I was just sitting here writing a post about all the different ways my readers incubate their yogurt. You do yours exactly the same way I did in the beginning before I got a new oven. It is so much fun to hear from you. Thanks for writing.
Thanks Paula! I’m so excited to start making my own yogurt. I eat it all the time. I can’t wait to see how it turns out and start troubleshooting if need be. I’m after the best greek yogurt I can get. And have to say, love your site!
And if I am just going to let the milk cool to room temp, how long would that take if its just sitting there?
I’m very excited to find your site. I just bought a yogurt maker-I didn’t know they even existed until last week. I never even thought to make it myself. I’m making my first batch now, which won’t be ready for another 10 hours or so. Since I live in a really small town, the only place I really have to get a thermometer is Wal Mart. I hope it works-was $10 digital kind.
I cooled it down via the fridge-think that will make a diff?
Hi Karla, Welcome to the world of homemade yogurt. The thermometer you got at Walmart should work just fine. Kinda surprised your yogurt maker didn’t come with one. Cooling down the milk in the fridge won’t hurt your yogurt although it could be kinda hard on the rest of the food because it will raise the temperature in your fridge a little bit. I could not even guess how long it will take for your milk to cool. Depends on MANY factors: How much milk? How warm in your kitchen? Is it covered? What kind of container is the milk in? My guess…anywhere from 30 minutes to an hour but could be even longer.
I found your site via Google and made yogurt yesterday and it turned out great! I also have a copy of Sandor Ellix Katz’s Wild Fermentation and I kept going back and forth between the two, using info from both which helped a lot. I used organic fat free milk and a little starter (Trader Joe’s nonfat Greek yogurt) – about two tablespoons (Katz’s suggestion). I then used my dehydrator (thanks to a former poster here!) and my candy thermometer which told me that my “85” degree setting was really 100. It “yoged” in about 9.5 hours but I will let it set longer next time for more tang. I also followed another suggestion here of using a large handkerchief inside a sieve to drain the yogurt. Because it was late, I set this in the refrigerator overnight and when I got up this morning I had super thick yummy Greek yogurt (16oz) and a jar of whey which I’ll use in my next bread baking project. Not sure about the money savings, though. The Greek yogurt at TJ’s was only $2.79 for 16oz. and the organic milk cost me $3.85 for a half gallon! However, 16oz of Oikos at the local co-op was over $4, so there was a small savings if I were only shopping at the co-op and TJ’s is 1.5 hours from home for me. Of course, when you factor in electricity costs, not sure it makes any difference – I just like to make stuff myself. Thank you so much for sharing this technique!!
Whey is great in protein drinks and smoothies. Keep it in the fridge and pour some in the blender next time you make a smoothie. My kids like frozen strawberry/yogurt ones for breakfast.
I just had a crazy thought… could you use leftover whey as starter for the next batch? There must be bacteria in that as well as the solid part, right?
I just hate wasting all that whey.
Christine, That’s a new one. If you try it, let me know how it works. I’m skeptical. When you only need a couple of teaspoons of starter, you’re not saving much. The best idea I’ve heard is to use it in making bread. Some people have told me they use it in soups and cooking veggies. Honestly, mine goes down the drain. There’s just too much to keep.
I make a lot of cheese (cheddar, mozzarella, colby, etc) so we end up with lots of whey every week. I let it cool and pour it on my garden, both flowers and veggies – whey is truly a wonder-food for plants!
Sara, I have tried watering my plants with the whey. Wasn’t sure how much it was helping but I will keep doing it. Thanks for writing.
My oven only goes down to 170 degrees, so I didn’t think I could try your method. But then I realized that I could use my toaster oven!
It worked, but you were right about it being hard to tell when it’s ready. I think I left it in too long to be honest, but it didn’t seem done. Then I strained it and it was fine.
I recently left mine 24 hours because it wasn’t convenient to deal with. It was still fine–no problem.
I have been making your recipe for a year now, except I heat the milk in a double boiler on the stove.(my microwave is too old, and the milk always boiled over). I have to say it never occurred to me not to stir the milk while it was cooking and cooling. I always have and have never had a problem with skin. I was making gritty yogurt once in awhile, and I now sterilize my pot and equipment by boiling water in the pot and putting my whisk, and the end of my thermometer in the boiling water. I also take my new yogurt starter out before I add milk back into my drained yogurt – this seems to have ended my gritty yogurt problem.
Thanks so much for your take on the “gritty yogurt” problem. Maybe this will help others. I’ve personally never experienced it but evidently, it happens occasionally and you seem to have figured it out–for your own situation anyway. Seems like that’s the way it is with yogurt. Everyone brings slightly different ingredients and environments to the process so solving problems can take some trial and error.
Thank you for your recipe/tech and all the tips. My husband made two batches, I loved them. Asked him how he made it and I have been making 6 batches a week now for almost 2months. A little addictive now 🙂
The first time I got started I bought a quart of greek plain yogurt and put it into ice cube trays to freeze 2tsp cubes. when I make a batch, I just toss one in the blender when I start. It thaws while my milk is heating. Then to make sure the powdered milk blends well, I put some of the cooled milk in the blender (with the 2tsp starter) and then blend powdered milk in. Then I mix it back together with all the milk, whisk well, put in jars. I also use a heating pad on the counter wrapped in a towel with a Super thick towel over hte top to keep heat in. Consistent external temp (external around jars) is 118. Takes 10 hours to grow. I strain mine with cheesecloth. My kids are all addicted now too.
thank you so much for your help! 🙂
Thank you Paula. I tried again and so far it looks like it will be successful. I am at 8hrs and it has started to set. Yippee!
I’ve made a couple batches of regular yogurt but I’m looking to thicken it up to greek yogurt consistency. I’m hesitant to buy an inexpensive bouillon strainer as I’m afraid the mesh will not be small enough, but the better quality ones are well, really expensive. Does anyone know if using a yogurt cheese strainer would work? I found one an amazon and it got really good reviews for turning yogurt into a cream cheese consistency in 24hrs, so I’m wondering if less time would give you greek yogurt?
Sara, I think the yogurt cheese strainer would probably work but is it big enough for your needs?
I hope so. It should arrive monday so we’ll see if it’s large enough to hold one batch of yogurt made with 4 cups of milk. I’m also excited because if I use it go beyond greek yogurt and make yogurt cheese it’s a great substitute for recipes with mayo or cream cheese.
what is yogurt cheese and how do you use it/cook with it?
Nikki,
Yogurt cheese is just yogurt that has been strained of its whey until it is as thick as cheese–usually more like cream cheese and often used the same way although I would not say it’s interchangeable in every recipe.
So….if I took yogurt and strained “only a little”, I’d have Greek yogurt….and if I continued to strain, I’d have something called yogurt cheese? Is that what people also call Lebnah?
I have made this recipe and it has turned out runny. I do not want to throw away so is there anything I can do. I followed all instructions, however, my oven only heats to 175 and I covered with plastic and a towel and let sit 14hrs and it is still runny. Will it not set if it is too hot? I boiled the milk in a pan until it was 180, let it cool to 120 added the starter and put it in the oven. I am thinking it was to hot for the bacteria to form? Please help!
Jessica, After you add your starter, you don’t want the temperature of the milk to go over 110. I keep mine at 100 degrees F. If you put the milk with the starter back in the oven at 175 or 180, I assure you the bacteria died. It’s probably too late now but if you cool the milk back down immediately, you could add more starter and incubate again at the 100 degree temperature. I hope you will try again. It really is worth it.
I am using the crockpot and gas oven with light on incubation method for my yogurt. I thought my batch last night was a failure – after 9 hours in the oven it looked like I still just had a crock of milk, even though it had the “yogurty” smell.
Frustrated and disappointed – I left it in the oven overnight and thought I would just deal with it in the morning. When I got up to dump it this morning- it was fully set with a thicker yogurt than I had with my previous batch. It does not smell off in anyway (I’m pregnant and can pick up on the slightest nuances of odor), it has a bit more tang to it than a shorter incubated yogurt, it was like a full custard thickness without any whey separation.
So, I guess I want to know if this is okay to eat or not? Today’s standards make you paranoid anything left unrefrigerated must automatically have gone bad within a half hour’s time and here I’ve got a dairy product that incubated approximately 16 -17 hours. Any thoughts or advice for me? Thank you!!!!
As a chef I think I can give a few tips in terms of food safety:
1, the yoghurt simply needed a bit more time (possibility wasn’t warm enough?) so I really hope that you didn’t throw it out!
2, the point you make about leaving stuff out of the fridge is valid, but we are talking about fermentation, where we want the (in this case beneficial) bacteria to grow, instead of the opposite.
3, the acidic nature of the yoghurt plus the amount of live cultures should prevent any obnoxious pathogens from reproducing..
4, as you (were) pregnant, there’s a higher risk from live cultures in general, so you’re right to be wary; yoghurt from pasteurised milk is fine, but you should avoid unpasteurised products like some cheeses and vinegars..
I hope this helps people in the future!??
I am curious if you have any experience with “raw milk” which can be skimmed of the thick butter fat cream at the top of the jar of milk after it is chilled promptly following the grass grazed cows being milked. I feel better when I consume raw milk products vs, pasteurized, I have an old yogurt maker which is a group of round jar spaces in a sealed box that plugs in and I swear it is not much different than a heating pad contained in a plastic box. I want to experiment with this oven method as the small individual jars have at least an inch of whey at the top. (Thus far I have only made it with store bought pasteurized skim milk.) Lining a strainer with cheese cloth and letting yogurt drain over night at room temperature makes an interesting “cheese” with versatile cooking uses.
I just made a batch with raw milk for my kiddos yesterday. It is delicious. I didn’t skim the fat off of the top because I’m ok with them getting the fat (good for brain development). I just whisked when finished & it made a very creamy yogurt.
This is really interesting stuff! Thanks for sharing this worth reading post about making Yogurt at home. We know Yogurt are already available in different variant of flavors somewhere in the grocery. But it’s more likey enjoyable if we are the one who made it. So, thank you very much and I really did enjoyed reading your post!
Love that photo. Thanks for all the info. on yogurt!
great tips. This will come in handy should I decide to take on this adventure someday. NOt at this stage in life, but glad it’s documented!
Great tips, Paula! Luckily, dairy products (including yogurt) in Austria are of superb quality, so I’m quite spoiled. It is a lot of fun though to make your own yogurt. 🙂
My first batch of yogurt with your recipe came off without a hitch last night. Excellent flavor and texture! I found I could speed up the draining process by using a cheesecloth a layer of paper towel, and pressing the yogurt lightly, I got 4 cups of whey in only 10 minutes of draining time. Also another alternative sweetener you may like is Organic Agave Nectar. It’s all natural, and has a low-glycemic index.
Great idea to use a little pressure when draining the whey. I occasionally shake mine or tip it back and forth but next time I will try your idea to speed things up.
I’ve never tried making my own yogurt, but I really should with as much of it as I buy! I’m definitely going to have a go at this- your directions make it seem very simple. Your photos are gorgeous! 🙂
Paula,
This post came exactly at the right time for me. I was just at the store and bought my umteenth carton of nonfat Greek yogurt and as I looked at the price, I said to myself…”Jane, it is time to makek your own.” Not sure this apt. oven can be trusted, but will be in my own new kitchen in a couple months! Yeah. Thanks for you post, photos and knowledge. You are the best!
Nice post beautiful photos and I had no idea about this post so i’m glad you answered these questions because I’m intrigued now. You have amazing patience it seems since yogurt making takes time and accuracy.
thank u so much, now I can make a healthy yoghurt
please visit my blog to share each other at http://grosirsandalsehat.wordpress.com
thanks
Can you explain the crock pot method?
Is it made right in the crock pot or in jars in the crock pot?
Thank you
I never used a crock pot but people have told me about it in comments on my original post. I think you would use jars or another container and I would line the crock pot with towels. The temperature should be between 100 and 110 so you need to check that out. Maybe somebody who does this will answer your question.
My oven can only be set as low as 170 deg. F. Do you think a heating pad set on low would work? Can the yogurt be made in a metal, as well as a glass or ceramic bowl?
I used to have an oven like that. Do you have an interior light you can turn on? Sometimes that is perfect.
I’ve tried the heating pad and it works. Every heating pad is a little different so you may need to mess with it. High or low, wrapping in towels, etc.
Tina, I would think you could use metal as long as you stay away from cast aluminum but I’ve never actually tried it. I prefer the super cheap Pyrex 2-quart batter bowl. I can heat, incubate, strain and whisk all in one bowl. (Of course, that’s using a microwave to heat)
In your post instructing viewers How to Make Homemade Yogurt, you had mentioned you’d like feedback or ideas regarding what to do with the leftover whey.
I put mine in a resealable mason jar and store it in the refrigerator. When I am baking muffins, cakes, etc., or making pancakes or waffles, I simply substitute the whey for the water in the recipe. This results in a slightly tangy flavor, not unlike buttermilk, but also in an increased protein content of the final baked good, rendering it more healthy for my family.
I love this idea. Wonder how long it stays good.
I have heard that ricotta cheese can be easily made from leftover whey. It might be worth looking into.
I’ve read in a few places that whey stays good in the fridge for 6 months! Also is great in place of chicken stock in soups, etc. 🙂
I also found your blog last week via google! I made my first patch a few days a ago and ate it in 48hrs! Yummy!!! I do have a question though- both times I have heated my milk to 180 degrees, I burned my pan. The stuff is impossible it get off the bottom! Should I stir the milk the whole time it’s heating? Heat it at a lower temperature for longer? Please help!
Crystal, you may find this hard to believe but I have never heated my milk on top of the stove because of the exact reason you have described. Also more time consuming and gets another pan dirty. I assume you don’t have a microwave. I am guessing you should heat the milk at a lower temperature. I can’t imagine stirring the whole time. Oh my! Sounds like a lot of trouble. Maybe somebody who doesn’t use a microwave will help us out here.
I’d been using the stove because I don’t have a microwave safe bowl (I’m a college student). But now that I think of it, I do have a caserole dish that should work. Thanks!
I did on the stove too. Didi the burning the bottom stuff once at another recipe but aparently this time got it righ: I used a normal pan (no thick bottom or anything) on a medium-low heat. Stired it just to be on the safe side but only a few times, maybe wouldn’t even need that). Took a while to heat it with a lower heat but had no other trouble. Also kept an eye on it and sttoped before it boiled (or the mess can be too much).
I have been heating milk on the stove for a long time.. for bread, cocoa, etc. You do have to watch it. I use very high heat at the outset because I’m not patient, stir occasionally with silicone spatula scraping the bottom, when I start to see steam rising I back off on the heat and stir almost constantly, if not constantly. If I don’t think my temperature is really high, I’ll keep it at the foaming stage for longer rather than increase the heat. Using stainless steel over a copper core bottom.. no burns, no milk stuck to pan, and with yogurt, I culture in the pan. IF you burn milk onto your pan, soak it in cool water with a lot of liquid dishwasher machine detergent. About an hour or 2, that will loosen the burned on crust. Even if you do all dishes by hand, keep some dishwasher machine liquid around for this kind of thing.
Good stuff to know. Thanks for sharing, Mary.
My mother taught me to first rinse the pot with cold water than add the milk. This way the pot will not burn on the bottom. It works for me. Try it.
Yes, I will try this, Maria.
you will need 2 pans – one large and one small enough to fit inside the large pan. Fill the large pan with some water, put the smaller pan inside, and the milk in the smaller pan. This way you can heat the milk without burning it. People use this method to heat chocolate as well.
I have made yogurt 4 times in 2 weeks following your instructions and it came out perfect each time.Great ,Great, Great.
I found you through google too 😉 I just started making yogurt about 3 months ago and we love it!! I haven’t bought yogurt since. I actually let my milk boil and then strain off the skin, it still tastes great. I’m going to try to make greek yogurt now!
I’ll admit to accidentally boiling mine too with no ill effect. But I’m too lazy to strain the heated milk because I don’t want more dirty dishes. I just try to skim the skin off the top. Unfortunately, it breaks and sometimes leaves small pieces behind. I would rather just avoid it which I usually can if I just keep it covered while it cools. I think you’re going to love Greek yogurt.
Great points!! I think I’ll try not letting boil my next batch… anything to do less dishes 😉 I’m going to try cheesecloth before I invest in the thingamajig 😉
Cara,
I have found that cheesecloth can be expensive, and it really doesn’t work that well. I suggest you buy a cheap mens hankerchief, as large as possible. I have found this works better than anything else I have tried. I lay the hankie in a sieve, and pour the yogurt in to strain. Then, I just wash it in hot water and use it again!
Just use a paper coffee filter folded over a glass. You may need to set up a couple times with a large batch!
I do it with paper coffee strainer too. It works great and no need to wash afterwards. You can either use a big size (like the extra big restaurant stuff) or 2 of the big average home ones (for 1L milk I used a big and a small home ones).
Another option that has worked very well is to get a set of the tightly woven nylon washing bags from Walmart. I use the larger one over a big sieve. It works very well and cleans ups easily. The whey isn’t quite at clear as using a coffee filter, but very close and it’s reusable! In a pinch you can also use the bag for washing a sweater… 😉
That’s a clever idea! I must remember to look for those the next time I visit Walmart. Thanks so much sharing with all of us yogurt-makers.
To reduce skin, I cool my yogurt quickly. I heat the milk in a thin pot, then put the pot in a sink filled with cold water. It cools much faster, usually fast enough to not form a skin.
Watch the temperature with a candy thermometer so you don’t cool it too much.
You do realize that you torture people with your photos, right?
Heating the milk to 180 degrees helps partially denature the proteins in the milk so they coagulate into a thicker matrix when they turn into yogurt.
I make yogurt regularly, and I find that if you use 2% milk, dry milk powder and greek yogurt as a starter, you can get yogurt that thick without straining it. We let ours incubate for 8 hours at 105°F, and it turns out super thick. It does have a little bit of that pasty texture that you described, but I don’t mind it once the yogurt is mixed with granola and berries.
Thanks so much for this post! I actually found your blog last year because of that Google search you referred to and have been enjoying it for so much more since then. 🙂 I have made one attempt to make my own yogurt and it failed. I have not tried since but reading this post gives me the tips I need to give it another go. Thanks again!
Hi Brenda, I don’t think my first batch was all that great either but I was determined. I remember my mom making it when I was a kid so I knew it was possible and kept trying. It took a few times to tweak my incubation method. After I got a new oven that could be set to 100 degrees, I was in yogurt heaven and haven’t looked back–except for the couple of times I forgot to turn the oven on. 🙁
Which ovens have 100 degree setting? Please help! Thank you.
Maureen,
Mine is an Electrolux. Totally love it, although a little pricey. Look for an oven with a “bread proofing” setting.
My Wolf oven has bread-proofing temp’s, like 100 deg. A friend of mine uses their warming drawer.
Hi Jon,
I’m a bit envious. A Wolf oven would be fabulous and I’ve always wanted a warming drawer. But I’m thankful my oven also has a bread-proofing temp so it makes it easy.
You can use a toaster oven.
Hi Paula,
Thanks for this post. My first batch of yogurt came out so great… thick and creamy. I tried it in MEC’s pure clay pot that hold heat for a longer time.
So no need to set the oven to 100 degrees for all that time, i just put the oven light on and the yogurt turned out so good. better than anything else i’ve made before.
I do all my cooking in MEC pots. It turns out really great and nutritious too.
Thanks
Thanks for the great yogurt recipe! I tried in my pure clay yogurt making pot it turned out great I didn’t have to add any additives because the pot itself thickens the yogurt naturally. As it is a “breathable” pot.
Hi Brenda,
I agree about the additives. I don’t add any myself. paula