Bread Machine Dough to Oven-Baked Bread: Step-by-Step Guide
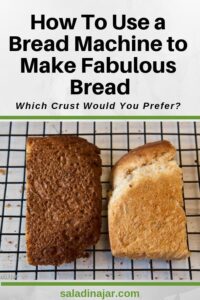
Sneak Preview: Want better bread from your bread machine? Use the DOUGH cycle, then bake your loaf in the oven for a golden crust and bakery-style texture. I’ll walk you through every step—from kneading to baking—to help you make bread that’s worth every bite.

This post contains affiliate links. As an Amazon Associate, I earn from qualifying purchases at no extra cost to you.
The automatic nature of a bread machine can sometimes ruin a loaf. That’s because it works on a timer, not intuition. My solution? Use the DOUGH cycle and bake in a conventional oven.
Not convinced it’s worth the trouble? See: Bread Maker vs. Oven: How to Get the Best Crust. No more cardboard crusts, holes in the bottom, or crumbly bread.
Step-by-Step: Bread Machine Dough to Oven-Baked Bread
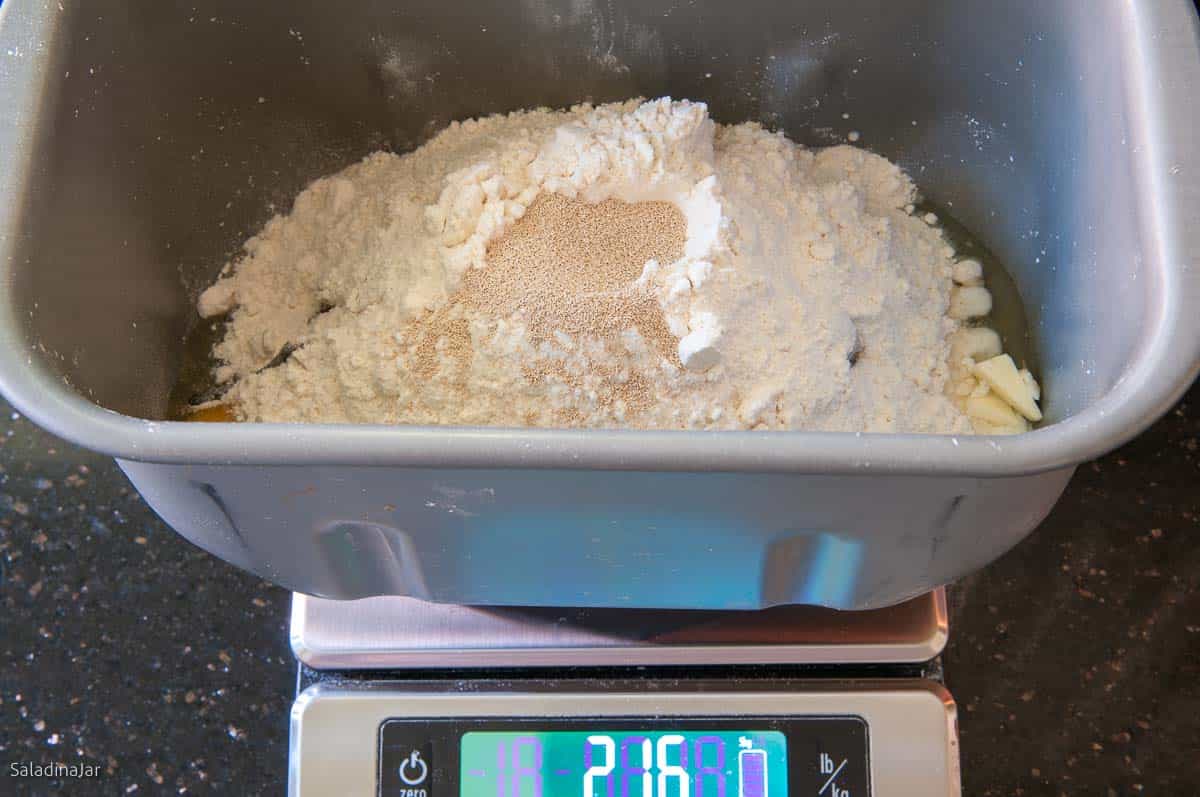
1. Prepare the Dough
Add liquids first, followed by dry ingredients (please weigh for best results), with flour and yeast last. [See: 5 Keys to Using Yeast with Confidence in Your Bread Machine]
Select the DOUGH cycle and start the machine. Some machines call it “FERMENT.”
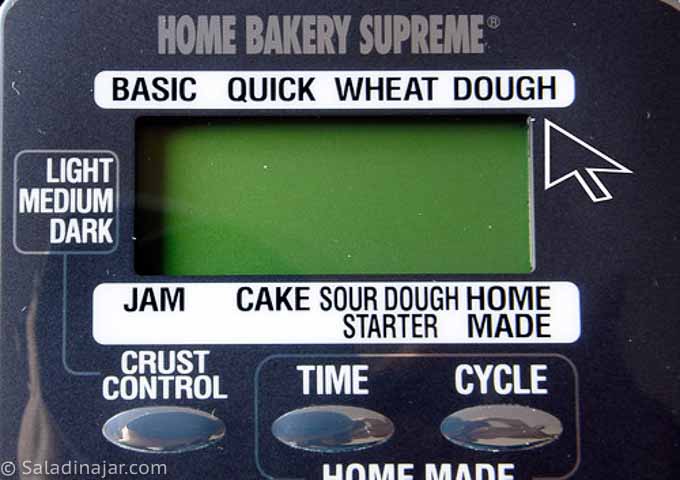
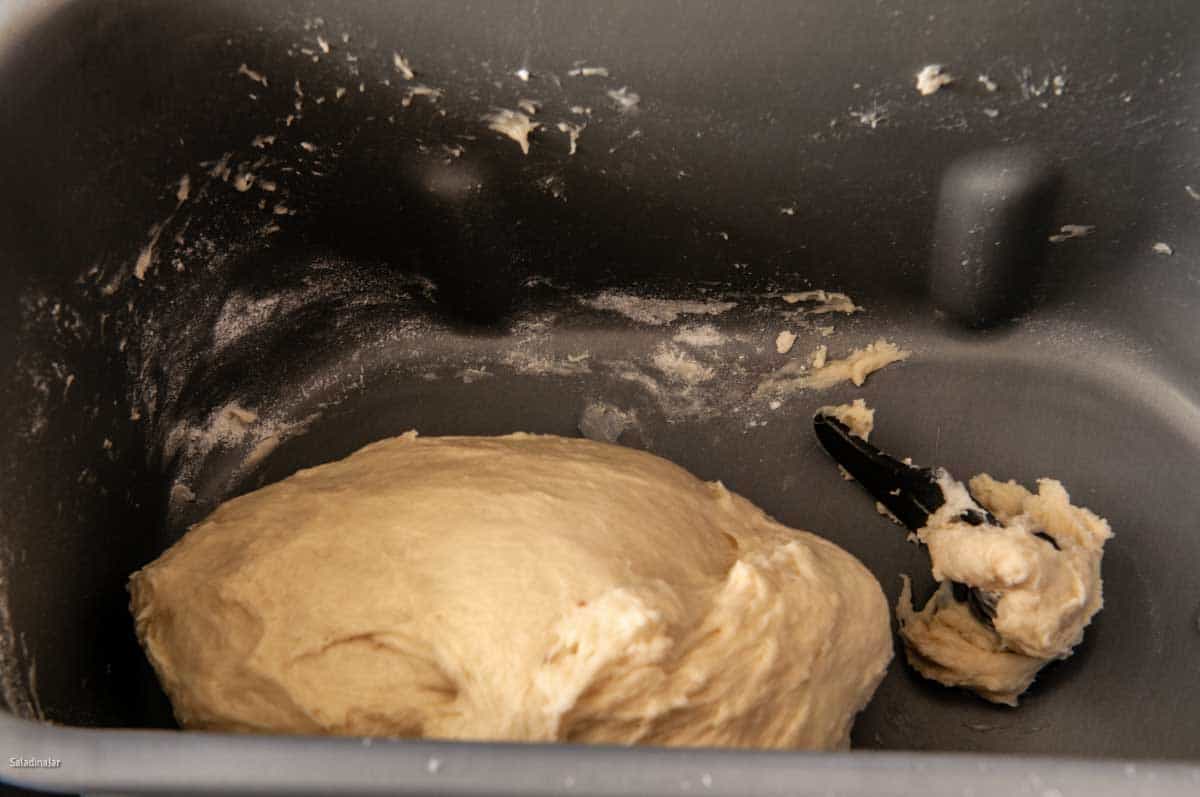
Check during kneading: dough should stick to the side, then pull away cleanly. If too wet/dry, adjust flour or liquid. [For details, see: A Surprising Secret for Making Better Bread with a Bread Machine.]
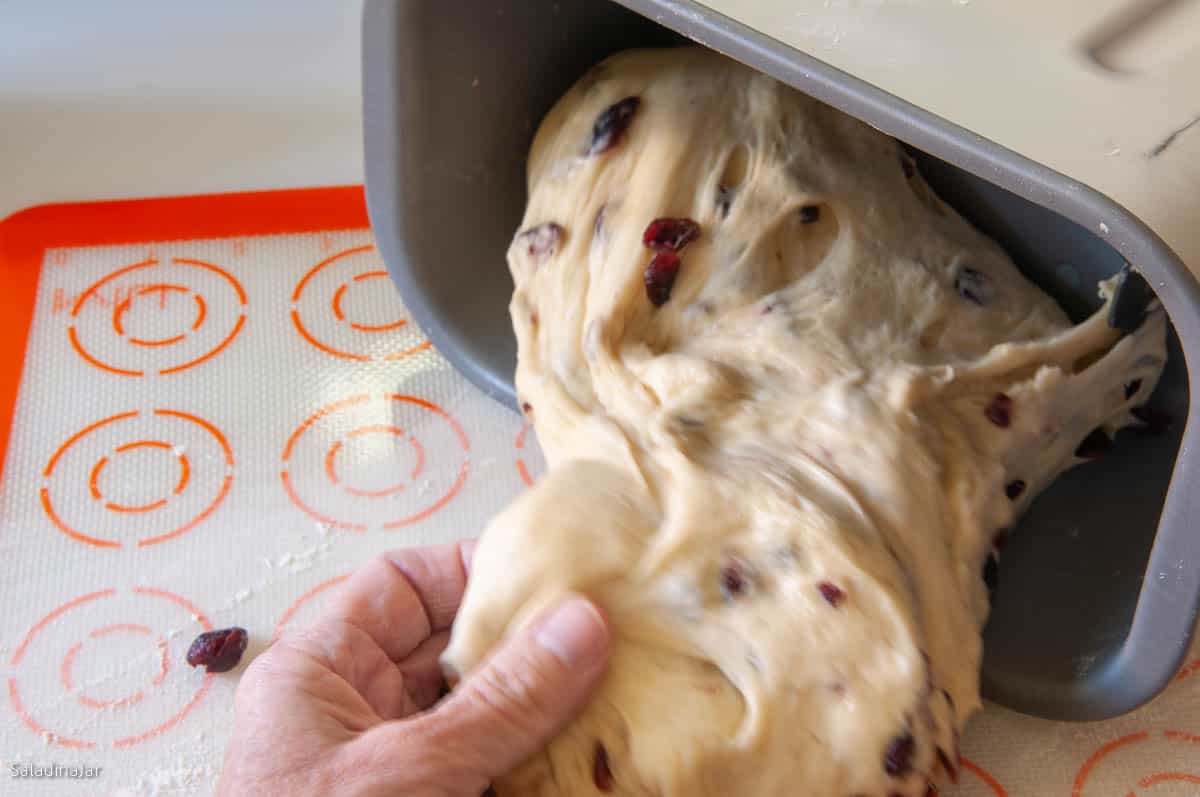
2. Shape the Dough
Once the dough cycle ends and the dough has doubled in size, move the dough to a lightly floured work surface. (I like to use a silicone mat that I throw into the dishwasher.)
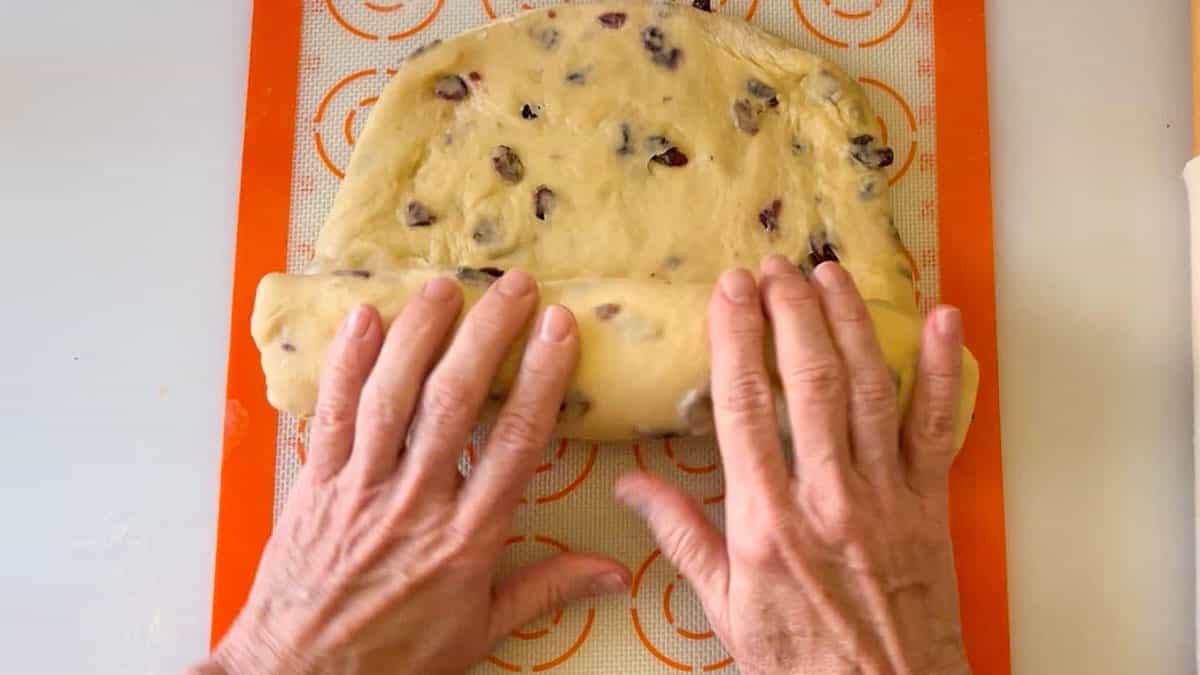
Shape into a loaf or other desired shape. [See: How to Shape Bread Dough]
3. Final Rise (Proofing)
Cover the dough and let it rise in a warm place until it peeks over the edge of the pan (30-60 min). For a freeform bread, it should almost, but not quite double in size. [See: How to Proof Dough in a Microwave]
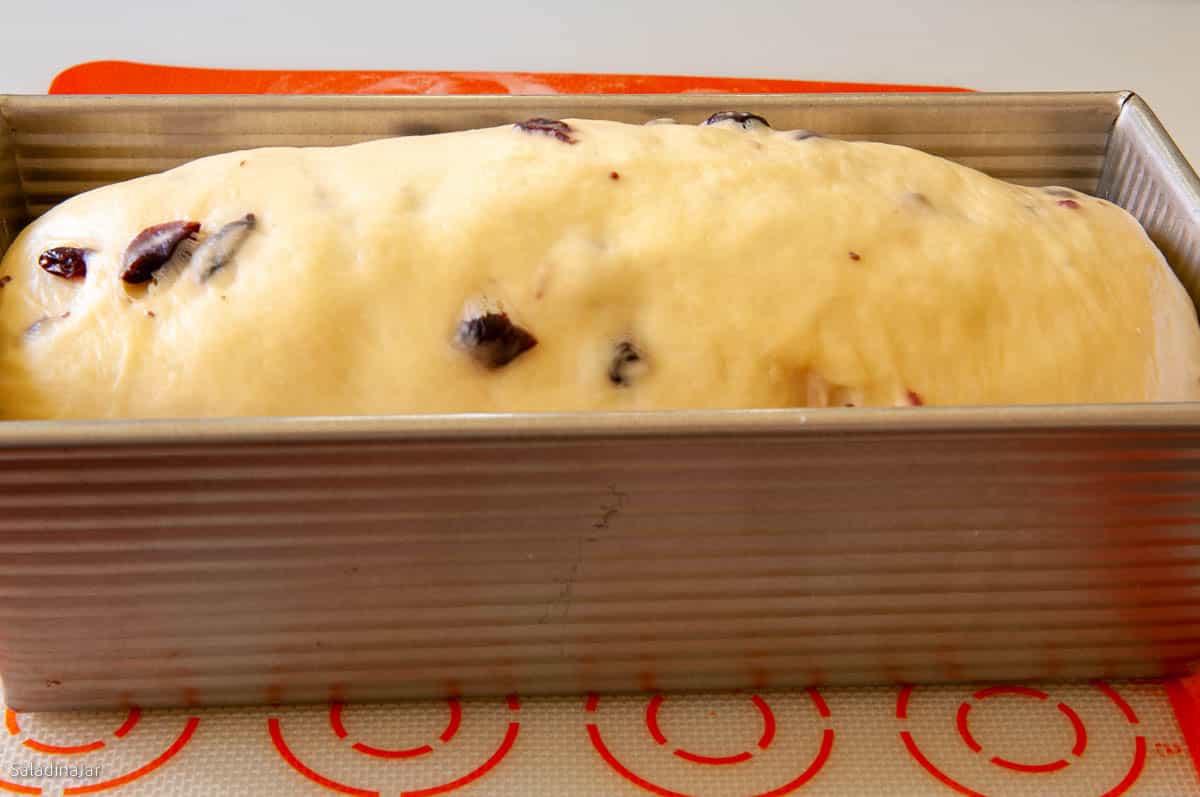
Avoid overproofing: a gentle press with your knuckle should leave an indentation that slowly springs back.
4. Bake the Bread
a.) Preheat oven
Depending on your oven, preheat 15-20 minutes before baking.
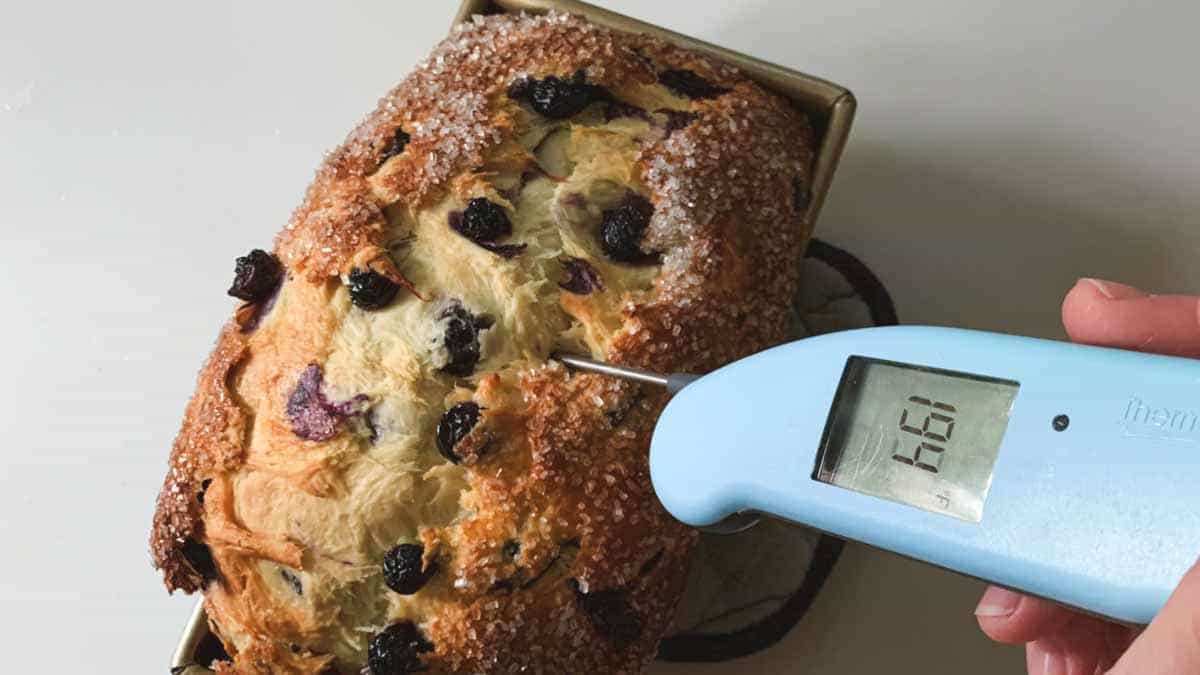
b.) How Long Should I Bake Bread Mixed in a Bread Machine?
There isn’t a single baking time that works for every loaf—and that’s why I rely on a quick-read digital thermometer instead of the clock. Expensive thermometers are faster and more precise, but even an inexpensive one will do the job.
Bake your bread until the center of the loaf reaches the internal temperature listed below. Insert the probe into the middle of the bread from the side or bottom for the most accurate reading.
Baking time varies widely depending on the size of the loaf, the amount of sugar, the type of flour, the pan you’re using, and how dense the dough is. Temperature takes all that guesswork out of the process.
c.) What temperature?
- Enriched Doughs (milk, eggs, sugar): Bake at 350-375°F (190-195°C).
- Lean Doughs (water, flour, salt, sometimes, small amount of fat or sugar): Bake at 400-450°F (200-230°C).
- Whole wheat or dense loaves: ~200-205˚F
5. Cooling & Storing
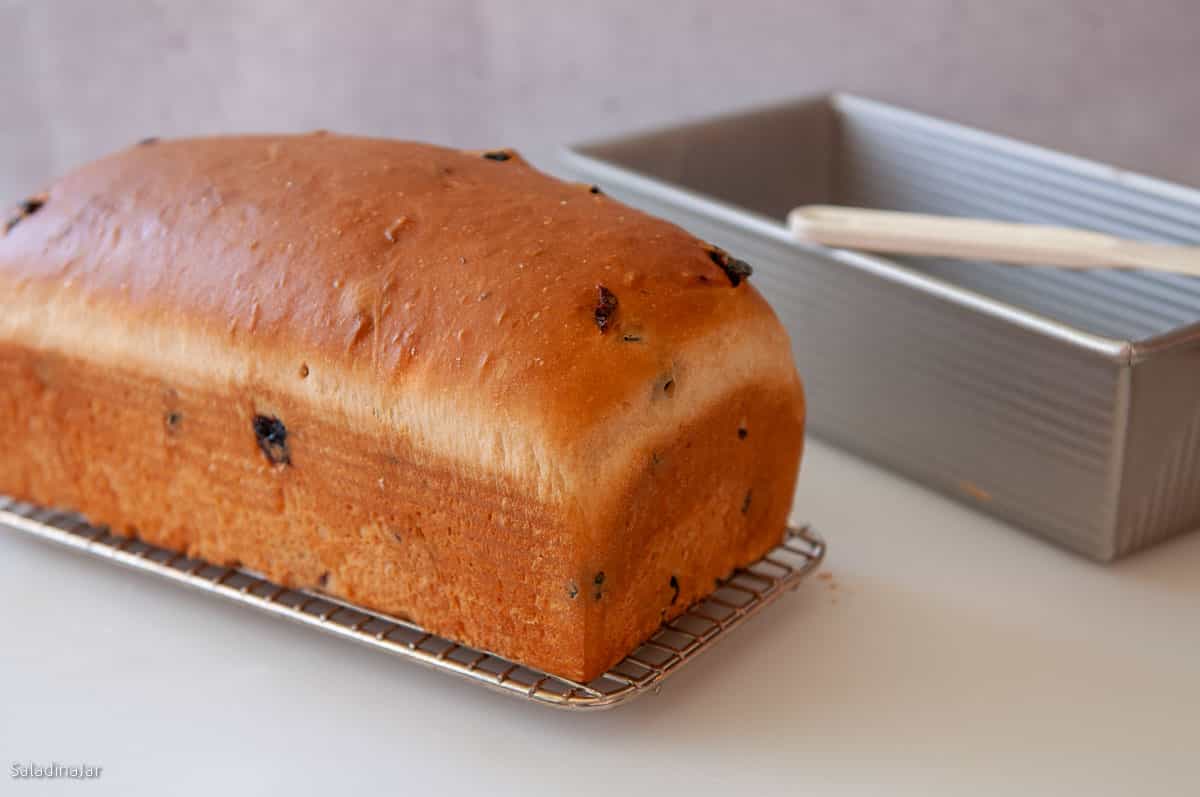
- Let bread cool 15 minutes in the pan, then carefully transfer to a rack.
- Wait at least 30 minutes before slicing (longer for whole grain loaves).
- Store in a bread box or freeze slices for later. Do not refrigerate.

Common Questions
What size pan should I use?
- When using my recipes, I’ll suggest what size to use. Otherwise, it depends on how much flour you are using and what kind of bread you are making (fluffy vs. more dense or white flour vs. whole grains). [See: Choosing the Right Pan for Bread Machine Dough]
Why does my bread collapse?
- Overproofed dough can deflate. If this happens, reshape and let it rise again. [See: Overproofed Dough: How to Avoid a Sunken Loaf]
How do I know if my bread is baked through?
- The best way is to know for sure is to use a quick-read digital thermometer: Bake to 200-210°F for lean bread, 190-195°F for enriched bread. [See: How to Use a Digital Thermometer for Perfect Bread Every Time]
Want to Practice?
- 71 Bread Machine Recipes To Make You Look Like a Pro
- Transform Your Favorite Recipes for Bread Machine Success
- 6+ Bread Maker Tips You Need to Make Marvelous Bread
Final Thoughts
A bread machine needs your active participation to make fabulous bread worth eating and sharing. If you’re only looking for toast in the morning, I get the appeal of “one-button” bread. But if you want bread worth the calories, time, and expense, stick with me. You’ll be making beautiful and tasty bread in no time.
— Paula, Home Economist
Homemade Food Worth Sharing
Need help troubleshooting?
Email me: Paula at saladinajar.com — photos help!

it might b helpful to state how long to cook the bread.
Hi Kristy,
I have added that information to the post. Thank you for asking.
recommend a bread maching to make dough plesse
Hi Simon,
Read my recommendation at the end of this post that’s filled with advice for buying a bread machine for making dough.
Here in Japan the fridge is the only way to store bread, otherwise it goes mouldy very quickly. Store bought ‘processed’ bread is fine for a while outside the fridge, but more natural home baked bread has to go in the fridge. However, if kept in one of those breathable plastic bags it keeps nicely in the fridge.
Hi Paula, thank you for this website I have followed it for years! I even bought a $10 bread machine at a yard sale solely for the purpose of the dough cycle. Lately I’ve seemed to have lost my bread making mojo and I have no idea what I am doing wrong! My bread looks great – I have been using the pullman pan – but I vary the shapes regularly – what I am finding is after slicing a completely cooled loaf, the slices feel “damp” that’s the only way I can describe it. Not gummy because the bread is fully cooked, they feel “tacky” to the touch. What I think the issue may be is adding too much liquid – I totally follow your “secret” to the perfect dough – but I always seem to over add water a tablespoon at a time – the dough looks great at the end of the cycle – when I touch it a little sticks to my fingers – is that also a sign of too much liquid? I am ready to throw in the towel! Any advice would be greatly appreciated! Thank you so much!
Hi MJ,
Sounds like your dough may be slightly overhydrated, as you say. Are you using a thermometer to test for doneness? I imagine you are, so that’s probably not the problem. Are you adding ingredients that might add moisture? Many fruits, whether dried or not, take a while to give up their moisture. Bananas and raisins come to mind. Could it be your flour? The same brand can vary from year to year depending on growing conditions. It may contain more moisture when grown during a particularly wet year. Are you using any freshly ground whole grains? That’s a different subject I won’t go into, but suffice it to say, that changes all the rules.
Generally speaking, you shouldn’t need to add any water to the dough when using my recipes, unless you are not weighing your flour (which may result in using too much flour). Also, I would allow 2 minutes of kneading between each addition of water. It takes some time to incorporate it into the dough. The dough should be smooth and elastic before adding more. If you are adding more than a tablespoon of water, (unless you are baking bread in extremely dry conditions), something else is going on.
One more thought…Could it be your machine? As bread machines age, the belt tends to loosen, and the dough does not get kneaded like it used to. Have you noticed any difference lately?
What do you think? Are any of these things possibilities? I will send you an email that you can respond to if you want to continue the conversation.
I purchased a Le Creuset bread oven. Found a great white bread recipe. Made the dough in my Cuisinart bread maker. It said 2 rises. Formed the bread and let rise in bread oven for 1 hr. Put in oven to bake. When I went to remove lid to brown the bread was stuck inside the lid. When I finally got it out the bread was flat on top. It was still eatable and delicious. Do you have any idea what went wrong? The amount of Ingredients is no different than any other loaf of bread. It definitely over rose. Thank you
Hi Delilah,
I sent you a note in regard to your questions. Check your email.
Love love love my Pullman use it for every thing
Hi Grace,
I’m with you. So versatile.
Thanks for writing.
Hi, i use my bread machine only for mix dough on dough cycle, the dough really sticks to the sides of the pan when I am removing it after the complete rising cycle, can figure out why???
Hi Bourne,
I’m so glad you asked.
Sticking to the pan is normal at the end of the complete rising cycle. Pull the dough out with your (damp) hands (or use a wet spatula) onto a lightly floured or damp surface. At the same time, use your hands to compress the dough and form it into a ball. For normal bread (there are some exceptions like ciabatta or brioche), it should not be so sticky after a few folds and shaping into a ball. If it is still too sticky for you to handle, it was probably too sticky when it was kneading and you should have added a tablespoon or two more flour before the end of the kneading phase. You’ll know to watch closer the next time.
Getting this right is more of a “feeling” and takes some practice. Keep trying and soon, knowing when the dough has the right amount of moisture will come naturally to you.
I hope this helps.
Hi, I followed all info for the sourdough in bread machine. After machine stopped waited for dough to rise and it only rose very little. 6 hours later and still not, took dough out and shaped into pan to proof in oven with light on. Bread rose to top of pan after 3 hours, baked for 40 min, took out of oven but bread was quite heavy. Starter was very bubbly and active. I feel it didn’t bulk ferment enough maybe due to not warm enough in bread machine when stopped. Maybe taking dough out of bread machine once it stops and put it in container to oven with light on to finish bulk. Your thoughts would be greatly appreciated. Have been making sourdough boules and sandwich loafs for over 2 years and never ran into this problem until wanting to try bread machine.
Thank you
Deb. Stevenson
Hi Deb, somehow, I think I missed your comment earlier. When using a bread machine, I always remove the dough from the pan after the kneading is done. The dough will need some stretch and pulls or coils by hand to build strength. These directions are in my recipe. How long your dough takes to rise depends on how warm it is and how active your starter is. It is possible to get away with no extra hand work when using a loaf pan. If you’ve been making sourdough for a couple of years, you probably know this. The only thing the bread machine eliminates is mixing the dough by hand.
Do I need to grease n flour pan?
Hi Lisa,
Nice to hear from you. There’s no one answer. It depends a lot on your pan. The USA pans I use should not be greased or floured. However, most other pans need to be greased. The recipe can make a difference, too. To be safe, you can make a sling with parchment paper to ensure you have no trouble at all removing the bread. You can see a picture of that here. 10 Pro Tips To Ensure Your Bread Slides Out of the Pan Easily Usually, there is no need to flour your pan. If you like PAM, that works well, too.Good luck with your bread.
Paula, I am tired of paying the high price for bread so I decided I’m going to make my own. I have a bread maker but the crust has always been to hard. So after sitting in the pantry for over 10:years I pulled it out and decided to try again. My maker has the setting for dough, so I googled how to use the dough setting. Your tutorial came up so I tried it. I used a recipe for half all purpose and half wheat flour. I followed your instructions for the dough and I couldn’t believe how good and pretty the bread turned out. The crust looked perfect. I used your tip to boil water in the microwave then put the prepared dough pan inside to help it rise. Your tutorial is very informative and easy to follow. Every question I had was answered in the tutorial. Thank you for this great tutorial. My bread machine has found a new place in my kitchen. Diane Day.. Texas
Sent from Yahoo Mail on Android
Hi Diane,
Always good to hear from another Texan. Glad the tutorial was helpful. Enjoy your bread machine!
Write back anytime.
Really interesting way to make the bread.My question is can I use a airfryer
instead of a oven to bake the bread.thank you for your work
Hi Shel,
Great question. It all depends on your air fryer and the pans you use. If there is enough room, it’s worth a try. You may have to experiment to find the best temperature and time. This is when a quick-read digital thermometer is invaluable.
I recently purchased a KBS bread machine and it has 2 dough programs. The raw dough program stirs for 23 minutes and is done. The leaven dough program has three rises in its 1 hour 23 minute program. Which dough program is best for making bread?
The leaven program.
I have a full size Pullman pan with lid what recipe should I use?
Hi John, What do you mean by full-size? 13x4x4? or 9x4x4? You can use the 9x4x4 for a 1-2 lb. loaf. That would be almost everything you can mix in a bread machine because you don’t want to use more flour than recommended by the manufacturer. Because of the size limitation, I do not own a 13x4x4 pan, so I can’t speak knowledgably about that size. If you happen to have a 3 lb. machine, you could probably use the 13x4x4 pan. None of my recipes are for that size, but perhaps you have some.
Just found your website. I have a loaf in my machine now. Can I use the “bread proof” selection on my oven for the 2nd rise?
Hi Laraine,
Yes, you can use the bread proof setting on your oven for the final rise. However, the lowest temperature on mine is 85˚F which is too high, in my opinion. What is the temperature of yours? I would rather my bread take longer to rise and develop more flavor than to rush it. I rarely use mine to proof bread unless I’m in a big hurry for some reason. Better to let it sit on the counter unless your kitchen is really cool.
wow, this information is the best I have ever seen. Looking forward to using your methods.
Thanks, Laura. Let me know if you have more questions and Ill point you in the right direction.
When I researched, using a long question about dough cycles and oven baking, I did not expect any joy! However, there you were and I got what I needed and more. Thank you for your time as I now understand about shaping and 2nd rise but also have your tip about using the microwave to assist said 2nd rise.
Hi Lynn,
Your comment made my day. I’m so happy you found me. Google worked like it’s supposed to. Hurray!
Thank you
Really enjoying trying your recipes in my new machine. I would like to bake sour dough bread..how would I start the mix?
Hello,
I would suggest you pick one of my sourdough recipes. The recipe will guide through every step for making sourdough with a bread machine. Here are the three recipes I currently have on this website: (if you are a beginner, start with this one) https://saladinajar.com/recipes/sourdough-bread-machine-bread/; https://saladinajar.com/recipes/bread/sourdough-bread/; https://saladinajar.com/recipes/bread/sourdough-bread-machine-recipe-no-yeast/
Do you see that you gave temperatures for the oven but I don’t see that you gave an approximate time of baking. I have never taken it out of the bread machine and baked in the oven before so how long do you bake the bread for
It is hard to predict time that works for every loaf because of the different sizes of loaves and various ingredients. In my recipes, I specify the time. Bake with me if you find a recipe you like. Otherwise, I start to take the temperature (with a quick-start thermometer) of my bread in a loaf pan after about 25 minutes. Most 3-cups-of-flour recipes are done in 30 minutes. The more you use this method and know your oven, the easier it will get to estimate. If you don’t have a quick-start thermometer, I have a pretty cheap one in my Amazon store. They really are essential to making good bread. You don’t want it to be raw in the middle, but you also don’t want it to dry out. Free-form loaves often don’t take quite as long as a loaf pan.
I have been using this method for years. I am on my second bread maker now. I use it for different types of bread and rolls especially brioche. I have a method for proofing my bread that is almost failproof. I set my oven to 350f for three minutes and then turn it off. It provides enough warmth and humidity to proof a loaf without covering in about 30 minutes. I set my timer for 30 minutes the first time and then check it. Depending on the height of the bread I will adjust at 10 minute intervals. Works every time. I remove the bread while I heat my oven for baking. Do not leave in while heating your oven.
Hi Joan,
Thanks so much for sharing your method of proofing. I especially enjoyed the last sentence. Sometimes, you have to add these details. ? Also, your recipe for a whole wheat and white combination loaf sounds delicious and worth trying. Thanks so much for sharing.
Your bread machine tutorial saved my bread a few times already. Checking the bread machine mixing after a few minutes is genius. Once, I didn’t have the pan all the way in the machine (my Cuisinart was really stiff when it was new) and another time, I didn’t have the paddle in tightly, requiring a dump out of the pan, but I still got perfect bread. I love your recipe hints that deal with leftover ingredients. I’m tired of dumping out 3 1/2 cups of buttermilk, love the idea that I can freeze it for the next time. Hand shaping a loaf is far more easier than I’d imagined and more impressive than my former “holy” loaves with tough crusts that I baked in the machine. Your videos and visuals on how to check for adequate rise, shaping bread, etc. are wonderful. I recommend your blog to other bread bakers that I know.
Hi Laurie,
I think you must be Santa Claus. Your comment may be the best present I got over the last couple of days. Very encouraging! Thanks especially for the recommendations. If you ever have any questions, be sure to send them my way. I get the best ideas from my readers.
I was wondering if you’ve ever tried to use some whole wheat flour with this bread. If so how much would you suggest?
Hi Pat,
I have not tried whole wheat in this recipe. However, I would recommend you start by substituting 1/2 cup of whole wheat for the same amount of bread flour. If that is successful, keep increasing it until the density is too much for your liking. That would be my recommendation for any recipe where you want to substitute whole wheat for bread or all-purpose flour.
@Pat Hill, I use whole wheat and white combination in my bread all the time. My recipe is different than the one above. I have tried all combinations and I have found this to be the best recipe I have developed. I use 2 cups white flour, 1 1/2 cups whole wheat, 1 egg, 1 cup warm not hot milk, 1/4 cup melted butter, 1 tsp salt. 2 tsps yeast, 3 tbsp sugar. I put liquid in first, add dry ingredients and yeast last. I get a perfect loaf every time in a 9 x 5 pan.
Hi Paula I have a Hamilton Beach bread maker it has 2 rise cycles. 30 minutes into the rise cycle it comes on again and knocks the dough down again then it rises for another 40 minutes. Your recipe calls for one rise then remove it from the pan, shape it and let it rise again. My question is should I remove the dough after the first rise then shape it and let it rise a second time or let the machine finish it’s cycle then shape and allow to rise a third time?
Hi John,
Good question. Most bread machines do indeed have two cycles of rising with the DOUGH function. If you are making bread from beginning to end with the REGULAR function, you would have three cycles of rising.
For my recipes, let your bread finish the DOUGH cycle no matter how many rise cycles it has since those two cycles are fairly short. I hope that answers your question.
@Paula, Thank you I will let you know how it goes.
Thanks for this. Just about to try it out. Are your oven temperatures for fan assisted ovens?
Good question. The temperatures given are not for a fan-assisted oven. As I’m sure you know, adjust backward 25˚F if using a convection oven.
Okay, I just cut into this loaf of bread. I haven’t made it before but I can guarantee I’ll be making it again, and again, and again!! It is by far the BEST bread I’ve ever tasted!! Husband agrees…we don’t have to buy bread any more!! Thank You, Paula!!
HIGH FIVE, Cherie! Great job.
Paula
This bread is amazing! I have made it several times in the past couple of weeks. Each time is better than before. I like the idea of letting the machine do the heavy lifting and still being able to make it my own. This latest loaf I used an egg wash to help the extra seeds stick to top of the loaf. It is a beauty to behold. Thank you again.
Cheers, Mariette
Good deal, Mariette. Sounds like you are becoming fearless and creative. Love it!
This bread is amazing. I made it exactly by the recipe and I’ve made it twice now. I may never buy bread again!
Fantastic, Debbie. Thanks for coming back to say so.
Hi
Can I make this loaf with wholewheat bread flour?
Best wishes
Mo duggan
Hi Mo,
The answer to your question is, “quite possibly.” I have not done it so don’t know the exact proportions you should use. Oatmeal isn’t going to help provide gluten so you’ll probably want to use only a small amount of whole wheat and the rest bread flour. If you want to use a lot of whole wheat flour, you might consider adding some Vital Wheat Gluten. Otherwise, your loaf will most likely be small and dense. If you decide to try it, let me know how it goes.
Hi Paula,
I am new to your website and want to make the Oatmeal and Sunflower loaf, but I am in the UK and have Imperial measuring cups. As you said, the converters on the internet vary considerably in comparing weights, so please do you know what weight of bread flour is equal to 1 Imperial cup?
I can’t wait to get started with using the Dough setting on my bread machine and finishing it off by hand!
Many thanks,
Joanna
Hi Joanna, Glad you asked. I found this online. 360 grams flour equals 2.137 Imperial cups (284.131 ml).
Let me know how it works out.
Hi Paula
Re: Oatmeal n Sunflower bread
I am interested to bake this bread with my bread machine.
However the amount of flours in recipes on the manual is max 250 gm.
The measurements in your recipe is by cups.
Please advise how to convert the portion with your recipe that works for my bread machine.
Thank you.
Hi Peggy,
I think I can help. 1 cup of flour equals 120 grams in all my recipes. So in the Oatmeal & Sunflower Bread recipe, it calls for 360 grams. The oatmeal should also be counted into the flour amount. So this recipe would definitely be too much for your machine.
Is your machine smaller than the standard size? Sounds like it might be. Perhaps you could cut the recipe in half.
Just a note that if you bake this recipe in your machine, the shape of the loaf, the texture, and the crust will not be nearly as nice as it could be. Better to use the DOUGH cycle only, then bake it in your conventional oven.
If you try it, I would love to hear how it turns out for you.
@Paula,
thank you for your response.
Yes my machine is smaller than standard size. It has only one paddle in the middle.
The capacity is max 280 g as stated in the manual.
Will try it out with the bread machine as I do not have an oven.
Having made and thoroughly enjoyed your lovely buttery dinner rolls, I moved on to make this Oatmeal-Sunflower bread, following your instructions to the letter, and finally baking it in the oven….something I hadn’t tried before. I have to say that I found your pics really helpful for comparison as I went along, and I am truly delighted with the result! This bread is so delicious, soft, yet nutty with the added sunflower seeds, and I’m sure it will become a huge favourite in our house. Thanks so much for your terrific site, and very detailed instructions. Now what shall I make next…..I’ll let you know, lol.
Woohoo!!!!
I made the twisted cinnamon coffee cake yesterday. It turned out great. My bread maker is probably 20 years old. It’s a toastmaster and I don’t know if they make them anymore. I don’t bake in the bread maker I prefer the oven where I have more control. My next effort will be post bread and devote bread. Thank you for the microwave tip. It works really well
That should read oat bread and white bread. Sorry about that lol
If you haven’t already seen it, here is my best oat bread and white bread.
I’m so glad the twisted cinnamon coffee cake worked out for you. It’s one of our favorites.
May I know how to make this using kitchen aid / stand mixer please? Thanks.
Ju,
Thanks for asking. I have added the directions in the “Notes” of the recipe card. This is one of my favorite loaves. Hope you like it.
Thanks Paula! I absolutely love it ?
I tried it using my left-over-nobody-likes-to-eat homemade granola, and it turn out so nice that I can eat it eat the bread just by itself ?
Great way to use a leftover. Better than throwing it out.
I made this one too, on the same Monday I made the crusty rolls and french bread!!!! A bread baking frenzy ?
I haven’t got enough amount of sunflower seeds, so top up with flaxseeds, melon seeds and sesame seeds. Turn out fantastically tasty! The ladies of my church cell group absolutely love it ?
May I know if I can turn this recipe into making bread sticks?? How should I adjust the baking time?? Thanks.
So happy to hear you are enjoying the bread recipes. I have not tried making breadsticks from either of those recipes. You might take a look at these garlic breadsticks to give you an idea.
Thanks. Will try that out.
Paula, you make some great suggestions! By chance, do you have a good banana/apple sweet bread recipe, thats tried and true? My kids absolutely love it. But I am a novice at this and had to throw out some loaves without getting a good result so far. Thank you in advance!
Thank you so much for sharing this technique! I had tried several times to make a loaf work in my machine, and they all kept caving in. 🙁 I guess it was rising too much. Now that I am letting it rise until I know it’s ready, the bread is perfect! Just one question though…my bread is measuring at 205 degrees after only 25 minutes. The bread tastes great, but I’m wondering if it would be even better if I turn the oven down? How low would you go?
Lori,
Have you checked the temperature on your oven with an oven thermometer? Maybe your oven runs a little too hot. If so, make adjustments. If it is where it should be, I would remove the bread from the oven a few minutes earlier then 25 minutes. It’s also possible you are putting the thermometer a little too close to the edge of the pan and not in the middle of the loaf. However, if you like the way your bread is turning out and it doesn’t seem too dry, maybe you shouldn’t do anything. paula
Thank you for getting back to me so quickly! I appreciate it 🙂 i have only tried a handful of recipes for my bread machine which although i’ve gotten great results so far both baking in and out of the mahine im kind of a nerd (Lol) and like to know reasoning behind each ingredient used and quantaties and what difference they make etc. but i suppose most bakers are like that and we love to experiment but i plan on making your bread this evening although without the seeds as i dont have an on hand (i do have flax seeds so i may try a couple tablespoons of those in there) but i will try the 1 1/2 tsp yeast to see how that works and if not i know i can up it to 2 for your results! Thanks again
Hi, your bread recipe looks lovely! I have made bread by hand before and just recently bought a bread machine to help me out a bit and have been trying a few different recipes..anyway my question is most recipes i find and my Zojirushi manual instruct using only use 1 1/2 tsp. instant yeast per 3 cups of flour and i am wondering if there is a specific reason you use more yeast? Thanks in andvace 🙂
Hi Stefany,
Most of my recipes are “tried and true” and I know they work with 2 teaspoons. That’s not to say they might be even better with 1 1/2 tsp, but I haven’t tried it. I probably should experiment with that. Do whatever works best for you.
Thanks for the reply! I made my loaf in an 8×4. I could use the extra inch I am sure. Your microwave trick worked wonders. My bread making has been made so much easier thanks to you. Have a great night.
Hello,
First I want to say thank you for the microwave+water tip. My house is almost always cold and rising takes forever. Hopefully this solves my problem. Second, I noticed two of your recipes for bread, this one and the white with condensed milk call for different bread pan sizes. The 8×4 and the 9×4. I plan on making mostly whole grain breads using my machine or at least trying to. Which pan size do you think would be best? Thanks!
Breanne,
My favorite pan for a 3-cups-of-flour bread recipe is 9 x 4″. It will hold 10 cups of water when filled to the very top if you want to compare with a pan you have. Whole grain bread doughs usually don’t rise quite as much as the white but I would probably still use the same 9 x 4 inch pan.
Paula, I also ground the oatmeal to a flour. It required more liquid of course but it was so smooth 🙂
I tried this bread tonight and not only did it taste fabulous, it also sliced very well! It takes patience to slice baked bread without an electric knife but I did it lol. I subbed out the butter for sunflower oil because that’s what I had, forgot to add my seeds so when I rolled it, I sprinkled chia seeds in the middle creating a slightly circular pattern in the slices which was neat. I got my fingers wet and spread it around the outside of the dough after I rolled and formed it and rolled it in mixed seeds. Worked perfectly actually. Thanks!! Loved the microwave rising tip. I will take that to my grave lmao
Hi Jade,
Love your idea of using chia seeds. How pretty! I’m going to try that on my next loaf.
So I don’t knead the bread after it comes out of the bread machine? Just flatten into a rectangle & let rise the second time?
Awesome idea with the shower cap! I will have to remember to take them next time we are away! I’m an avid baker and never would have thought of that one.
Can this be done without a bread maker? If so, would I just knead the bread and set it out to rise, and how many times should I knead it? Sorry! New to breadmaking!!
Yes, Stacey. You can make almost any of my bread recipes by hand, if you prefer, or don’t have a bread machine. I can’t give you a hard and fast rule about kneading because everybody’s technique is different. Knead until the dough is smooth, shiny and elastic.
So, I totally did not ask that question right!! Sorry! I’ve read in some recipes that you knead the dough, then set it out to rise for a set amount of time, and then punch it down again and set it out to rise a second time. That’s my question…How many times do I punch it down and let it rise? You see, I’m a MAJOR rookie when it comes to bread making!!
I would knead the dough. Then shape it into a ball and put it in a bowl to rise – until it is about double the size. Then take it out and shape it as described above. Then put it in the pan and let it rise again – until it is 1″ above the pan (as described above). Hope this helps!
I googled how to make a loaf after it has been mixed in my breadmaker and found this site. I made the the Oatmeal-Sunflower bread and it tasted awesome. The best bread I have made. I followed your photo guide explaining what to do after the dough was mixed. Excellent!! Thanks for posting this recipe and bread making guide for baking a loaf in the oven.
Hi just been reading that you use the dough cycle on the bread machine and not the basic white loaf is that right because I’d love to try this
Jess,
You are correct. I almost never use anything but the dough cycle. Occasionally, you might get lucky and make a pretty good loaf that is BAKED in the bread machine but if you want a reliable and far superior method with a more predictable result, use your machine for mixing, kneading and rising ONLY. That is what is does best.
Bhi do you have any more recipes I could try or know where I could get some
Fabulous! I was so excited to learn how to make a SOFT, actual looking like bread, bread. I had been using my machine and the bread that came out was hard and compact although it tasted good. I really wanted that “real bread” look. Now, having accomplished this with your great recipe, I am on to try other breads with your recipe as a base. Can I make dough ahead of time and freeze it? At what stage do I need to freeze it? Do I need to let it rise again after it thaws, then bake it? Thanks!
Hi Heather, Glad you found me. I guess you checked my recipe index where you can find lots more bread recipes. I have a recipe for cinnnamon bread and also, herb bread but have not published them yet. Perhaps in the near future.
Re: freezing the dough, I don’t normally recommend it with homemade dough. The stuff you buy at the grocery store has been specially formulated for freezing, unlike most homemade bread. I prefer to freeze the finished product. Be sure to wrap securely and don’t let it stay in your freezer more than a month or two.
Paula, shortly after I wrote my message I found the link to all the recipes. They look great! Cannot wait to try. My husband was so excited about how soft the bread was for his lunchmeat sandwich he takes to work. He was used to the bread maker’s tougher bread and hard crust. Thanks again, I made two loaves this past weekend.
This was delicious! Had to beat the kids off with a stick so I could have some. 😉 Thanks so much!!
I just finished making this loaf of bread and I am eating my first slice. It is absolutely fantastic. I love your tips and pictures. You clearly explained every step and totally nailed it. Thank you!
This loaf of bread turned out wonderfully. Thank you for helping me solve my bread machine crust problem.
Thank you so much for your answer, my husband and I have been eating this bread and it is good!!!!! thank you really
Hello…. this looks delish, and only one question… when you said once the cycle is completed means once it proofs the first time in the machine then punch and remove to a floured surface… or does it means as soon at the machine beeps remove to a floured surface…. a bit confused here, thank you much!!!
Grethel,
You are right on the first one. Let the dough cycle complete which will mean the dough has risen once. Most machines will beep close to the end of the kneading portion when it’s time to add in nuts or raisins. Ignore that beep unless you want to add something like that.
I just tried this tonight, and it turned out beautifully! In fact, it’s actually my first yeast loaf to really turn out. I may have just eaten half the loaf myself. 🙂
Glad to hear it! Did I not warn you that fresh bread can be dangerous? 🙂
Looks great! Can I use freshly milled whole wheat or would the recipe need to be altered?
I made this bread last night, with minor adjustments, and absolutely fell in love with it! I love your use of the bread machine to knead it, and then baking. I am definitely inspired to not only make more, but buy less and less store bread. I am wondering though, what methods do you use to store it?
Rikki,
Storing homemade bread can be a challenge because it has no preservatives. Personally, I slice it, then put it into a plastic bag and then, into the freezer. I do this within 24 hours to maintain the freshness. Some recipes hold up better than others–bread with potatoes in it seems to stay fresh longest.
Wow. Just wow. I bought a William Sonoma bread machine 15 years ago and put it away after making five or six bricks . I don’t really know why I decided to give it another try – but I’m so glad I found your site – and decided to give it another shot . I made the oatmeal white with sunflower seeds – and it’s unreal. It’s far better than what I’d hope for when I first bought the machine ! Thanks very much for your detailed and clear instructions. I’m looking forward to my next loaf/experiment!
Hi Joe,
Congratulations! Thanks for taking the time to write. You made my day!
The bread recipe was heaven. Great technique using the microwave for the rise cycle. Would this make dinner rolls? The texture was so soft inside and the crust was devine. I ate the inside first and saved the crust for last. yum!
Hi Connie,
I haven’t tried it as dinner rolls, but I suspect they would be delicious. We used this bread for bacon and tomato sandwiches yesterday. So good!
I love honey oat breads- the texture of this one looks perfect! The added crunch of the sunflower seeds adds a lot too, I’m sure. This is one I’d love to try with my bread machine doing the hard work 🙂
This recipe looks and sounds delicious – thank you for it and all your good suggestions.
Yeah, i was thinking of when you had your blog, quite awhile back, and just for the fun of it i typed it in, and wow I am so happy to see you back! Welcome back!
Great post! Thank you for the great tips and recipe.