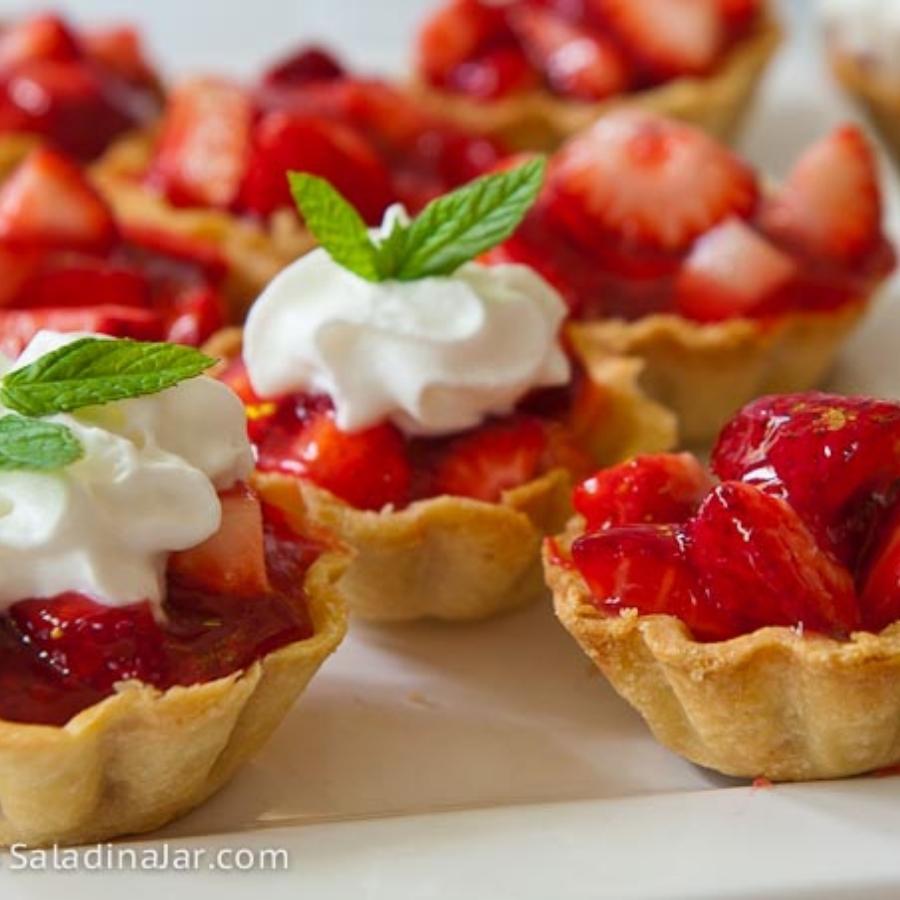
Mini Strawberry Tarts with Shortbread Crusts
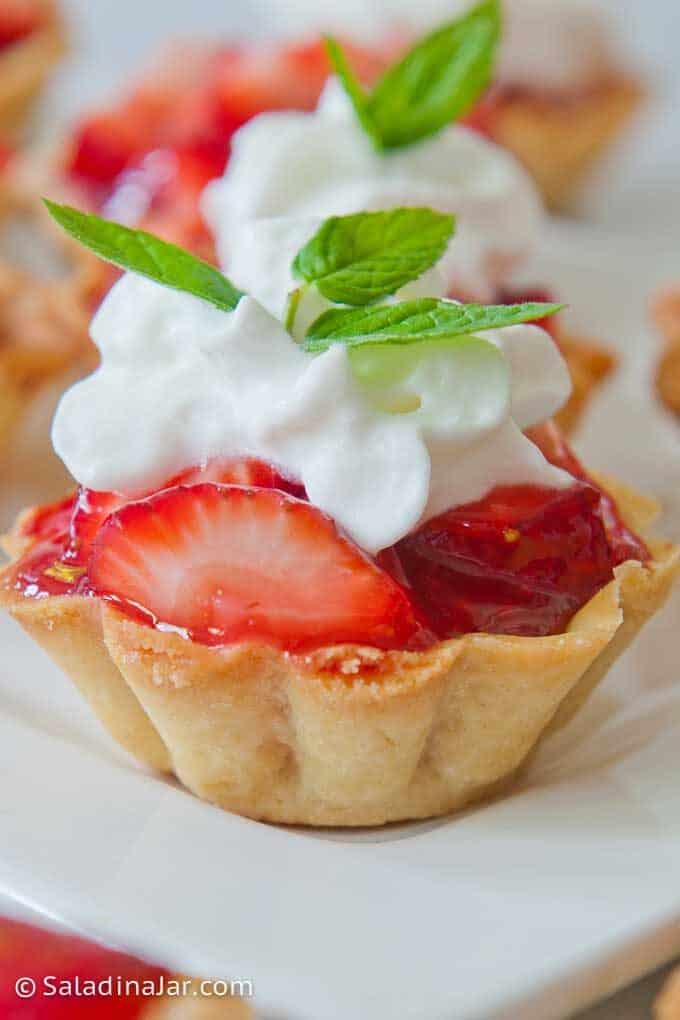
Sneak Preview: These mini strawberry tarts feature fresh berries in a glossy microwave glaze tucked into crisp homemade shortbread crusts. They’re easy to assemble ahead and especially nice for showers, brunches, or spring celebrations.
This post contains affiliate links. As an Amazon Associate, I earn from qualifying purchases at no extra cost to you.
These mini strawberry tarts disappear fast at any gathering, but it’s the crisp homemade shortbread crust that makes them memorable. Add a glossy microwave glaze and a dollop of whipped cream, and they turn into a bite-sized dessert that feels special without being fussy to assemble.
Ingredients & Substitutions
ALL-PURPOSE FLOUR – stick with all-purpose for best texture; white whole wheat flour can work but yields a denser crust.
POWDERED SUGAR – no good substitute here; granulated sugar makes the crust gritty.
BUTTER – use real, chilled butter for best results; plant-based butter sticks work if dairy-free.
VANILLA EXTRACT – optional; almond extract or another flavor can be substituted.
CORNSTARCH – thickens the glaze; arrowroot or tapioca starch can work, but cornstarch is most reliable.
STRAWBERRY JELLO POWDER – adds color and flavor; do not use sugar-free. Raspberry or cherry Jello offers a fun variation.
CORN SYRUP – essential for shine and structure; golden syrup or agave syrup are possible substitutes.
RED FOOD COLORING – optional; skip if you don’t mind a paler glaze.
ALMOND EXTRACT – optional; vanilla or nothing at all is fine.
FRESH STRAWBERRIES – ripe berries are best; frozen strawberries release too much liquid and make the glaze runny.
Step-by-Step Instructions for Strawberry Mini-Tarts
⬇️ Jump to the recipe below for exact amounts and detailed instructions.
Shortbread Crusts

Strawberry Filling

Mini Strawberry Tarts with Shortbread Crusts
Video
Ingredients
Cookie Crust
- 1 ¼ cup (150 g) all-purpose flour
- ⅓ cup (40 g) powdered sugar
- ¼ teaspoon salt
- ½ cup (113 g) chilled butter, cut into 8 pieces
- 1 large (17 g) egg yolk
- 1 tablespoon heavy cream
- ½ teaspoon vanilla extract
Filling
- ½ cup + 2 tablespoons (142 g) cold water
- 2 tablespoons cornstarch
- 2 tablespoons powdered strawberry Jello
- ¾ cup (240 g) corn syrup
- few drops of red food coloring
- ⅛ teaspoon almond extract optional
- 1 pound (454 g) fresh strawberries
Instructions
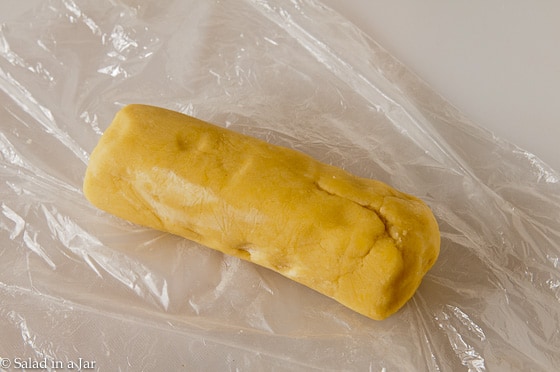
- Make the shortbread dough: Combine 1 1/4 cup (150 g) all-purpose flour, 1/3 cup (40 g) powdered sugar, and 1/4 teaspoon salt in a food processor. Add 1/2 cup (113 g) chilled butter, cut into 8 pieces and process until it looks like a cross between oatmeal and coarse cornmeal.Combine 1 large (17 g) egg yolk, 1 tablespoon heavy cream, and 1/2 teaspoon vanilla extract. Process until most of the dough rolls into a ball. If necessary, sparingly add drops of cream to make it come together.Press dough into a roll like refrigerated cookie dough. Wrap in plastic and chill 30 minutes
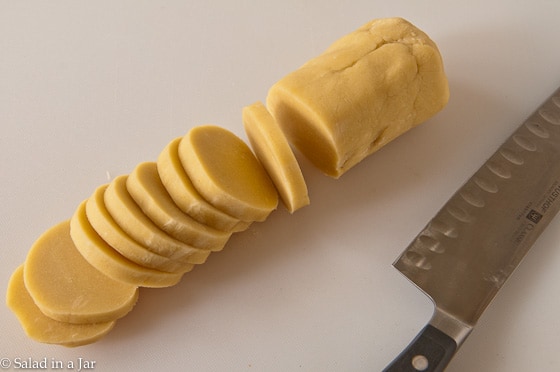
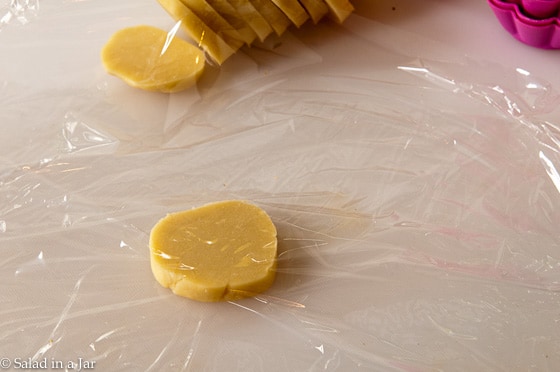
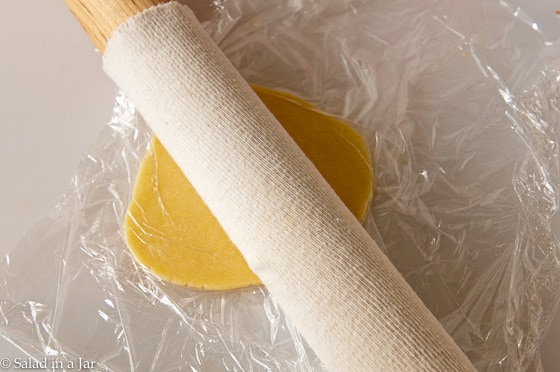
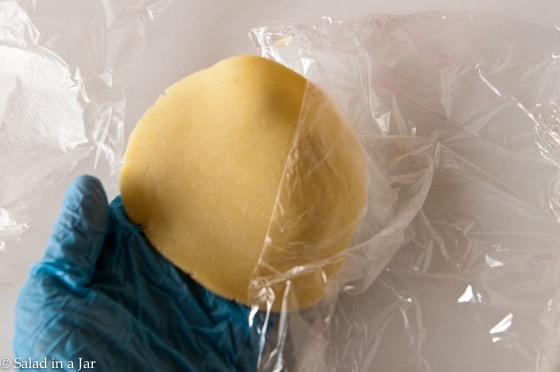
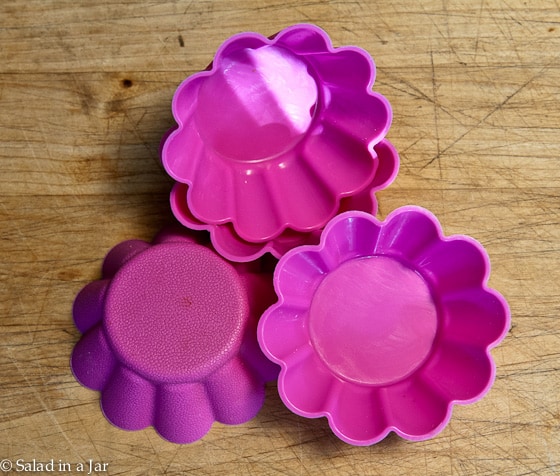
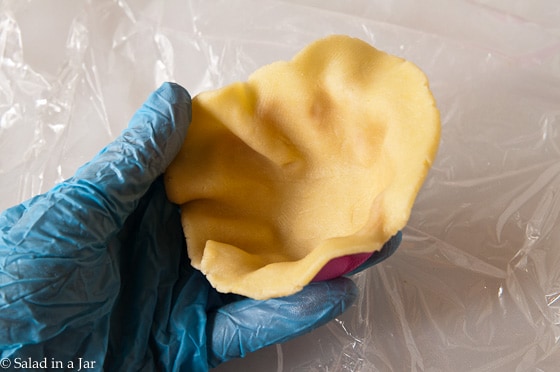
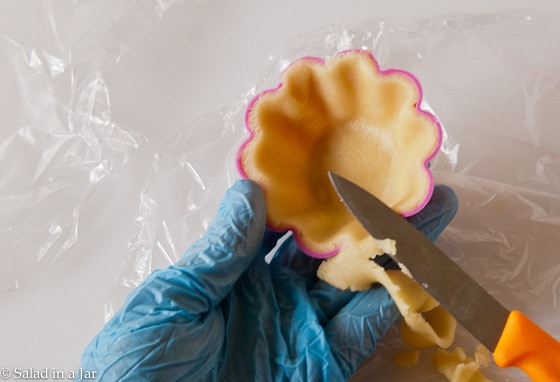
- Shape and chill: Spray molds generously with Baker's Secret or something like it. (Baker's Secret is an aerosol spray mix of flour and oil.) If using silicone molds, no greasing is necessary.Slice each roll of dough into 14 pieces. Using a rolling pin, roll the dough between two pieces of plastic wrap into a circle slightly larger than tart molds. Press into a mold with fingers being careful to keep the thickness consistent. Use a knife to trim off any extra at the top. Freeze for at least 30 minutes, overnight or up to a month. (See video for this step.)
- Preheat the oven to 375˚F. (190˚C).
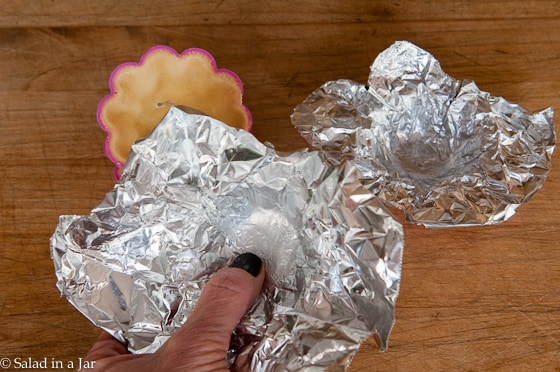
- Blind bake the crusts: Lay a small square of aluminum foil over each tart and use you fingers to push the foil down snugly inside the frozen crust (keeps the crust from puffing up like pie weights do).Bake in a 375˚F (190˚C) oven for 30-35 minutes. Remove foil for the last 8 minutes of baking time. When you remove the foil, gently push the crust down if you see it has begun to puff. Cool.
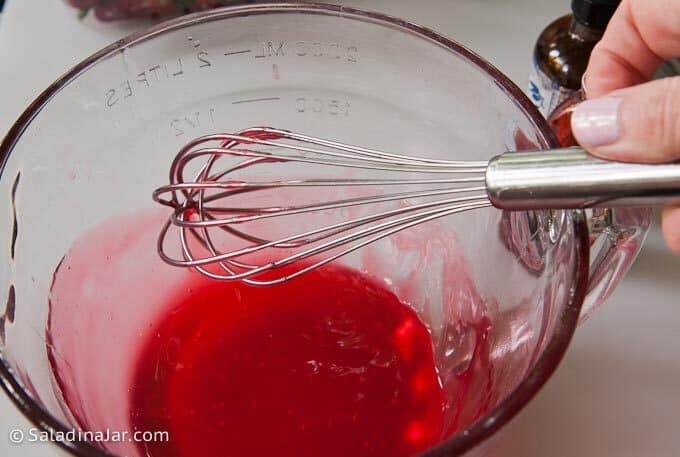
- Make the glaze: Combine 1/2 cup + 2 tablespoons (142 g) cold water, 2 tablespoons cornstarch, 2 tablespoons powdered strawberry Jello, and 3/4 cup (240 g) corn syrup into a large microwave-safe dish in the order listed. Stir or whisk until dissolved.Cook the filling in a microwave using a 2 qt-glass batter bowl. Takes 4-7 minutes on High, stirring once or twice. The mixture should boil and thicken to the consistency of molasses.Add few drops of red food coloring and 1/8 teaspoon almond extract, if using. Set aside to cool for about 30 minutes.
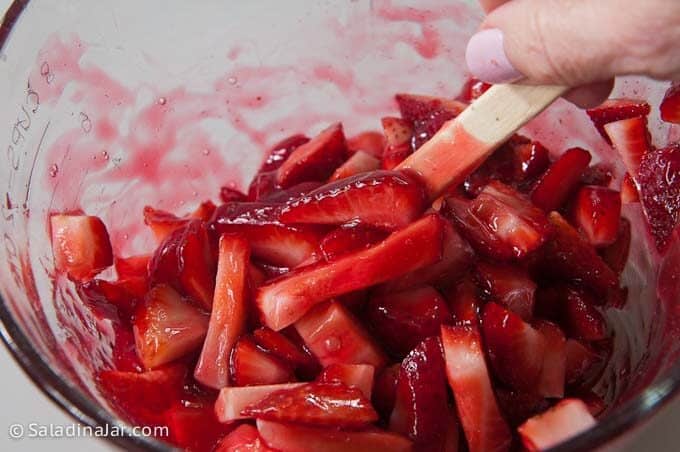
- Prepare strawberries: Rinse, de-stem, and dry 1 pound (454 g) fresh strawberries. Slice or chop into small pieces. Gently fold into cooled glaze.
- Fill and chill tarts: Spoon glazed strawberries into baked shells. I like to fill them as high as possible. Decadence is irresistible.Refrigerate for at least 2-3 hours. Best eaten the day they are made. Just before serving, top with whipped cream. Garnish with fresh mint if desired.
- Top and serve: Just before serving, add whipped cream and garnish with mint, if desired
Equipment
Nutrition
All images and text ©️ Paula Rhodes for SaladinaJar.com
Frequently Asked Questions
• Can I make these ahead of time?
Yes–bake crusts 1-2 days ahead. Fill and chill the day of serving.
• Can I use frozen strawberries?
Not recommended. They make the glaze watery.
• Is corn syrup necessary?
Yes. It gives the glaze shine and structure. Light corn syrup is not the same as high-fructose corn syrup.
Final Thoughts
Mini strawberry tarts are one of the easiest ways to serve a fresh strawberry dessert to a crowd without slicing or plating. Once you get comfortable shaping these shortbread shells, the same method works beautifully with other seasonal fruits, too.
I’m adding this recipe to my mini-tart collection. It’s a riff on Aunt Marg’s BEST Extremely Fresh Strawberry Pie.
— Paula, Home Economist
Homemade Food Worth Sharing
Need help troubleshooting?
Email me: Paula at saladinajar.com — photos help!
Paula Rhodes, Home Economist & Owner
As a retired home economist, I created Saladinajar.com to prove that you don’t have to be a chef to find joy in creating food worth sharing. Bread machines (used in an unconventional way), homemade yogurt, and quick microwave recipes are my favorite ways to do that.