How to Measure Flour for Bread (5 Mistakes to Avoid)
Sneak Peek: Measuring flour the right way prevents dense, dry bread. Learn how to measure flour with cups or a scale, whether you should sift it, and the five mistakes to avoid. Plan 5 minutes to read. Works with bread-machine dough mixed on the DOUGH cycle and baked in a conventional oven.
This post contains affiliate links. As an Amazon Associate, I earn from qualifying purchases at no extra cost to you.
If your bread turns out dense, dry, or uneven, the problem may not be your recipe—it may be how the flour was measured. After years of testing bread-machine doughs in my own kitchen, I’ve learned that a tablespoon or two too much flour can change everything. Here’s how to measure flour correctly and the five mistakes to avoid.
The Best Way to Measure Flour for Bread
For the most consistent bread, weigh your flour with a digital kitchen scale. In my bread-machine recipes, I usually count 120 grams per cup of all-purpose flour unless noted.
If you don’t have a scale, use this method instead: fluff the flour with a fork, spoon it lightly into a dry measuring cup, then level it off with a straight edge. Never scoop directly from the bag.
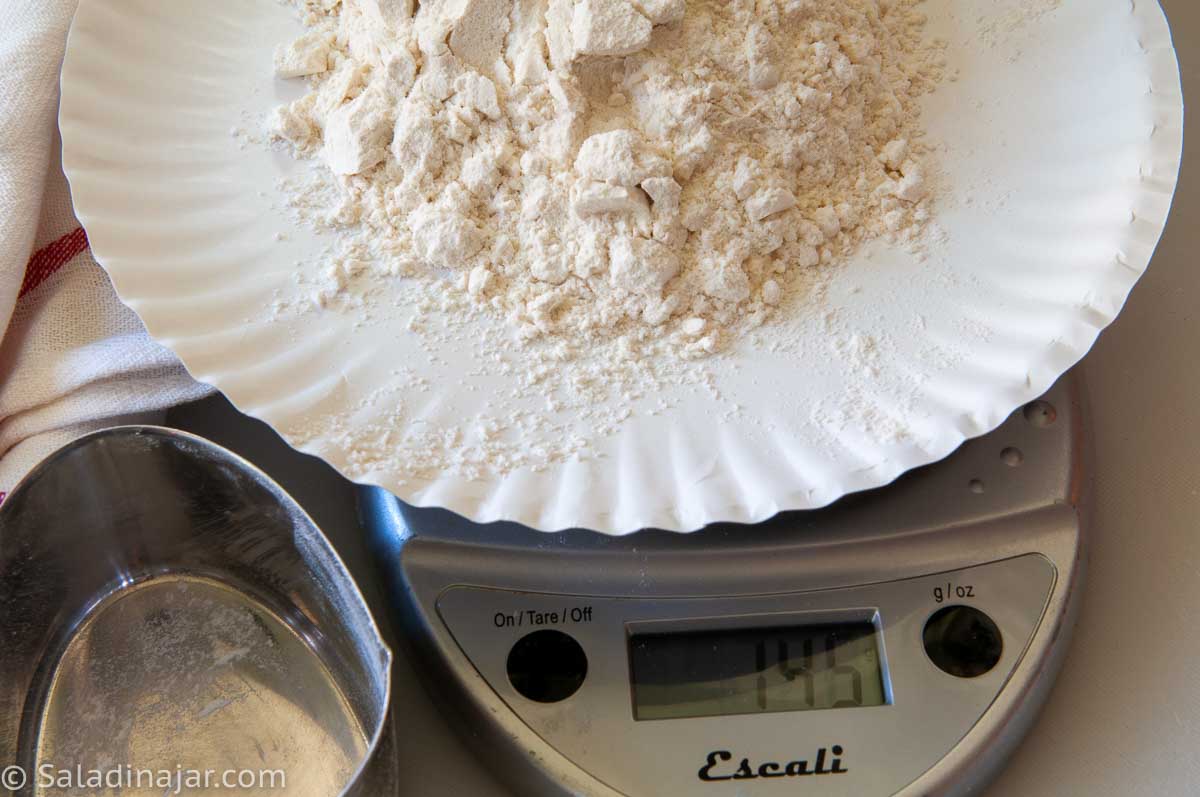
How to Measure Flour with a Scale
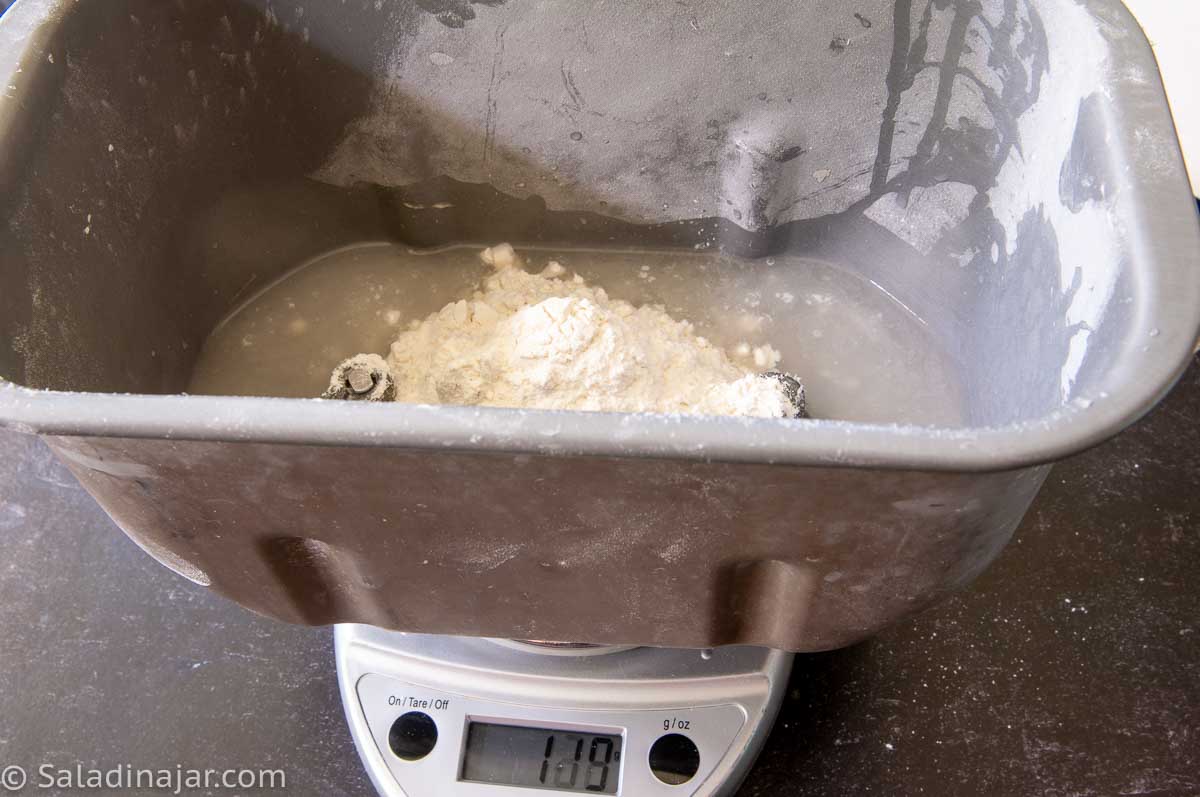
Set your scale to grams. Place your mixing bowl or bread-machine pan on the scale and press “tare” to zero it. Add flour until you reach the weight in the recipe. Press “tare” again before adding the next ingredient.
Weighing flour is faster, more accurate, and means fewer measuring cups to wash.
Small amounts like teaspoons of yeast or salt are still easier and more accurate to measure with spoons.
Small Tips That Make Measuring Easier
• Keep a fork in your flour canister for quick fluffing.
• Use a roomy container so you can measure without packing flour.
Let’s talk about the 5 mistakes I see most often...
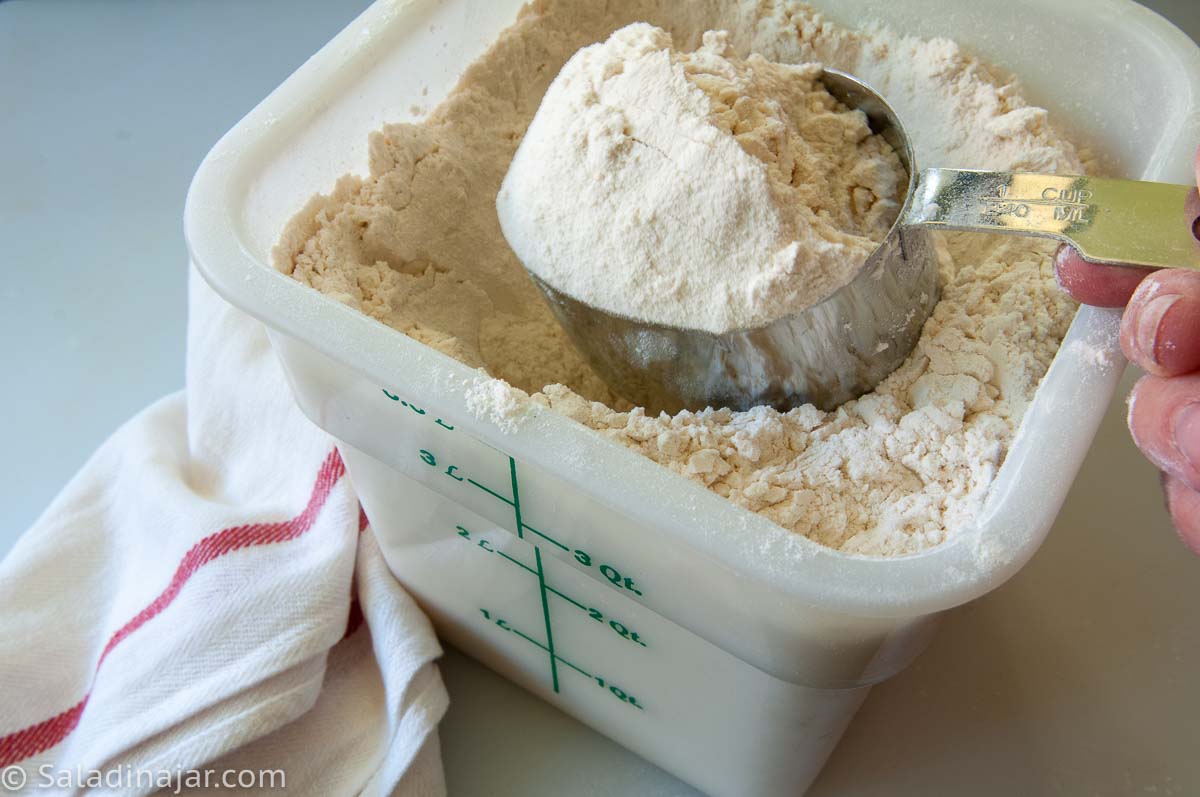
1. Scooping Flour Directly from the Bag
Scooping with a measuring cup packs extra flour into the cup. That extra flour makes dough stiff and is a common cause of dense bread.
Better Method: Fluff the flour with a fork, spoon it lightly into a dry measuring cup, then level it off.
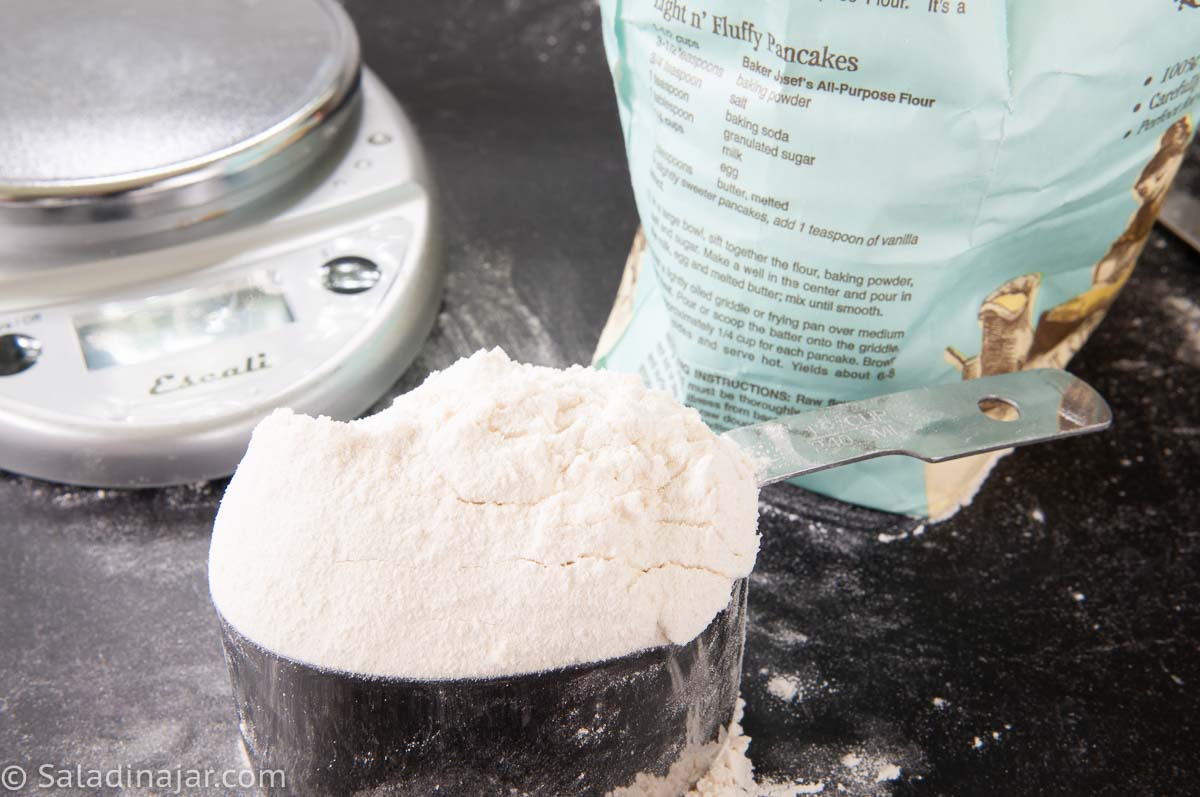
2. Using the Wrong Measuring Cup
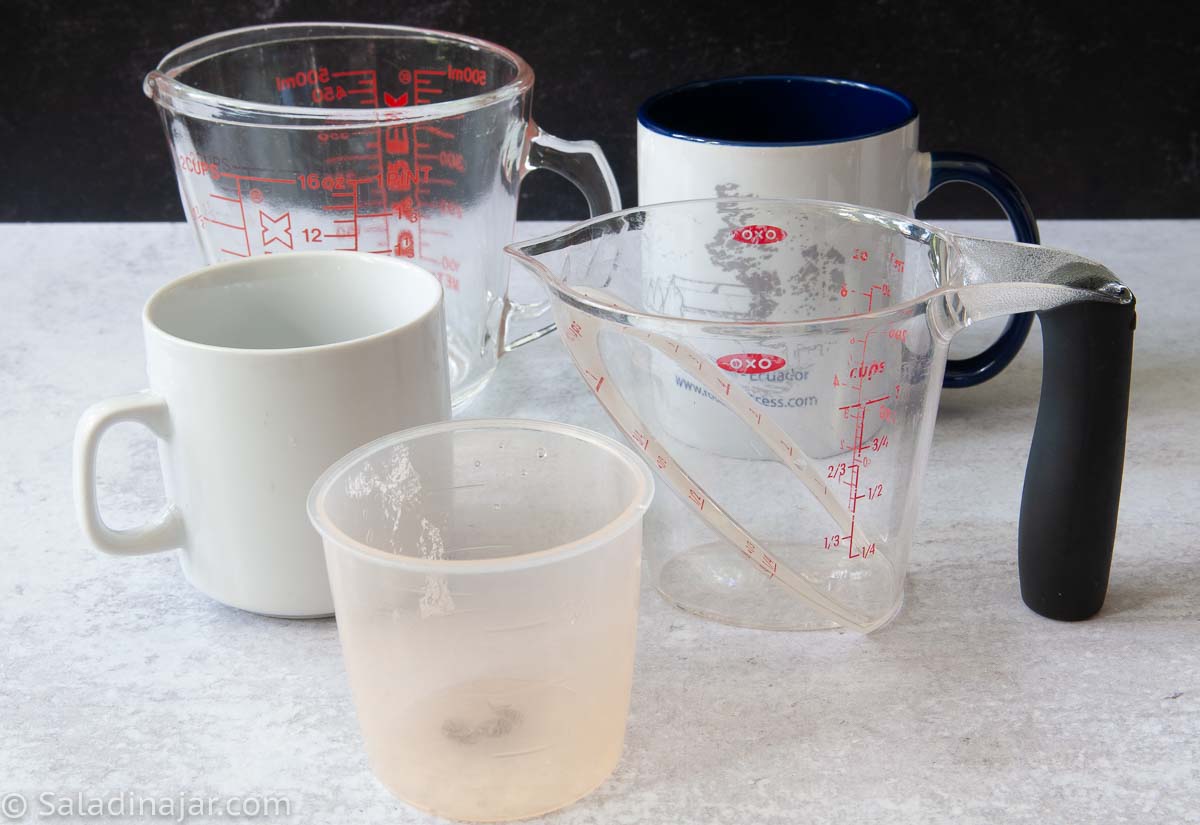
Coffee mugs, liquid measuring cups, or random kitchen cups are not accurate for flour.
Better Method: Use a standard dry measuring cup or—better yet—a digital kitchen scale.
3. Not Weighing Flour When Possible
Bread recipes are sensitive to small changes. One extra tablespoon per cup adds up fast.
Better Method: Weigh flour whenever possible. For most of my bread recipes, 1 cup of all-purpose flour is about 120 grams unless noted.
4. Sifting Flour Before Measuring
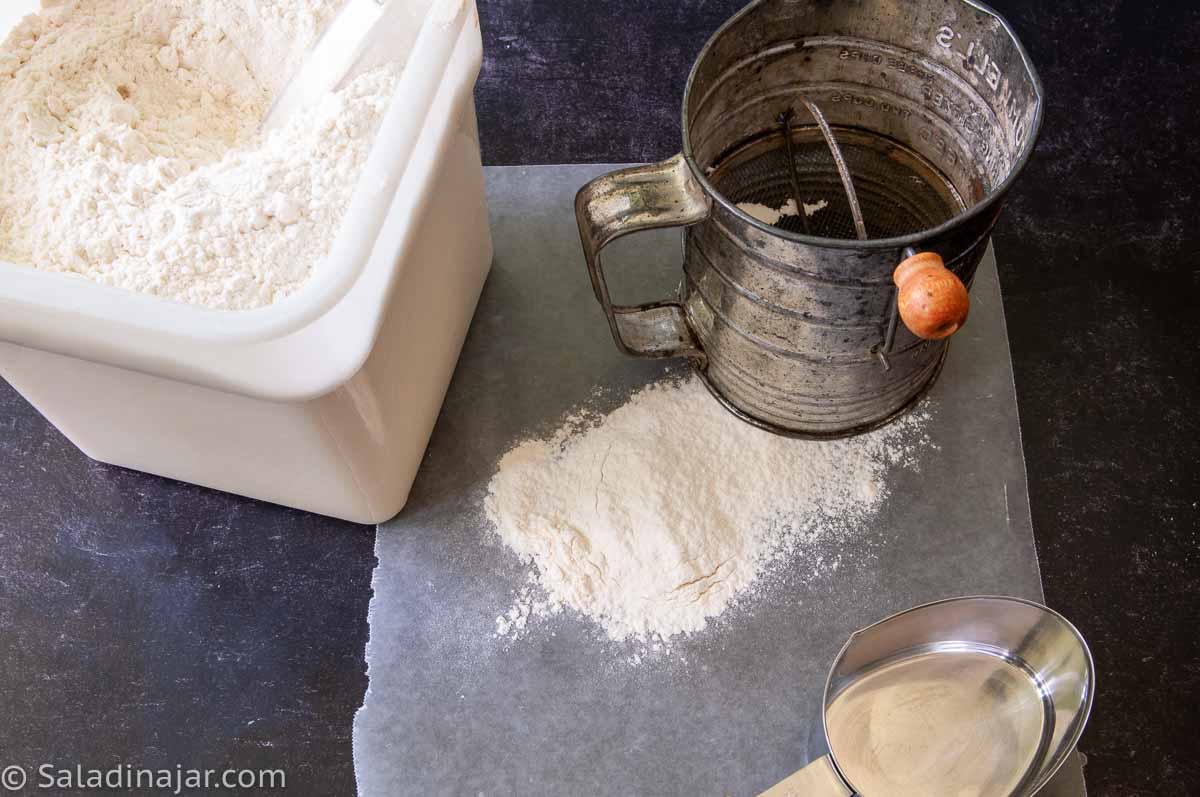
Sifting increases volume, so you may use too little flour and end up with sticky dough.
Better Method: Fluff the flour instead. Only sift if the recipe specifically says to.
5. Ignoring Small Measurement Errors
A tablespoon or two may not seem like much, but in bread it can change texture, rise, and crumb.
Better Method: Measure carefully and stay consistent from batch to batch.
FAQ About Measuring Flour
Because different recipe authors use different standards. The most important thing is to follow the measurement system your recipe author uses. If the recipe gives weights, use them. If it only gives cups, measure the way the author describes.
And if your dough still feels too stiff or too sticky, see my guide on how to adjust bread dough consistency so you can fix it before baking.
Use the fluff-spoon-level method for consistency. If you bake the recipe often, weigh your “1 cup” once and write it in the margin so you can repeat it exactly.
It can work, but for bread it often measures heavier and makes dough too stiff. If you’re using cups, fluff-spoon-level is usually more consistent for bread—or use a scale whenever weights are provided.
Unless noted, I count about 120 grams per cup of all-purpose or bread flour in my recipes.
Final Thoughts
Many wonderful cooks don’t measure carefully—and sometimes that works. But if your bread has been unpredictable, accurate measuring is one of the simplest ways to improve your results without changing the recipe. Once measuring becomes a habit, you’ll spend less time guessing and more time enjoying bread worth sharing.
— Paula, Home Economist
Homemade Food Worth Sharing
Need help troubleshooting?
Email me: Paula at saladinajar.com — photos help!
Learn More About Making Fantastic Bread with a Bread Machine
- How to Use a Bread Machine for Homemade Bread
- Crusty French Bread (Bread Machine Method)
- 6 Bread Machine Secrets You Need to Know

I have just started doing dough only in my breadmaker. So far no wins. I am assuming the flour is “stale” it doesn’t smell bad, I am assuming I need to put a bit extra water in, when I lift the lid of the breadmaker the dough looks sort of dry. The first loaf I did dough only epic fail, so did the whole production in the bread maker…epic fail. I will try the microwave proving as directed.
Hi Susan,
I hope you will sign up for my FREE bread machine course. I think it will get you back on track. Meanwhile, check out my French bread recipe. It’s very popular and works for almost everybody.
It’s imperative that you learn how to “read” the dough and know when and how to add moisture or more flour. You can read about that here.
I want to make your crusty French bread, you refer to a video, but I don’t see it!
Hi Pam,
Are you talking about the video for crusty French Bread? You can find it inside the recipe card on the post for French bread. If you are talking about the video on measuring flour, it is on the post about measuring flour where you left this comment. If you can’t find it, refresh your browser, which should help.
Thank you
I have a small, very accurate kitchen scale, but never use it for measuring flour. I’m convinced! I will never again make bread w/o measuring my flour. Maybe I’ll have more consistent results now.
Hi Jo,
I predict your bread will get better and better.
I come from the UK so we have never measured via ‘cups’ and I was taught a good while ago that the measuring of the ingredients for bread is absolutely crucial. So treat yourself to some scales – mine weighs in pounds and ounces and also in grammes, that way whatever your faults with your breadmaking they will never be as a result of an incorrect weight.
I actually did not even understand about ‘cups’ until the internet came into being. By the way the American Tablespoon and Teaspoon are different from the UK ones too – they are smaller.
Hi Julia,
Thanks for writing. I learned something. I didn’t know that the American tablespoon and teaspoon were different. Good to know.
Paula, I would never have thought about putting my bread machine canister on the scale without your advice. I would have created another bowl to wash and transfered it with a spoon. Your idea is wonderful and so easy. I now put my canister on the scale, zero it out, and proceed with the flour. If I get too many grams in, I just reach my spoon in and remove a small amount until I am accurate. I still use cups to measure liquid as mistakes aren’t as easy to remove! Thanks for your helpful hints. I love your website and have shared your recipes and hints with many of my friends. Keep up the good work!
Nifty, isn’t it?!
I just bought a new zojurushi virtuoso and the book uses 130 gm per cup bread flour.i read that you use 120. Are your recipes good for a zoj ? There are very few recipes in their book.
Hi Corinne,
Yes, my recipes are good for a Zoji. Nearly all of them were developed in a Zoji. Here’s the thing about flour measurements. If you “google” flour weight, you will find many different measurements. I decided to use King Arthur’s standards since their flour is highly regarded among many of my readers. Also, when I look on the label of ALL the flours available to me, they say 1 cup of flour = 120 grams.
Here’s how I apply this in real life. If you are using a recipe that gives weights, use that weight because that is most likely what the author of the recipe used. So use 130 grams when you make recipes from your Zoji manual. I used 120 grams in all my recipes, so that’s what you should go by when you use my recipe.
If a bread recipe doesn’t include weights, then you’ll just have to guess. That’s when my trick for making adjustments on the fly is so important.
Hi, Paula! Any comments and advise on which digital scale is great for my kitchen baking and cooking. Really enjoy your website!
Hi Cindy,
Are you a farm girl? Me, too, sorta. I grew up a farm girl, then married a city kid, so I’m a city girl now.
About the digital scale: I love my OXO scale that goes up to 11 lbs. because I can set my bread machine pan (or any big bowl) on top of it and still read the numbers. With smaller scales that don’t have a pull-out digital screen, it can be difficult to see what you’re doing–the bowl gets in the way. But I just got that one a few months ago. Before that, I used a smaller one and made it work. Can’t remember the brand although I’m sure it is in some of my pictures.
Thanks for your kind words. Have a great day.
I have been trying to make bread in my bread machine. I use gluten free flour and I can’t have dairy or eggs. My bread always comes out in weird shapes and very hard. What should I do?
Hi Gail,
Unfortunately, I’m not an expert when it comes to gluten-free flour. I have yet to make an edible loaf with gluten-free products, so I’ve decided to leave it to the experts I see online. I’m sure if you google “gluten-free bread” you will find some.
My bread recipes are easy to follow. They came with the machine, but when it bakes the end result looks like I piled up dough on the top with a melon baller. What am I doing wrong? Thanks
Hi Anita,
It’s quite possible you are doing nothing “wrong.” People often end up with weird looking loaves when baking in a bread machine. They may taste perfectly fine, but the appearance and the crust usually leave something to be desired. That’s why I only use the DOUGH cycle and let my machine do the hard work of mixing and kneading–nothing does it better. Then I take control after the first rise, shape the dough, and bake it in the oven. That’s how you get beautiful bread. Some people don’t care how their bread looks or how the crust turns out and that’s OK. To each his own.
What can I do my my bread machine doesn’t beep when nuts or fruit have to be put in .when do I put them in.
@Martha Roane,
Hi Martha,
Add fruits and nuts about 5 minutes before the kneading portion of the cycle is completed. Another option is to add the fruits or nuts by hand when you are shaping the dough after removing it from the DOUGH cycle. Doing it by hand ensures that the nuts and fruits aren’t crushed, which I quite like.
Hello Paula I need your help urgently.
I do not know why all the time when I put all the ingredients in the machine everything runs well until the dough starts to rise and all the dough is poured into the machine and then everything burns.
Hi luba,
Sounds like you are using a recipe with too much flour or one that rises too high for your machine. You can either: 1. Choose a recipe from your bread machine manual that is designed for your machine 2. Find a recipe with similar amounts of flour and yeast that you see in the bread-machine manual or 3. Only use the DOUGH cycle and remove the dough at the end of the cycle. Shape it yourself, let it rise again, and then bake it in your oven. https://saladinajar.com/recipes/bread/oatmeal-sunflower-bread-recipe-how-to-knead-in-a-bread-machine-but-bake-in-a-conventional-oven/
I followed your recipe for dinner rolls. The mixture was very watery. I reread your recipe and do not think I made any mistakes in measuring. I then consulted my bread machine book and they have the same recipe for every ingredient as yours except it calls for a full 4 cups of flour instead of 3. I am confused!! Thx in advance for your help.
Also can I use recipes designated for the other cycles and just pull the dough out before baking time ?
Hi Caroline,
I’m so glad you wrote. Which bread recipe are you talking about? I have many dinner roll recipes. Once I know which one, I’ll be anxious to troubleshoot with you. Give me as many details as you can. I’ve never seen a “watery” bread dough. Do you mean sticky?
In answer to your second question: If you pull the dough out just before baking, then the dough will fall. You’ll have to reshape the dough and let it rise again anyway.(this would mean your bread rises 3 times) Better just to make that recipe (any recipe) on the DOUGH cycle. When it completes, remove the dough, shape it and let it rise again.
I’ve been trying for years to successfully make a very low sodium/salt free loaf of bread and have had no luck regardless of the many, many recipes and tips that I’ve found online. What makes it harder is that I can’t have white flour so I also need to use whole wheat or some other type(s) of whole-grain flour. I’ve found that you CAN cut the salt back if using white flour, as long as you cut back on the yeast as well and still make a suitable loaf of bread, but 100% whole wheat/grain bread has enough trouble rising well without tweaking the salt/yeast amounts, cutting back on those 2 ingredients have produced nothing but bricks and door-stops. I’ve even added extra gluten to help give it a lift, but it didn’t help. Sometimes the loaves rise very little and sometimes not at all, sometimes they rise beautifully, only to deflate in the oven.
I love bread, and the only store-bought, salt-free bread that’s available in my area is awful. Do you have any ideas or suggestions for making a nice loaf of wheat (or spelt, buckwheat, oat, etc) bread that will rise well and then not sink like the Titanic when the heat of the oven hits it?
Hi Autumn,
You pose a difficult challenge. Salt is such an important ingredient. It works in tandem with the yeast. It would be kinda like driving a car with only a gas pedal and no brakes. The description of your bread describes perfectly what happens when you cut out the salt completely. I know of no way around it. You could experiment with cutting back the amount. Some say Morton Lite will perform decently but it still has salt in it.
!00% whole wheat is a different animal. I was going to mention adding Vital Wheat Gluten for a better rise, but it sounds like you’ve tried that. I have never experimented with spelt or buckwheat flour so can’t advise you on that. I do have a wonderful oatmeal bread recipe but it contains white flour. I’m so sorry I can’t be more helpful.
Perhaps a reader will see your request and offer some help. I hope so.
@Paula, Thanks for responding. It IS tricky, but I know it can be done. I just haven’t figured out the secret. The bread that I buy is 100% whole wheat and completely salt free, yet it still has the same loft and texture as regular sandwich bread. Also, I have an Italian recipe for salt free white bread which works, but I don’t know why! I love oatmeal bread so I’m going to try your recipe, and see how it does if I cut back the salt by half. Thanks again!