Classic Bread Machine Dinner Rolls (Tested & Approved)
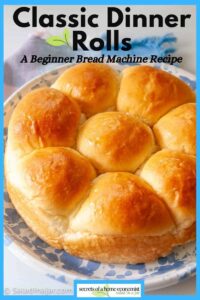
Sneak Preview: Classic bread machine dinner rolls mixed on the DOUGH cycle and baked in the oven for soft, golden results. Allow about 2¾ hours, with make-ahead and freezing options.
This post contains affiliate links. As an Amazon Associate, I earn from qualifying purchases at no extra cost to you.
Back in the ’80s, I clipped this gem from our local paper. It was reportedly from the cooks at a local high school, and I’m so glad to have their famous scratch-dinner roll recipe.
Though not originally a bread machine recipe, it converted beautifully—and I was hooked. Countless batches later, I can confidently say this recipe is thoroughly “tested and approved.” Proceed with confidence!
How to Use a Bread Machine To Make Dinner Rolls
If you are a bread-maker newbie, read 6 Bread Machine Secrets You Need To Know. But, for now, here’s the quick answer.
- Use the bread machine’s DOUGH cycle for mixing, kneading, and rising.
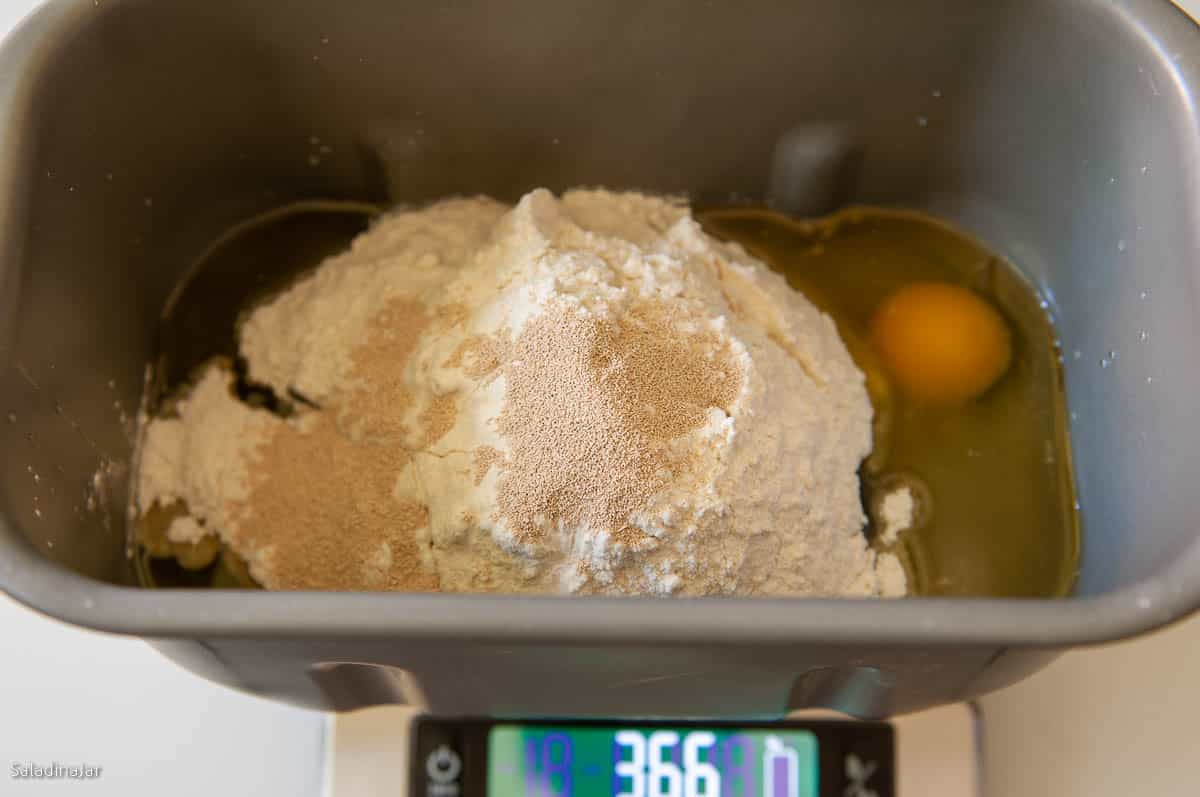
- Add ingredients to the pan in the order listed.
- After the cycle ends, remove the dough, shape it, and let it rise again in pans on the counter.
- Bake in a conventional oven for a great rise and golden crust.
Ingredients & Substitutions
• FLOUR: Unbleached, all-purpose flour is preferred. Bread flour, white whole wheat, or bleached flour will alter the taste and texture (but still make good rolls).
• MILK: Whole milk is best; higher fat preferred. Substitute with milk powder + water.
• EGG: Large eggs recommended. Adjust liquid for different egg sizes.
•SUGAR: Granulated sugar. Sub honey, but remember that honey adds moisture—so you may need to add more flour on the fly with this surprising secret .
• BUTTER: Butter preferred over shortening. Use shortening or vegan butter for a lactose-free option. Use cold butter and chop it instead before adding.
• YEAST: Instant or bread machine yeast recommended. Sub active dry yeast (According to King Arthur Flour, active dry yeast no longer needs to be dissolved ).
• SALT: Table salt or sea salt. Add ¼ tsp more if using Kosher salt. Salt is an important part of the recipe, so please don’t leave it out.
Versatile Dinner Roll Dough: Endless Possibilities
- Make it Into: Cinnamon rolls, hamburger buns, or raisin bread.
- Holiday Upgrade: Add rosemary and brown butter for a festive touch.
- Dairy-Free Option: Swap out milk and butter for non-dairy alternatives.
- Want Softer Rolls? Try these rolls with the Tangzhong technique—a quick step that improves texture and keeps them fresher longer.
Step-by-Step: How to Make Bread Machine Dinner Rolls
⬇️ Jump to the recipe below for exact amounts and detailed instructions.
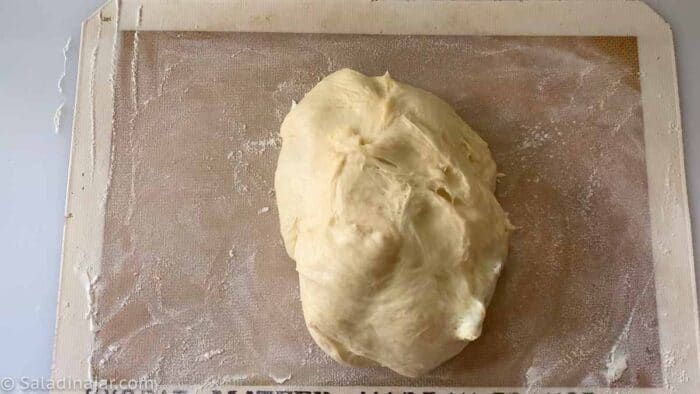
Make the Dough


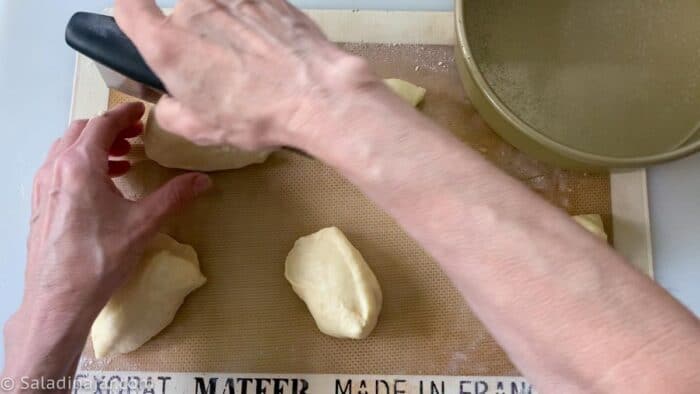
Shape the Rolls
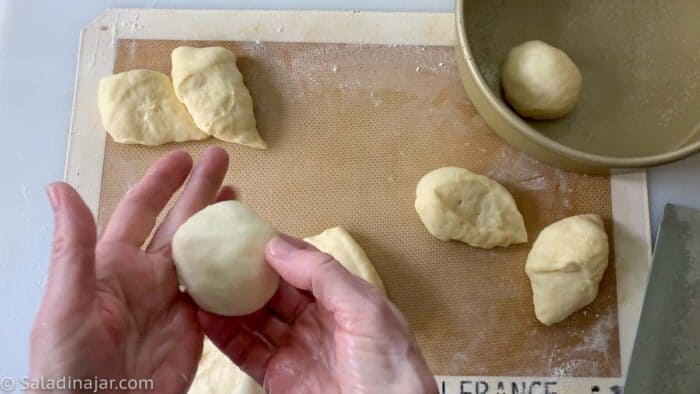
“Don’t worry about making perfect dough balls. If they are too perfect, people might think you bought your rolls from the grocery store.” –Paula
Final Rise
Bake
Tips That Make a Difference
- Weigh Flour: Prevent dense rolls by measuring with a digital scale instead of scooping.
- No Warming Needed: The bread machine heats the ingredients as it kneads; use cool liquids and chop the butter finely.
- Handle Sticky Dough: Lightly oil your hands instead of adding extra flour.
- Choose the Right Pan: Heavy, nonstick pans (USA pans, paid link) brown better than glass or lightweight aluminum.
- Check Doneness: Rolls are perfect at 190°F internal temp. Check with a quick-read thermometer(paid link)
- Cool Smart: Rest in the pan for 5-10 minutes, then move to a rack to avoid soggy bottoms.
Bread Machine Dinner Rolls: A Tested and Approved Classic
Video
Ingredients
- 1 cup (227 g) milk, cool
- 1 large (50 g) egg
- 3 tablespoons (36 g) granulated sugar
- 1 teaspoon table or sea salt
- ¼ cup (57 g) unsalted butter, finely chopped
- 3 cups (360 g) unbleached all-purpose flour
- 2 teaspoons bread-machine or instant yeast
Instructions
- Load Ingredients: Place 1 cup (227 g) milk, cool, 1 large (50 g) egg, 3 tablespoons (36 g) granulated sugar, 1 teaspoon table or sea salt, 1/4 cup (57 g) unsalted butter, finely chopped, 3 cups (360 g) unbleached all-purpose flour, and 2 teaspoons bread-machine or instant yeast into your bread machine pan.
- First check: After a couple of minutes, check the dough to make sure it is coming together into a raggedy ball. If not, add more water 1 tablespoon at a time. If you see pancake batter instead of dough, you forgot some flour—just add it slowly until everything pulls together.Second check: Check dough again after about 15 minutes. The dough should stick to the sides of the pan, then pull away cleanly. If too wet, add flour 1 tablespoon at a time. If too dry and the dough doesn't stick at all, add more liquid. See more details–Surprising Secret for Making Better Bread with a Bread Machine.Note: Getting the dough consistency right makes all the difference in how light and tender these rolls turn out.
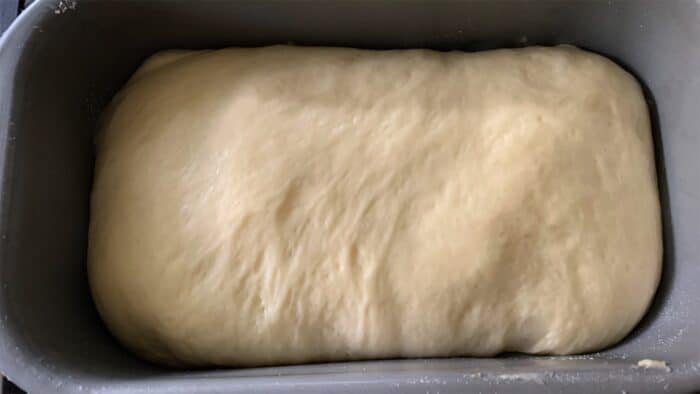
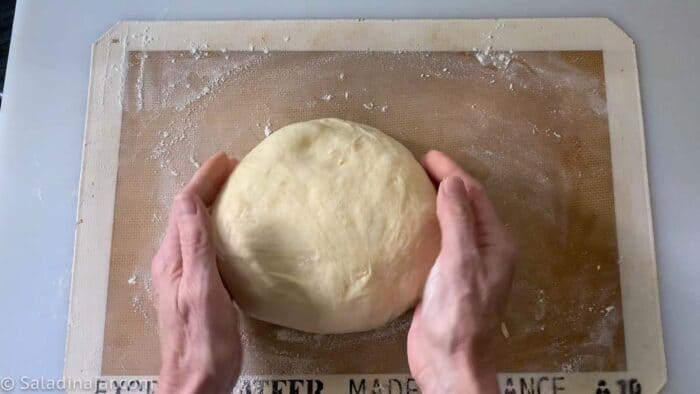
- End of DOUGH cycle: The dough should be doubled. If not, give it more rise time until it is. Restart the DOUGH cycle and knead for 5-10 seconds to deflate the dough. Stop the machine and turn the dough out onto a lightly floured surface, shape into a smooth ball, cover, and let rest for 10 minutes.
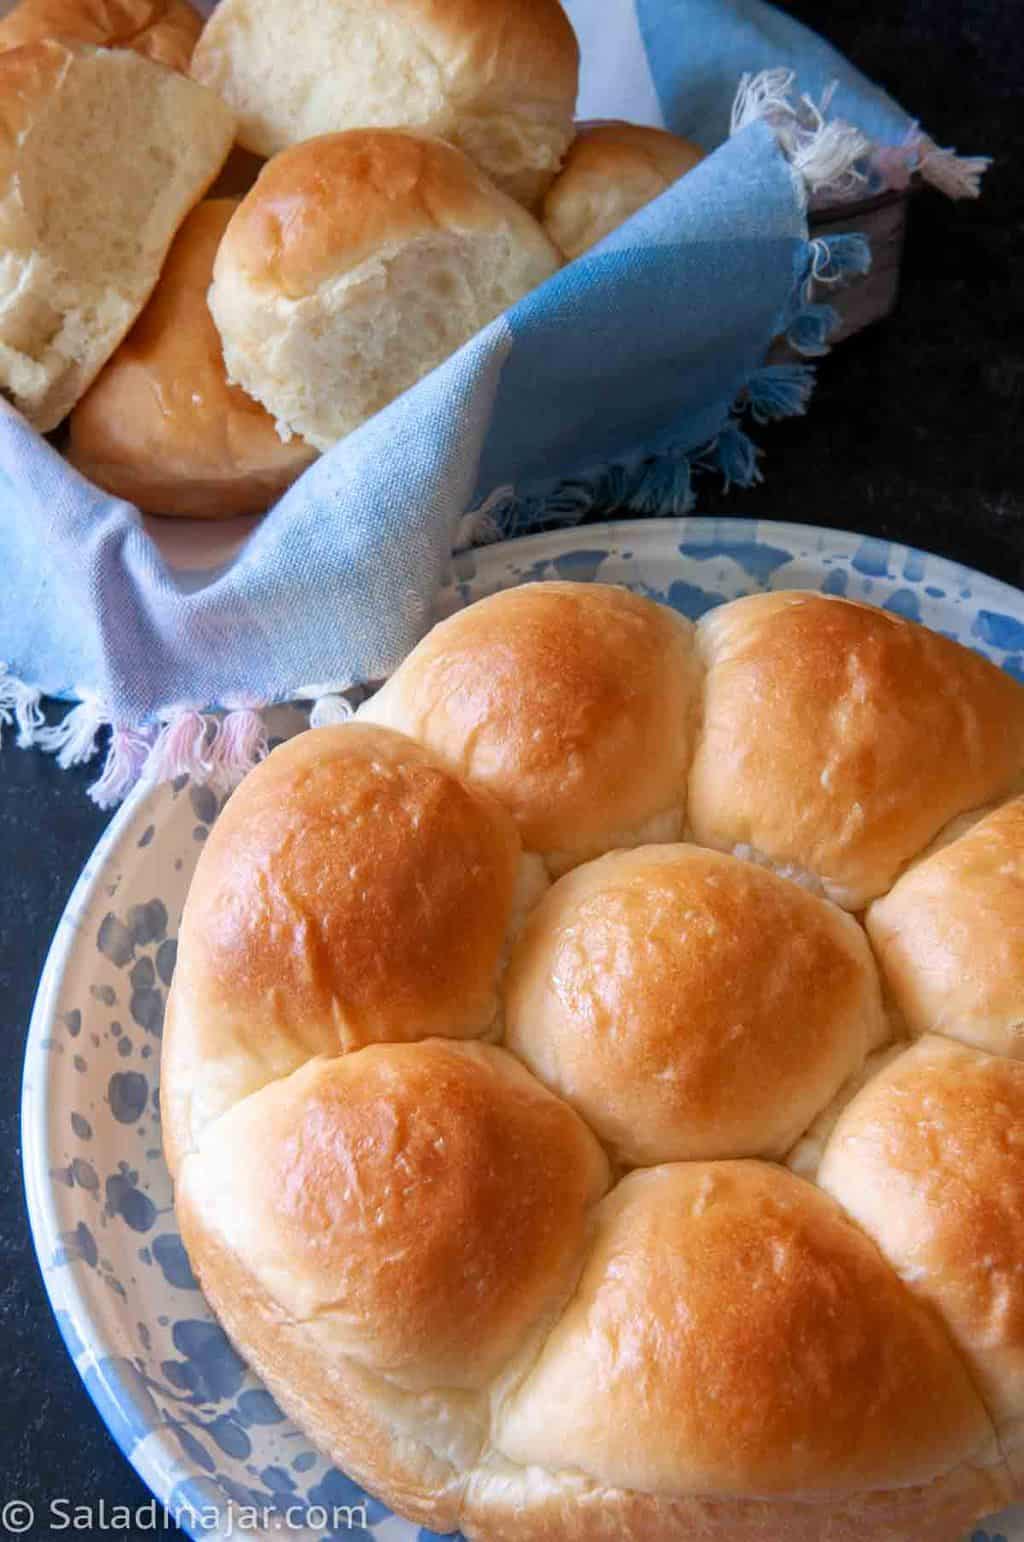
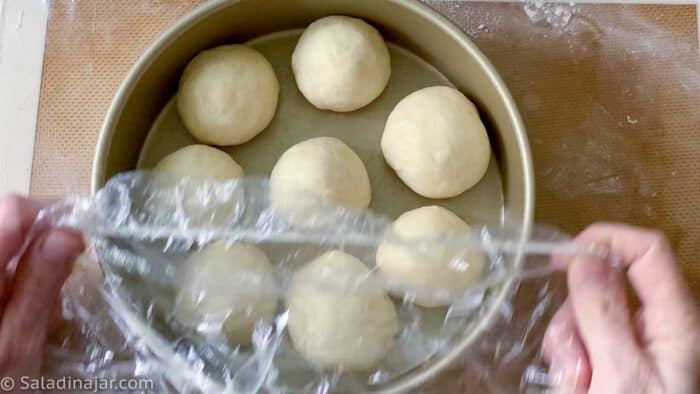
- Shape Rolls: Divide into 16 equal pieces and shape each into a smooth ball. (See video.)Arrange in two greased 8- or 9-inch pans.
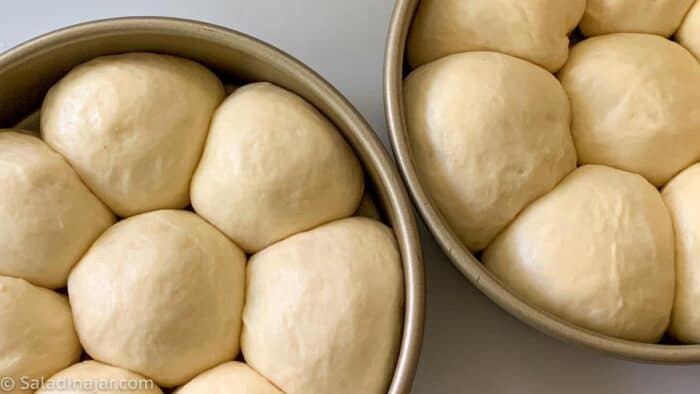
- Second Rise: Cover and let rise in a warm place until almost doubled (about 45–60 minutes). They should look puffy and touch each other.
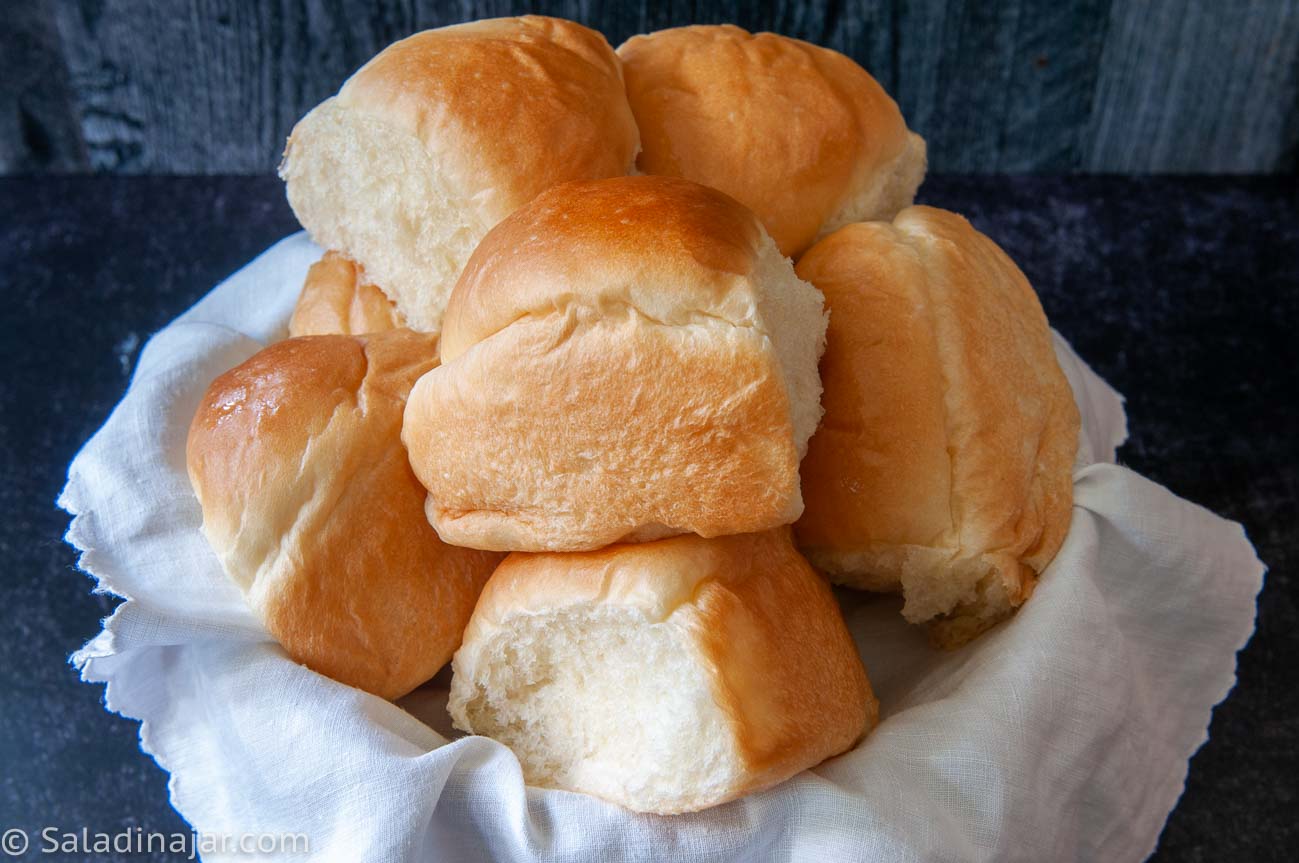
- Bake: Preheat oven to <strong>350</strong> °F (180˚C). Bake for 12–15 minutes or until golden brown (internal temp: 190°F/88°C). Rotate the pans for even browning.
- Cool and Serve: Remove rolls from the pan within 5–10 minutes to prevent soggy bottoms. Transfer to a rack and brush with melted butter if desired.
Notes
- Unbaked dough: Freeze after the DOUGH cycle or after shaping (before final rise). Defrost in the fridge overnight.
- Baked rolls: Double-wrap and freeze up to one month. Reheat gently. Frost after thawing.
- Stand Mixer: Mix until moistened, then knead with a dough hook (speed 2–3) until smooth and elastic (5–10 minutes). Let rise, deflate, and shape as directed.
- By Hand: Mix to a shaggy dough, knead on a floured surface until smooth and elastic (10–20 minutes). Let rise, deflate, and shape as directed.
Active dry yeast may be substituted. Use about ¼ teaspoon more than instant yeast. Dissolving first is optional.
Equipment
Nutrition
All images and text ©️ Paula Rhodes for Salad in a Jar.com
What Readers Ask Me About This Recipe
- Why are my rolls small and dense?
Usually under-proofing. Let them rise until puffy and nearly doubled regardless of what the clock says. Substituting whole wheat will also result in denser rolls. Use this recipe instead if you want to add whole grains.
Final Thoughts
I always let these rolls cool for a few minutes to prevent squashing before piling them into a basket. However, if taste testers are hungry, let them dig in — they’ll appreciate your efforts even more when they are ravenous.
— Paula, Home Economist
Homemade Food Worth Sharing
Need help troubleshooting?
Email me: Paula at saladinajar.com — photos help!

I can’t thank you enough for sharing this amazing recipe. The rolls melt in your mouth and are so pillowy soft. I want to share them with everyone I know. My whole family loves them too. They freeze really well and I am just SO thankful!
I glad you enjoy these rolls as much as we have over the years.
These are the easiest rolls I have made. Followed directions exactly. They are so soft and yummy. My husband rated gold star, his highest rating of my cooking. My house is cool, I boiled water and placed in pan on bottom of oven for rise after forming rolls. I replaced. water once. They rose up beautifully. Also not good at dividing dough so there were 12 instead of 16.
I will be making these again. Thank you for sharing.
I’m so happy to hear your husband thinks these are gold star rolls, and I agree. Thank you for writing.
I love this recipe. I’ve been making it for a few years now. I do sub honey for the sugar and add a tablespoon or so more flour. I also do half bread flour. They are wonderful! Thanks for the recipe!
Hi Bonnie,
I love the way you have made this recipe your own. Glad to hear that you love them. Thank you for writing.
onto my second batch in 2 days of these. thank you for the perfect sweet dinner roll recipe. my whole family loves them
Hi Annie,
This doesn’t surprise me. Kids, husbands, moms….well, just about everybody loves these rolls. Now you are a dinner roll rockstar!!
I’ve made these rolls several times. Really good. The previous time before today that I made them I realized I didn’t have enough All-Purpose flour on hand and didn’t want to go to the store to buy more. So, I mixed 1/2 bread flour and 1/2 All-purpose flour. They turned out even better than if I had used what the recipe calls for. These are yummy days after. The originals were not. The leftovers were eaten the second day. My grandson asked his mom to make him a sausage patty for him to put on his roll. WIN- WIN!
Hi Kathy,
Sounds like you’ve hit on a variation that works well for you. A sausage patty is a great use for these versatile rolls. Thank you so much for sharing your success.
How much flour and milk would you use from this recipe to make a tangzhong??
Hi Donna,
I have already figured it out, and you can see the results here. I started with the recipe you mentioned, and tested many times with the added Tangzhong until it was perfect. The “Japanese Milk Bread Rolls” have become the family’s favorite dinner rolls. Hope you like them.
Paula, this recipe is amazing. I have made it many times now! In the photo above, what gram weight did you make each dinner roll and what size is the pan that holds 8 dinner rolls? 8 or 9 inch? Thanks!
Hi Lana,
An 8-inch pan is perfect in my opinion but a 9-inch will also work. The rolls spread out a bit more in the 9-inch. For many years, I only had one 8 and one 9-inch pan so I put 7 rolls in the 8-inch pan and 9 rolls in the 9-inch pan. That works great, too.
Paula, the gracious owner of this blog, is so generous with her time and knowledge. We have correspondended several times via email and each time she helped to patiently answer all of my questions. As a dinner roll newbie, I really appreciated that. At the holidays, no less!
I was able to make delicious and attractive dinner rolls and I will be making them over and over! Thank you, Paula!
Hi Lana,
Thank you for your kindness. I’m so glad I could help and that your dinner rolls turned out both delicious and attractive. Keep baking!
These were highly praised on Thanksgiving!
Hi Maddie,
Thank you for coming back to my website to leave a comment and rating. I appreciate it more than you know. Sounds like you were a Thanksgiving rock star!!
Hi Paula,
These are by far the best rolls I have ever made and I have been baking for 50+ years. I just received a bread maker and was so discouraged with the results. Bread was hard, tasteless and misshapen. Then I found your website and followed your instructions . And it made all the difference. Look forward to trying more of your recipes.
Hi Janet,
I know the feeling. It was the same way with me when I first got a bread maker. The good smell can only take you so far before you want better bread than what you get when you bake it in a bread machine.Can’t wait to hear more about your bread-baking adventures.
Hi Paula,
This is one of my favourite recipes and it has never failed me. However if I have to make this recipe without the egg what would be a good substitute and how would it impact the texture. My inlaws do not eat eggs and they love dinner rolls so i would like to make this for them soon.
Thanks
You might try heavy cream instead. That will provide fat, protein, and liquid similar to what you get with eggs. An large egg is approximately 50 gr, so I would start with 1/4 cup of heavy cream. I haven’t tried it but I bet it will be good.
These rolls just could not be any better! We all love them and they’re so easy to make. I’ve tried other recipes but come back to this one time and again. Thanks so much for such a delicious experience.
Hi Gretchen,
Thank you so much for taking the time to write. I use this recipe for everything. Just last night I made hamburger buns with the dough. It’s so versatile!! I can’t wait to hear about how you make it your own.
Delicious rolls!
This was my first time using my bread machine to do the kneading and first rise! I’ve used this recipe at least 5 times now. I usually need around 400g of flour and I heat up the milk and butter first. I really appreciate the metric measurements! I’ve been practicing using my kitchen scale. This is a great recipe for beginners!
Hi Jennifer,
Glad this recipe worked for you. Thank you for the 5-star rating.
I have loved all your recipes that I have tried and have followed all your helpful tips. Today I decided to make these rolls and oh my goodness we were not disappointed. I followed the recipe to a tee with the exception that I needed to add 2 extra TbSP of flour. They turned out so amazing. Perfectly risen, pillowy soft and a wonderfully light buttery flavor. What a great recipe. This one is going in my cook book for sure.
Hi Diane,
Thank you for taking the time to write and share your results. Congratulations on an amazing batch of rolls. I hope you find bread baking as rewarding as I do.
I have been home baking for years with a few specific recipes for different things.
This just came out the oven and oh my, tasty. Saying it’s the best rolls I have ever made doesn’t do it justice.
thank you!!!
Hi Michael,
That’s high praise when you’ve been baking for years. Thank you so much. I hope you enjoy these rolls more many years to come.
This was my first time making homemade rolls. These turned out excellent. Thank you for the terrific recipe. I would like to ask if there is something I can do to enhance the yeast flavor. Would increasing the amount of yeast yield a stronger flavor or is there something else I can do?
Hi Krista,
Your comment inspired me to write a post about adding flavor to bread. Take a look at the first three tips for the answer to your question.
p.s. Thank you for the 5-star review on the rolls.
I cut the original recipe in half, which is awkward. Was Christmas day, had no milk but used half and half instead. …..I’m used to using warm liquids in the bread machine so I heated it a bit before putting it in…only 1 T of sugar instead of 1.5 and used a whole egg instead of a half. Checked the machine and it was too wet and ended up adding probably 5 more T of flour, and a lot more when I kneaded it before dividing it. Ended up with 8 rolls. I put them in a pan and let them rise and they sat for probably 3 hours before going into the oven….only oven space I had was in a 300 degree oven and they didn’t brown up as much as I would have liked but they were tasty. Thanks for the recipe.
Also, really happy this called for regular flour vs bread flour.
Yes, cutting a bread recipe in half is not always straightforward, especially when done by a computer. Using a whole egg would definitely throw off the liquid. Next time, I would whisk the egg and just use half of it. But if you liked the way the rolls turned out, adding more flour is the right thing to do. As you observed, you will not get a nice, golden brown crust at 300˚F without drying out the inside of the rolls. Holiday cooking can be a challenge when it comes to oven space. I understand! Thank you for the 5-star review.
These rolls are awesome. I tried several different recipes
and never really had any success until I tried these.
My girlfriend and her family were really impressed.
Easy to make and they sure beat the heck out of the pillsbury frozen ones.
Thanks for sharing!
Hi Fred,
Always good when you can impress the girlfriend’s family. Good job!
This is a fantastic puffy bun recipe! So glad I found it. Weighing the ingredients is a must and you will not need to add or subtract from the amounts.
Thanks!!!
Thank you for the 5-star review, Karen. You are right about weighing the ingredients. Makes a big difference.
the easiest roll recipe to follow. makes perfect rolls every time!
Hi Jennifer, Thanks for leaving the nice comment. I agree with you!! Happy Thanksgiving.
Paula
I have enjoyed learning how to make good bread from your articles. I would like to know how to convert a bread recipe to a machine bread recipe. I also want to know how to make a dairy free recipe from a dairy bread recipe.
Your help is very much appreciated.
Thank you,
Annette
Hi Annette,
Great to hear from you. I wrote a post about converting any bread recipe to a bread machine recipe that may help. How To Convert a Bread Recipe for Use in a Bread Machine.
I usually give non-dairy alternatives in all of my recipes. Let me know if you find one that doesn’t have it. In general, you can use nut milks instead of regular milk, although this may change the taste depending on the milk. You can even try water, although that will change the character of the bread, especially the crust.
If you are substituting for butter, you can use vegetable oil, Crisco, or even lard. This will also change the taste, somewhat, depending on the other flavors in the bread and the kind of oil you use. Some people use margarine as a sub for butter.
Hope that helps.
Oh my gosh, these are literally the BEST buns I have ever made. The best recipe EVER. I made these today, will NEVER buy buns again. Thank you…
I’m thrilled that you love them. I’ll have to agree with you.
I made these today. They turned out amazing, better than any store bought roll. Even better than my Grandmothers and she was a fantastic cook. Thank you so much for sharing all of your wonderful recipes.
I love this!!!
I love that you have measured the weights. Could you please add the weight of the egg?
Hi Kunoodle,
I will try to add the weight of the eggs. In general, a large egg is 50 grams in the USA. However, it is hardly ever precisely 50, so that’s just one of the reasons why I teach people to evaluate their dough as it kneads in the bread machine to see if it needs more flour or more liquid.
My family loves this recipe! I usually bake the rolls in my 12 inch cast iron skillet for about 25 minutes instead of using 2 pans.
I weighed my flour but only measured my other ingredients with the measuring cups and spoons, and I ended having to add about 5 tbsp of flour. I’ll try weighing all the ingredients next time and see if that makes a difference. Either way, they’ve always turned out really good!
Hi Heather,
Sometimes you may have to add more flour–it’s just the nature of breadmaking although 5 tablespoons is a lot. However, your egg may have been slightly bigger and maybe you added slightly more liquid than you thought. Humidity and brands of flour also make a difference. Thank you for the 5-star review.
You are absolutely right Paula!! These are THE BEST and softest rolls ever! And It came together so quickly. My family , that does not typically like my preservative free home made breads, gobbled this up in no time. Thank you so much for sharing!
The key is to weigh the ingredients vs using measuring cups. I did this for the first time and i must say that extra step made it all worthwhile.
Anubha
Your comment made my day! Thanks so much for writing. Weighing can make a huge difference. Thank you for the 5-star rating, too.
I’m not sure what I’m doing wrong. I’ve tried this recipe twice using different scales and following the measurements exactly. Both times my dough ended up way too wet and needed a lot of extra flour. Then in the oven the bread rolls didn’t rise a lot and sort of melded together. Any advice?
Hi Tanisha,
Oh dear. How distressing! You may need to add more flour or reduce the milk. How much do your eggs weigh? This can be a bigger factor than you think. Do you measure the milk? In the end, there is an easy way to fix the problem. See this post for all the details.
These are to die for! I can’t even tell you how many batches I have made because they go SO fast and I did share with a few. (very few) I tried to make some extra batches to put into the freezer but that never happens. It’s 1 2 3 they’re gone! My inlaws live close and I shared with them and my gosh…. They went nuts over them, so that’s a must-share with them. Great recipe!!!
Thanks Again!
oh, and btw the French Bread I made last night…. gone.
Samantha,
You are on a roll!! You are most likely the most popular person in your family these days. I agree with you about the rolls. I’m pretty sure I have made that recipe more than any other on my website.
After cooking for 50 years, I have finally found the perfect dinner roll recipe. All my other roll recipes have been discarded. I followed the recipe (with one exception), including weighing the ingredients and checking the dough a couple of times in the bread machine. I did not have unbleached flour, so I used all purpose. Rolls were baked in two dark non-stick pans for 12 minutes, rotating the pans at 6 minutes. They were brushed with melted butter when taken out of the oven then cooled as directed. YUM!! Hubby said he loved the rolls and loved the one who cooked them❣️
I love the part where your husband said he loves the one who baked them. High Five!!
Hi, could this recipe be used to make hamburger buns?
Hi Tina,
Yes, but they are on the soft side. They are especially good for slider buns.
As a new wife in a new home, I’ve been working in trying new bread recipes this last year. This has by far been the best! I think using the ingredients by weight has made a huge difference, before everything was much too dry. I just made a small batch of rolls, and used the other half to make a batch of cinnamon rolls! Thank you for the wonderful recipe, Paula!
Hi Kylie,
Congratulations on your new marriage and home. I agree that using weight can make a big difference. So glad to hear you enjoyed the rolls. Thanks for commenting.
These were a big hit at Christmas!
Christmas Eve morning realized I had forgotten to get dinner rolls,and didn’t want to go out to the store again. Made these that day shaped them and refrigerated them overnight. Took out 2 hours before baking and were perfect! Made an excellent leftover prime rib sandwich too. Thank you will definitely make these again.
You got me with the leftover prime rib sandwich. Yum!!! Thanks for writing.
I’ve made this recipe twice and both times the rolls were yummy!
High-five! You may have started a tradition.
The best dinner roll recipe you will ever need. Thank you Paula. From Seattle, WA
You’re welcome, Sangeeta. My family would agree.
These rolls are wonderful, planning to make for thanksgiving but would like to make ahead and freeze the shaped rolls.
Approximately how long from frozen rolls to oven? Thank you
Hi Jackie,
It’s hard to give you an exact time. It depends on how cold your freezer is and how warm your kitchen is (or wherever you set the rolls to thaw and rise). I would probably allow two hours, but it could be more or less. It might be worth a practice run.
Hi there. I was interested in watching your video on how to shape the rolls, but I can’t find it. Is it still available?
Yes, it’s still available. You can see it on this post.
Hi Paula! I have made your recipe twice and it worked out JUST the way I hoped. First, I watched one of your YouTube videos and it was helpful. I used whole milk. I took great care in shaping my rolls and making sure they were evenly spaced in my pan. The second time I shaped into Crescent Rolls (I also spread melted better on top of dough after I rolled it out, as well as after baking). For one batch I shaped and kept in refrig overnight and did the second rise the next day (took about 2 hours). For another batch I took some of the dough balls (after first rise) and froze them to bake the next week. Both ways worked perfectly and I could not detect a difference and made it so much easier to get hot rolls out of oven the same time as dinner. Thank you so much!
Sounds like you worked all the angles. Great. Thank you for writing.
I made the cinnamon rolls and they were delicious. So I washed out my bread machine pan to make the dinner rolls. I put everything in for the dinner rolls according to directions and started the dough cycle. About two minutes in I realized I forgot to put the paddle in. ? So I carefully removed the yeast so it didn’t get wet and then the other ingredients. I put the paddle in and the ingredients back in. And turned on the machine to the dough cycle and let it do its thing. Once the dough cycle was completed I waited for it to rise. It took hours. I finally was able to divide it and put it into pans for it to rise again. I covered it with plastic wrap and put it in the oven to proof. I set my timer and checked it every 30 minutes and again it took hours. HOURS. The last time I checked it I forgot to reset the timer. And forgot they were in there. Until the honey saw them and asked what was in the oven. They had finally risen after several hours. So I baked them. I was sure they were going to be a bust. But they are the most delicious mouth-watering yeast rolls ever. I put some garlic butter on top of them and they literally melt in your mouth. Thank you so much for sharing this recipe. Your advice has been a lifesaver. Some of the best advice was to use only the dough cycle, give it time to rise, and use fast acting yeast. Thank you again! Got to run! Some mouth-watering yeast rolls are beckoning.?
Hey Christine,
Reading your comment was better than a good novel. I couldn’t wait to hear how it all turned out. Glad your rolls were delicious. Not sure why it took them so long to rise but I have a couple of thoughts. Once you put all the ingredients into the pan, don’t worry about the yeast getting wet. The only time that is a concern is if you were going to wait a while before mixing the dough. So when I have forgotten to put a paddle in, I don a plastic glove and push the paddle through the whole mess until I find the post. Make sure the paddle is pushed all the way down over the post. Push the button to start and all is good. If you know the paddle is in there but it’s not engaged, use the handle of a wooden spoon to press through the ingredients and knock it down.
Thanks again for taking the time to write and leaving 5-stars.
Great bread, soft fluffy and wonderful taste
Hi Doug,
So happy to hear these turned out well for you. Baking these rolls are a good way to make yourself famous for your homemade bread.
I love using all your recipes! I have had great luck since finding your site! I normally use Instant yeast but can not find it lately in our area so I was wondering if I could make them in the bread machine with active yeast?
Hi Daphne,
I’m sorry you can’t find instant yeast. Yes, you can use active dry yeast in any of my recipes. Some people say it’s slightly slower to get started so they recommend increasing the amount by 1/4 teaspoon. However, since a slow rise improves flavor, you might not want to increase the amount. A little experimentation might be in order.
Hello Paula. Do you think if I shape my rolls, and then cover and place them in the refrigerator overnight, and bake the next day would work with this recipe? I would let them rise a little before baking. Wishing you and your family a Merry and blessed Christmas.
Hi Connie,
Yes, you can do this. Take them out an hour and a half to two hours to warm up and rise (depending on the temp in your kitchen.) Bake them when they are soft, puffy, and not-quite-double the size they were when you shaped them. Hope they turn out good for you. I’ll be making the same recipe.
Hi, I am so glad I found your site. I have read many of your tips and they are so helpful even though I have been baking and cooking for 70 years. Thanks so much for sharing what you do and love. I am going to try these rolls right now!
Thank you for your kind words.
How did your rolls turn out? 70 years is a lot of experience. I bet you could teach all of us a few things.
These rolls are fantastic. I made them for Thanksgiving, and they were a hit. Thank you again for another wonderful and easy recipe. Keep them coming, please!
These are HANDS DOWN the best dinner rolls I’ve ever made. Measuring the flour really does make all the difference. I didn’t even think results like these were possible with regular flour, but man you can’t get any better! Now I want to try the other method you posted too. Thanks so much!
Hello,
Can you substitute bread flour for flour?
Hi Pam,
Yes, bread flour is fine. The absorption rate for all-purpose flour and bread flour varies, so be sure to check your dough while it kneads to see if you need to add more liquid or more flour to make the dough is “perfect.”
Love making rolls this way. I plan to use many of your recipes! One question: Would I be able to make a larger batch of rolls successfully. When hosting a group of people I need more. Please and thank you!
Deborah,
In general, I don’t advise doubling recipes when using a bread machine. It can strain the motor when you use more flour than advised in the bread machine manual. This is what I do: 1. Make one batch using the DOUGH cycle. When the machine gets quiet and the kneading is done, stop the machine, remove the dough, and place it in another bowl to rise. 2. Assemble and start the next batch immediately using the DOUGH cycle. Unless you need to do a third batch, let the second batch complete the entire DOUGH cycle. Then shape and bake as usual.
Doing it this way almost always results in the rolls being ready to bake one after the other. Of course, you could make one batch the night before and put it in the fridge overnight. Then make the next batch in the morning.
And one more idea. Pick up another cheap bread machine at the thrift store. It doesn’t have to be fancy since you only need the DOUGH cycle. You can often pick one up for 5-10$. I currently have three and none of them are new. Just an idea for next year.
I made these today, following your recipe exactly. The rolls turned out wonderfully and were eaten very quickly. I’ll definitely be making these again soon.
Planning to make the cinnamon rolls tomorrow….
Love hearing this, Jennifer. The same dough makes good cinnamon rolls, too.
Paula, you never cease to put a smile on my face. Somehow, whenever I am looking for a recipe eg. tangzhong dinner rolls…bingo! That’s your next blogpost. Thanks for this. They turned out perfectly.
Hi Vivian,
Seems like we are on the same wavelength. Any time you are looking for something and can’t find it, send me a note. It might be my next post.?
Loved making these dinner rolls, turned out very soft and good, kids and husband loved them. I also made these stuffed with potato/spice mix and they also turned out very good. I do have a question, do you have a substitute to make these type of dinner rolls eggless? Thank you.
So happy you liked the rolls. Substitute 50 grams of milk (or water) for the egg if you want to leave it out. They won’t be quite as rich. Making substitutions like this are one of the advantages of making your own bread!! Be sure to check the dough after it has been kneading for a while to make sure it sticks to the side, then pulls away cleanly. Make adjustments according to what you see.
I made these dinner rolls with pot roast dinner tonight and I’m lost for words that I made these!! They are soft and airy and amazing! I made the first 8 normal and the second half with flaxseeds, chia seeds, and hemp seeds mixture! Also absolutely beautiful dinner roll! Thank you for a great easy dinner roll!
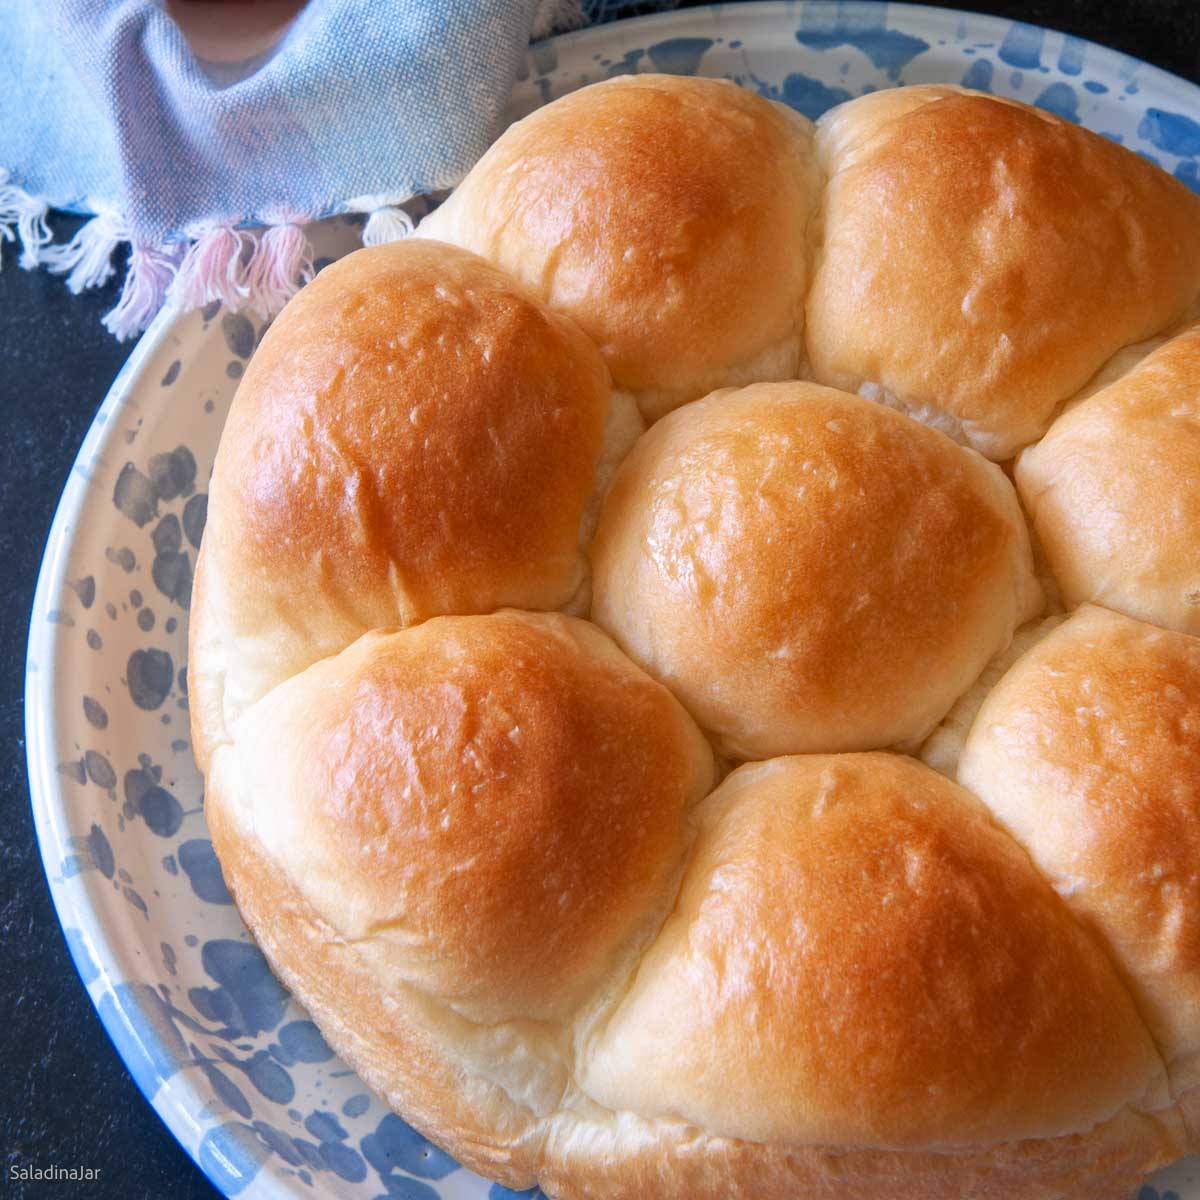
a quick one please Paula. What glaze did you use on the rolls as can be seen in the baked buns still in the pan pic above.Butter doesn’t usually give a shine for me. Thank you 🙂
Suzanne,
You have a good eye. It is actually butter. But I take the pictures immediately after I butter just to catch the shine. As soon as the butter is absorbed, there is no more shine. If you want “shine,” try an egg yolk and heavy cream glaze. (1 egg yolk to 1 T. heavy cream). That glaze will make the rolls beautiful but still soft like the rolls.
These are delicious, simple & easy to make. I made them in a 9×13 pan and made sliders with a sloppy Joe filling.
Help when I make dough in my machine it is all cobwebby and sticks to the sides then when I eventually get it out and shape it onto rolls it rises then goes flat , what am I doing wrong xx
Hi Sandra,
Be sure to open the lid and check your dough while it is kneading. After the machine has been kneading for 10-15 minutes, the dough should stick to the sides, then pull away cleanly. If it doesn’t pull away, add more flour 1 tablespoon at a time. Give the machine time to knead in the flour before you add another tablespoon. That should take care of the flat rolls. However, if you let the rolls rise too long, they will still flatten out. Here are two things to look for:
1. The rolls should rise just short of double in size. If the formed rolls completely double before baking, they may not have enough power to rise anymore in the oven and could even flatten out. 2. Another test: use your knuckle to make an indentation on the side of one of the rolls. It should slowly fill in. If it doesn’t fill in at all, the rolls have already risen too much. If it fills in quickly and you can’t even tell where you made the indentation, they need to rise a little bit more. A lot of bread making is experience. You’ll get it.
I’ve made these rolls probably six times now with varying outcomes, but always delicious. I generally split the dough and make one pan of 8 rolls and one pan of 8 cinnamon rolls! Yum. The one situation I always have is that the dough is very sticky when I remove it from the machine, without the substance generally found in other yeast doughs so I find myself using a lot of flour to ease handling and forming. I must be doing something wrong. I weigh my flour (thank you for this great tip!) and the dough looks correct while kneading and proofing. Regardless, this is a great recipe. Any ideas?
A couple of possibilities: Are you using bread flour by any chance? Sometimes you need to add more flour because of the additional protein. Whenever your dough is over-proofed, it is often sticky to work with. When you poke your finger in the dough to check if it has risen enough, the hole should fill back in slowly. If it fills in quickly, it needs to rise more. If it doesn’t fill in at all, then it’s likely the dough has over-proofed. Push the dough down and let the dough rise again, but this time not as much.
Another thing could be your work surface. Have you tried spraying a little oil on the surface and also your hands? It works like a charm and you don’t have to use any flour.
Does any of this sound possible?
I made these last week and they tasted great! I will be making them again not only because we enjoyed them but clearly…I need practice forming dinner rolls. Thanks, Paula
Yes, a little practice is all you need. Thankfully, the shape doesn’t normally affect the taste.
When I’m making dinner rolls I don’t want the angel food cake buttin in.
Made these a couple of hours ago and I’m making a second batch now. My partner and I ate more than we should’ve given we wanted to serve them to his parents for dinner tomorrow! These are delicious!! Now that I’ll have many more rolls than needed, I’m wondering how long they’ll stay fresh for? Also, do they freeze well?
Hi Hallie,
Glad you liked the rolls. Now you know why they are a family favorite. These rolls have no preservatives so they are best the day they’re baked and pretty good the next day, too. If you freeze them, I would probably slice and toast them for the best flavor. You might be interested to know that this recipe for Tangzhong dinner rolls is the same recipe with the Tangzhong technique applied. These rolls stay fresh for a good three days and taste even better. The recipe has one added step that’s not hard. Might be the best solution.
This is the best roll recipe I’ve ever made, and I’ve made quite a few. They are perfectly light and airy. I’ve found my new go-to!
I am in the process of making rolls for my second time.. they came out perfect the first time ~ a week ago. Was my first time to use the “dough” feature on my machine. Thanks so much for all the tips, and recipes.
Hi Cheryl,
You’re welcome, So glad to have you on the “Dough Cycle” team. Hoping for a rerun of last time.
The first time I made these, ( maybe a week ago?), they turned out beautifully and super fluffy. Today I made them again. They tasted good but were very dense, not big and fluffy like before. What did I do wrong?
Hi Karen,
I’m sorry about your rolls. There could be more than one reason. How did you measure the flour? Is it possible that you used more this time? Were any of your ingredients cold? That’s not a problem, but it will slow down the rising time. Speaking of rising, did you allow them to double before you baked them? Did the dough over-rise or over-proof when it was in the bread machine pan? That can happen pretty easily if your kitchen is warm. There are more reasons, but since I didn’t watch you make the rolls, I can’t be specific.
But don’t be discouraged. You’ll get it. We’ve all that those failures, but that’s how you learn. Right? Just like momma said. 🙂
@Paula, I’m trying again!
I made these rolls over the weekend and the aroma sent me back to my Grandmother’s kitchen in the Winter and the fogged over windows in her kitchen. If we were playing outside, we knew to come and get it! When the husband took a bite he said “OMG, cafeteria rolls!”. Thank you, Paula, the search is over!
Hi Peggy,
This is my favorite kind of comment!!! Thanks for taking the time to share.
I’ve just made these rolls, and they are absolutely wonderful, and look exactly like the photo you have on here of the finished article. My husband and I have just shared one straight from the oven and dripping with butter…delicious! Thank you so much for this wonderful recipe…I shall be making a few more bread items from your site now that I’ve pulled my bread machine out of the cupboard it’s been hiding in for the past few years. xx
Your letter is quite a day-brightener and so encouraging. Glad to hear your bread machine is no longer hiding but instead, bringing you delicious homemade bread. Stay in touch. I would love to keep up with your bread-making adventures.
It’s been a while since I made these but they are my favourites. If I didn’t want to do the new recipe for the cheese rolls could I just add the cheese to these? I think that was basically what the old cheese rolls recipe was??? Sorry for being a nuisance but I liked them the old way xx
Yes, Bethan. Adding cheese to these makes them just like the old cheese recipe. I had no idea there were so many fans of the old recipe. Glad you are one of them.
This may be one of my favorite recipes on your blog, Paula! Glad to see the recipe again. It works every time and it is so easy and the rolls are always delicious. Thank you, Paula!!
Thanks for the confirmation! You’re welcome.
Good morning. I noticed that you have butter listed twice in the ingredient list. I have too make this soon. It sounds delicious and I love the way they rise and bake. Like the Dresden pattern for quilting. Have a blessed Sunday.
Hi Connie,
Hugs to you, my friend. My mistake about the butter is now corrected. You are going to love the rolls. And you’re right. They look like the Dresden pattern. Blessings to you, too, on this beautiful Sunday (at least where I live).
Some of the best dinner rolls I’ve ever made. I’ve make these for holidays, family dinners, church suppers, pot lucks, etc. The recipe is simple, my bread machine (which I’ve had for at least 15 years) does the work. Thanks you for this recipe.
Hi Robin,
Thanks so much for the positive comments. I lost all the comments from the old post, so it’s good to have a new testimonial. Happy Bread-making.
Paula, I’ve lost count how many times I’ve made this recipe. It’s so good and in my binder where I keep my best recipes, I have a handwritten love note from my husband attached to this recipe. He added little hearts with arrows and wrote, “These are the BEST rolls!!!!” He had gotten up in the middle of the night and eaten a bunch of them while I slept. In the morning I discovered the note propped on the kitchen counter. Still makes me smile. Thank you!