Bread Machine Garlic Breadsticks (DOUGH Cycle + Oven-Baked)
Sneak Preview: These garlic breadsticks are mixed and kneaded in a bread machine, then shaped and baked in a hot oven for a golden crust and tender center. Finished with a garlic-butter glaze and ready in about 3 hours.
This post contains affiliate links. As an Amazon Associate, I earn from qualifying purchases at no extra cost to you.
There’s something deeply satisfying about pulling a tray of garlic breadsticks from a hot oven—especially when the dough didn’t require any hand-kneading.
This is one of those recipes I reach for when I want homemade bread on the table without fuss. The shaping is simple, the timing is flexible, and the results are the kind of soft-inside, golden-outside breadsticks that disappear fast.
How I Use a Bread Machine for Better Bread
I use my bread machine (this is the model I use) to mix and knead the dough using the DOUGH cycle, then shape it by hand and bake it in a conventional oven. This approach takes advantage of the machine’s consistent kneading while giving me full control over shaping, rising, and baking—especially important for rolls, pizza, and other swirled and shaped breads.
My free Bread Machine Crash Course explains this approach in more detail.
Ingredients & Substitutions
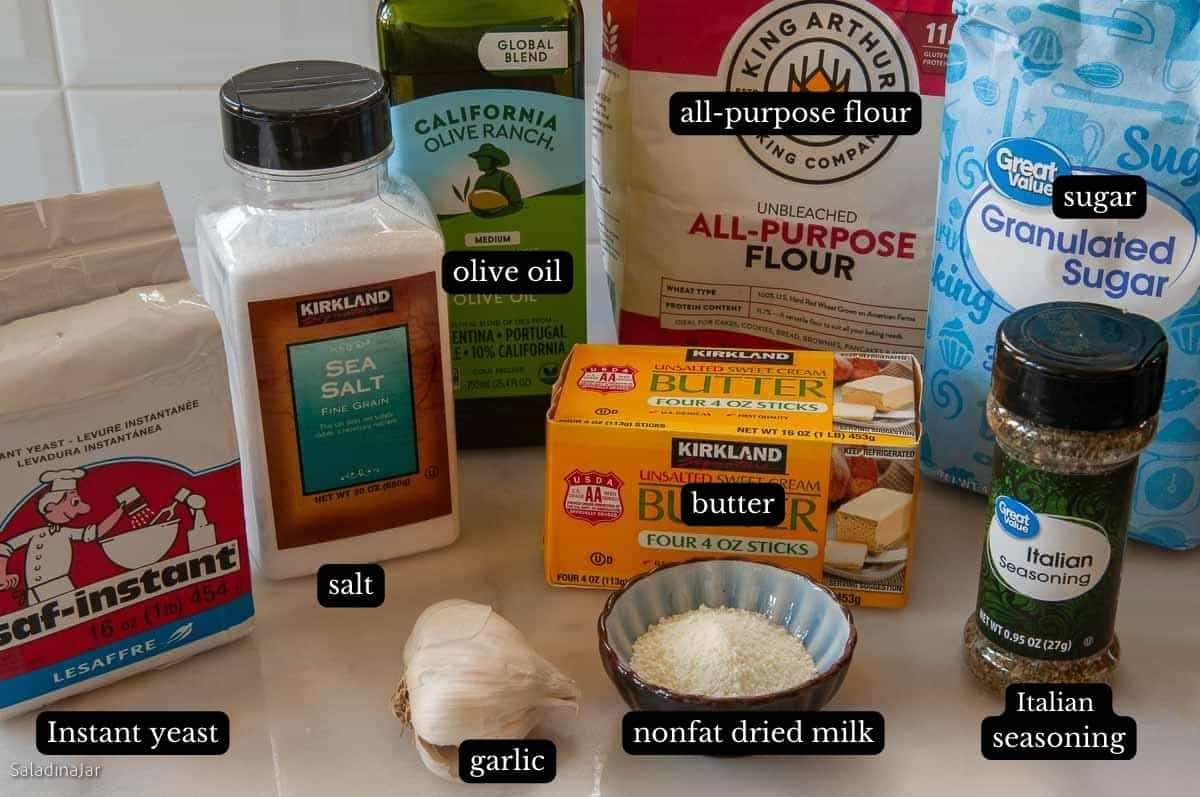
• WATER: Tap or filtered–cool temperature
• INSTANT NONFAT DRY MILK: Sub whole milk powder or replace with liquid milk (reduce water accordingly).
• OLIVE OIL: Swap with avocado, canola, or vegetable oil
• SALT: Use table or sea salt; add ¼ tsp more if using kosher salt.
• SUGAR: White granulated sugar; sub honey or brown sugar (adjust liquids if needed).
• ALL-PURPOSE FLOUR: Unbleached preferred; bread flour makes chewier bread.
• INSTANT YEAST: Bread machine or quick-rise yeast; for active dry, add ¼ tsp more.
• GARLIC (for glaze): Fresh minced or jarred garlic; garlic powder in a pinch.
• BUTTER (for glaze): Salted or unsalted; sub olive oil for dairy-free.
• ITALIAN SEASONING: Use dried basil, oregano, or parsley instead.
• EGG (for alternate glaze): Large egg; skip for egg-free and use oil-only glaze.
• OLIVE OIL (for alternate glaze): Swap with melted butter or other mild oil.
How to Make Breadstick Dough in a Bread Machine
⬇️ Jump to the recipe below for exact amounts and detailed instructions.
Making the Dough
Shaping & Baking the Breadsticks

Cinnamon-Sugar Breadstick Twist
Want a sweet version?
- Skip the garlic butter.
- Brush unbaked breadsticks with butter.
- Bake as directed.
- Brush again after baking.
- Roll in cinnamon-sugar.
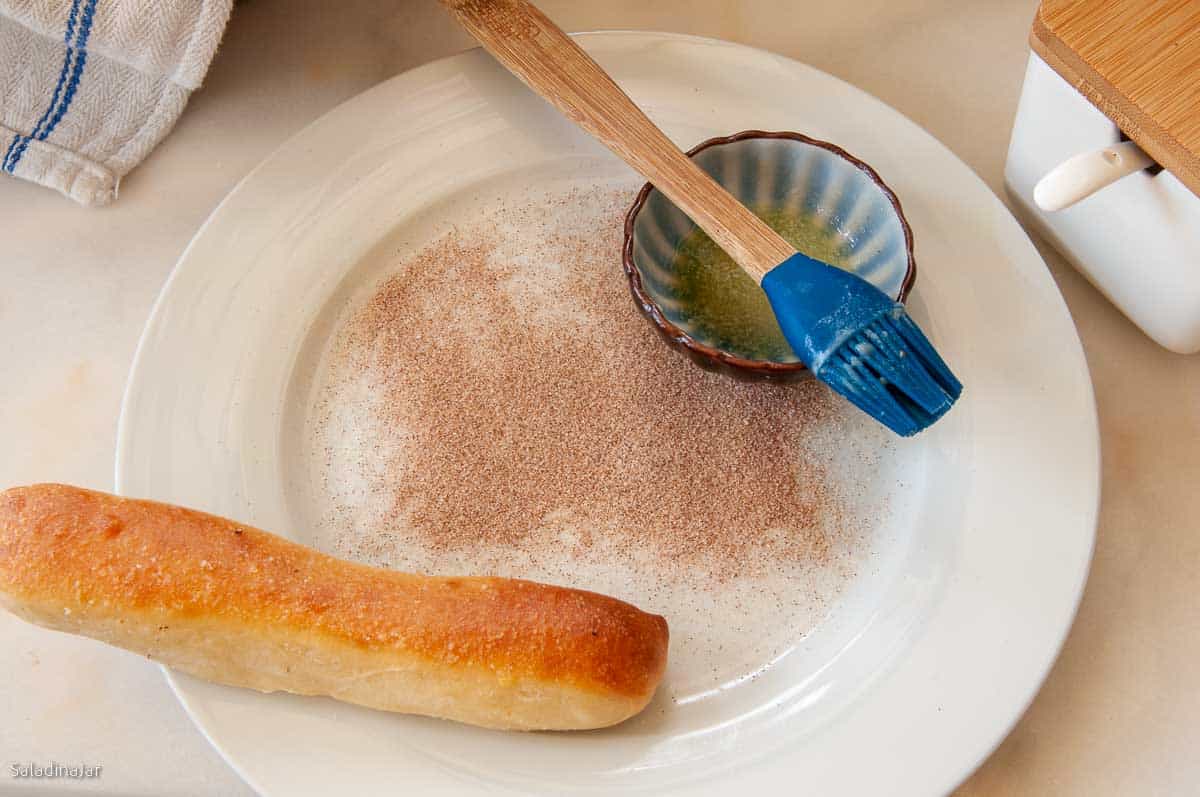
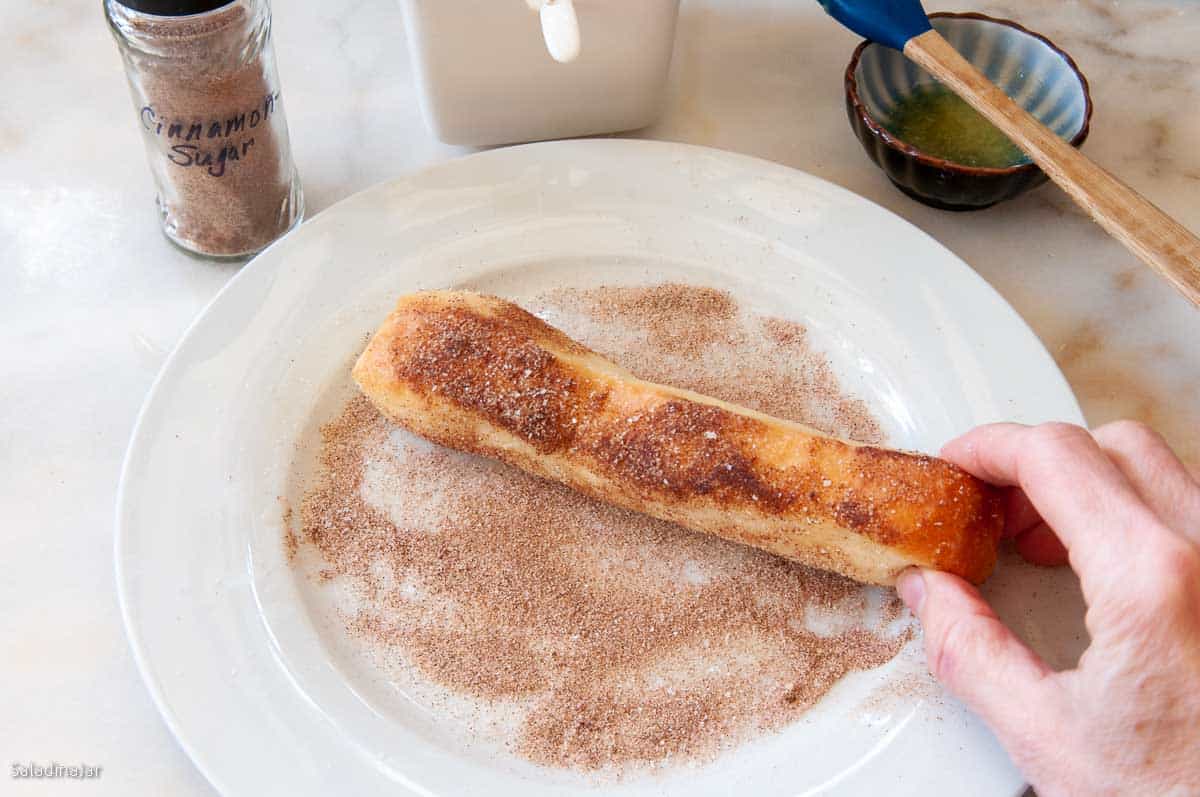
Bonus Tip: Use leftovers for crispy cinnamon treats—just reheat in an air fryer at 390°F for a caramelized crunch.

Bread Machine Garlic Breadsticks (DOUGH Cycle + Oven-Baked)
Video
Ingredients
Dough:
- 1 cup (227 g) water
- 3 tablespoon instant nonfat dry milk
- 4 tablespoons (52 g) olive oil
- 1½ teaspoon table or sea salt
- 1½ tablespoons granulated sugar
- 3 cups (360 g) all-purpose unbleached flour
- 1½ teaspoons instant yeast
Buttery Garlic Glaze:
- 1 clove garlic finely chopped
- 3 tablespoons (42 g) melted butter
- ½ teaspoon Italian seasoning
Alternate Egg Glaze:
- 1 large (50 g) egg
- 2 tablespoons (26 g) olive oil
Instructions
Making the Dough:
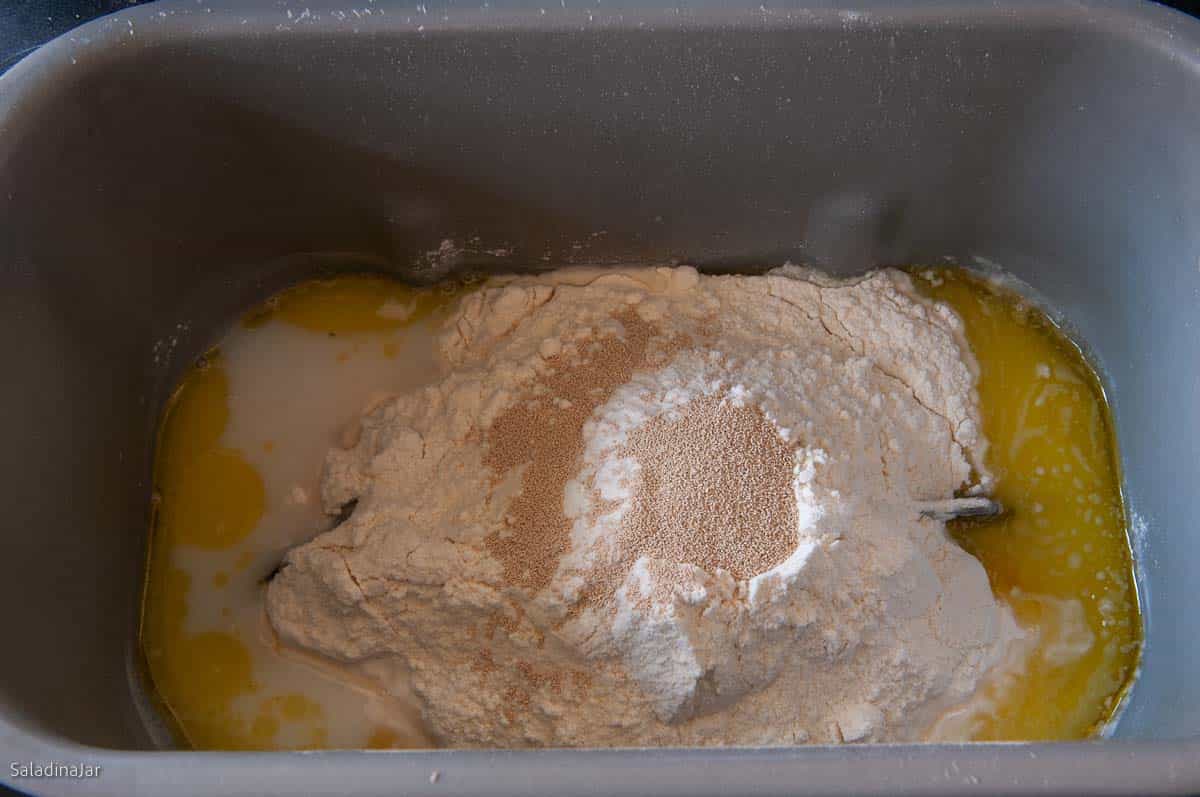
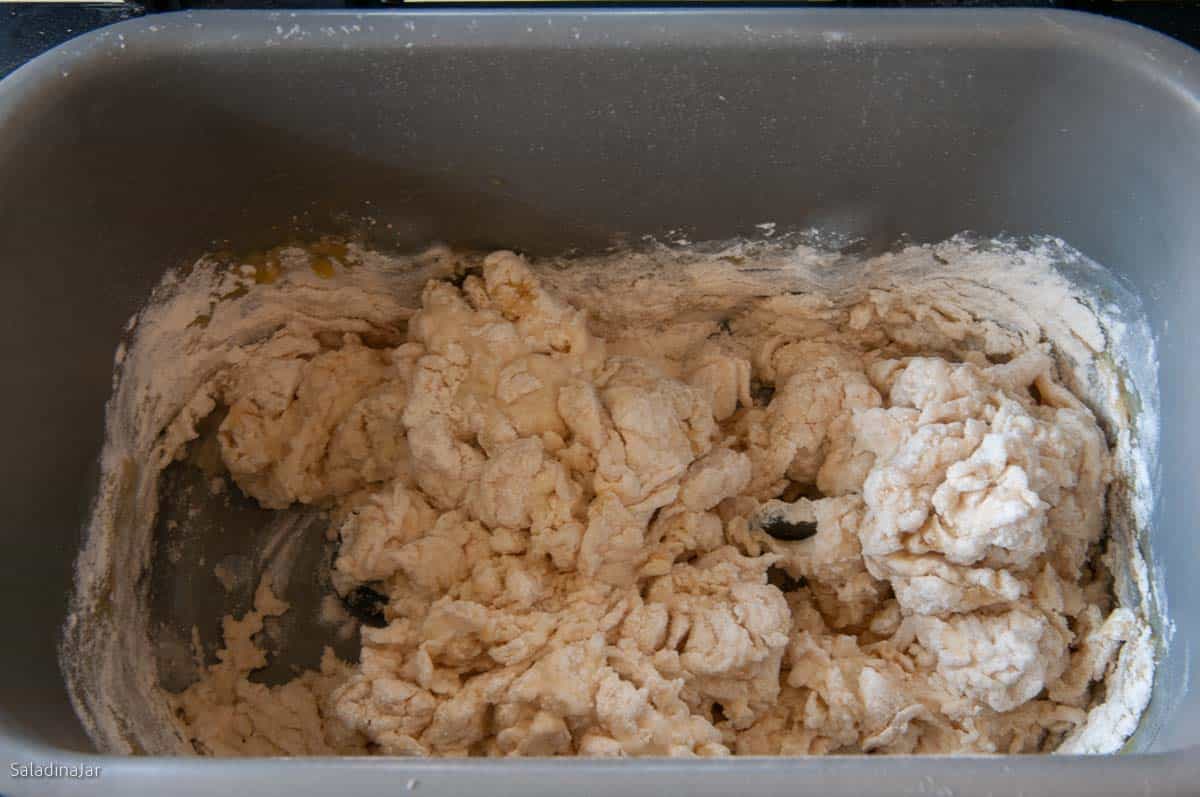
- Making the Dough:Place 1 cup (227 g) water, 3 tablespoon instant nonfat dry milk, 4 tablespoons (52 g) olive oil, 1½ teaspoon table or sea salt, 1½ tablespoons granulated sugar, 3 cups (360 g) all-purpose unbleached flour, and 1½ teaspoons instant yeast into the bread machine pan.Select the DOUGH cycle, then START.
- Check the Dough: During the first minute, lift the lid and take a peek. Check to see if the paddles are correctly engaged. The dough should start to clump immediately.Recheck the consistency of the dough 15 minutes into the DOUGH cycle.If your dough is too wet, add flour one tablespoon at a time. The dough should stick to the side, then pull away cleanly.Conversely, if the dough is too dry, add 1+ tablespoons of water until the dough looks just right. Learn more about this surprising secret to success with a bread machine here.
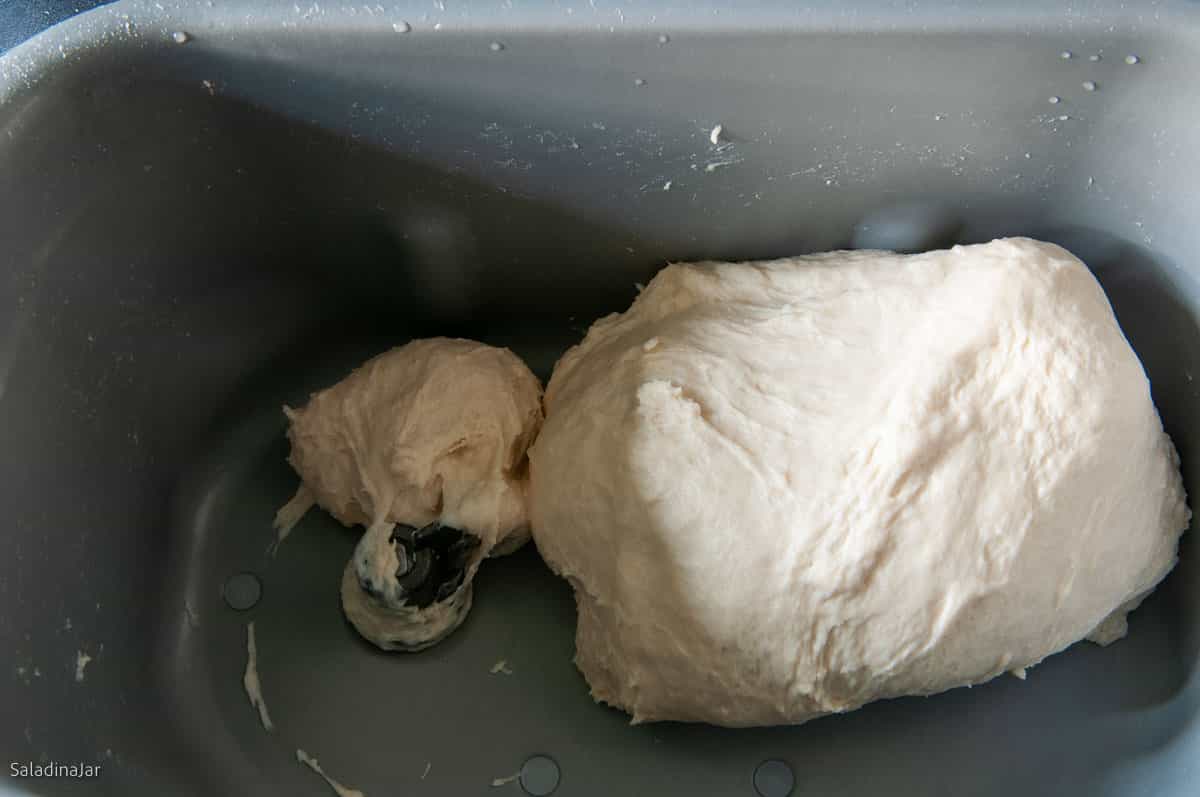
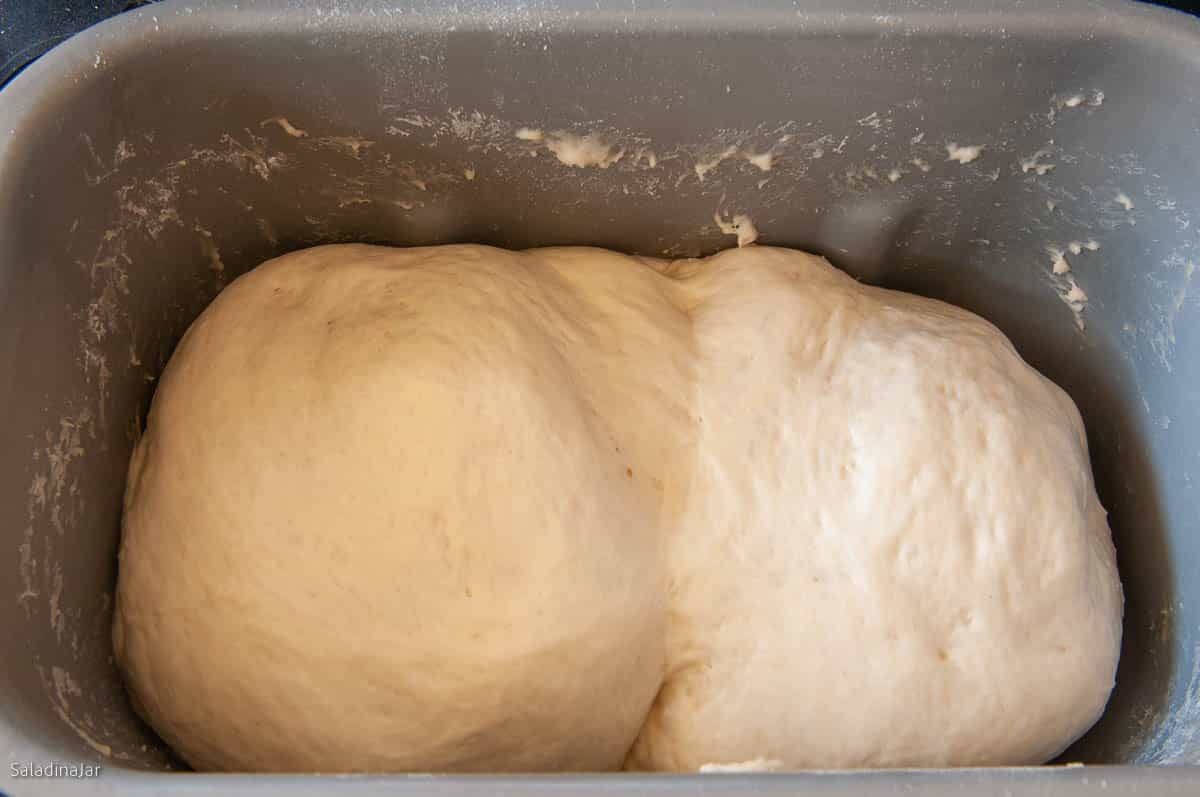
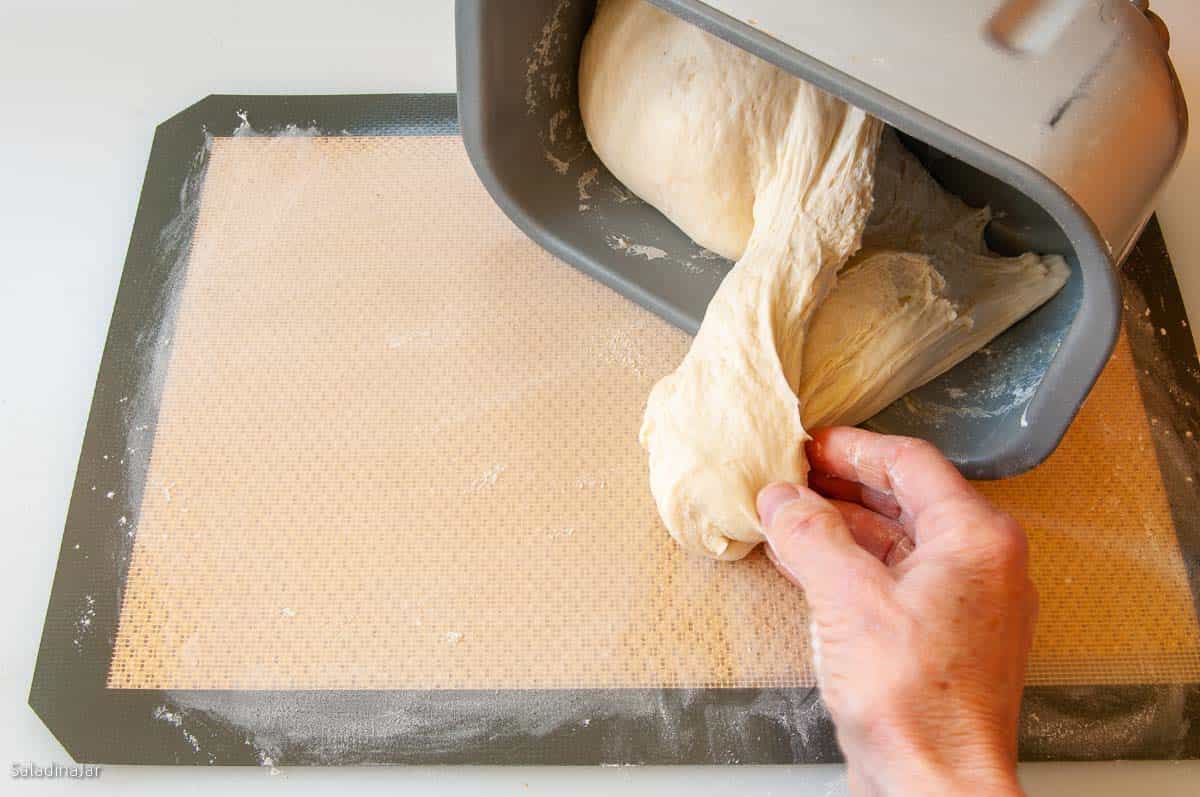
- End of DOUGH cycle: The dough should be doubled. If not, give it more rise time until it is. Restart the DOUGH cycle and knead for 1 minute to deflate the dough. Stop the machine and turn the dough out onto a lightly floured surface, shape into a smooth ball, cover, and let rest for 10 minutes.
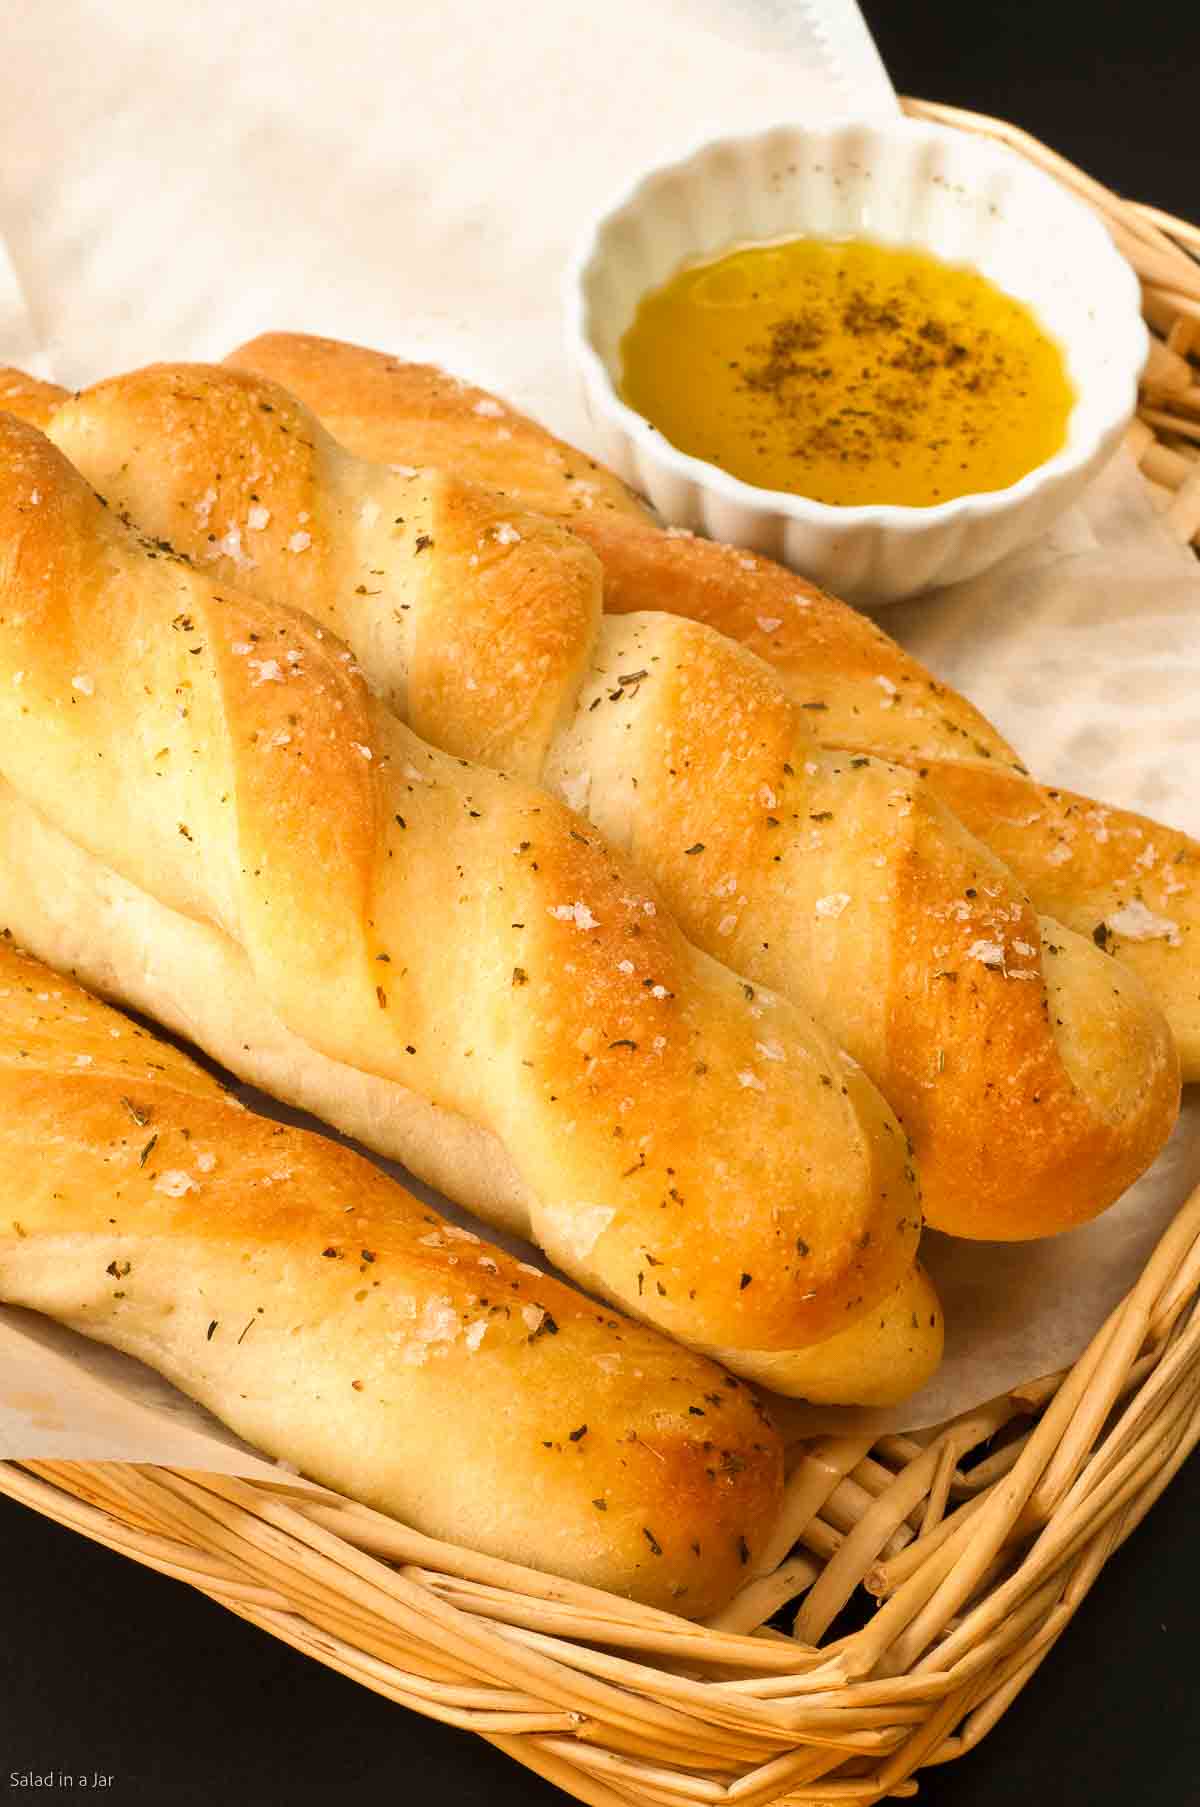
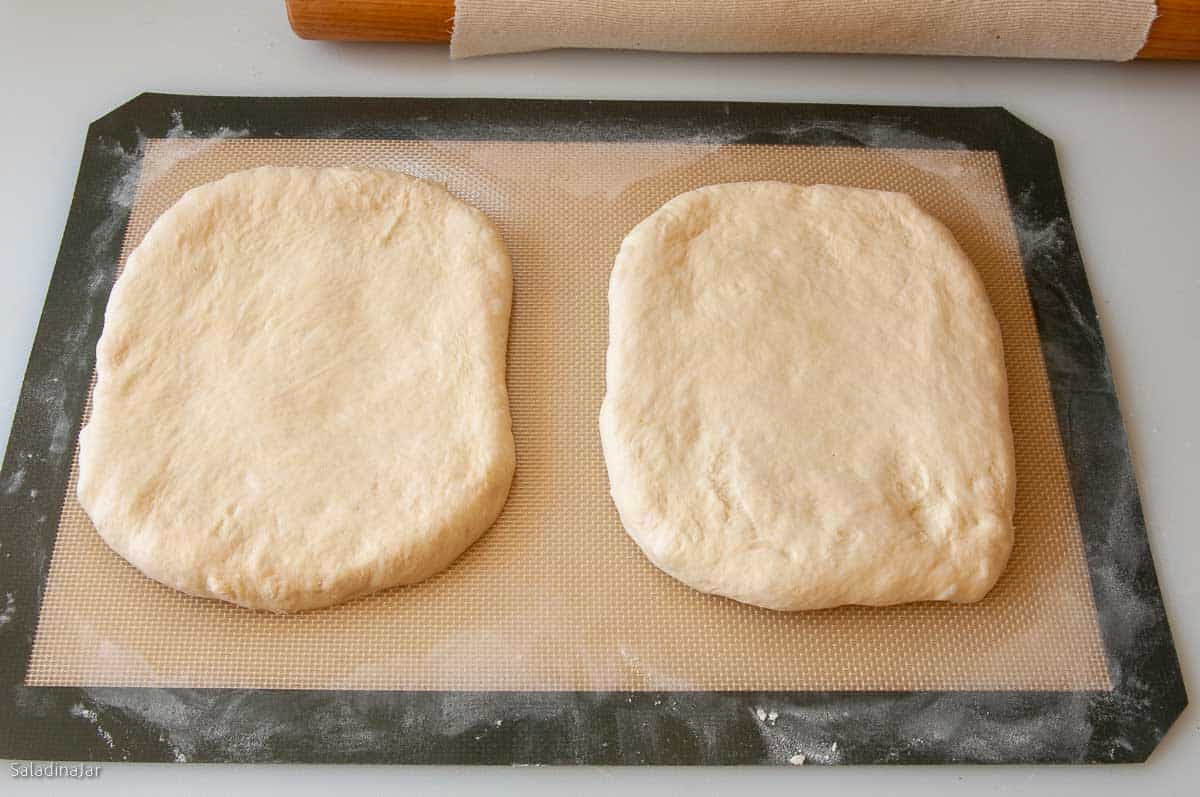
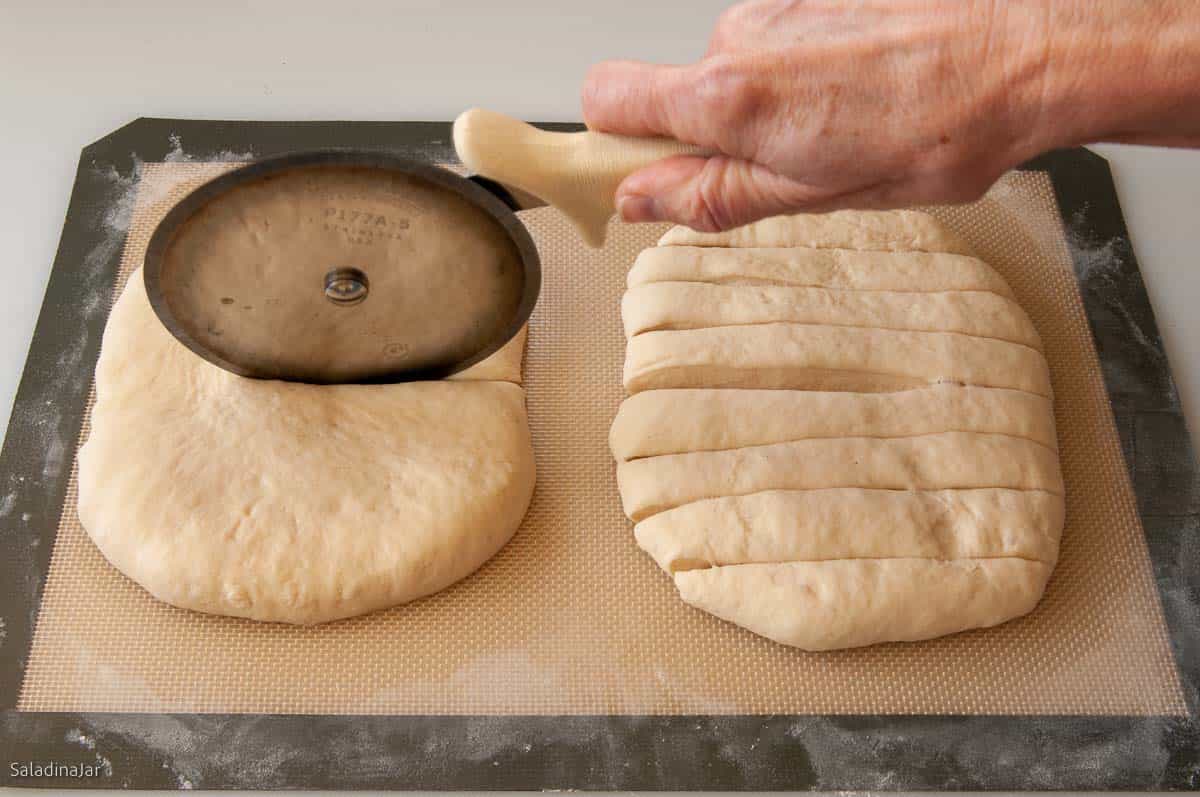
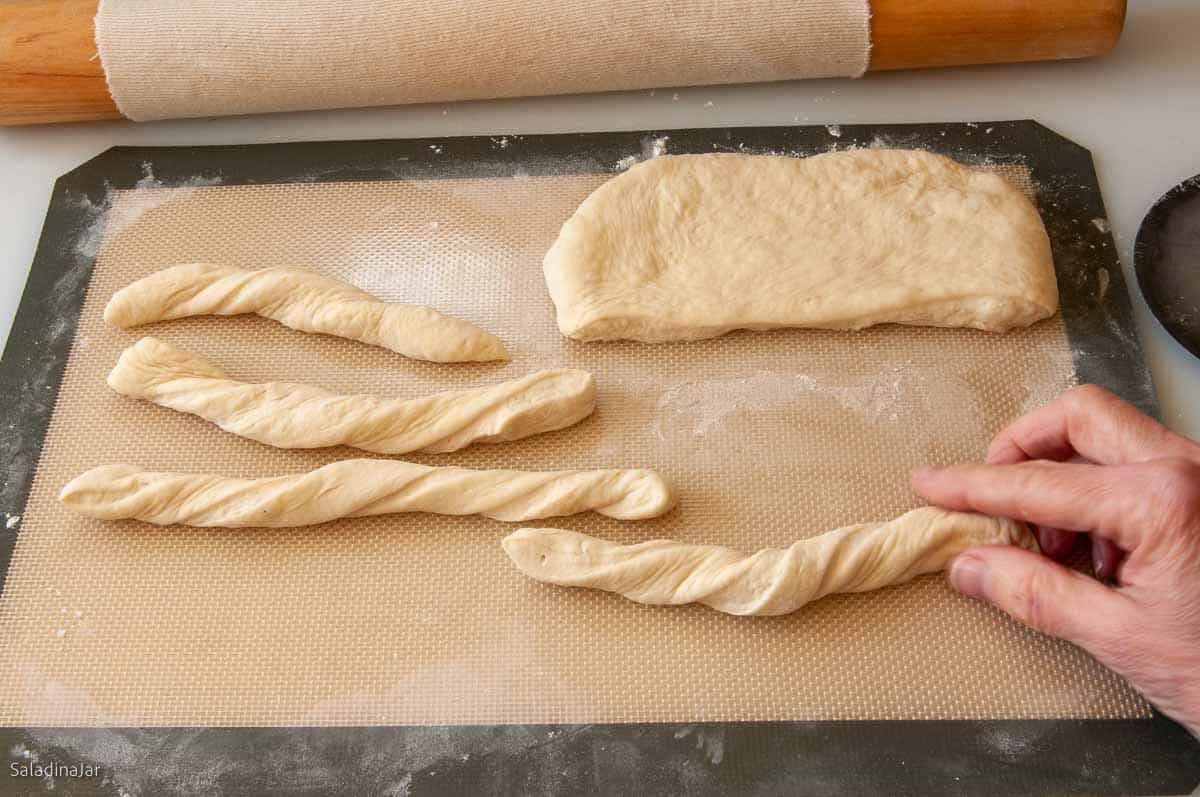
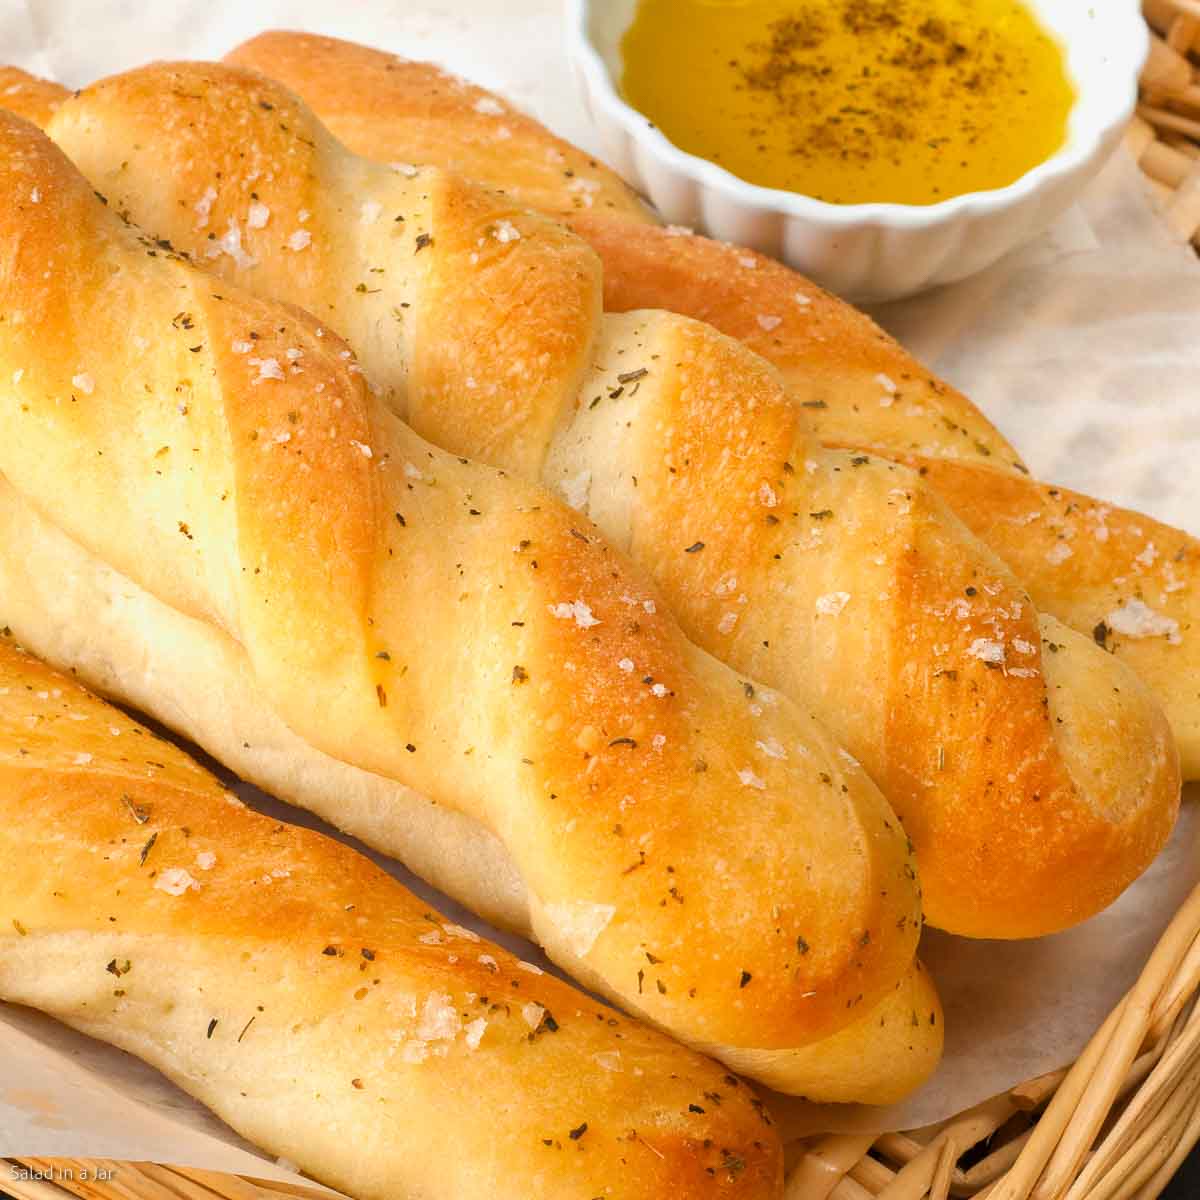
- Shaping the dough: Divide the dough in half and shape it into two balls. Roll out each ball into a 7 x 9-inch rectangle. Let the dough rest for 10-15 minutes. Cut the dough into 8 strips with a knife or a pizza cutter. Leave the strips straight for a classic look or twist them (hides shaping irregularities) as shown in the pictures in the post. If they resist twisting, let them rest for a few minutes, and try again.
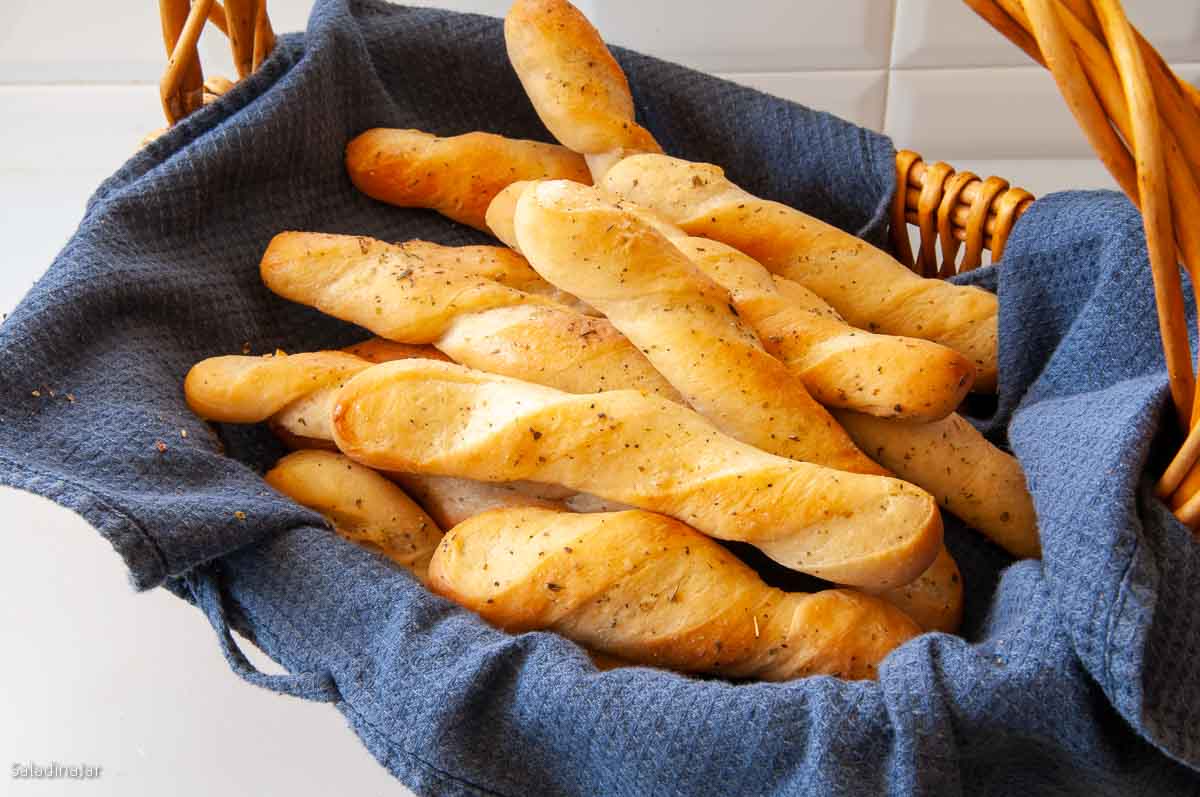
- Second Rise: Cover the strips with a tea towel. Let them rise until puffy and almost double in size.
- Preheat oven to 500˚F (260˚C).
- Glaze: Meanwhile, mix the ingredients for the glaze of your choice. When the breadsticks are ready to bake, brush them with the glaze. Sprinkle with Kosher or sea salt.
- Bake: Turn the oven back to 475˚F (241˚C) and bake for 7-9 minutes or until golden brown. You may need to rotate the tray halfway through for more even browning. Watch your rolls carefully. At this high temperature, they can easily over bake if your oven is not calibrated correctly.
- Cool and Serve: Brush the breadsticks with butter immediately after the breadsticks come out of the oven. Serve warm.
Notes
- Don’t over-twist: 2-3 twists are plenty—any more, and they may unravel.
- Avoid thick strips: Thicker dough is more likely to untwist while rising.
- Press down if needed: If a twist won’t hold, press the whole strip gently with the palm of your hand to reinforce the shape.
- Let the dough rest: If the dough resists shaping, walk away for a few minutes. When you return, it’ll be easier to handle.
- Unbaked dough: Freeze after the DOUGH cycle or after shaping (before final rise). Defrost in the fridge overnight.
- Baked bread: Double-wrap and freeze up to one month. Reheat gently.
- Stand Mixer: Mix until moistened, then knead with a dough hook (speed 2–3) until smooth and elastic (5–10 minutes). Let rise, deflate, and shape as directed.
- By Hand: Mix to a shaggy dough, knead on a floured surface until smooth and elastic (10–20 minutes). Let rise, deflate, and shape as directed.
Equipment
Nutrition
All images and text ©️ Paula Rhodes for Salad in a Jar.com
Final Thoughts
If these breadsticks are too fussy for you, I recommend this extremely popular recipe for Crusty French Bread (Mixed in a Bread Machine). After baking the loaf, slice it down the middle the long way and use the garlic butter mixture to cover the inside cut edges. Toast under the broiler while you watch.
— Paula, Home Economist
Homemade Food Worth Sharing
Need help troubleshooting?
Email me: Paula at saladinajar.com — photos help!
✦ ✦ ✦

Looking forward to making these….I am a little confused by the typo in the instructions under Shaping the dough. Do you let the dough rest, then cut and twist? Then let the twisted strips rise? Thank you!
Hi Ginger,
Oh dear! I can see why you were confused. Thank you for writing. I have corrected the recipe so it should make sense now. I am also sending you an email.
I am an avid bread baker and these breadsticks are 10/10 fabulous every time.
Hi Ashley,
Thanks so much for your positive feedback. ??
What is the swap out measurement for real milk
Hi Zoe,
Substitute 1 cup of milk for 1 cup of water. Leave out the dried milk.
Paula, I want to make these for a dinner I’m in charge of at our clubhouse & I need 72. I would like to make them a few days/weeks ahead of time & freeze them. Will that work &, if so, how would you suggest reheating?
Hi Mary,
It’s so nice to hear from you. I have a post about how to make any kind of rolls (or breadsticks in this case) ahead of time. You might want to take a look at it.
It sounds like you want to go ahead and bake the rolls ahead of time. I suggest you parbake at a lower temperature (275-300˚F) and don’t let them get brown, but they should reach an internal temperature of 190˚F. After they cool, freeze them. Bake them straight out of the freezer at a much higher temperature like 425˚F. It won’t take long for them to thaw and brown. Be sure to brush them with butter both before and after baking or the crust may get too dry. I hope they turn out great.
These came out great and went over BIG for spaghetti night.
These are WAY better than the Olive Garden. Easy and delicious.
Thanks for sharing
Hi Fred,
I’m thrilled that your breadsticks were a hit. Sounds like that made you look good. Awesome! Thank you for taking the time to leave a comment.
Hi Sara,
I have racked my brain for what is happening. Are you weighing your ingredients and using the tare button between each ingredient? Or are you using measuring cups? Normally, people who use measuring cups add too much flour. So I’m think you are weighing. Is there something wrong with your scales perhaps? I have made that recipe many times and I just went over it ingredient by ingredient to make sure there were no mistakes. This recipe is very similar to pizza dough. It shouldn’t be anywhere close to thin cake batter. I am stumped with the information you gave me. So sorry.
I make at least two to three loaves of bread at a time. My question is about freezing the bread dough before baking. How do I freeze the dough?
Hi Patricia,
I rarely freeze dough except for pizza dough. In my opinion, homemade bread dough doesn’t bake up as good after it has been frozen. Unlike frozen bread dough, you can purchase from the supermarket, it doesn’t have the same preservatives and dough conditioners. But if you want to try it, you can go two ways: 1. After you pull the dough out of the bread machine, press all the bubbles out. Form the dough into a ball and double-wrap it. When you’re ready to use it, let it thaw in the refrigerator. When thawed, shape as desired, let it rise a final time and bake. 2. After you pull the dough from the bread machine, press all the bubbles out. Shape the dough into a loaf or rolls. Immediately double-wrap and freeze. Thaw in the fridge. When the dough is puffy and risen, bake as usual.
Hope this helps.
Absolutely phenomenal. Great flavour.
Glad you liked them Jacqui. Thank you.
Could you half this recipe? I have two small boys and we could never eat this many breadsticks.
Hi Morgan,
Yes, you can halve this recipe. Your boys must be very small. My two boys could put these away by the time they were 8 or 10. Your boys will love them. By the way, homemade bread is a cheap way to fill up teenage boys. You’ve got some time to practice.?
I followed the recipe exactly as written. These turned out amazing! They were so soft on the inside. I am going to try this recipe as a French loaf shape tomorrow and see if it turns out just as good. Thank you for publishing this.
Hi Kristina,
You’re welcome. Glad you enjoyed them. Let me know how they turn out as a French loaf.
Turned out delicious !!
Really great recipe! Super easy & delicious. My husband was so happy and requested I make them again soon.
One opportunity for improvement: I was reading the directions and adding the ingredients in order, as specified. The last line of step 1 read ‘reserve 1/4 cup water’ but I had already added the full 1 cup, as suggested by the directions before that. In the list of ingredients, instead of 1 cup water, maybe you could list as ‘1 cup water, divided into 3/4 cup and 1/4 cup’ to alert cooks that there is a direction somewhere to use the split. Thank you.
Hi Denise,
I’m thrilled that your husband liked the rolls. High five!!
A big thanks for writing about the confusing directions. I have corrected that by deleting that instruction to save back any water. It’s easier to adjust the moisture level later than to try to remember not to add it originally or add it later. If the dough is too wet, it’s easier to add some flour to make it right.
Great recipe turned out amazing! So soft and everyone loved them! Used half and half as my milk. Beautiful and delicious! Bread machine did most of the work. Thanks for sharing.
I tried to view the pictures but could not. I took off privacy mode, I went to the mobile side and I went to the desktop site but I cannot see the pictures. Not sure what’s up. So can you tell me if the breadsticks are touching like the dinner rolls do once they rise a second time? Thanks.
I’m sorry you can’t see the pictures. I will check it out. Meanwhile, it is hard to say if the rolls will touch because it depends on how tight you twist them and how long they are. The rolls should be nice and puffy. They might touch and they might not.
Well I am here yet again to leave 5 stars for these awesome sticks! I struggled a bit with the twist and confused myself on the water measurements, but a lil extra flour when I peaked fixed the problem. Despite my mistakes these babies were super DELISH!! I froze half and take what I need when needed and I think they actually taste better cause the flavor is sealed in??? Anyway Thanks, I’m making more today!I think I will maybe throw in a pic next!
Hi Teri,
Congrats on your delicious rolls. I’m so glad to hear the little peeking trick helped you recover.
I made these today and they were delicious.
Two things I noticed — 1. Where I am seems extremely dry so I had to add extra water to the recipe, and even then the dough came out a bit thick (this has been happening to all my recipes this winter). This made twisting a bit difficult.
And 2. I baked one batch on the middle rack of my oven, giving them a crispier outside, and I baked one batch on the top rack which gave a softer more even bake. Both were great, so this might be a good thing to note for anyone who has a preference for one over the other.
Hi Matthias,
It sounds like you’ve got the hang of adding more liquid or flour to your recipes as necessary. Weather affects bread more than many people give it credit. If you let the breadsticks rest (10-15 minutes?) after you cut them and before you try to twist them, it helps. Of course, you don’t have to twist them at all–just leave them straight.
Thank you for taking the time to write about your experience with baking your breadsticks. I’m sure other readers will find it helpful. Ovens can be so different from each other depending on the manufacturer, size, age, etc. You really have to know your oven.
These breadsticks are gorgeous. I froze half of them at the roll out stage took them out later and let them rise at room temperature before cooking. My family reckon the batch that had been frozen were even better than the unfrozen batch. Kids are even placing orders for them now
Thank you, Julia
That’s fantastic news. I’ve never tried freezing the unbaked sticks of dough so I’m glad to hear it works. Other readers will also be glad you took the time to share that tip with us.
Do I let the dough prove in the bread machine and then roll it out, cut it, and let the sticks prove until puffy? Or do I take the dough out as soon as it is mixed and only let it prove once I cut it into sticks?
Hi Amy,
Do the first thing you said. Let the dough prove in the bread machine. Then, roll it out, shape, and let rise until puffy before you bake in your conventional oven. Wish I could help you eat them.
I feel like you are missing baking instructions?
Hi Brigitte,
Sometimes, the instructions for a recipe disappear mysteriously. However, I just looked and I see them where they should be–after the ingredients. Sometimes there is an ad between them. Take another look and if you still can’t find them, let me know and I will email you the recipe by itself.