Make Cold-Start Yogurt Without Boiling Milk
Sneak Preview: Save time with the cold-start yogurt method—no boiling or cooling required. Just mix ultra-filtered milk with a starter and incubate. Works in an Instant Pot or any warm setting.
This post contains affiliate links. As an Amazon Associate, I earn from qualifying purchases at no extra cost to you.
Are you overwhelmed with the idea of heat and cooling milk to make yogurt? Here’s an easier way.
Cold-start yogurt skips the boiling step, making it faster and easier than traditional yogurt. All you need is ultra-filtered milk (like Fairlife) and a small amount of starter. Incubate until set, chill, and enjoy.
What Is Cold-Start Yogurt?
Instead of heating milk first, this method starts with cold ultra-filtered milk, saving at least 90 minutes.
⚠️ Important: Regular, organic, or plain ultra-pasteurized milk will not always set. Look for milk labeled ultra-filtered.
That’s it—no thermometer, no cooling stage, just mix and incubate.
Choosing the Right Milk
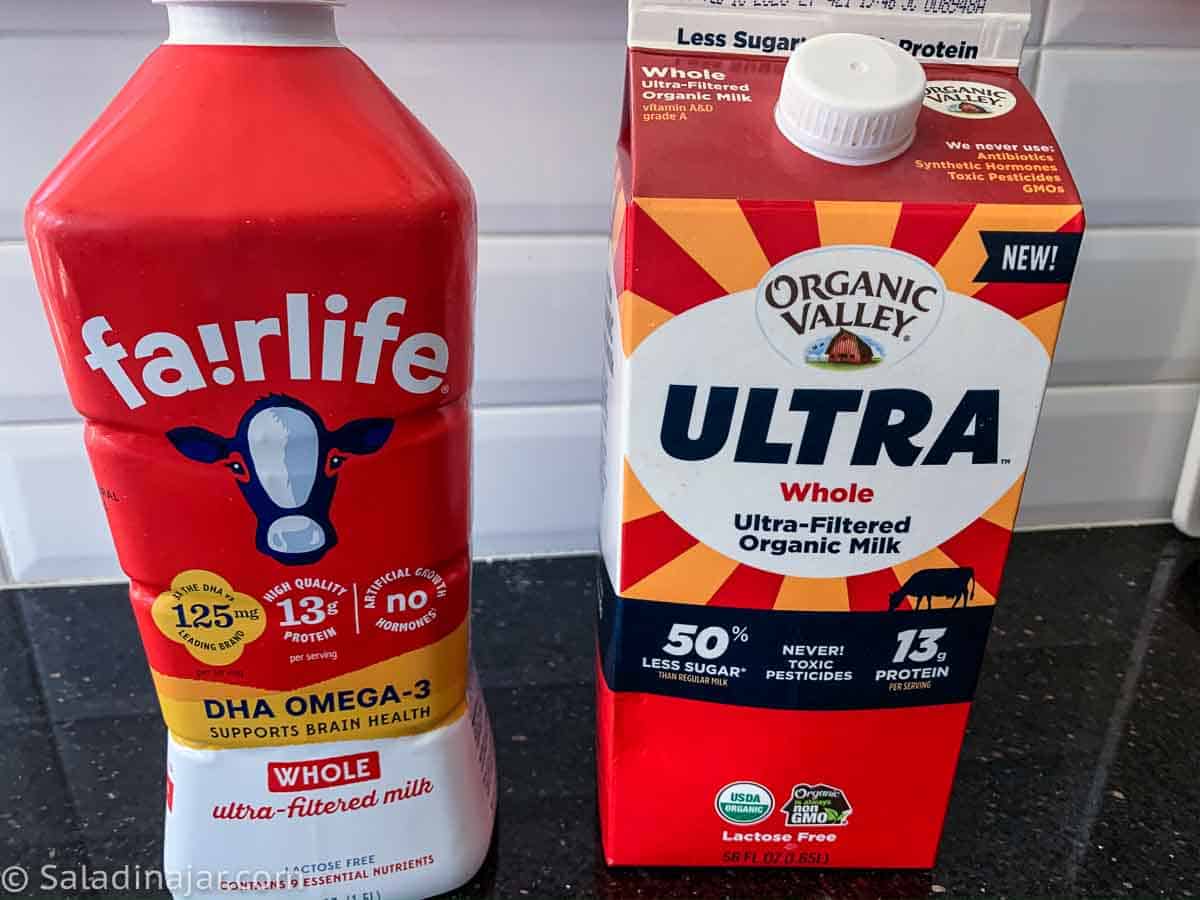
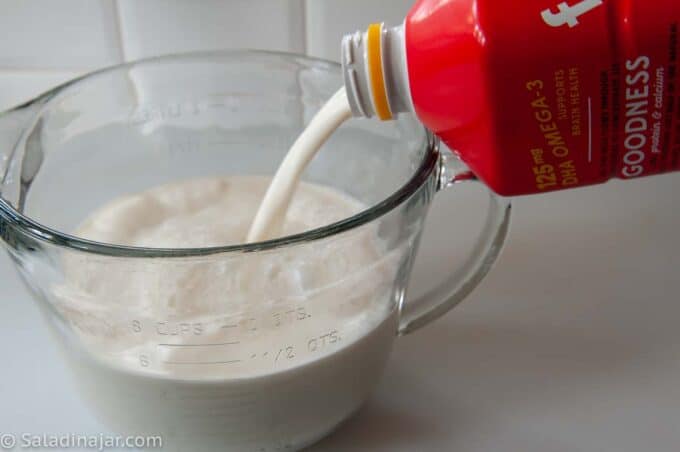
For cold-start yogurt, ultra-filtered milk is non-negotiable. Brands like Fairlife or Organic Valley Ultra work well.
**Some cartons may also say ultra-pasteurized—that’s fine as long as the label also says ultra-filtered. If your yogurt doesn’t set, switch brands.
Preparing the Starter
Use any of these:
- A spoonful of plain store-bought yogurt with live cultures
- Homemade yogurt from a previous batch
- Freeze-dried starter (follow package directions)
How to prepare starter:
Cold-Start Yogurt Without an Instant Pot

Cold-Start Yogurt With an Instant Pot

Note: The Instant Pot does not use pressure for this process.
Cold Start Yogurt Recipe
Video
Ingredients
- 1 liter (1031 g) ultra-filtered whole milk or use 2% or non-fat ultra-filtered milk
- 1 tablespoon unflavored yogurt homemade or storebought
Instructions
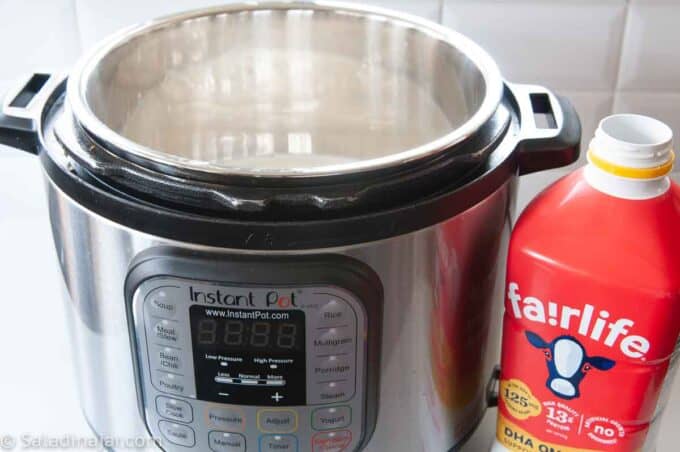
- Pour 1 liter (1031 g) ultra-filtered whole milk into an Instant Pot or a large bowl.
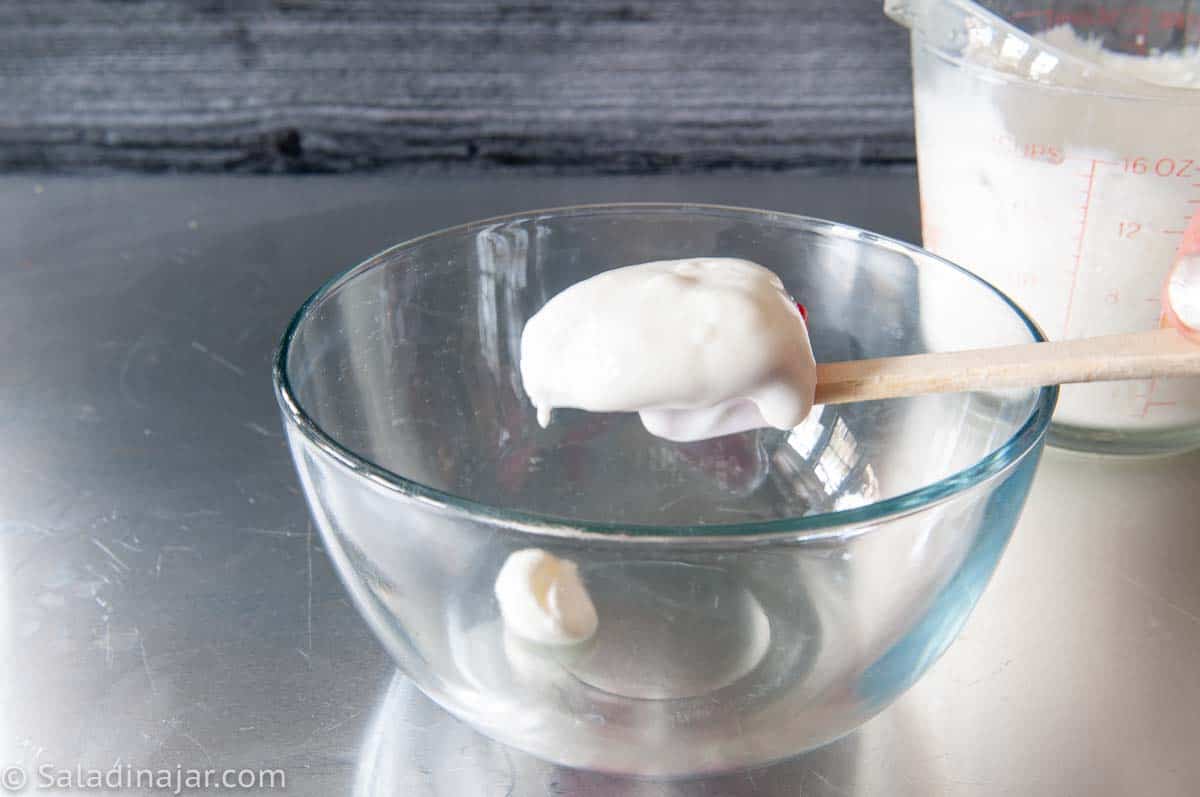
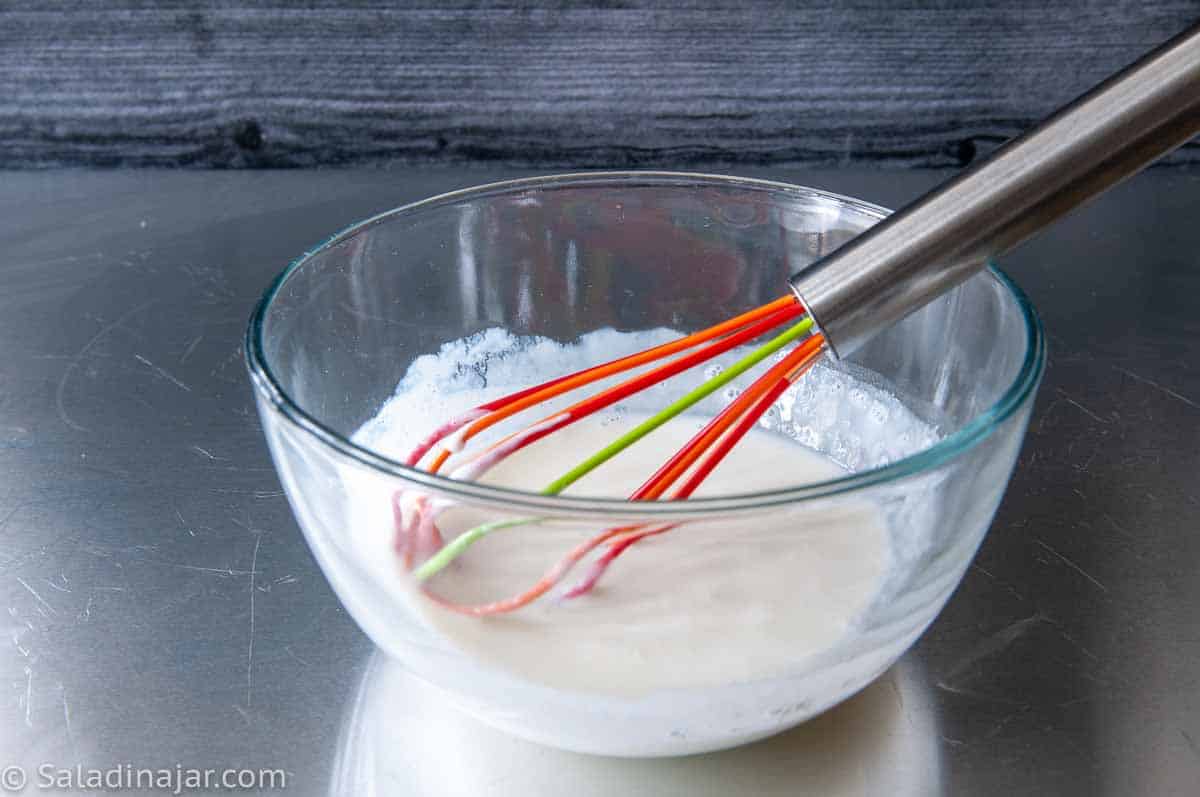
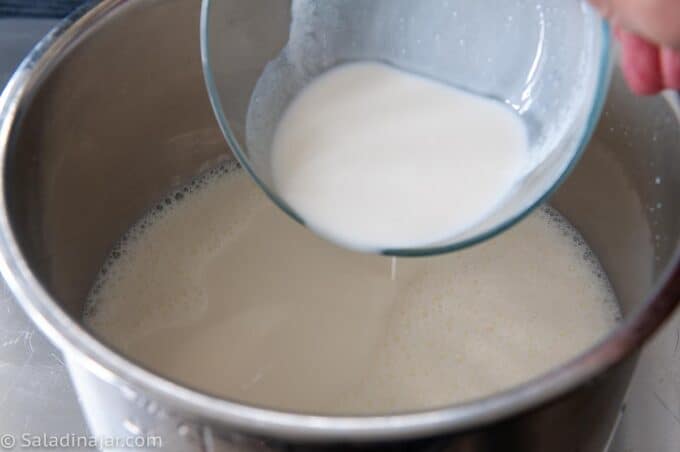
- Whisk a small amount of cold milk into 1 tablespoon unflavored yogurt until it is smooth.
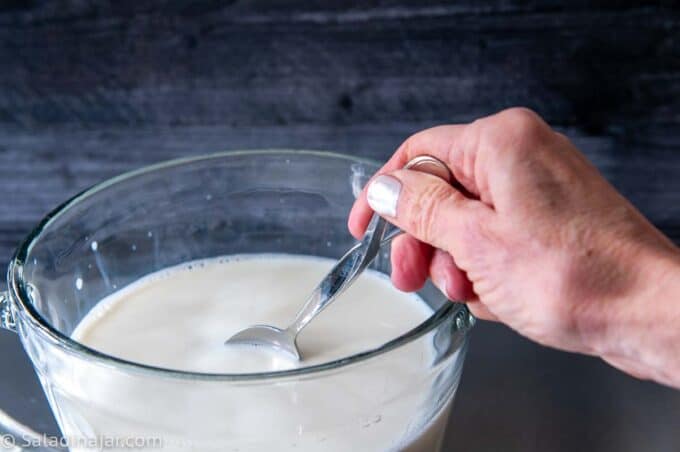
- Stir thinned "starter" into the milk.
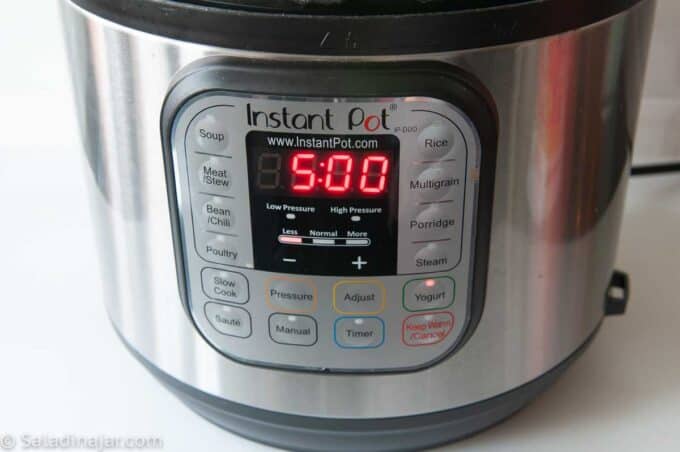
- If using an Instant Pot, position the lid on top and push the Yogurt button. Time should be 5-9 hours according to the level of tartness you prefer. If you are doing overnight, set the pot to finish when you wake up.
Incubate
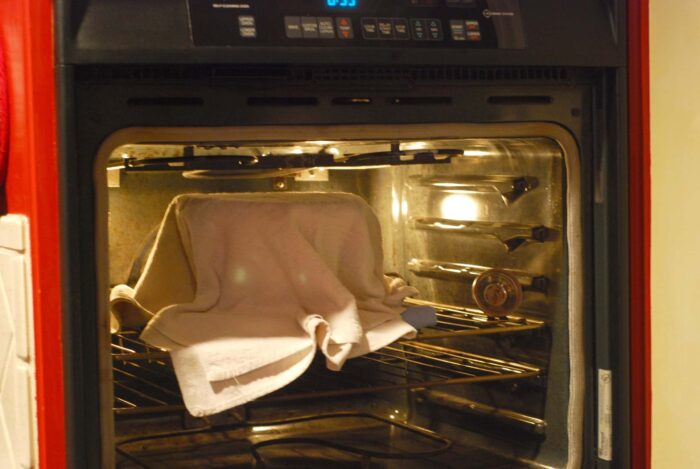
- If using a bowl, place the pitcher in a warm environment. Keep the temperature at a constant 100-110˚F level.
- Instant Pot: Use “Yogurt” mode for 5-9 hours.Without Instant Pot: Keep at 100-105°F for at least 5 hours.
- Check consistency—yogurt should hold its shape when spooned.
- Chill for at least 2 hours before eating.
For Greek yogurt:
- Strain the finished yogurt for 1-2 hours.
Notes
Equipment
Nutrition
All images and text ©️ Paula Rhodes for SaladinaJar.com
Frequently Asked Questions
- What is ultra-filtered milk?
- Milk that’s been filtered to remove some water and lactose, leaving more protein and nutrients.
- Can I use ultra-pasteurized milk?
- Sometimes. If your yogurt doesn’t set, switch brands. Ultra-filtered is the reliable choice.
- Does this method produce higher-protein yogurt?
- Yes. Ultra-filtered milk naturally has more protein, so the yogurt is thicker.
- How can I make Greek yogurt?
- Strain finished yogurt for 1–2 hours to remove whey.
- How long does cold-start yogurt last?
- Up to 2 weeks in the fridge.
Final Thoughts
Cold-start yogurt is all about simplicity—no boiling, no cooling, just milk, starter, and time. If you’d like to explore more, see my step-by-step guide to traditional yogurt or check out these troubleshooting tips if your yogurt won’t set. If you are wondering which method you should try, I wrote this post for you.
Need help troubleshooting? Email me: Paula at saladinajar.com—photos welcome!

I don’t understand why you say ultra-pasteurized milk won’t culture. From what I’ve seen, most milk in cardboard half-gallons is ultra-pasteurized. I make my lactose-free yogurt every week or so from ultra-pasteurized milk, using the cold-start method. The ultra-pasteurization process tempers the proteins just like heating regular milk to 180 degrees.
Other than this quibble, I love your site.
I routinely make cold start yogurt and have used frozen samples of yogurt as starters. I noticed that the texture is too fluffy. I have been keeping it in a proofing box at 108 for almost 10 hours. Not sure why it takes so long. Could it be because the yogurt starter was frozen? Should I divide the yogurt into smaller jars instead of using one big bowl? Maybe Incan then lower the temperature and ferment for less time?
Yes, Linda—both things you mentioned can play a role. Frozen starter works, but it’s often slower and can give you that fluffy texture. And 108°F is pretty warm for cold-start yogurt, which doesn’t always help it set faster.
Try dropping the temp closer to 100–104°F, splitting the milk into smaller jars, and checking earlier. Most cold-start batches don’t need a full 10 hours. Using fresh yogurt as a starter can also make a big difference.
Hope this helps.
Hi Paula,
Just wondering, is it okay to not strain the (Greek) yogurt, seems like an unnecessary step to me? I don’t mind having whey in my yogurt, even if it makes for a slightly less thick final product. I’d appreciate your thoughts. THANKS!
Hi John,
It is absolutely OK not to strain the yogurt. Straining is what makes it “Greek yogurt,” but since you made it, you get to do whatever you like.
Hi Paula, great tips for cold start yogurt. I have been using Fairlife whole milk 52oz with 5oz Chobani greek yogurt with live culture, I love the taste of yogurt. I have a question if can use Belle-Bella culture powder with Fairlife whole milk cold start.
Thanks.
Hi Sean,
Great to hear from you. I am unfamiliar with the Belle-Bella culture powder so I looked it up. They say it works with cow’s milk so I don’t see why it wouldn’t work. If you try it, please come back and tell us how it went.
As always, excellent recipes and advice!
Thank you!!!
Can you freeze cold start or heat started yogurt?
Hi Kris,
When you freeze yogurt, no matter how it’s made, it will change the texture. It’s OK for baking or pancakes, but not so nice for eating out of a bowl.
Great recipe, I’m so glad to have found your site you have answered lots of questions I’ve had since starting to make my own Greek style yogurt a few weeks ago. Thank you. I’m using an Instapot without a yogurt setting, and after trying several methods of incubation I tried the Sous Vide function and find it works well for me since I like to just make a big batch instead of making individual cups. I pour cold ultra pasteurized milk into the container, select sous vide for 6 hours at 105*, when pot beeps check that the temp is actually at 105, mix in starter, close pot and voila, yogurt in 6 hours.
Karin, If it works for you, keep doing it.
Also, I might add that I am spending an incredible amount on yogurt (skyr actually) since my husband has replaced his daily ice cream with it. So, no matter how much ultra filtered milk cost it doesn’t come close to the $2 a serving skyr that we are eating now. I do love the skyr. But, I’m hoping this might be a good replacement after a bit of straining and flavoring. Hub won’t eat plain. He wants it to be dessert.
Hi Margie,
Thank you for the 5-star ratings. Yes, indeed, this method is easier. It should make wonderful skyr if you strain it enough.
I have just started my first batch. I’m using a sous vide bath to incubate the yogurt. If this works for me and I like the flavor, texture, etc. I am going to be so thrilled! I hate the heating up and cooling down process. It’s just soooo boring. I was able to put my jars in to incubate within about 5 minutes from time I started the process. Now, all I have to do is forget about it until this evening and see how it turns out. I’m going to have to give this recipe 5 stars just for the lack of effort involved!
Hi Paula,
I’ve made my yogurt exactly as you’ve stated, however went back to the 180° method due to cost. A half gallon of the Fairlife milk is now $5.00 a Half-Gallon!! I can make an entire gallon for $1.65 if I use the saute button on my Instant Pot, just check the temperature now and again. I also add 1/4 cup dry powder milk to give extra thickness and creaminess.
Your recipes are great and enjoy reading your articles. Thank you for your time and efforts!
Cathy
How kind of you to write this. So glad you’ve found your preferred method for making yogurt. That is my goal for everybody–to find a way to make yogurt that fits your budget, your schedule, your taste preferences, and your kitchen. Great job!
I love this cold start method and make Greek yogurt all the time. Here’s a pro tip:
Instead of straining the yogurt to get it thick, add powdered milk to the ultra filtered milk. The thicker you want it the more powdered milk you add! To start off I suggest adding 1/2 cup powdered milk to 4 cups of milk. That will result in a moderately thick end product.
Hi Kathy,
I’m so glad you added your advice to the comments. I have people asking me about adding powdered milk quite frequently. Since I’m not a fan of powdered milk (childhood hangup), I can’t speak from experience. But your advice sounds good. Thanks so much for taking the time to write it down.
It doesn’t have to be a filtered milk. I’m using ultra pasteurized (called long life in UK) milk and it’s perfectly fine. I live in UK and there is no filtered long life milk in the market here. I’m keep wondering why some many people repeat this false information. Maybe because Fairlife is owned by Coca-Cola company, and obviously they want to increase their sale.
Hi Joanna,
Thank you for taking the time to write. I have never tried the ultra-pasterurized milk in the UK so can’t speak to that. If it works to your satisfaction, keep doing it. Absolutely! For me, the ultra-pasteurized milk available to me makes yogurt that is too thin. But the beauty of making your own yogurt is that you get to use whatever works for you and is available where you live. Happy yogurt-eating!
I was wondering why not add powdered milk to your regular milk instead of buying ultra fine milk? If it’s just a matter of more protein seems like that could work…of course it might not save you any money and powered milk needs a LOT of stirring for best results so it might not be worth it. But do you think it would work?
Hi Esther,
You are my kind of friend–always thinking and asking questions to find a better way. I don’t know if it would work. I’ve never tried it. But I hope you will, then let me know. For me, I don’t like the taste of powdered milk. However, my experience on this website tells me that many people don’t mind it at all.
I look forward to hearing how your experiment turns out.
I got sick from the cold start yogurt. Maybe it’s because I put honey in before it incubates, or possibly from an unsterilized utensil (the pot was sterilized), but I won’t try it again. My regular yogurt from milk brought to 180 degrees takes a little more time, but I don’t have to worry about it. When I’ve tried to add sweetener before incubating, the yogurt thins down or gets gluey. I usually use 1 or 2% milk, pasteurized or ultra and then I strain it to get a thicker, Greek yogurt. The Fairlife is double the price and I eat so much yogurt, I didn’t want to spring for it.
Hi Penny,
As you have illustrated, the cold start method is not for everybody. I agree that the milk is more expensive and the regular method is not that much more trouble. I’m so sorry you got sick. I never put sweeteners into my milk before making it into yogurt and wouldn’t recommend it to other home yogurt makers although I can’t say for sure that the honey was responsible for making you sick.
Hope you are feeling better now. Thanks so much for writing.
Paula,
Two questions:
#1: I am wondering if there is any way to tell what the sugar content is in a batch of homemade yogurt? I am assuming the cold start method would produce less sugar because the ultra filtered milk already has less sugar and more protein. Regardless, I am still looking for a more exact number if that is possible? I ask due to a medical condition. I spend extra money on specialty foods, low-sugar(2g) yogurt being one of them, and I would love to save some money and make some healthier homemade yogurt in the process if that’s possible.
#2: I saw on your website that you also make bread. I would also love to produce a gluten-free (gf) bread without yeast but I haven’t been successful thus far. Wondering if you had any experience with yeast-free options? GF bread baking in general is different, but manageable. I just can’t make it look and taste like normal bread with the baking soda method. I know it’s possible because I spend almost $7 a loaf to buy from a baker out of FL called Sami’s Bakery. They are the only place that I know that produces GF and yeast-free bread that taste normal.
I realize I am asking a lot but it seems like you have accumulated a lot of knowledge and experience and I will appreciate any knowledge you can provide!!!
Hi Bethany, Nice to hear from you.
Re: #1–The amount of sugar in your yogurt would be roughly the same as in the milk (and starter) that you use. I’m guessing the only way to know for sure is to have a lab analyze it for you. If you strain your yogurt to make Greek yogurt, some of the sugar will be in the whey that you strain off. I have no idea what the specific amount would be.
Re: #2–I have tried several GF bread recipes and not one of them was edible in my opinion, so I’m afraid I can be of no help. Several websites out there specialize in GF bread–perhaps you could reach out to one of them.
Sorry, I cannot be more helpful.
Hey Paula, my cold starts still are working out when I use a Tbsp of yogurt as a starter per quart. But I’m not a Greek yogurt fan, so do you know why my yogurt turns out quite thick, like Greek? It happens even if I use regular yogurt for a stater. I incubate 8.5 hours. Thanks.
Hi Jimmy,
Congrats on your yogurt. This is the first time I’ve ever had anybody complain about it being too thick. :-). You could just add some regular milk to your yogurt to thin it down a bit. Also, I only incubate for about 4-5 hours but it’s still thick. Still, you could try incubating for less time.
I thought I’d mention that, after a series of good and poor results with CFL starters, I just use a tablespoon/quart of plain yogurt as my starter. Works perfectly and actually is cheaper, even though I just pitch the plain yogurt when I’m done. I think CFL starters are inconsistent and probably handled poorly during shipping.
Hi Jimmy,
I say do whatever works for you. I like the CFL starters but if they don’t work for you, yogurt from the store works.
Hey, Paula, have made cold start with 2% Fairlife? Thanks.
Yes. It’s good.
Oh, I should mention that CFL contains one strain that Yogourmet does not: Bifidobacterium lactis.
FYI, I had my first failure of a cold start yogurt. However, the reason seems to be that I tried a different packaged, starter culture: Yogourmet. I had used it to make yogurt with the traditional hot-start method in my Instant Pot, and it turned out fine, but closer to Greek than the CFL-based varieties. I don’t believe that any of the commercial starter outfits suggest cold start, regardless of whether a given variety works.
Hi Jimmy,
I have used the packaged starter culture with the Cold Start method several times. HOWEVER, it was not the first generation. The first generation is usually thin no matter what method you use. The more you use it, the thicker it gets. Was it the first batch with that particular culture?
An interesting note about the bacteria in CFL.
Yep, you’re right! The yogurt I made in jars came out perfectly. I mixed a pack of Cultures for Life Traditional starter in a quart of Fairlife whole milk, and then poured about 6 oz. of the milk in 6, 8-oz. jars. I added a cup of water to my Instant Pot and incubated for 8 1/2 hours. For me, the CFL starters are the way to go. As I don’t eat a lot of yogurt, the CFL is as economic as using a plain yogurt starter, as I’d probably get only one starter portion out of a store-bought yogurt. My homemade is better than any of the premium yogurts I’ve had, and I sweeten mine with homemade fruit syrups/jams or date/maple/agave syrup/honey. Thanks for the advice!
Awesome!! Love hearing the success stories.
Hi, Paula. After that first failure with the Cultures for Life Traditional starter, which I bought from Amazon, I tried again with a pack that I purchased from CFL. I used a quart of Darigold Fit ultra-pasteurized whole milk. It turned out perfectly! While it was creamy and on the thick side, I would have strained it if I preferred Greek yogurt, which I don’t. So, it seems that the first starter was bad, probably the result of mishandling by the Amazon merchant. I’ll have to try making it in jars next time. Thanks!
Hi Jimmy, Good to hear your yogurt turned out good. I’m betting it will work fine in jars if that’s your preference.
I checked the website. It looks like Darigold Fit is not only ultra-pasteurized, but also ultra-filtered. In case other readers are reading this comment, I just want to make that clear. The cold-start method doesn’t usually work with milk that is only ultra-pasteurized. Perhaps I should say–it has never worked for me.
Paula, have you tried making yogurt in an instant pot according to the company’s instructions? My 3 qt iPot has instructions for a “Yogurt “ setting, but it seems to bring it to a boil.
Hi Bonnie,
Bringing milk to a boil is the traditional way to make yogurt. It is necessary when using regular milk. The Instant Pot manual assumes that’s the kind of milk you will use.
However, if you purchase ultra-filtered milk, you do not have to boil it first because it has more protein available to begin with. Regular milk should be boiled to rearrange the protein strands in the milk so it will coagulate easily and make a thicker yogurt. I hope this answers your question. Happy yogurt-eating.
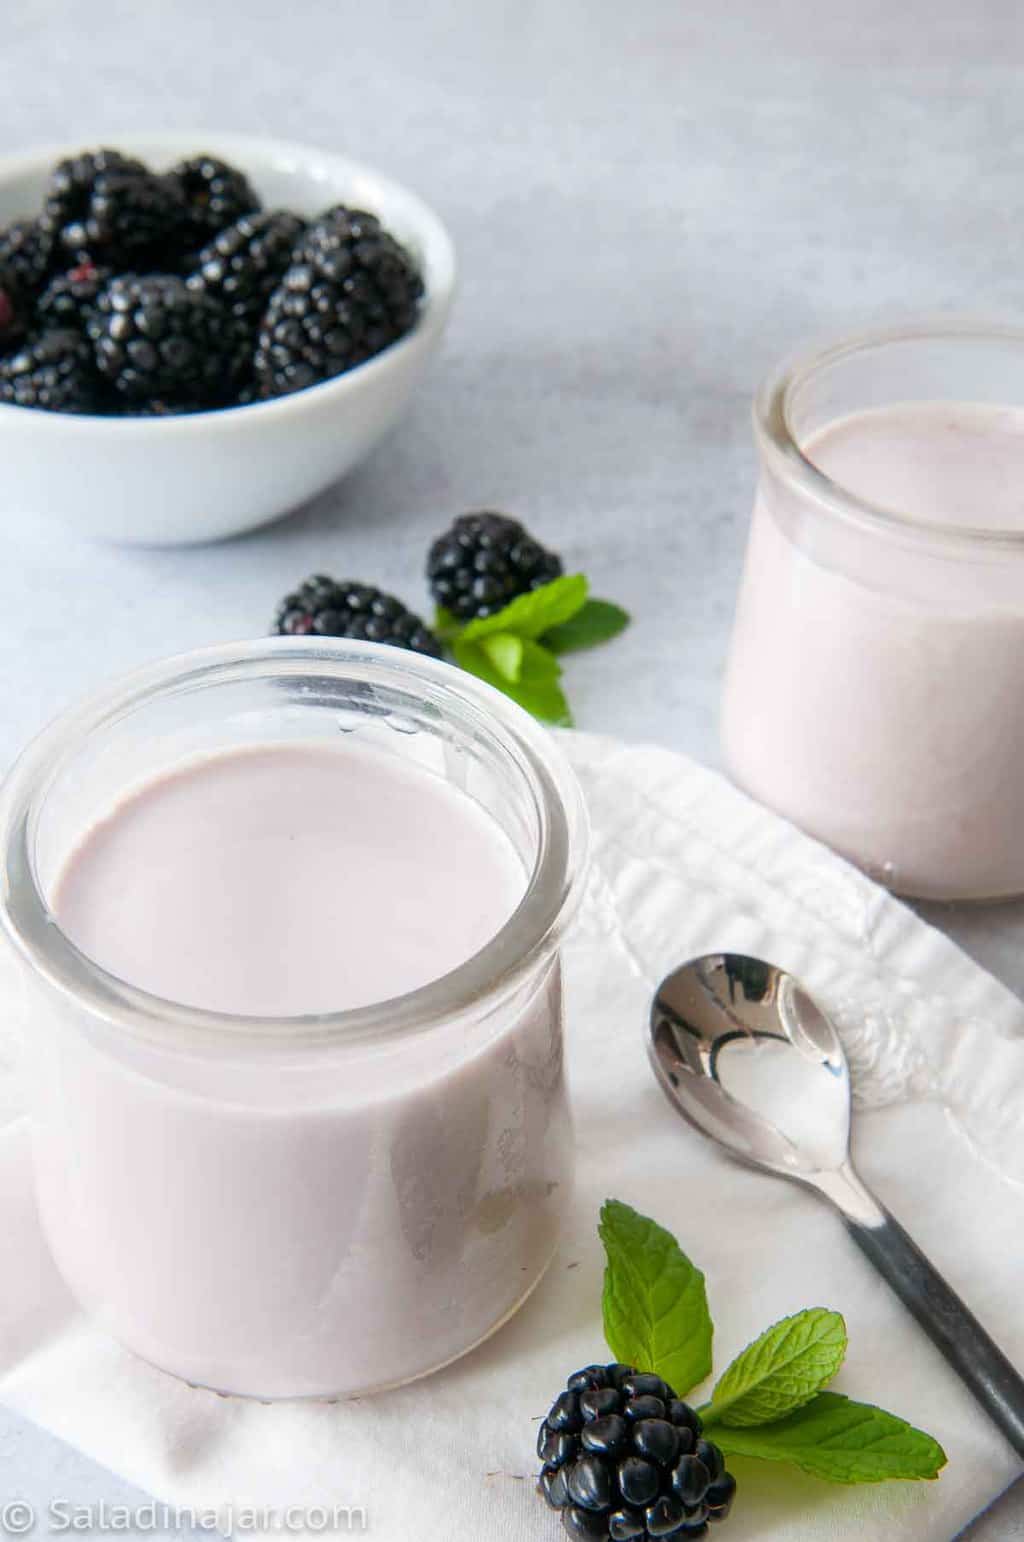
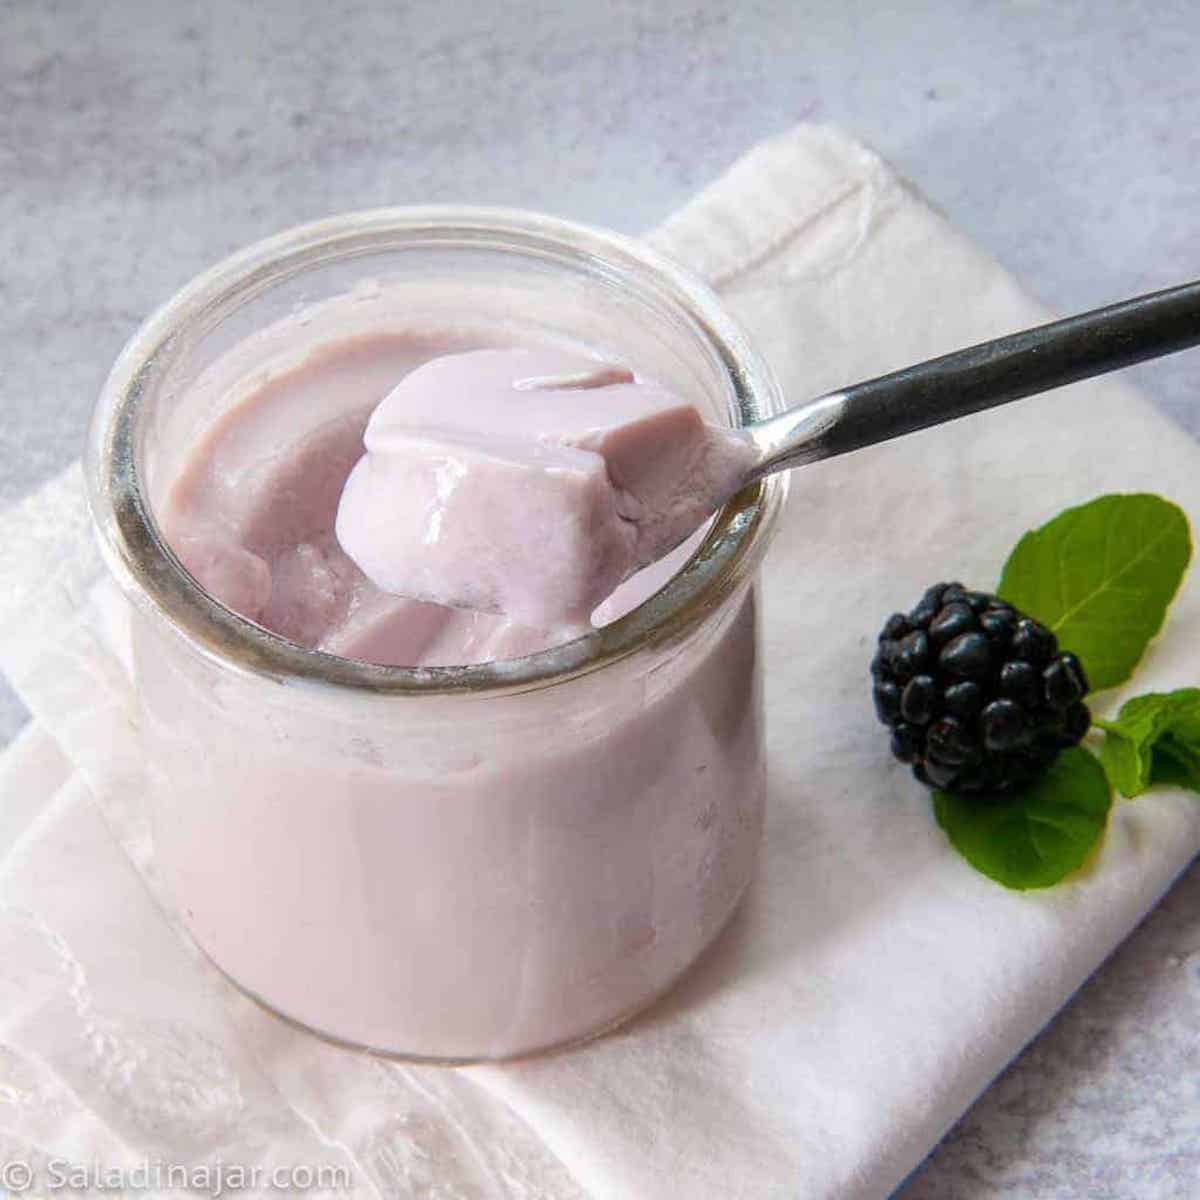
Your yogurt looks like it’s flavored with fruit, but I don’t see in the instructions when you do that. Can you please give pointers on berry flavored yogurt without just adding a compote at the end? Thank you!
Hi May,
You are very observant. The yogurt in the picture was flavored with grape juice concentrate. When using the cold start method and when I’m not planning to strain the finished yogurt, I do it the following way so I don’t have to stir or disturb the yogurt: With ultra-filtered milk, I stir in my yogurt starter and the concentrate (the amount is up to your own tastes), then incubate. Normally, I don’t recommend adding the flavoring until after the yogurt is set. Too much sugar and other flavorings can interfere with the incubation process. I have not yet experimented with enough different flavorings to know exactly what will and won’t work at this point.
Since I prefer Greek yogurt, I nearly always strain my yogurt and THEN, add the flavorings. One of my favorite ways to do fruit is to put blackberries, raspberries, or blueberries in a blender. I strain out the seeds (or sometimes let the blender grind them until they are unrecognizable) and freeze the puree. Then when just pull out what I need whenever I make yogurt and stir it into the strained yogurt. It is smooth and beautiful. If you have kids eating your yogurt, they seem to like it better when they don’t see chunks of fruit.
I live in France where at least 90% of the milk is UHT and live yogurt is usually sold in 4-packs. The other 3 pots can be frozen until needed.
I whisk 1 small pot of live yogurt into 1 litre of room-temperature UHT milk and fill 4 small pots. These are for me. Then I whisk in a tablespoon of full-fat creme fraiche to the remainder and fill the other 3 pots. These are for my husband.Then I leave them in my yogurt maker without a lid (or you could use a warm oven) overnight and then cover and chill for at least 3 hours. Perfect results every time!!!!!!!! I have been told that UHT milk actually makes BETTER yogurt.
I use one of the pots without cream as the starter for the next batch or, if I’ve eaten it all, I defrost one of the frozen shop-bought pots.
Hi Charlotte,
I want what your husband is eating. We don’t have creme fraiche available to buy like you do so that would be quite a treat. Sounds like you have a great set-up for making yogurt that suits you perfectly. I’ll be on the lookout for UHT milk which is not nearly as common in our stores as it is for you.
Thank you for sharing.
you can use double cream (do Americans call it heavy cream?) instead of creme fraiche. Great as a dessert but maybe too self-indulgent for breakfast! Or maybe not 🙂
Thanks Charlotte. I really don’t think there is a true substitute for creme fraiche. It’s hard to find in the grocery store. But sometimes, I make it myself. Good stuff!
I was so excited to see this post. I have used you as a resource for my yogurt making and through trial and error have it down to a science for what works for me. An opportunity to remove the heating/cooling step is a game changer for me as I use my crockpot to heat so need to account for that time (for me, 1 gallon of milk in High for 3 hours, then 1 hour to cool).
I tried this with 2% Darigold brand and it worked perfectly! Thank you so much for experimenting for all of us!
Yay! I’m so happy it worked for you. This will save you a ton of time! Thanks so much for writing.