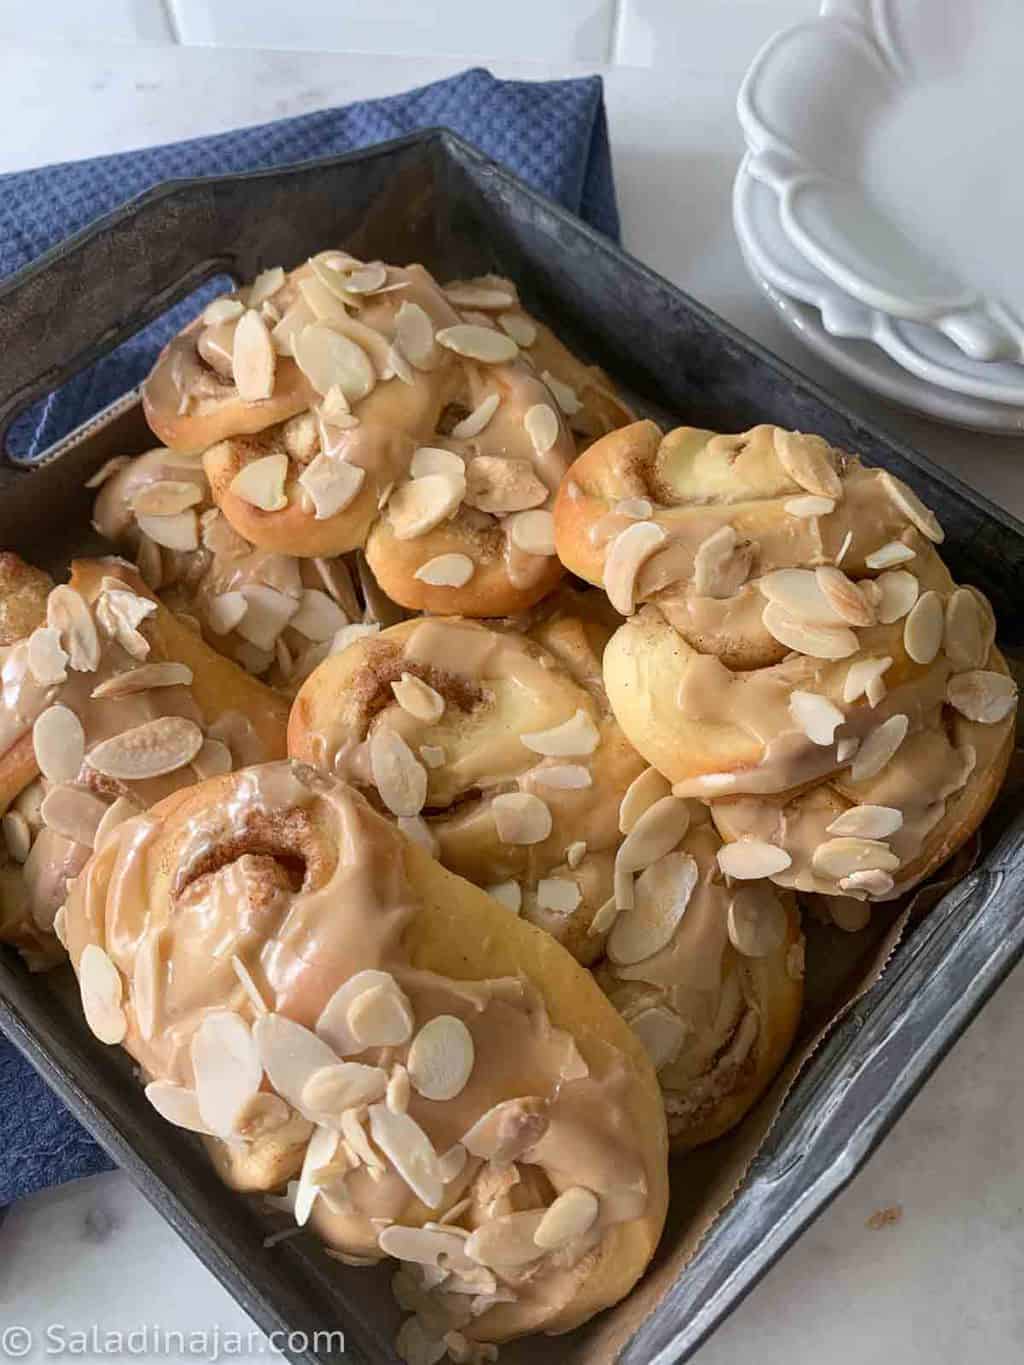
Cinnamon Bear Claws (Bread Machine Dough + Almond Glaze)

Sneak Preview: These cinnamon bear claws use sour-cream dough mixed in a bread machine, rolled with cinnamon sugar, and finished with glaze and almonds—ready in about 3 hours including rising time.
This post contains affiliate links. As an Amazon Associate, I earn from qualifying purchases at no extra cost to you.
Bear Claws are kissing cousins to cinnamon rolls. If you like one, I would bet all the cinnamon in Indonesia that you will like the other.
What Is a Bear Claw?
A bear claw is a sweet yeast pastry shaped to resemble a bear’s paw. The dough is usually rolled with a filling, sliced, and snipped so the pieces spread apart during baking. Some bakeries fill bear claws with almond paste, while others—like this version—use a simple cinnamon-sugar filling similar to cinnamon rolls.
Ingredients & Substitutions
WATER: Room temperature tap water is fine—no need to warm liquids with a bread machine.
FLOUR: Use unbleached all-purpose flour; bread flour or bleached all-purpose are good substitutes; Weigh for best accuracy.
SOUR CREAM: Adds richness; substitute with full-fat plain Greek yogurt
SUGAR: Granulated white sugar for the dough and filling
YEAST: Use instant or bread machine yeast; see notes for using active dry yeast
SALT: Table salt or fine sea salt; kosher salt also works (use a bit more)
BUTTER: Unsalted preferred; salted works too—just reduce added salt slightly
CINNAMON: Ground cinnamon; no direct substitute, but pumpkin pie spice works in a pinch
ALMONDS: Optional; sliced or slivered.
POWDERED SUGAR GLAZE: Make with powdered sugar, milk or cream, and vanilla; almond extract or citrus zest can be added for variation
Step-by-Step Instructions
⬇️ Jump to the recipe below for exact amounts and detailed instructions.
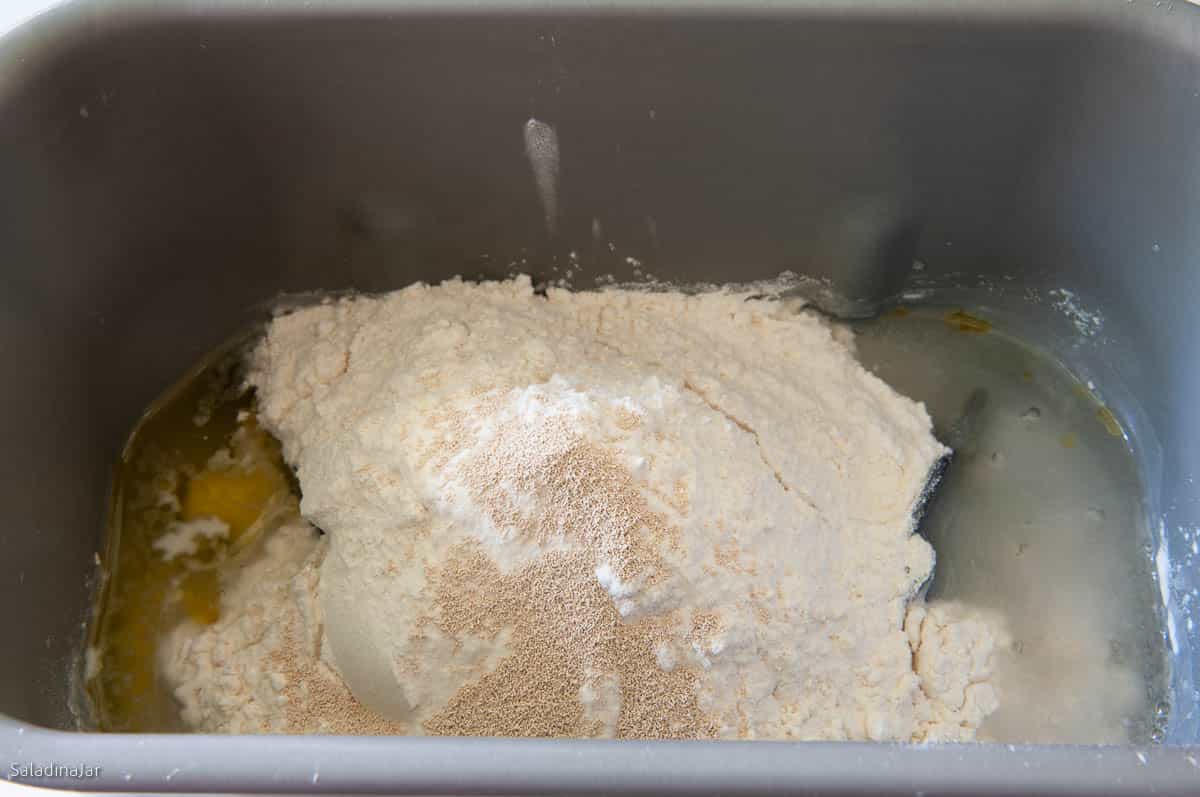
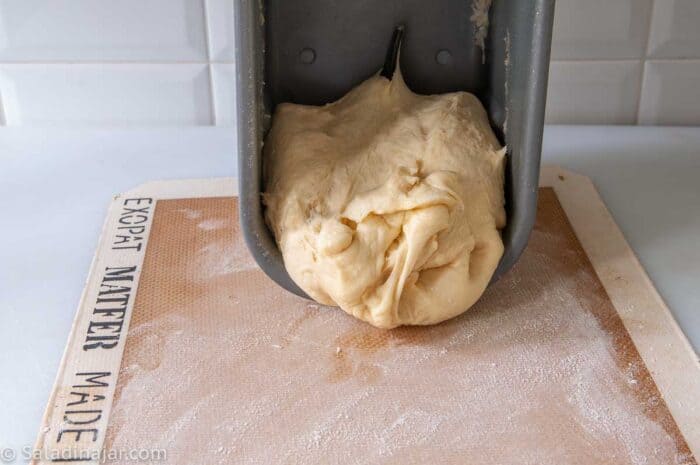
How to Mix Dough With Bread Machine
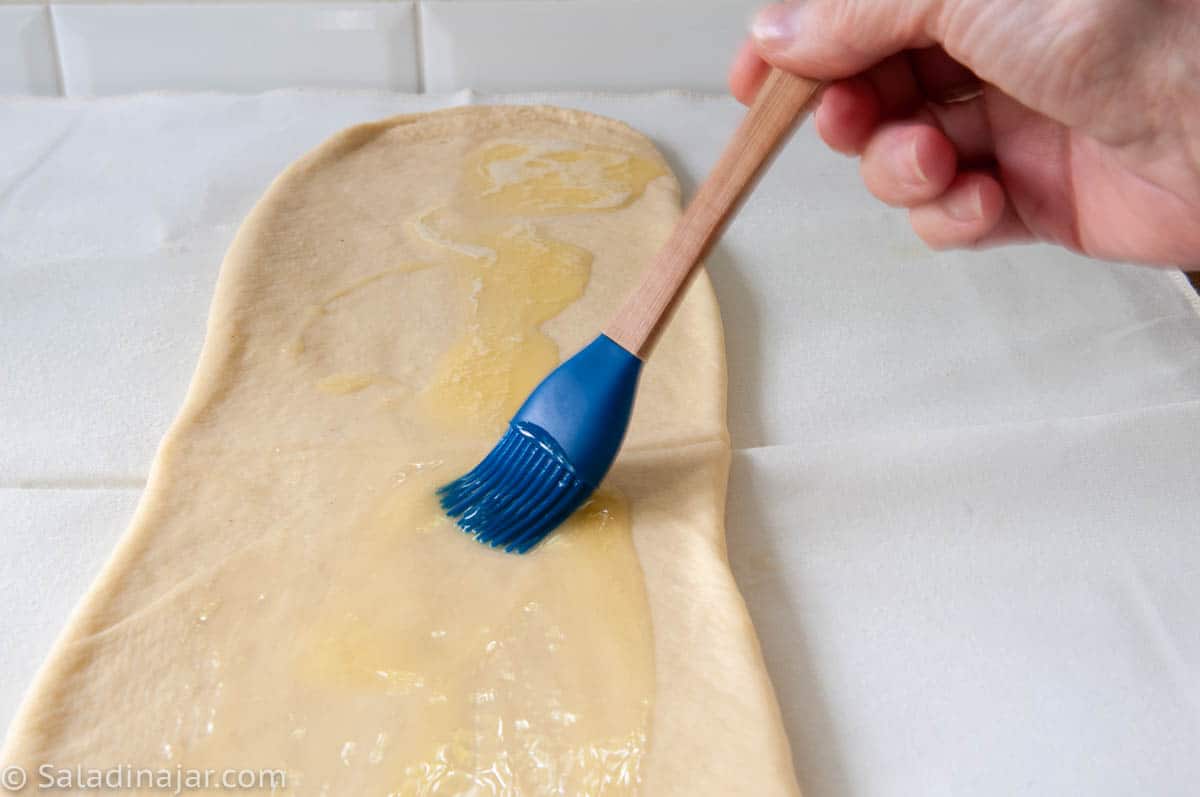
How to Shape Cinnamon Bear Claws

Tips That Make a Difference
- Microwave-toast the almonds:
Short bursts with stirring—done in minutes. - Boost the glaze flavor:
Add almond extract or lemon zest for flair.

Cinnamon Bear Claws (Bread Machine Dough + Almond Glaze)
Video
Ingredients
Dough
- ¼ cup (57 g) water cool
- ¼ cup (57 g) sour cream cool
- ¼ cup (50 g) granulated sugar
- ½ teaspoon table or sea salt
- 1 large (50 g) egg
- ¼ cup (57 g) butter, chopped
- 2-1/4 cup + 1 tablespoon (270 g) unbleached all-purpose flour
- 2 teaspoons bread machine yeast
Filling
- 2 tablespoons (28 g) softened butter
- ¼ cup (50 g) sugar
- 1 teaspoon cinnamon
Frosting:
- 2 teaspoons butter
- 2 teaspoons cream cheese
- 1 ½ tablespoon coffee or milk
- 1 cup (113 g) powdered sugar
- ¼ cup (23 g) toasted sliced almonds
Instructions
- Make the Dough: Add dough ingredients to a bread machine pan in the order listed: 1/4 cup (57 g) water, 1/4 cup (57 g) sour cream, 1/4 cup (50 g) granulated sugar, 1/2 teaspoon table or sea salt, 1 large (50 g) egg, 1/4 cup (57 g) butter, chopped, 2-1/4 cup + 1 tablespoon (270 g) unbleached all-purpose flour, and 2 teaspoons bread machine yeast. •Select the DOUGH cycle, then press START.
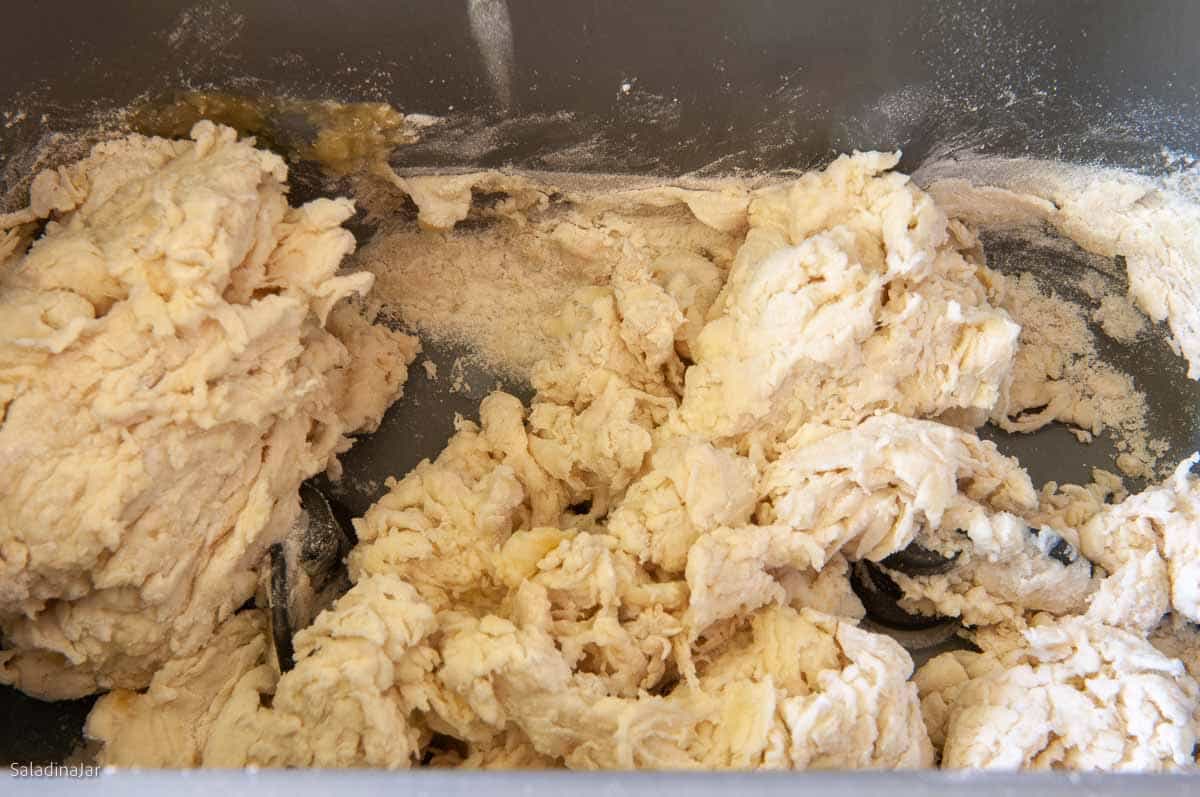
- First check: After a couple of minutes, check the dough to make sure it is coming together into a raggedy ball. If not, add more water 1 tablespoon at a time. If you see pancake batter instead of dough, you forgot some flour—just add it slowly until everything pulls together.Second check: Check dough again after about 15 minutes. The dough should stick to the sides of the pan, then pull away cleanly. If too wet, add flour 1 tablespoon at a time. If too dry and the dough doesn't stick at all, add more liquid. See how to adjust dough consistency in a bread machine. Note: Getting the dough consistency right makes all the difference in how light and tender these rolls turn out.
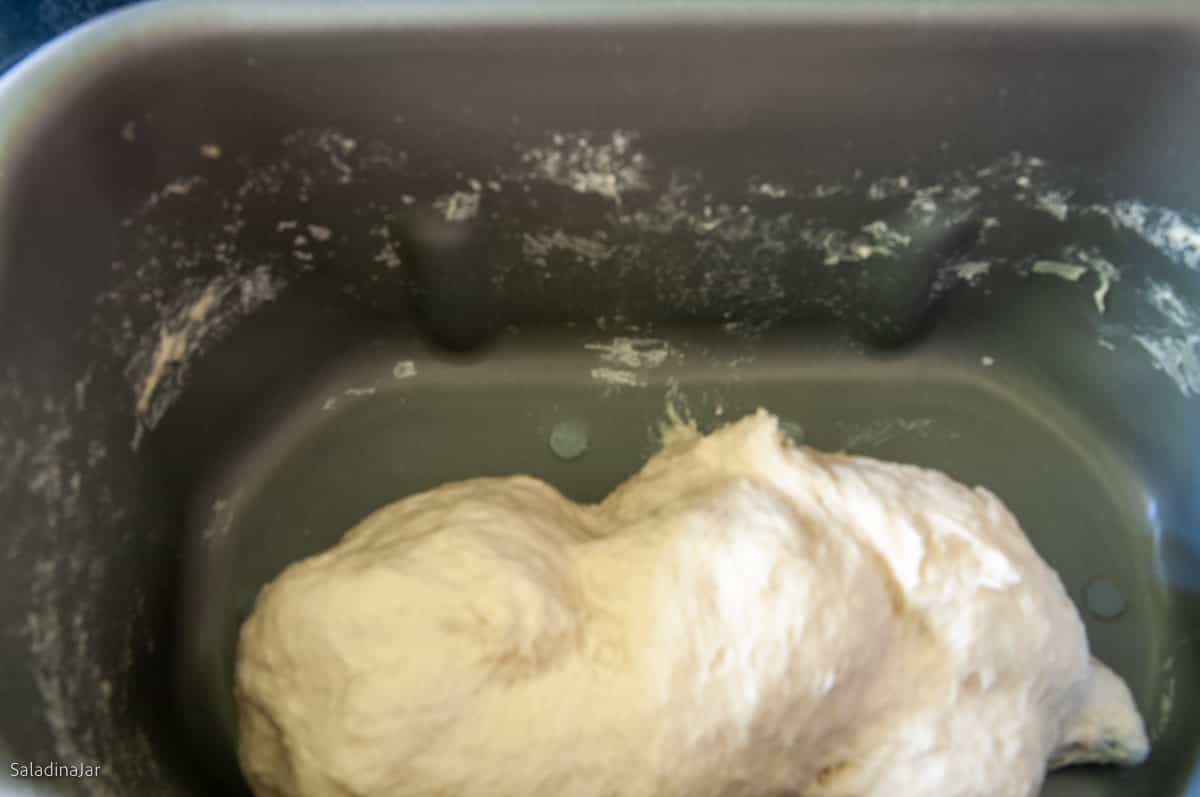
- End of DOUGH cycle: The dough should be doubled. If not, give it more rise time until it is. Restart the DOUGH cycle and knead for 5-10 seconds to deflate the dough. Stop the machine and turn the dough out onto a lightly floured surface, shape into a smooth ball, cover, and let rest for 10 minutes.
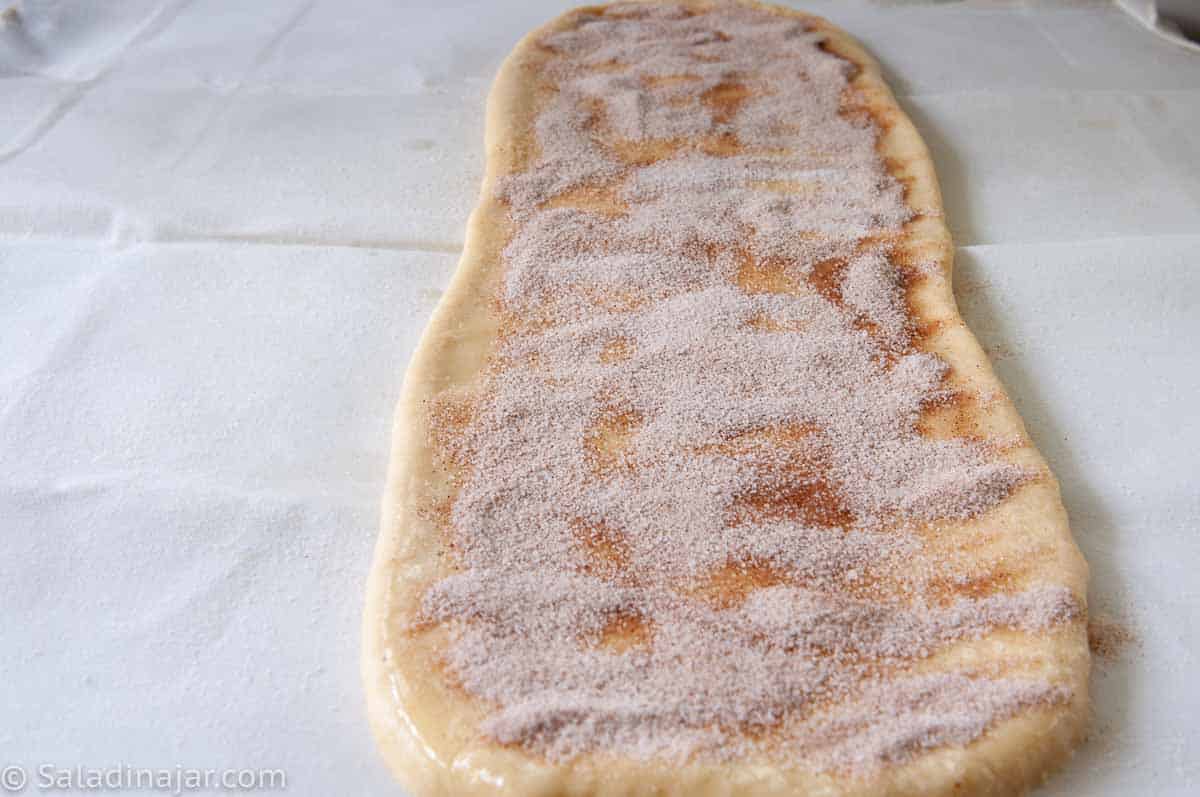
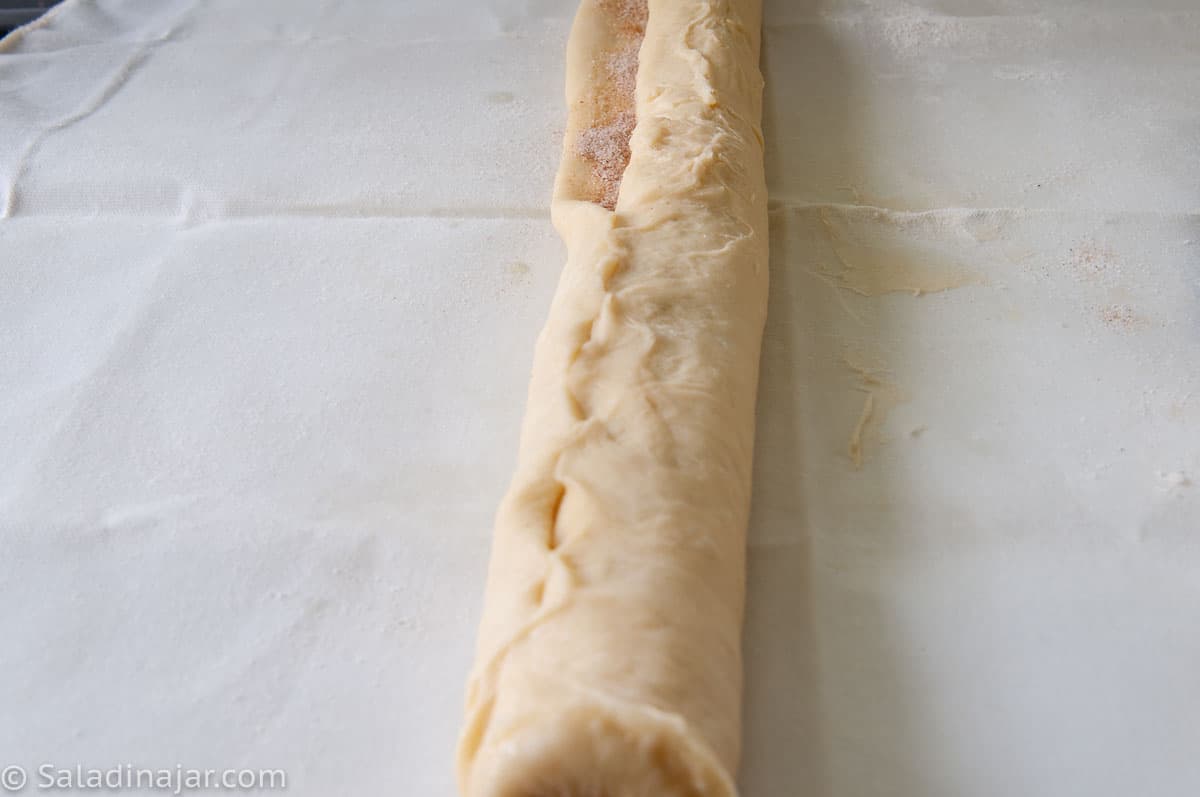
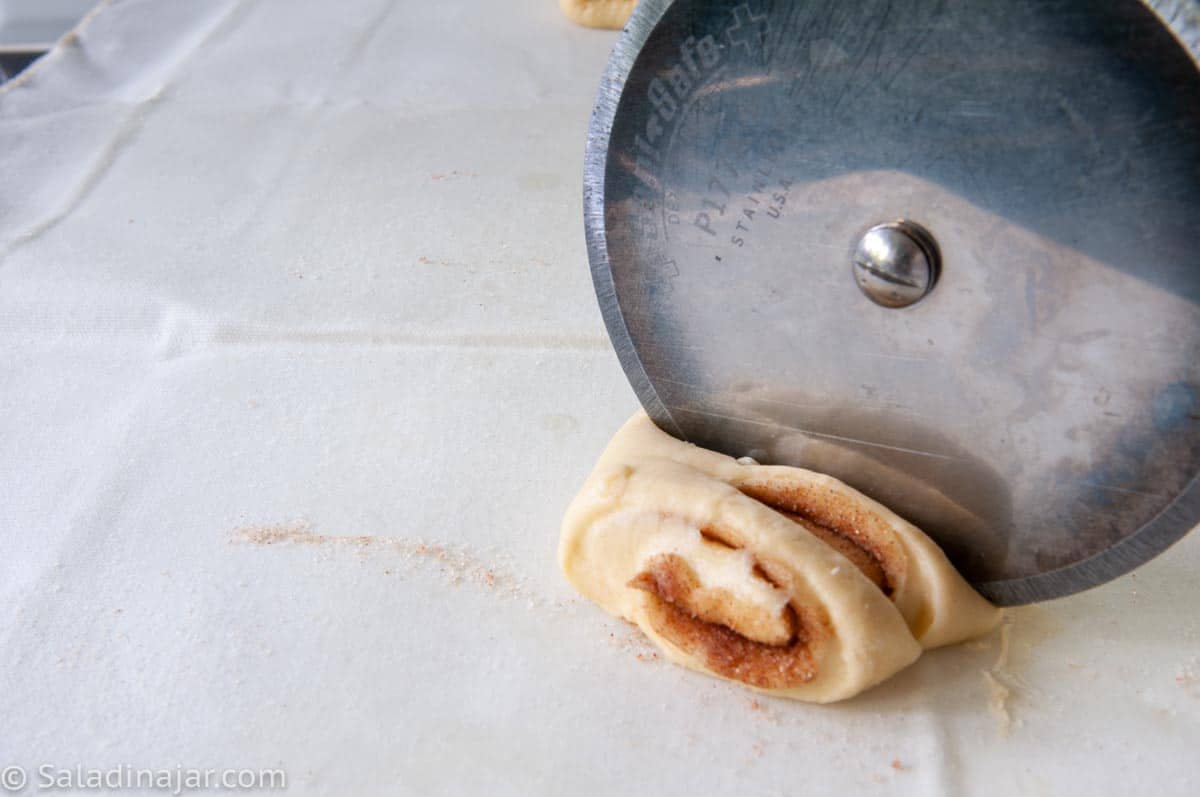
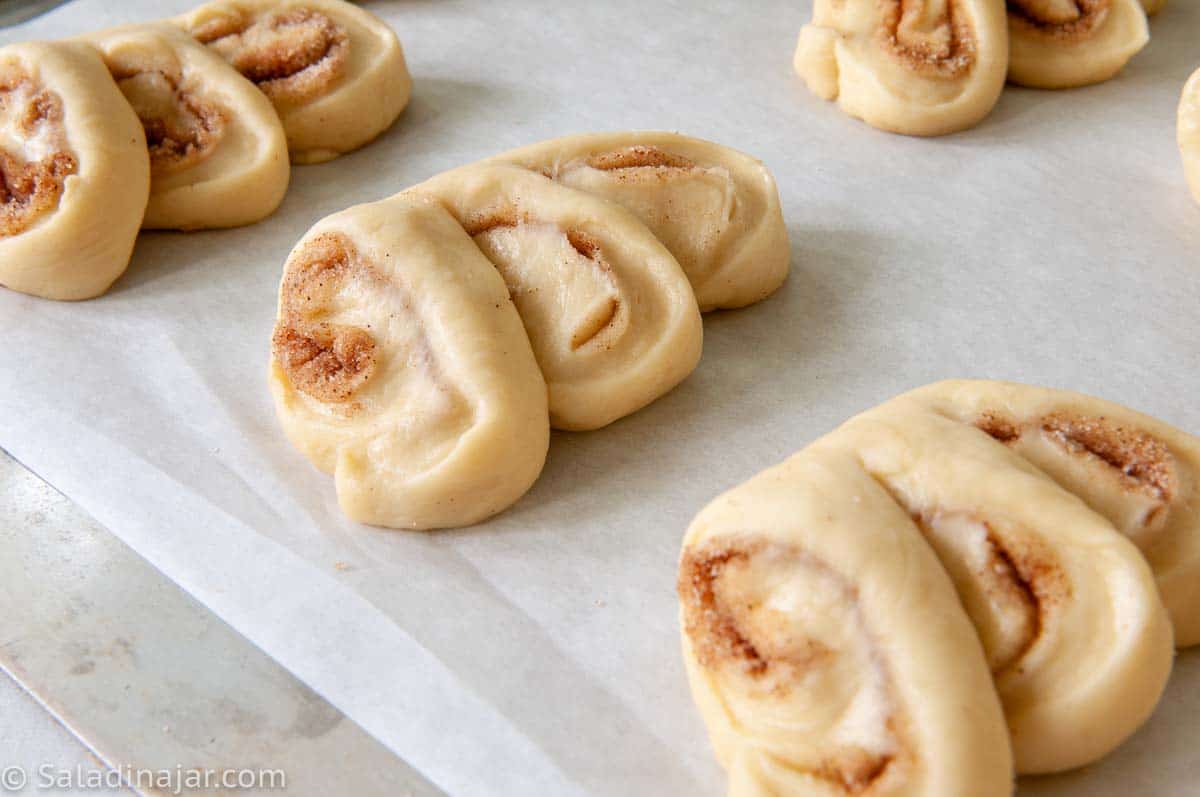
- Rolling Out the Dough: On a lightly-floured board. roll dough into a 6 x 24-inch rectangle.•Spread 2 tablespoons (28 g) softened butter on the rectangle. Sprinkle 1/4 cup (50 g) sugar mixed with 1 teaspoon cinnamon evenly over the buttered area.•Begin rolling from the long side, rolling up as tightly as possible. Flatten the log slightly with your palms, then slice it into 10 pieces.•Using kitchen shears or a pizza cutter, make two cuts into each slice, cutting to within half an inch of the other side.
- Final Rise: Cover and let rise until almost doubled. (45 minutes-1 hour)
- Bake: Bake rolls at 375˚F (190˚C) for 15-20 minutes until golden brown.
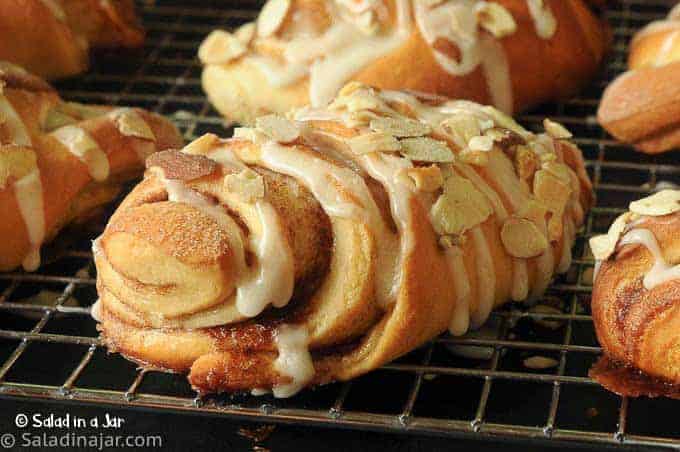
- Frosting: Soften or allow 2 teaspoons butter and 2 teaspoons cream cheese to come to room temperature. Combine the butter, cream cheese, and 1 1/2 tablespoon coffee or milk together and beat until perfectly smooth. Add 1 cup (113 g) powdered sugar and mix until smooth.•Use a spoon to drizzle frosting over the rolls. Or pour frosting into a small plastic zippered bag. Cut off a small corner of the bag and use the closed bag to drizzle frosting back and forth over rolls.•Sprinkle 1/4 cup (23 g) toasted sliced almonds (cooled) over frosted rolls immediately before frosting dries.•Or pick up the frosted roll and turn it upside down, pressing the icing into a plate of almonds. This ensures that the almonds stick to the icing.
Notes
- Unbaked dough: Freeze after the DOUGH cycle or after shaping (before final rise). Defrost in the fridge overnight.
- Baked bread: Double-wrap and freeze up to one month. Reheat gently.
- Stand Mixer: Mix until moistened, then knead with a dough hook (speed 2–3) until smooth and elastic (5–10 minutes). Let rise, deflate, and shape as directed.
- By Hand: Mix to a shaggy dough, knead on a floured surface until smooth and elastic (10–20 minutes). Let rise, deflate, and shape as directed.
Equipment
Nutrition
All images and text ©️ Paula Rhodes for Salad in a Jar.com
Final Thoughts
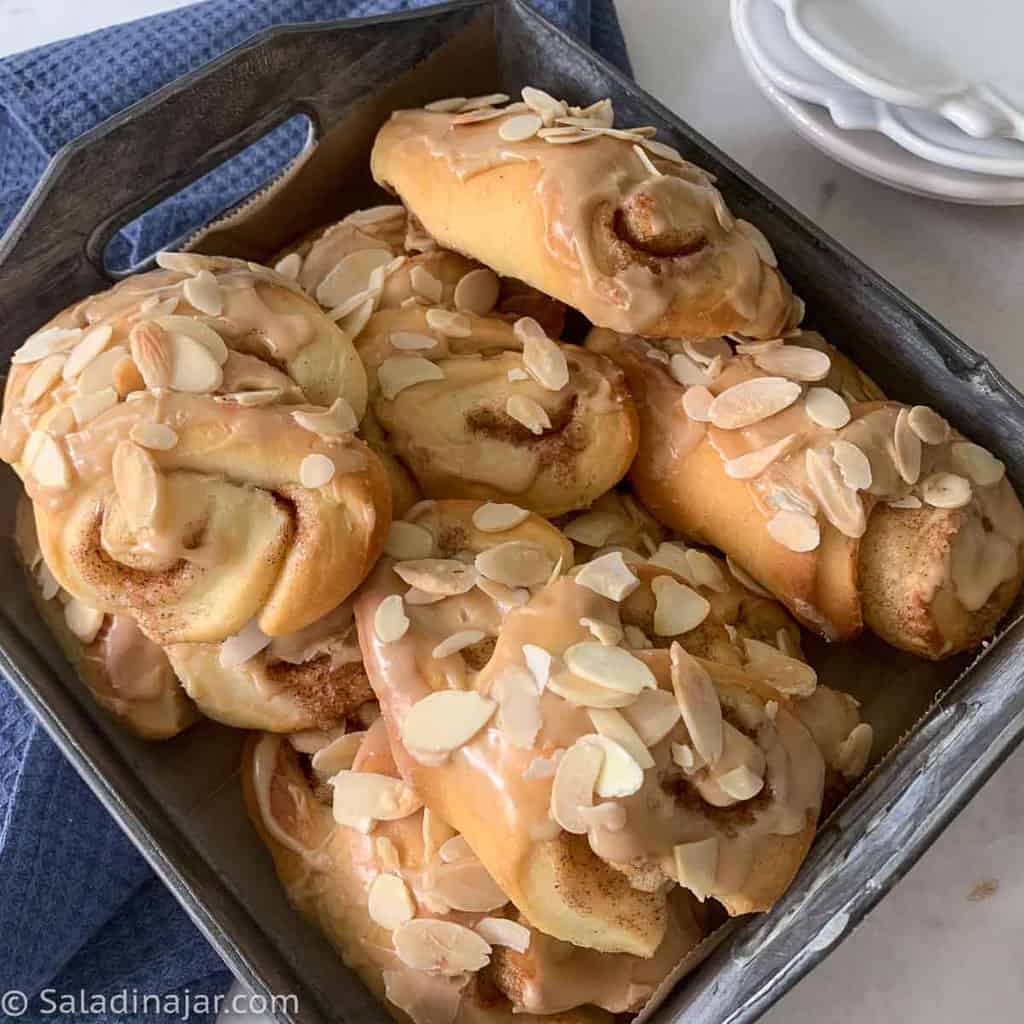
Wait for the oohs and ahs when you set these out on the counter for your hungry kids or guests. They look fancy…and taste fancy, too.
— Paula, Home Economist
Homemade Food Worth Sharing
Need help troubleshooting?
Email me: Paula at saladinajar.com — photos help!
I adapted this bear claw recipe from one of my favorite cookbooks, Grant Corner Inn Breakfast and Brunch Cookbook by Louise Stewart(paid link).

Easy to make and fabulously delicious
Hi Elizabeth,
So glad to hear you liked them. Thank you for taking the time to write.
Delicious !!The bread machine was a perfect mixer and time saver since the first rise was in the bread maker. Anyway, I made a batch into cinnamon rolls.
and substituted chopped toasted pecans because I had no almonds. Picky family member loved them ! Thank you so much . .
Hi Judy,
Oh, I’m sure they made wonderful cinnamon. Thanks so much for coming back to say so.
Hi Paula, I made these for the first time and they turned out just lovely! So excited to make my own, super fresh bear claws at home rather than paying 4 dollars each for a semi stale one. Thanks again!
I agree. Much better to eat them warm out of the oven, if possible.
Can you suggest a good bread maker? I really want one, but my last one died after less than a year of light use, and I can normally fix broken appliances, my kitchen is filled with great vintage stuff that just needed a little love. But not that thing, it was ridiculous! Any ideas on a stronger model?
Hi Sarah, I cannot remember if I ever answered your question. Please forgive. I have thought about it though. I love my Zojirushi, but of course, it is one of the most expensive. I like the way it has two blades and kneads the dough extremely well. That is, efficiently, without leaving flour in the corners. I’m sure there are many others that would be suitable. I would check places like Ebay and Craig’s List for like-new or never-used machines. So many people buy them and don’t like them because of the way they BAKE bread–something I never do. Have you seen this post?
The recipe only mentions 2 Tbls sugar. but in the directions it states that after the yeast , water and 2 Tbls sugar to add the rest of the sugar? how much more?
Thanks
Laurie
Laurie,
I am completely embarrassed to find I left out such an important ingredient. Add 1/2 cup more sugar. I revised the post to show this correction. I am so sorry. Thank-you from the bottom of my heart for writing.
I can see why these are so deadly!!!! The frosting made with the coffee was incredible, and I don’t even Like coffee!!! Add that to cinnamon rolls and lets just say we are DONE!!! I used maple sugar instead of white and added a sprinkle of nutmeg. Haven’t eaten one yet, seriously afraid to start! Thank for the recipe!!!!
Hi Lisa,
Guess they are all gone by now but hope you liked the almond fans. They are one of my favorites. I can imagine the maple sugar was wonderful.
These look delicious! I’m going to give it a try today 🙂
My mom and her dieting arent going to thank you for this though 😉
These look amazing, I’ve got the dough in the breadmaker now! One question, about how much confectioner’s sugar did you add to the icing? Thanks!
these are absolutely beautiful….no wonder you couldn’t help your self…
nice process photos 🙂
Romaine, this is fabulous!! Although you’ve been told that already! 😉
I can’t wait to try. Thanks for the recipe and tips for Ms. Stewart’s book.
Kathleen
Beautiful! It is stunning how easy this beauties are made. I love cinnamon rolls, so I have to try them!
These cinnamon rolls look so yummy!!! Thanks for the recipe, I’m gonna try it out soon!
hey
nice post
You make it look so easy. I am going to have to try it.
UUMMMM!!! These look fantastic.
Those almond rolls look beautiful. I really enjoyed how you provided the photos and recipe. I will make these next week for my kids.
Oooo, I have so bookmarked this page to make these in the near future. 🙂
As usual, these breads look too delicious. I don’t know how you cook all this and stay in shape. I would gain so much weight. They look so good though that it makes me want to try to cook them.
These look delicious. I don’t have much success with bread, but for some reason I can make cinnamon rolls that turn out fairly decent. I bet I could make these!
I can almost smell them here…lovely!
Fabulous photos! I use my bread machine for most all the bread I make, too. Although, I love to knead the dough-time is of the essence most of the time. I love how your blog is set up-the little jars for categories are very cool.
Congrats to Gina! (I’m jealous, but I’ll get over it). 🙂 This is SO odd… I’ve got sticky bun dough rising, and cinnamon roll dough rising. I’m making 2 versions to take to work tomorrow. We must be symbiotic (or whatever that is…) but I LOVE almonds!!! I am making these…. for sure …. for sure…. and I love the addition of sour cream in the dough. They look stunning!!!
Beautiful! I’m sure I could eat quite a few of these. I don’t have a bread machine, but I use my stand mixer to knead – it’s therapeutic to watch it do the work!
Hello,
We bumped into your blog and we really liked it – great recipes YUM YUM.
We would like to add it to the Petitchef.com.
We would be delighted if you could add your blog to Petitchef so that our users can, as us,
enjoy your recipes.
Petitchef is a french based Cooking recipes Portal. Several hundred Blogs are already members
and benefit from their exposure on Petitchef.com.
To add your site to the Petitchef family you can use http://en.petitchef.com/?obj=front&action=site_ajout_form or just go to Petitchef.com and click on “Add your site”
Best regards,
Vincent
petitchef.com
These look amazing… I guess I really do need a bread machine!
WOW! These look amazing. After looking at the pics they don’t look as intimidating either. I will definantly be trying these.
Yum – these look great! Thanks for the gift card – it’s so exciting to win something!
These look delicious. I was so struck by the photo and how you acheived that look…thank you for sharing the technique, I am going to give this a try as these look so impressive. You are such a fun read!
umm… heavenly delicious! I just love sweet, yeasty rolls!
Those look amazing! YUM!
Thanks for sharing these with Dad & Mom! Barrett and I got to eat one and Barrett couldn’t stop saying “Yummmmmm!”