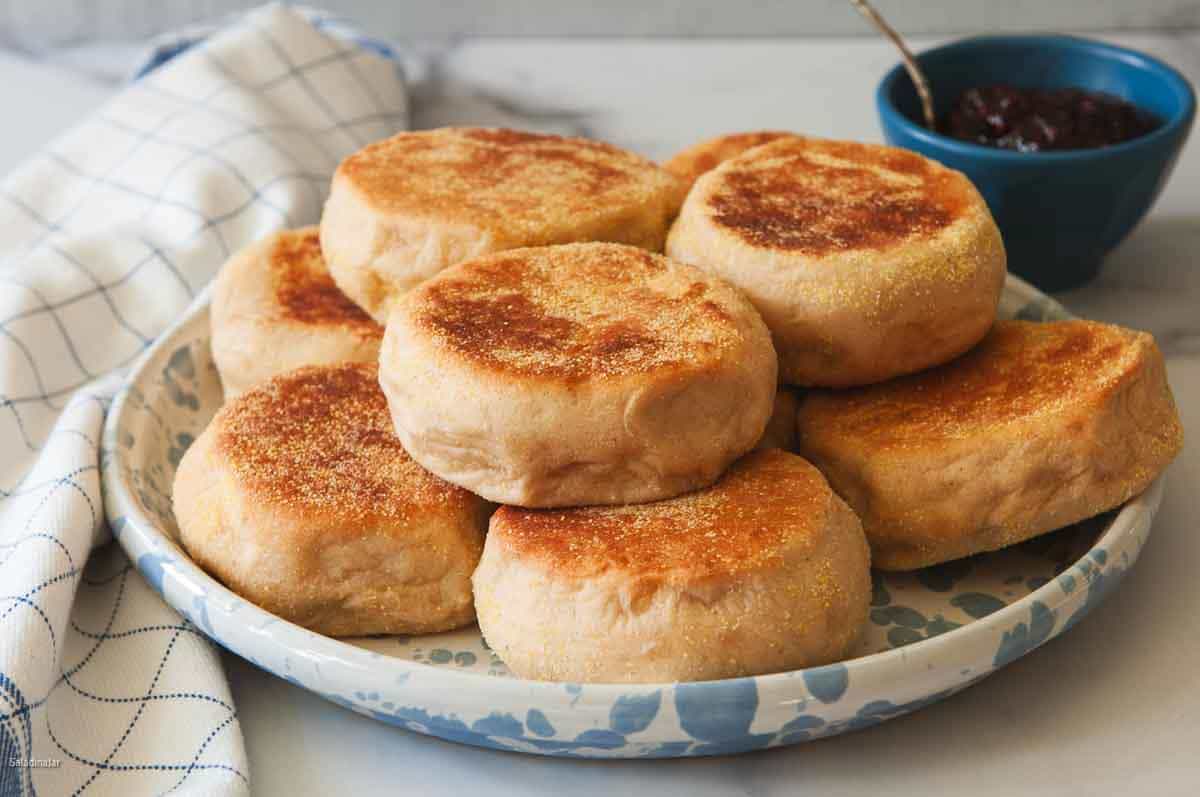
Bread Machine English Muffins (Honey Whole Wheat)
Sneak Peek: Mix these bread machine English muffins using the DOUGH cycle, shape by hand, brown in a skillet, and finish in the oven. Made with whole wheat flour and a touch of honey—ready in about 3½ hours.
This post contains affiliate links. As an Amazon Associate, I earn from qualifying purchases at no extra cost to you.
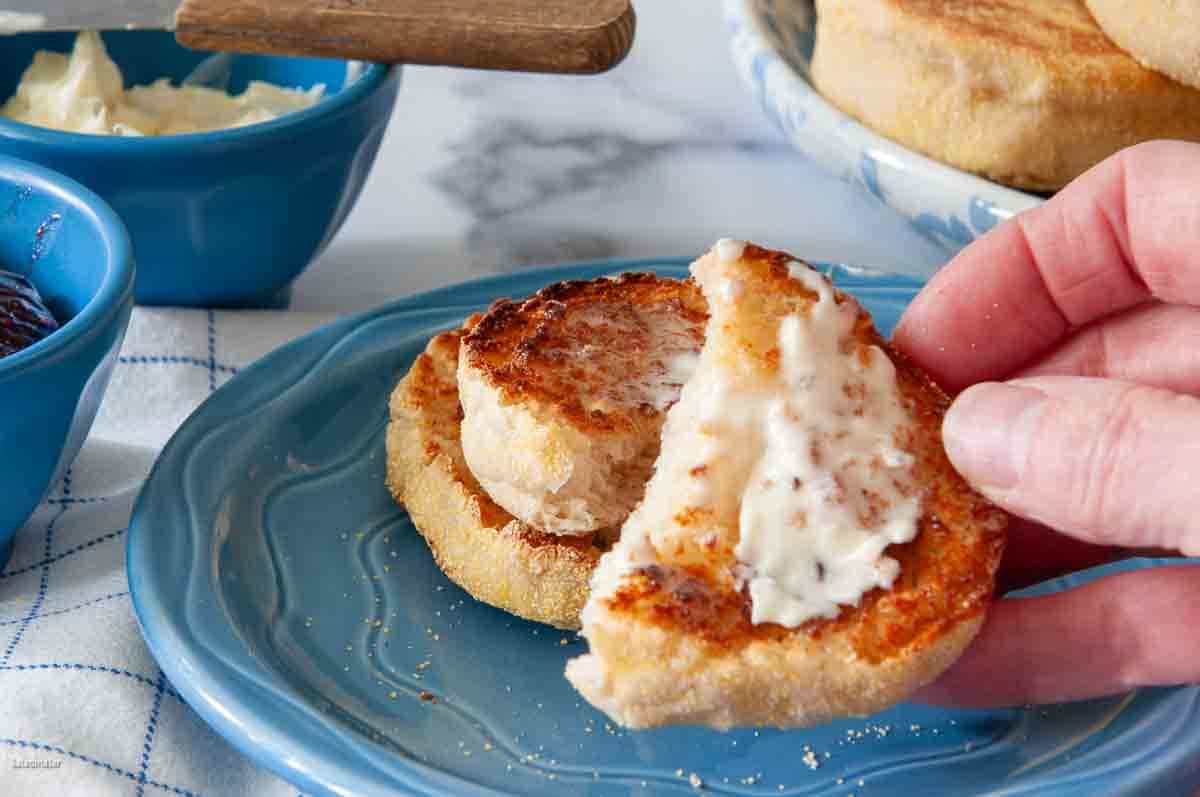
I avoided making English muffins for years—they seemed like too much work, and besides, we rarely eat breakfast. But this simple bread machine (paid link) recipe changed my mind. The nooks and crannies serve as great hiding places for your favorite jam or butter.
One more thing. You don’t need special rings to make these. I’ll show you how in the pictures.
Why Finish English Muffins in the Oven?
Browning the muffins on the stovetop creates the classic crust, but finishing them in the oven ensures the centers cook through completely without burning the outside.
Ingredients & Substitutions
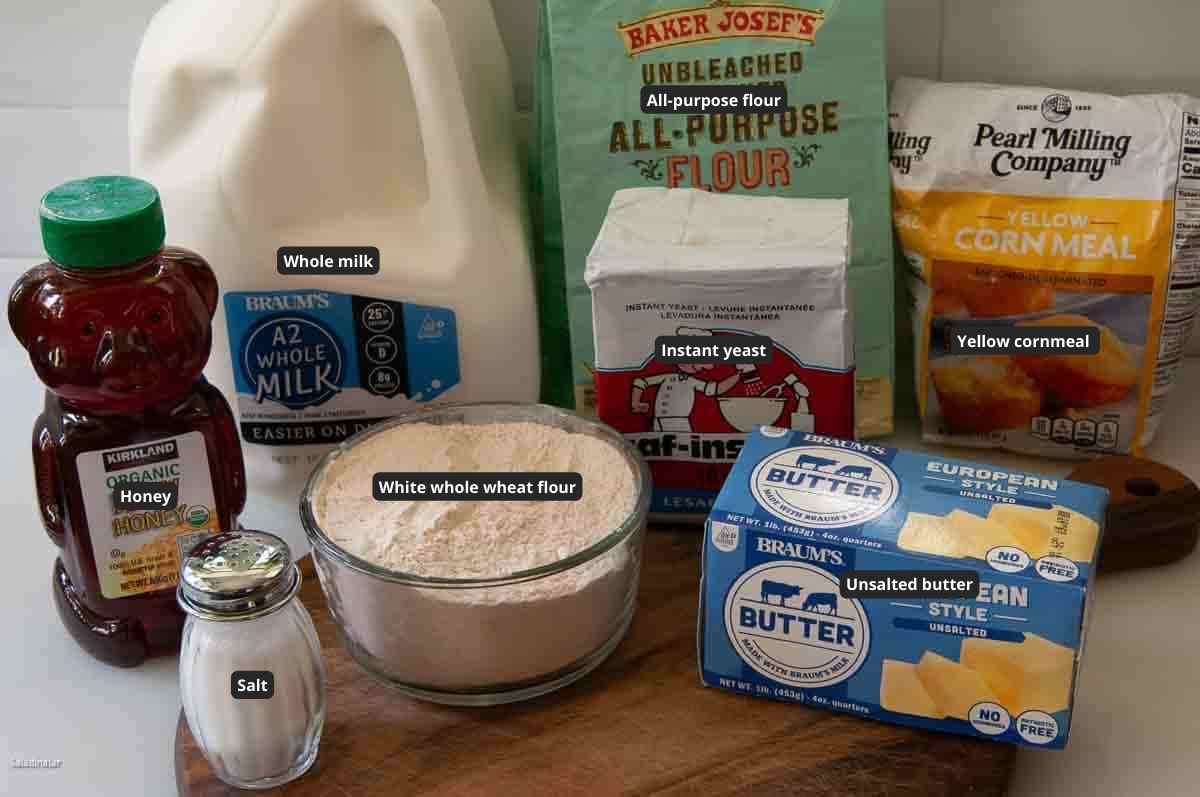
• MILK: Whole milk preferred; low-fat or half water is fine. No need to warm it.
• HONEY: Adds mild sweetness; halve for less sugar.
• SALT: Table or sea salt works. Add ¼ tsp more if using Kosher.
• BUTTER: Use unsalted; chop finely instead of melting.
• WHITE WHOLE WHEAT FLOUR: Lighter than red whole wheat but still wholesome. Sub the regular (red) whole wheat if that’s what you have.
• ALL-PURPOSE FLOUR: Softens the texture; sub bread flour for extra chew.
• INSTANT YEAST: No proofing needed; active dry also works with adjustments.
• CORNMEAL: For coating the pan; semolina gives more crunch.

Step-by-Step: How To Make the Dough for Bread Machine English Muffins
⬇️ Jump to the recipe below for exact amounts and detailed instructions.

Bread Machine English Muffins (Honey Whole Wheat)
Video
Ingredients
- 1⅓ cup (295 g) milk (11 ounces)
- 2 Tablespoons (42 g) honey
- 1¼ teaspoon sea or table salt
- 1 Tablespoon unsalted butter, chopped
- 1 cup (113 g) white whole wheat flour (or whole wheat flour)
- 1⅞ cups (225 g) all-purpose unbleached flour (organic is nice, if you have it)
- 2 teaspoons instant yeast
Instructions
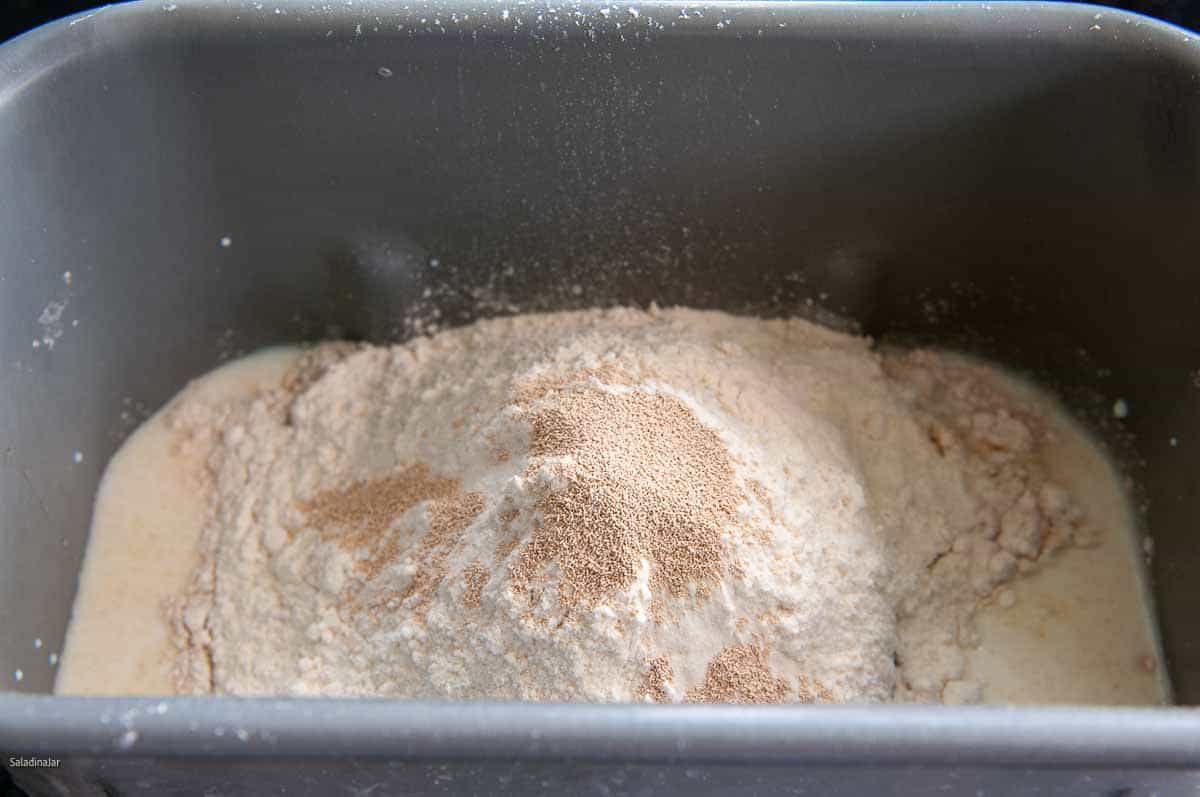
- Add Ingredients to Bread Machine Pan: Add 1⅓ cup (295 g) milk (11 ounces) , 2 Tablespoons (42 g) honey, 1¼ teaspoon sea or table salt, 1 Tablespoon unsalted butter, chopped, 1 cup (113 g) white whole wheat flour, 1⅞ cups (225 g) all-purpose unbleached flour, and 2 teaspoons instant yeast to the bread machine pan in the order listed. Select the DOUGH cycle and press START.
- Check Dough Early: Open lid in the first minute to ensure mixing has started. Dough should clump but remain sticky.Optional: As soon as all ingredients are mixed and moistened, stop the machine and let the ingredients rest for about 20 minutes. This will improve the texture of the dough. Then restart the DOUGH cycle.Check 15 minutes into the kneading phase again: Adjust moisture level if needed: If dough is overly sticky, add a tablespoon of flour at a time, but remember, you want the dough to be a little sticky or it will be too dry to develop the nooks and crannies characteristic of English muffins. If the dough is too dry, add water 1 tablespoon at a time. Read more about this trick that experienced breadmakers use to make good bread.
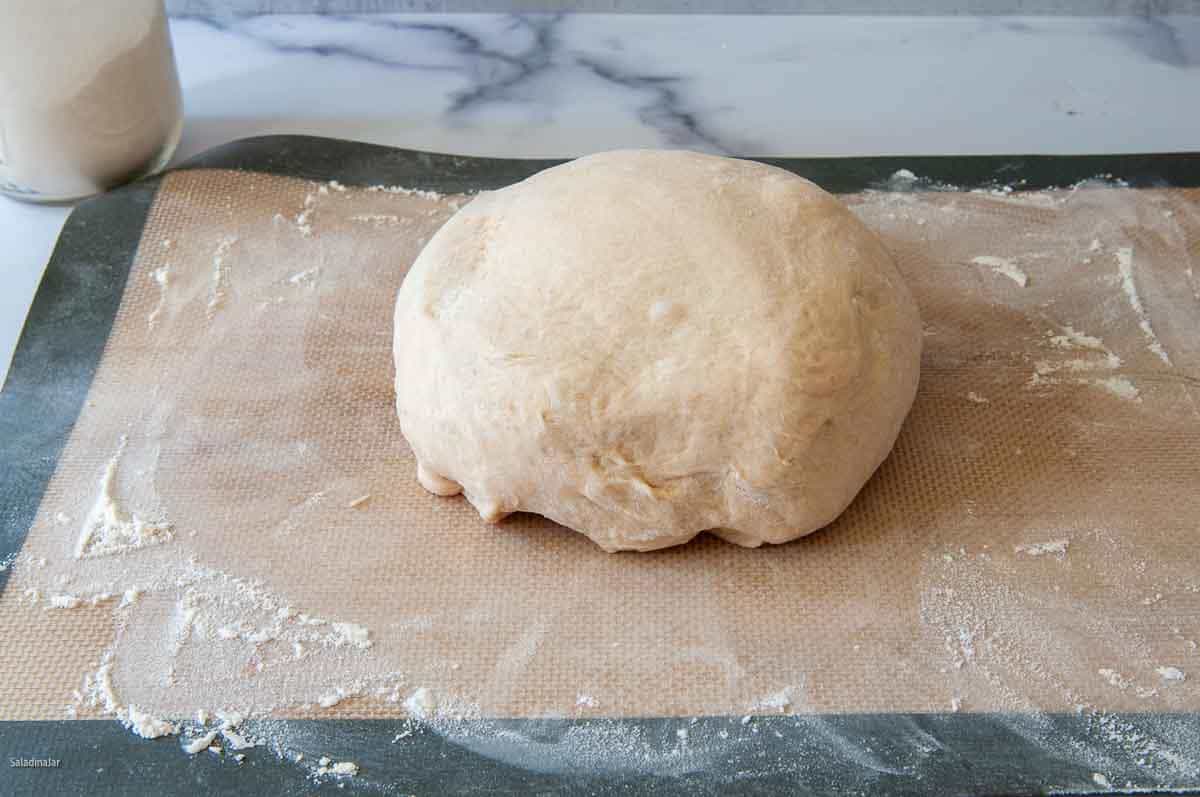
- End of DOUGH cycle: The dough should be doubled. If not, give it more rise time until it is. Restart the DOUGH cycle and knead for 5-10 seconds to deflate the dough. Stop the machine and turn the dough out onto a lightly floured surface, shape into a smooth ball, cover, and let rest for 15 minutes.
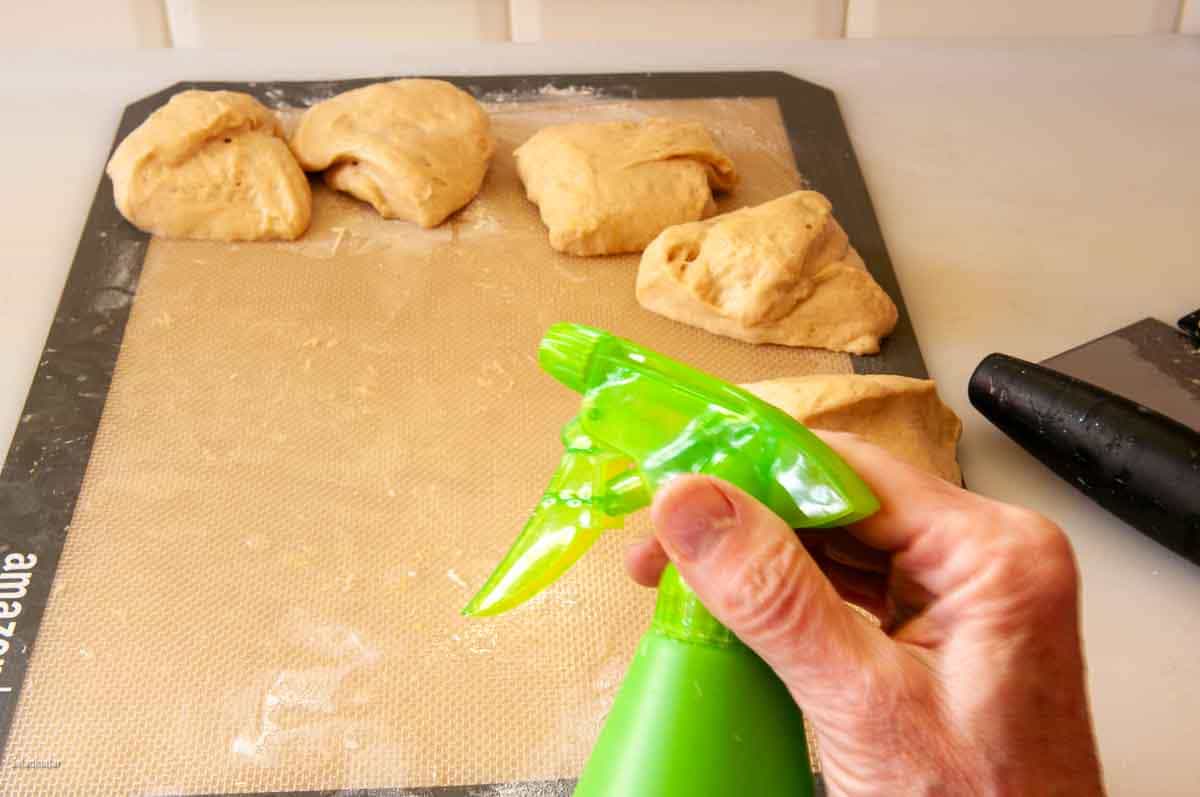
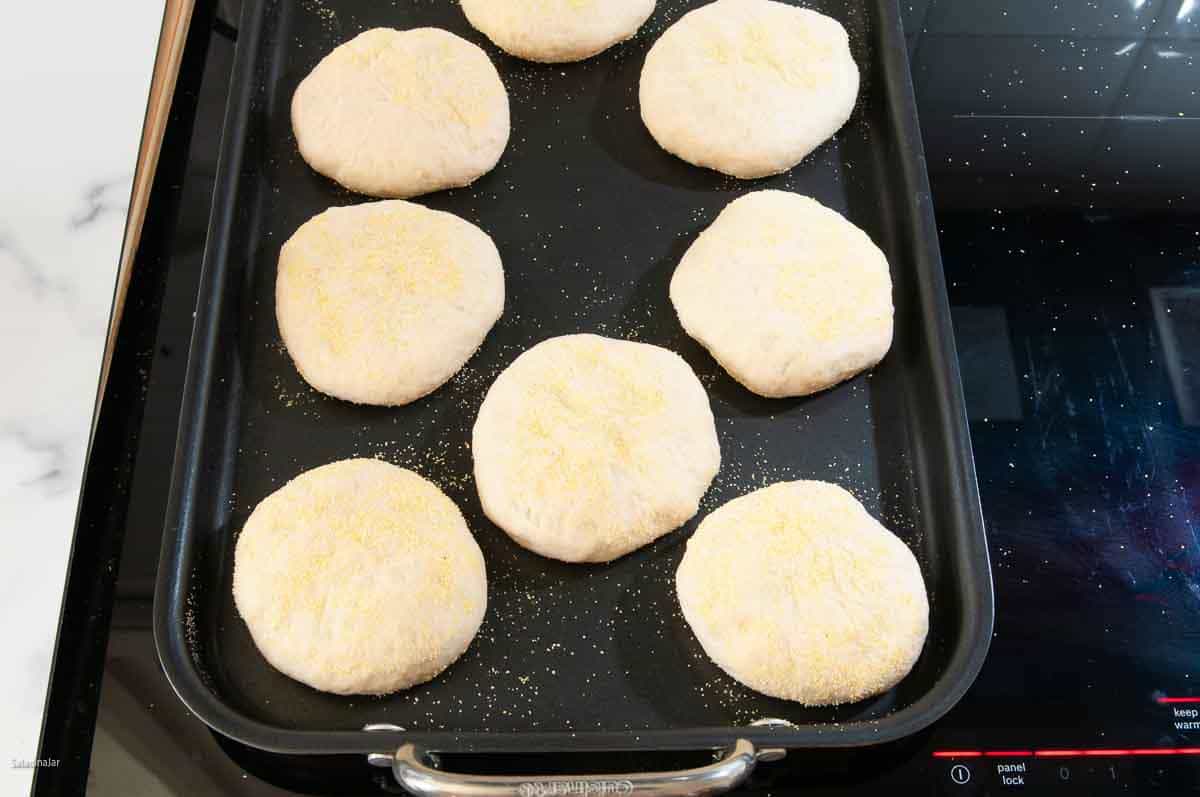
- Shape Into Balls: Divide dough into 10 pieces. Shape into smooth balls by pulling the edges and pinching them at the top. Wet hands help with stickiness.
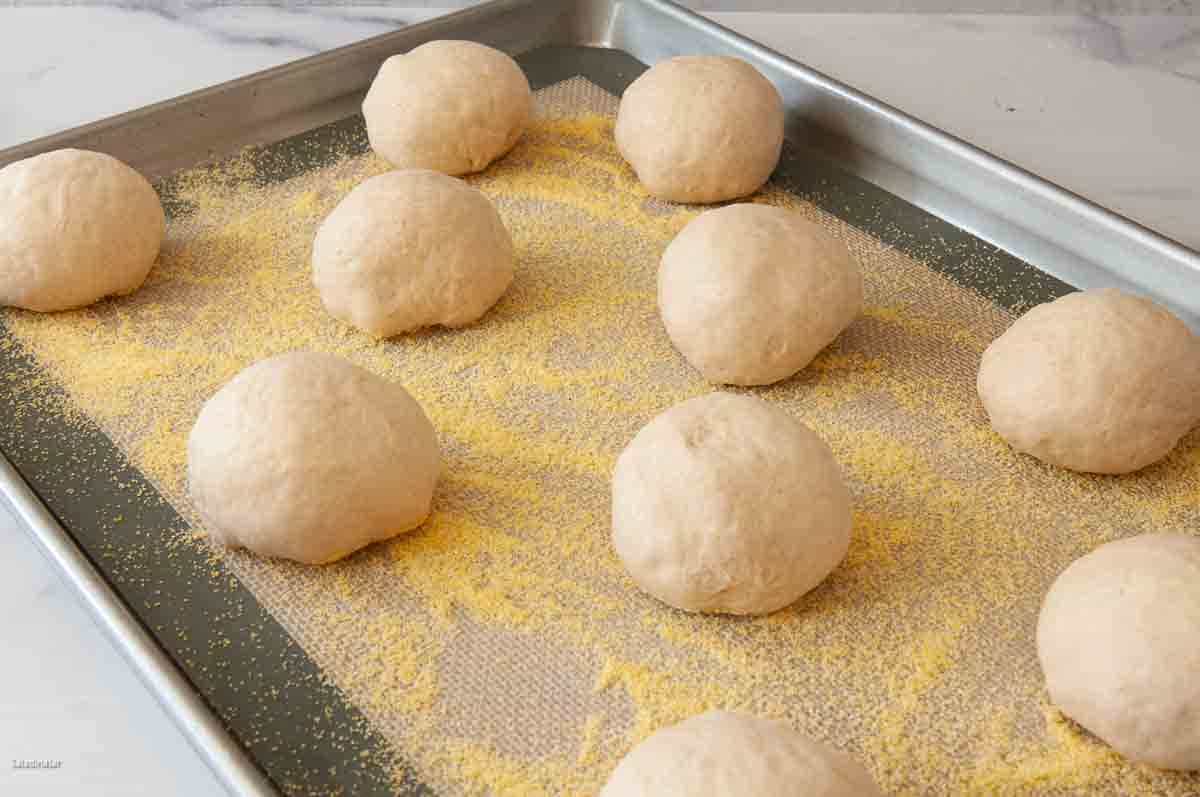
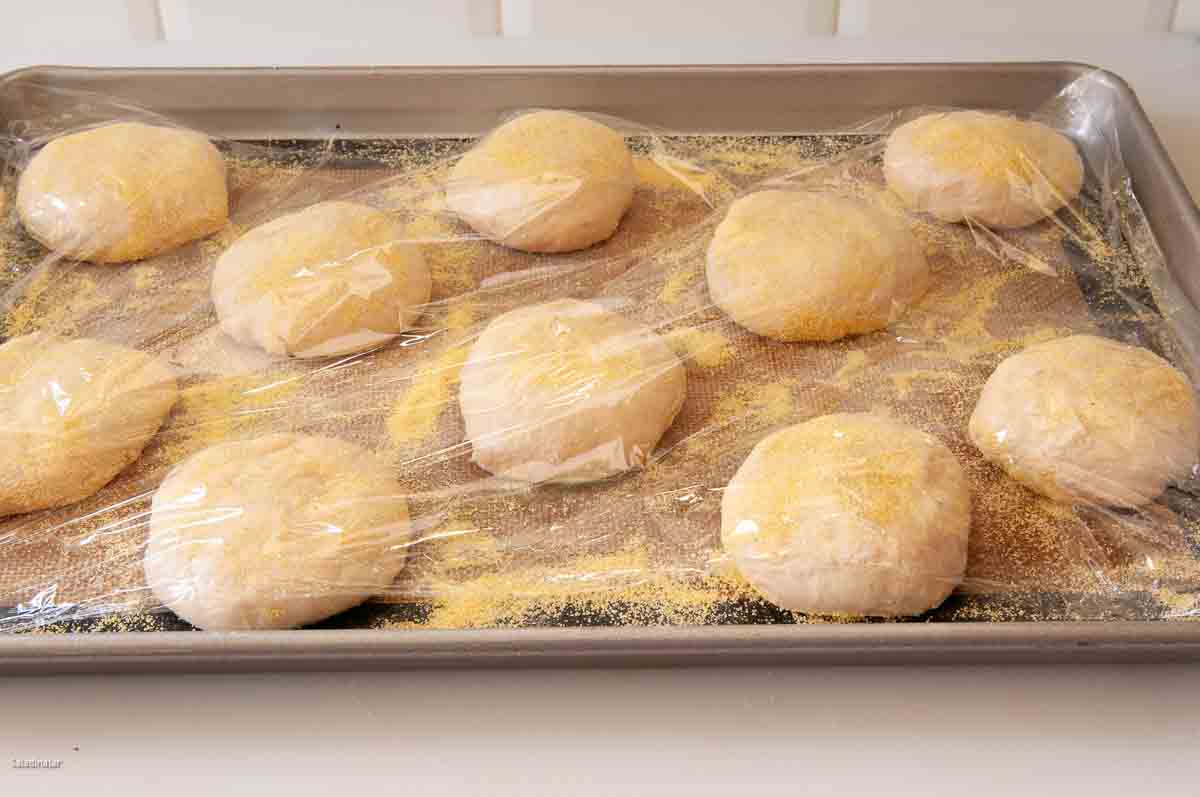
- Flatten and Prepare for Rise: Place dough balls on a parchment- or silicone-lined tray sprinkled with cornmeal. Flip each to coat both sides. Flatten to about ¾-inch thickness. Cover with greased plastic wrap, then lay another tray on top (do not press). Let rise until nearly doubled.
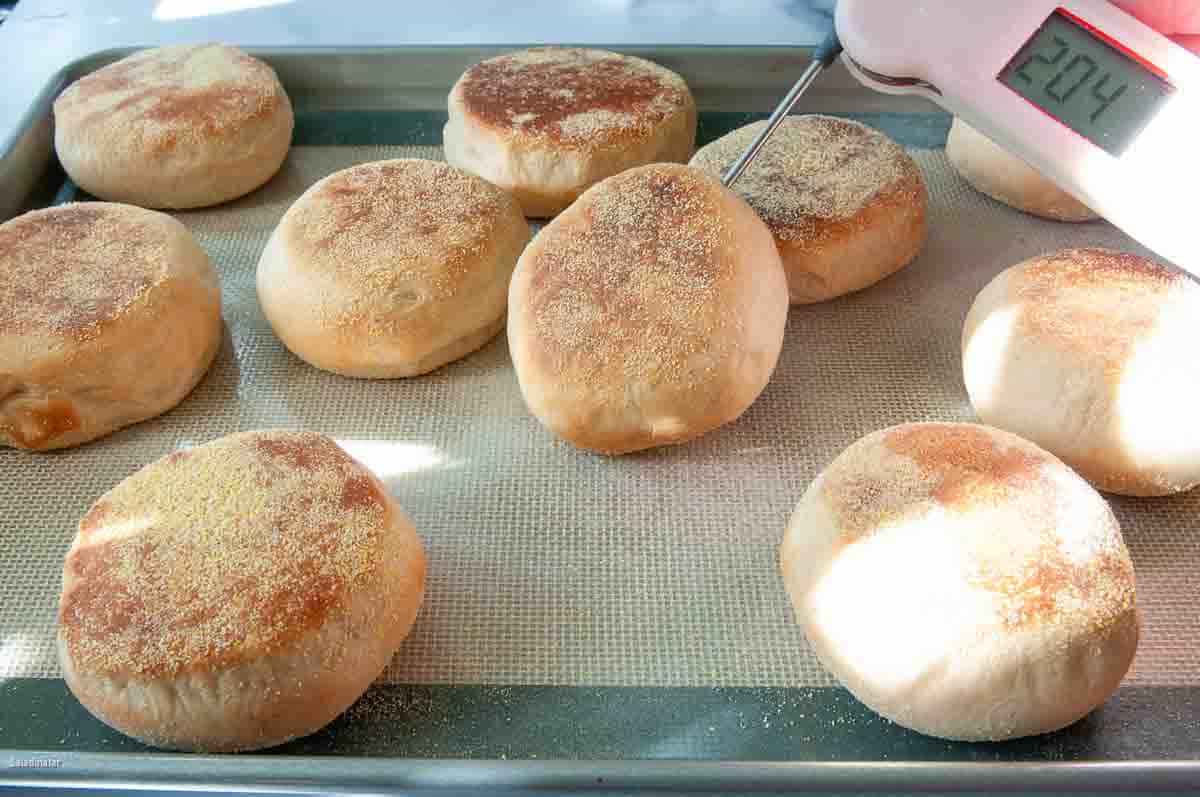
- Brown the Muffins: Preheat skillet or griddle to medium. Cook muffins 2–3 minutes per side until golden brown. Adjust muffins as needed to brown evenly.
- Bake to Finish: Return muffins to tray. Bake at 375°F for 8 minutes or until internal temp reaches 205–210°F. Cool on a rack. Use a fork to split before toasting.
Notes
- Unbaked dough: Freeze after the DOUGH cycle or after shaping (before final rise). Defrost in the fridge overnight.
- Baked bread: Double-wrap and freeze up to one month. Reheat gently.
Equipment
Nutrition
All images and text ©️ Paula Rhodes for Salad in a Jar.com
What Readers Ask Me About This Recipe
Can I skip the oven step?
Yes, but the inside might be undercooked. Browning plus baking gives the best texture.
My dough is too sticky. What can I do?
Sticky dough is normal and helps with the texture. Use wet hands for shaping or pause the cycle after the ingredients have mixed for about 1 minute, and let the dough rest 20-30 minutes before kneading resumes.
Final Thoughts
If you’ve only ever had store-bought English muffins, these will change your mind. The flavor, texture, and chew are worth the minimal hands-on time. I like to toast and slather mine with butter—or slice them horizontally for egg sandwiches. Once you’ve made them, you’ll want to keep a stash in the freezer for anytime cravings.
— Paula, Home Economist
Homemade Food Worth Sharing
Need help troubleshooting?
Email me: Paula at saladinajar.com — photos help!

Normally I would find English muffins too daunting of a recipe, but I have had good luck with a few of your recipes so i decided to give it a try! First, your recipe was really interesting. It really seemed as easy as making dinner rolls and then setting a sheet pan on top to flatten. I felt this was very doable! I was a little unsure of my dough because it was not as loose looking as in your video, but it was a little sticky/tacky. It was really easy to handle and shape into the balls. Well, it must have been ok, because my English muffins turned out great! Mine were a little smaller (12), but that was ok, because they are filling. My husband and I both have enjoyed these drizzled with honey and used for buns for chicken patties, veggie burgers, breakfast sandwiches. I froze mine and take out as needed, which works great. Thank you for inspiring me to try something that I normally would have not made. I look forward to making again.
Fan…tas…tic!!! I love hearing this. I use them for buns, too. Thank you for the 5-star rating and your kind words. I hope they will encourage others who are on the fence about trying them.
I made these today and they are delicious and perfectly crispy. I wanted to use them for burgers, so I made 8 instead of 10. I kind of regret it, because they are gigantic! Next time I’ll do the recommended 8, and I think they will probably still be bigger than Thomas’. I used an electric griddle and they browned beautifully on medium for 2-3 minutes. The only think I’d love clarified is the stacked-pan rise. My baking pans are heavy and it really seemed like they were getting crushed, so i removed the top pan after about 15 minutes. A general guideline of time in the recipe would be helpful for that rise (I went with 45 minutes since I don’t trust my judgement when it comes to doubling!). Thank you for the well-written recipe!
Hi Ellen,
So happy to hear these turned out well for you. I use USA pans and don’t know how they compare to your pans. They seem fairly heavy to me. I don’t worry about the muffins getting crushed. The reason I don’t include a time on the second rise is because the ambient temperature where your dough sits is extremely important when it comes to how long it will take. My kitchen runs warm (because I’m always cold) so less than 30 minutes is needed. But if your kitchen is cooler than 70˚F, it could easily take 45 minutes or longer. This is where practice really helps. Keep baking!! You will develop a 6th sense about it before long.
Wow, these are AMAZING!
This is the first time I have successfully made English Muffins. I love the concept of pan toasting them and then baking them. Used a baking thermo and they registered at 205 right at 8 minutes. Lots of people can cook, but not everyone can write a recipe that can be followed by viewers. You’ve done both! Thank you for sharing your talent!
Hi Pamela,
Your comment made my day—thank you! I’m glad the English muffins turned out well, and great job using a thermometer. That’s one of my favorite bread-machine tricks.
I want to make these English muffins but all I have is whole wheat flour. Will that work?
Hi Pat,
I have not tested this recipe using only whole wheat flour. If you do a straight substitution, I’m guessing these will be heavy and dense. Not so tasty. If you want to try it, I would add a soaking period. Start the DOUGH cycle. As soon as all the flour is incorporated, stop the machine and let it sit for 30 minutes so the flour can absorb the water. Restart the DOUGH cycle and proceed as usual. You might want to add a tablespoon of Vital Wheat Gluten if you have it. Watch the rises carefully. 100% whole wheat tends to rise faster. Let me know how it goes if you do it.
I was out of English muffins for my hubby’s breakfast sandwiches, so I made these up. He really likes them. I froze some so they will be still be fresh when the ones I left out are gone.
Thanks for another delicious recipe!
Breakfast sandwiches sound like a great way to start the day. Glad you liked them! Thanks for the 5-star rating.
excited to make these. could I double the recipe in my 2lb bread machine or will that be too big?
Hi Meghan,
That’s a good question. I don’t normally recommend doubling recipes in a bread machine. The paddles are designed for that much dough. Sometimes it will cause the motor to overheat or make strange noises. If you look up in the right-hand corner of the recipe, you can click the 1½ button to get a bigger recipe that’s not quite as big. That’s what I recommend. p.s. Don’t increase the yeast when sizing up in a bread machine. Here’s a post with more information.
Excellent recipe and a keeper. Very easy to make and so much better than store-bought. However, I was wondering if I could substitute whole milk with buttermilk.?
Hi Rosanna, Glad you liked them. I haven’t tried buttermilk, but I think it would be delicious.
I have made these delicious honey wheat english muffins at least 10x. They are so tender on inside and crisp on the outside. The perfect amount of sweetness. I weight my ingredients and use a combo of whole wheat and AP flour in my bread machine. We use them for burger buns to egg sandwiches. SO GOOD!
Thank you for taking the time to write, Ally. What a great testimonial! We also use them for buns as much as anything.
Paula, your muffins are delectable looking!! A daughter and her family were here last weekend and we made 32 English muffins and 26 were eaten! I do mine in two large skillets on TOP of the stove. Will have to try your brown and bake method. Have a happy and safe spring!!
Hi Gwynette,
You were my inspiration for this English muffin recipe. They weren’t even on my radar until I got to know you. I would love to taste some of yours.
Happy to be your inspiration when you have given me so many ideas and recipes!???