Bread Machine Brioche with Secrets To Help You Master the Recipe
Sneak Peek: You can make a fabulous bread machine brioche easier than you ever imagined. Brioche can be tricky with so many eggs and all that butter. Thankfully, a bread maker is your secret weapon. Don’t worry, I’ve included lots of pictures and a video to help you.
As an Amazon Associate, I earn from qualifying purchases.
Yes! You can make genuine buttery brioche with a bread maker. Although this recipe can be challenging for beginning bakers, I’ve included many tips and tricks to help you achieve success.
Four Things To Know Before You Start
- This recipe requires more time and attention than the average bread machine recipe. If you are rushed, baking for somebody else and wanting perfection, or throwing a dinner party for the boss, you may want to try my Hawaiian Bread Rolls or Challah instead. They are easier and taste fabulous–very close to the ones in the store, and contain much less butter and eggs than brioche.
- This recipe is designed to be mixed in a bread machine, then baked in a conventional oven. If you are looking for a recipe you can mix and bake in your machine, this may not be the one for you. The steps and timing of true brioche require a brain, something a bread machine does not have.
- When making this bread, avoid letting the dough get too warm at all costs. If it happens, the butter will “bleed out” and turn the dough into a greasy mess. Temperatures and timing are important.
- The dough must be chilled for 4-24 hours after the first rise. This step is essential for shaping the dough and fully developing the yeast flavors. After shaping and before baking, the dough needs 2-3 hours to rise. Planning ahead is advised. On the other hand, the range of chilling time allows for flexibility.
Happy cooks speak up
“I just wanted to say that this is a really fantastic recipe, I’d tried others before that didn’t work but this really does. I even managed to make it using dairy free butter for my son who’s allergic to dairy and it worked a treat. Thank you!”—LISSIE
Addendum 08/10/23: I have recently revised and changed this recipe to make it easier and more dependable–as much as one can do with brioche. If you printed it off in the past, you might want to update it with a new copy. Sorry for the inconvenience. I can never stop tweaking my recipes. I think you will enjoy this more than ever.
What Makes Brioche Different from Other Breads?
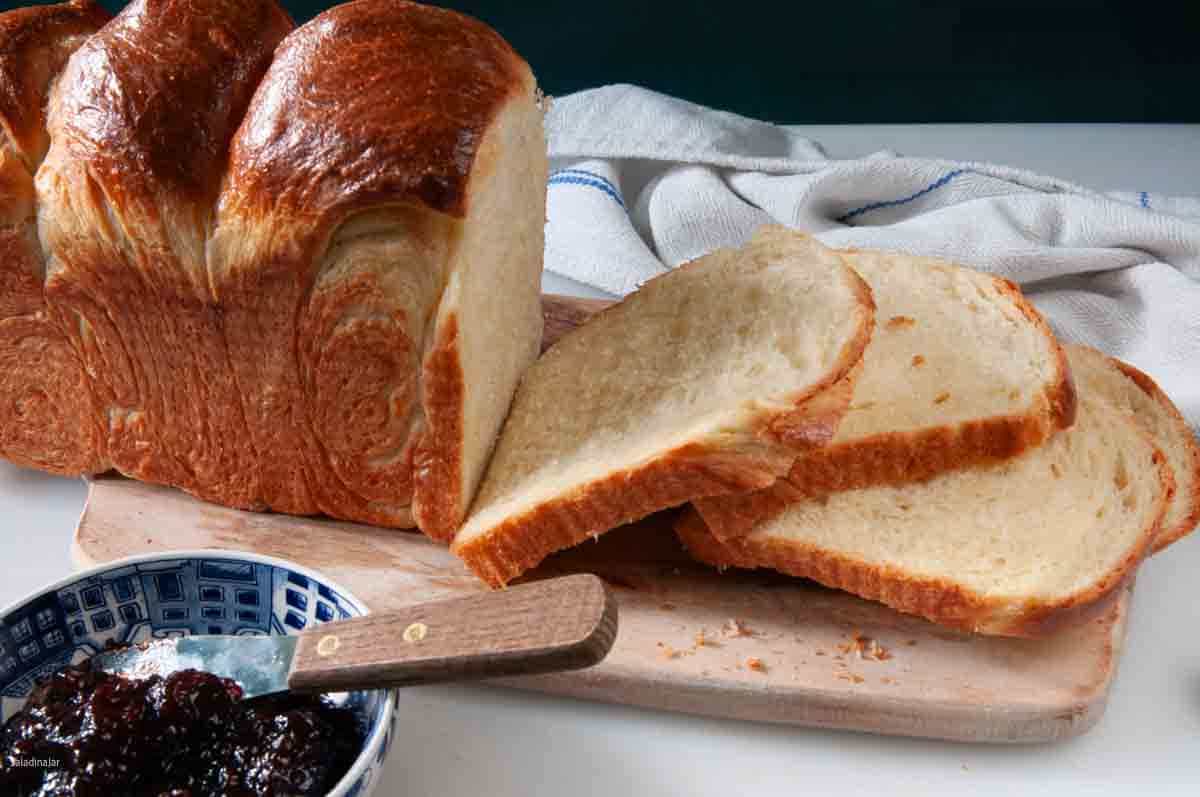
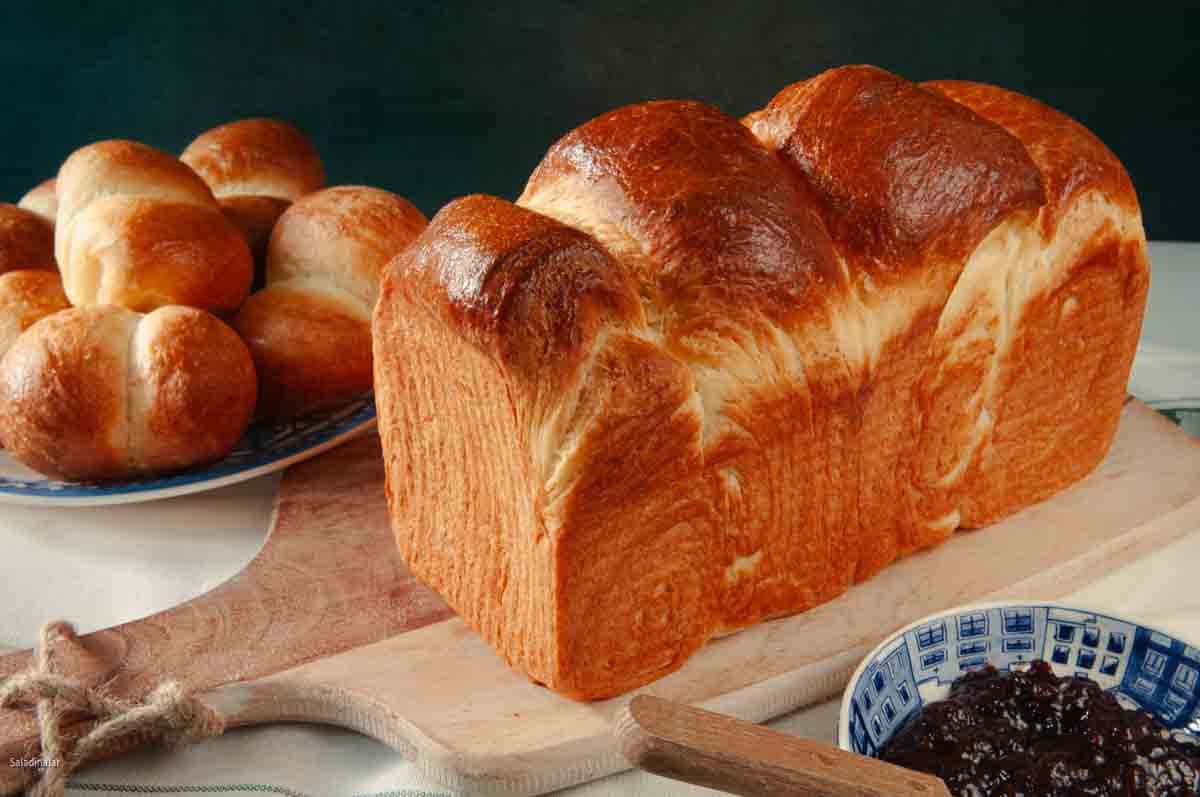
Brioche is a finely textured, rich, buttery, and eggy bread. It may remind you of Challah, Egg Bread, or a rich dinner roll, but they are NOT the same. When done right, you can pull a brioche bread apart in layers, and the crust will be almost flaky.
Some bread machine recipes claim to be brioche, but the gluten is not well-developed (resulting in a texture like cake), or the butter and eggs have been reduced to make the recipe easier.
Butter and eggs are what make brioche unique…and challenging. It’s not a diet bread, but who cares when it tastes this fantastic. If you execute this recipe correctly, it will give you the same satisfaction as making a perfect sourdough loaf without any commercial starter. The thrill of sharing it with friends will be hard to contain.
How Do I Shape Brioche?
You’ll find instructions below for making brioche burger buns, simple rolls in muffin cups, and a loaf. Or go for the traditional fluted shape with a little hat.
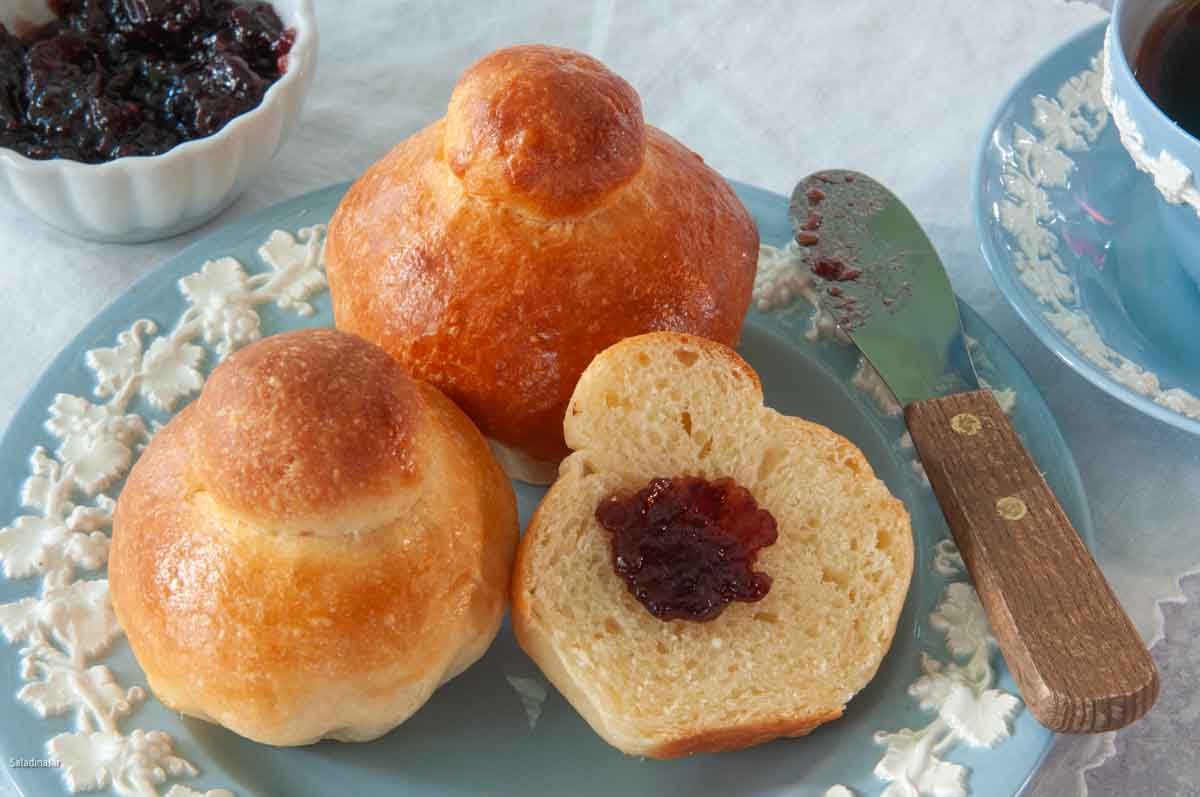
The traditional way to shape brioche
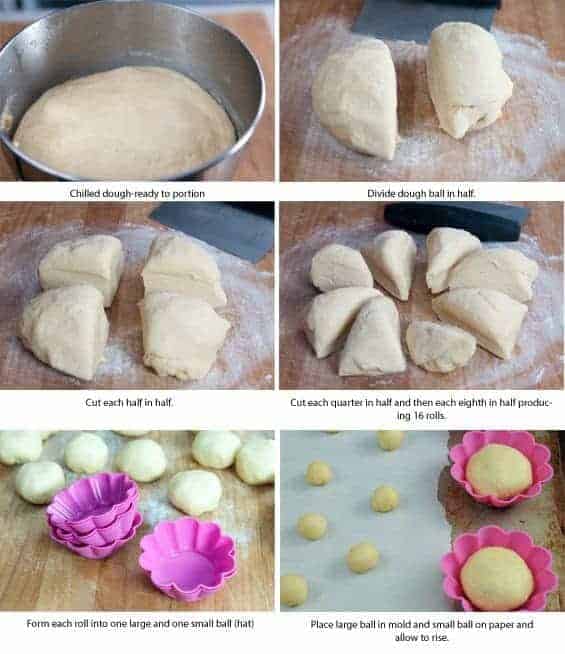
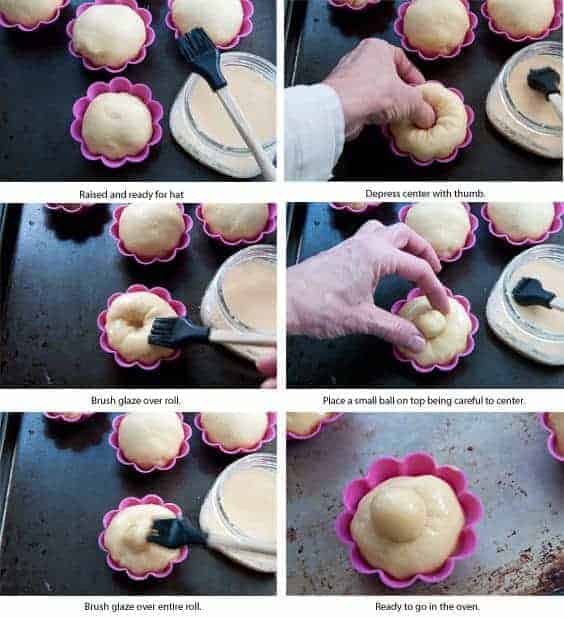
The French call it brioche à tête (with a hat). After making many buns with lopsided caps and ugly surfaces, I devised a cheater method. I made a picture board to show you how I do it. Look for it in the shaping section below.
Ingredients and Substitutions
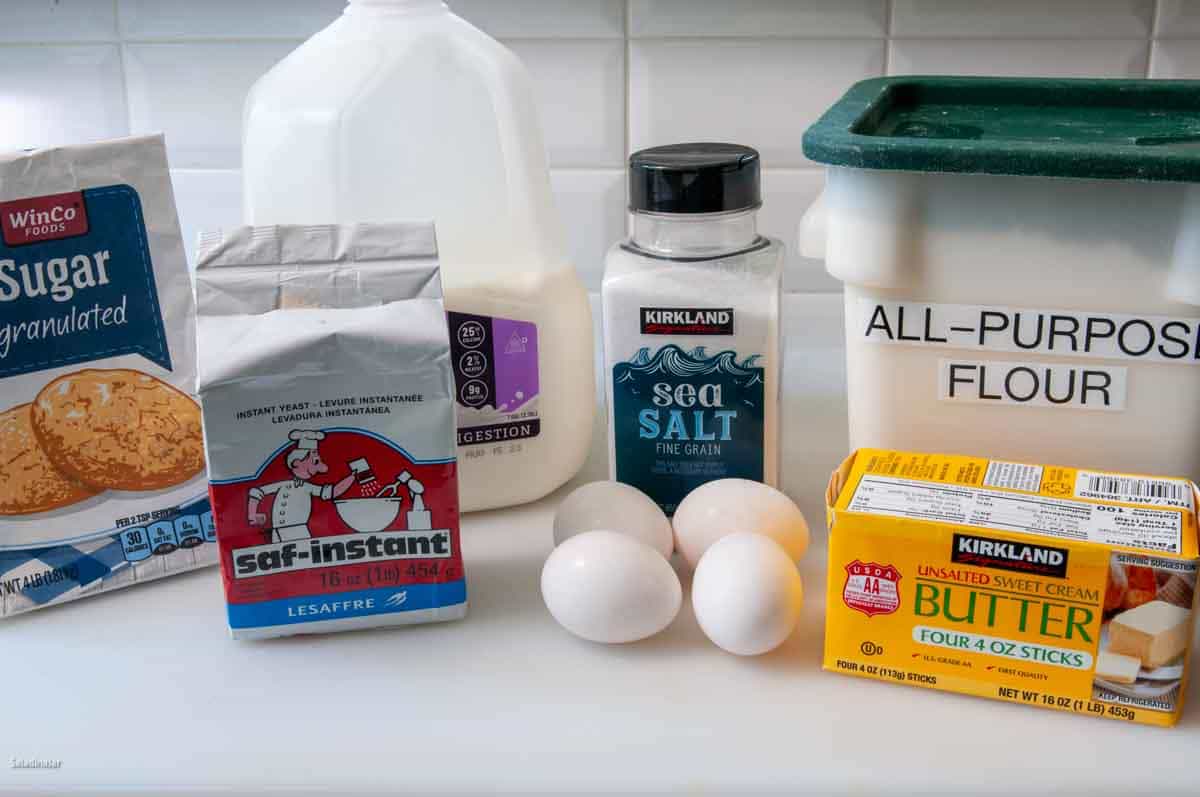
- MILK: Use dairy milk (with any fat percentage). This recipe has not been tested with non-dairy milk.
- FLOUR: I prefer unbleached all-purpose flour. Some people like bread flour for brioche, but I vote for the softer all-purpose flour, which results in a more tender texture that brioche is known for.
- EGGS: Large-size eggs are all I use. You may have to adjust the liquid if you need or want to use a different size.
- SUGAR: This recipe has only been tested with granulated sugar.
- SALT: Use table salt or sea salt. If using Kosher salt, add a 1/4 teaspoon more.
- BUTTER: I use unsalted butter as opposed to salted butter. If you only have salted butter, cut back on the salt in the recipe.
- I also like to use “European butter” because it contains less water. If you have a Braum’s store nearby, they run good sales on their European-style butter quite often. Stock up.
- Regarding substitutes, butter is the star of the show! No substitutes are allowed at my house. Of course, you can experiment with something else, but I can’t recommend anything from experience.
- YEAST: Instant or bread machine yeast is my go-to for all bread machine recipes. Add a quarter of a teaspoon extra if you must substitute active dry yeast.
- Many people who use active dry yeast like to dissolve it first. According to King Arthur Flour, this step is no longer necessary with modern formulations, but it’s OK to do it if you prefer.
Kitchen Secrets for Making Brioche with a Bread Machine
1. Don’t warm the ingredients before adding them to the pan.
Unless frozen, you can and should use the eggs, butter, flour, and yeast straight from the refrigerator. It is important that the dough doesn’t get too warm, or the butter will leak out of the dough and cause a greasy mess that is impossible to salvage without adding lots of flour, which leads to dense brioche.
2. The dough seems too sticky. Can I add more flour?
This dough is completely different from most breads. If you follow my “surprising secret for making better bread with a bread machine,” ignore that technique for this recipe.
For this discussion, I will assume you weighed the ingredients accurately. The dough will be very sticky, which is why a bread machine is a fabulous way to knead this bread.
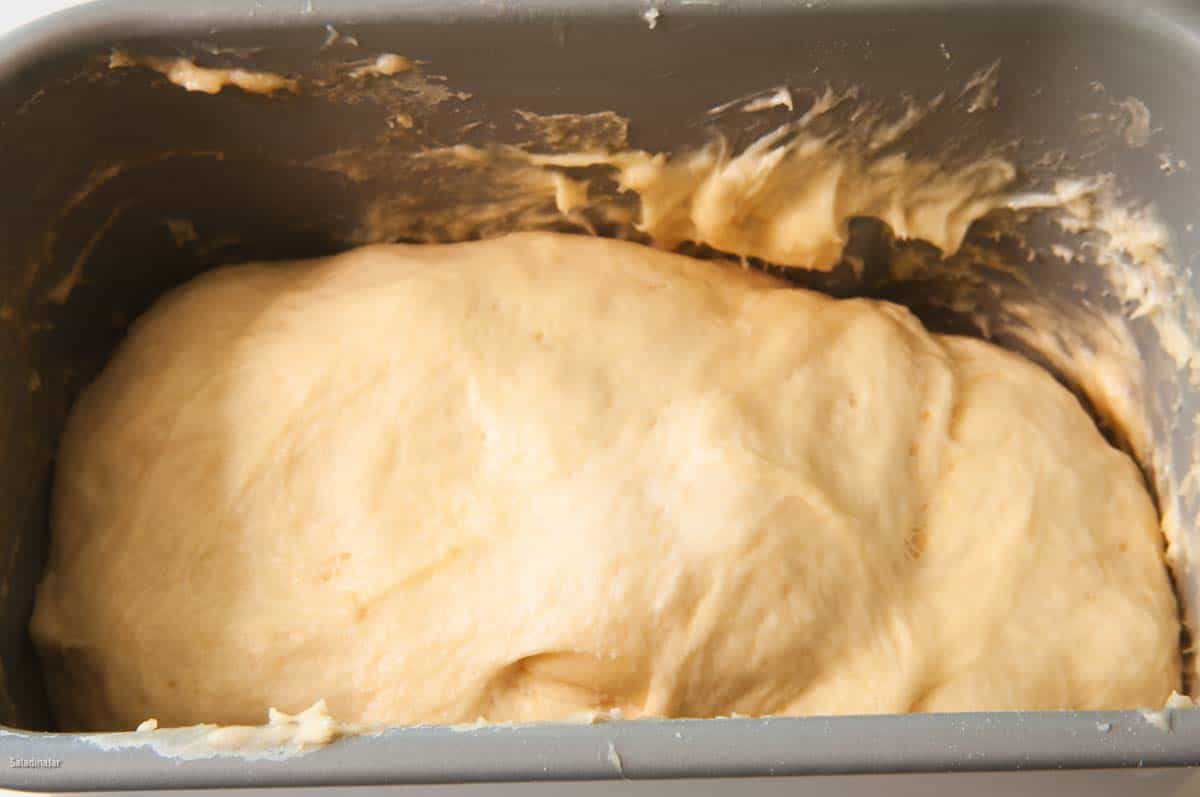
Let the machine do its magic and knead the dough, which builds the gluten, and eventually, the dough will begin to hold its shape and become a stretchy and supple dough. It will still be sticky with dough on the bottom under the paddles at the end of the DOUGH cycle. However, after the dough rises and is chilled, handling the dough is not difficult unless it warms up before you finish.
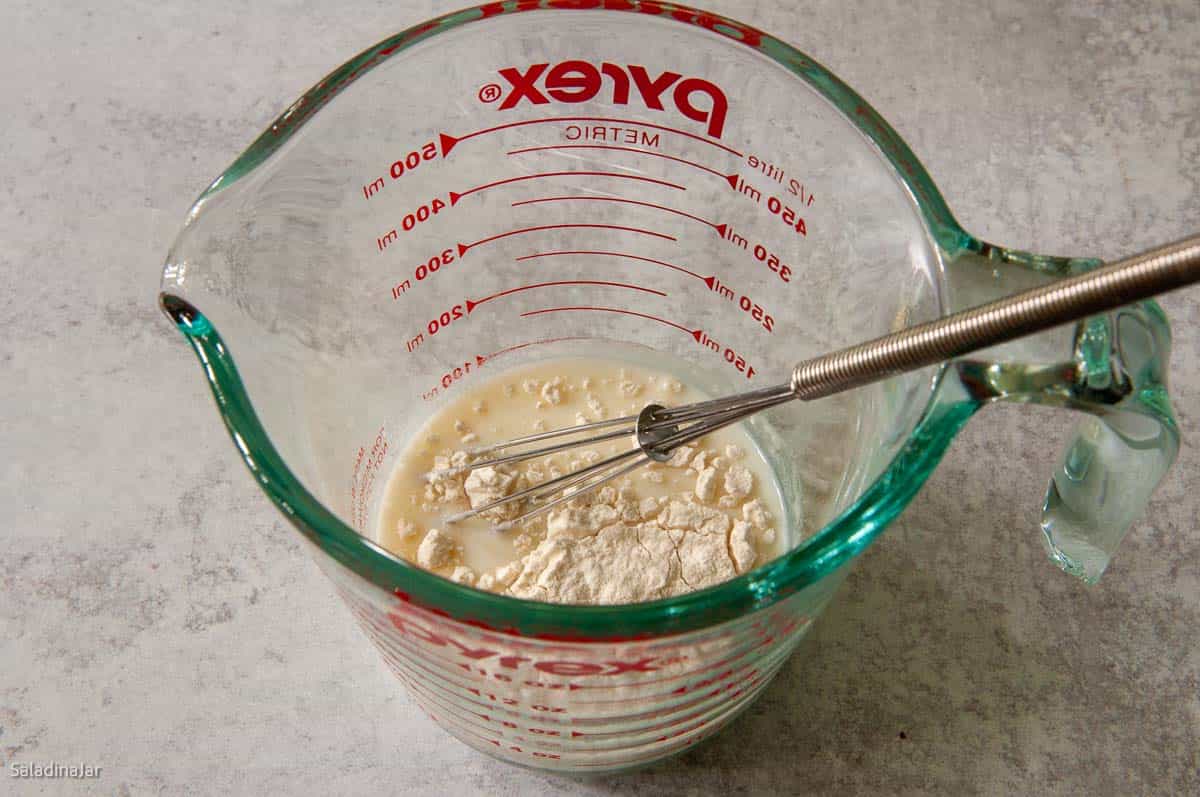
3. The Tangzhong trick
The Tangzhong method is a great way to increase the percentage of liquid in a bread recipe without resulting in a runny, sticky mess. The result is a moister bread with a better texture that stays fresh longer. In addition, the dough is easier to handle.
Overcooking the milk and flour mixture may cause it to become a blob, too thick to blend into your dough correctly. Throw it out and start over.
Let this mixture cool slightly before adding it to the bread pan. If it is too warm, your dough mixture may become greasy.
4. Adding the butter
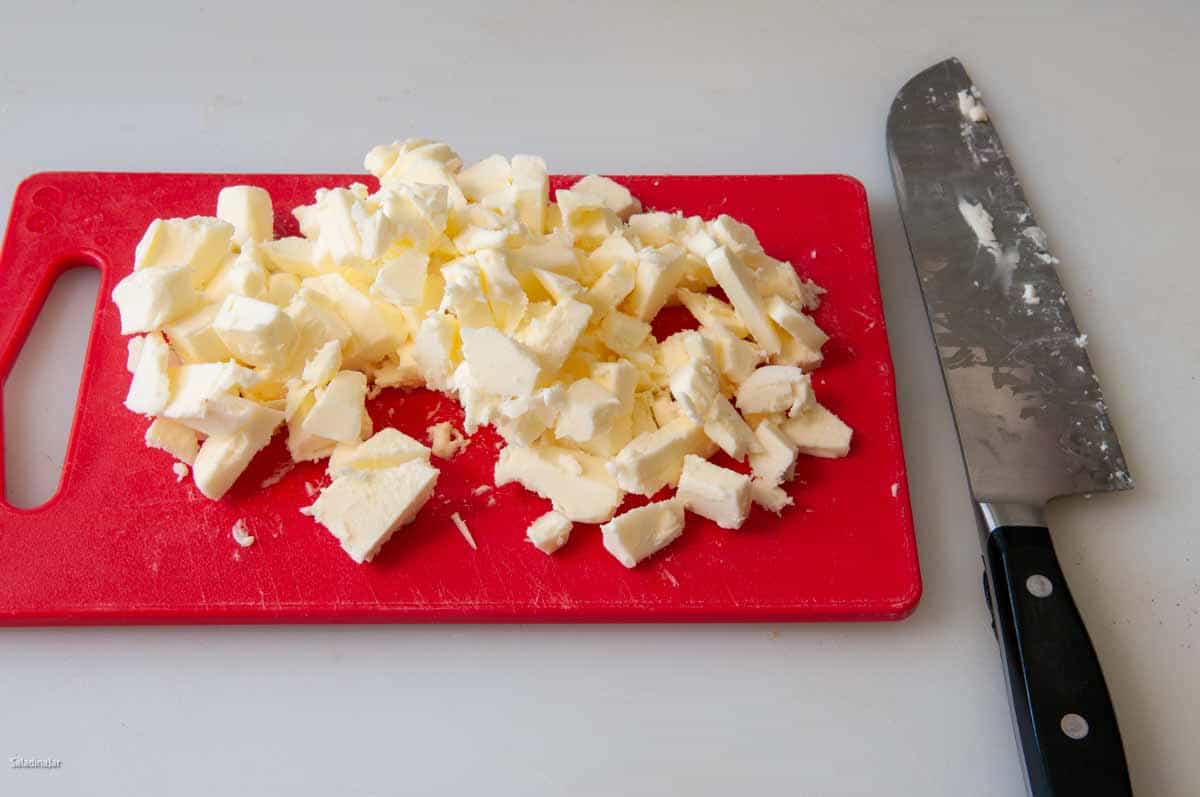
Over time, I have changed the way I do this. Now I add the butter after the machine has kneaded the first for a couple of minutes. The easiest way I’ve found to add butter when using a bread machine is to chop the cold butter (straight out of the fridge). Then squish it through your fingers as you add it to the dough while the machine is kneading. This will help the butter to incorporate as quickly as possible.
5. Removing rolls from the pan
Getting rolls out of the pan uninjured can be challenging. Try using a spray butter/flour mixture like Baker’s Secret (paid link). (I can’t tell you how handy this stuff is if you bake a lot.) Generously spray each cavity if you use a standard muffin pan.
Newsflash: My sticking problems were solved when I discovered these individual silicone plastic pans/molds (paid link). Same thing with USA baking pans (paid link). You don’t have to grease them ahead of time. Nothing sticks to them.
6. Make the dough ahead of time.
Brioche is a bit of trouble because the prepared dough needs a long chill (6-24 hours). This is not optional. Not only does it give time for the butter to bond with the flour, it allows more time for the yeast flavor to develop. On the plus side, you can make the dough the day before baking. This detail makes brioche perfect for your Christmas, Thanksgiving, or Sunday dinner menu.
Please note that the rising period after forming the rolls is usually 2-3 hours, depending on the ambient temperature. So you will have plenty of time to focus on other last-minute details.
7. Use exam gloves when shaping the dough.
The dough should be well-chilled when you are ready to shape it. Gloves will help protect the dough from getting too soft due to your warm hands while handling the dough.
How To Mix and Knead Bread Machine Brioche
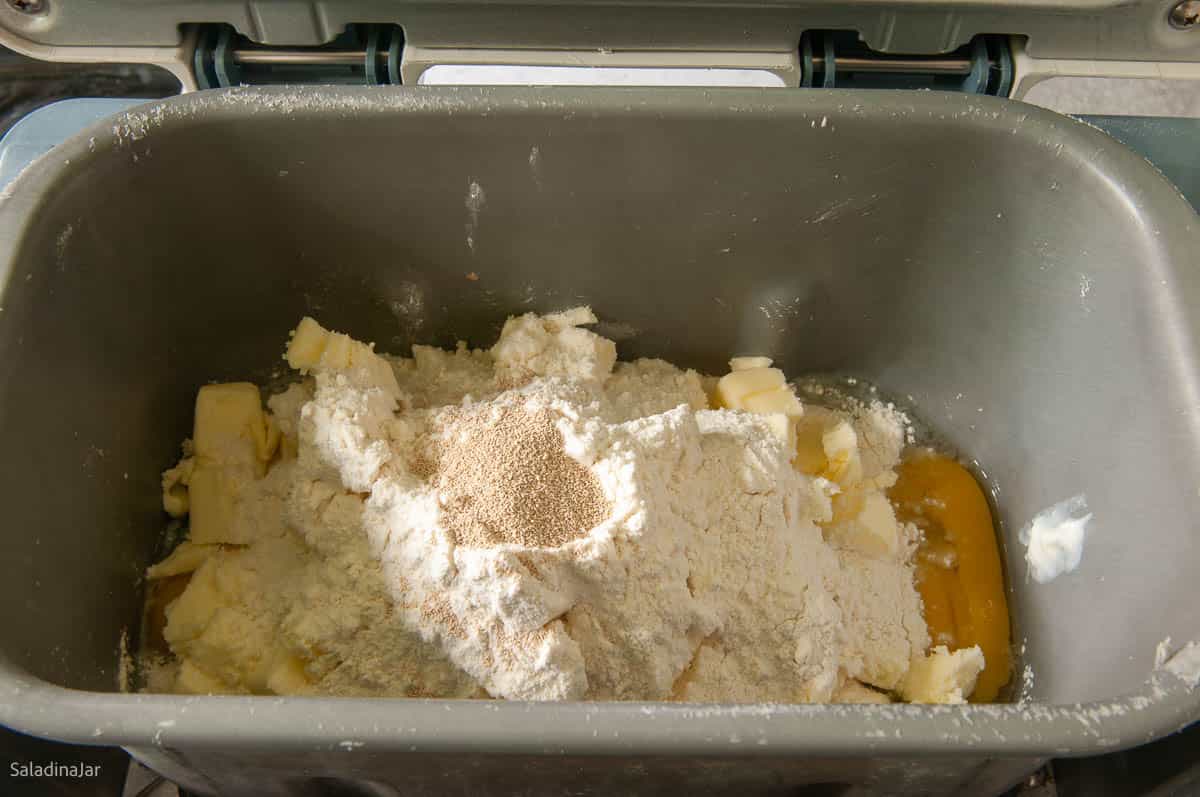
This dough is so tricky!! I will show you pictures of the dough as it passes through the various mixing and kneading stages. Because bread machines are programmed differently, your DOUGH cycle may not be exactly like mine. I hope these pictures will help. Note: Do not use the preheat feature for this dough. Either turn it off or start the DOUGH cycle and let the preheat phase run out before you add the ingredients.
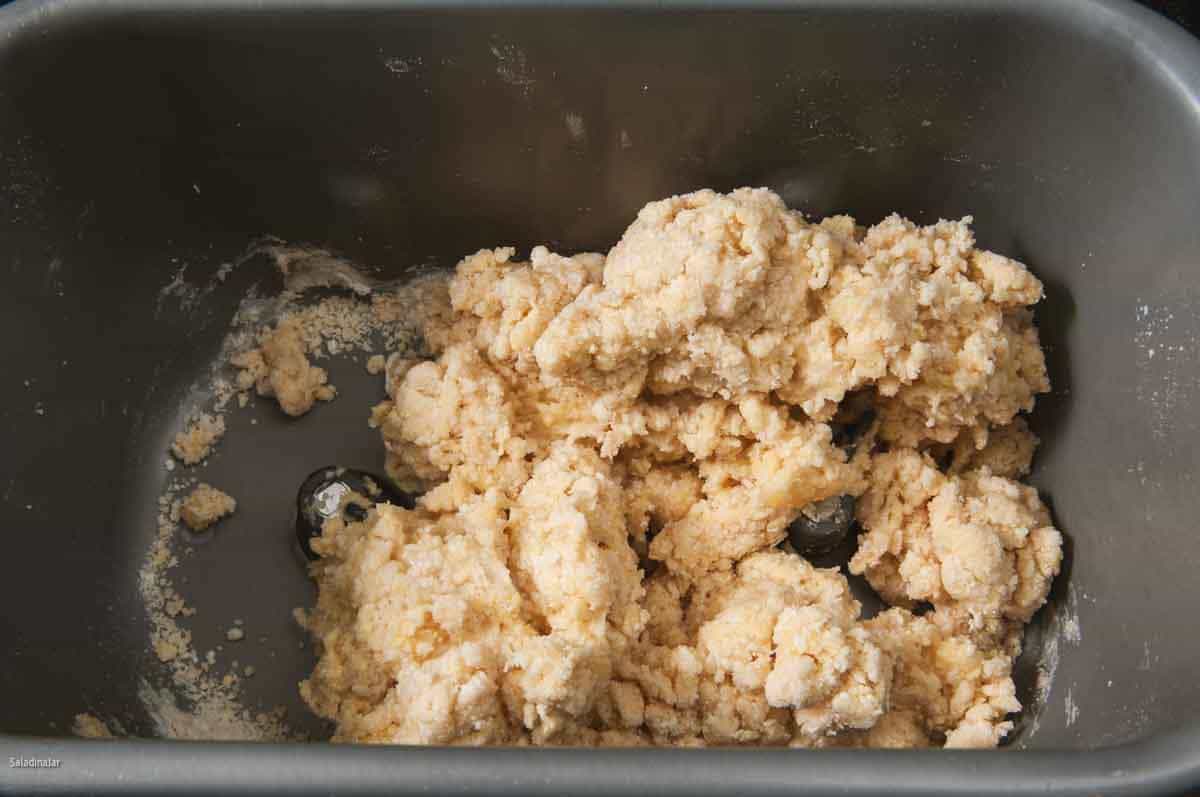
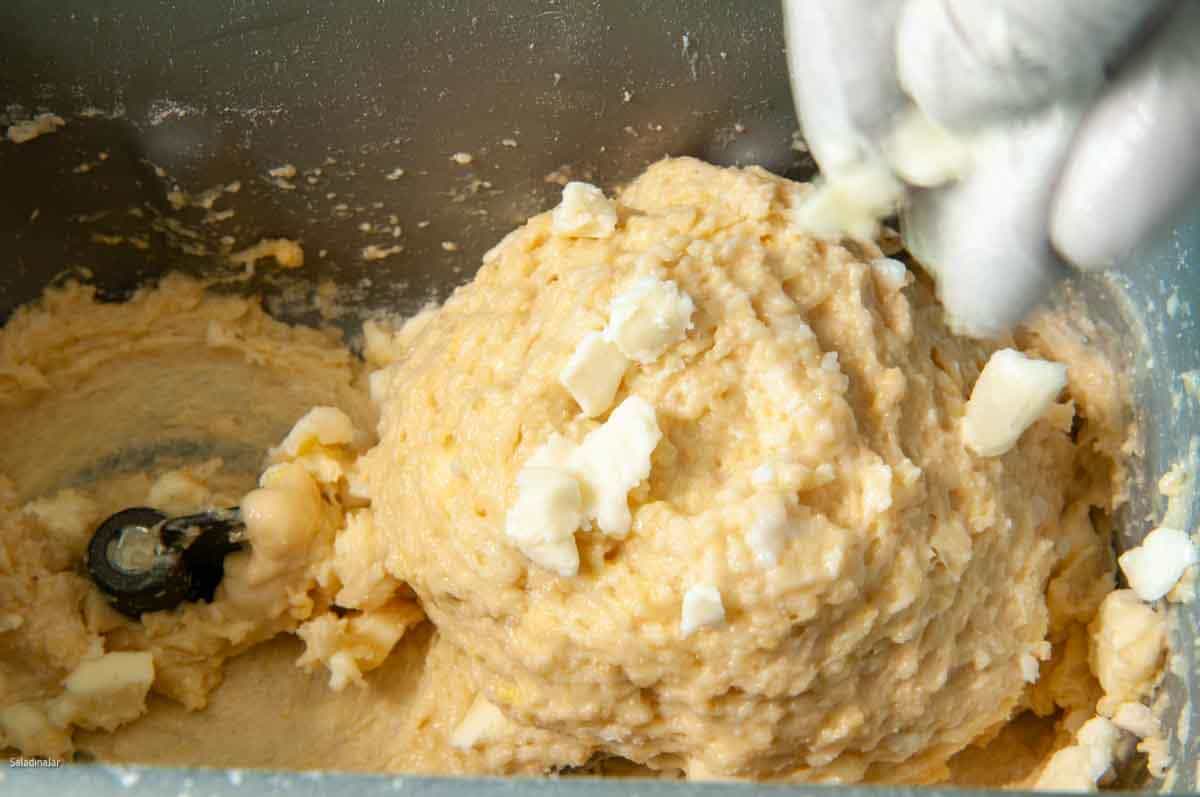
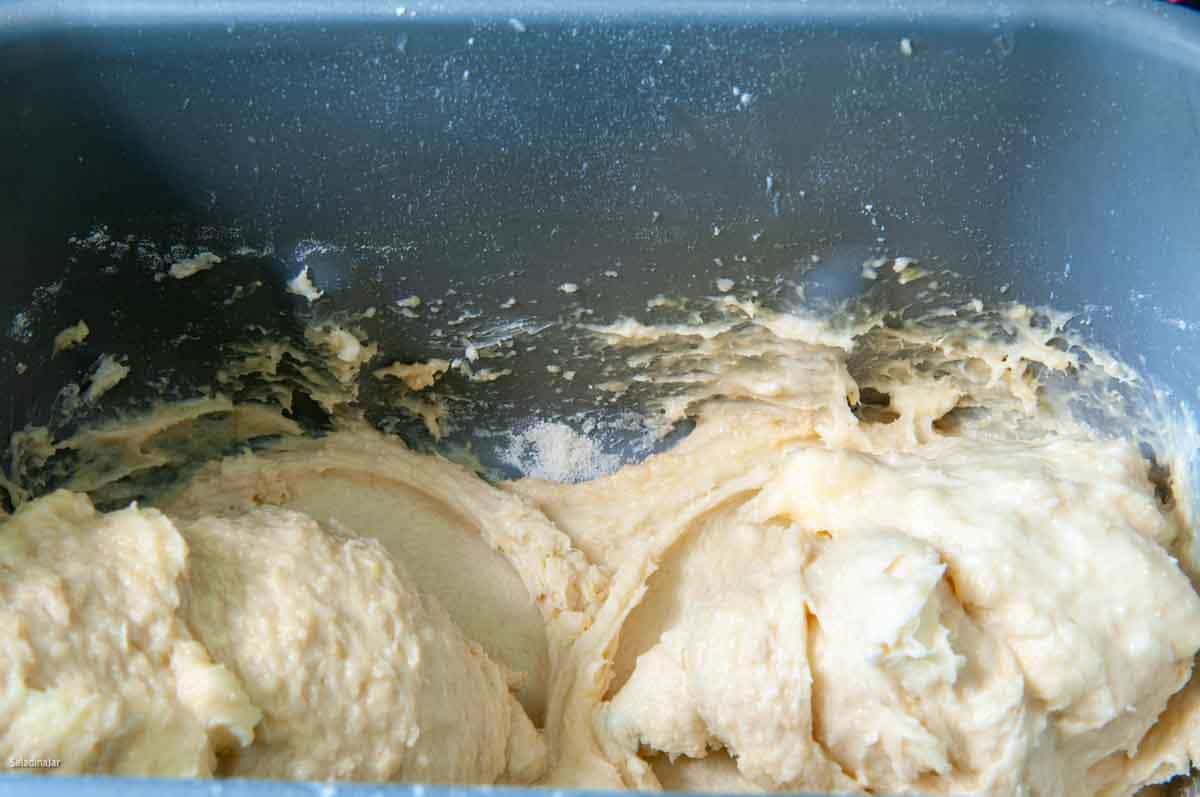
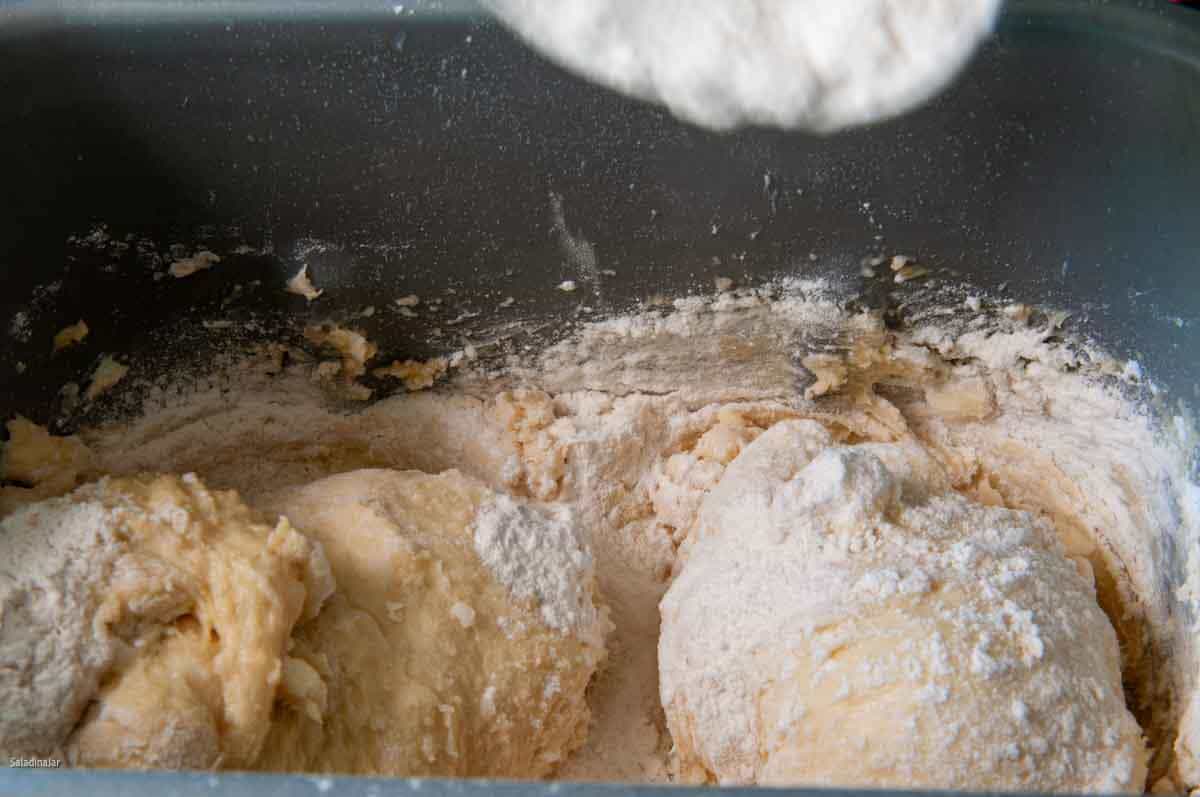
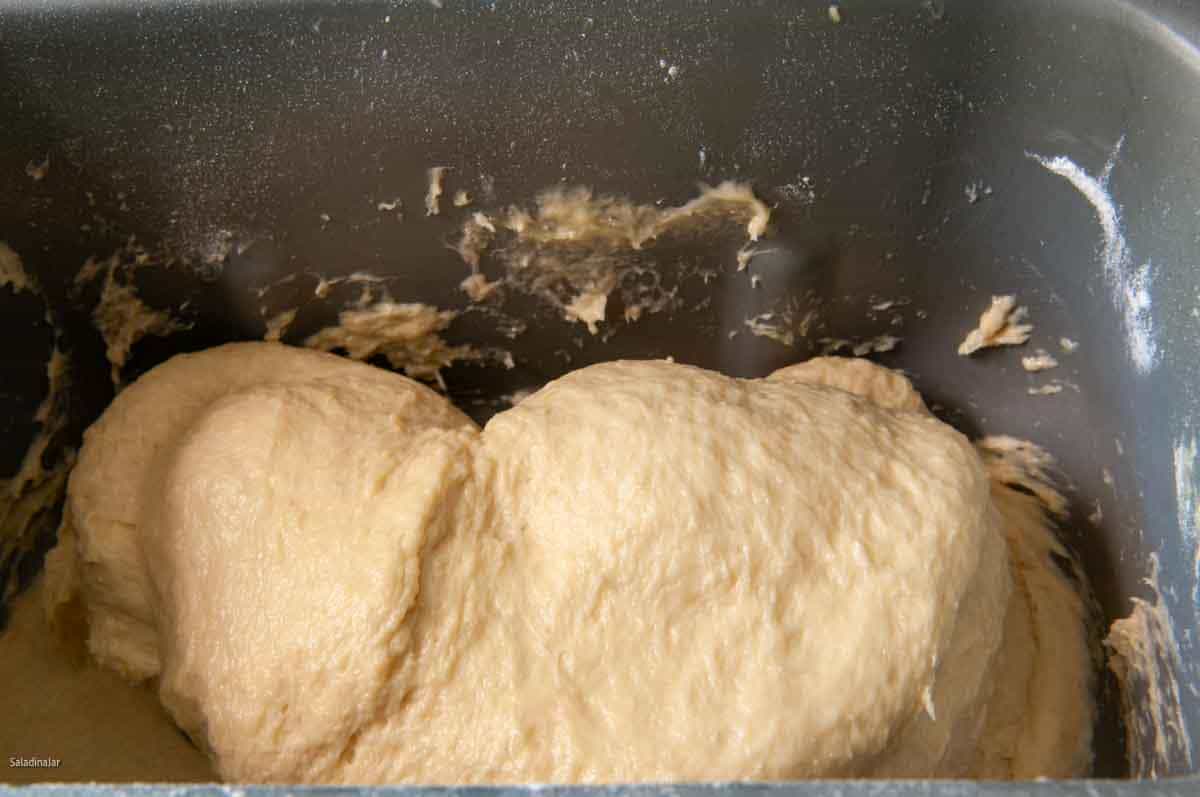
If your dough looks like the picture above, I urge you not to add more flour. After the dough chills overnight, it won’t be sticky anymore (unless it is allowed to warm up before you shape it).
There are many ways to shape brioche dough. Take your pick from the ones listed below, or do your own thing. If you want something fancier, take a look at this Pumpkin Brioche Twist for inspiration and direction.
How To Shape Easy Dinner Rolls Using a Muffin Pan
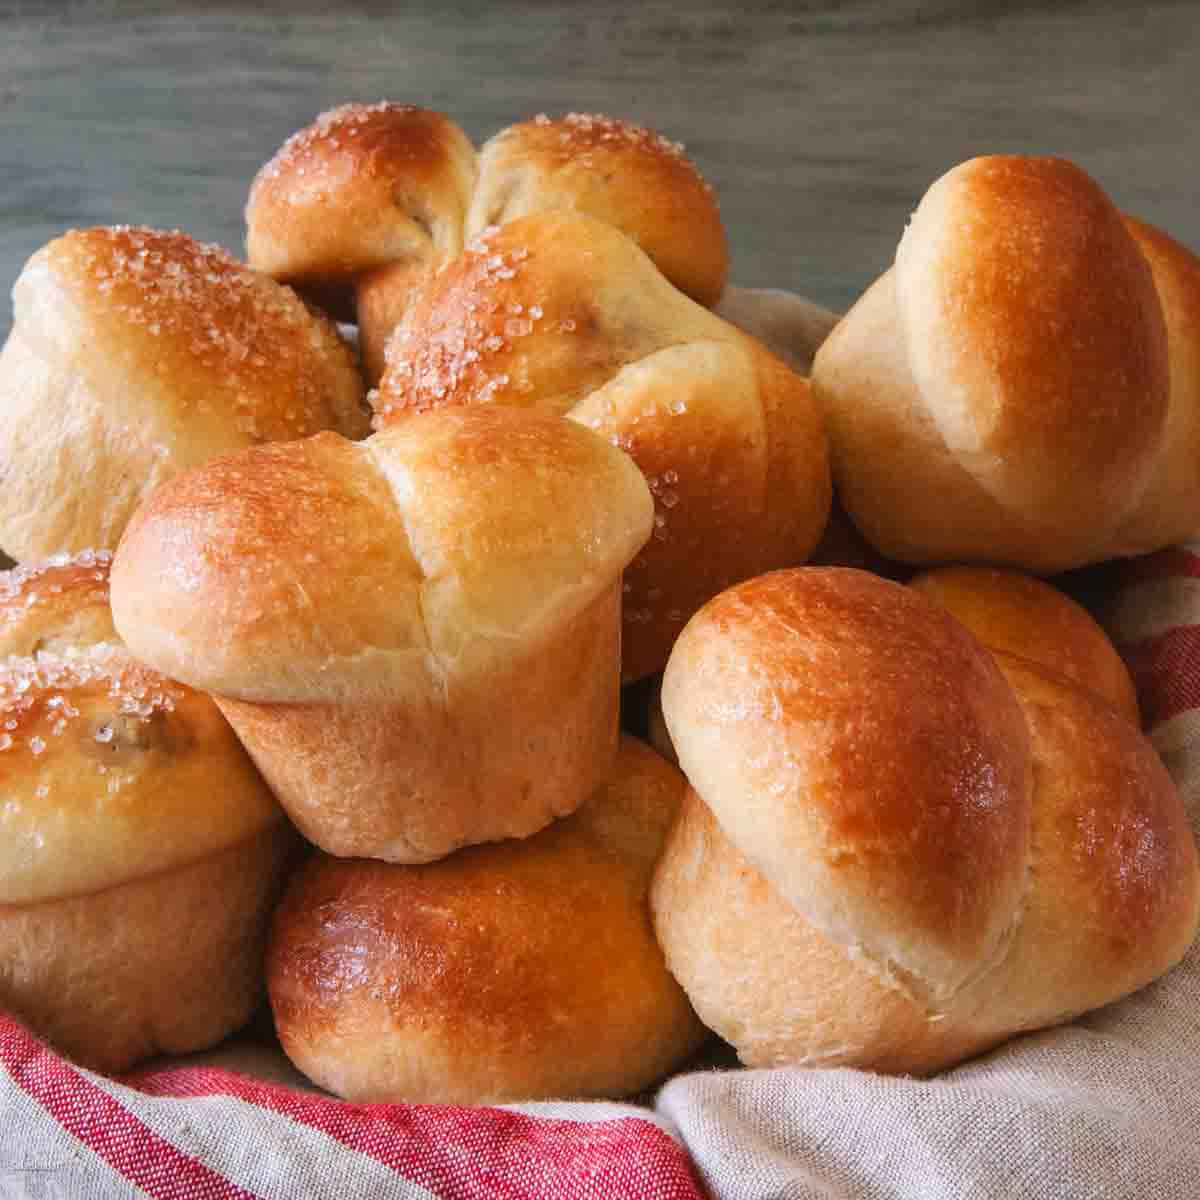
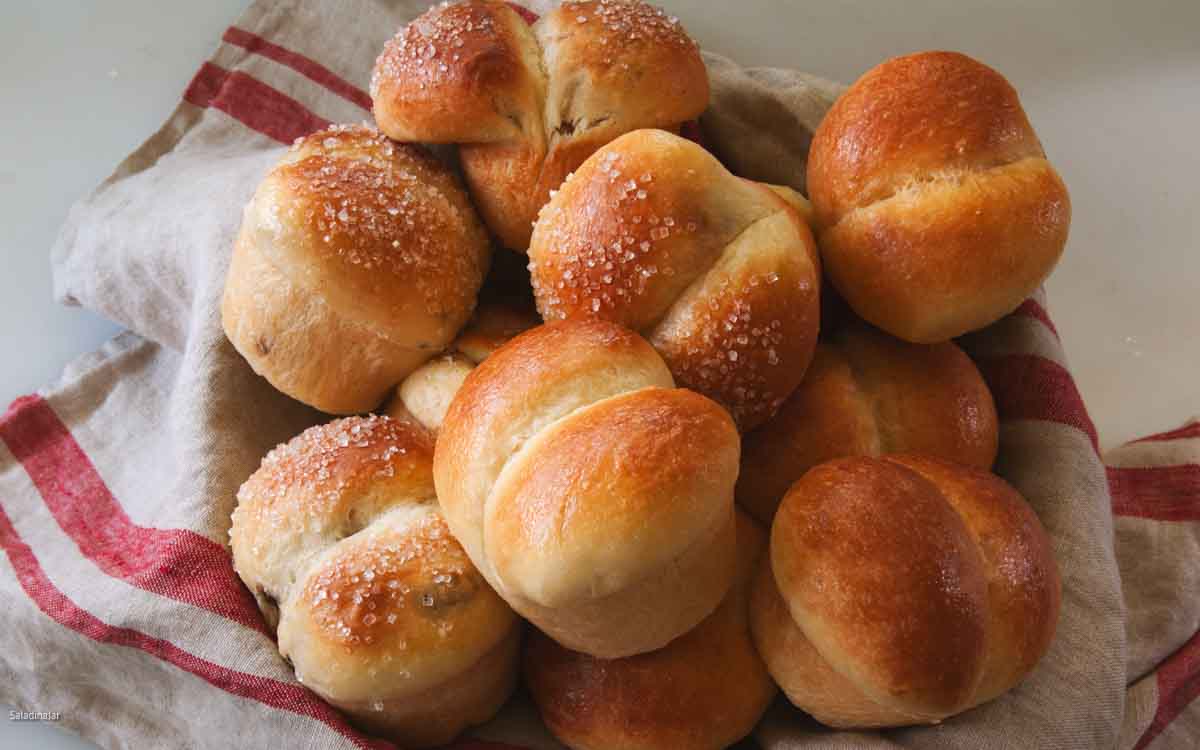
Remove the chilled brioche dough from the fridge and place it onto a lightly floured surface. I like to work raisins into half of the dough and sprinkle the glazed top with sanding sugar before baking. Guests and friends have a choice of sweet or plain. Most will want to try both.
There’s something exciting about having a choice when it comes to a bread basket, cookies, or sandwiches.
a Paula-ism
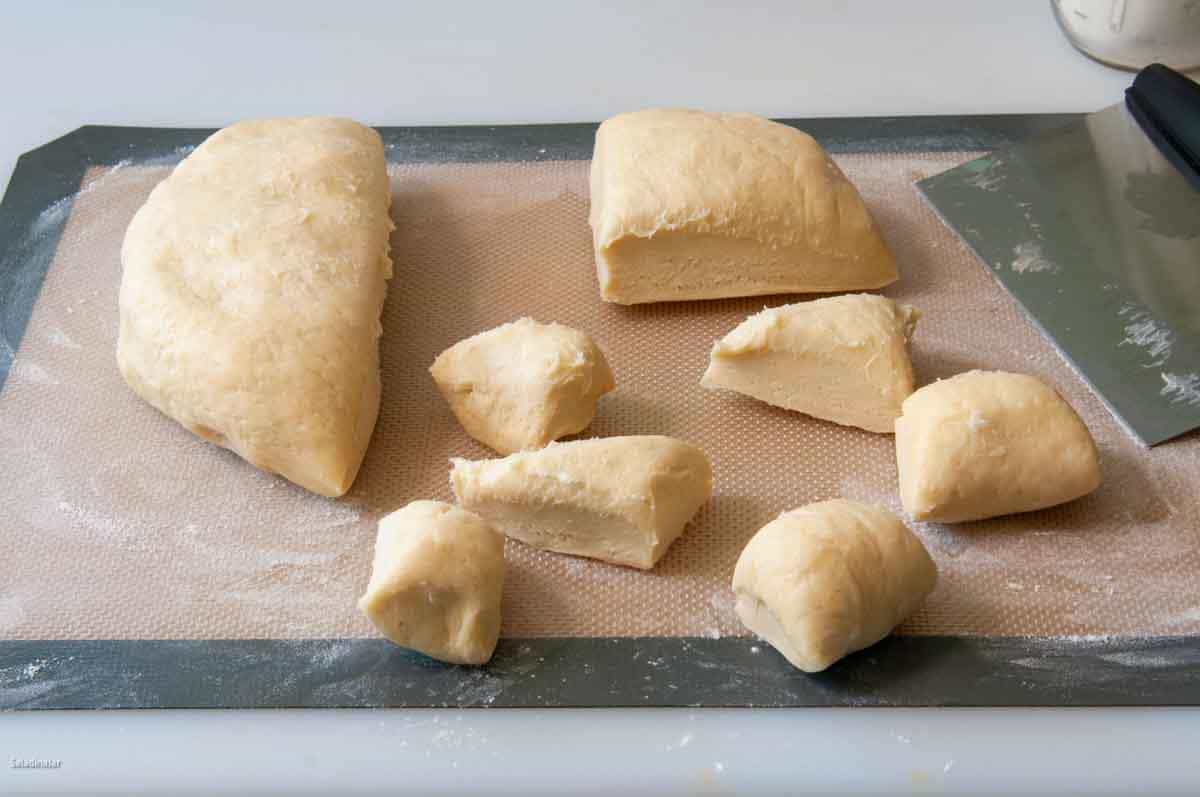
📌Kitchen Tip📌: I like to roll all of the dough into balls before placing any of them into the cupcake pan holes. Pair balls together that look exactly the same size. They bake up prettier that way.
How To Make Sugar-Crusted Raisin Brioche
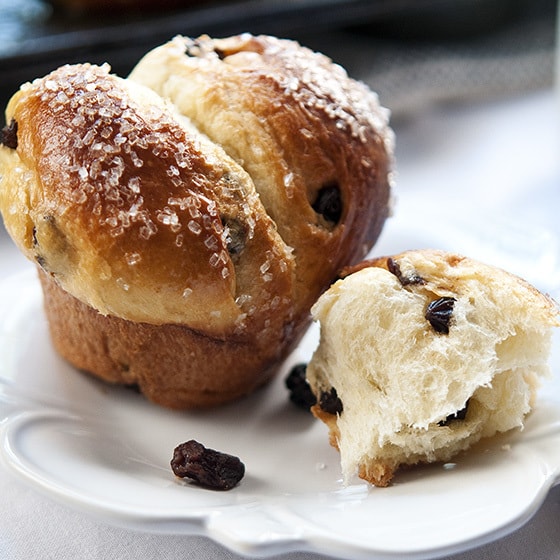
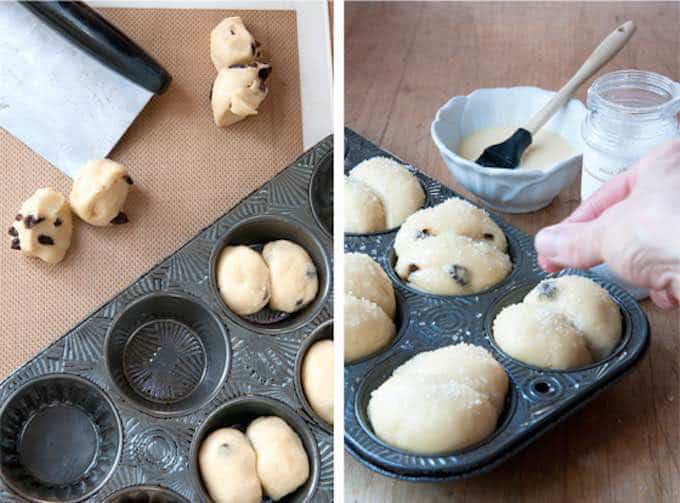
- Add 3/4 cup of raisins or currants to the dough a couple of minutes before the kneading cycle ends in the bread machine. Some machines will beep when it’s time to add fragile ingredients.
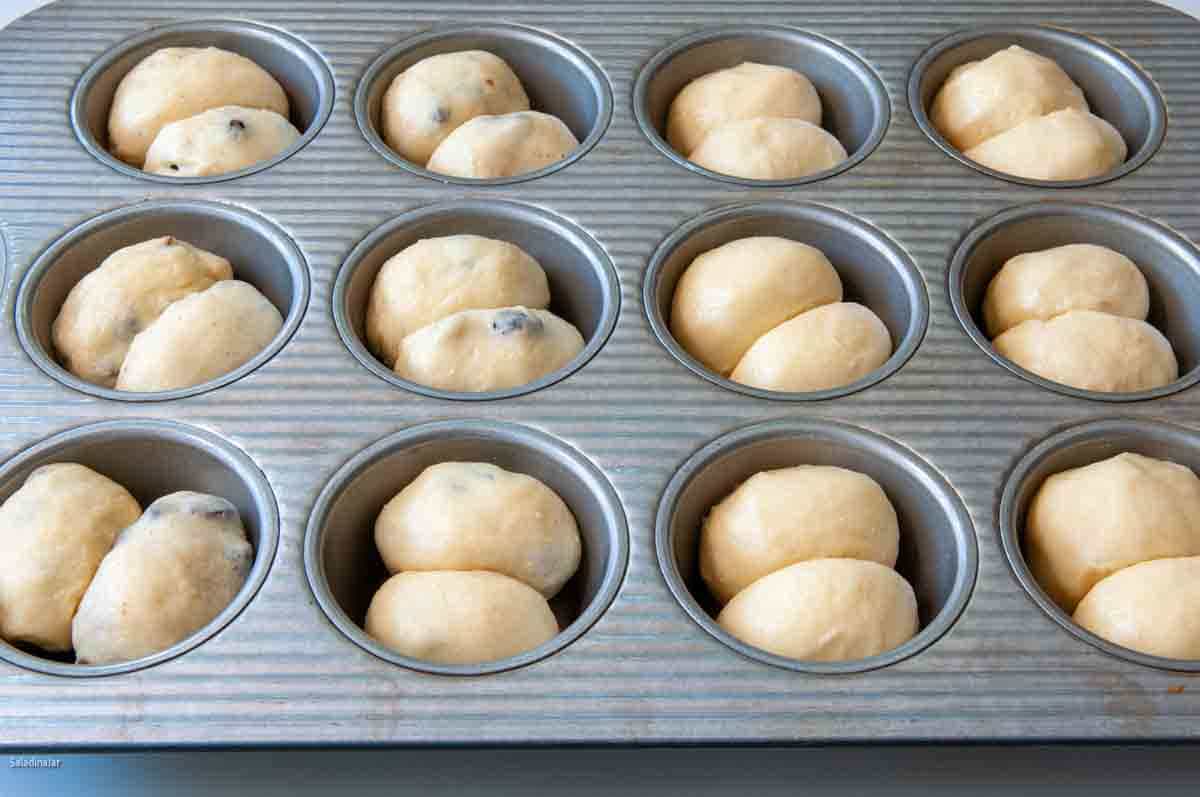
- For rolls that look like those pictured, divide the dough into 24 equally-sized portions after the overnight chill, then roll them into balls.
- Place two balls side-by-side into each cup of a muffin pan.
- Next, allow the formed rolls to rise for about 2-3 hours until light and doubled in size.
- Finally, glaze and sprinkle rolls with coarse sugar before baking.
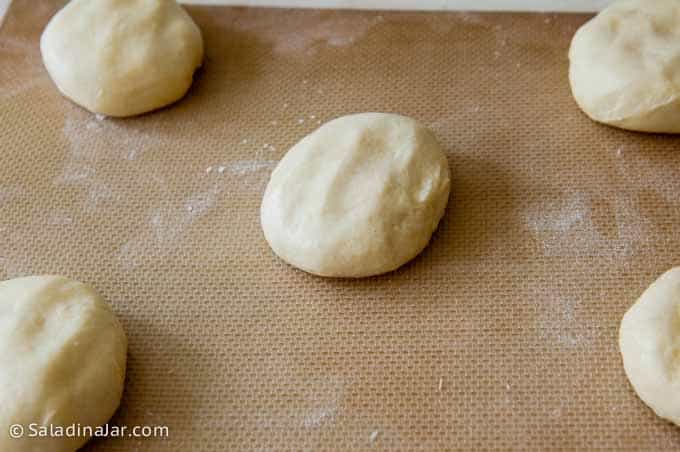
How To Shape Brioche Burger Buns
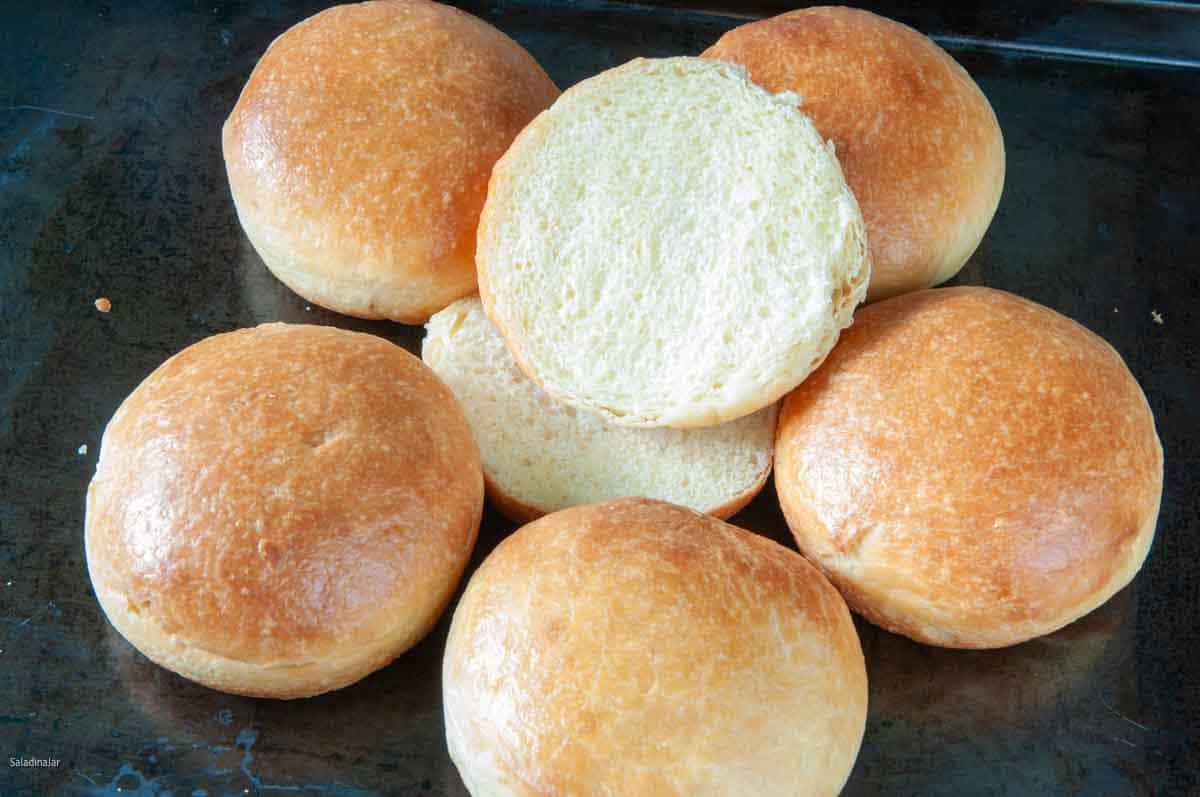
Brioche is having a moment as a “burger bun.” One of my favorite recipes for fresh salmon patties suggests a brioche bun. The idea launched me into an obsession with making these buns at home.
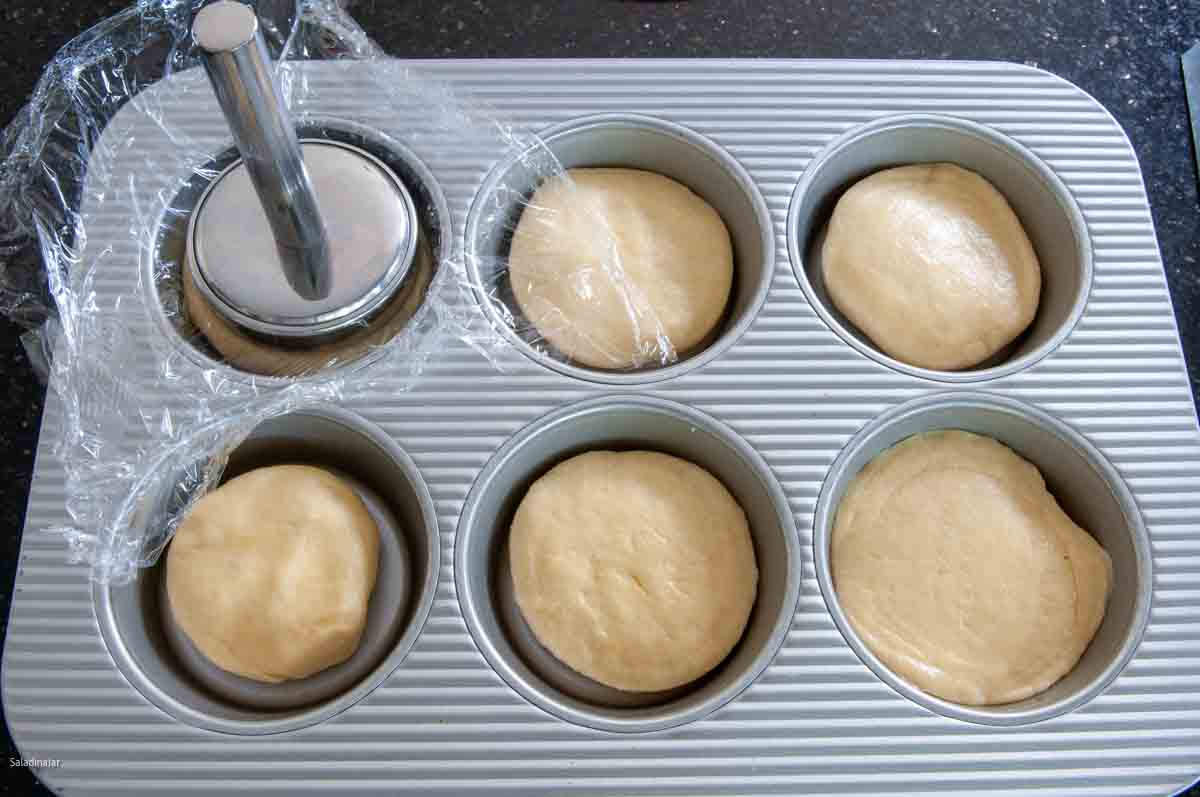
Buns are as easy to make as balls. Portion them a little bigger and smash them. More instructions are included below.
How To Shape a Brioche Loaf
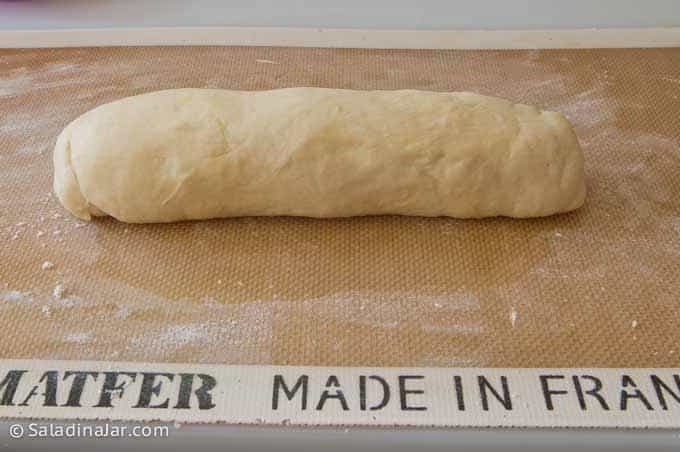
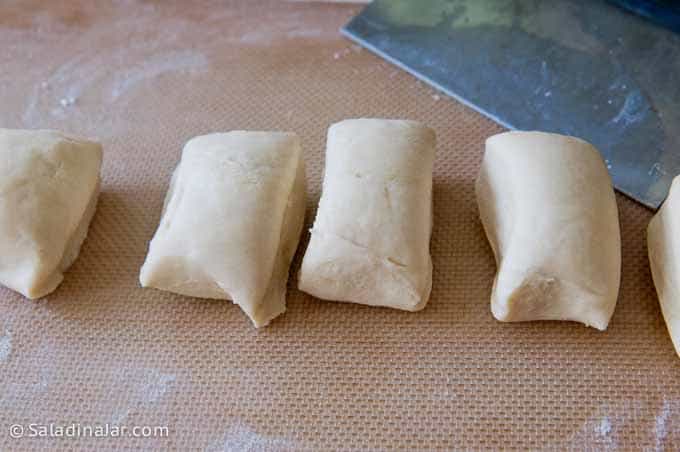
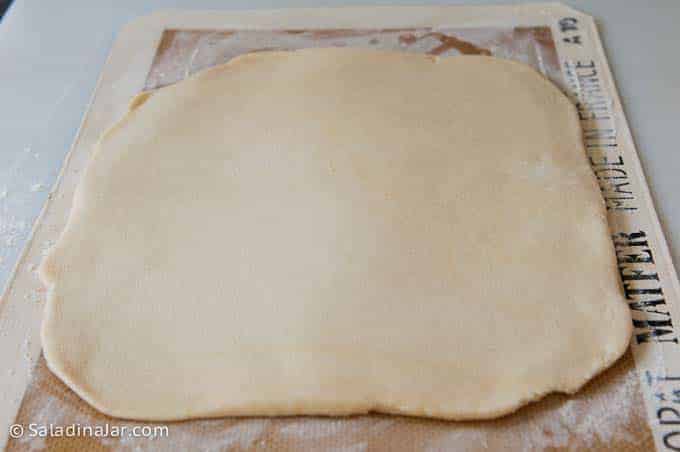
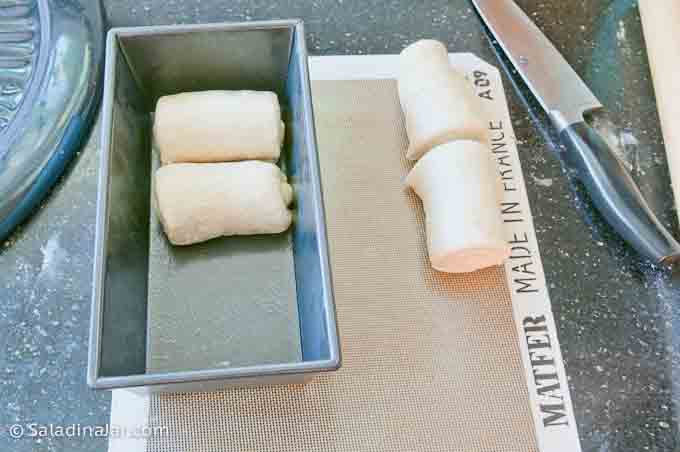
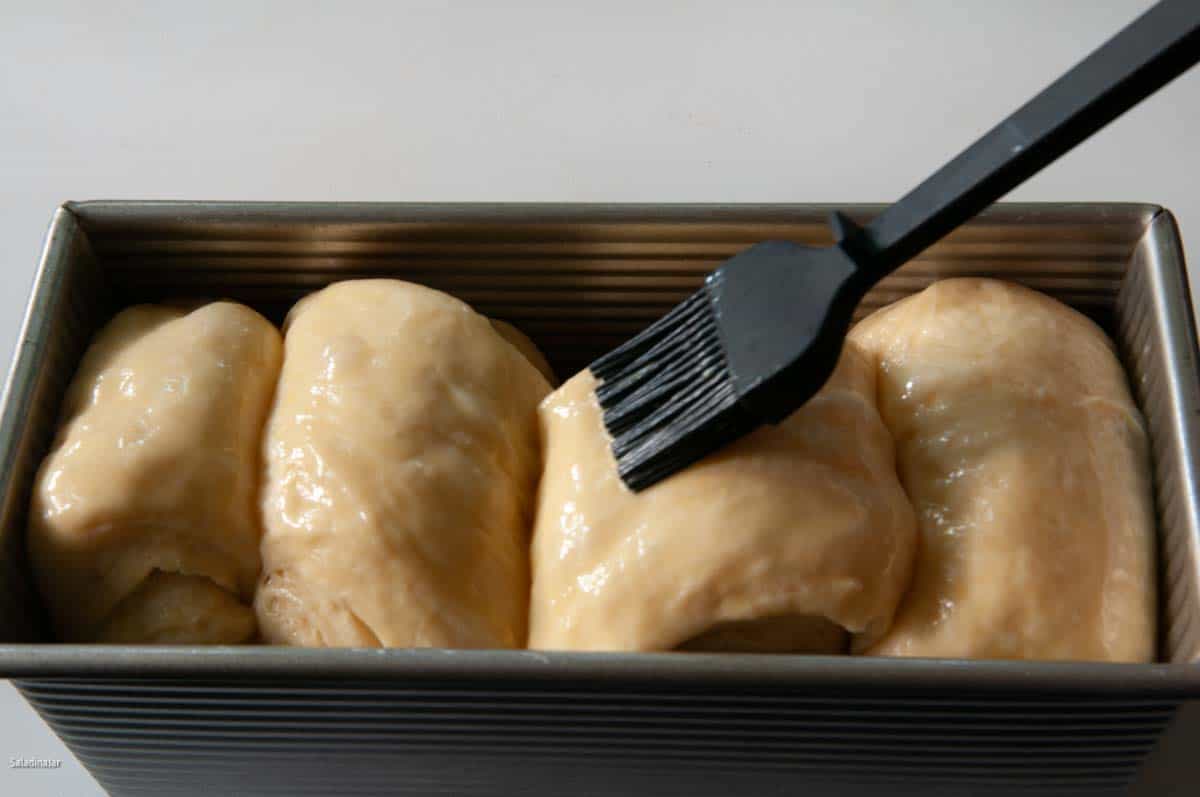
Brioche, shaped like a loaf, is quick to put together. I’ve tried several ways, but the pictures below show my favorite. Dividing the dough into four pieces instead of one helps avoid a blow-out on the sides as the bread bakes.
Sliced brioche makes a sophisticated grilled cheese sandwich or French toast. You can also make a scrumptious bread pudding with day-old cubed brioche bread.
A Foolproof Way To Make the Classic Brioche à Tête
This is my method for keeping the hats straight.
.
FAQ About Bread Machine Brioche
No. I suggest you don’t even try making brioche from beginning to end in a bread machine. Authentic Brioche is a delicate dough with completely different timing than the average loaf. Instead, let your bread maker do what it does best–mix and knead the dough. After the dough sits in the refrigerator overnight, shape it by hand and bake it in your oven for bread worth sharing.
Brioche dough is not like most bread. It will be sticky in the beginning, middle, and end–until you chill it. If you add flour until the dough is no longer sticky, your bread will be too dense and not representative of the classic feathery light brioche.
At some point, the dough got too warm.
1. Did you warm the ingredients? Not necessary.
2. Did you let the Tangzhong mixture cool down before adding the other ingredients? Tip: Place your bread machine pan in the freezer before you start this recipe. Pour the hot Tangzhong mixture into the pan first, and the paste will cool down instantly.
3. Was the area too warm where you placed the bread machine or the shaped bread to rise? (This includes the bread machine itself during the first rise incorporated into the DOUGH cycle.) If you have a quick-read thermometer (paid link), check it. The optimum temperature for proofing this dough is around 75˚F (24˚C).
4. Be sure to read the next question and answer. It may be the fault of your bread machine if it doesn’t knead efficiently.
Try using a large stand mixer instead of a bread machine. You need power to mix the butter into the dough. If it takes your machine too long to do this, the dough will get too warm from the friction and melt the butter in the process. As I’ve repeated several times, too much heat will transform your dough into a greasy mess.
Brioche bread is like a donut. Best the day it’s made. Toast it the next day or two. After that, use it to make a decadent bread pudding.
Parting thoughts: Make cinnamon rolls or braided loaves if you are more adventurous. Just about anything you can do with a standard sweet-roll recipe, you can do with brioche. The variations are truly endless.
Looking for More Recipes You Can Make in Your Bread Machine?
Recipe Help at Your Fingertips: For questions or suggestions, email Paula at saladinajar.com. If you need help, I’m happy to troubleshoot via email (faster than leaving a comment). Attach pictures and as many details as possible for the best advice.

Bread Machine Brioche Recipe
Rate this recipe
(5 stars if you loved it)
Video
Ingredients
Tangzhong Paste
- ⅓ cup (76 g) milk
- 1 tablespoon all-purpose unbleached flour
Dough:
- ¾ cup (168 gr) unsalted butter (1½ sticks) cold but pliable
- 4 large (200 g) eggs cold
- 2 tablespoons granulated sugar
- 1 teaspoon table or sea salt
- 2½ cups (300 gr) all-purpose unbleached flour
- 2 teaspoons instant yeast
- ½ cup (60 g) all-purpose unbleached flour
Glaze:
- 1 large (50 g) egg
- 1 tablespoon heavy cream
Instructions
Making the Tangzhong Paste:
- Combine ⅓ cup (76 g) milk and 1 tablespoon all-purpose unbleached flour in a microwave-safe container. Whisk until smooth. Microwave this mixture for 45 seconds on HIGH, stopping halfway to whisk well. The mixture should turn into a thick “gravy” consistency.
- Place the Tangzhong paste into the fridge to cool down. When room temperature or cooler, pour it into the bread machine pan. (Or do as I do and place your bread machine pan in the freezer when you walk into the kitchen to make bread. After making the paste, pull the pan out of the freezer and pour the paste into it to cool it down instantly.)
Completing the Dough:
- Chop refrigerator-cold butter and set aside.
- Add 4 large (200 g) eggs, 2 tablespoons granulated sugar, 1 teaspoon table or sea salt, 2½ cups (300 gr) all-purpose unbleached flour, and 2 teaspoons instant yeast to the bread maker pan.
- Choose the DOUGH cycle and press the “START” button. Mix and knead the dough for 1-2 minutes. Use a small spatula to ensure all the flour is incorporated into the dough. The dough will look sticky and wet, like crumbly cookie dough batter.
- After the initial two minutes of kneading described in the previous step, open the lid and add ¾ cup (168 gr) unsalted butter (1½ sticks), two tablespoons at a time, as the machine kneads. The butter should be colder than room-temperature but pliable. Open the lid and squish the butter through your fingers into the dough as it kneads. Try to accomplish this quickly. If necessary, use a small spatula to push the dough around so it will mix evenly.Don’t answer the phone while you do this. You don’t want the butter to get warm.
- When you finish adding the butter, dump the remaining ½ cup (60 g) all-purpose unbleached flour into the bread machine pan as it kneads. It will continue to be wet and sticky, but that’s OK. Close the lid and ignore it.As your dough kneads, the gluten will build strength, and the dough will begin to hold its shape. However, the dough will continue to stick to the sides and pull away reluctantly but not cleanly. Resist adding more flour, unless the dough won’t pull away from the sides at all. Then, add no more than one tablespoon.
- When the kneading phase ends, leave the dough in the bread machine pan to rise. Hint: I prefer to remove the pan from the machine so the bread machine doesn’t warm the dough and cause it to get greasy. Cover the dough and let it rise on the counter until it doubles. Don’t let the ambient temperature rise above 75˚F or 24˚C for best results.
Chilling the Dough Before Shaping:
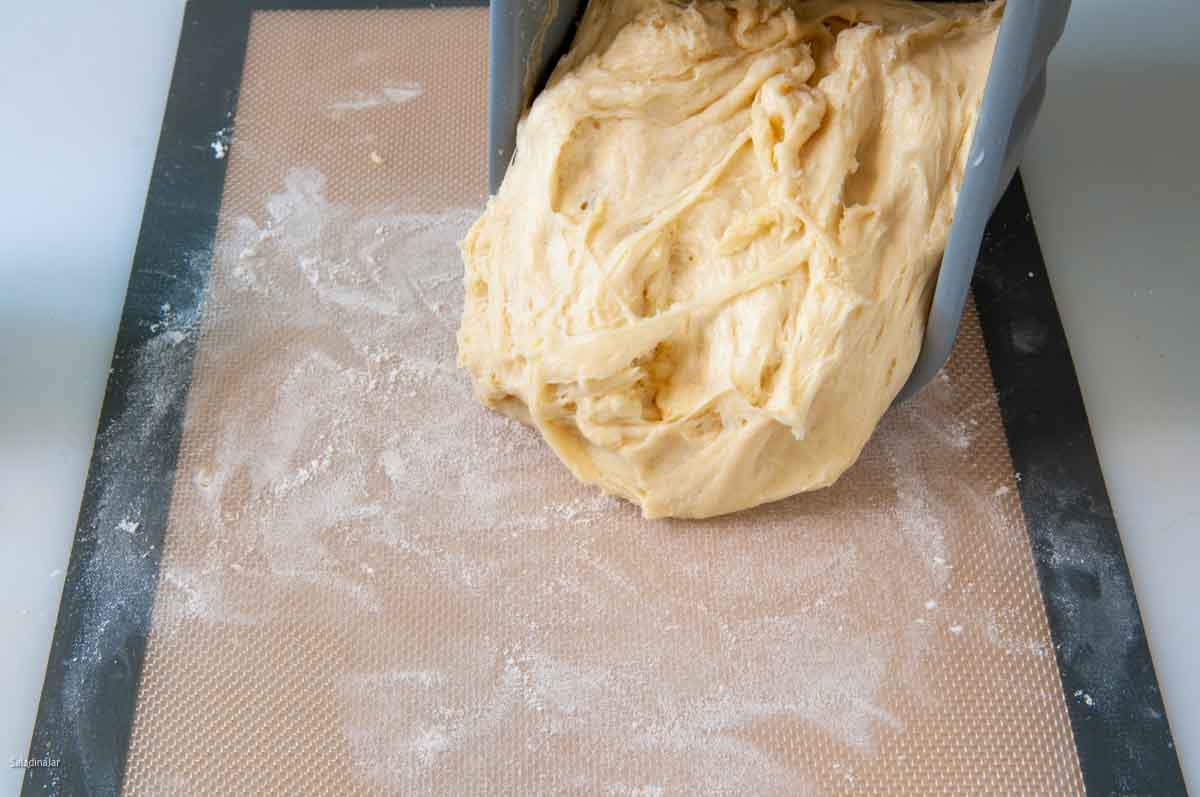
- Remove the dough from the bread machine pan onto a lightly floured work surface. (I like a silicone mat that goes into the dishwasher when I’m done.)
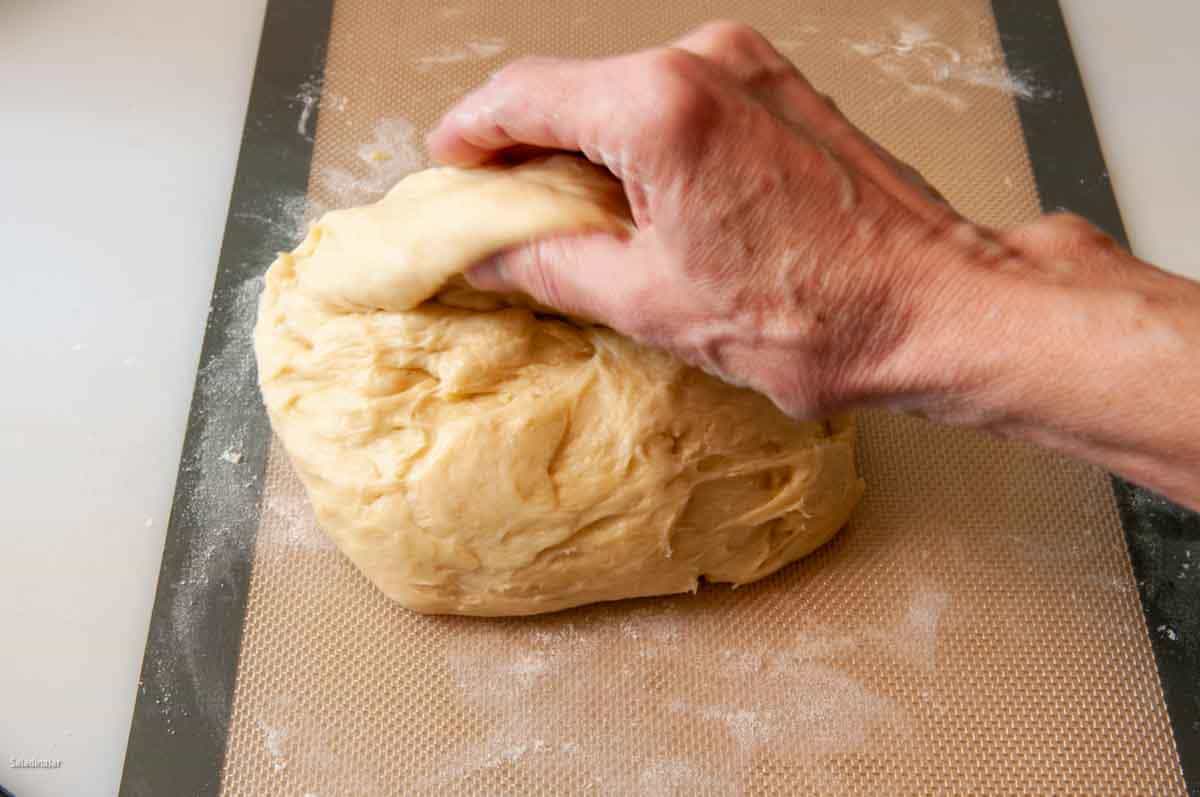
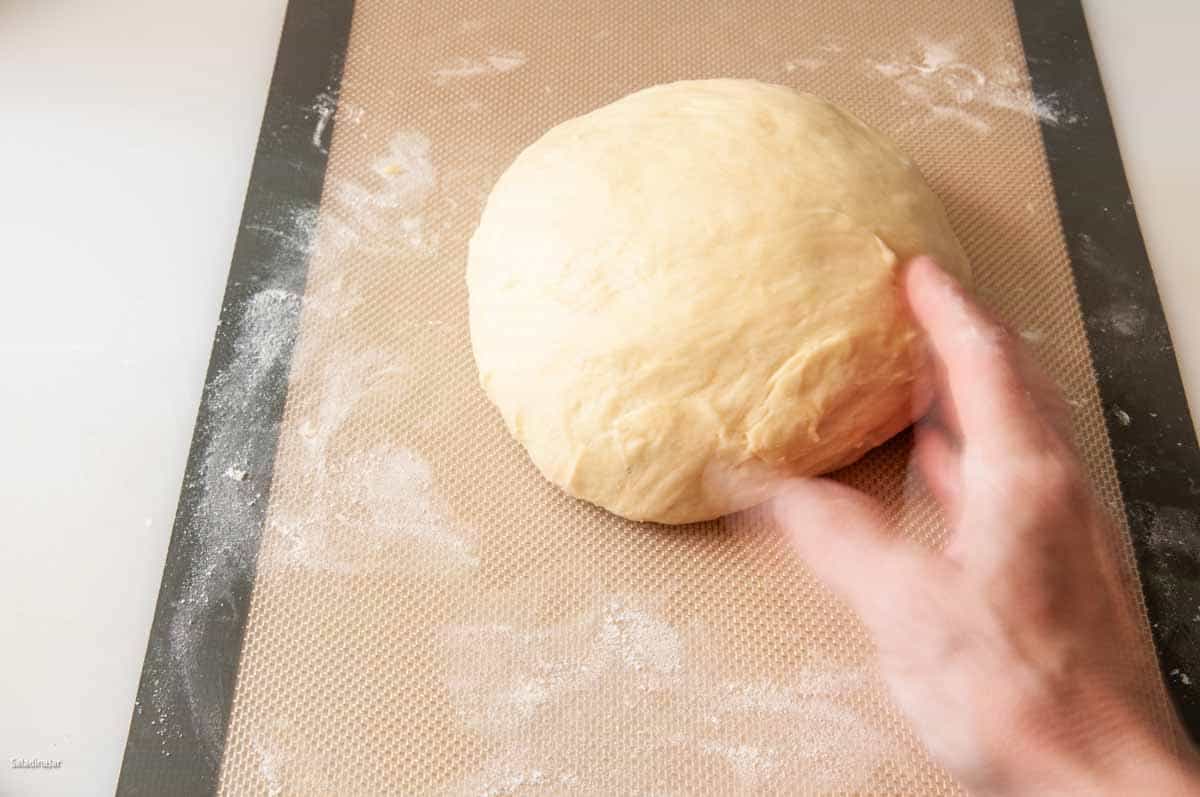
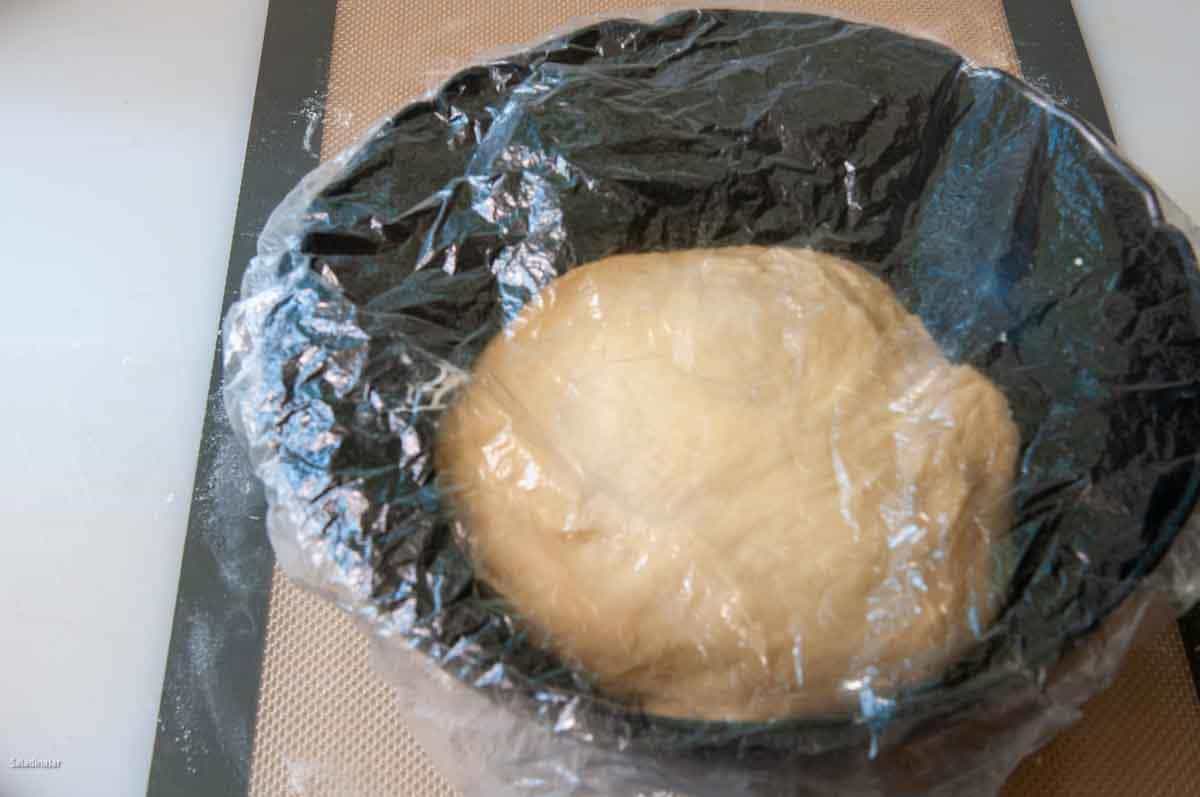
- Fold the dough several times to make a smooth ball. Drop the dough into a large bowl and cover. Refrigerate at least 4 hours up to 24 hours. Do not skip this step. If you don’t have time for the chill, you might want to make another variety of bread.
- Remove the dough from the fridge and shape as desired. (See options below.) Work quickly since the dough will get sticky as it warms up.
Mixing the glaze:
- Whisk together 1 large (50 g) egg and 1 tablespoon heavy cream.
Instructions for shaping “brown and serve” type rolls (makes 12 rolls):
- Remove the dough from the refrigerator onto a lightly floured surface and shape into a rough ball. Use a bench scraper or a knife to divide the dough into 12 equally-sized portions. Divide each of those portions in half.
- Roll each portion into a ball. Place two balls of dough side by side into a greased muffin pan (unless using a USA pan). Cover and allow to rise until doubled.
- Preheat oven to 400˚F (200˚C) about 15 minutes before the rolls are ready to bake.
- Brush with egg glaze and bake in a preheated oven at 375˚F (190˚C).
Instructions for shaping burger buns:
- Form dough into 2 logs.
- Cut each log into 5 equally-sized pieces. If you want sliders, cut more pieces. You get to decide. Make more than one size if you want to please everybody.
- Form each portion into a ball and flatten it somewhat with your fingers on the Silpat or parchment-paper-lined baking tray.
- Cover each bun with plastic wrap and smash it. (I like to use a transparent glass pie plate so I can see how evenly I’m smashing the bun.) Cover with a tea towel and allow to proof for 2-3 hours until the buns double in size.
- After rising to almost double their original size, press each bun gently and evenly with your fingers. Don’t worry. They pop right back once you put them in the oven.
- Preheat a conventional oven to 425 F (220 C).
- Paint with the glaze. Turn oven temperature back to 350 °F (180˚C) and bake for 15 minutes. The internal temperature should reach 195˚F or 90˚C.
- Remove bread onto a cooling rack.
Shaping a classic brioche with a topknot:
- Place dough on a lightly floured board. Lightly knead and mold into a ball. Divide in half. Cut each half into 6 pieces, then divide in half again to make 12 rolls.
- Pull off a small amount of dough from each of the 12 balls to make hats. Roll all portions into little balls. The smoother, the better. Practice helps. Place one large ball in each silicone mold or fill a muffin tin. Use your thumb (gloved) or the handle end of a wooden spoon to press a big hole in the middle, almost to the bottom. Place all small balls on top of the big hole.
- Cover rolls with a tea towel and allow them to rise in a warm place until nearly doubled in size. This may take 1.5-3 hours.
- Brush the glaze on each roll. Place individual molds or muffin pans onto a cookie sheet to keep the bottoms from over-browning.
- Preheat a conventional oven to 425 F (220 C). Then reduce the temperature to 350˚F (180˚C) and bake the rolls for about 15 minutes. Loosely cover rolls with foil if the tops are getting too dark. Internal temperature should reach 195˚F or 90˚C.
- Allow the rolls to cool for a couple of minutes. Turn out onto a cooling rack.
- Best eaten the same day but also good toasted the next day.
Shaping a brioche loaf:
- Roll out the dough into a 11 x 16-inch rectangle with the long side in front of you.
- Roll up dough, starting with the long side closest to you. Divide into four equal parts.
- Place each roll perpendicular to the long side of a greased 9 x 5 loaf pan or a 9 x 4 Pullman pan.
- Cover with a tea towel or shower cap. Allow dough to rise until it reaches the top of the pan.
- Preheat a conventional oven to 425 F (220 C).
- Brush the loaf with glaze.
- Set oven temperature back to 350˚F (180˚C). Bake for 30-35 minutes or until internal temperature reaches 195˚F or 90˚C. Cover loosely with a piece of aluminum foil if the top starts to get too brown.
- Let the bread cool for about 10 minutes before removing it from the pan to a cooling rack.
Notes
- Add 3/4 cup of raisins or currants to the dough a couple of minutes before the end of the dough cycle. Continue with step #7 in the general directions above.
- Divide the dough into 24 equally-sized portions after the overnight chill, then roll into balls.
- Place two balls side-by-side in each cup of a muffin pan.
- Next, allow the formed rolls to rise for about 2 hours.
- Finally, glaze and sprinkle rolls with sugar and bake according to the directions above.
Equipment
Nutrition
All images and text ©️ Paula Rhodes for Salad in a Jar.com



Paula Rhodes, owner
As a retired home economist, I created Saladinajar.com to share my belief that you don’t have to be a chef to find joy in creating homemade food worth sharing. Bread machines (used in an unconventional way), homemade yogurt, and quick microwave recipes are my specialty.