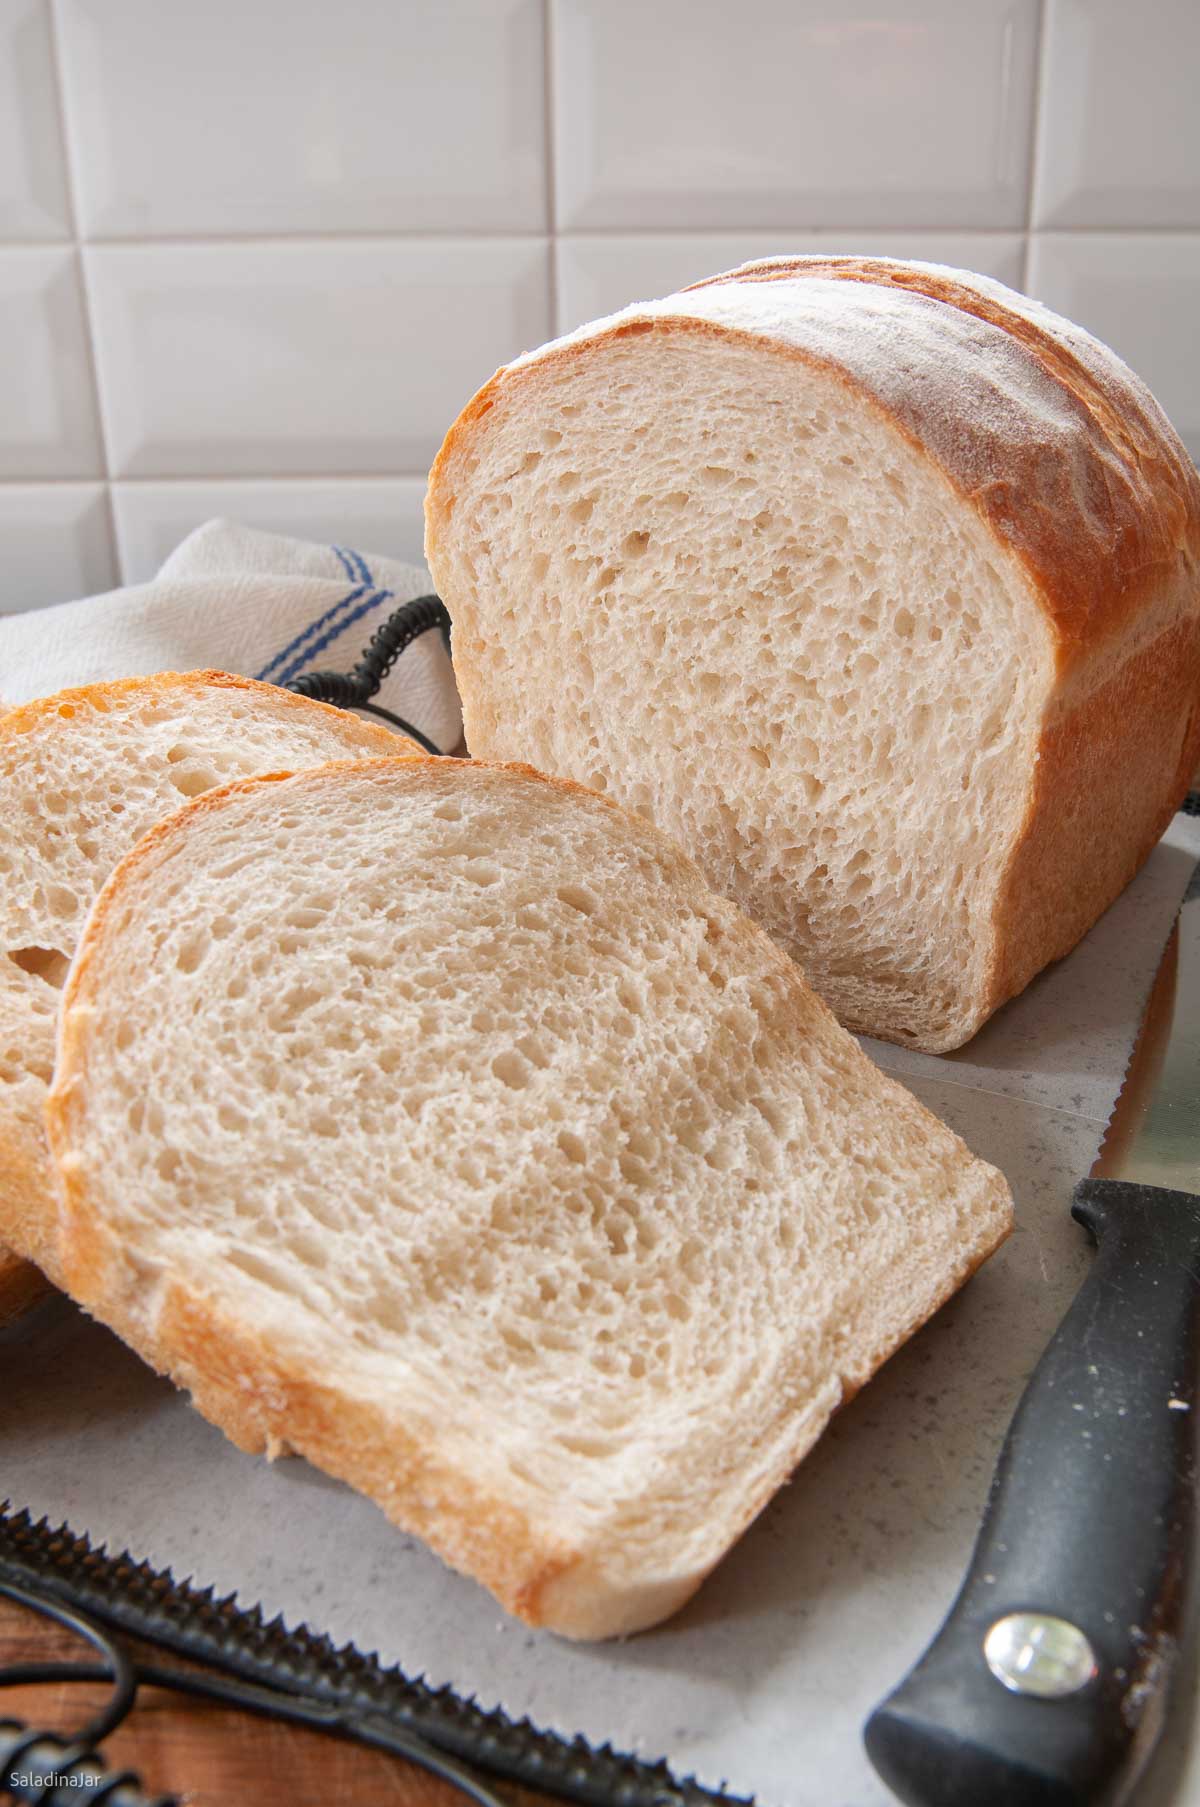
Sourdough Sandwich Loaf (Bread Machine Dough + Oven Bake)
Sneak Preview: This homemade sourdough sandwich loaf has a soft crumb, gentle sweetness, and a mild sourdough tang from using both sourdough starter and instant yeast (a “hybrid” dough). Mix the dough in your bread machine, then shape and bake it in the oven for a beautiful texture and golden crust in less than 4 hours.
This post contains affiliate links. As an Amazon Associate, I earn from qualifying purchases at no extra cost to you.
Making sourdough bread can feel like joining a secret club—everyone has their own method, and the rules can seem overwhelming. Who has time for all that?
Years ago, I dabbled with a sourdough starter, but when it started looking more like a science experiment, I tossed it (along with my sourdough dreams). This time, I’m keeping it simple and guilt-free. Enter: the bread machine and some instant yeast—to make hassle-free sourdough magic.
How I Use a Bread Machine for Better Bread
I use my bread machine (my favorite) to mix and knead the dough using the DOUGH cycle, then shape the loaf and bake it in a conventional oven. This approach gives me better rise, structure, and crust — results I’m happy to share with family and friends.
If you prefer to bake bread entirely in your machine, you can—but results will vary depending on the recipe, humidity, and your bread machine model. My free Bread Machine Crash Course explains my approach in more detail.
Ingredients & Substitutions
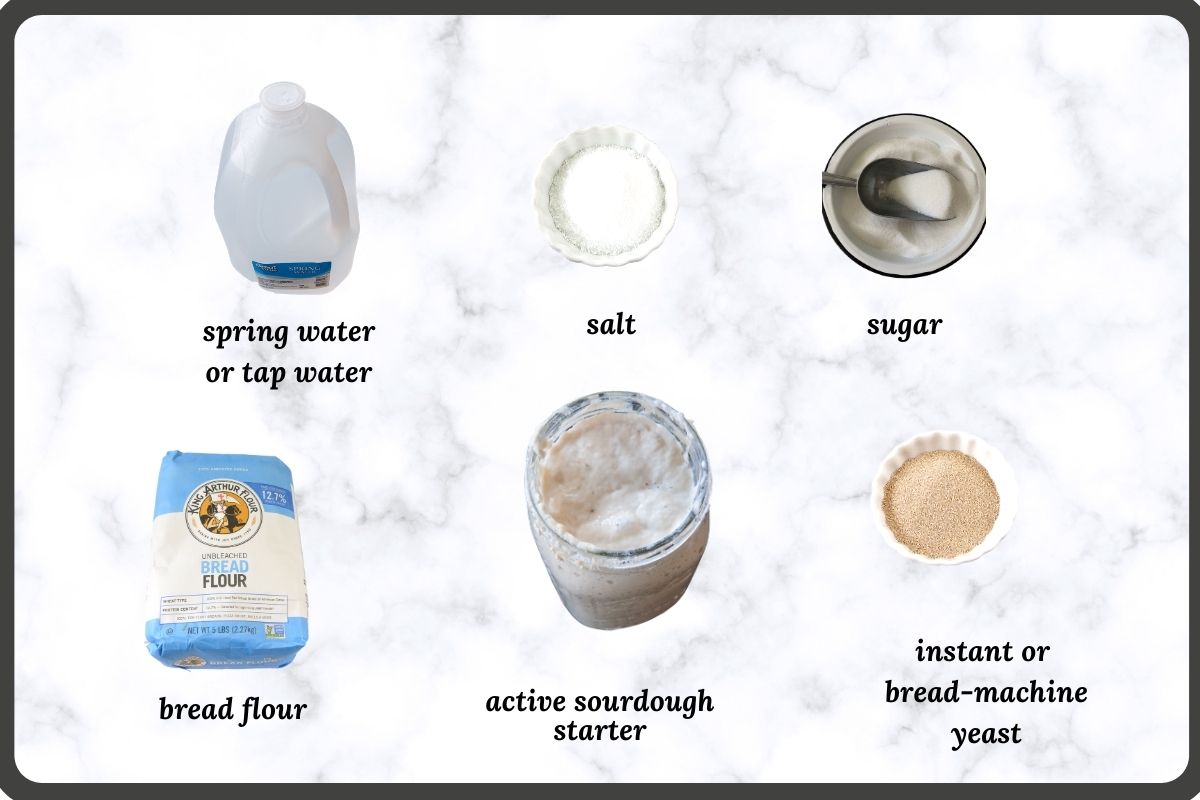
• STARTER: Use bubbly, active sourdough starter—store-bought or homemade.
• WATER: Use filtered or tap water.
• SUGAR: Granulated sugar is easiest. Honey works but may slightly change hydration.
• SALT: Table or sea salt preferred. Add ¼–½ tsp more if using Kosher salt.
• OIL (optional): Use olive oil or butter to soften the crumb. Omit for a chewier texture.
• FLOUR: Bread flour gives the best texture. Unbleached all-purpose works in a pinch.
• YEAST: Use instant or bread machine yeast. For active dry, add ¼ tsp and allow extra rise time.

Step-by-Step: Mixing in a Bread Machine
⬇️ Jump to the recipe below for exact amounts and detailed instructions.


Sourdough Sandwich Loaf (Bread Machine Dough + Oven Bake)
Video
Ingredients
- 1 cup (227 g) cool water
- ⅓ cup (80 g) sourdough starter
- 1½ teaspoon table or sea salt
- 1½ teaspoon granulated sugar
- 1½ tablespoon olive oil or softened butter (optional)
- 3 cups (360 g) bread flour
- 1½ teaspoons instant or bread machine yeast
Instructions
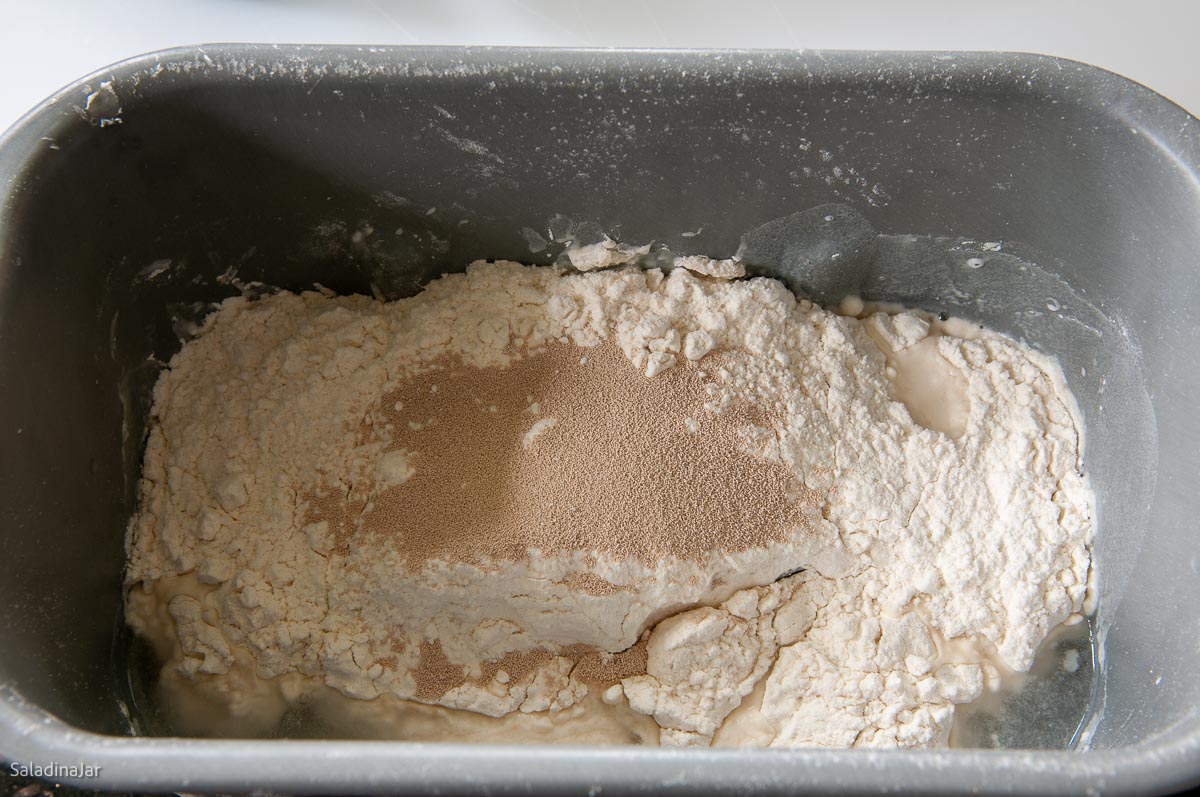
- Add ingredients to the bread machine pan: 1 cup (227 g) cool water, ⅓ cup (80 g) sourdough starter, 1½ teaspoon table or sea salt, 1½ teaspoon granulated sugar, 1½ tablespoon olive oil or softened butter, 3 cups (360 g) bread flour, and 1½ teaspoons instant or bread machine yeast.
- Start Dough Cycle: Select the DOUGH cycle and press START. Open the lid and check the dough during the first minute to ensure the paddles are engaged and the dough is clumping. Recheck dough after 15-18 minutes. It should stick to the sides, then pull away cleanly. Add flour or water if needed, 1 tablespoon at a time, allowing time between each addition. This step is crucial to ensuring a successful outcome.
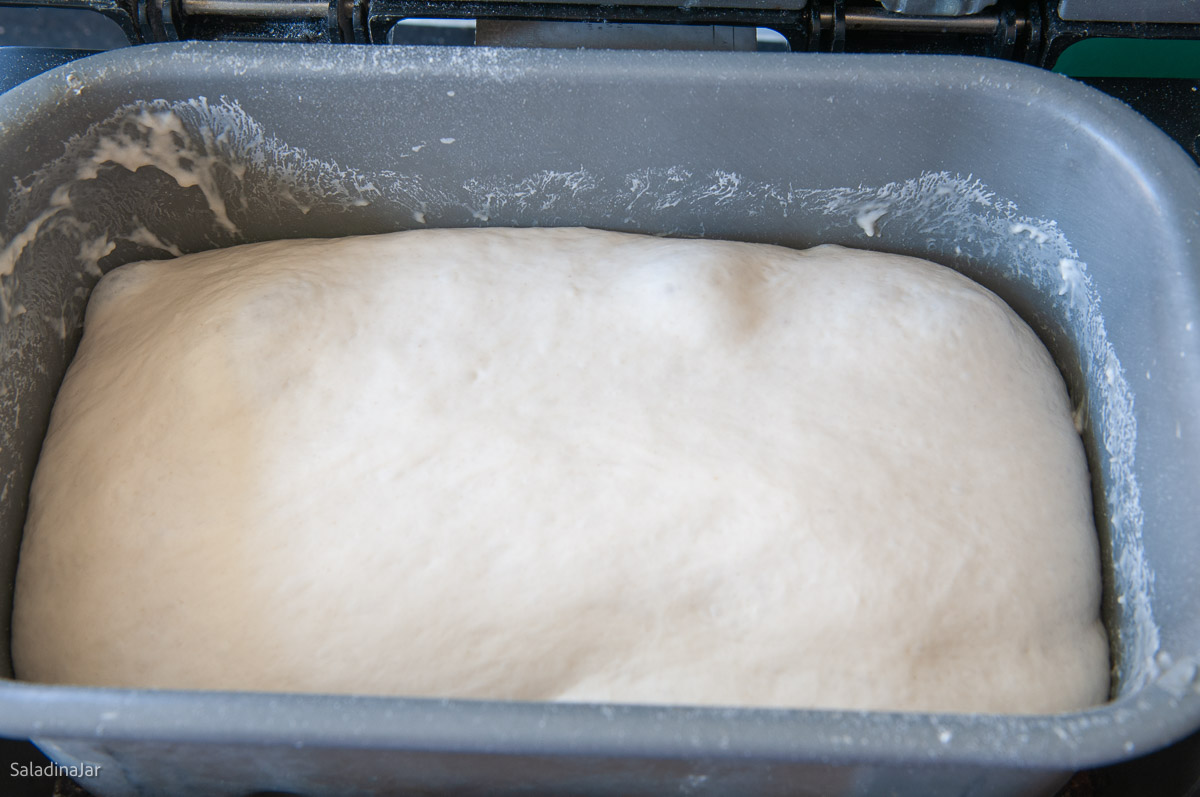
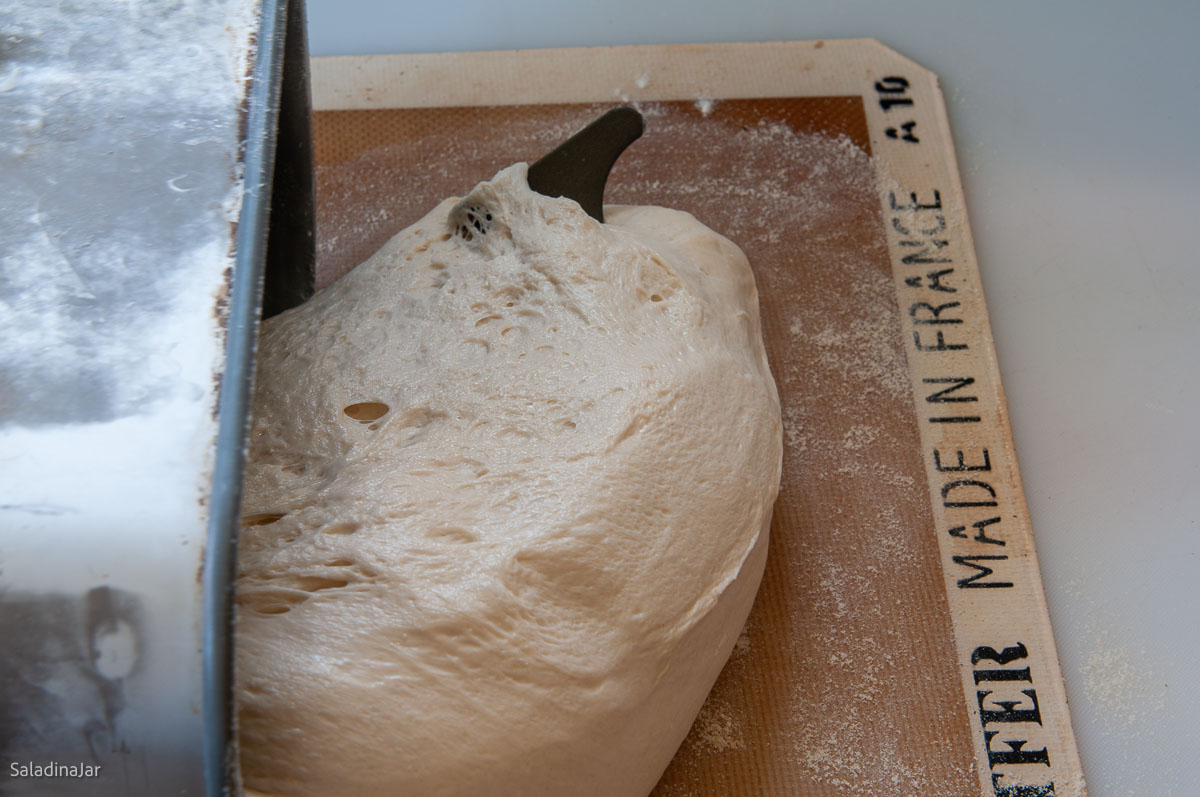
- End of DOUGH cycle: The dough should be doubled. If not, give it more rise time until it is. Restart the DOUGH cycle and knead for 5 seconds to deflate the dough. Stop the machine and turn the dough out onto a lightly floured surface, shape into a smooth ball, cover, and let rest for 10 minutes.
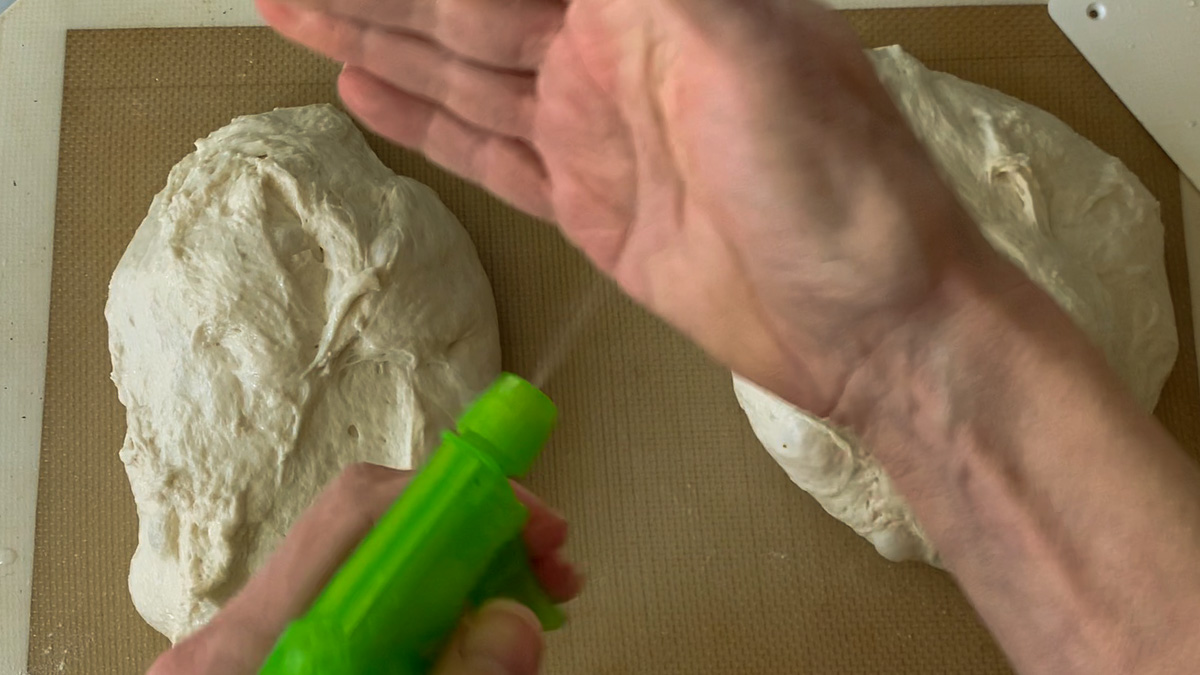
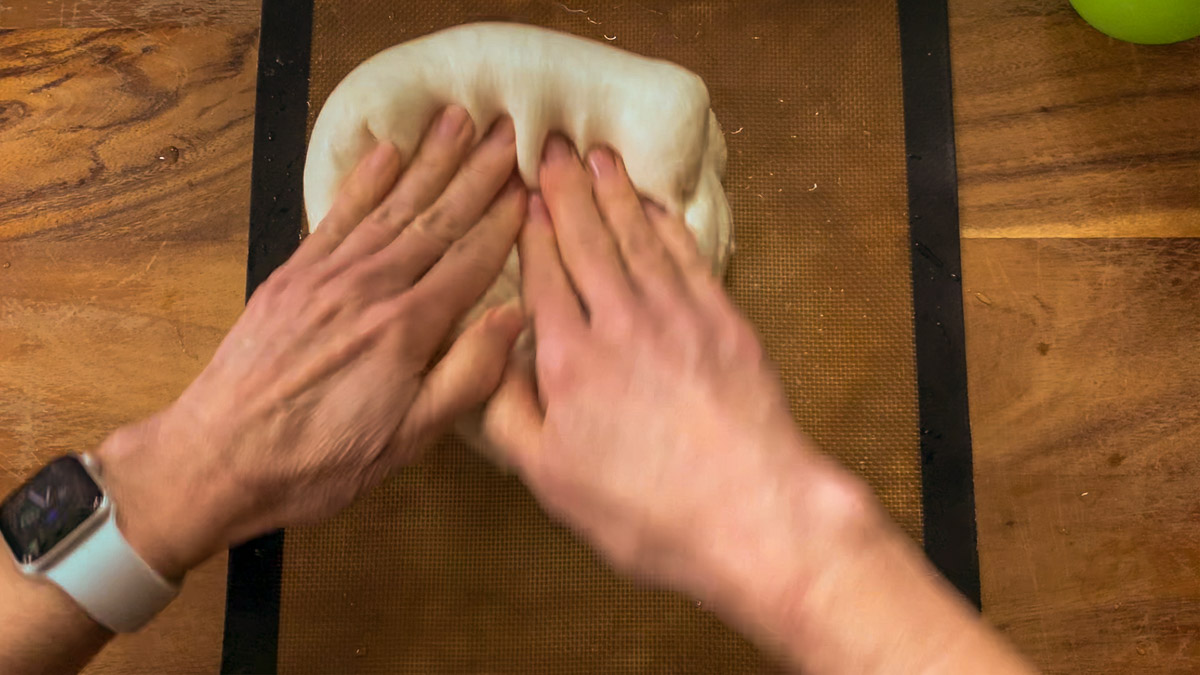
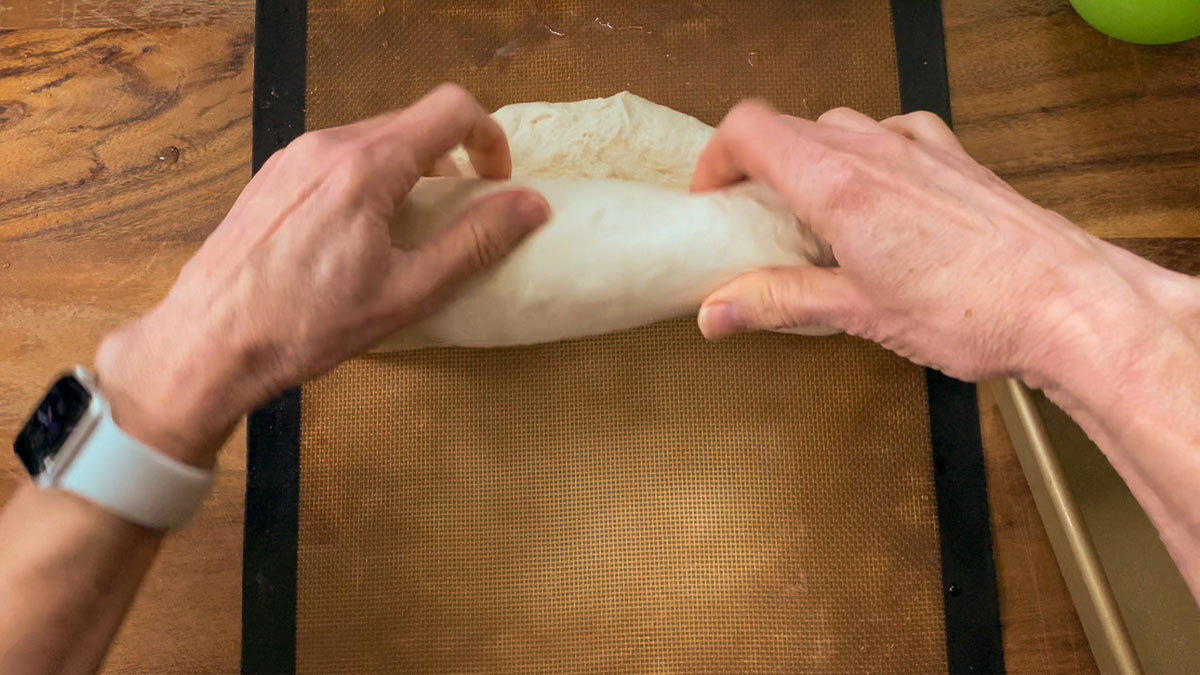
- Shape Dough: Press into a rectangle (short side slightly wider than bread pan). Roll into a cylinder, seal seams, and tuck ends under.
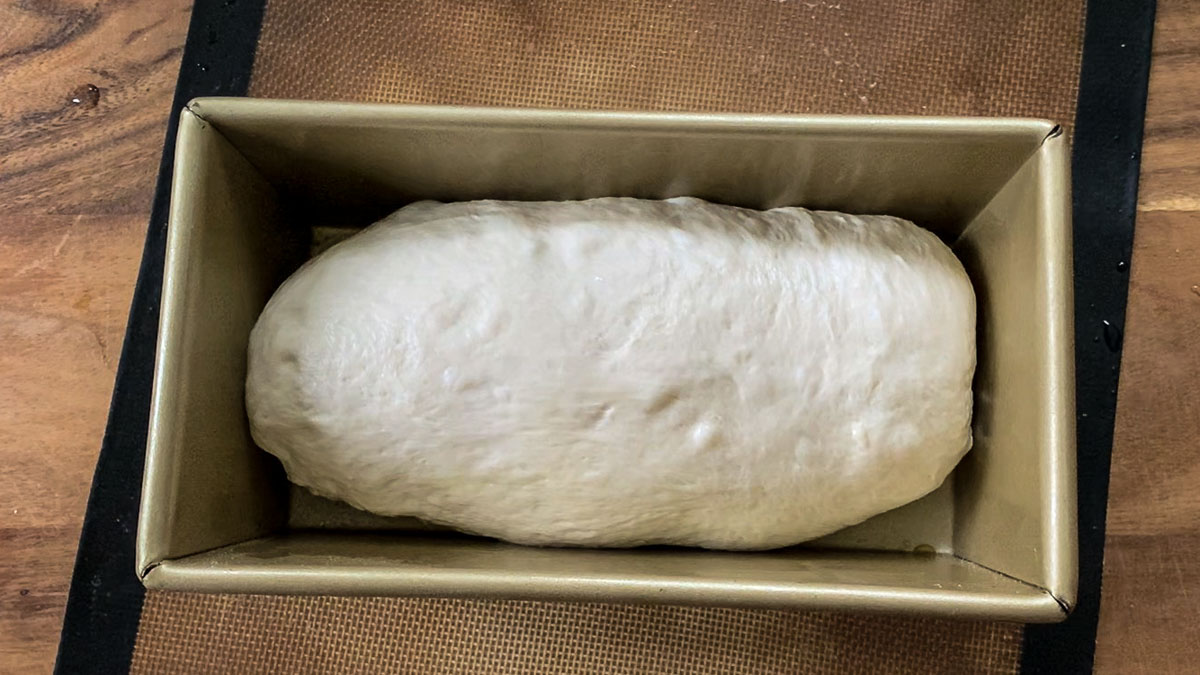
- Final Rise: Grease a 9 x 5-inch pan. Place dough seam-side down. Pan should not be more than half full. Cover and let rise until dough is about 1 inch above the top of the pan.
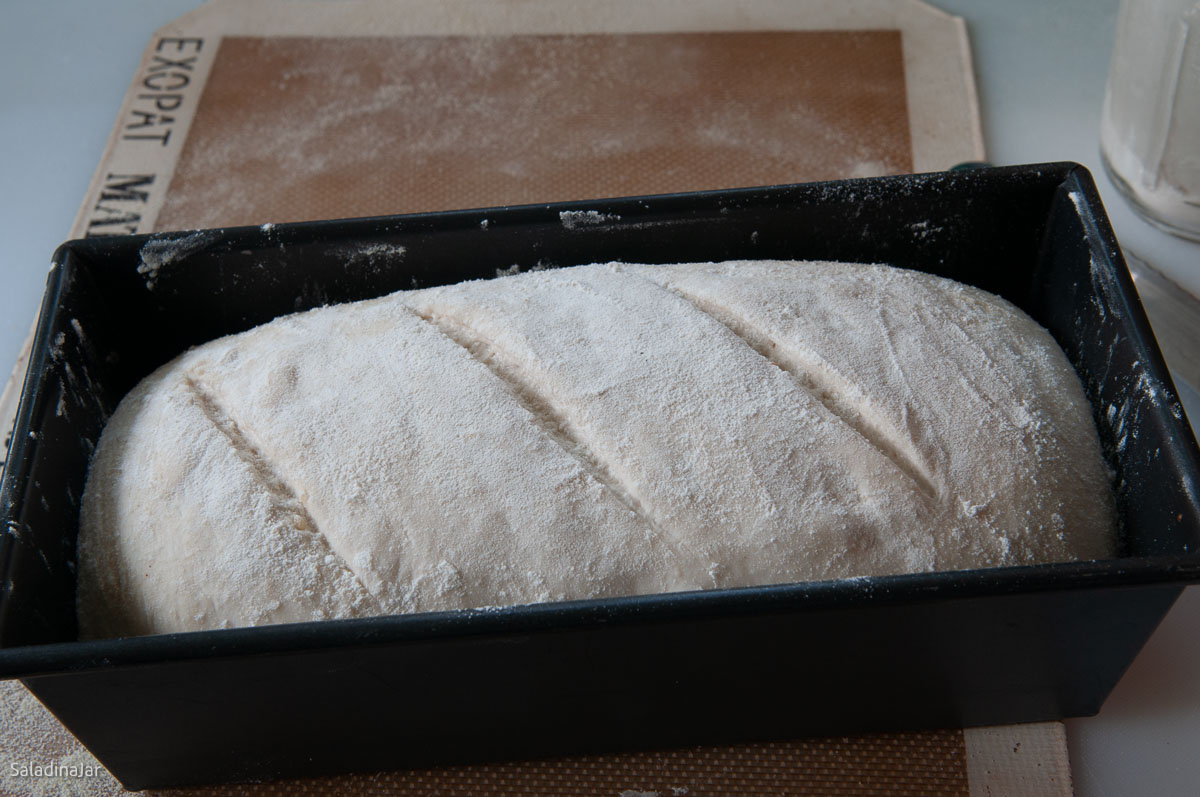
Preheat to 450°F (230°C).
- Bake: Dust with flour, if desired, and slash the top of the loaf. Reduce the oven temp to 425°F (220°C). Bake 25–30 minutes or until internal temperature reaches 200–210°F.
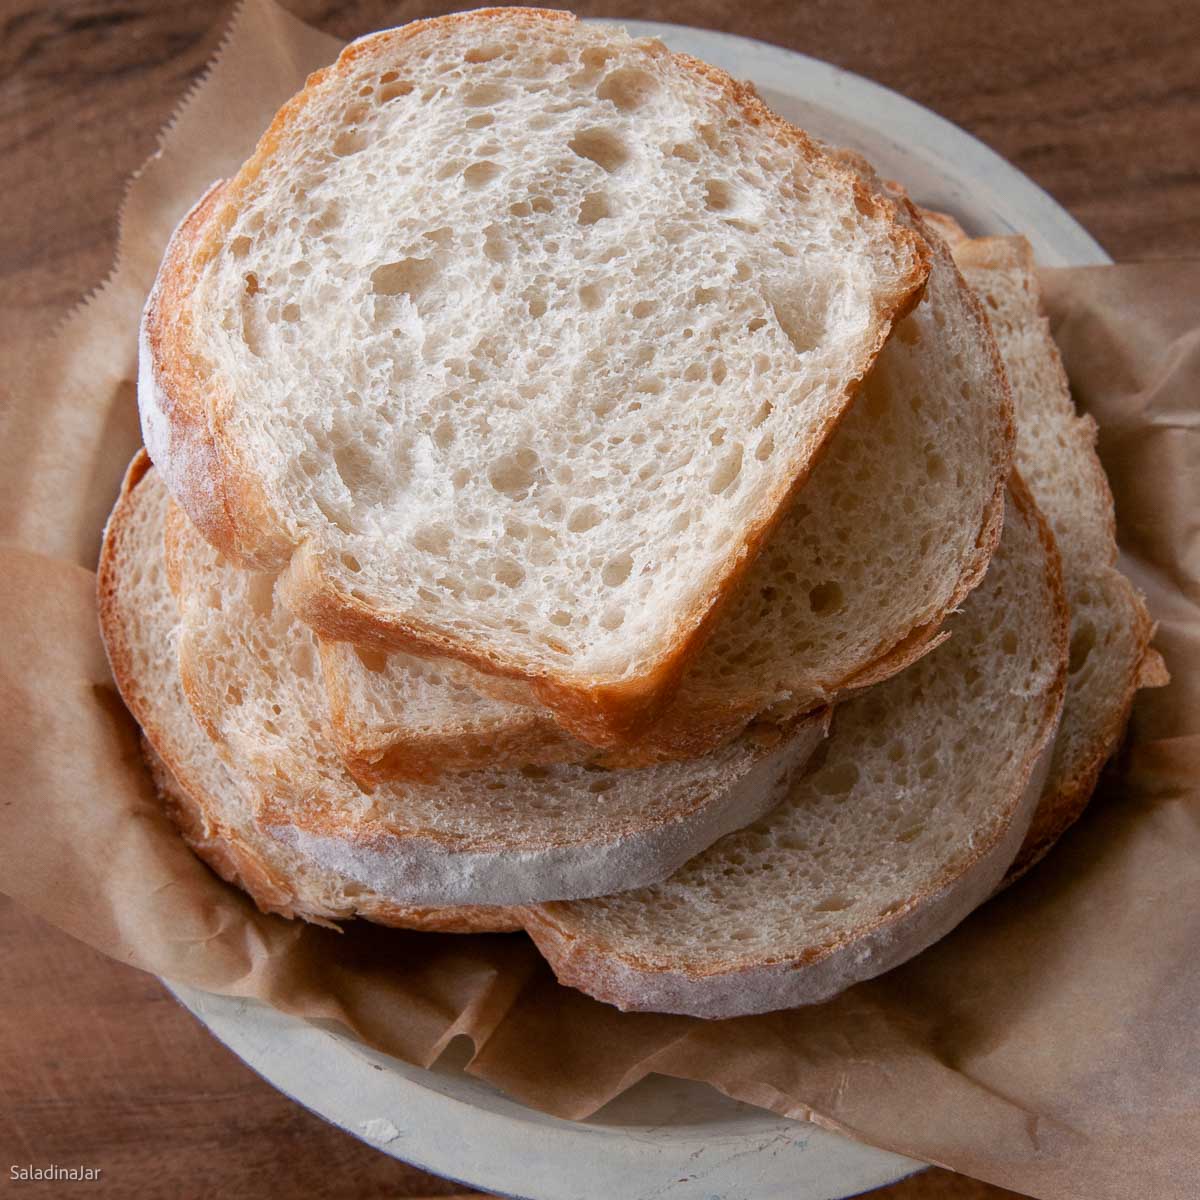
- Cool Bread: Remove from pan after 10 minutes and cool on a rack for 1 hour to prevent gumminess.
Notes
- The day before you want to serve the bread: Combine all of the water, sourdough starter, and half of the bread flour in the bread machine pan. Start the machine and let it mix just until all the flour is moistened. Turn the machine off. Let this mixture sit until you are ready to make bread the next day.
- Making the bread: Add the salt, sugar, remaining flour, and yeast. Mix on the DOUGH cycle. Proceed to Step 4 and finish making the bread as directed.
- Stand Mixer: Mix until moistened, then knead with a dough hook (speed 2–3) until smooth and elastic (5–10 minutes). Let rise, deflate, and shape as directed.
- By Hand: Mix to a shaggy dough, knead on a floured surface until smooth and elastic (10–20 minutes). Let rise, deflate, and shape as directed.
Equipment
Nutrition
All images and text ©️ Paula Rhodes for Salad in a Jar.com
FAQ
- Can I bake this entirely in my bread machine?
- Yes, but expect a denser texture and less crispy crust. Oven baking is strongly recommended for best results.
- Why is my bread dense?
- Check for an active starter, correct hydration, and adequate rise time. Adjust moisture early in the cycle if needed.
Final Thoughts
This loaf is flavorful, fuss-free, and perfect for slicing. It’s also a great gateway for anyone intimidated by full sourdough baking. Cooling bread before slicing is key, but it’s so tempting to cut right in! (If you can’t resist, I understand.) My trick? Run an errand or go for a walk to get out of the house.
— Paula, Home Economist
Homemade Food Worth Sharing
Need help troubleshooting?
Email me: Paula at saladinajar.com — photos help!
Not sure you want to mess with sourdough? This Condensed Milk Bread is one of the best. Or try this Honey Wheat Bread Machine Bread if whole grains are your thing.
More Bread Machine Recipes
- 71+ Best Bread Machine Recipes To Make You Look Like a Pro
- A Crusty Bread Machine French Bread
- Bread Machine Sourdough Dinner Roll Recipe
- Bread Machine Sourdough Bread Recipe – No Yeast

Hi Paula
New to sourdough and made my own starter. I’ve been using the bread maker to mix other bread doughs for years.
I want to try freezing a formed
Loaf. The instructions say to defrost in fridge overnight before baking
2 questions
Does this mean I have to bake in the morning or will it be ok to leave in fridge until after work?
Since the loaf is frozen before the second rise. After I remove from fridge, before I bake do I need to proof or does the second rise happen while it thaws in fridge?
Thanks for the recipe! I have a few of your others bookmarked and have enjoyed them all
Hi Carolyn,
I’m so glad you wrote. It was an oversight to recommend this in the recipe notes without more experimentation. I apologize. Hopefully, you have already made this loaf and baked it per the original instructions so that you know how it should turn out. I know you can buy frozen raw loaves of dough in the grocery store, but the manufacturers have added certain stabilizers and additives to the dough to help the yeast survive the “freeze and thaw-out” process. My own experience with other bread recipes is that it’s possible to freeze the dough, but the taste and rise may not be as good. Specifically, the dough may taste yeastier than usual and the rise is usually not as high. Freezer temperatures and behaviours vary a lot, so it’s hard to guarantee success.
In answer to your two questions. The answers can only be ascertained with some experimentation. There are so many variables such as, how cold is your freezer?, how many times is the refrigerator door opened while the loaf is defrosting? How active is your yeast and starter? Your loaf will need a second rise. The second rise may or may not happen or happen completely in the fridge depending on the answers to these questions.
This recipe is not like a traditional sourdough that rises slowly and can easily spend all night and day in the fridge while the flavor just gets better. This is a “hybrid” recipe using some instant yeast and some starter which makes it easier and can be baked from start to finish in about 3.5 hours–with much less trouble than a traditional sourdough loaf.
If you decide to try it, I would love to hear how it goes.
I was really pleased to find this hybrid – I could make the dough in my Mini Zo and it was easy to shape and bake. The sourdough flavor is light, and that is good for someone who claims not to like it. Great recipe!
Hi Mary,
Thank you for the glowing review. Appreciate it!
Perfect
I was wondering after you put your dough in the banneton can you cold rise it in the refrigerator for 24 hours.
Hi Pat,
Yes, but you have to let it rise again once you take it out of the refrigerator. This recipe is using sourdough as “discard.” That means you are not depending on the sourdough to actually raise the loaf–instead you are depending on the commercial yeast. It makes the recipe go faster, but it must rise a final time at room temperature before you bake it.
I think you will be happier with this loaf if the directions are followed exactly as written, at least until you become familiar with how this loaf behaves. From your second letter, it sounds like it didn’t rise properly. The other possibility is how you shaped it, but since you didn’t mention that, I’m assuming you followed the recipe in that regard. What are your thoughts? Have you used sourdough starter before? Looking forward to hearing from you.
Today is the second time I have made sourdough bread using this recipe. Both times, they came out as close to perfect as possible. I made Alabama Orange Rolls (your recipe) yesterday and my only regret is that I didn’t make a double recipe. They disappeared really fast! Thank you for sharing!
You’re on a roll, Phyllis! May it continue.
Can I add flavors such as herbs, garlic and onions (dried)? For any sourdough bread and rolls. To be cooked in the oven. All with fresh active starters, not discarded. And can levains be exchanged for active starters?
Thank you for all your help and recipes!
Hi Cookie,
Yes, you can add flavors to your heart’s content. Dried or roasted garlic is better than raw. Same with onions. A levain is an active starter. So yes, you can use one for the other. Hope that helps. ?
Making this for the second time. The first time the rise in the loaf pan was perfect, but when I scored it, it deflated a bit.m (tasted good anyway). I was wondering about doing a cold proof like with real sourdough. Have you tried it? Would it also help develop more flavor?
Hi Shirley,
I haven’t tried it, but I’m sure it would work and probably develop a better flavor, too. Maybe I’ll give it a try. If you experiment with the overnight chill, let me know how it turns out.
Hi, I am in the process of making my sourdough starter. I am new to sourdough baking. I was wondering if you have a recommendation for a proofing basket. If I was closer, I would love to try the breads from your Thank You Bread Co.
I will definitely try this recipe in my Breadmaker. Thank you for your help
Terry
Hi Terry,
If you will go to my Amazon store (just google Saladinajar Amazon Store) and look in the bread section you will see the things I have tried and like. I hope your starter is vibrant and energetic.
Paula
Great tasting bread. Wonderful recipe. Thank you so much Paula. I like to use olive oil and I need to make non-dairy, so this recipe is perfect for my needs and it’s so easy! Making my 2nd loaf in 1 day. My family and I really enjoyed it.
Hi Lenore,
Don’t you love it when your family likes your baking?! Good job. I’m so glad this recipe ticks all the boxes for you. May you enjoy it for many years to come.
No fat at all??
Hi Donna,
That’s right. But you can always add a tablespoon or two of oil or butter if you want it to be softer. If you do that, be sure to check the moisture level as the dough kneads. You may have to add a little extra flour–to reach the goal. By the end of the kneading phase, the dough should stick to the sides of the pan, then pull away cleanly.
Can I add cranberries and pecans during the add cycle on the bread machine?
Hi Jill,
There are many ways to add inclusions like this and one of them is adding them during the last few minutes of the mixing phase. You can also “knead” them in as you shape the loaf. Either works.
Is this version of sourdough bread considered to be fermented? I attended a sourdough bread class and the benefits of fermented bread was presented
Hi Jill,
How have you been?
The recipe you asked about is fermented but not 100% naturally fermented. It contains some commercial yeast (so you can make it much quicker) but also has some of the flavor and characteristics of sourdough bread. It is easier than a totally naturally-fermented loaf like this one.
This is my favorite sourdough bread. I used the method to make it more sour. It’s so easy and tastes and sliced great! Thank you for the easy recipe!
Hi Mary,
Thank you for the wonderful testimonial and the 5-star rating!!! I’m so happy you love it. Enjoy lots of wonderful sandwiches.
I just bought a 7qt cast iron oval enameled roaster. What temperature would you suggest pre-heating it on, and what temperature to bake the bread? (and for how long?) Thank you!! (again, amazing bread!)
Hi Donna,
I have never baked this recipe inside a roaster because it contains instant yeast as well as a starter. Since it’s a sandwich bread, most people want a soft crust. Better to put the dough in a loaf pan and bake it as directed in the recipe.
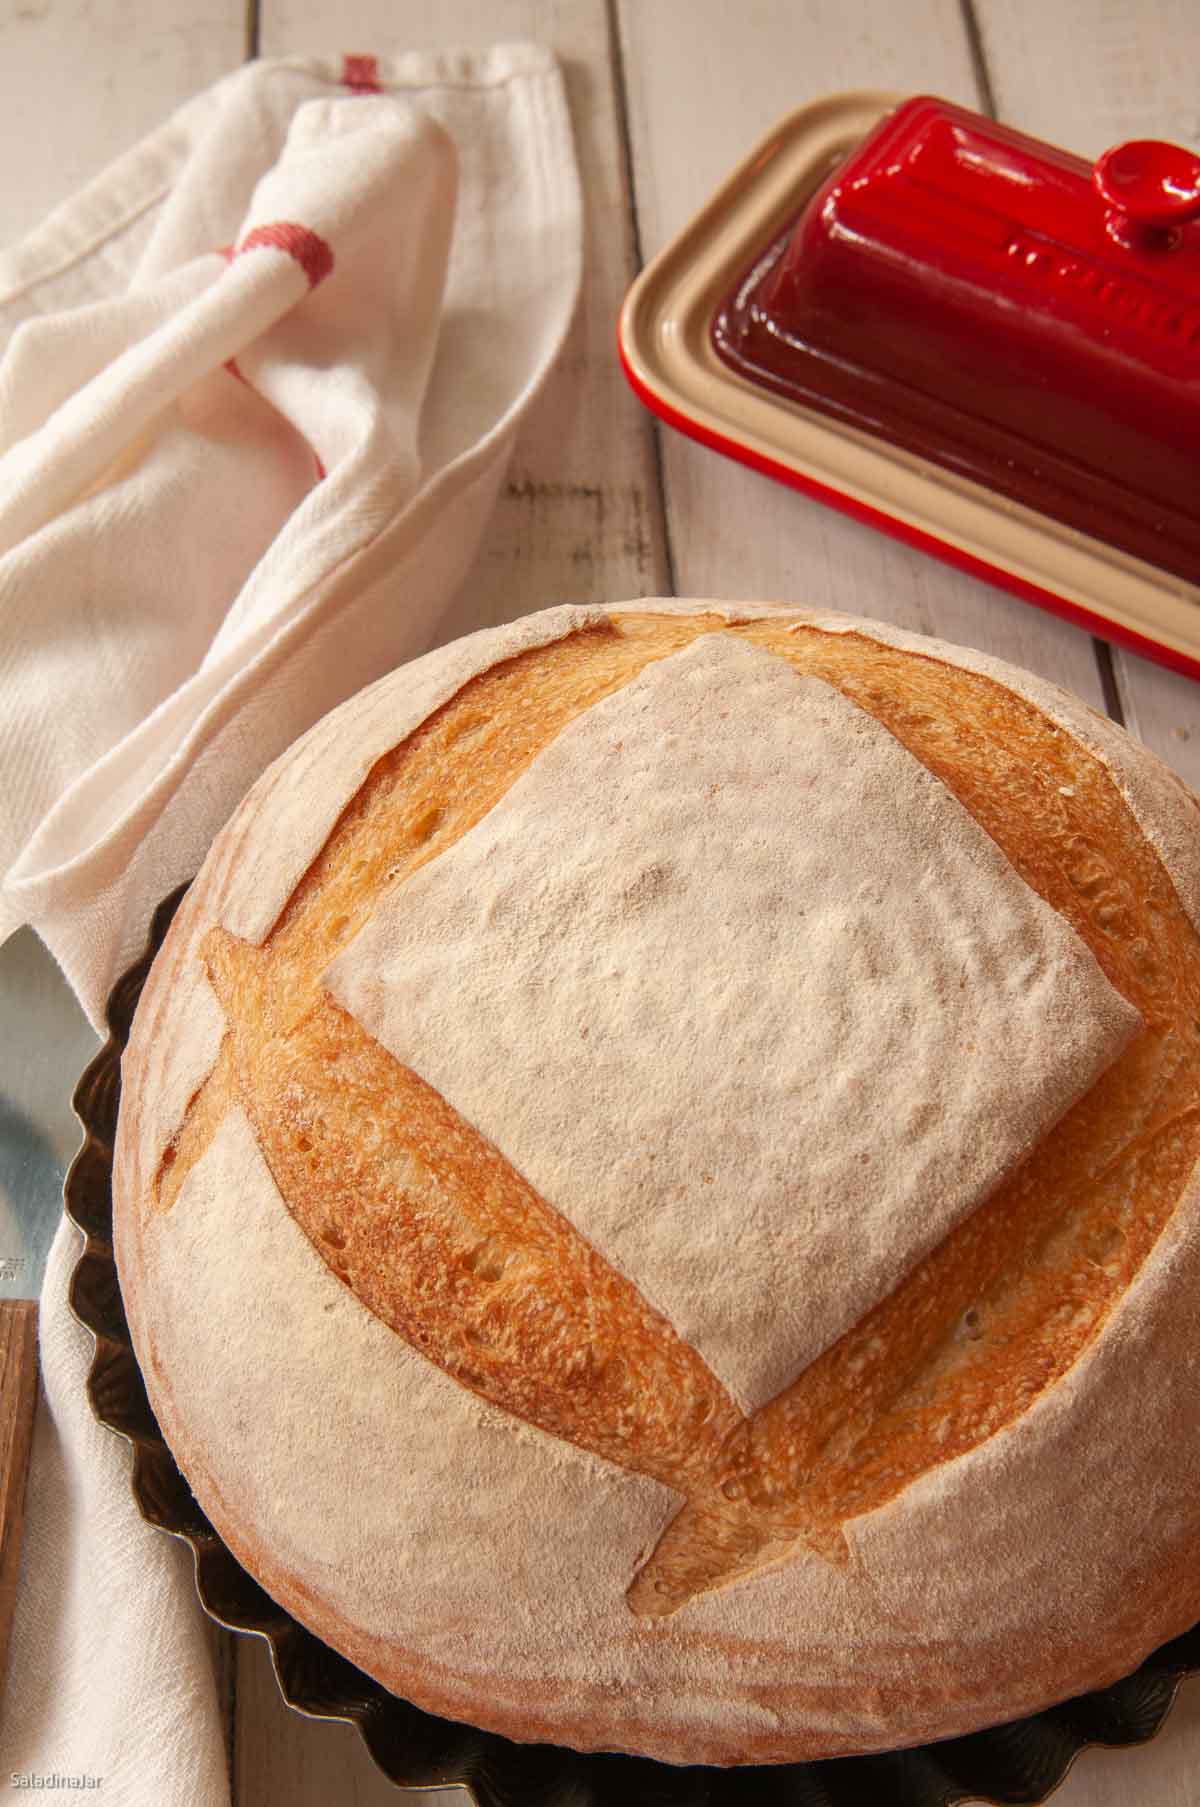
If you want to make traditional sourdough bread (without any added yeast) and bake it inside a covered Dutch oven, see this recipe for temperatures.
Paula you are a genius!! I made this today, my first complete success using your recipe!! (After almost two weeks of daily failures). You are so wonderful to take your time to help everyone with questions .
THANK YOU!!!
.
Yeah!!!! I am so happy for you. It’s a great feeling, right??
I decided to make this bread again, but this time I decided to add 2 slightly heaping tablespoons each if potato flakes and whole powdered milk (I also add 2 tablespoons butter). WOW, I thought this bread was good before, but this time it was unbelievably soft and delicious!! Just amazing!!
Hi Donna,
Well, yes. You just added some wonderful “enrichments.” No wonder your bread is so soft and delicious. I can’t wait to try it myself.
Could I throw in a couple of tablespoons of potato flakes in or would that make a difference? Also, should my fed starter out of the fridge be warmed up or can it be used straight from tge refrigerator?? Thank you!
I haven’t tried it, but it seems like a good idea.
I am very new to making Sourdough Bread. I wanted to try using Mt breadmachine and saw your recipe. (a little concerned w/the yeast, that it wouldn’t be ‘real’ Sourdough. I made it anyway… Oh my gosh, this is the softest, best tasting Bread I’ve ever made, of any kind!! I don’t care if the yeast negates the Sourdough name, this is the only Bread I want to make now. This bread is absolutely delicious!!!
Thank you Donna. This recipe is a great stepping stone to making the traditional recipe. Most of the sourdough sold in groceries has commercial yeast in it when you read the label. Enjoy!
I’m totally new to Sourdough! I keep my starter in the fridge and it hasn’t been fed since last week (today is Tuesday). So, do I leave it out till it warms up, then feed it, then let it rise before measuring what I need??
Thank you Paula! I see the change and have noted it. I have made a couple of your bread recipes; the rye with making the sponge / bigga and the cinnamon swirl, and both were absolutely amazing! I am now waiting for my sour dough starter to be ready. I plan to bake in bread pans for sandwiches. I can’t wait, I’m having so much fun!! Thank you!!
I’m wanting to make x2 / 24 slices . I am confused with the measurement 2-1 tsp ? I haven’t come across this before. Does it just mean 1 tsp x2 / 2 tsp?
Hi Janet,
That was caused by a technical error on my part. Take another look and it should be clear. Let me know if you still have a question.
Hi Paula,
I’ve been reading your article on making bread more flavourful and will definitely be giving the sourdough starter with whey protein a try in the new year. My question is if it’s ok to also use liquid whey as a replacement for the 227g water in the above recipe? I always have plenty of whey in the fridge from yoghurt making & use it in all my loaves but this will be my first sourdough loaf.
Thankyou for creating such a brilliant website, I love how you make every recipe seem straightforward with clear step by step instructions, it’s definitely helped me become more adventurous in my baking.
Wishing you a happy and peaceful new year.
Judy
Hi Judy,
Thank you for your kind words. It is my goal to make all of my readers more adventurous in baking.
I have never tried substituting whey for the entire amount of water. Whey is so acidic, I think it might throw my starter out of balance. But I could be wrong. It’s definitely worth a try.
I would love to hear what you think if you try it.
Hi Paula, first thank you for responding so quickly to my question about a “pinch” of rye in starter. I just finished mixing in my bread machine, and it looks perfect ( other recipes left me with a soupy, gummy mess). It’s rising now in bread machine. I have another newby question. Now that the starter is completed its process of making it, do I now feed it every time I bake, with the same amount I have taken out for my recipe? Also, can this be made in a Dutch oven? Your site is so wonderful, I have made your buttermilk bread many times with great success!! THANK YOU!!
Hi Helga,
Yes, you will have to continue to feed it at least once every week or two to keep it alive. When you do that, you will remove all but a tablespoon or two of the starter and throw it away or use it within a week in a recipe that calls for sourdough “discard.” Then you will add equal weights of flour and water—I usually add around 40 grams of each. Stir it up, cover, and set it on the counter until you see it start to rise a bit. If you don’t plan to use it for several days, store it in the refrigerator. When you get ready to make bread again, if it has been in the refrigerator, repeat the part about throwing most of it out, then adding equal weights of flour and water. Let it rise again to double or triple the original volume. That is the best time to use it in bread. (These instructions should be included in the same place as the recipe you used to make the starter.)
Yes, you can make this in a Dutch oven.
Hi Paula, Happy New Year. I am definitely going to try this sourdough recipe. Sharons remarks on making this bread has spurred me onward. I have NEVER had any luck with a starter. I will give it one last try using your starter recipe. Presently, I have a loaf of Mild sour dough white bread in my zojurushi machine. I always use dough cycle. But because I didn’t know if I could use their “starter recipe” and bread recipe all made in the machine on the “dough” cycle, I am baking it in my machine. You put the ingredients for the starter in the machine and put it on “sourdough starter” cycle. When done you simply add all the bread ingredients to the starter. We will see how it turns out. I would prefer a “real” starter as then the taste would be what I am looking for. Hence, giving it 1 more try using your recipe even though it takes 7 days. That is ok because when done, you just keep feeding it and you have it whenever you need it. I love your recipes and all the advice and tricks you give. Love the microwave one to make the bread rise a little faster. That is just awesome! thanks for all your help.
Thanks Paula, another winner! I have struggled with sourdough bread recipes. This one is straightforward. It bakes up perfectly. If anyone is skeptical about trying this one, don’t be afraid of it.
Thanks for your high praise, Sharon. Appreciate it.
Hello! 🙂
Thank you soo much for sharing your expertise with us all. It has helped my bread making skills, lol, though they are still very much a work in progress. 😀 I was wondering about your thoughts on using the metal bread pans versus glass ones? Apologies if I missed this explanation somewhere, I tried to find it myself first.
Thank you much,
Take care,
Kelly
Hi Kelly,
Thank you for your kind words. I’m glad to hear you are practicing.
Regarding metal vs. glass: I much prefer metal. Glass seems to have hot spots. I also don’t care for the rounded corners of glass pans. Seems like the crust is thicker and tougher with glass. Of course, I have not tried every glass dish out there but that’s my experience. My all-time favorite pan is a USA pan. You can see them in my Amazon store.
I am hoping to make this
How I can make sour bread starter
Will I get the recipe
Leela,
You can find a recipe for starter at the bottom of this post about yogurt whey. It takes at least 2-3 weeks to make it yourself. If you know somebody who makes sourdough bread, it’s easiest to get sourdough starter from a friend who makes sourdough. Or, you can buy it online from somebody like King Arthur Flour or Cultures for life.
This is the first loaf I’ve made that I actually like! The texture and flavor were just right! I made a mistake and kept the oven at 450 but there were no issues. I took it out at the shorter time. I used the water in the pan below and the upper crust was nicely browned and chewy. Thanks!
Hi Jay,
I’m so glad to hear this. You brightened my day. Glad it came out to your satisfaction. Thanks for taking the time to write.
Hello,
I tried it again using the overnight method to develop a more sour flavor. The dough rose beautifully during the DOUGH cycle in the bread machine. But when I took it out of the bread machine pan to shape, it was incredibly sticky and I had to sprinkle flours on it to work on it. I’ve put it in a rectangular bread pan for a second rise since about 5 hours ago, but it only rose a little and not over the edge of the bread pan. Is there something I did wrong? I followed the recipe entirely.
Hi Anita,
Is it possible your starter was more active than the first batch? It sounds like the bread may have over-proofed–possibly even in the bread machine if your room is warm or the humidity is high. Next time, check on the dough even before the end of the DOUGH cycle. I don’t quite understand how you did the overnight rise. Was that after the DOUGH cycle finished? If so, that was probably too long. Dough does continue to rise in the refrigerator, although much slower. Keep experimenting. It’s the best way to learn.
Loved this recipe! My bread came out perfect and so soft. Was wondering how I can get more sough taste to it?
Hi Jennifer,
Bread needs time to develop the more complex flavors found in traditional sourdough. Try making the dough, shaping it, then putting the loaf pan of dough in the refrigerator over night before baking it the the next morning. If you try this, cut back on the instant yeast a little bit.
A more sour starter will help your bread taste more sour. Starter that has been stored in the refrigerator (for days or weeks) tends to be more sour. Adding a bit of rye flour to your starter can make it a bit stronger tasting. The whole subject of developing flavors in your starter is complex but that’s where you would start.
I made this over the weekend; replaced the 2 Tbsp of bread flour with whole wheat flour; added about 50g of mixed black sesame chia seeds and oat flakes. It is DELICIOUS! I think I may prefer this than the traditional sourdough loaf given the convenience and the ability to fit this into my busy WFH life!! Thank you for this recipe.
What a great idea to use the chia seeds and oat flakes. That would add wonderful texture!
Made this today Paula. Turned out great. Baked it on the gas grill since our kitchen is being remodeled. Didn’t use any yeast and it came out fine. Needed about an hour longer to rise though. That’s ok since I have plenty of time.
Used a fork as you suggested instead of a spoon and it works a lot better for measuring flour. Experimenting with the digital scale a little and will probably use it next bread baking day.
Love your website. Great job!!!
Don
Thanks, Don. I’m surprised it only too an hour longer to rise. Amazing. Thanks for writing.
Hello, love your blog, I use my bread machine once or twice a week for help with the manual labor. About once a month I make a sourdough loaf (autolyze, bulk rise, etc.) but am anxious to try your recipe for the simple loaf. For the overnight option you state “Since you have used less bread machine yeast, your dough may need additional time for the first and second rise but it will pay off in additional flavor.” I don’t see a note to reduce the amount of yeast. That made me wonder if I could use some of my discard plus the 1 ½ tsp yeast. I only feed my starter once a week or so and use the discard for our favorite pizza dough. Thank you!
Sharon Scott
Sharon,
I’m glad you asked. The sentence about less yeast should have been deleted. I have another variation of this recipe that I decided not to include just to keep things simple. But I’ll tell you. Here’s what I do sometimes. Add all the water, half of the flour, and 1/8 teaspoon of yeast the night before. Turn on the bread machine and mix just until the flour is all moist. When I get ready to make the bread, I add the rest of the ingredients and the remaining flour but reduce the yeast to 1 teaspoon so you are adding a total of 1 and 1/8 teaspoon. So “Since you have used less bread machine yeast, your dough may need additional time for the first and second rise but it will pay off in additional flavor.” Now you know the whole story. This is combining a biga and a long autolyse of sorts. Just something I made up. I haven’t tried adding discard to this mixture but maybe I will. Seems like a good idea. You might need to add more flour depending on how thin your discard is.