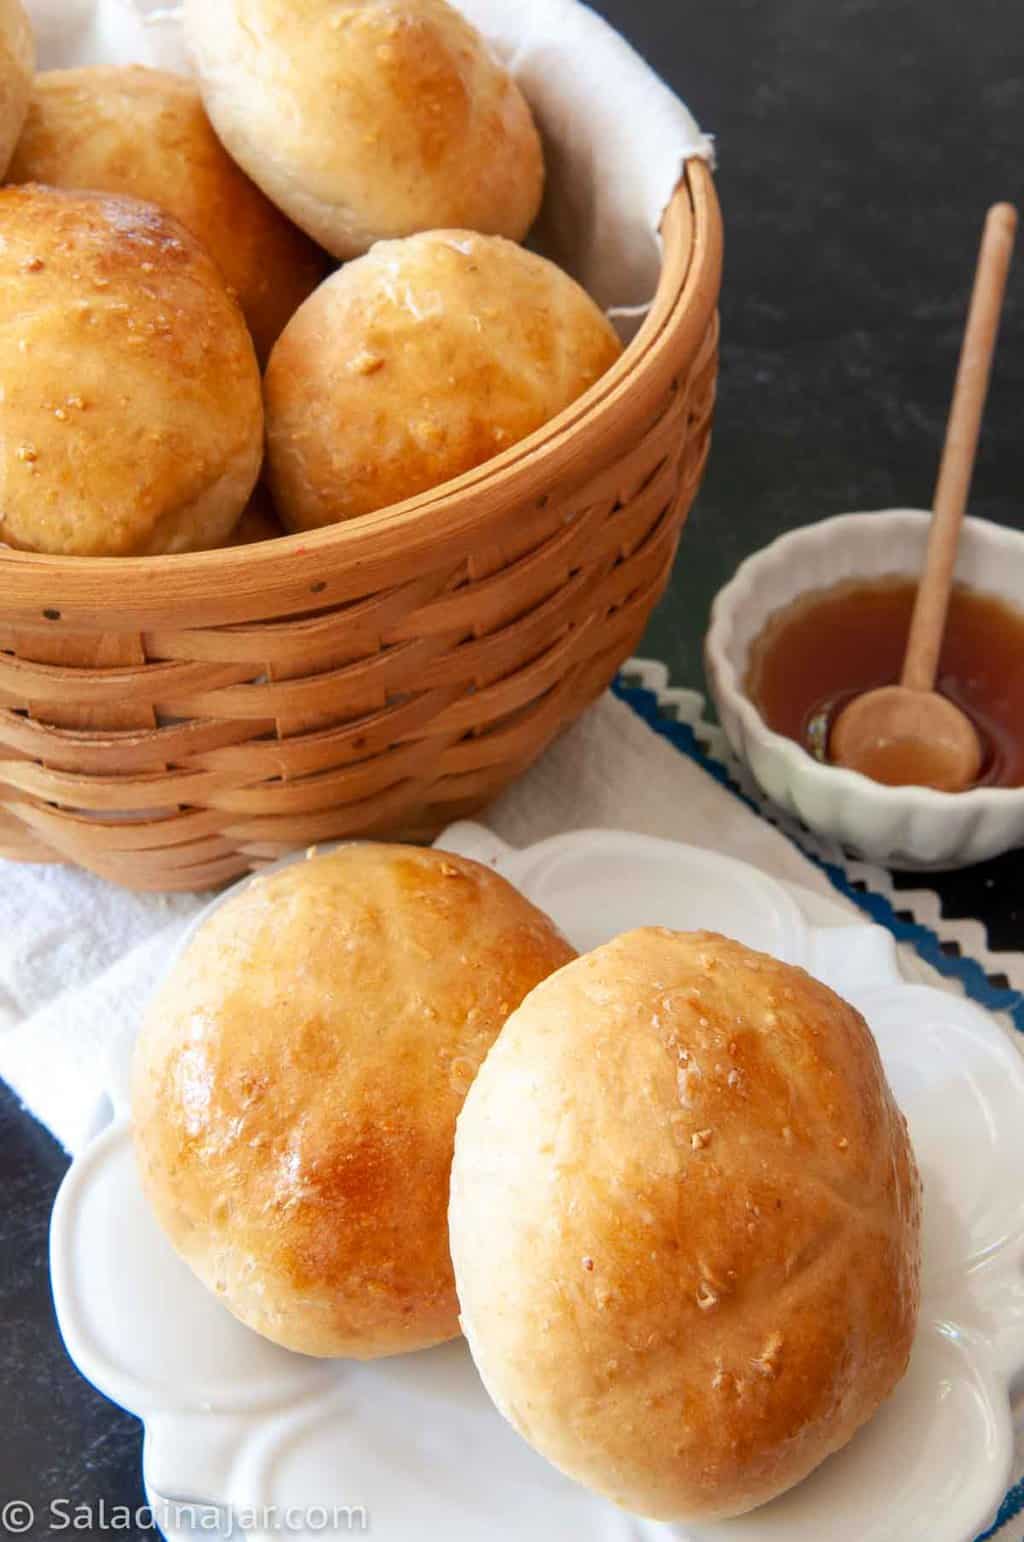
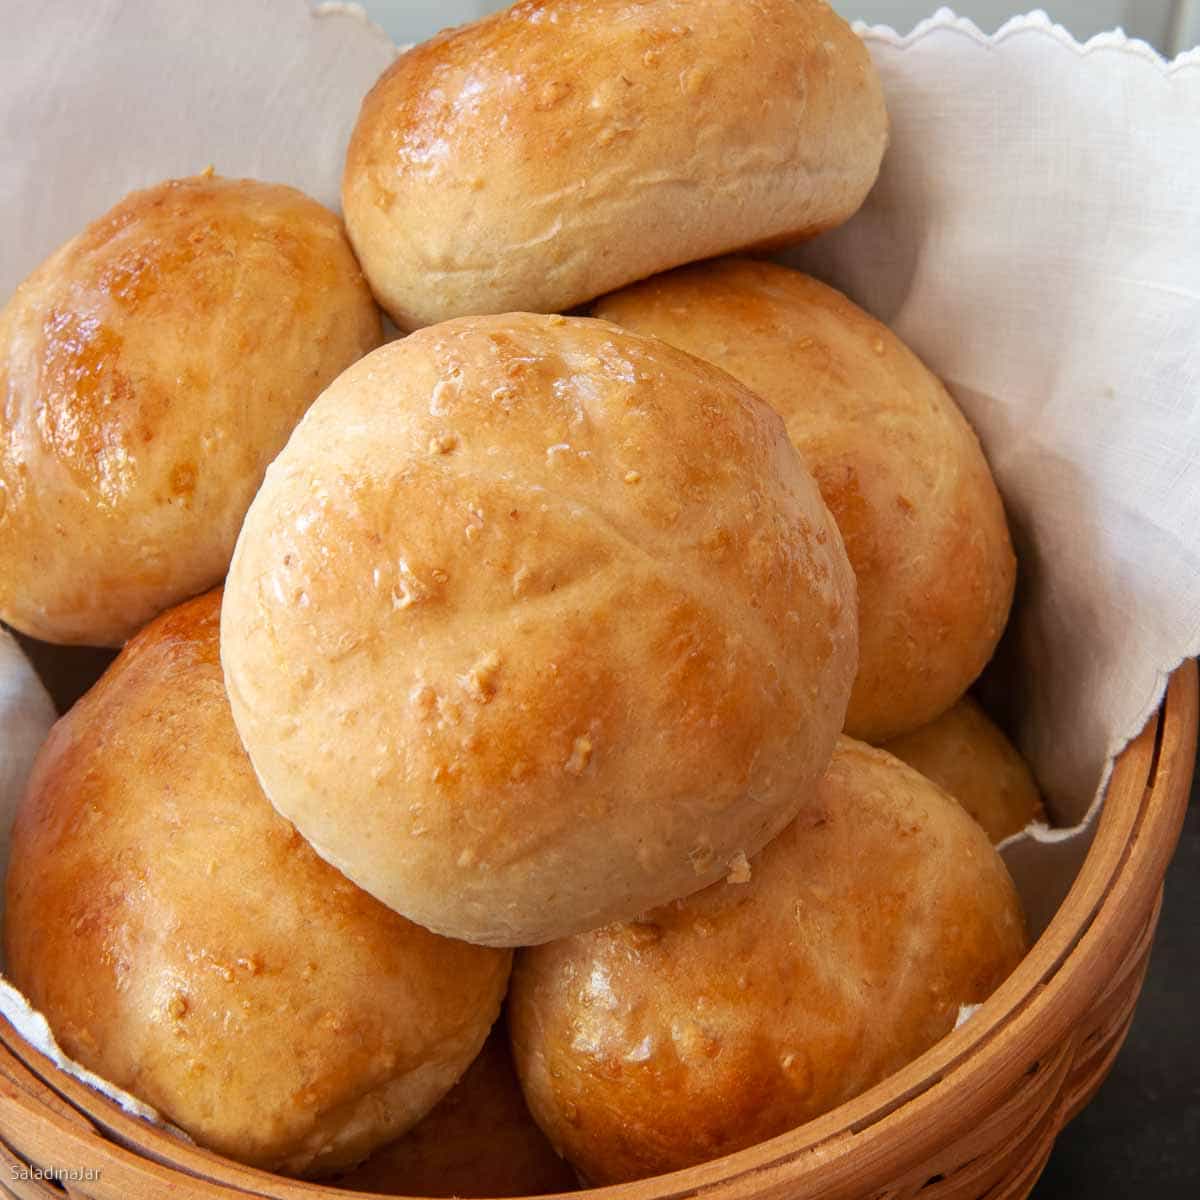
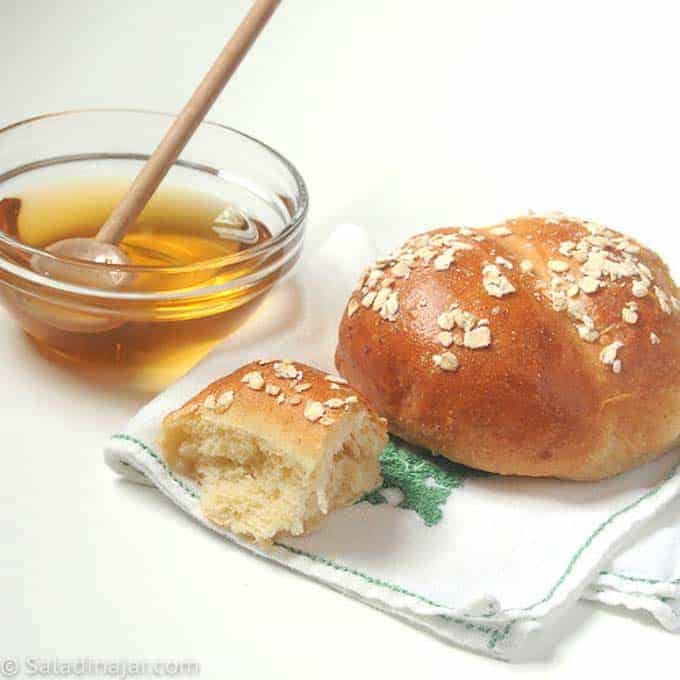
Honey Oat Dinner Rolls (Bread Machine Dough)
Sneak Preview: These honey oat dinner rolls are soft, slightly chewy, and lightly sweetened with honey. Mix and knead the dough in a bread machine, shape by hand, and bake in the oven. Ready in about 2¾ hours.
This post contains affiliate links. As an Amazon Associate, I earn from qualifying purchases at no extra cost to you.
Ever since my doctor said my cholesterol was too high, I’ve been trying to add more oatmeal to my diet. Since I’m not a fan of mushy oatmeal in a bowl, I’m looking for any excuse to eat it in other ways. These rolls qualify!
Granted, you’d have to eat quite a few rolls to match a bowl of oatmeal, but every little bit helps.
Ingredients & Substitutions
MILK: Whole milk makes the softest rolls, but 2%, skim, or even water will work.
HONEY: Adds sweetness and helps keep the rolls soft. Maple syrup can be substituted.
EGG: Enriches the dough and contributes to a softer texture.
BUTTER: Adds flavor and tenderness.
SALT: Table salt or sea salt. Essential for flavor and dough structure.
BREAD FLOUR: Produces a higher rise and chewier texture. All-purpose flour may be substituted.
OLD-FASHIONED OATS: Adds texture and a mild oat flavor. Quick oats can be substituted. Avoid instant oatmeal.
VITAL WHEAT GLUTEN: Optional. Especially helpful when using all-purpose flour or lower-protein bread flour.
INSTANT YEAST: Also labeled bread machine yeast. If using active dry yeast, add an extra ¼ teaspoon.
Step-by-Step for Making Honey Oatmeal Dinner Rolls
⬇️ Jump to the recipe below for exact amounts and detailed instructions.

Honey Oat Dinner Rolls (Bread Machine Dough)
Video
Ingredients
- ¾ cup (170 g) milk cool
- ¼ cup (84 g) honey
- 1 large (50 g) egg
- 1 teaspoon salt
- ¼ cup (57 g) unsalted butter
- ⅔ cup (60 g) old-fashioned oats
- 2 ½ cups (300 g) bread flour
- 1 tablespoon vital wheat gluten (optional)
- 2 ¼ teaspoons bread-machine yeast or instant yeast
Glaze:
- 1 (50 g) egg
- 1 tablespoon water
Instructions
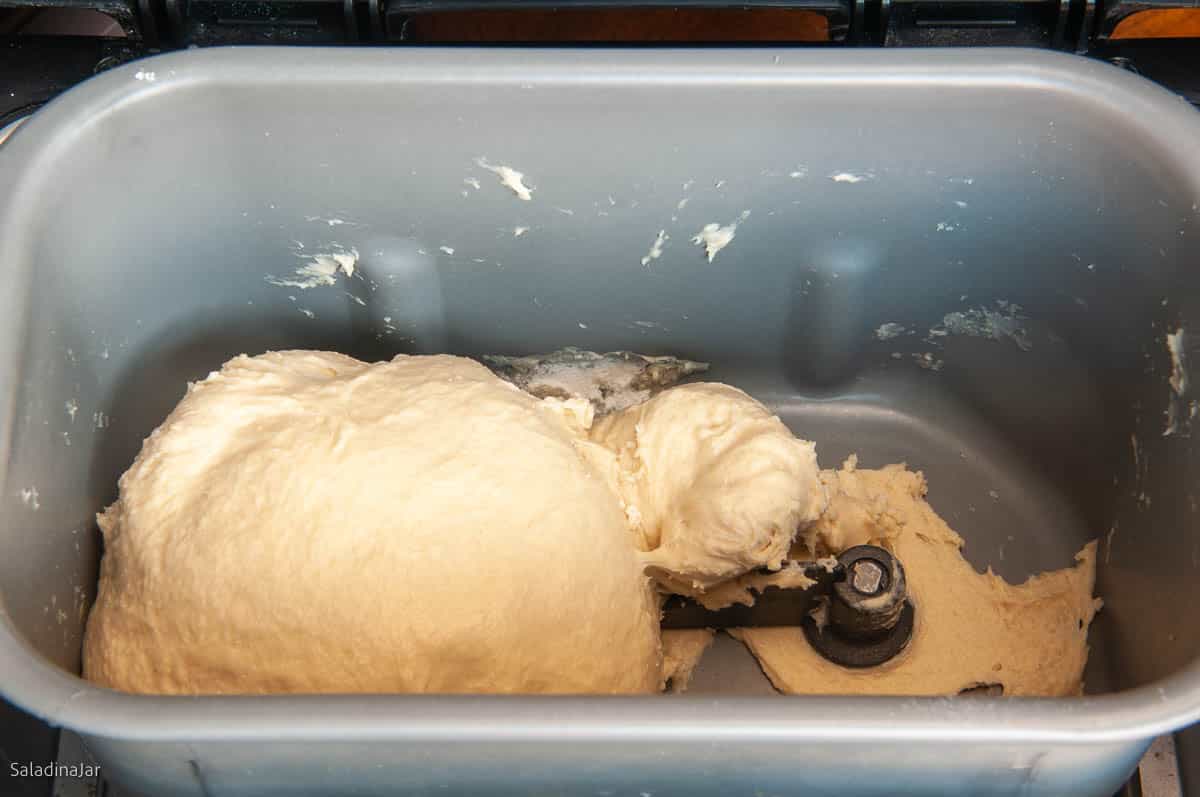
- Load the bread machine pan: Add 3/4 cup (170 g) milk, 1/4 cup (84 g) honey, 1 large (50 g) egg, 1 teaspoon salt, 1/4 cup (57 g) unsalted butter, 2/3 cup (60 g) old-fashioned oats, 2 1/2 cups (300 g) bread flour, 1 tablespoon vital wheat gluten, and 2 1/4 teaspoons (2 ¼ teaspoons) bread-machine yeast or instant yeast.Set your bread maker on the DOUGH cycle and press START.
- Check the dough: Look at least twice by lifting the lid to take a peek. The first time, look immediately after the machine starts to ensure the paddles are engaged correctly. Look again 15 minutes into the DOUGH cycle to assess the consistency of the dough. The dough should stick to the side, then pull away cleanly.If your dough is too wet, add flour one tablespoon at a time. Conversely, if the dough is too dry, add one tablespoon of liquid at a time until the dough looks just right. Read more about this surprising secret to success with a bread machine here.
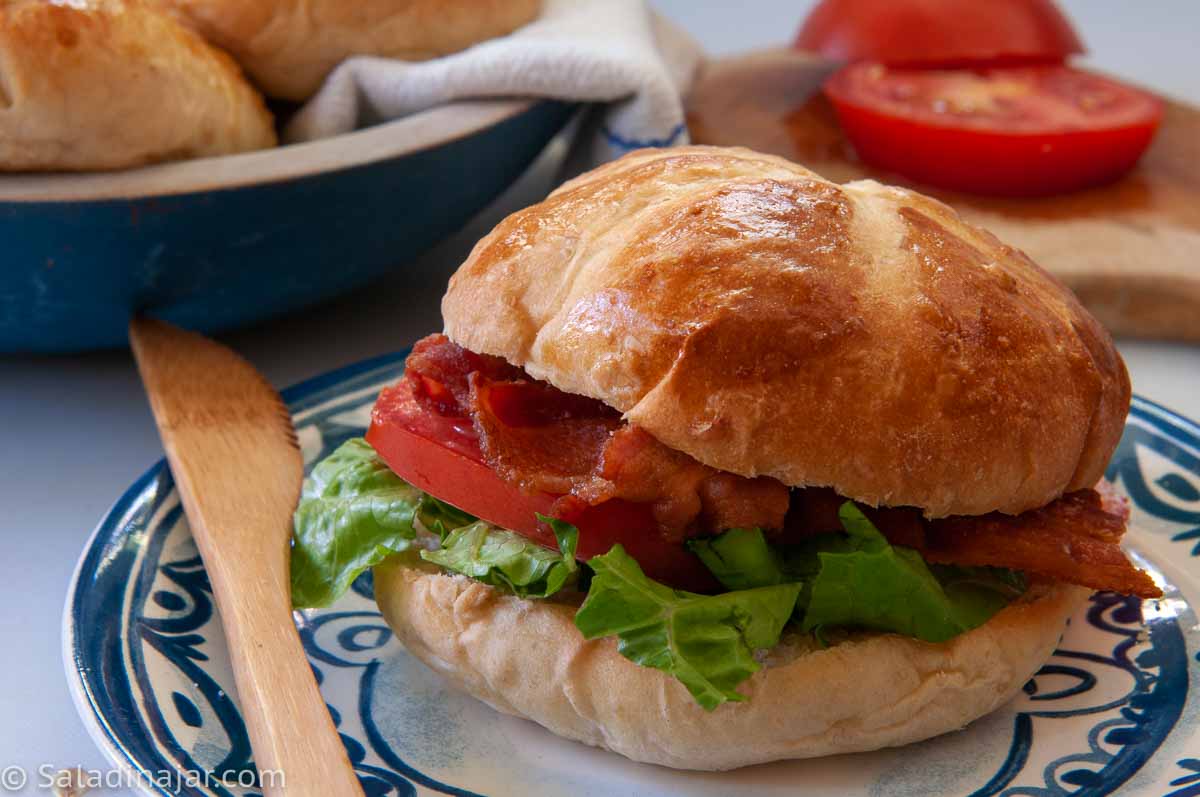
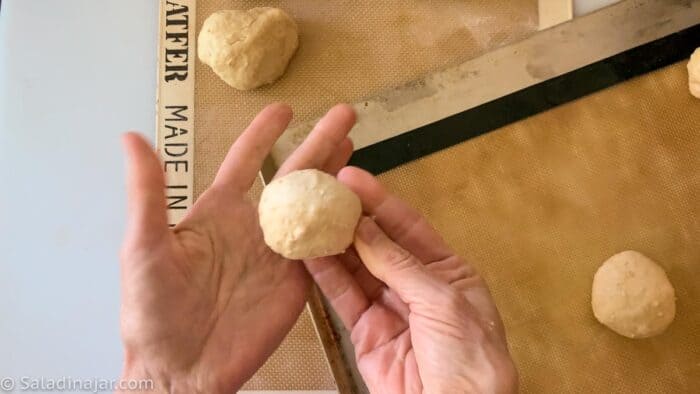
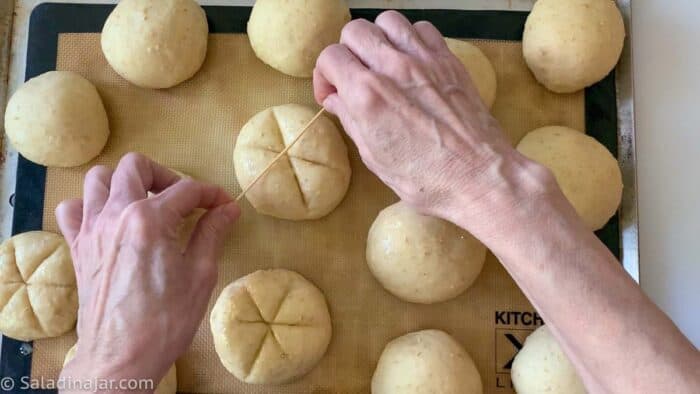
- After the DOUGH cycle ends: Turn the dough out onto a floured surface. Divide dough in half. Divide each half into 7 rolls for a total of 14. Use your fingers to make each portion into a smooth ball.Place dough balls onto a greased cookie sheet. Allow to rise until almost doubled.
- Preheat the oven to 350˚F (180˚C) about 15 minutes before you anticipate the rolls will be ready to bake.
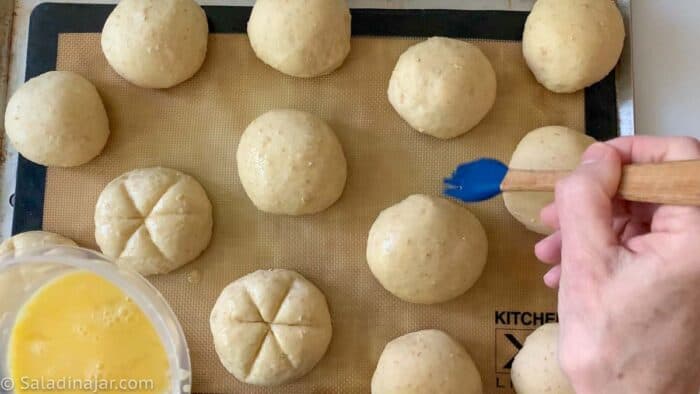
- Glaze: Whisk 1 (50 g) egg and 1 tablespoon water together. Brush the tops of the rolls carefully so it doesn't drip and glue the rolls to the baking sheet.Use the dull side of a thin knife or a wooden skewer to gently press down 1-3 times in the middle of each roll to make a decorative pattern.
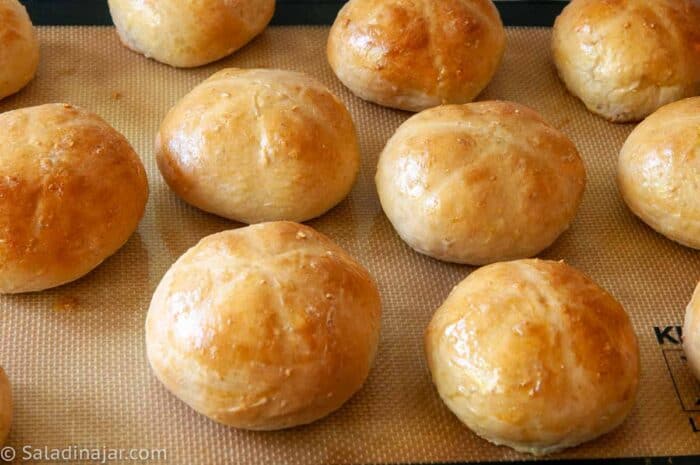
- Bake and cool: Bake at 350˚F (180˚C) for 10-13 minutes. Allow to cool on a rack for a few minutes or eat as soon as they don't burn your fingers.
Notes
- Unbaked dough: Freeze after the DOUGH cycle or after shaping (before final rise). Defrost in the fridge overnight.
- Baked bread: Double-wrap and freeze up to one month. Reheat gently.
- Stand Mixer: Mix until moistened, then knead with a dough hook (speed 2–3) until smooth and elastic (5–10 minutes). Let rise, deflate, and shape as directed.
- By Hand: Mix to a shaggy dough, knead on a floured surface until smooth and elastic (10–20 minutes). Let rise, deflate, and shape as directed.
Equipment
Nutrition
All images and text ©️ Paula Rhodes for Salad in a Jar.com
Final Thoughts
The picture below is from the original version of this recipe when I sprinkled oatmeal on top of the rolls. I thought it looked pretty and hinted at the flavor inside, but my grandkids weren’t fans. These days, I usually leave it off. Feel free to do whichever makes you happy.
What Would You Like To Read Next?
- Oatmeal-Sunflower Bread Recipe
- Double Chocolate Oatmeal Refrigerator Cookies
- Homemade Brown Sugar-Cinnamon Oatmeal Pop-Tarts
- 6 Bread Machine Secrets You Need To Know

This is my new favorite!!! Thanks for sharing!!! I mean wowzahhh!
Hi Mika,
Glad they turned out good for you. Thank you for the 5-star rating and taking the time to leave a comment.
I have these so many times that I have lost count!
Today I made half of the Dough into cinnamon buns and the other half into the regular ones.
Love this recipe ❤️
Could you use this recipe for a loaf of bread?
Hi Julie,
Great to hear from you. I haven’t tried this as a loaf, but my guess would be yes. The oatmeal lends some structure. Worth a try.
Yummmm! Absolutely delicious! Thank you for this recipe!
Love these. I made them two days ago with maple syrup instead of honey. They are still soft. Thank you for this recipe. It’s a keeper. I tried to give it 5 stars ⭐️!
Thanks, Lois. Maple syrup is a good substitute for honey. I hope you enjoy the recipe for years to come.
Love your expertise in bread making. I have always loved homemade bread. The Oat Rolls came out perfect! And I too love using the bread machine to do all the hard work. I made the bigger rolls for our hamburgers. Yum!!! Oh, used a wood skewer for pressing into the dough. Turned out great!
Lynn,
So kind of you to come back to say so. Glad the rolls worked out for you. Look forward to hearing from you again soon.
I read your comment on using whole wheat flour… so I added 3 tbsp of those when the initial dough was too wet;
Result — the dough balls had rough surface, and they won’t brown after 18 mins of baking. And I didn’t get them to be as nice as yours ???
Sounds similar to what I experienced when I added whole wheat flour. It was not an improvement.
I’ll give them another go… this time not adding the whole wheat flour ?
Hey Ju,
If you want to add whole wheat flour to the Honey Oatmeal Dinner Rolls recipe, you might try adding some Vital Wheat Gluten to help it rise. This recipe is a slow-riser anyway. Whole wheat would really slow it down.
This recipe is great! I just made them, and they are so light, and so so good. I made a few substitutions, but stuck to the proportions for the most part. Thank you!!
I usually don’t comment about recipes unless it is either very good or very bad, mostly because people leave so much excessive praise for recipes on food blogs when often the recipes are not very good.
This recipe, however, is pretty excellent. I am not an inexperienced baker, but often new recipes don’t always turn out perfectly. These rolls turned out perfect the first time I made them, and the rolls were extremely soft and delicious.
The oats on top don’t do much to flavor the rolls – it’s a very light hint of oat. So, if you’re looking for a very “oaty” roll, this is not it. However, the light oat taste is a nice compliment to the faint taste of honey.
I have definitely saved this to my personal archive of recipes to hang on to!
As a follow up, I *did* make the rolls smaller than pictured. I think they’d bake equally well if made larger, though think I will continue to make them on the smaller side to assure a certain kind of very round, ball-shaped rise.
I don’t understand amount of flour is it 2 and 1/2 cups then add 3/4 cup as necessary?
Hi Debbie,
I just looked at the recipe and changed it to hopefully make it clearer. You guessed right. Add 2 1/2 cups to start with. Then add 3/4 cup as needed. The amount you need can really vary according to the humidity.
I made a sweet roll version of your rolls last week. Such a fun way to get a little oatmeal in the morning. I’ll have to try the dinner rolls soon too. Thanks for sharing.
Hello again!
I made a wheat version of these today that came out VERY nice 🙂 I substituted 1 cup of the AP flour for wheat flour. I used King Arthur flours, which I do think are better than average quality – nice, light, fluffy rolls. I also didn’t have milk in the house so I used 1/2 and 1/2 instead. The extra fat probably helped keep them from being dry.
The only thing I would do is maybe add more oatmeal into the rolls themselves as I enjoyed the texture it gave the rolls, but wanted more 🙂
I made a whipped honey sea salt butter to go with them, and it was a FANTASTIC combination. For the butter, whip 1 stick unsalted butter until light and fluffy. Add 2-3 tablespoons of honey and 1/2 a teaspoon of coarse sea salt and whip until incorporated. The salt gives the butter a slight salty crunch and balances the sweetness of the honey.
Obviously I’m going to have to go through and try all your bread recipes as they keep turning up winners.
I made these today in my bread machine and they’re great- thanks for the recipe! 🙂
Kristen, I would do the first. Freeze after you shape the rolls but before they rise. Allow at least a couple hours for rolls to thaw and rise before time to bake them. Hope you love them as much as we do.
These look amazing! I want to make these for Thanksgiving but would be best with my schedule to make a head of time. What do you think the best thing to do would be? Make the dough and have ready to go in oven but freeze and bake that day, or bake then freeze and warm up in oven so they are warm when being served?
Yummy!!
Hey, these sound so delicious! One problem, I don’t have a bread machine. Any helpful suggestions for the bread-machine-less?
Naomi,
There is a link right above the recipe where you can see general directions for making these rolls without a bread machine. Hope that helps.
Yum! Thank you for the whole milk substitution in the recipe too!
Another bread machine beauty from you! These oatmeal rolls look fabulous and I love the dripping honey idea!
YUM!!! I am definitely going to try and make these someday!
My mom used to make this oatmeal bread that I loved; she toasted it, buttered it and then topped it with a smear of cinnamon applesauce. It was divine. These rolls remind me of that bread. Thanks for taking me back.
oh, I love oatmeal so much!
Gorgeous rolls! – and the oats make them so unique. I’m into oats theses days (muffins, cookies, bars) – so this will fit right in. Love the skewer technique as well – and a “little” honey is never enough (I agree)!