Make Sourdough Bread (Without Yeast) Using a Bread Machine
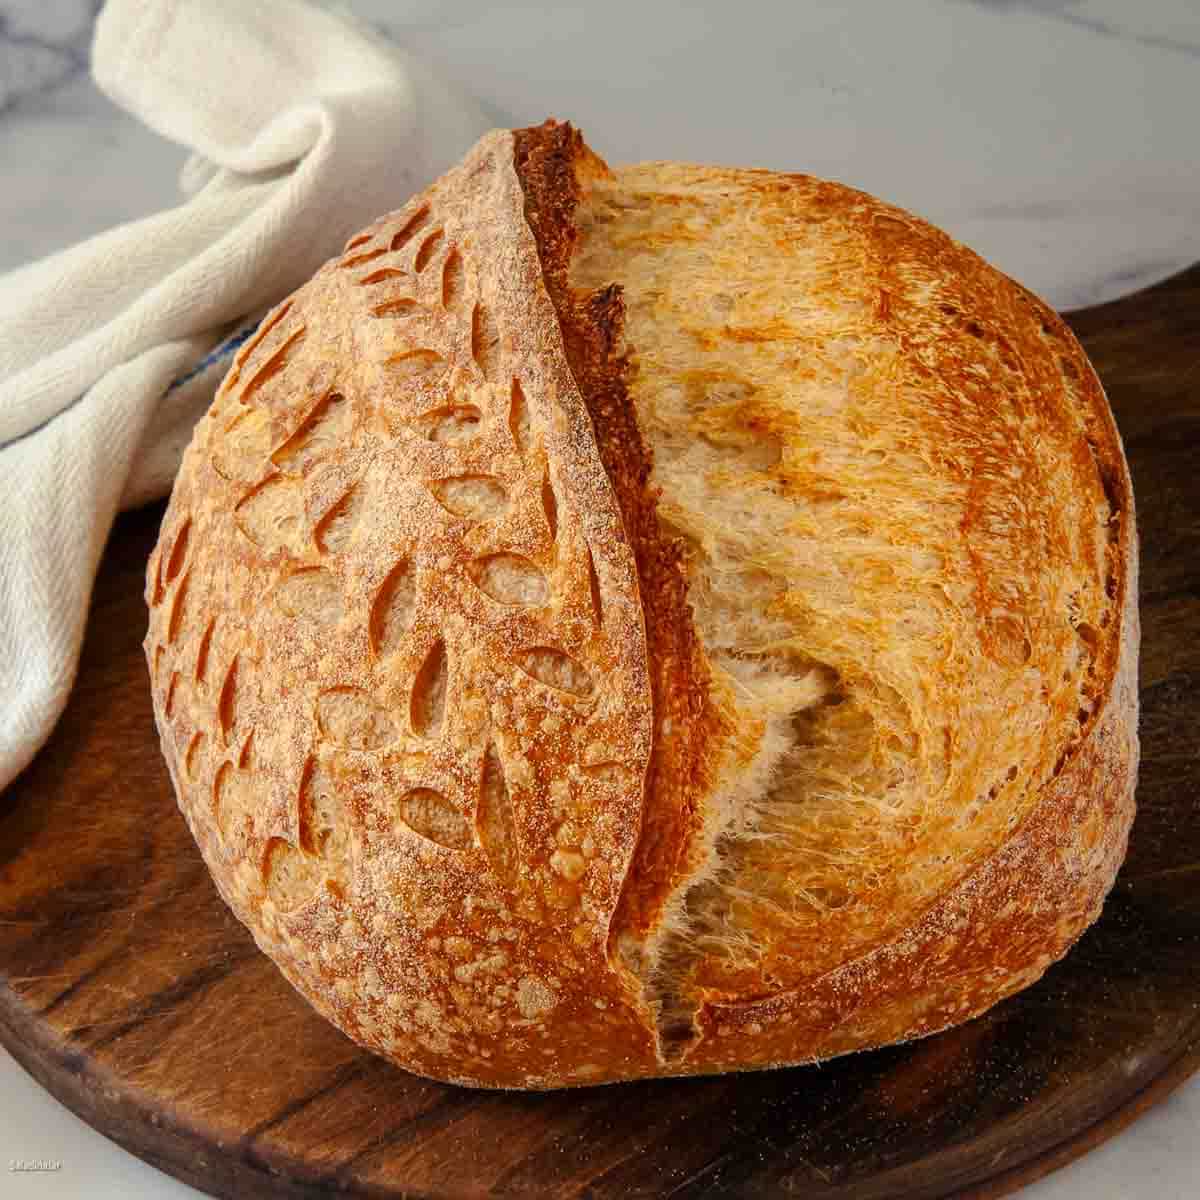
Sneak Preview: Make yeast-free sourdough bread with your bread machine’s DOUGH cycle, then bake it in a conventional oven for an artisan-style loaf. This simple recipe uses only starter, water, flour, and salt. Allow at least 24 hours from start to finish.
This post contains affiliate links. As an Amazon Associate, I earn from qualifying purchases at no extra cost to you.
Many people assume a bread machine isn’t useful for artisan sourdough because it can’t handle the long fermentation and high-heat baking. That’s only partly true. Let the machine do the mixing and kneading, then finish the dough by hand and bake it in your oven. You’ll save time and effort while still getting the crust and crumb that make sourdough special.
FYI to sourdough beginners: Making sourdough may seem easy at first glance, but it can take years to perfect your techniques. I’m giving you a basic recipe with instructions for how I personally do it. However, you can use almost any sourdough recipe in a bread machine as long as it’s not too big for your machine (Check your manual.)
Quick Facts About This Recipe:
- Loaf Size: 1¾ pounds
- Equipment: Works with most bread machines (no sourdough cycle needed)
- Time Commitment: ~24 hours, including overnight fridge rise
- Helpful Tools: Digital scale, bench knife, banneton or round bowl, and Dutch oven
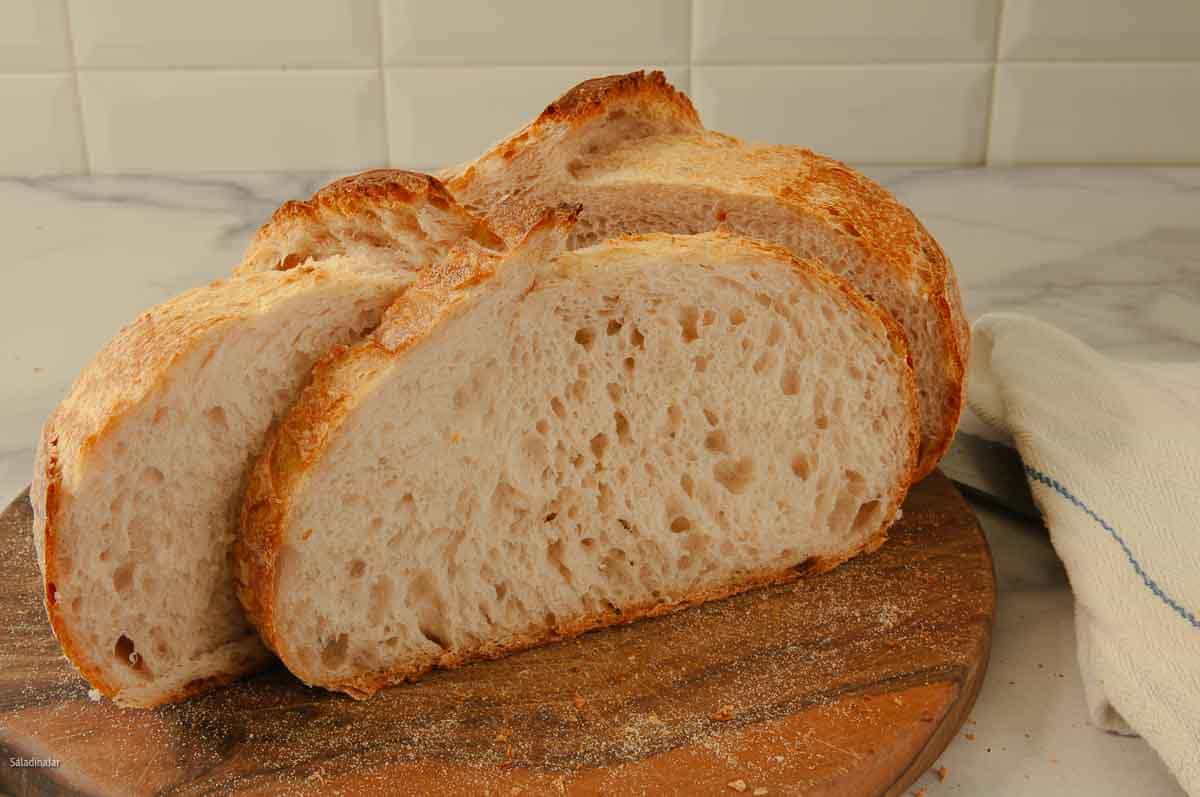
No one will ever guess you used a bread machine to mix and knead this tasty sourdough bread.
Ingredients & Substitutions
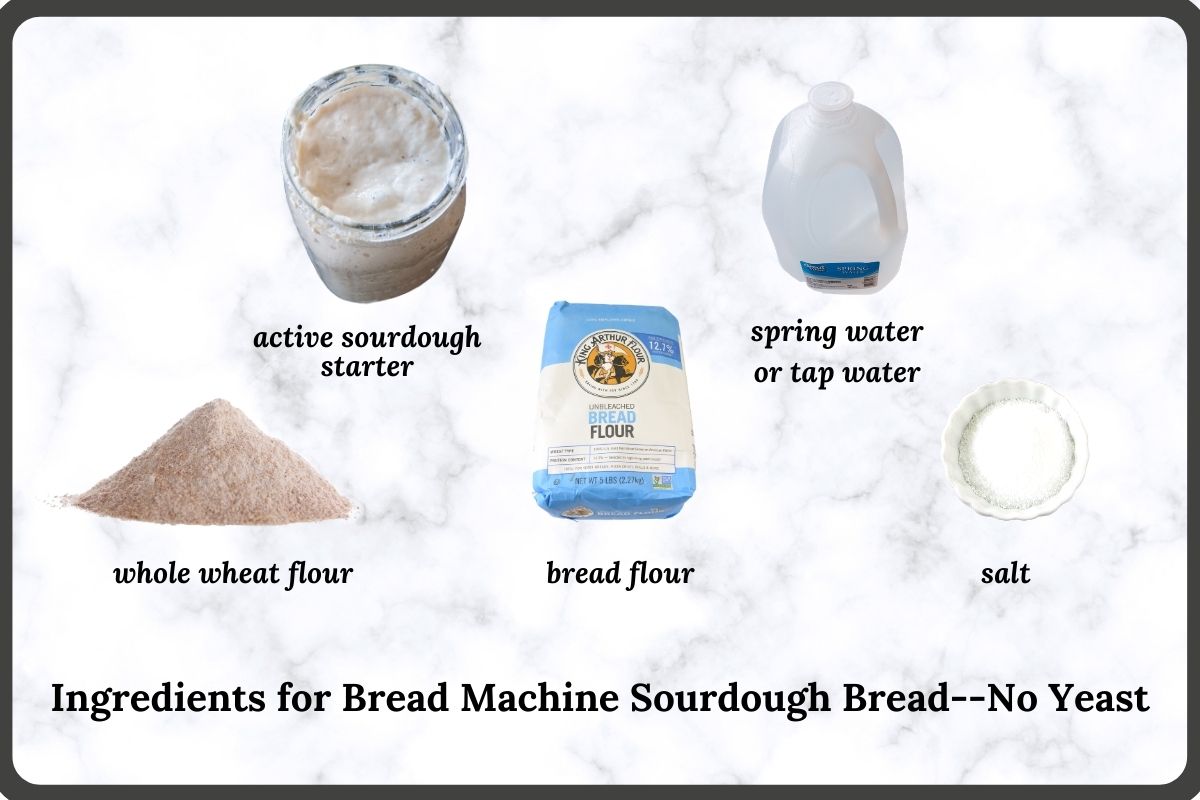
• STARTER – Active and bubbly starter is essential. A flour-and-water starter works best. (starter recipe here)
• WATER – Cool tap water is fine.
• FLOUR – Produces the best structure and chew.
• SALT – Table salt or fine sea salt works well.
Step-by-Step Instructions
⬇️ Jump to the recipe below for exact amounts and detailed instructions.
Mixing, Kneading, and First Rise in a Bread Machine

Shaping the dough

Baking the Sourdough

Tips That Make a Difference
- Dough rises slowly at first, then speeds up as bubbles form—timing varies from 4 to 7+ hours depending on temperature.
- Watch the dough, not the clock—learning sourdough timing takes observation and practice.
- Under-proofed dough can lead to dense spots and random large holes in the finished loaf.
- Over-proofed dough tends to spread, loses structure, and won’t rise well in the oven.
- Read how to make your own starter using yogurt whey.
Mistakes are part of the process—each one teaches you something new.

Make Sourdough Bread (Without Yeast) Using a Bread Machine
Video
Ingredients
- 1½ cups (345 g) water
- ⅓ cup (40 g) whole wheat flour (substitute with bread flour if preferred)
- 3⅔ cups (440 g) bread flour
- ⅓-½ cup (70 g) bubbly and active sourdough starter
- 1½ teaspoons (9 g) table or sea salt
Instructions
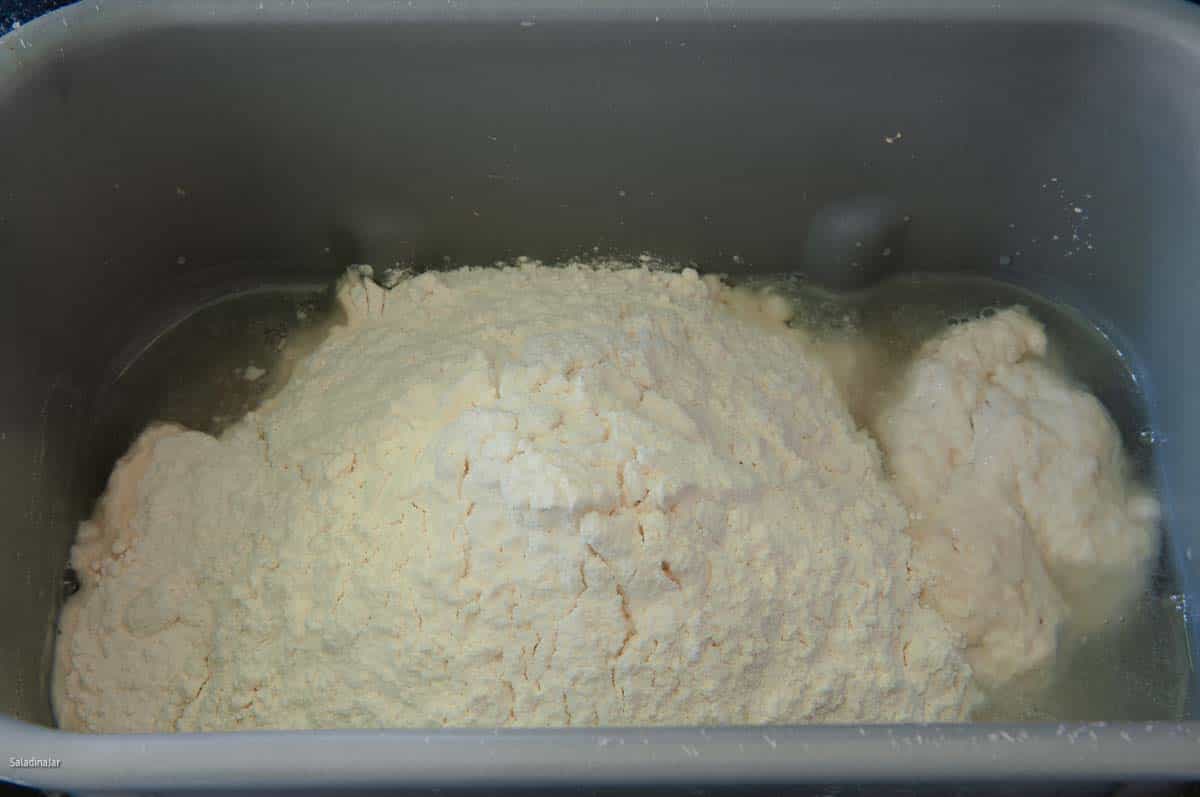
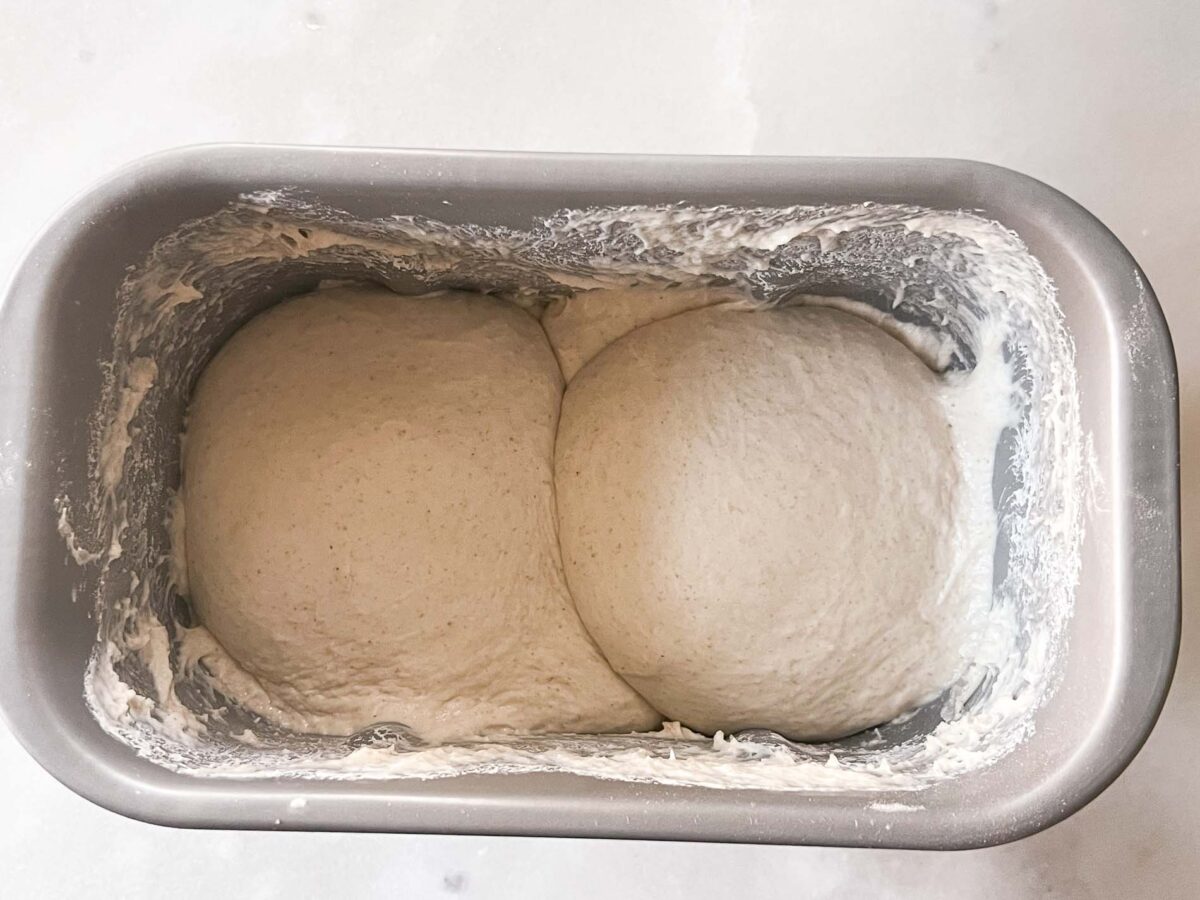
- Mixing and kneading in the bread machine: Add 1½ cups (345 g) water, ⅓ cup (40 g) whole wheat flour (substitute with bread flour if preferred), 3⅔ cups (440 g) bread flour, ⅓-½ cup (70 g) bubbly and active sourdough starter, and 1½ teaspoons (9 g) table or sea salt to the bread machine pan.Select the DOUGH cycle and press START. Use the windowpane trick to check for full gluten development.
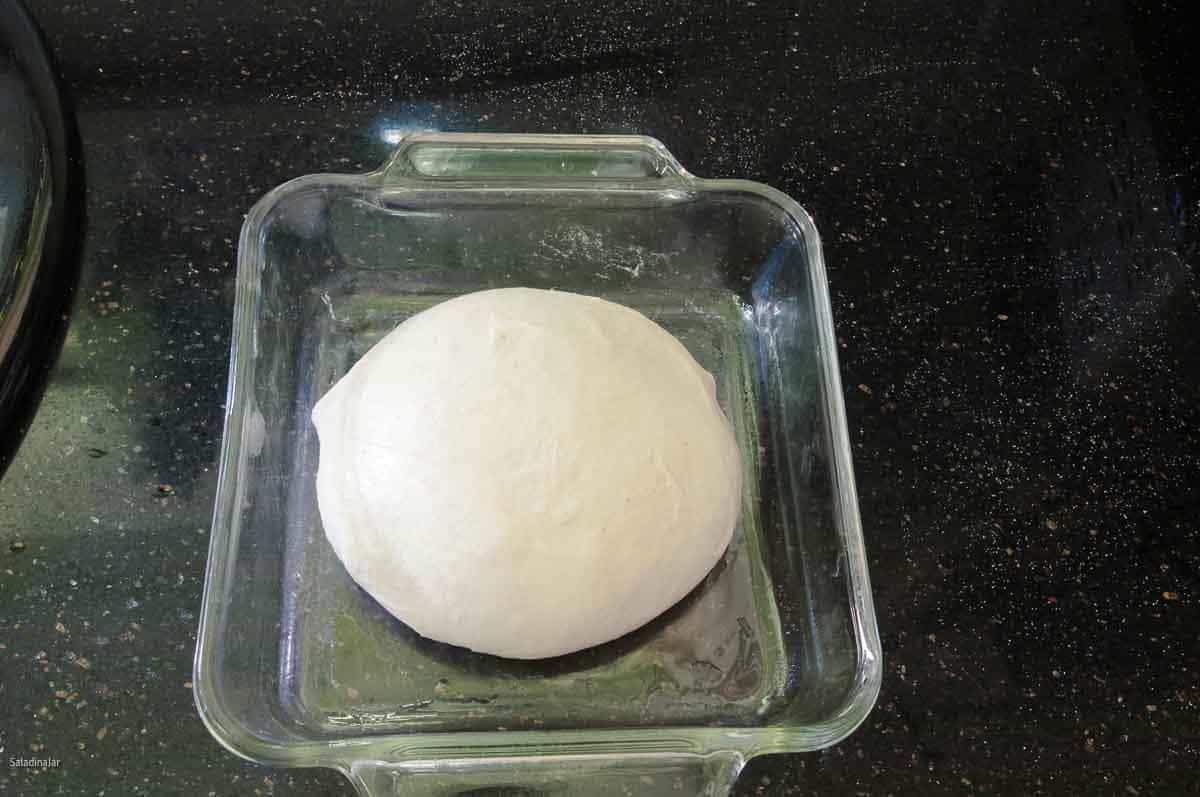
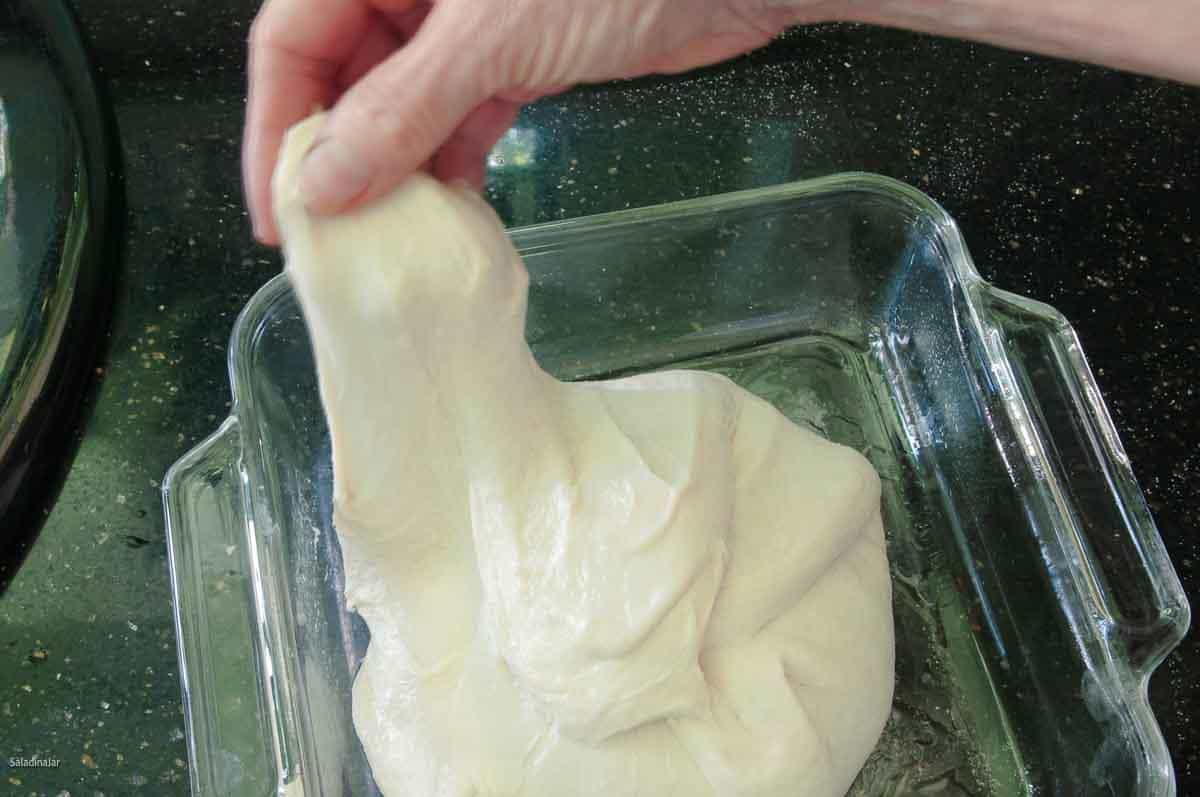
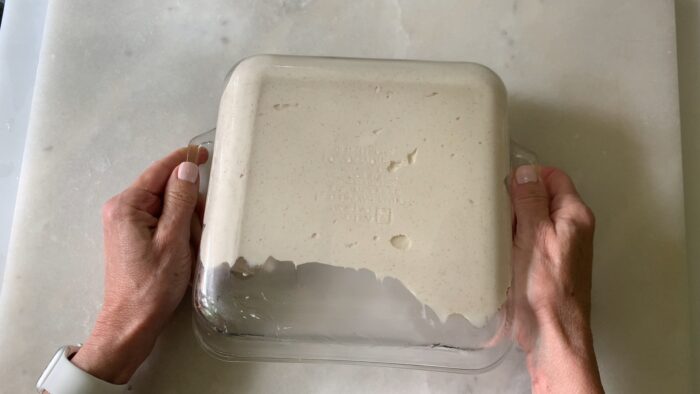
- Bulk rise: Transfer dough to a greased, clear container. Let rest 30–60 minutes, then perform 3–4 rounds of stretch-and-folds or coil folds every 30–45 minutes. Let rise 5–8 hours at 75–77°F until airy, bubbly, and slightly jiggly.
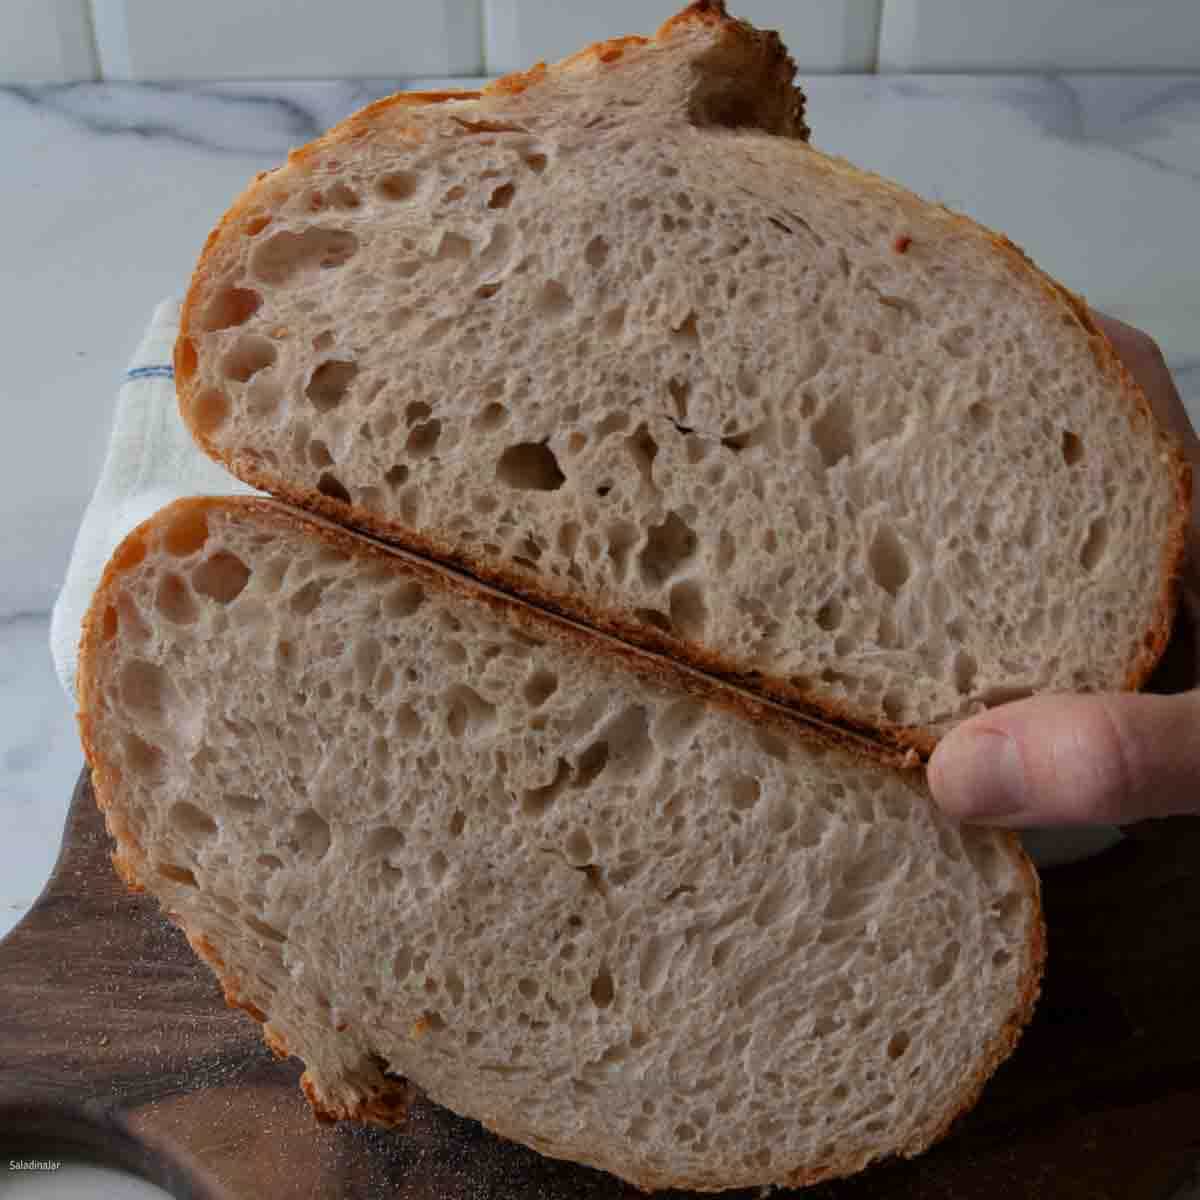
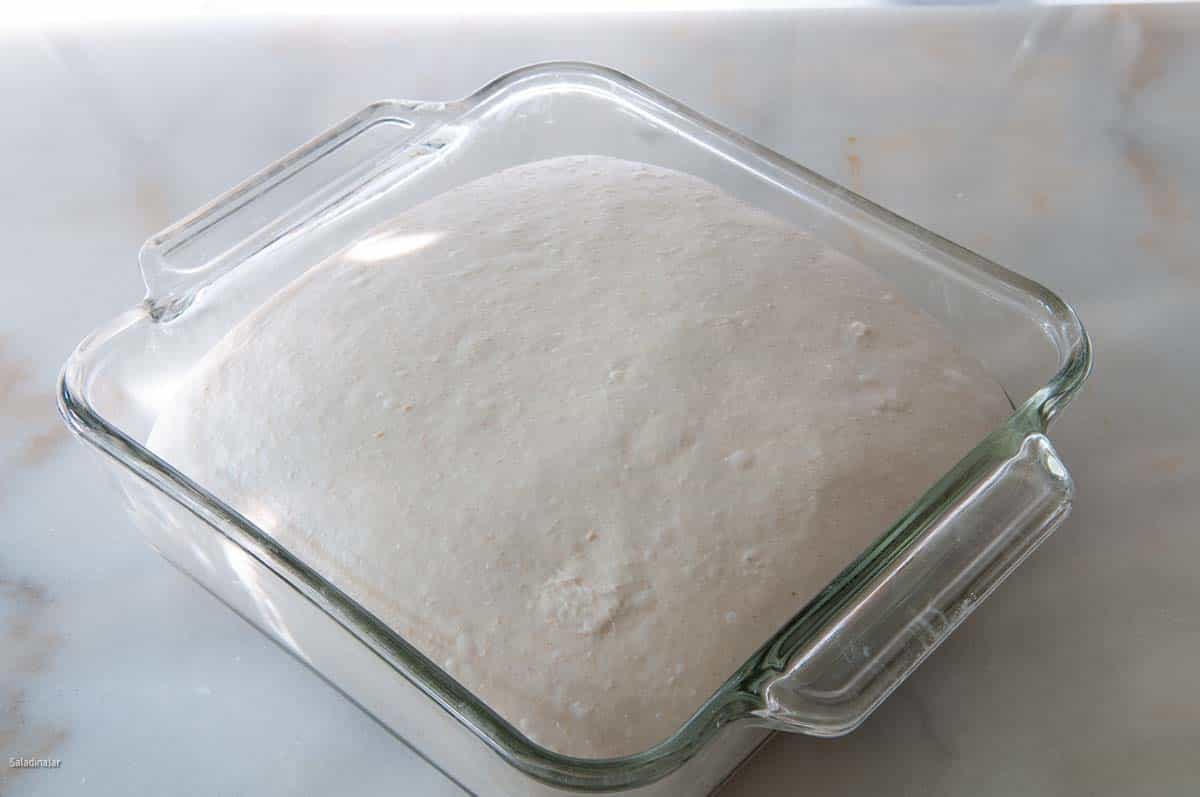
- How to tell if the dough has risen enough: The dough should approach almost but not double its original size. Look for giant bubbles on top and many bubbles covering the sides and bottom of the dough. (This is why a clear container is helpful.) It should jiggle slightly when you shake it. The dough should slope downward at the edges of the bowl or dish.
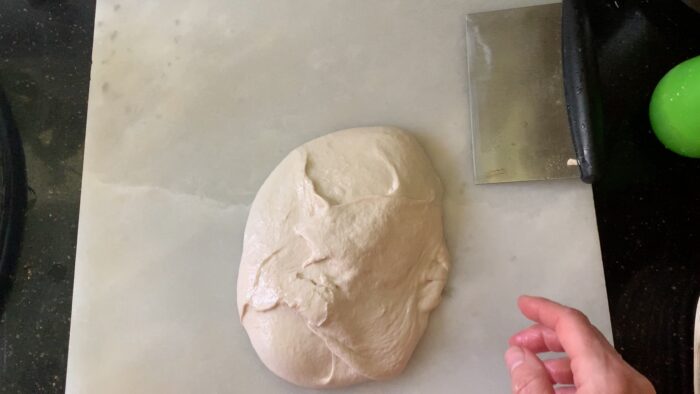
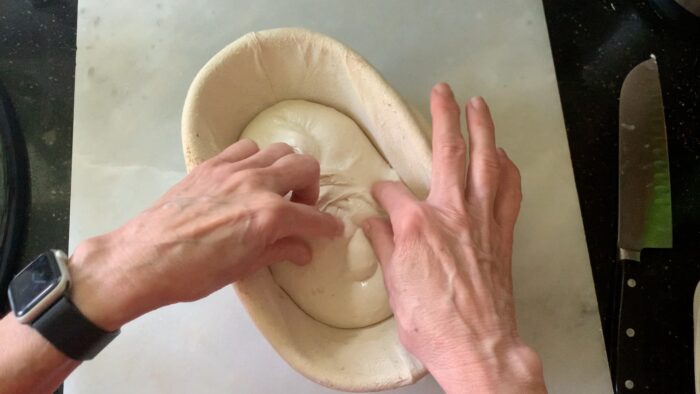
- Preshaping: Turn the dough onto a damp or floury surface and shape it into a smooth ball. Rest uncovered 15–30 minutes.
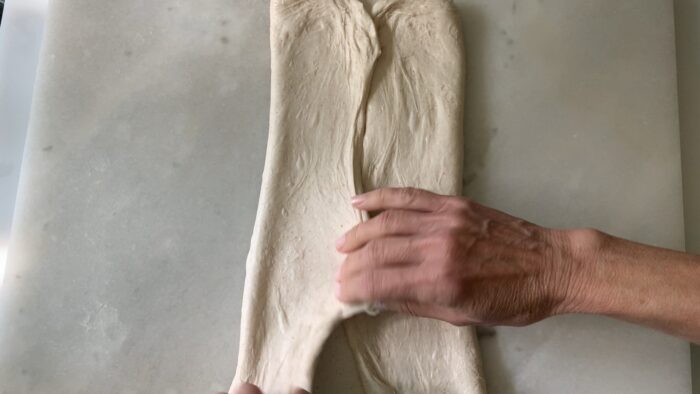
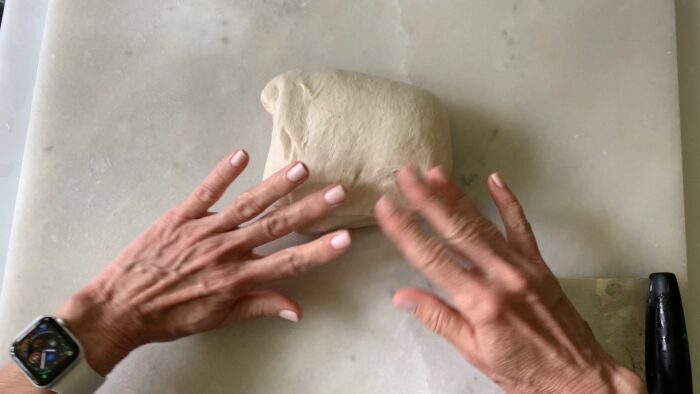
- Shaping: Stretch into a rectangle, fold like an envelope, then roll up to make a compact package. Note: If your dough turns into a gooey mess, the dough may be overproofed. (Recovery tip: Scrape the dough into a greased 8½ x 4½-inch bread pan and make a sandwich loaf.)
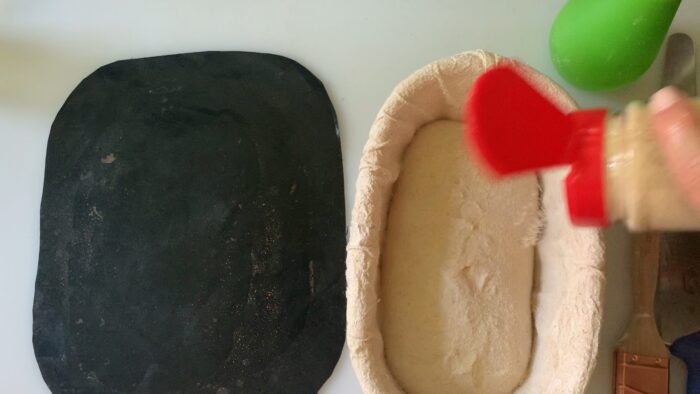
- Final Shaping: Place seam-side up in a well-floured, cloth-lined banneton or bowl. Let rest for 15 minutes. Stitch if desired. Cover and refrigerate 8–24 hours.
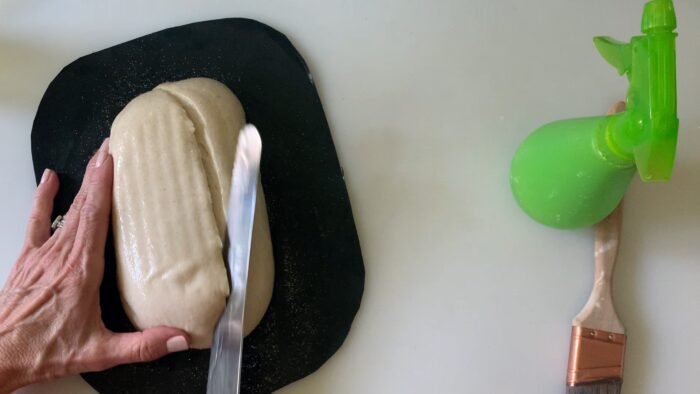
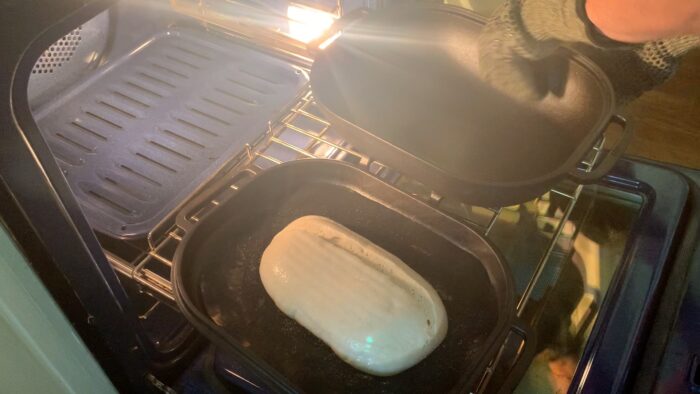
- Bake: Preheat your oven and Dutch oven to 500°F (260°C) for 45-60 minutes.Remove the dough from the fridge, flip it onto parchment paper, and score the top.Bake at 450°F (230°C) for 20 minutes with the lid on.Remove the lid and bake at 425°F (220°C) for an additional 25 minutes, or until the crust is golden brown and the internal temperature reaches 210°F (99°C).
- Cool the baked bread on a rack for 3 hours or more before slicing. Cutting the loaf too early or underbaking the bread may result in gumminess.
Notes
- Sticky dough? Reduce water slightly next time.
- Warm kitchen? Use less starter (40–60 g) to extend the bulk rise.
- Burned bottom crust? Place a sheet pan on the lower rack or use parchment under the loaf. A grill mat in the Dutch oven also helps.
- Larger batch? Use the 1½× button to make two loaves. If your machine strains or overheats, stop the cycle immediately.
Equipment
Nutrition
All images and text ©️ Paula Rhodes for SaladinaJar.com
FAQ
Usually to maintain the right temp for starting or feeding a sourdough culture—not baking a full loaf.
Some bread machine sourdough recipes sneak in a little instant yeast to hurry things along. This one doesn’t—your starter does all the work. It takes more time, but that slow rise is what gives sourdough its wonderful flavor and character.
Most people mix sourdough by hand, which works fine if you have the time and hand strength to do it thoroughly. The DOUGH cycle does a thorough job of developing the gluten with the press of a button. You will still need to do stretch-and-folds or coil folds by hand to strengthen the dough.
The oven can create high heat and the steam needed for a crisp crust and good rise. Bread machine pans restrict the shape; ovens let you make boules or batards and score them as you choose.
Use a baking stone and a pan of boiling water for added steam.
Final Thoughts
Don’t be discouraged if your bread doesn’t turn out perfect the first time. It’s not as easy as you might think. Enjoy the challenge and keep practicing. Meanwhile, don’t hesitate to send me pictures and questions if you want somebody to celebrate or commiserate with you.
— Paula, Home Economist
Homemade Food Worth Sharing
Need help troubleshooting?
Email me: Paula at saladinajar.com — photos help!

This is my second time making this recipe. The taste is so good but I definitely struggled with regulating temperature in my house yesterday during bulk fermentation. It had overly doubled before hr. 4 was up! Ahhhhhh! I wasn’t home during that time. I’ll plan better next time. So my loaf turned out a bit flat but the taste and texture inside is great so it’s more the looks of it isn’t that great. If you want to check my loaf out please visit me on IG
annie_kight_art It’s the loaf with the painted bee on it (blue wings)
Hi Annie,
I saw your loaf. How interesting. For awhile, I didn’t recognize it was bread. Beautiful! As you so vividly illustrated, temperature is a BIG deal when making sourdough bread. Hopefully, you have a quick-read thermometer so you can check it. Just this morning I moved my sourdough to a cooler place in my kitchen because I was leaving and didn’t know when I would be back. It slowed the process and bought me a lot more time. Thanks for writing.
Thank you for responding Paula! I do, in fact, have temperature doodads all over my house so I’m moving them around when I’m proofing etc. We live in the desert and when we leave to go to dinner we usually shut off our swamp cooler if it’s just for a couple hrs. I think I found a sweet spot this week for proofing! I didn’t have a problem at all and this next loaf baked off perfect! Love all of your recipes so far I think I’ve made about 20 of your bread machine ones! Thank you for your great recipes.
You’ve tried 20 of my recipes? Wow! I’m impressed. Thank you for your kind words.
Hi Paula! First off, your site is AMAZING, wish I’d found it years ago. I’ve only ever used the dough setting on my bread machine (on the advice of a friend) so finding this treasure trove of recipes has been extremely helpful. 2025 was rough, bread helped me through it!
I make your 100% whole wheat loaf every week, which I love, but my ultimate bread goal is whole wheat sourdough. Would it be possible to make this loaf 100% or mostly whole wheat? I’m probably putting the cart before the horse, since I’m new to sourdough, but I enjoy making things difficult haha. Cheers!
Hi Emily,
Welcome!! I’m so glad you found my website. Hoping 2026 will be much better.
You are right about the 100% whole wheat loaf. That would be a super-challenge for a beginner. I’ve only tried it once, and it went in the trash. 😩 20% is about as high as I go. Sourdough takes a lifetime to master, and I’ve only been doing it for about 5 years.
First, a question. Do you grind your own wheat or are you using store-bought whole wheat? Huge difference. If I tried it, I would sift the whole wheat flour to separate most of the bran, so the dough has a chance to develop gluten before the bran’s sharp edges damage it. There are various ways to add the bran back in. Some people boil, others roll their shaped loaf in the bran so it makes a nice crust (and helps to prevent burning on the bottom). There are entire cookbooks devoted to this topic. Here’s a link to such a recipe: https://www.theperfectloaf.com/100-whole-wheat-sourdough/ If you like making things difficult, this project should make you very happy. 😄
Thank you for a recipe that works every time!! I generally substitute the whole wheat with rye flour. I learned that rye flour helps bread stay fresh longer, and I enjoy its flavor. Recently I made cheese bread in a loaf pan with this (baked at 400 degrees) and it was delicious.
I have a question: do you know why sourdough bread takes much longer to brown in the toaster than store-bought or yeast-raised breads?
Hi Jane,
Funny that you mention baking in a loaf pan. I just saw somebody on Instagram doing that and covering it with another same-size loaf pan for the first half of the bake. And now you are saying you did it. I’m taking that as encouragement to give it a try.
In regards to your question–I have a theory. I think it’s because sourdough tends to contain more moisture. I’ve noticed that when I toast a slice a sourdough bread from a freshly baked loaf, it takes a lot longer to brown. With every day that passes, the bread takes less and less time to toast. Also, sugar causes bread to brown faster. If your loaf has no sugar it won’t brown as fast as a loaf that does.
One more thing: Today I sliced some sourdough that was 6 days old. It was getting very dry sliding into the “too stale to eat” zone. So I ran the slice quickly under running water, squeezed out the excess water, and toasted it. It was fabulous and soft again…but it did take a little while to toast.
Hi Paula, my bread machine has two dough cycles–“basic dough course” (for active dry yeast; the cycle is 1 hour and 50 minutes) and a “quick dough course” (for rapid rise yeast; the cycle is 45 minutes). How long is the dough cycle that you are using? I want to make sure to select the right dough cycle. Thank you!
I would always select the basic dough course. The rapid rise cycle does not give enough time to develop the yeasty flavor. I never use it.
I loved your recipe from April 2021 which made a slightly larger loaf using 500 gr of flour total. Where can I find it?
Hi Ruth,
I added that version to the notes for you.
I don’t have a bread machine, and am wondering if this method is transferable to a KitchenAid with a dough hook?
Hi Mary,
Absolutely yes. The bread machine is actually just a “mixing machine” in this recipe. You can do it just as well with your KitchenAid.
Can you substitute whey for the water for a more sour flavor as in your sourdough loaf recipe without affecting this process?
In this particular recipe, there is no added yeast. So you can not substitute whey for starter as the bread will not rise. If you want to try using whey in bread to test the flavor, I recommend my French bread recipe. It won’t be the same as sourdough, but the flavor is slightly different when using whey.
Great idea! I will try this for my next loaf, thank you! A tip for the bulk rise is to let it rise 25% to 50% in the container. I mark the top of the dough level on the outside of the square container with a pen, measure it and put another mark where the 25% rise will be. When the dough reaches that height I know it’s ready.
Hi Tam,
Thanks for leaving this tip. I have also used large rubber bands to mark where my dough is at the beginning of the bulk proof and another one where I want it to be at the end. It’s easy to forget how far the dough has come, right?
Hi Paula,
I would like to make this recipe but put it in a pullman pan for a sandwhich loaf. Also want a soft crust. Should I put the top on the pullman pan? Any advice? I do not want to use yeast or sugar.
Thanks for your reply,
PattiAnn
Hi PattiAnn,
Yes, I have done this before. I would put a top on the Pullman pan for the first half of the baking time. Then remove the top so it can brown. With some experimentation, you might decide you need to leave the top on a little less or a little more time. I would love to hear how it turns out for you.
We just got the same bread maker as you have described. Would it alright to bake the bread in the machine? Same as described, take it out to stretch and fold, ferment,and shape but, just pop it back into the bread machine? My husband has started taking care of my sourdough while Im in school and working full time, he will make discard recipes but refuses to make a loaf of bread unless it can be done in the bread machine.
Hi Emily,
Your husband should be up for “spouse of the year” for taking care of your sourdough.
I can’t imagine baking your precious sourdough bread (the classic kind like this recipe) in a bread machine. The temperature doesn’t get nearly hot enough to make a nice crust and the moisture (steam) won’t be enough to make the crust golden brown and crispy. But nobody is keeping you from trying it. Instead, I would encourage him to try this hybrid sourdough sandwich bread recipe. I haven’t tried baking this one in a bread machine, but I’m guessing it would turn out fairly good if you don’t mind holes in the bottom and the weird shape.