Yes! Make Sourdough Bread (Without Yeast) Using a Bread Machine
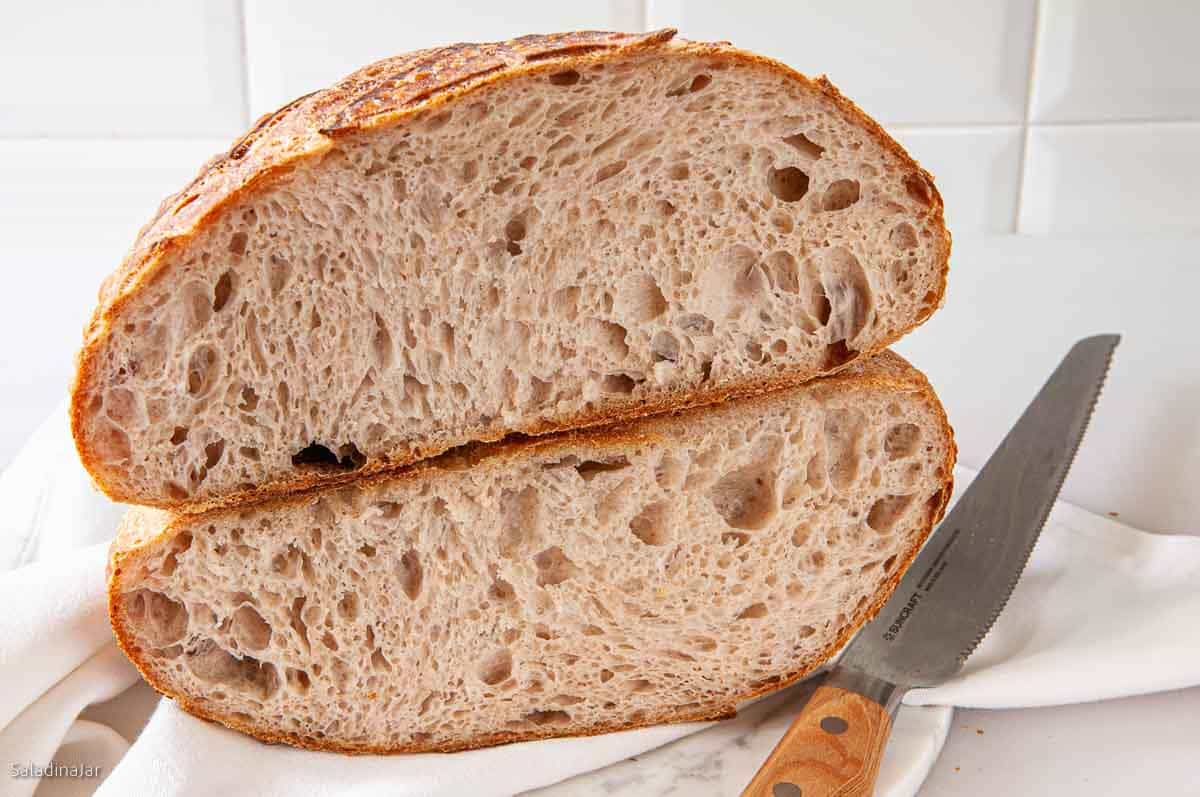
Sneak Preview: Create yeast-free Sourdough Bread using your bread machine’s DOUGH cycle. This easy recipe requires just four ingredients: starter, water, flour, and salt. You’ll end up with a tasty loaf featuring an open texture and 72% hydration, perfect for sourdough lovers.
As an Amazon Associate, I earn from qualifying purchases.
Yes, you can make sourdough bread in your bread machine without commercial yeast! This method uses the machine’s DOUGH cycle for mixing and kneading, sparing you the hard work.
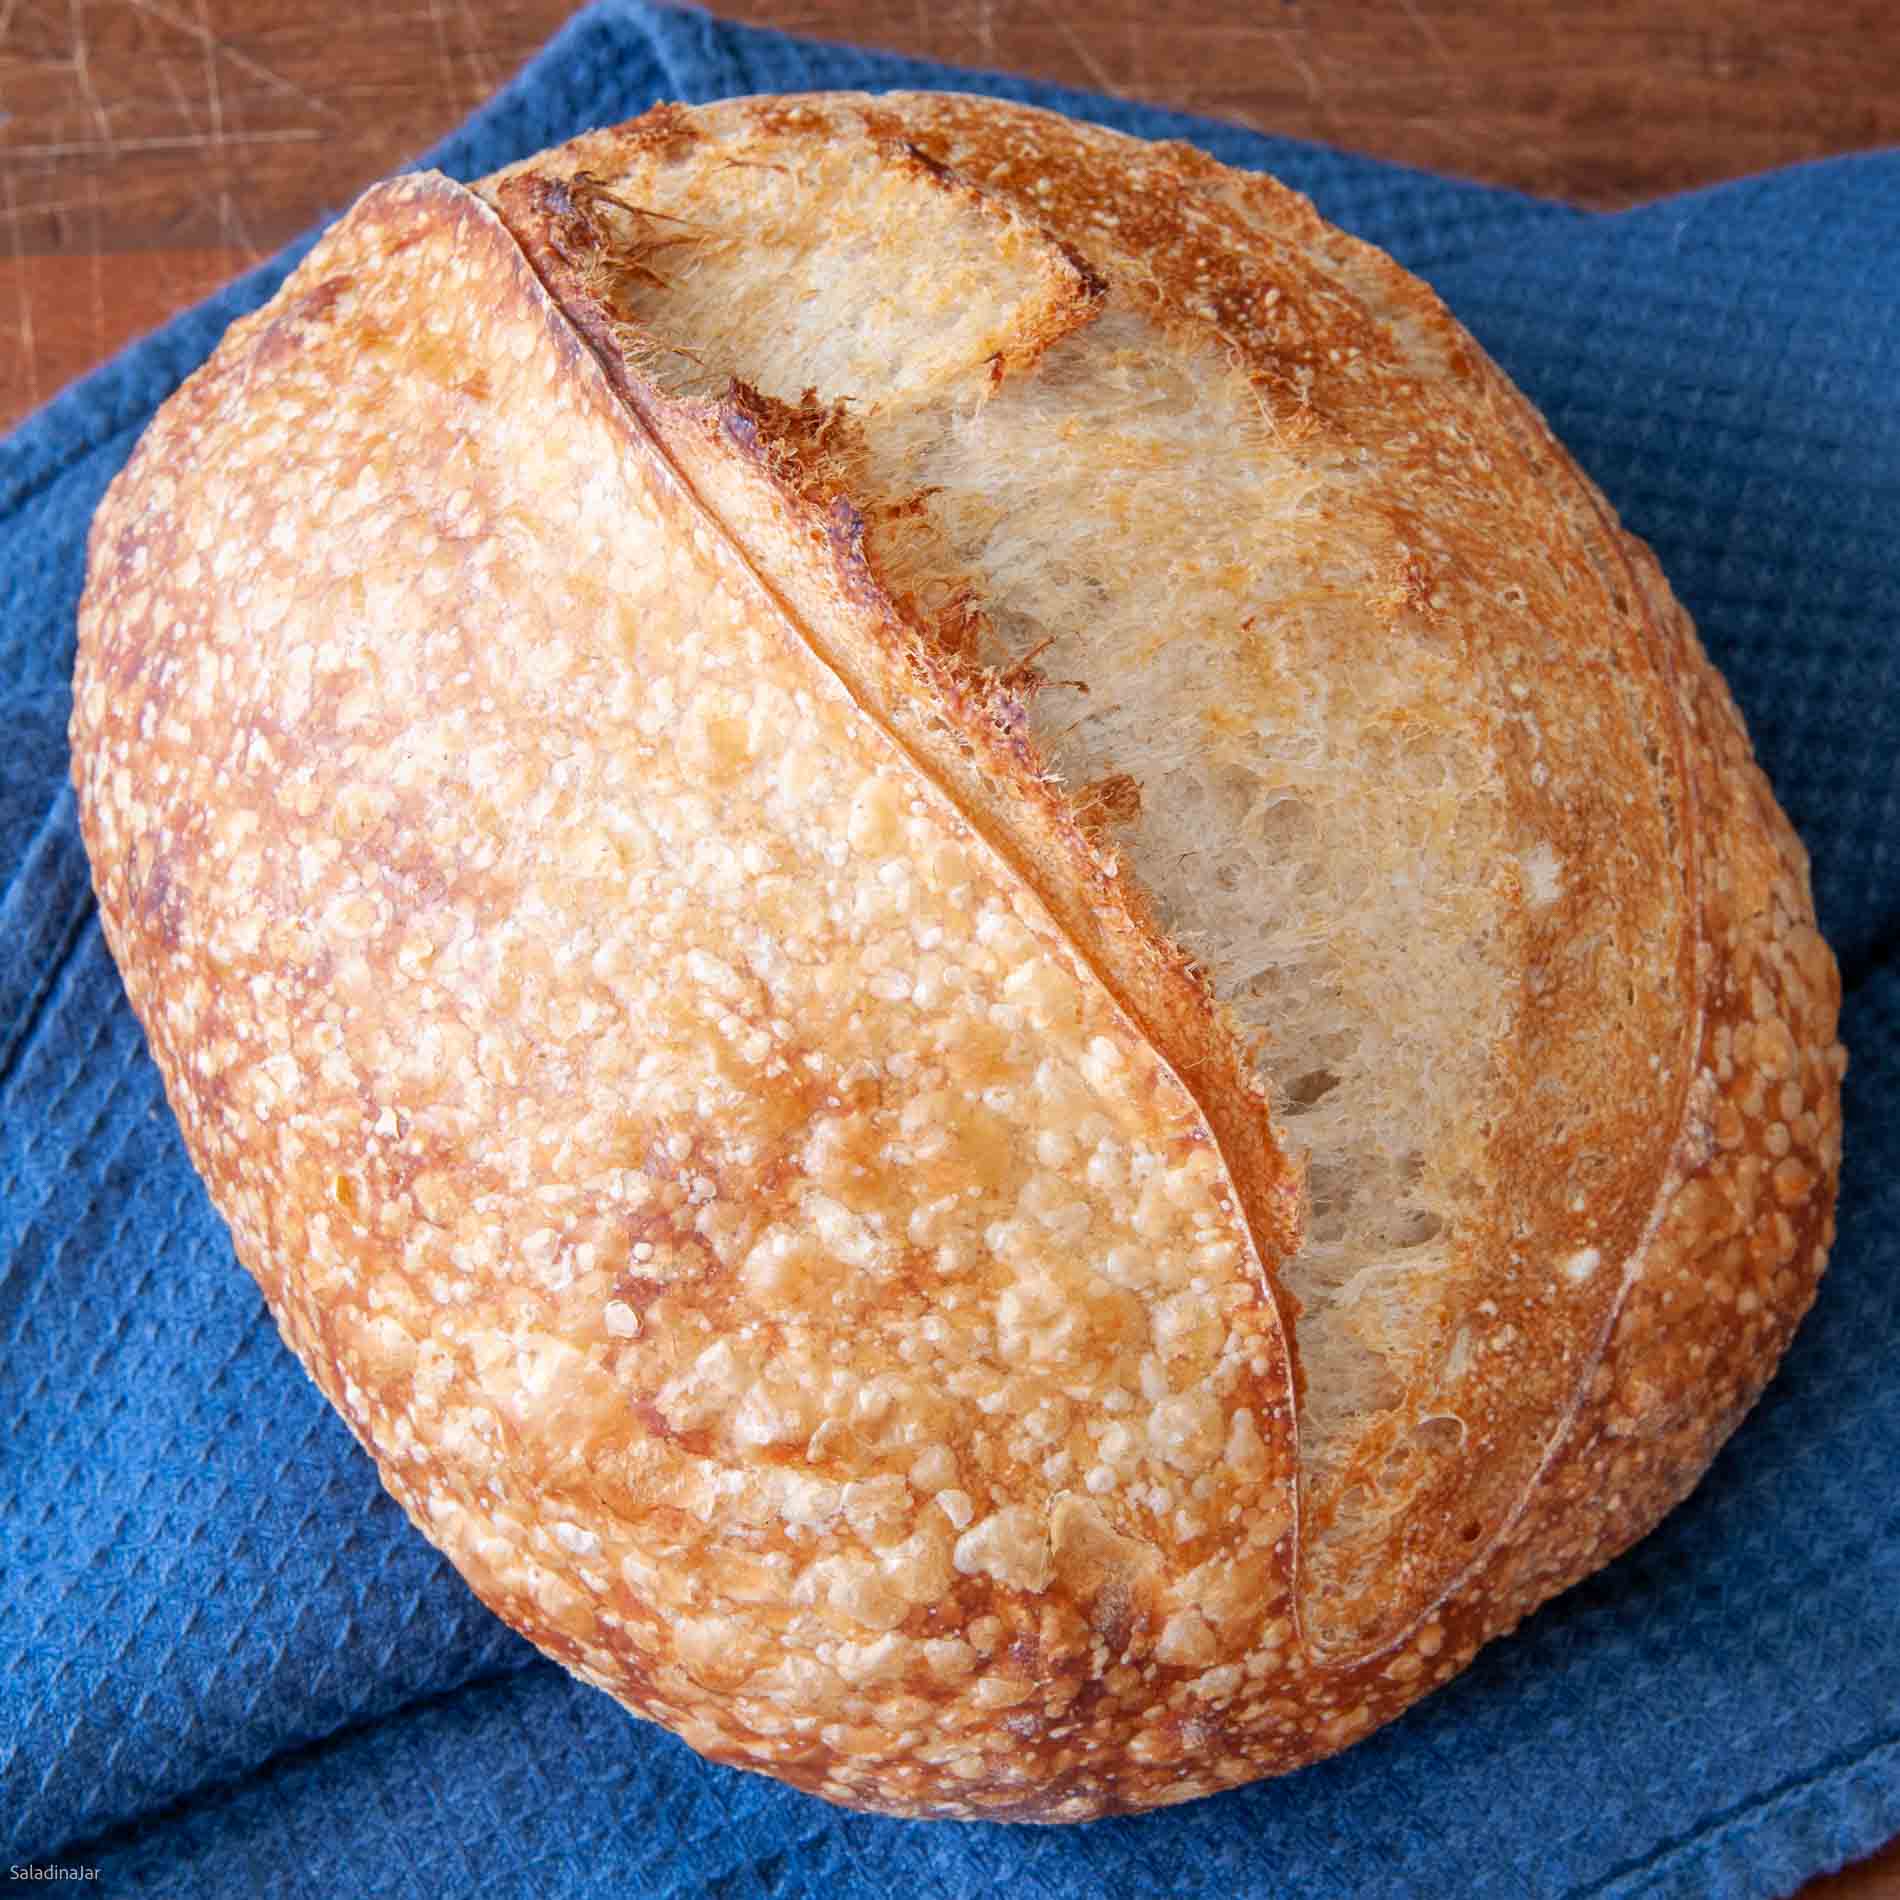
Your role is simply the fun parts – doing a few stretch-and-folds, shaping the dough, and baking it in a conventional oven. Remember, patience is key in this process. The reward for your wait is a loaf with a superior crust full of blisters, a light and airy texture, and beautifully distributed holes throughout.
Four Reasons Why You Will Love Using a Bread Maker To Mix and Knead Sourdough
- Kneads dough more effectively than manual kneading
- Incredibly convenient–add the ingredients, press START, and wait 21 minutes, for well-mixed and kneaded dough.
- If your bread machine has a timer on the DOUGH cycle, you can use it to build in an automatic autolyse phase that some people prefer, especially when using whole grains in this recipe. (Not included in this recipe.)
- Beneficial for individuals with arthritic hands
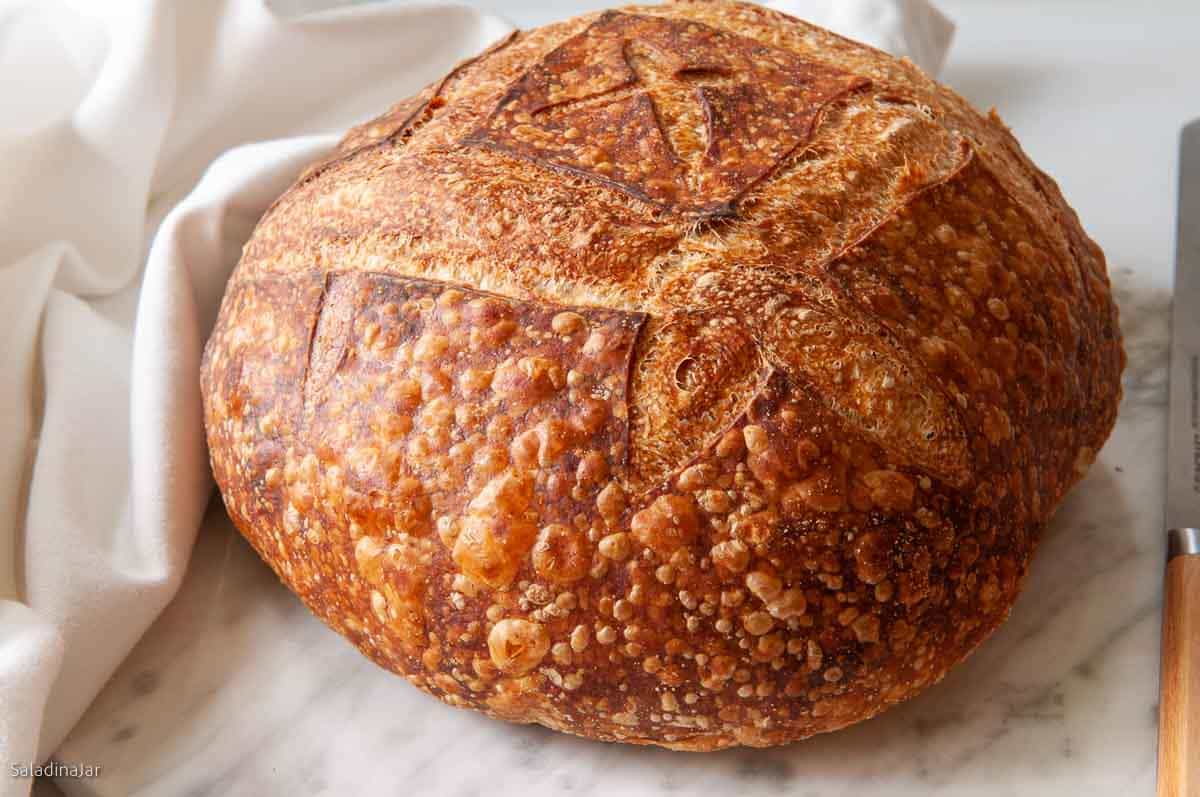
No one will ever guess you used a bread machine to mix and knead this tasty sourdough bread.
Happy Bakers Speak Up
“I followed your recipe step-by-step. I used the Zo and did boost my starter with a little rye starter. Marvelously easy instructions to follow.” — VANESSA F.
Two Reasons Why Bread Machines Are Not Suited for Making a Traditional Sourdough Loaf from Beginning to End
- Sourdough loaves vary due to natural leavening, so using a timer for a uniform process is difficult.
- Bread machine ovens don’t heat up enough to produce the strong oven spring and crisp crust typical in sourdough bread.
Why Do I See Other Recipes To Make and Bake Sourdough in a Bread Machine?
Most bread machine sourdough recipes online are not traditional, often including extra ingredients like sugar or butter, and usually some instant yeast, resulting in a hybrid sourdough bread.
While some bread machines have a sourdough setting, it’s typically for creating a starter by maintaining the right temperature. If your machine’s manual suggests making sourdough bread, the recipe likely includes instant yeast along with the starter.
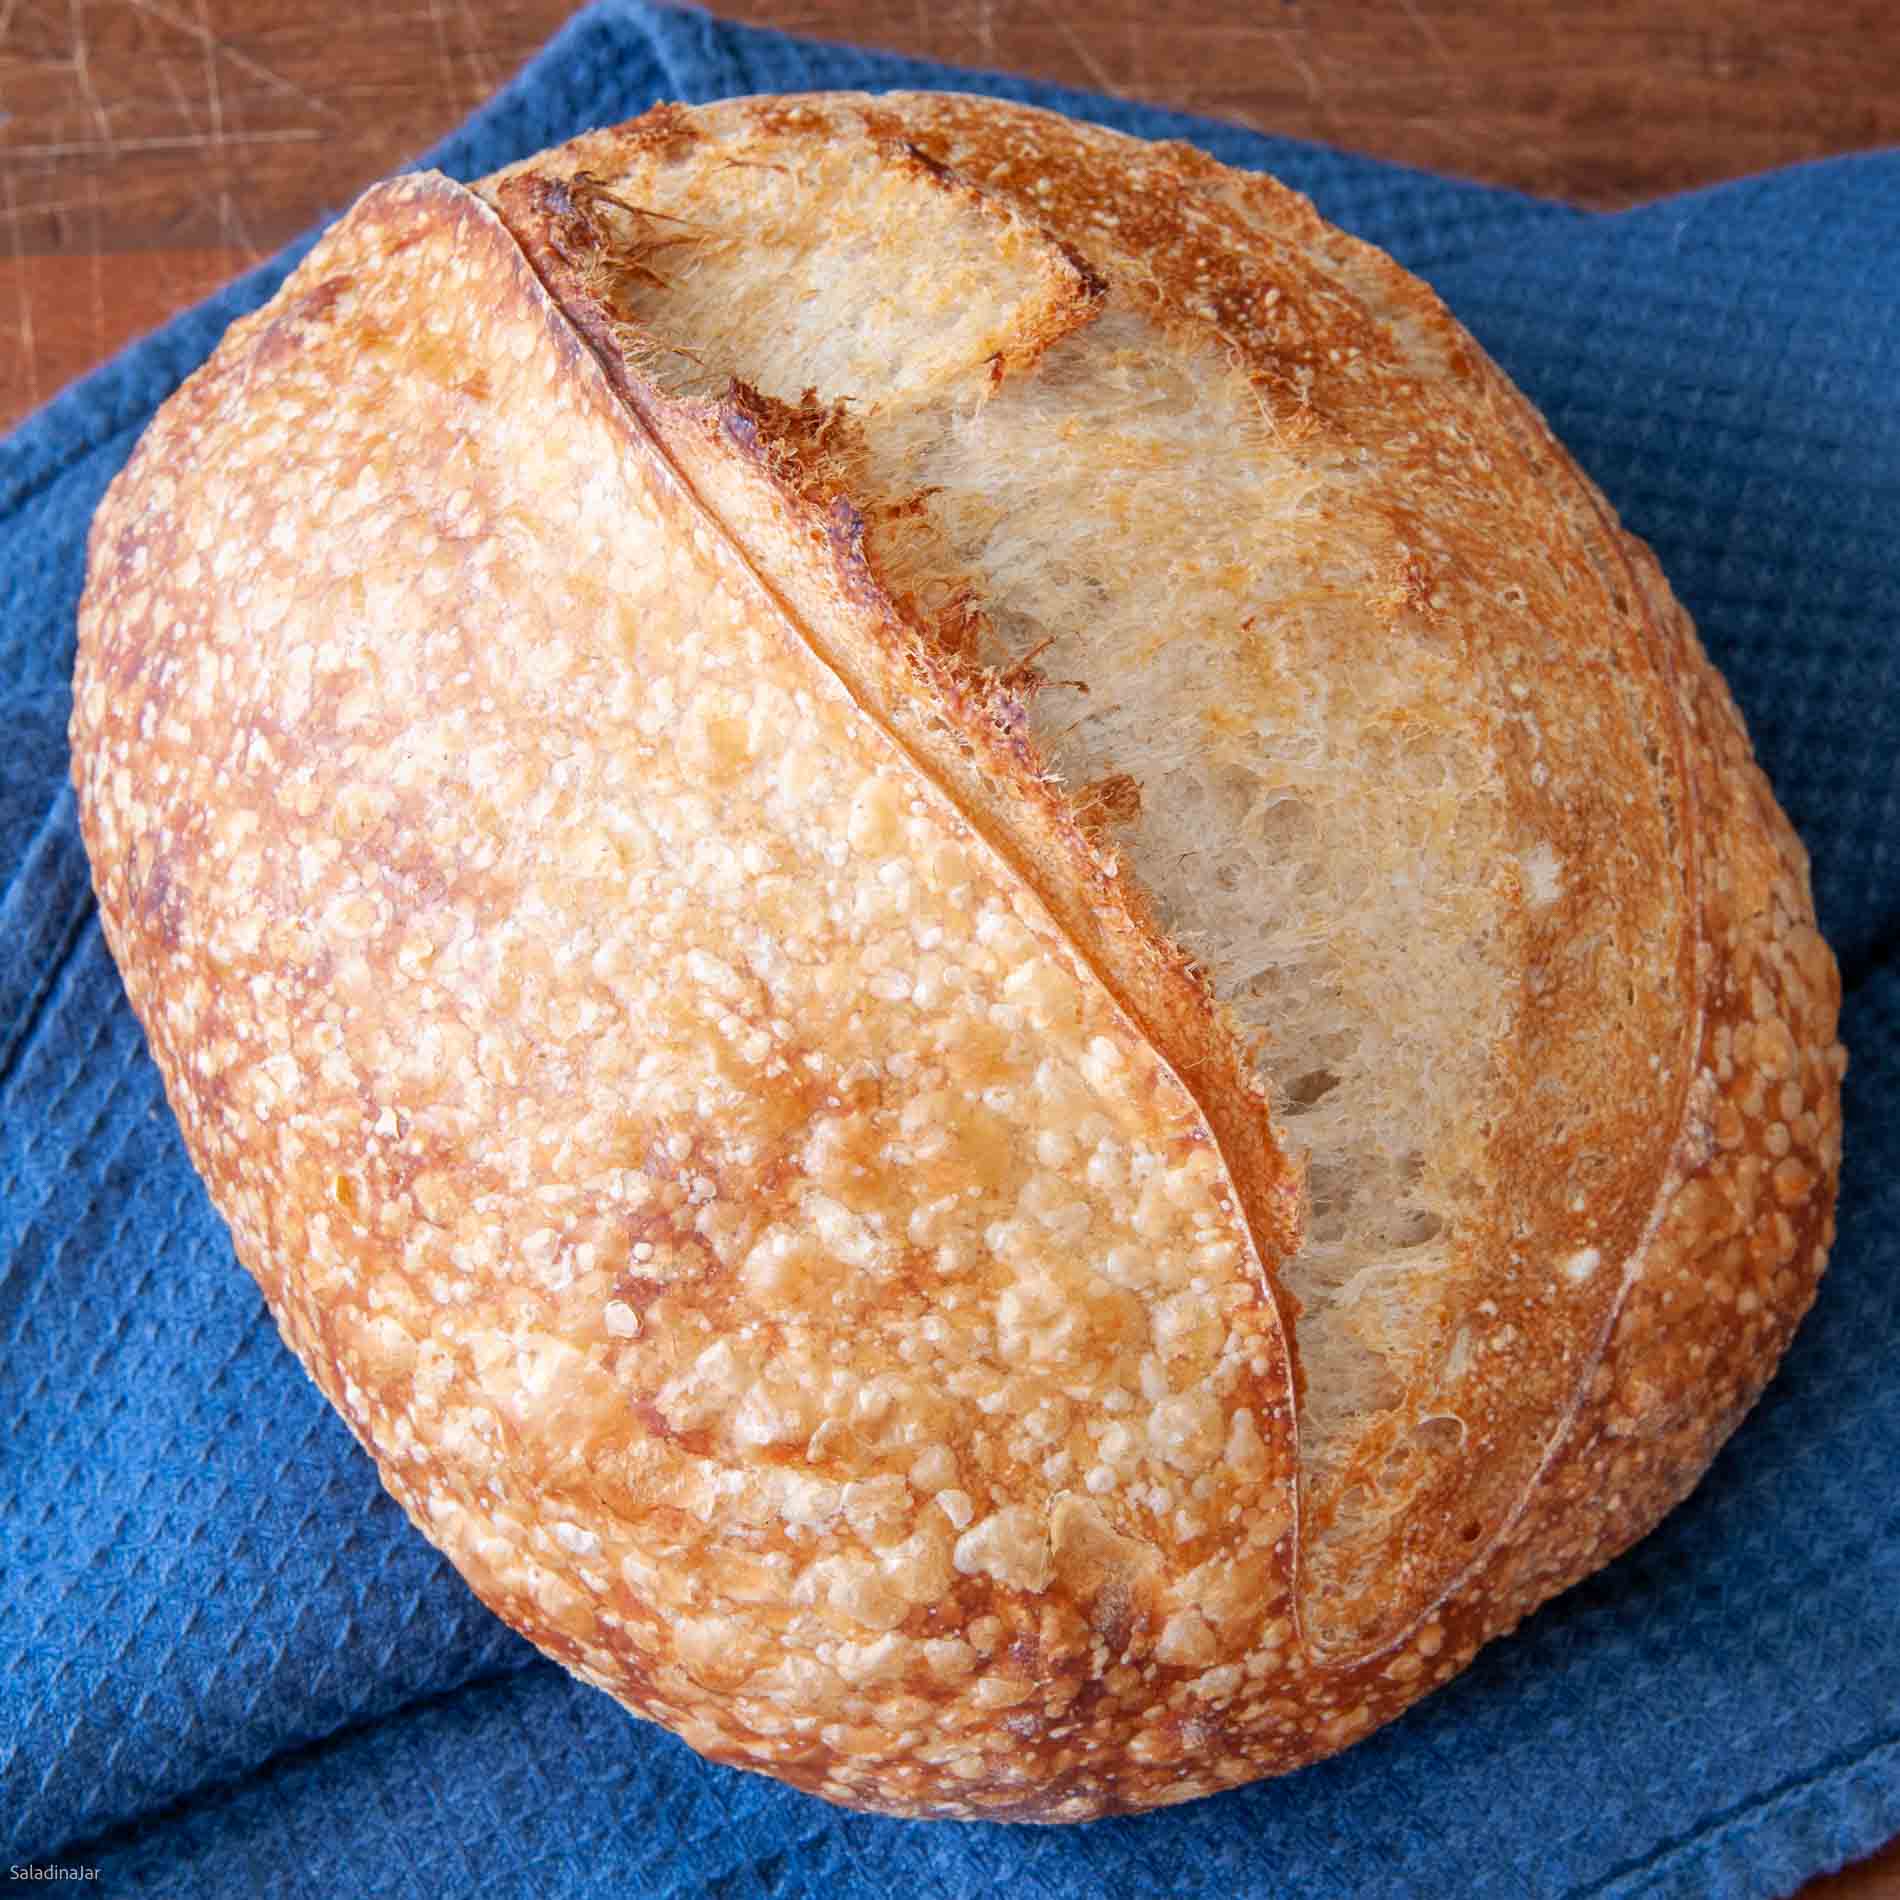
Can I Use the Artisan Cycle with a Longer Rise?
For the best bread, the gluten in sourdough needs strengthening through “stretch-and-pulls” by hand. A bread machine can’t do this.
The process is quick and easy, usually requiring only three to four sessions. I’ll demonstrate below, or you can watch the video.
Additionally, each sourdough loaf requires a different rise time, which can be unpredictable.
Three Reasons Why I Prefer a Conventional Oven for Baking Naturally Leavened Sourdough Bread
I prefer using the oven over a bread machine for baking because:
- Bread machines don’t reach high enough temperatures for a thin, blistered, crispy crust.
- The shape of the bread is limited to the pan, preventing bakery-style boules or batards.
- The oven allows for artistic scoring, creating satisfying sourdough loaves with ‘ears’ and large expansion cracks.
Five things you should know about this recipe
- Produces a 1¾-pound sourdough loaf
- Suitable for most home bread machines
- Time required: 24 hours, which includes an overnight rise in the fridge
- No “sourdough cycle” required
- Recommended utensils: A digital kitchen scale, bench knife, and large
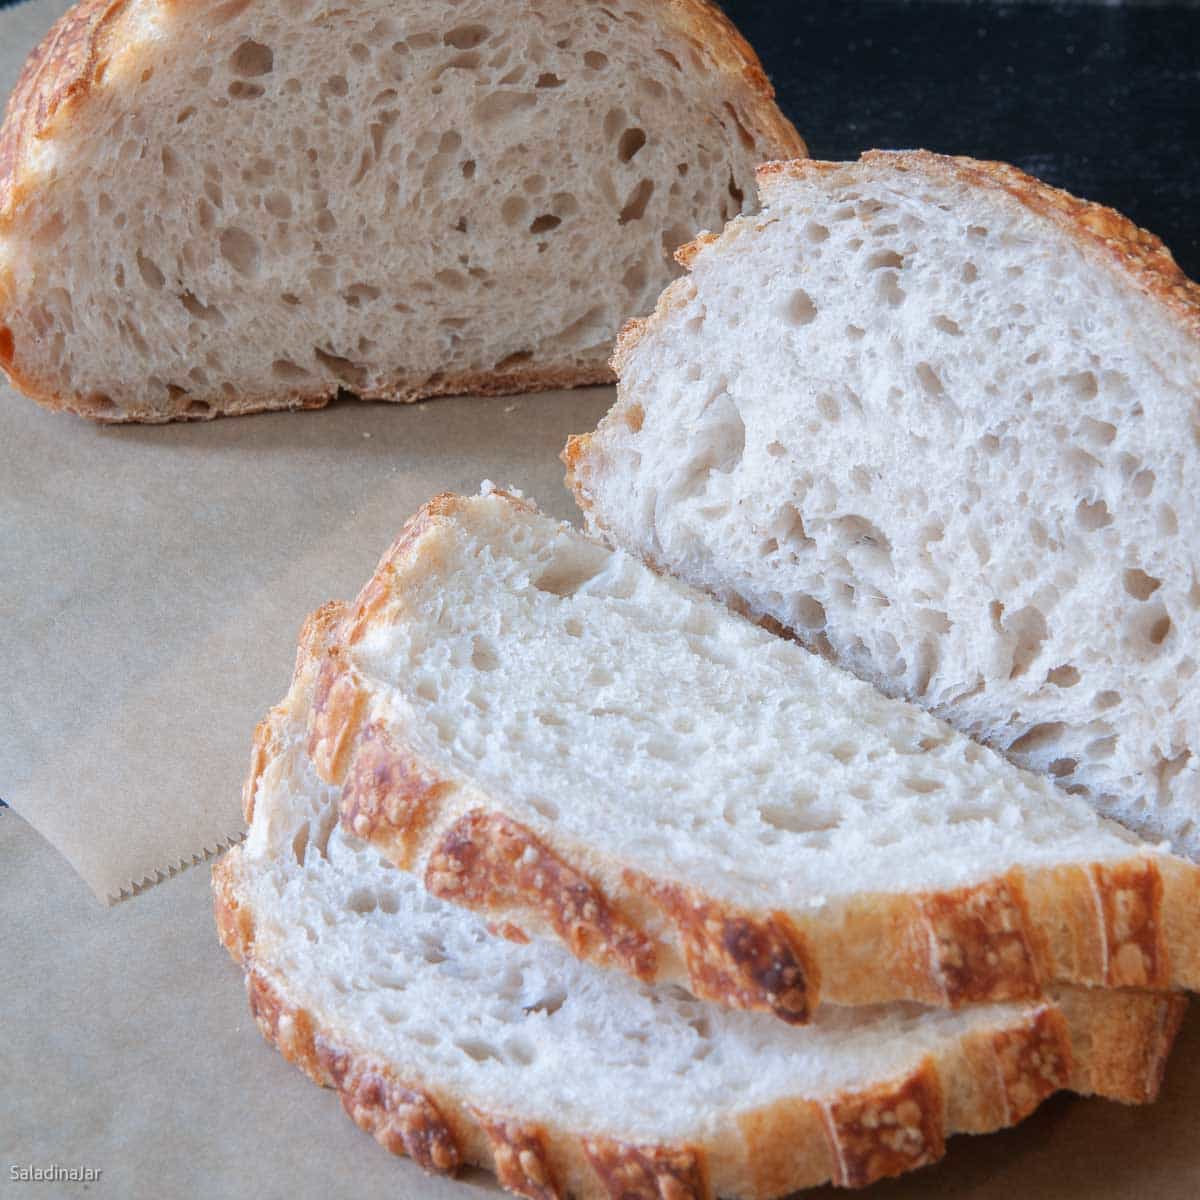
Ingredients and Substitutions
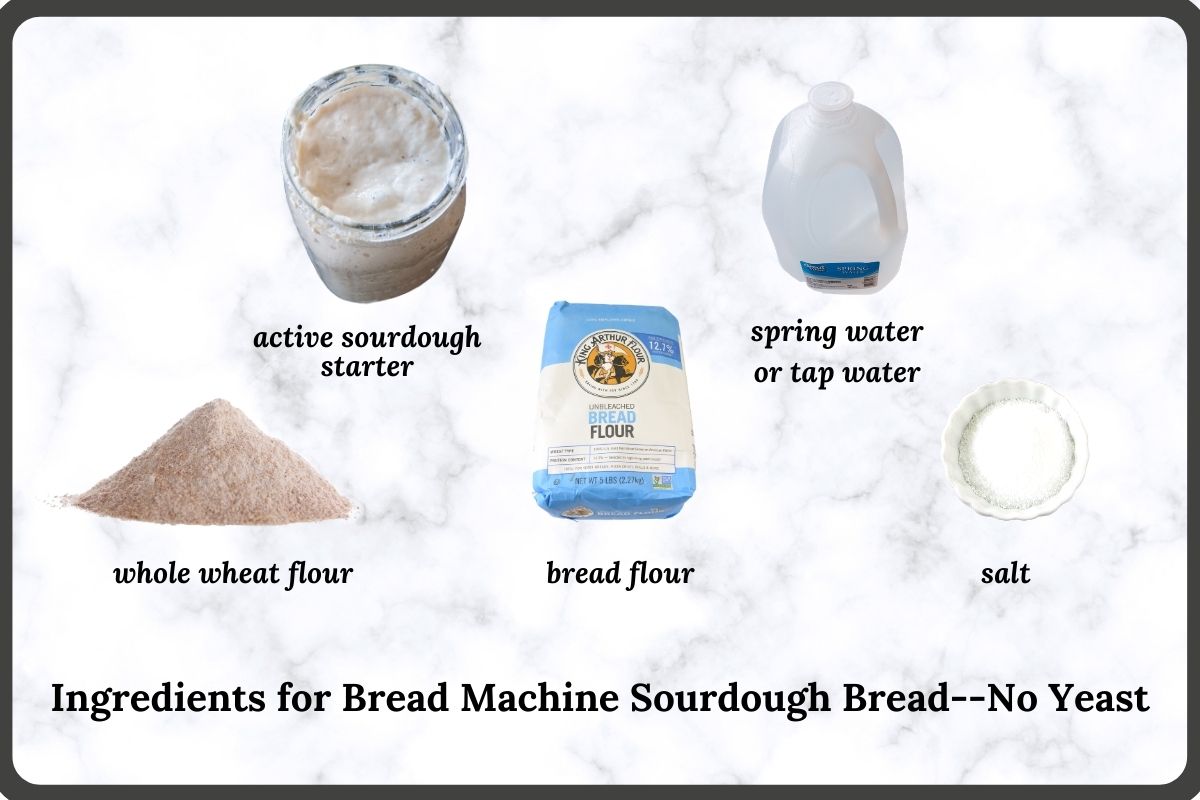
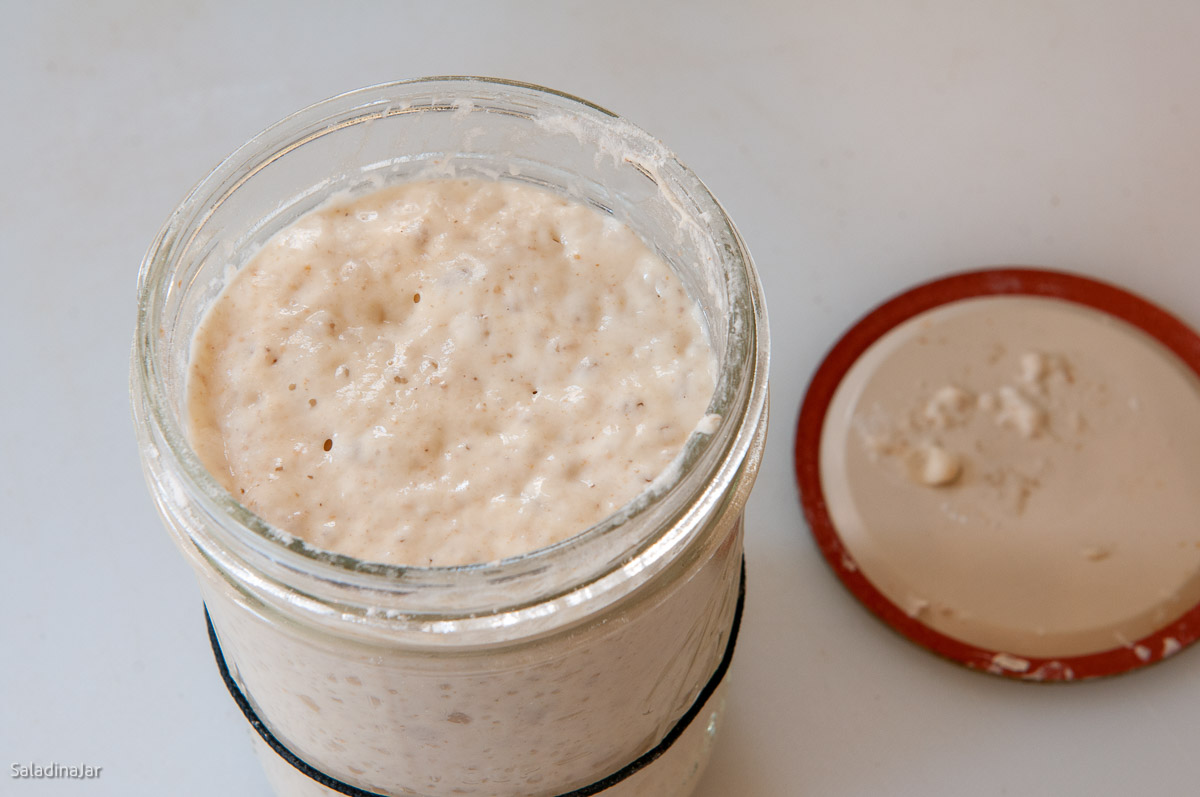
- STARTER: To begin making sourdough, you need a starter. A basic one is just flour and water, but I used yogurt whey in mine. Creating a strong starter can take five days to several weeks. If you’re in a hurry, consider buying King Arthur Flour’s fresh starter; it’s ready in a few days and is very effective. I personally prefer a thick, paste-like starter initially.
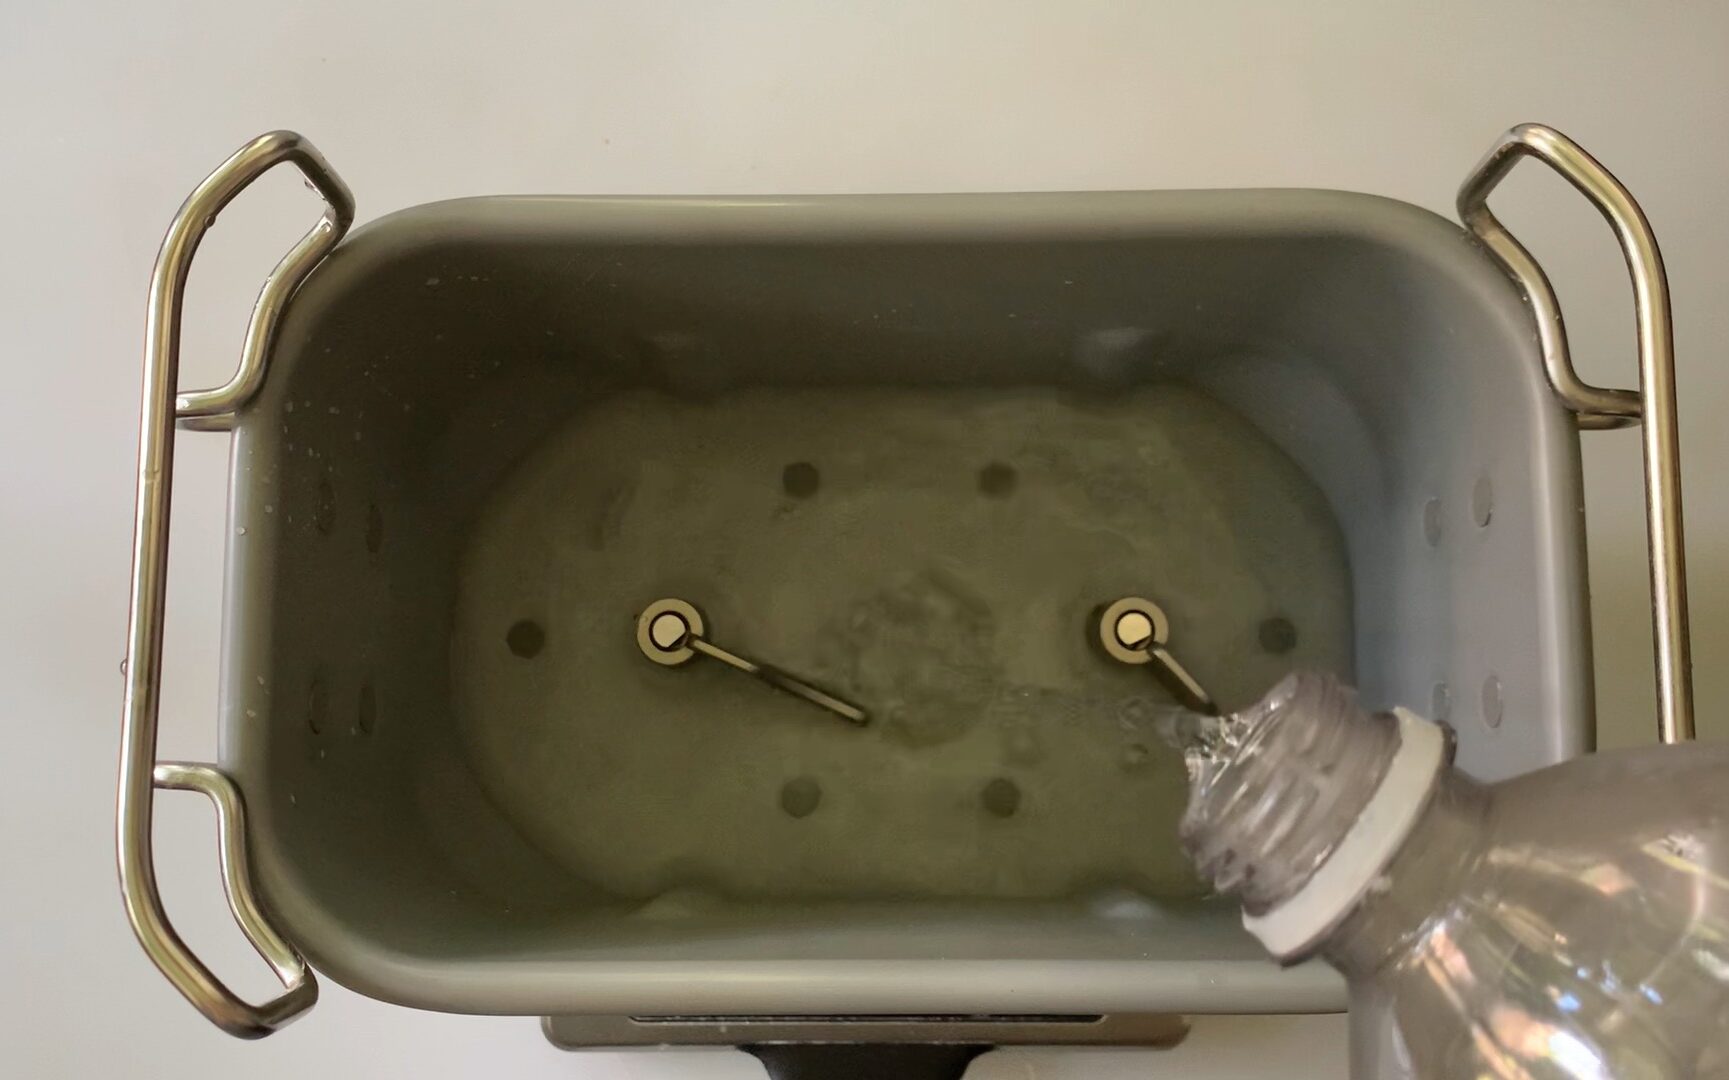
- WATER: I use tap water for my dough, letting it sit out for 24 hours to remove chlorine. It doesn’t need to be warm since the friction caused by the bread machine paddles will quickly heat the dough. The more water you use, the higher the hydration and the more your bread will have an open crumb.
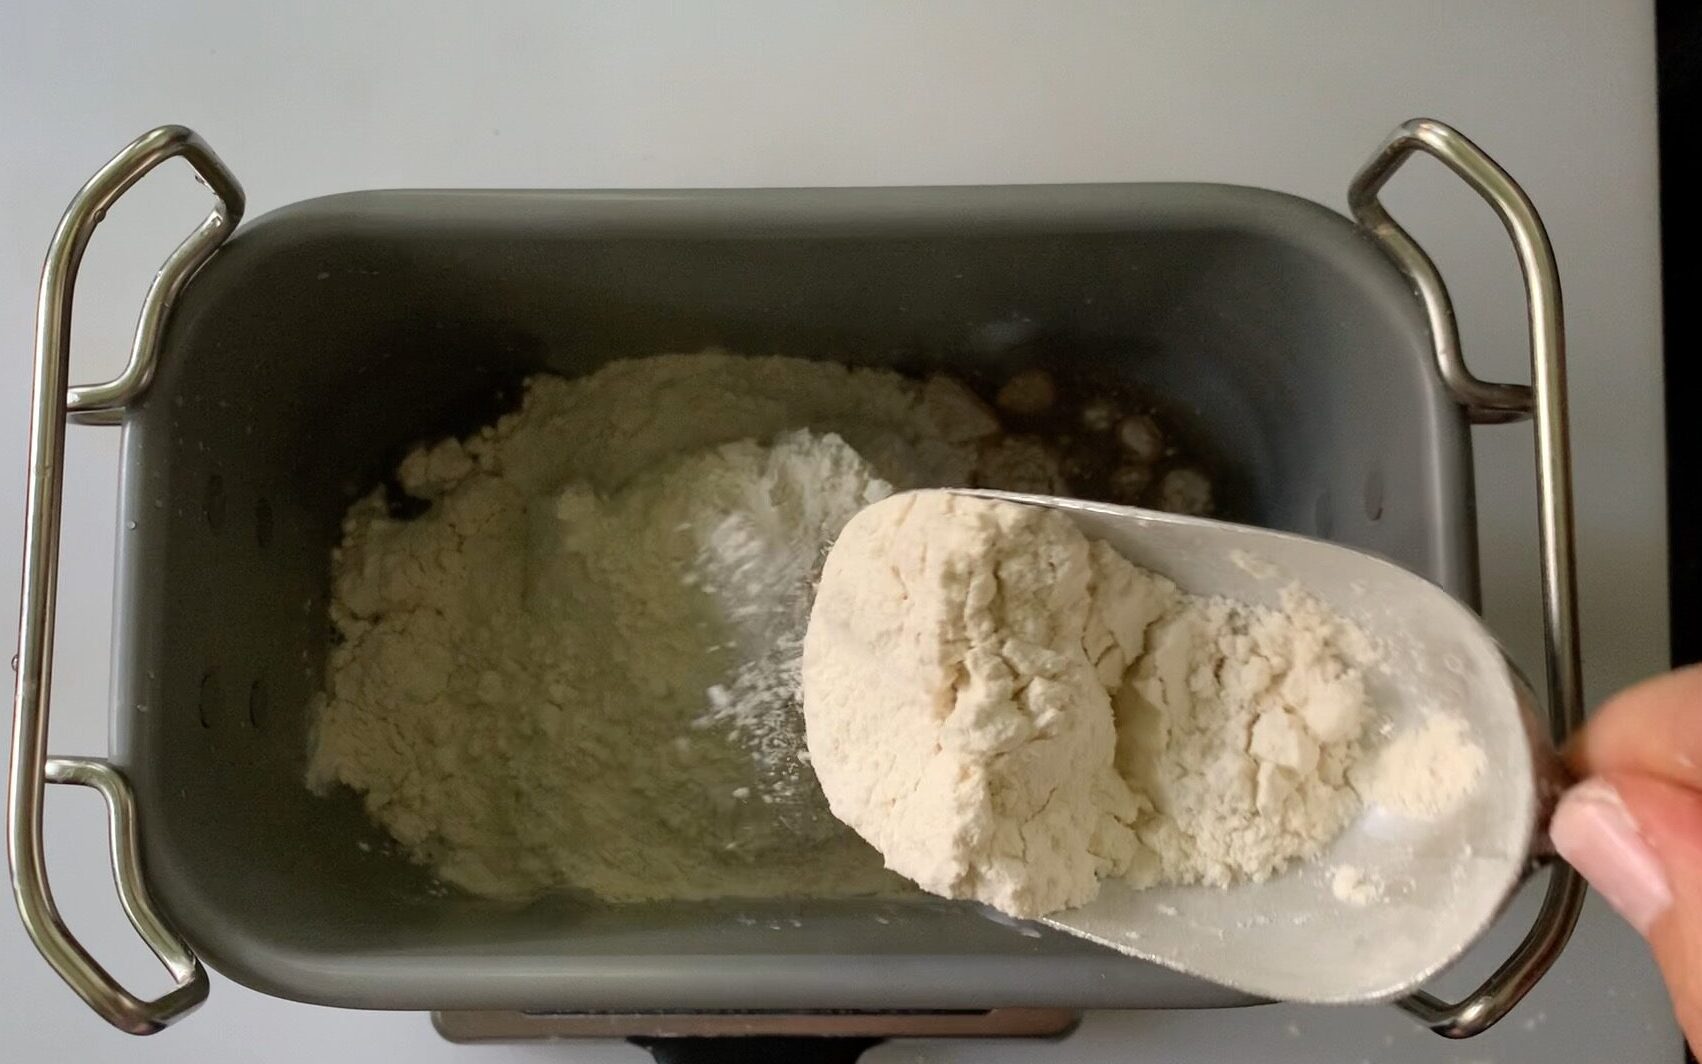
- FLOUR: My recipe uses 40 grams of whole wheat, 200 grams of all-purpose flour, and 240 grams of bread flour, totaling 480 grams. The high protein in bread flour aids in oven spring. Some all-purpose flour makes the loaf a bit softer and less chewy. The small amount of whole wheat flour enhances taste and hydration, as it absorbs more water than white flour. Substitute bread flour for whole wheat flour if you want to.
- SALT: Use fine sea salt or table salt for quick dissolving. Add extra if using Kosher salt. You can reduce the amount of salt, but don’t eliminate it entirely.
How to make Bread Machine Sourdough Bread – No Commercial Yeast
Mixing and Kneading the Dough
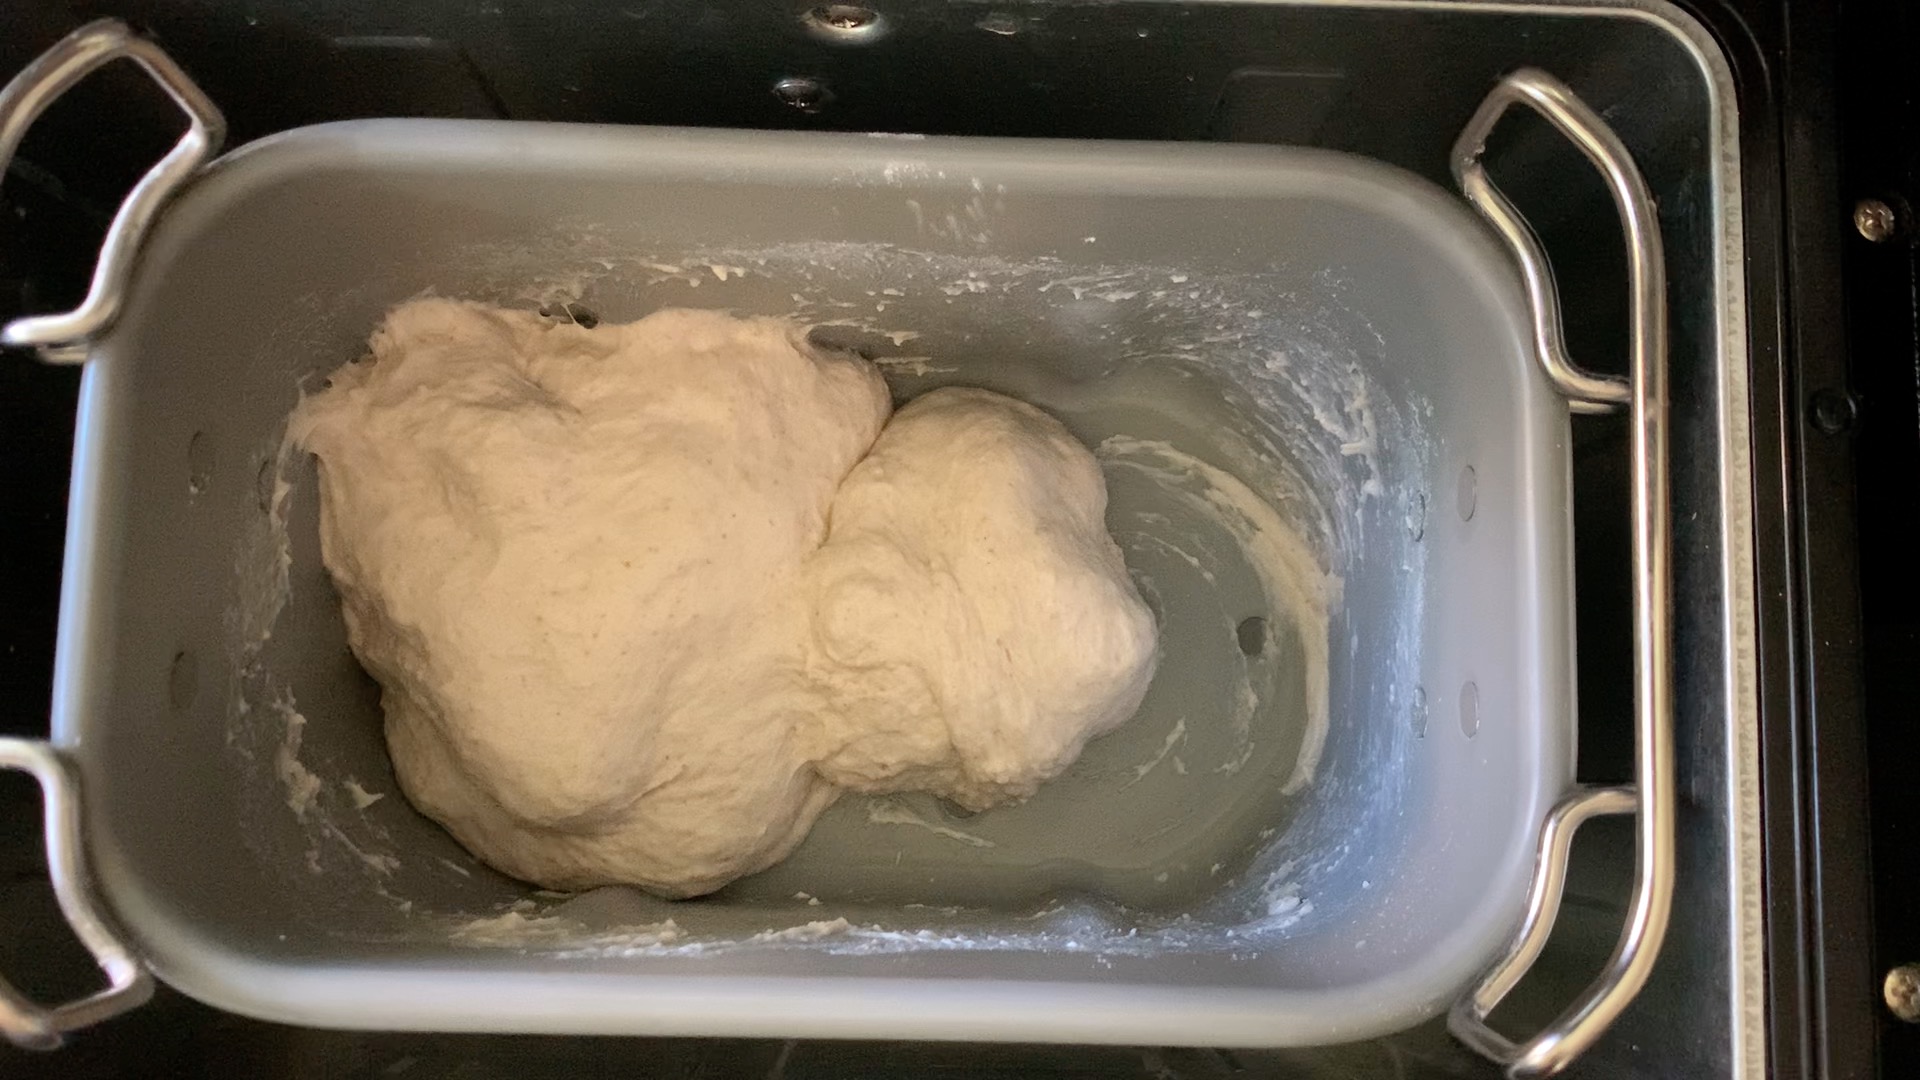
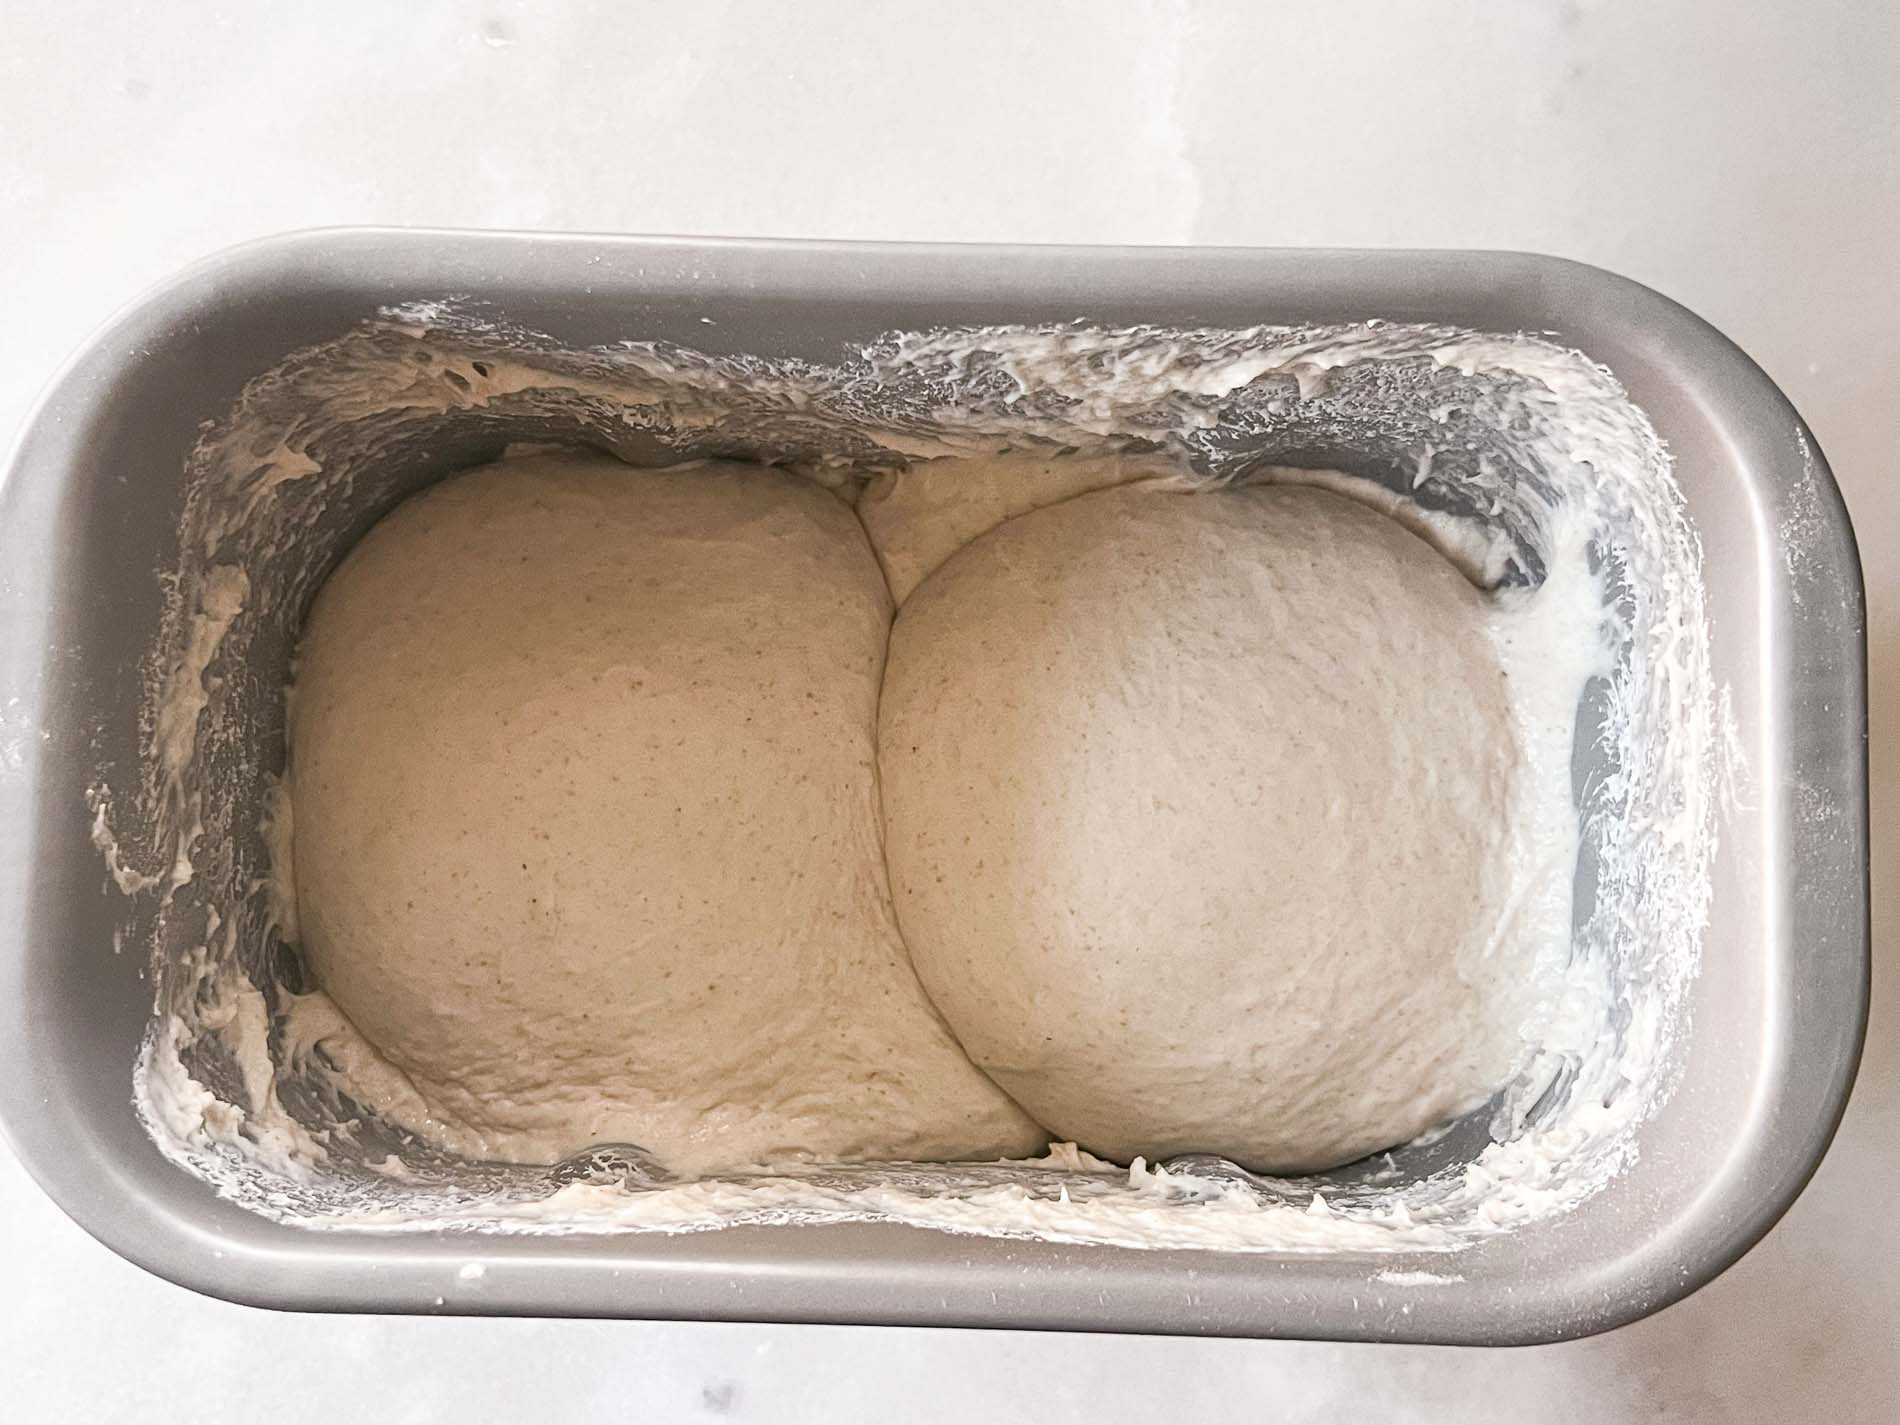
Bulk Rise
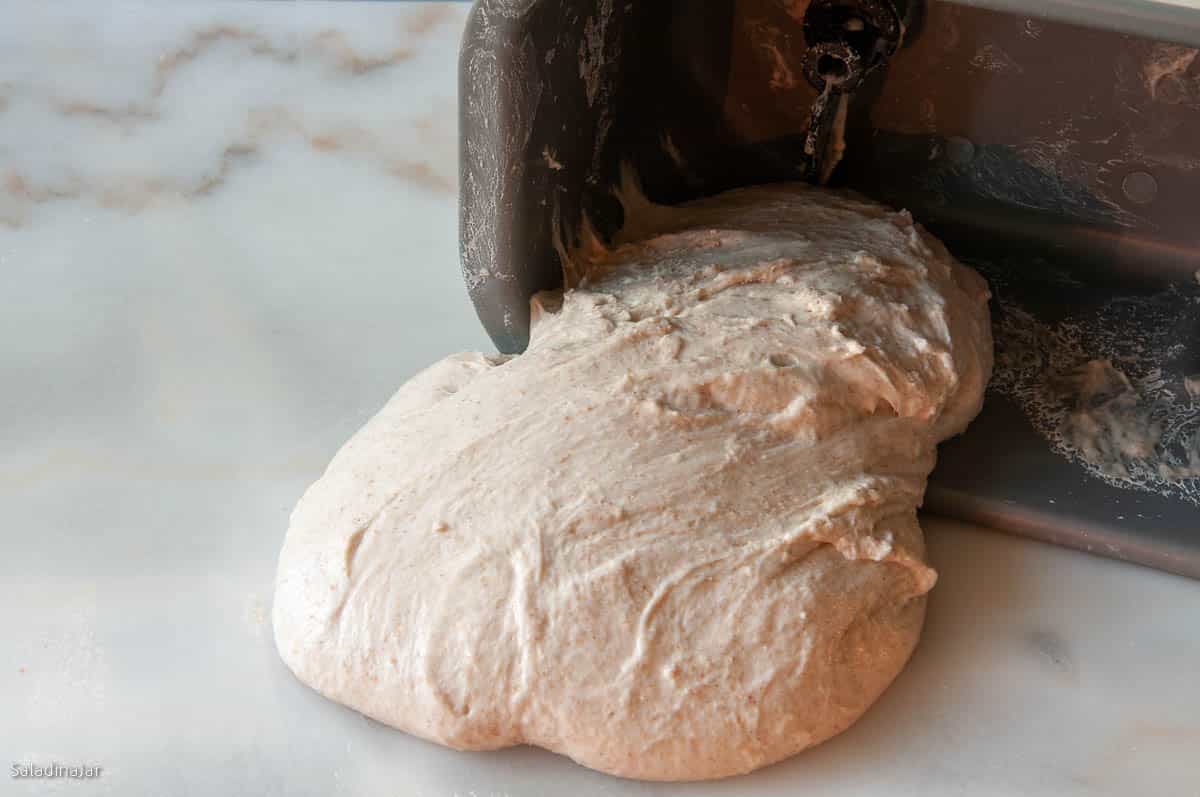
Expect the dough to be slack and sticky. It’s been kneaded to develop gluten, but now needs more work to strengthen it.
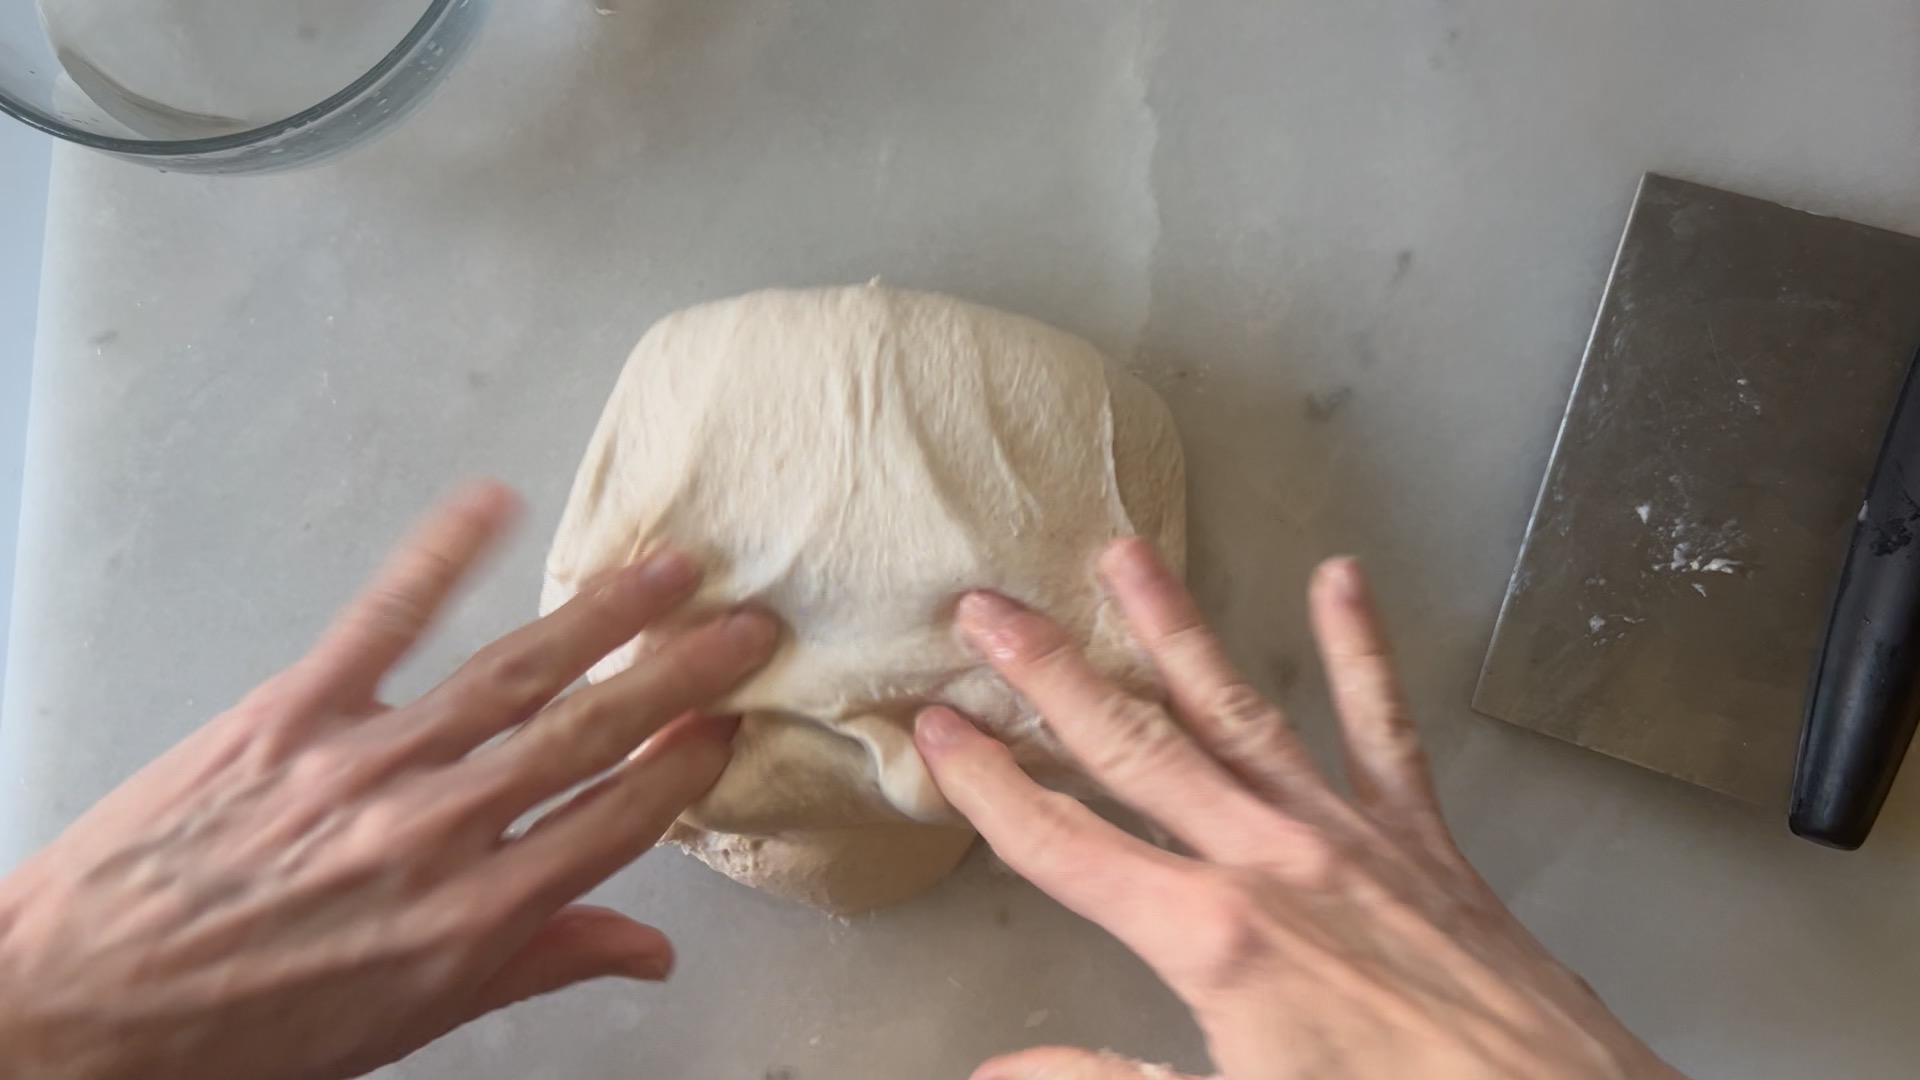
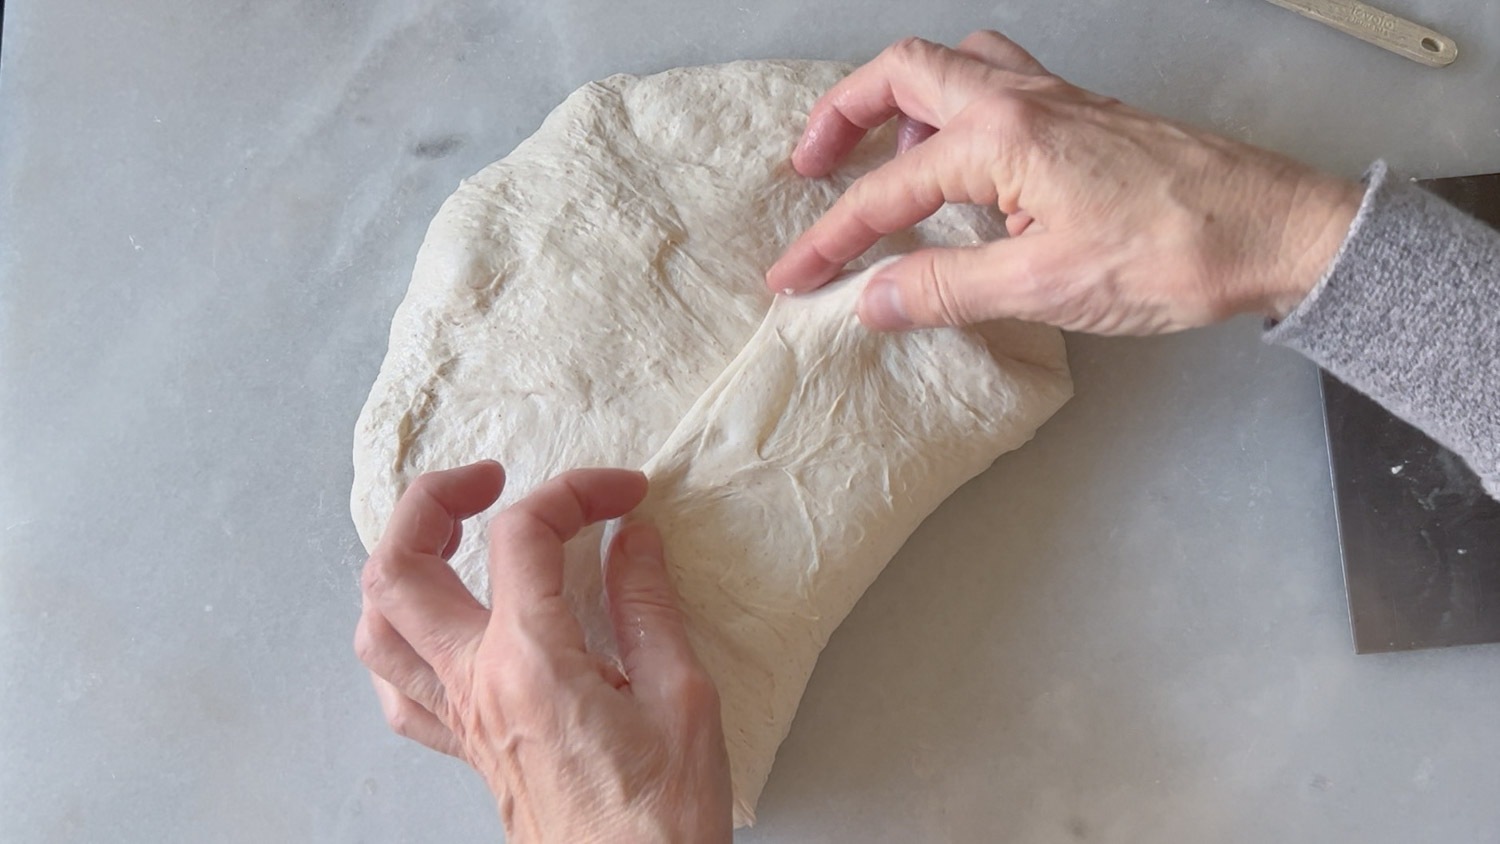
How to do a “Stretch and Fold”: Grab one side of the dough with both hands or use one hand and a bench scraper and pull or stretch the dough upward without tearing the dough. Fold over two-thirds of the way toward the opposite side. Proceed to the next side and pull, stretch, and fold. Work your way around the ball, pulling and stretching, then folding over until you have done all four sides two times around. Cover the dough and let it rest on the work surface for 15-30 minutes.
Repeat the process described above two more times with another 15-30-minute rest period after the second. In summary, do at least three “stretch and folds” with 15-30 minutes between them. After the third “stretch and fold,” the dough should be smooth and only slightly sticky.
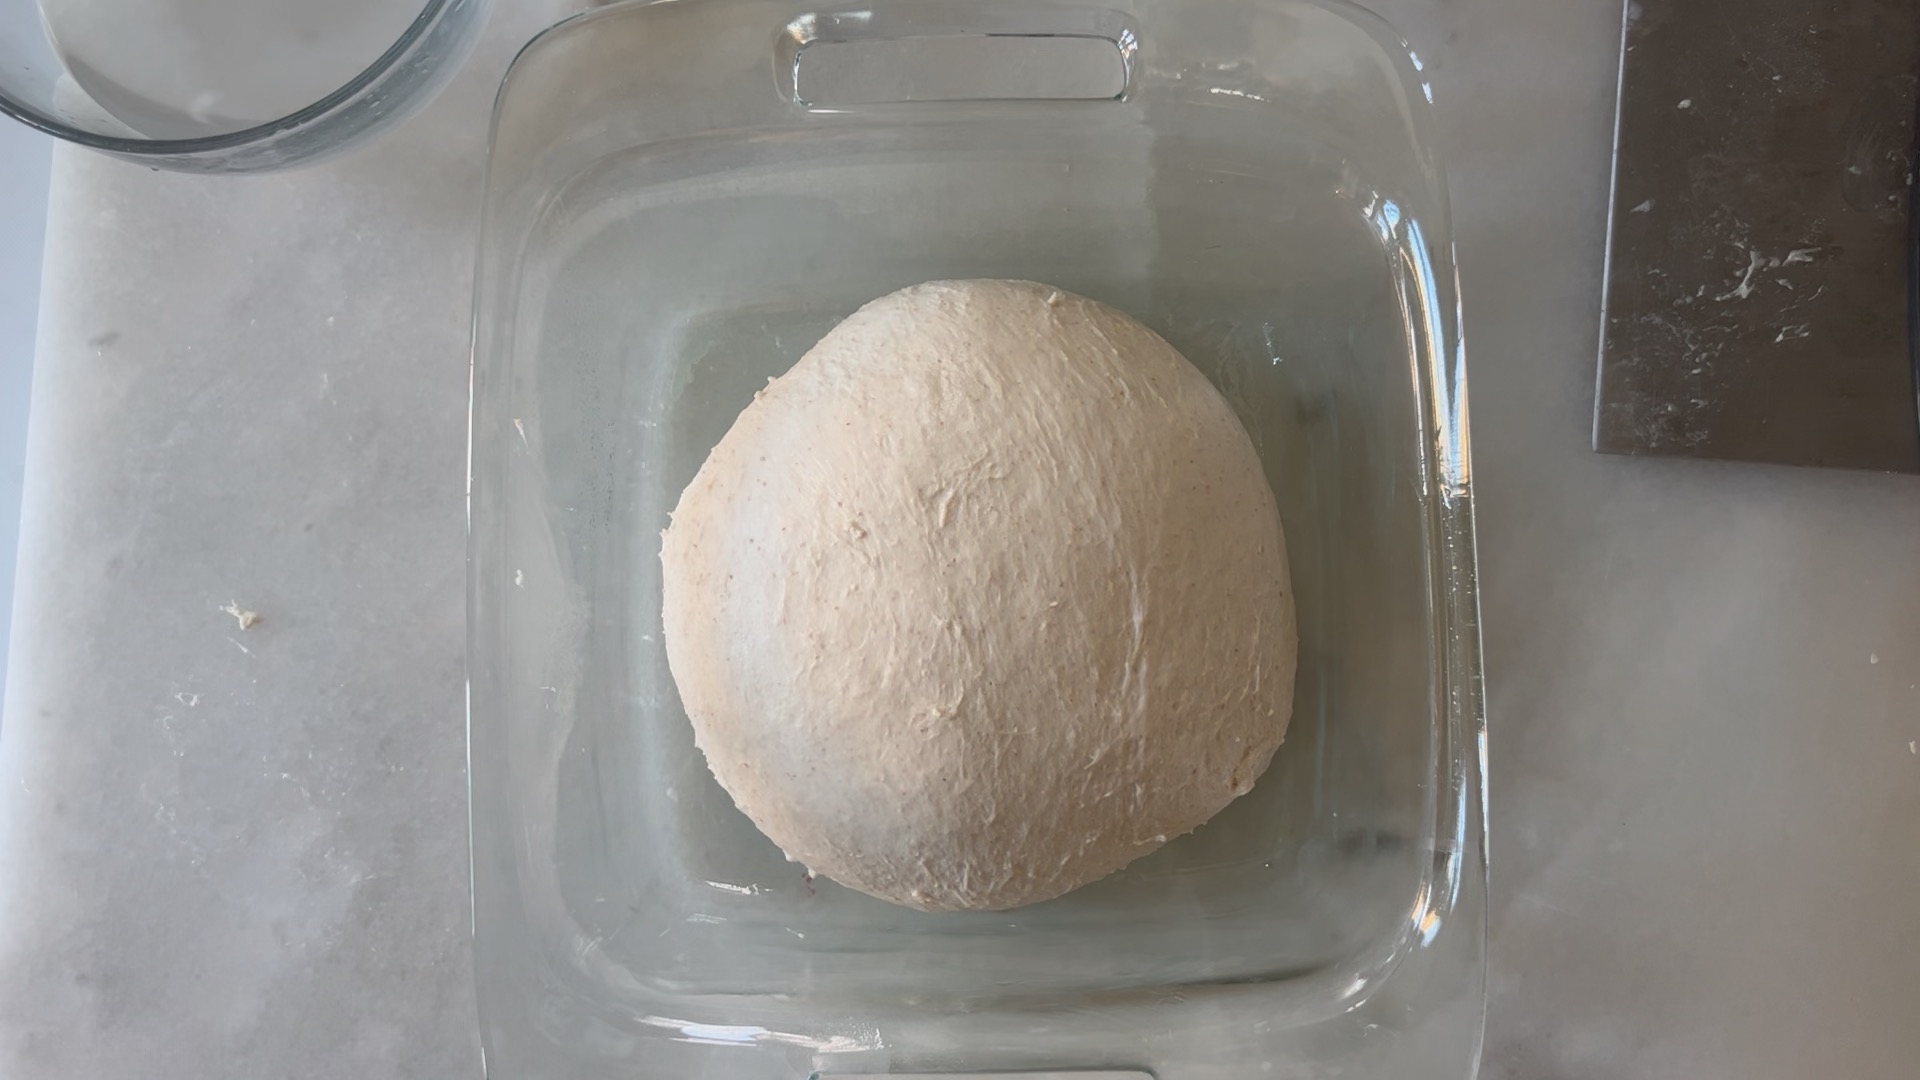
How To Determine When the Bulk Rise Is Complete
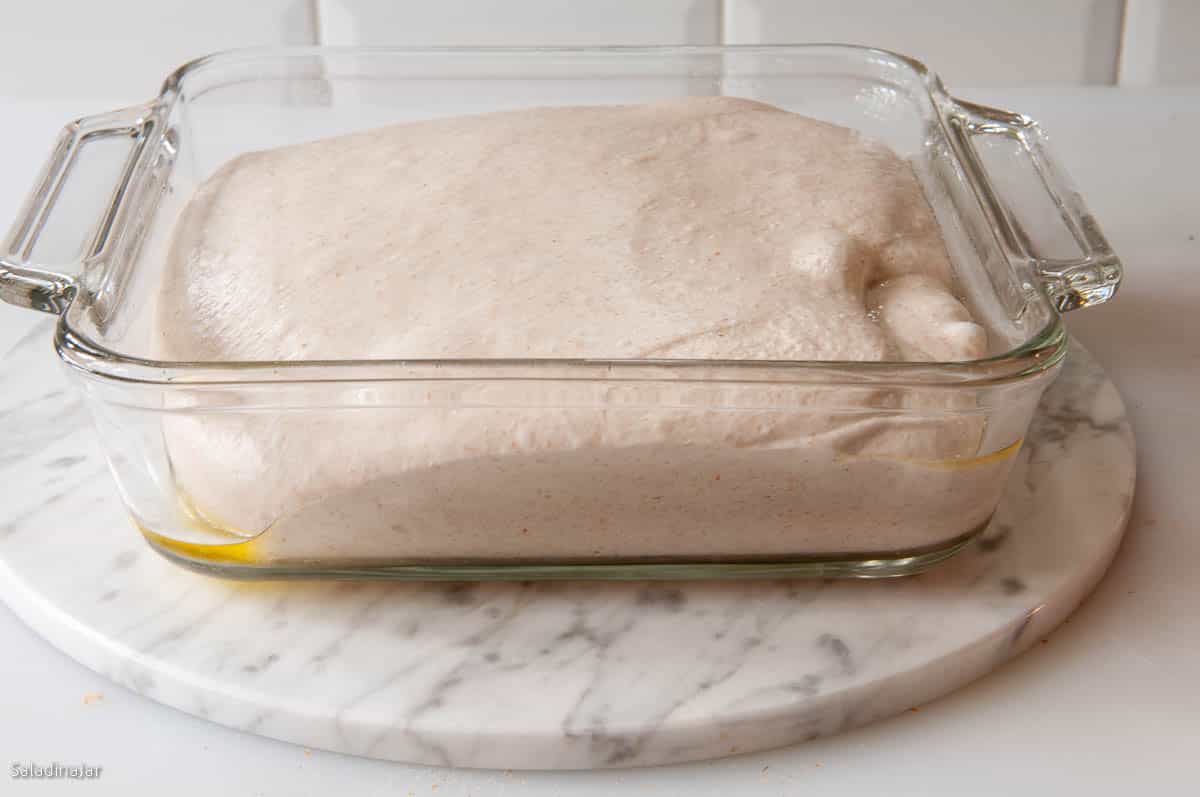
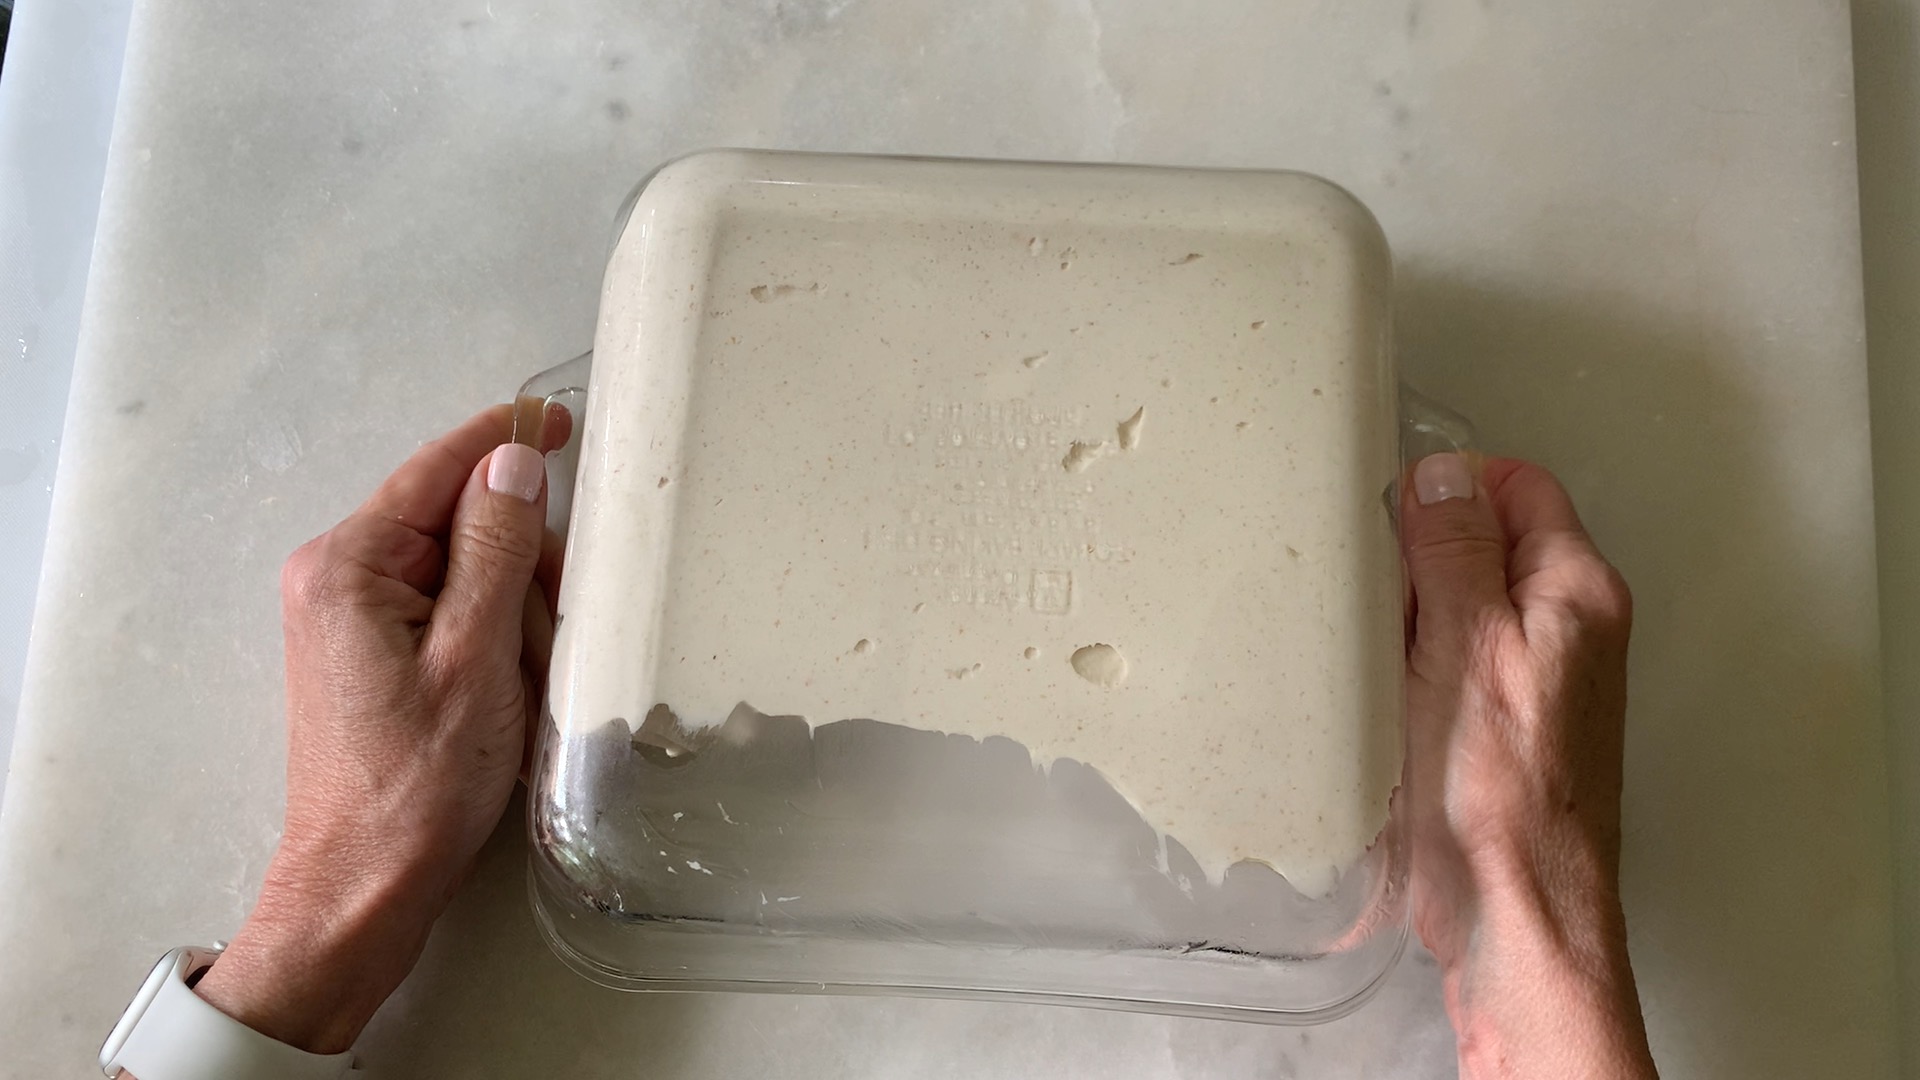
Hours later: When your dough is ready, it will be light and almost twice as big as before. You’ll see big bubbles on top and small ones on the bottom. When you shake the pan, it will wiggle like jello. The jiggling is my favorite sign.
Warning: For the first hour or two, your dough won’t change much. Then, it starts to grow more quickly. Most bubbles will show up near the end. The time it takes can vary a lot, maybe 4-7 hours or more, depending on how warm it is around the dough.
Don’t worry so much about time; just watch the dough. This is one of the trickiest parts of making sourdough without yeast.
If the bread doesn’t rise enough, it might be too heavy. Under-risen bread can have big holes in the middle.
If it rises too much, the bread will be too spread out and have really big holes. The taste, color, and rise in the oven won’t be as good.
Both too little and too much rising can make the bread not turn out well. But remember, it’s okay! Making mistakes is how you learn.
Shaping the Dough
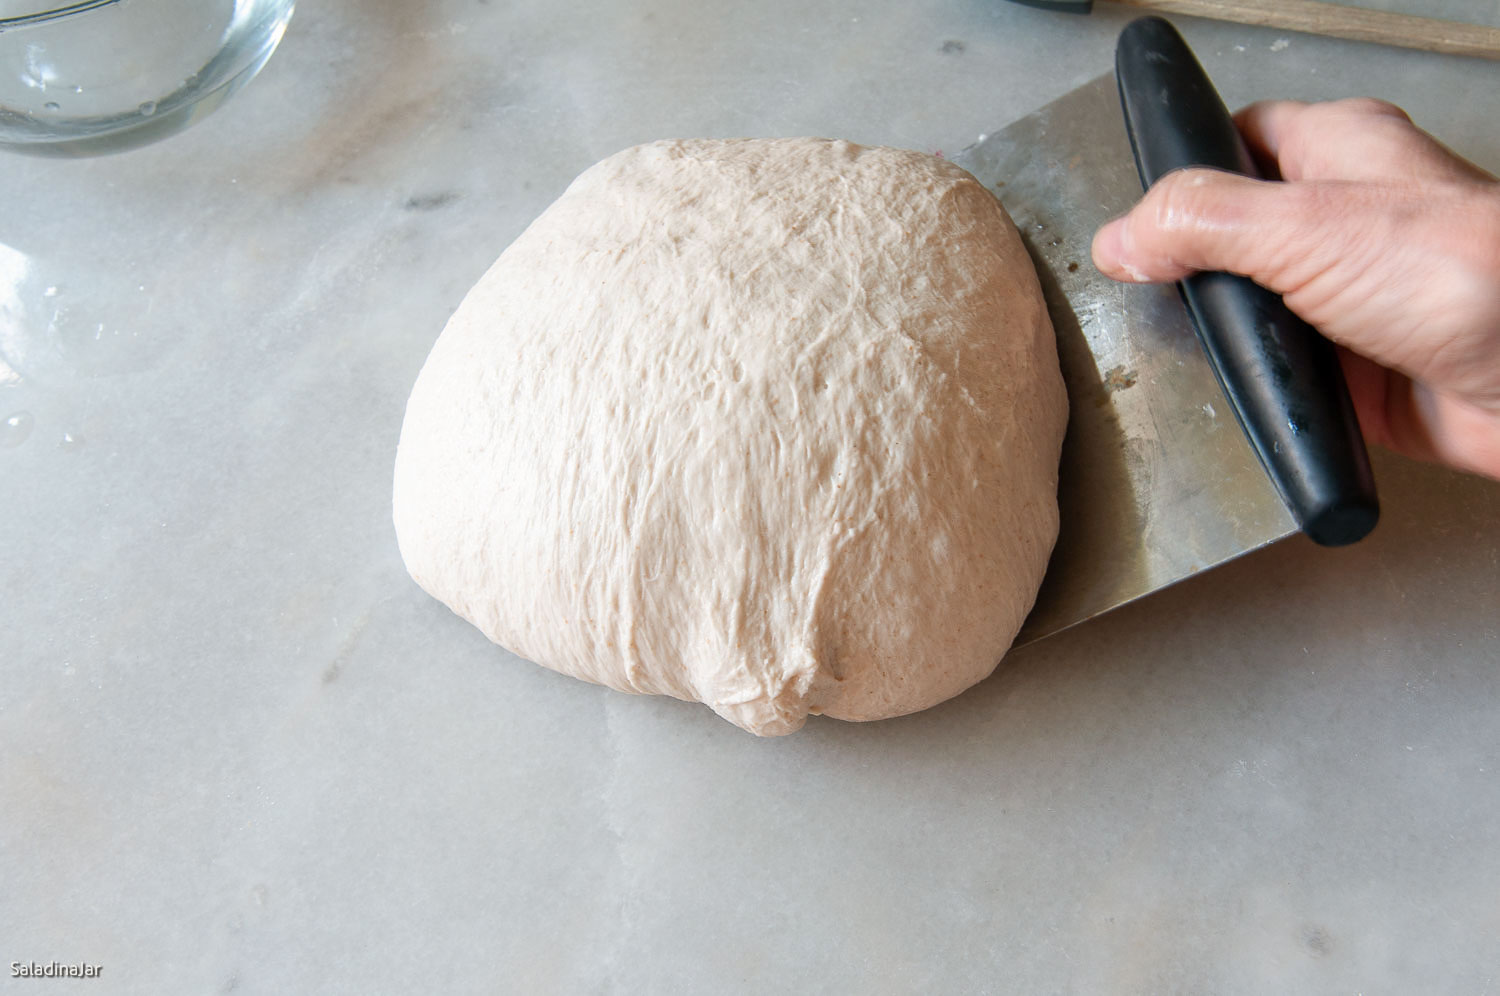
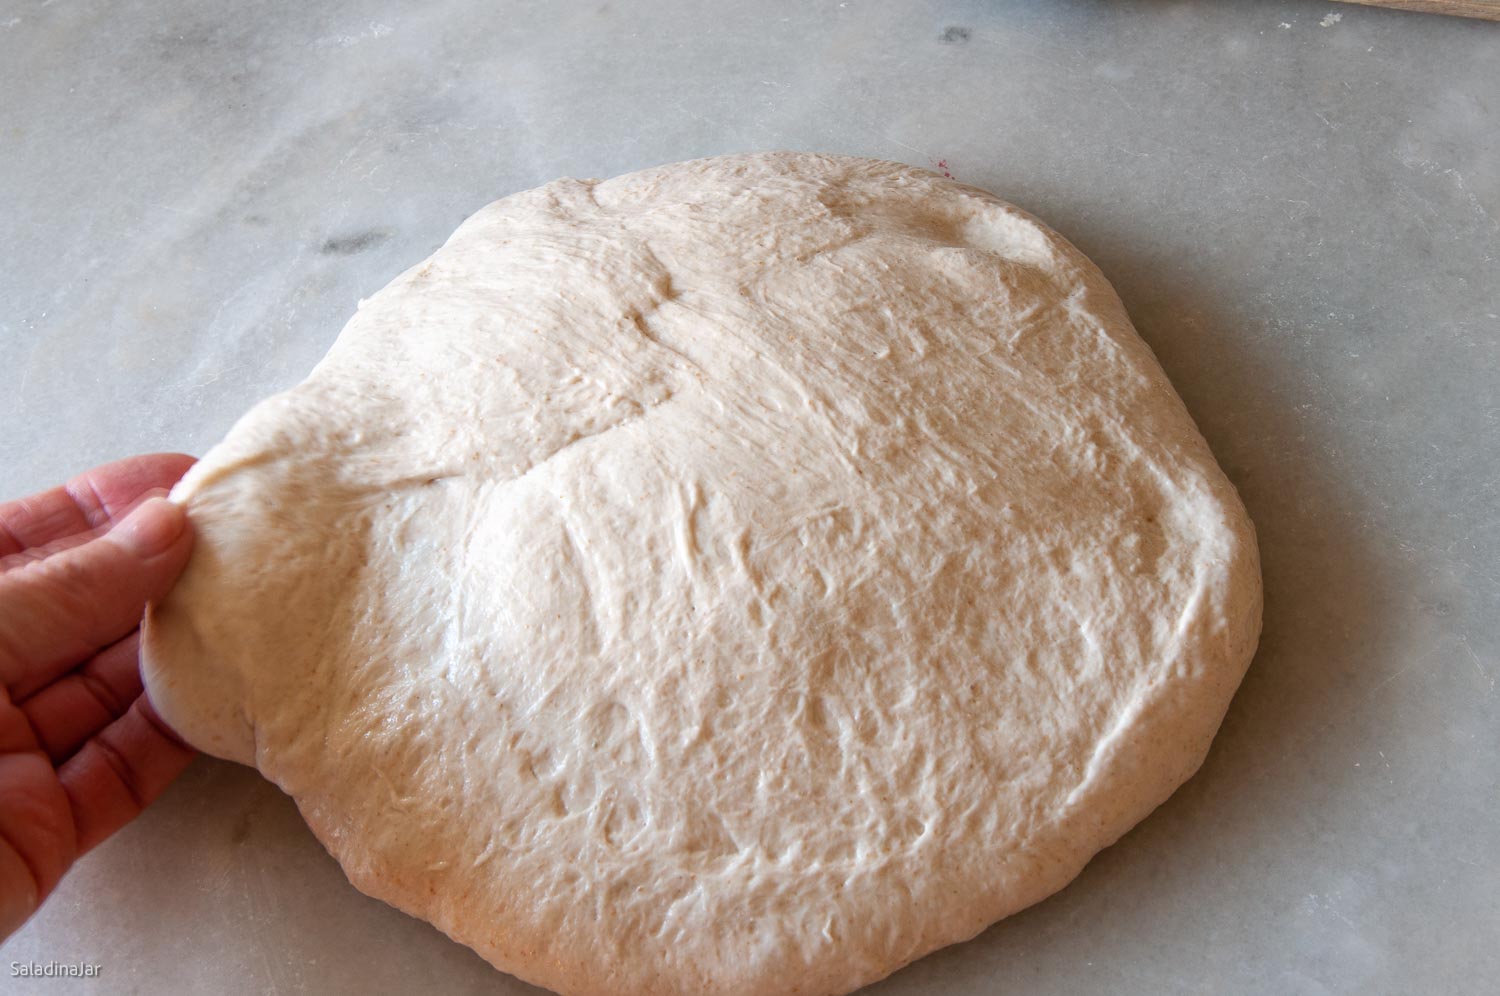
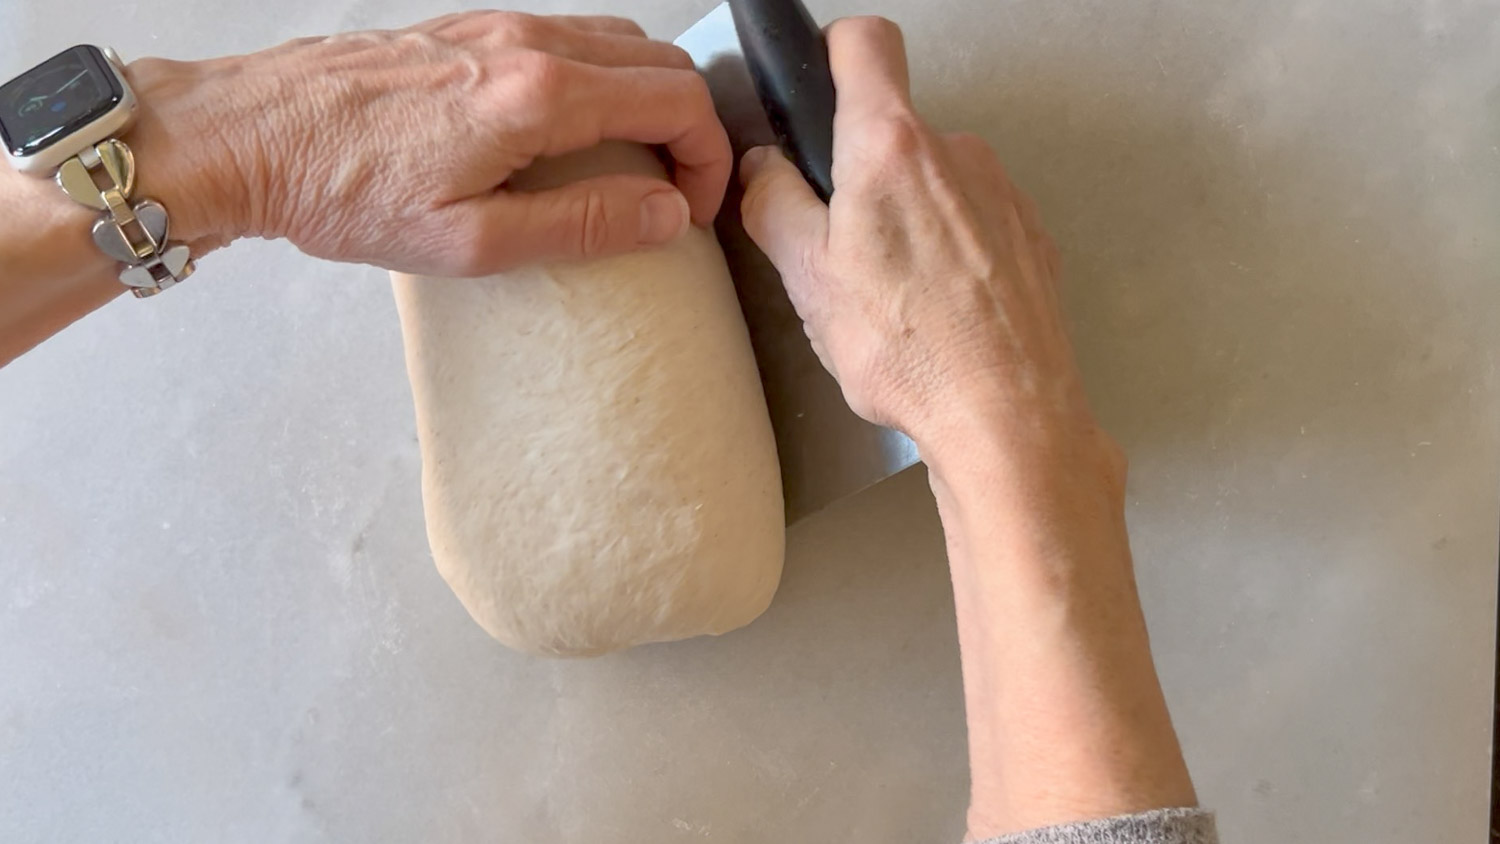
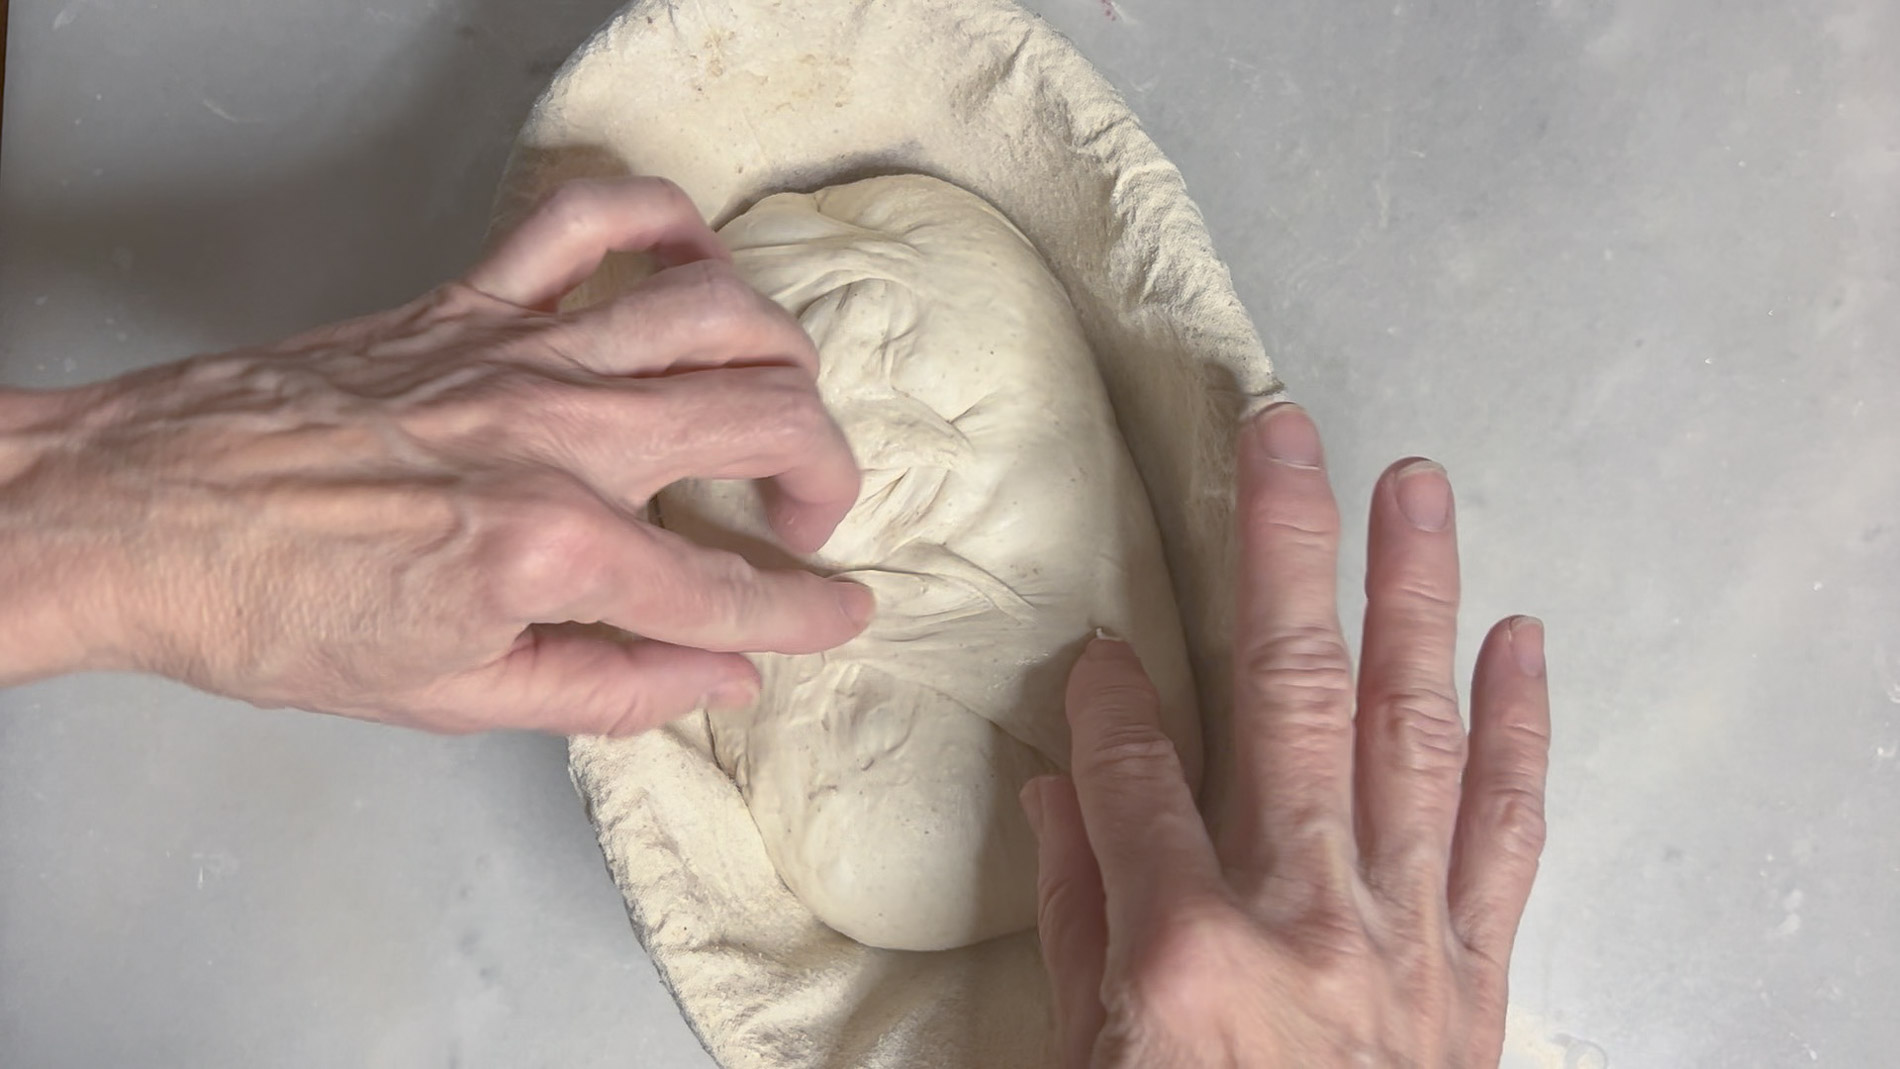
Put the dough in a lined banneton or a similar basket with the smooth side facing down. Let it rest for 30 to 60 minutes.
Baking
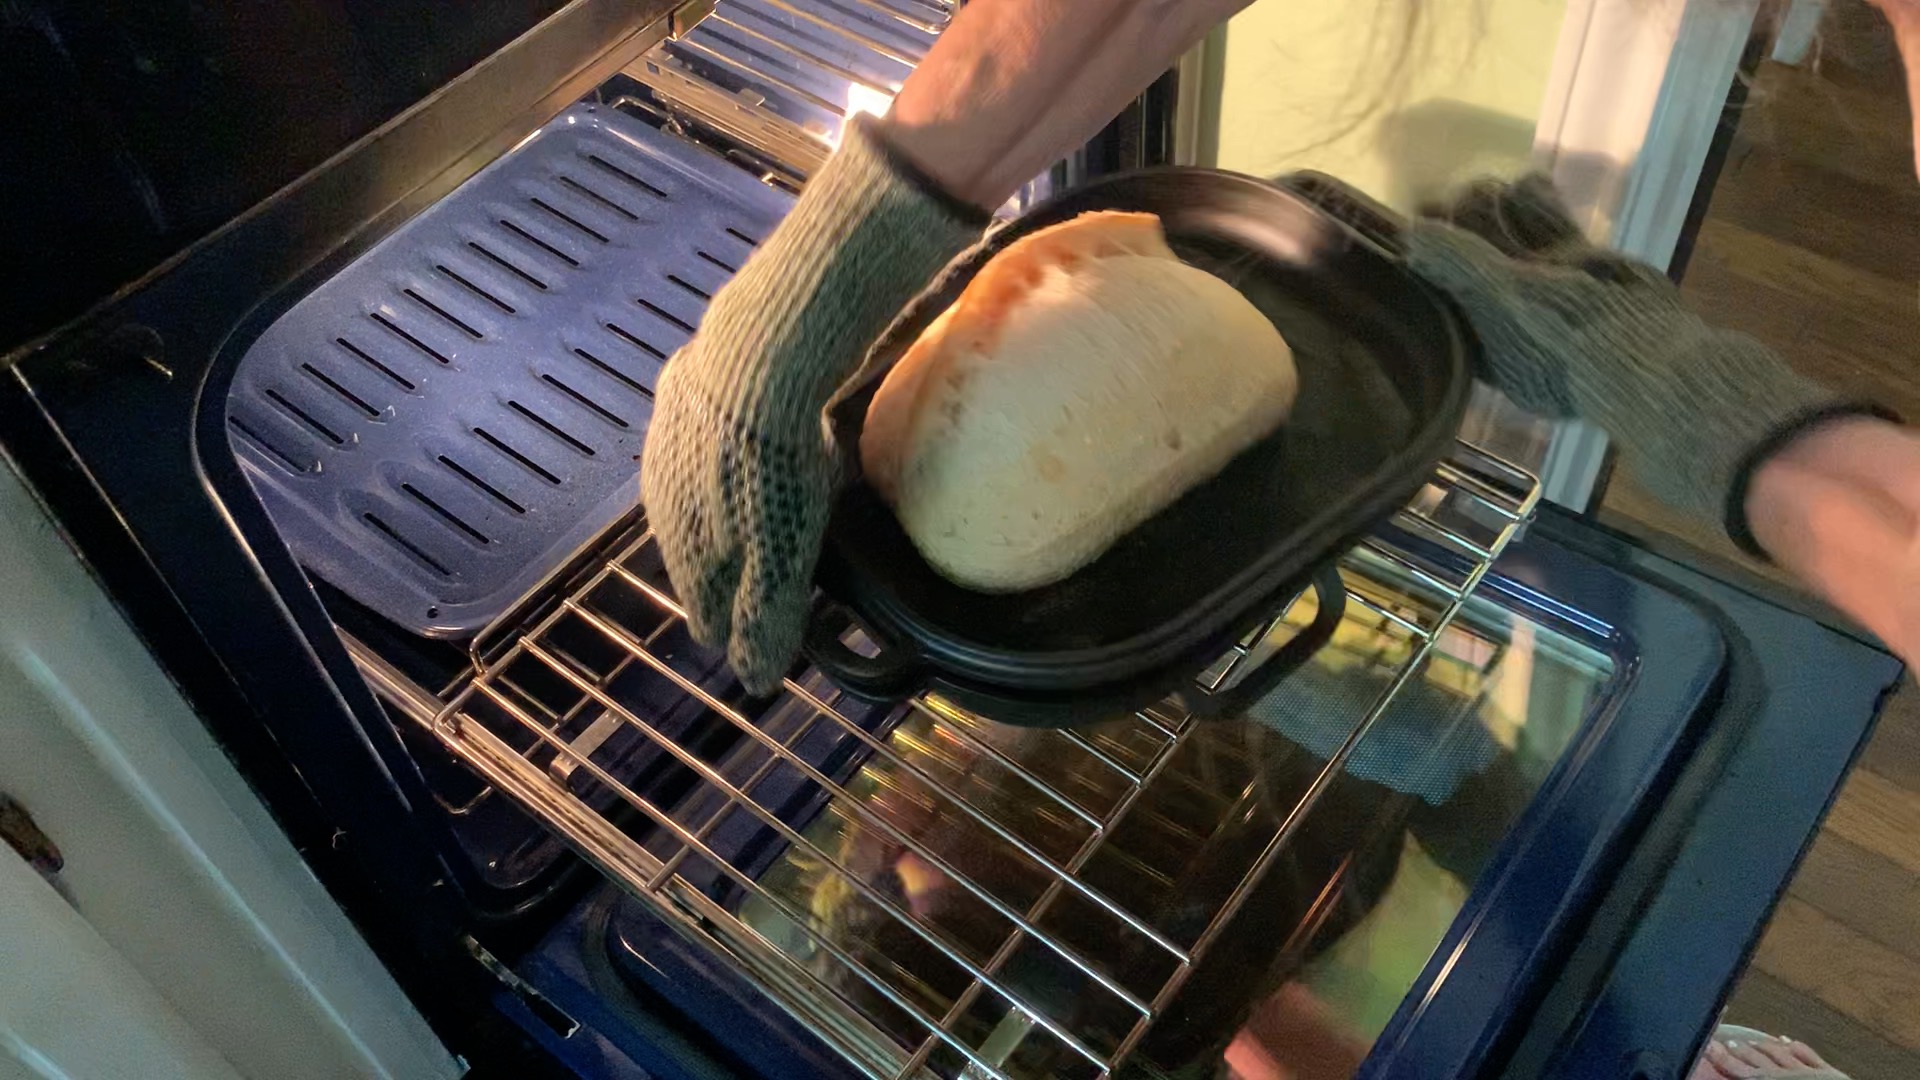
Before taking your dough out of the fridge, heat up your oven. Turn it to 500°F or the highest it can go. Let it heat up for 45-60 minutes. Put a Dutch oven inside to heat up, too.
But, be careful not to go over the highest temperature the maker says is safe. Some say not to heat an empty pan. If so, heat the oven first, then put the bread in the pan and into the oven. You don’t have to preheat the Dutch oven, but it usually works better if you do.
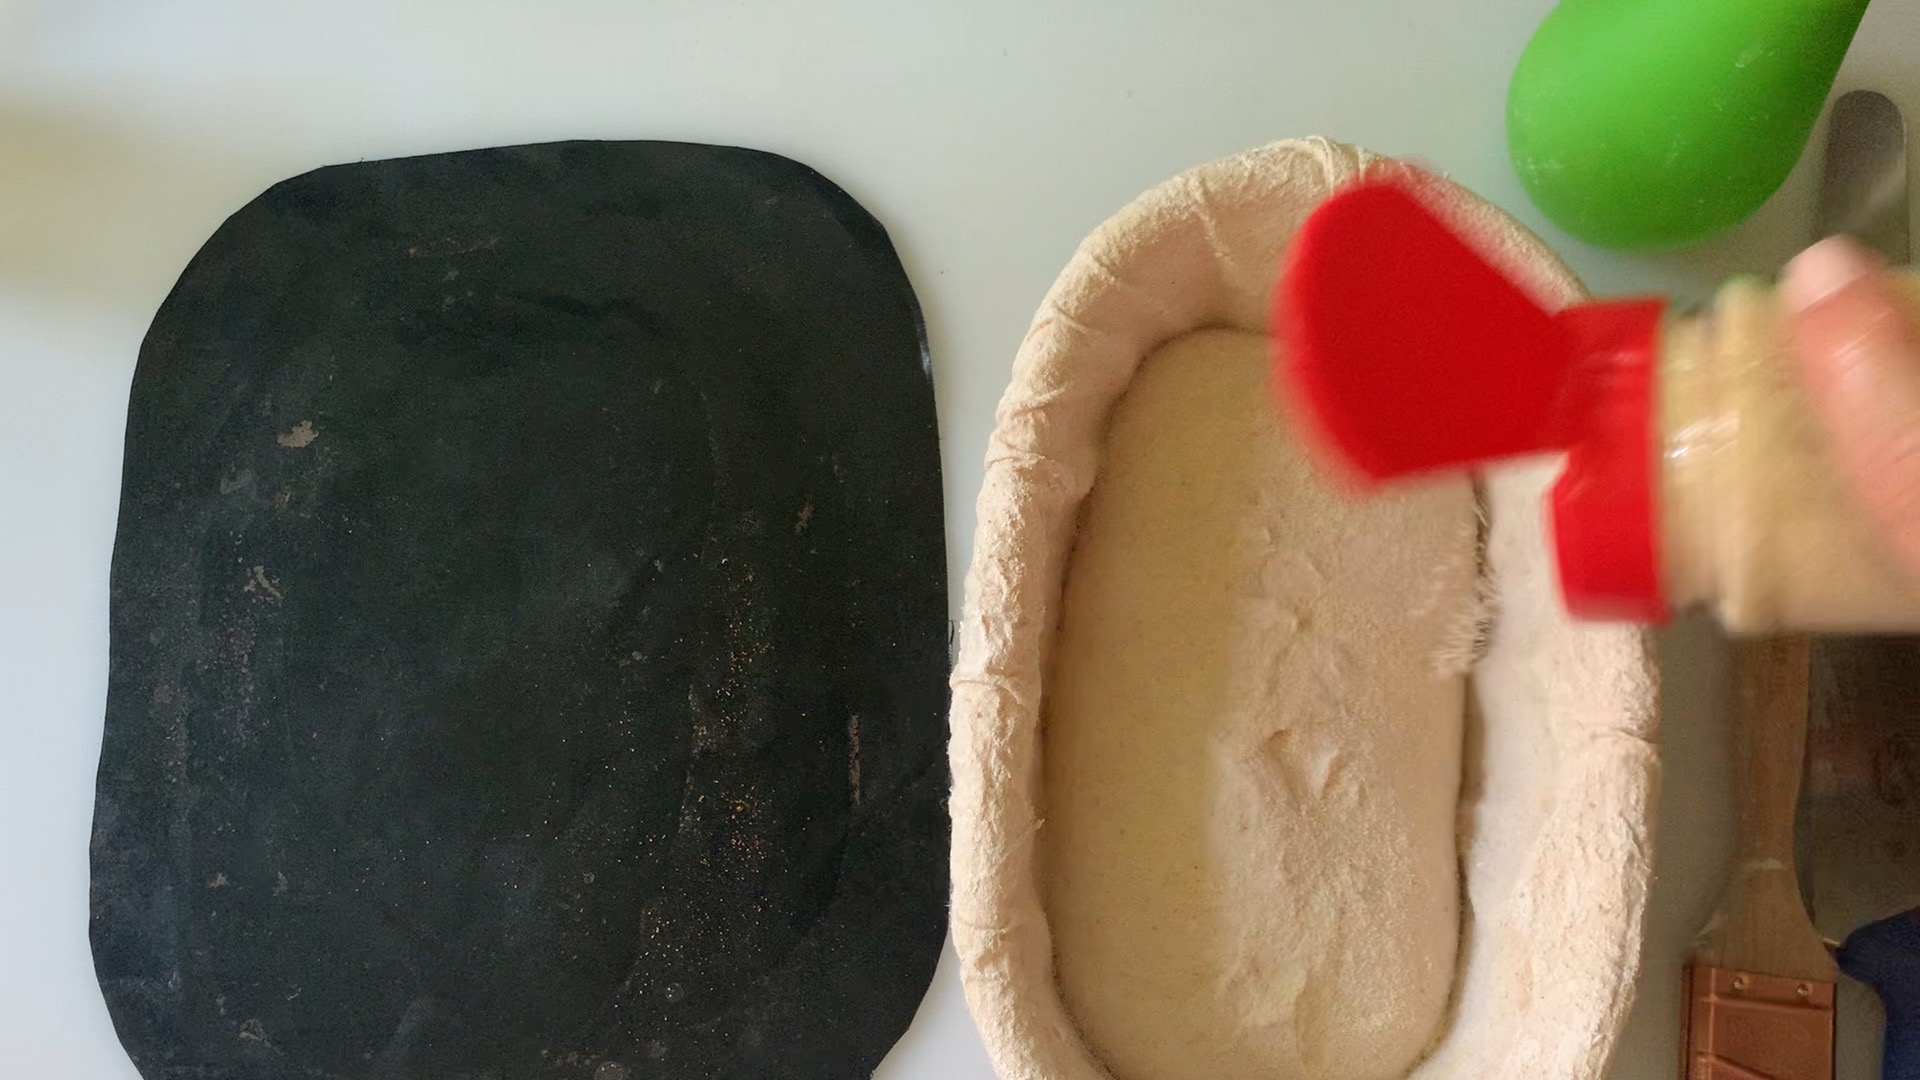
When your oven is fully hot, take the dough out of the fridge quickly. Sprinkle the dough with semolina or cornmeal, then flip it onto a piece of parchment paper. (Note: I use a grill sheet (paid link) cut to fit my Dutch oven. It seems to stop burning better than parchment paper.)
FAQ’s About Naturally Leavened Sourdough Bread Made in a Bread Machine
The hydration of this recipe is 72%. In baker’s percentages, divide the grams of water (345g) into the total grams of flour (480g). This calculation doesn’t include the water and flour in the starter which would be a stricter way to calculate.
Yes. To find out how much water you need for your bread, use baker’s percentages. You decide how much flour you want to use and then calculate the water based on that. For example, if you want 75% hydration and have 100 grams of flour, you would use 75 grams of water.
Yes. 240 grams of flour will require 173 grams of water.
If you’re making bread dough in a machine, remember that 800 grams of flour is usually too much for most home machines. The solution is to make one batch of dough. Once it’s done kneading, move it to another container. Then, start making the next batch. Most machines take around 20-25 minutes to mix and knead dough. This time doesn’t include any pre-programmed preheating or resting phases that might be part of the DOUGH cycle in some machines.
Sure, here’s what to do after the DOUGH cycle on your machine finishes:
1. Put the dough on a very clean and smooth surface like a granite countertop or a marble slab.
2. Do three sets of stretch-and-folds, about 8-10 times each, on a damp surface until the dough is smooth. The dough will be sticky, so have a bowl of water nearby to wet your hands and bench scraper as needed.
3. Shape the dough into a smooth ball and put it in a lightly oiled bowl or a clear 8×8-inch casserole dish for the bulk rise. Leave it alone for about 3-6 hours, depending on how warm it is, until it’s ready to shape.
4. After shaping the dough as the recipe says, put the covered loaf in the fridge for 8-16 hours before you bake it.
For no-knead sourdough recipes or those with more than 70% hydration, you don’t need to knead the dough much. Water and time build the gluten.
You could use the bread machine strictly for mixing the dough. Stop the machine as soon as the dough is well mixed. This might be quicker than washing the machine’s pan! Dough that’s very wet doesn’t knead well in a bread machine because the paddles struggle to engage thin dough.
To get blisters, two things are required:
1. Build tension in the dough by “stitching the dough” in the banneton after you have shaped it and let it relax for a few minutes. Pull the dough from each side of the loaf and overlap them. (See the video. This is difficult to describe)
2. Spray the crust thoroughly with refrigerator-cold water. Then, bake inside a pre-heated Dutch oven with the lid on at high heat
Place a cookie sheet or broiler pan onto the bottom rack below your bread rack. A grill sheet cut to size in the bottom of your pan also helps.
1. Spray the paper with cooking spray.
2. Sprinkle the bottom of the dough with semolina flour or cornmeal before turning it out of the banneton or basket.
3. Use a grill sheet cut in the shape of the bottom of your pan instead of parchment paper (my favorite solution because it’s reusable)
Using water is a good choice for handling dough. Keep a bowl of water nearby to keep your hands and a bench knife damp. This helps in handling the dough without it sticking too much.
You can use flour, too, but only a little bit. Adding too much flour can make your bread dough turn into a sticky mess. So, it’s better to use flour sparingly.
The built-in timer is a huge plus. Since the kneading is on a timer (as part of the DOUGH cycle), you don’t have to worry about how long to knead or if you’re doing it right.
You can set it and walk away. With this sourdough recipe, you don’t need to check the moisture level unless you’re worried you didn’t measure correctly. Remember to come back and remove the bread dough from the machine at the end of the DOUGH cycle.
The secret to sourdough bread with no yeast is learning to read and handle the starter and dough. It takes experience. Knowing when to go to the next step is crucial and difficult to learn from pictures.
The reward for persistence with sourdough baking is one of the most satisfying feelings I’ve ever experienced in the kitchen.
Note to readers as of 3/24/23: I continue to modify and make this recipe simpler as I refine my sourdough process. Check the recipe for the latest version. paula
More Recipes and Posts Related to Bread Machines:
- Sourdough Bread Machine Bread: A Simple Loaf Recipe
- Bread Machine Sourdough Dinner Roll Recipe
- Bread Machine Ciabatta Recipe
- Do All Liquids Need to be Warm When Using a Bread Machine?
Recipe Help at Your Fingertips: For questions or suggestions, email Paula at saladinajar.com. If you need help, I’m happy to troubleshoot via email (faster than leaving a comment). Attach pictures and as many details as possible for the best advice.
Classic Bread Machine Sourdough Bread Recipe – No Yeast
Rate this recipe
(5 stars if you loved it)
Video
Ingredients
- 1½ cups (345 g) water
- ⅓ cup (40 g) whole wheat flour (substitute with bread flour if preferred)
- 1⅔ cup (200 g) all-purpose unbleached flour
- 2 cups (240 g) bread flour
- ⅓-½ cup (70 g) bubbly and active sourdough starter
- 1½ teaspoons (9 g) table or sea salt
Instructions
Mixing
- Add 1½ cups (345 g) water, ⅓ cup (40 g) whole wheat flour (substitute with bread flour if preferred), 1⅔ cup (200 g) all-purpose unbleached flour, 2 cups (240 g) bread flour, ⅓-½ cup (70 g) bubbly and active sourdough starter, and 1½ teaspoons (9 g) table or sea salt to the bread machine pan.
Kneading
- Select the DOUGH cycle and press START.
- When the DOUGH cycle is complete, transfer the dough to a damp surface.
Stretch and Folds
- Stretch and fold the dough on a damp surface (spritz with water) using a damp bench scraper and damp hands. Use your hands to pull up one side and fold it halfway over to the opposite side. Pat it down lightly. Working your way around the dough, go to the next side, pull it up with both hands, and fold it halfway to the opposite side. Continue until you have worked your way around to where you started. Use the bench knife to help roll it over until you see a smooth surface on top. Cover and let rest for 15-30 minutes This technique builds strength so your bread won’t spread out like a pancake when you bake it.
- Repeat the above exercise with the dough at least two more times so that you have done three “stretch and fold” sessions.
- Shape the dough into a smooth ball with the smooth side up. Place into an oiled bowl or a 1½-quart clear casserole dish. Cover.
Bulk Rise
- Let the covered container of dough sit in a warm place to rise. The ideal temperature of the warm place should be 75-80˚F (37˚C). Test the air with your instant-read thermometer. The proofing process may take 3-10 hours, depending on the temperature, the vitality of your starter, and the amount of starter you use. You can control the timing somewhat by moving the dough to a warmer or cooler location but don’t let the temperature go above 85˚F(29.4 C).
- How to tell if the dough has risen enough: The dough should approach almost but not double its original size. Look for giant bubbles on top and many bubbles covering the sides and bottom of the dough. (This is why a clear container is helpful.) It should jiggle slightly when you shake it. The dough should slope downward at the edges of the bowl or dish.
Shaping
- Preshaping: Lay the bowl of dough upside down onto a damp surface. Allow gravity to help the dough fall out gently on its own. Shape into a rough circle. Pick up one side of the circle, then fold it toward the center. Use your fingertips to tap the seams and “glue” them down gently. Continue folding like an envelope to form a rough ball. Flip the ball over so the smooth surface is on top. Cover the dough with a damp towel and let it rest 15-30 minutes.
- Use a damp bench scraper to flip the relaxed dough upside down. Repeat the initial shaping process by using your damp fingers to gently stretch the dough into a larger circle approximately 10 inches in diameter.
- Next, pick up one side of the circle, then fold it toward the center. Use your fingertips to tap the seams and “glue” them down gently. Continue folding like an envelope to make a ball again. Flip it over with the bench knife.
- Use a push and pull motion with your hands and a bench scraper to make the ball more compact and create tension.NOTE: If your dough turns into a gooey mess, the dough may be overproofed. (Recovery tip: Scrape the dough into a greased 8½ x 4½-inch bread pan and make a sandwich loaf.)
- Place the dough with the smooth side down into a lined banneton, small mixing bowl, or a small colander. (Line the bowl with a well-floured linen or cotton tea towel. Rice flour works best.) Cover and allow the dough to rest in the banneton for 15 minutes to an hour. If you like bubbles on the crust, “stitch” the dough in the banneton to create more tension. (See video.)
Final Rise
- Refrigerate your covered loaf for 8 to 24 hrs.
Bake
- Preheat your oven to 500˚F (260˚C)for 45 minutes before you want to bake. If using a Dutch oven, put the lid on and place it into your oven while preheating (unless the manufacturer recommends against heating the pan empty).
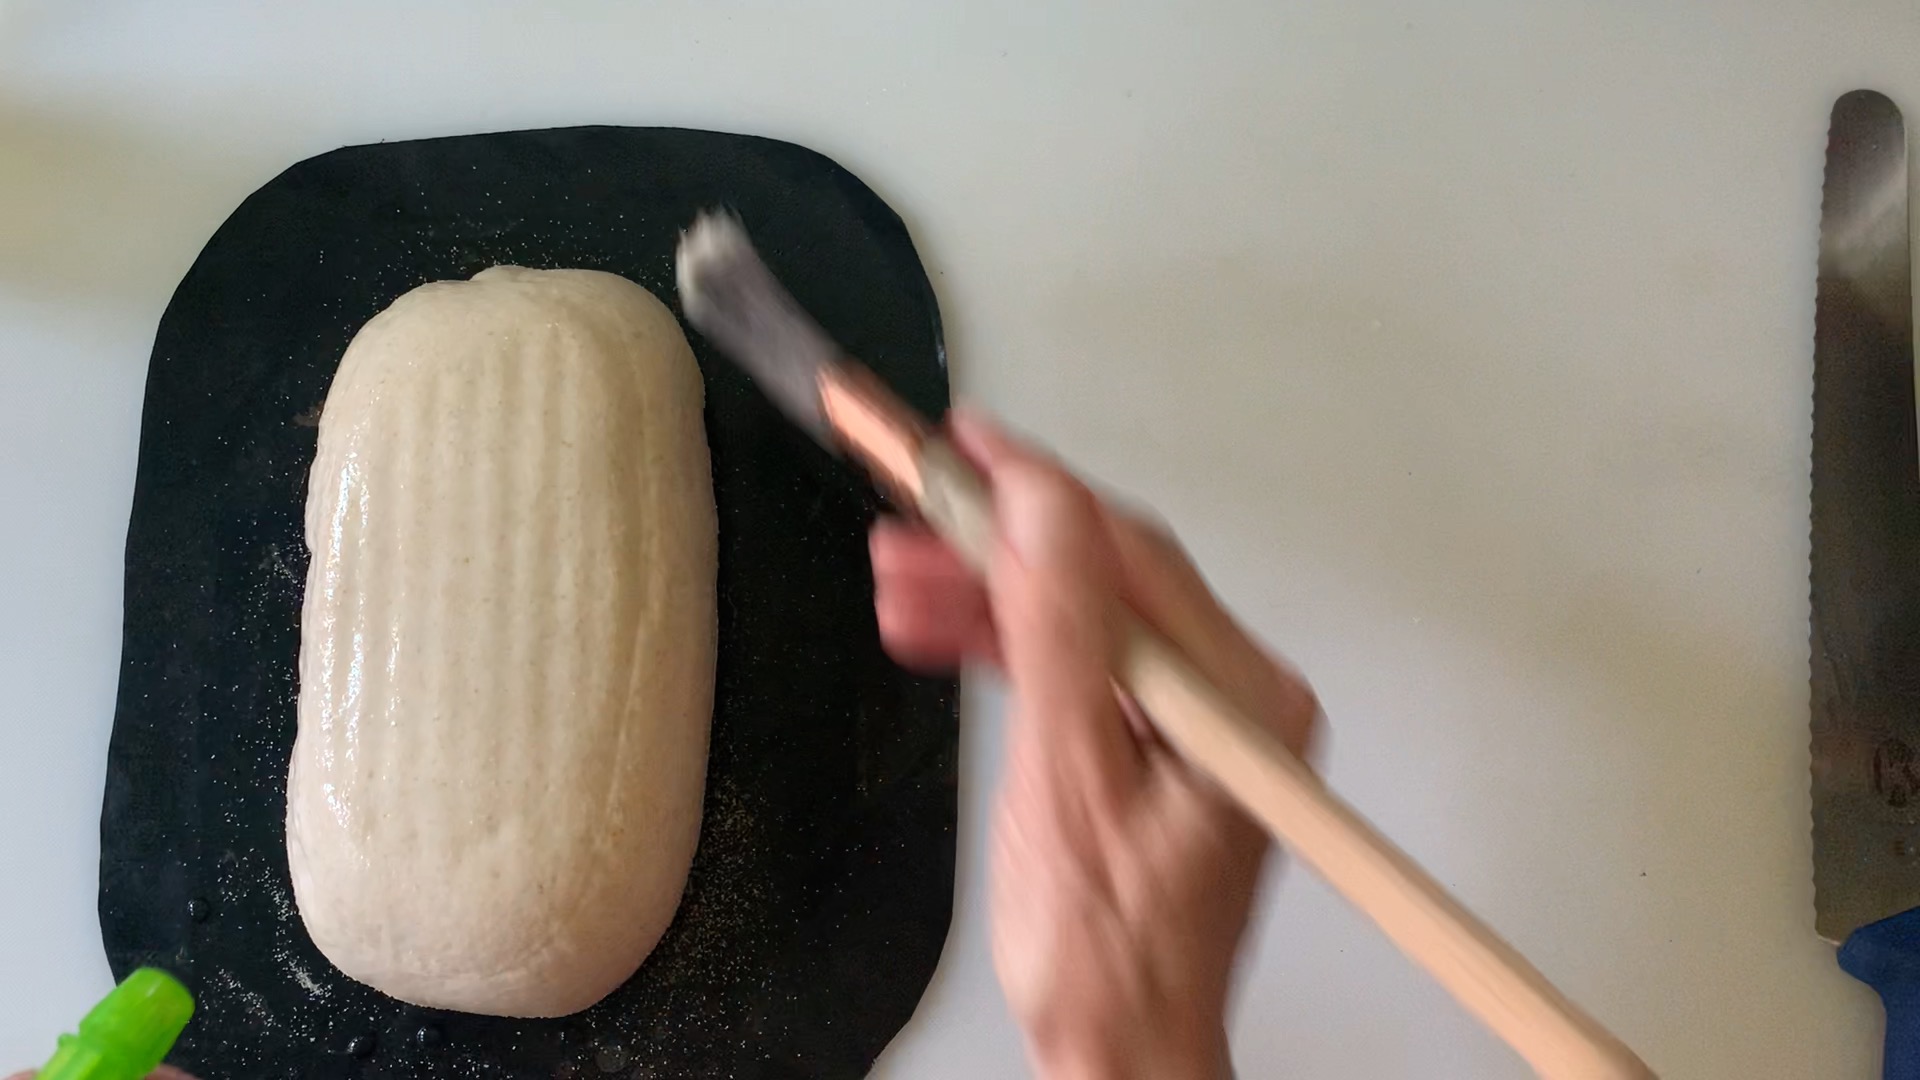
- Remove the bread from the refrigerator immediately before you’re ready to bake. Sprinkle the top of the dough (which will become the bottom of the loaf) with semolina or cornmeal while still in the banneton or bowl so it won’t stick to your parchment paper. Use a toothpick to poke any large bubbles you see in the dough. Turn the dough onto a piece of parchment paper. Brush off excess flour with a brush.
- Turn the dough onto a piece of parchment paper. Brush off excess flour with a brush.
- Optional: If you like a blistered crust, liberally spray the crust with COLD water. (I keep a small spray bottle of water in the fridge for this purpose.)
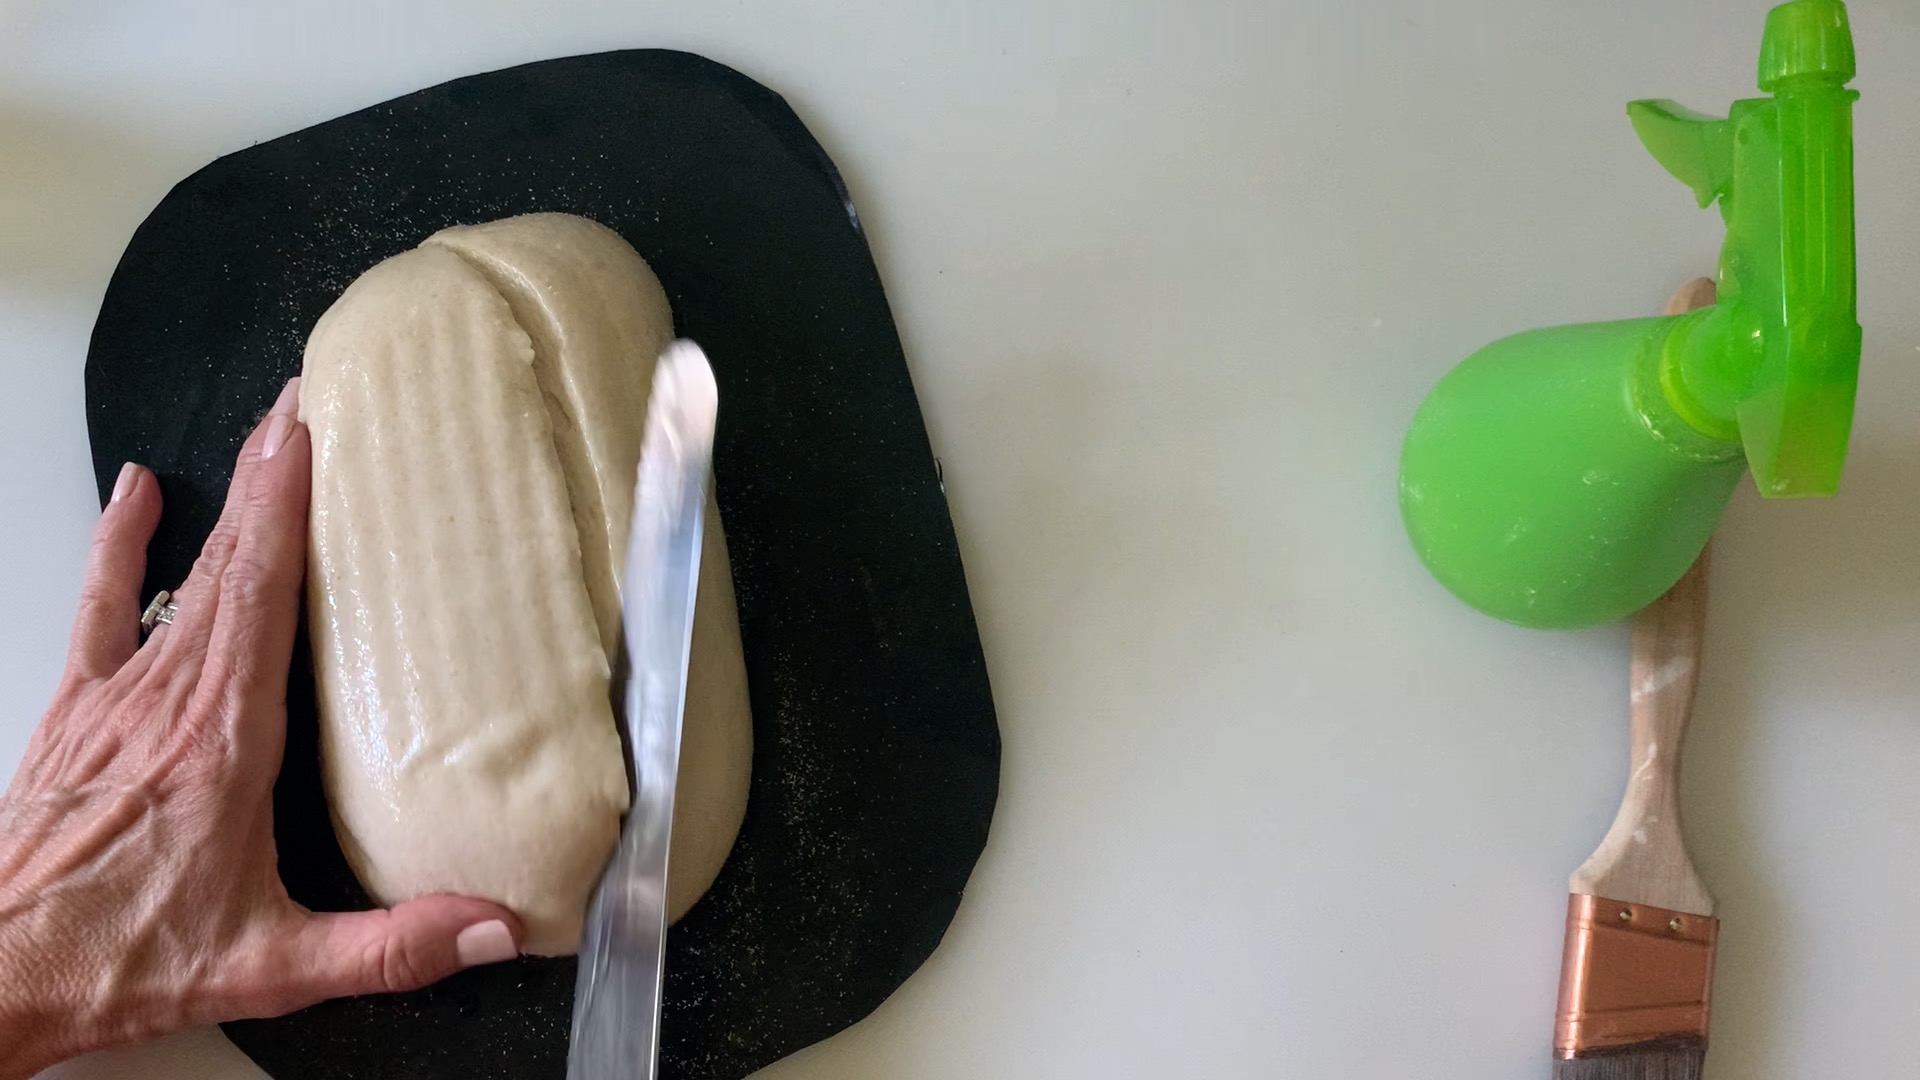
- Slash the bread with a sharp knife or razor blade using any design you like. The primary slash should be at least 1/2 to 1 inch deep. Keep it simple if you are a beginner. An ‘X’ works fine. Move the shaped dough with the parchment paper under it to your preheated Dutch oven.
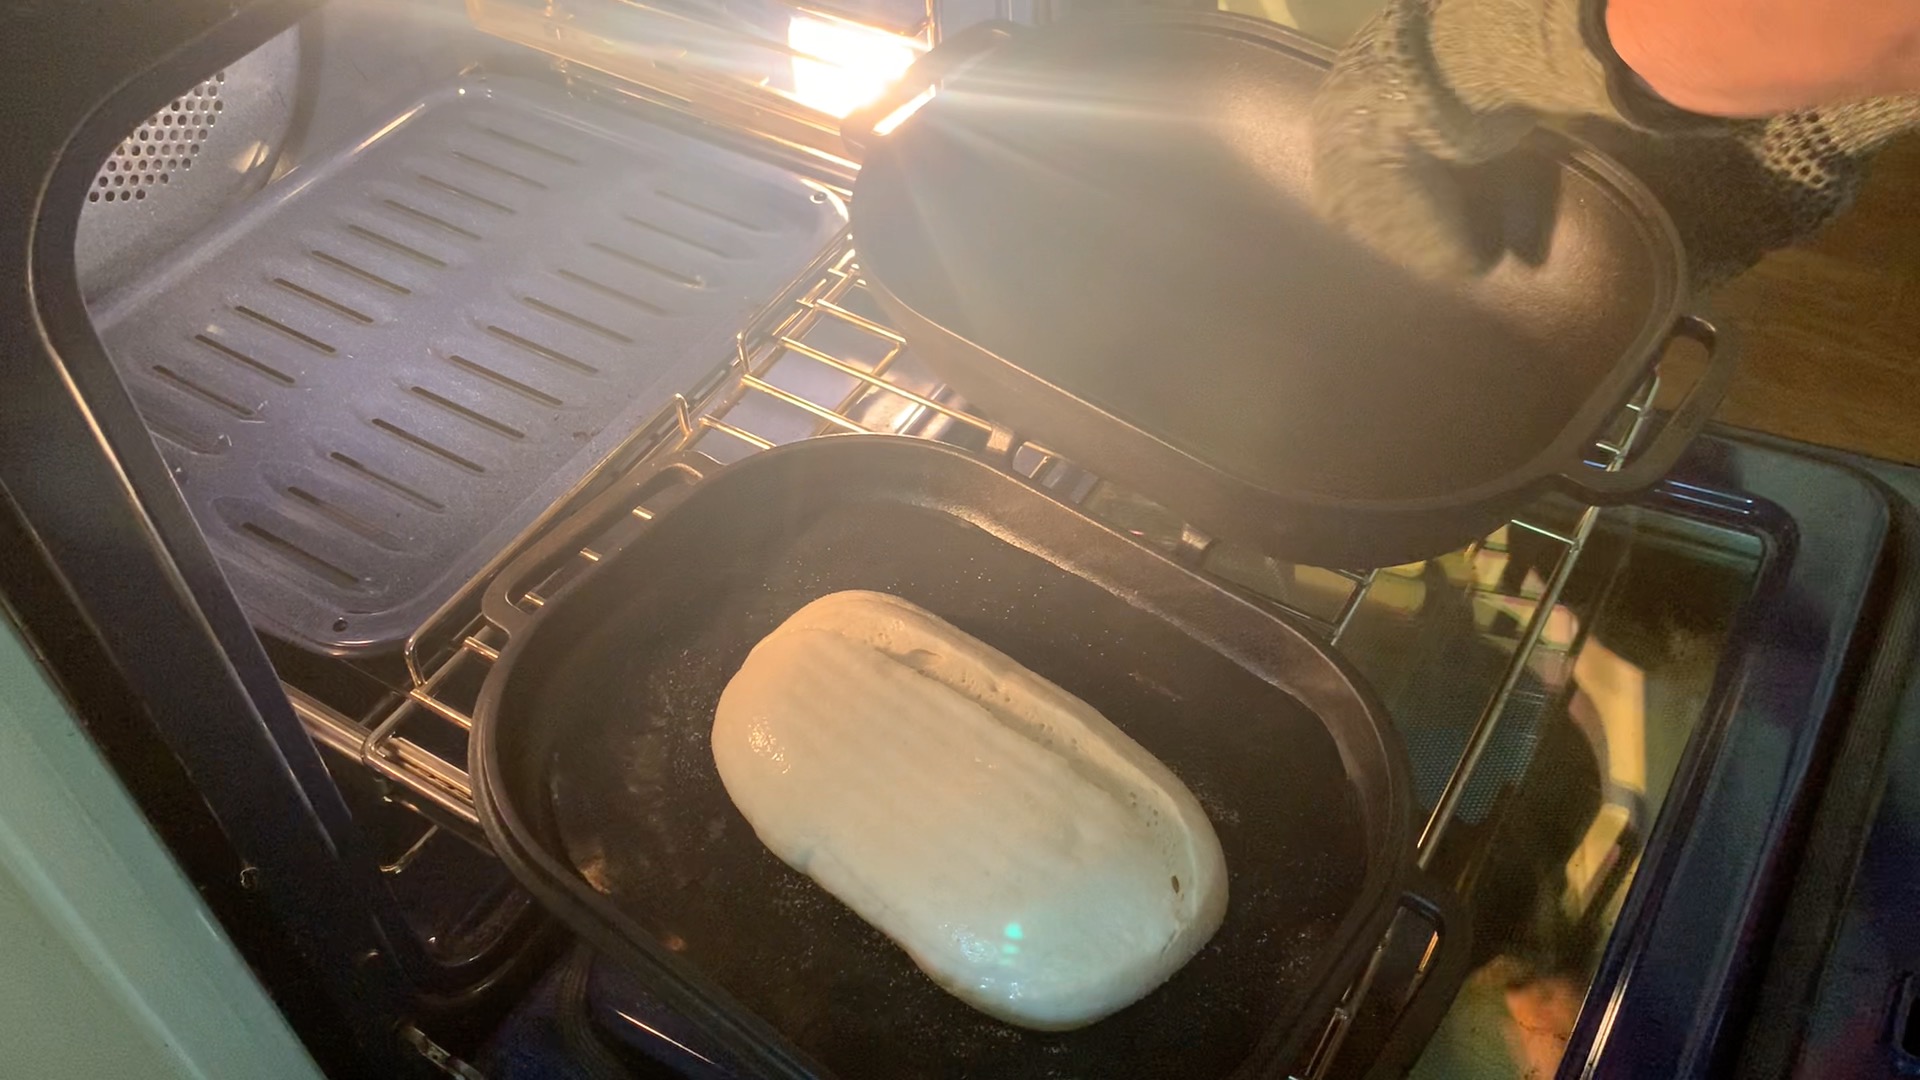
- Put the lid on the Dutch oven and place it into your oven. Turn the temperature back to 450˚F (230˚C). After 20 minutes, remove the cover. Bake for 27-30 additional minutes. The total time in the oven should be 46-50 minutes.
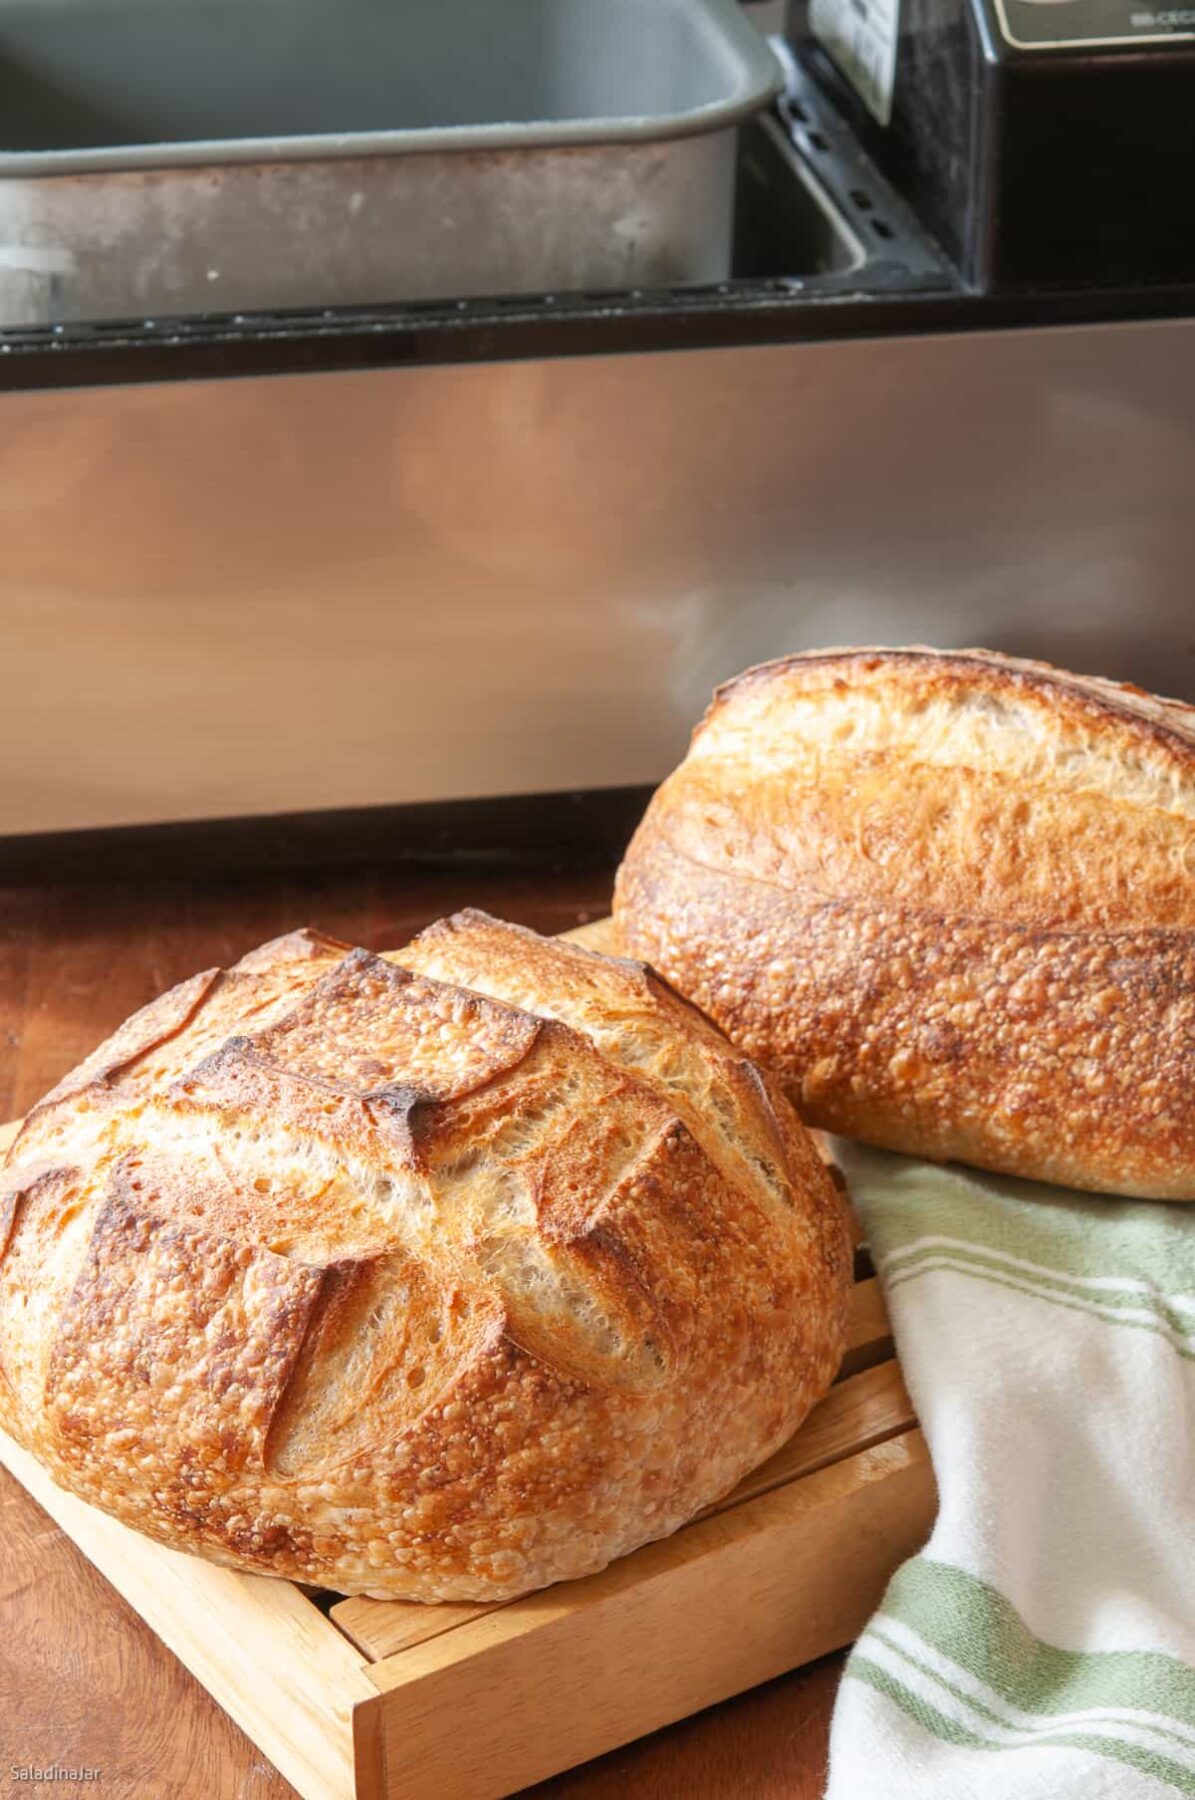
- Bake bread until it registers 207-210˚F (97-88˚C) in the middle using a quick-read thermometer. The crust should be dark brown for maximum caramelization.
- Cool the baked bread on a rack for an hour or more before slicing. Cutting the loaf too early or underbaking the bread may result in gumminess.
Notes
Possible Adjustments:
- If the dough is too sticky to handle, decrease the amount of water in your next loaf. As written, this recipe is 75% hydration.
- If your kitchen is warm or you want a longer bulk rise period, decrease the starter back to 40-6o gr.
- If you don’t have whole wheat, replace it with more bread flour.
Recipe for a larger loaf:
375 gr water, 87 gr starter, 55 gr whole wheat flour, 445 gr bread flour, 11 gr table or sea salt.Equipment
Nutrition
All images and text ©️ Paula Rhodes for Salad in a Jar.com


Paula Rhodes, owner
As a retired home economist, I created Saladinajar.com to share my belief that you don’t have to be a chef to find joy in creating homemade food worth sharing. Bread machines (used in an unconventional way), homemade yogurt, and quick microwave recipes are my specialty.