Flaky Greek Yogurt Pie Crust Recipe
Sneak Peek: This flaky yogurt pie crust uses butter and unflavored yogurt to create tender layers with rich flavor—perfect for sweet or savory pies.
This post contains affiliate links. As an Amazon Associate, I earn from qualifying purchases at no extra cost to you.
Years ago, I ran across a pie crust recipe using sour cream instead of water. That led me to wonder: what would happen if I used yogurt instead? The result was one of the flakiest, most flavorful pie crusts I’ve ever made.
Why Yogurt Works
The acidity in yogurt slows gluten development, helping create a more tender crust. Yogurt also replaces water as the binder while adding richness and flavor.
Egg yolk encourages browning and adds richness.
Ingredients & Substitutions
• FLOUR: Use all-purpose flour, bleached or unbleached. A high-protein flour (such as bread flour) may cause toughness.
• SUGAR: Granulated sugar adds flavor and helps the crust brown. Optional.
• SALT: Salt is optional but enhances flavor.
• BAKING POWDER: Inspired by the Kitchn, I add baking powder. You won’t taste it, but it adds a slight lift and prevents shrinking.
• BUTTER: Use cold butter for maximum flakiness. Skip the added salt if using salted butter. Can substitute shortening for less flavor.
• YOGURT: Although I use my homemade unflavored yogurt, this recipe also works with store-bought yogurt, vanilla-flavored yogurt, and Greek yogurt. Thin thick Greek yogurt or skyr with milk before measuring.
• EGG YOLK: Skip the yolk if preferred, or use 1/3 cup yogurt instead.
How To Assemble a Flaky Yogurt Pie Crust
⬇️ Jump to the recipe below for exact amounts and detailed instructions.
Roll out dough and fit into pie crust. Crimp with fingers or a fork.
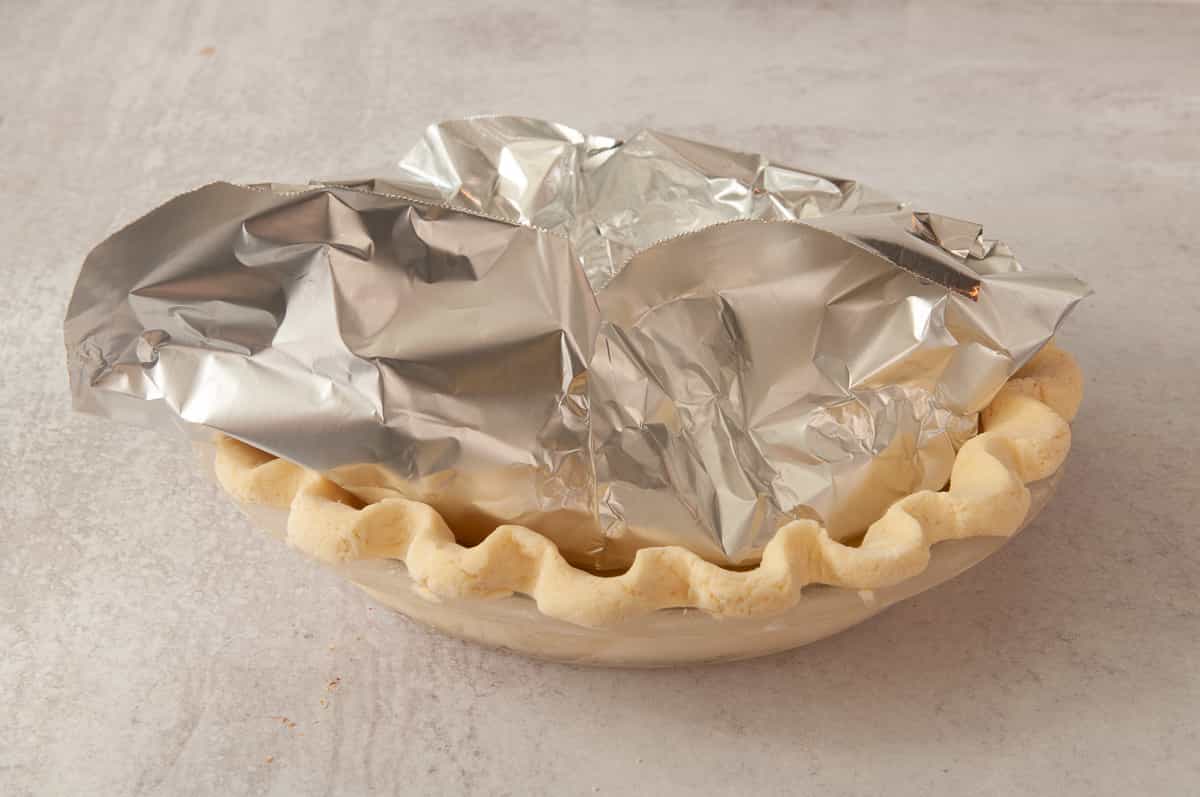
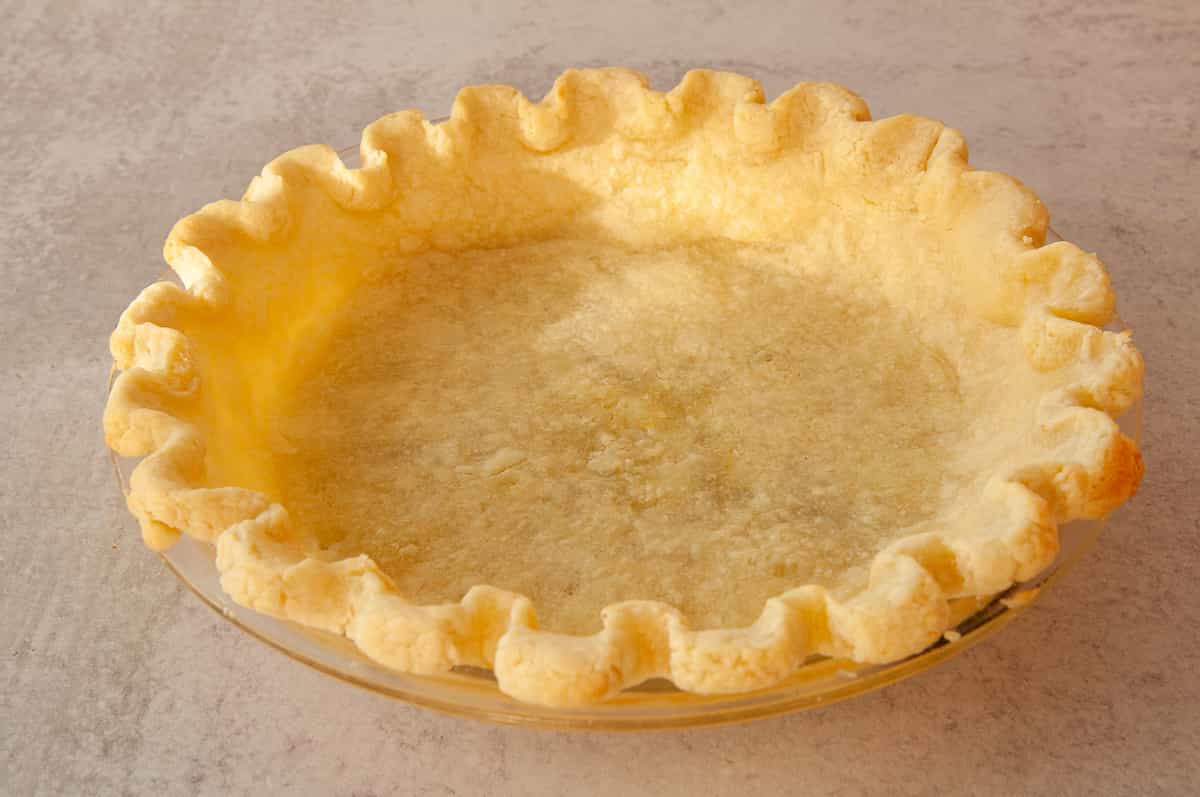
Making a Par-Baked Crust
Tips That Make a Difference
- Chill the crust before crimping for 15 minutes to prevent shrinking.
- Having trouble with the butter leaking out of the crust as it bakes? Freeze the butter first, then grate it into the flour mixture. Bake the crust/pie on a silicone mat-covered cookie sheet just in case.
Flaky Yogurt Pie Crust Recipe
Video
Ingredients
- 1¼ cup (150 g) all-purpose, unbleached flour
- 1 teaspoon granulated sugar
- ¼ teaspoon salt
- ⅛ teaspoon baking powder
- ½ cup (114 g) unsalted butter, cold
- ¼ cup (70 g) unflavored regular yogurt or Greek yogurt
- 1 (18 g) egg yolk
Instructions
- Mix the dry ingredients: Combine the 1¼ cup (150 g) all-purpose, unbleached flour, 1 teaspoon granulated sugar, ¼ teaspoon salt, and ⅛ teaspoon baking powder in a stand mixer using the paddle attachment.
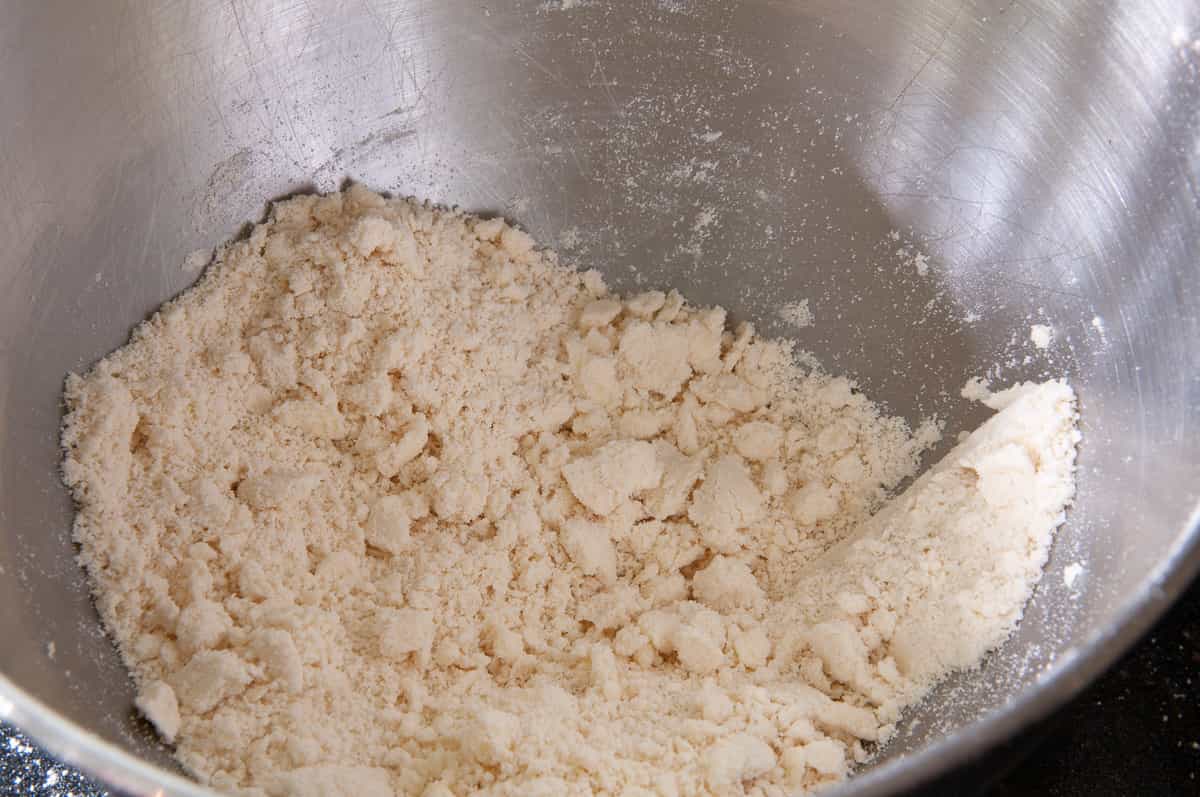
- Cut in the butter: Add the ½ cup (114 g) unsalted butter, cold (pieces), and mix on low speed until the mixture resembles coarse crumbs.
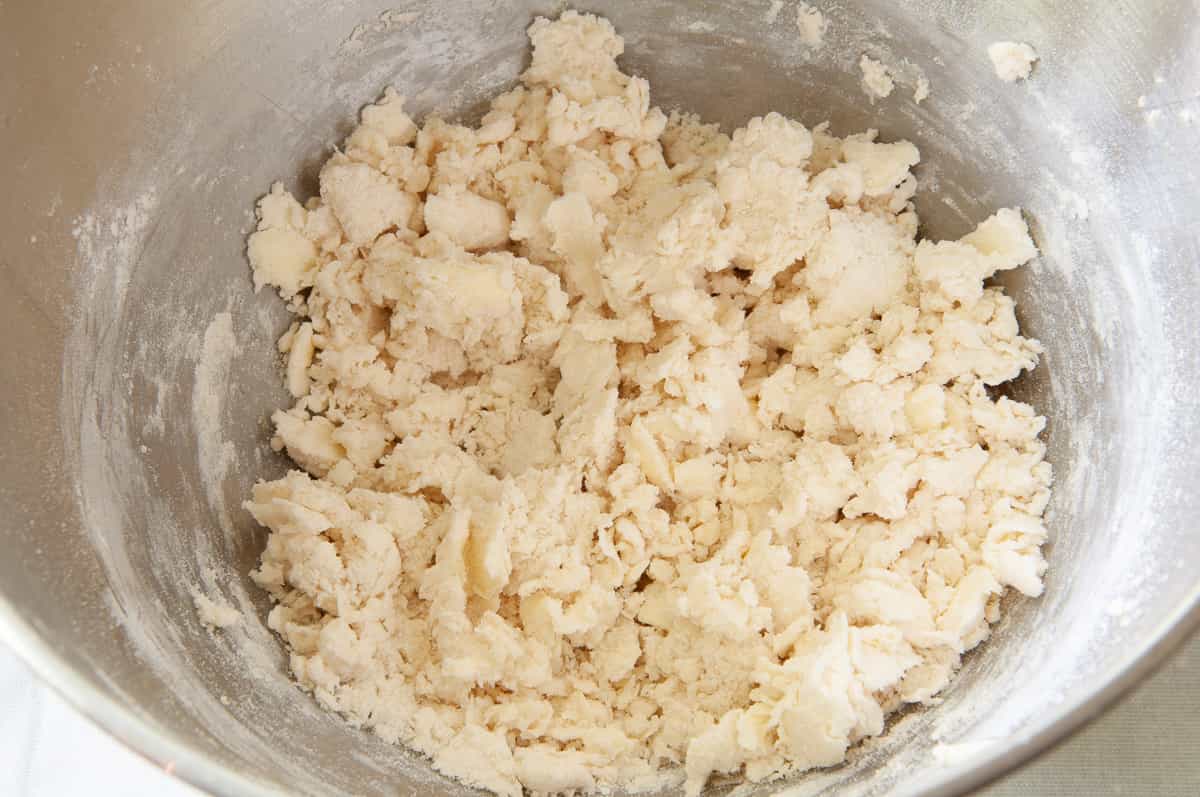
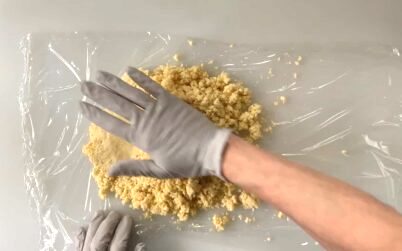
- Add the yogurt mixture: Stir together the ¼ cup (70 g) unflavored regular yogurt or Greek yogurt and 1 (18 g) egg yolk, then add all at once. Mix briefly just until the dough looks shaggy and barely moistened. It should hold together when squeezed but not form a smooth ball.
- Press the dough together: Dump the crumbs onto plastic wrap or a lightly floured towel. Use the palm of your hand to gently press and smear the dough together until no large butter chunks remain.
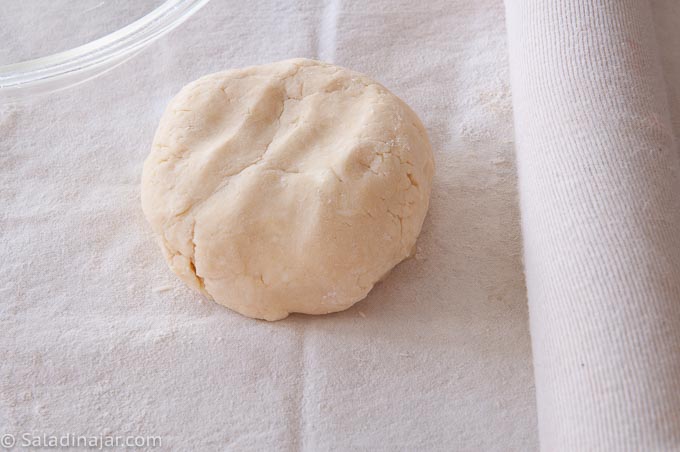
- Shape and chill: Form the dough into a flat disk about 1 inch thick. Wrap and refrigerate for at least 1 hour or up to 4 hours.
- Roll out the dough: Let the chilled dough sit at room temperature for about 10 minutes. Roll into a circle about 1½ inches larger than your pie plate.
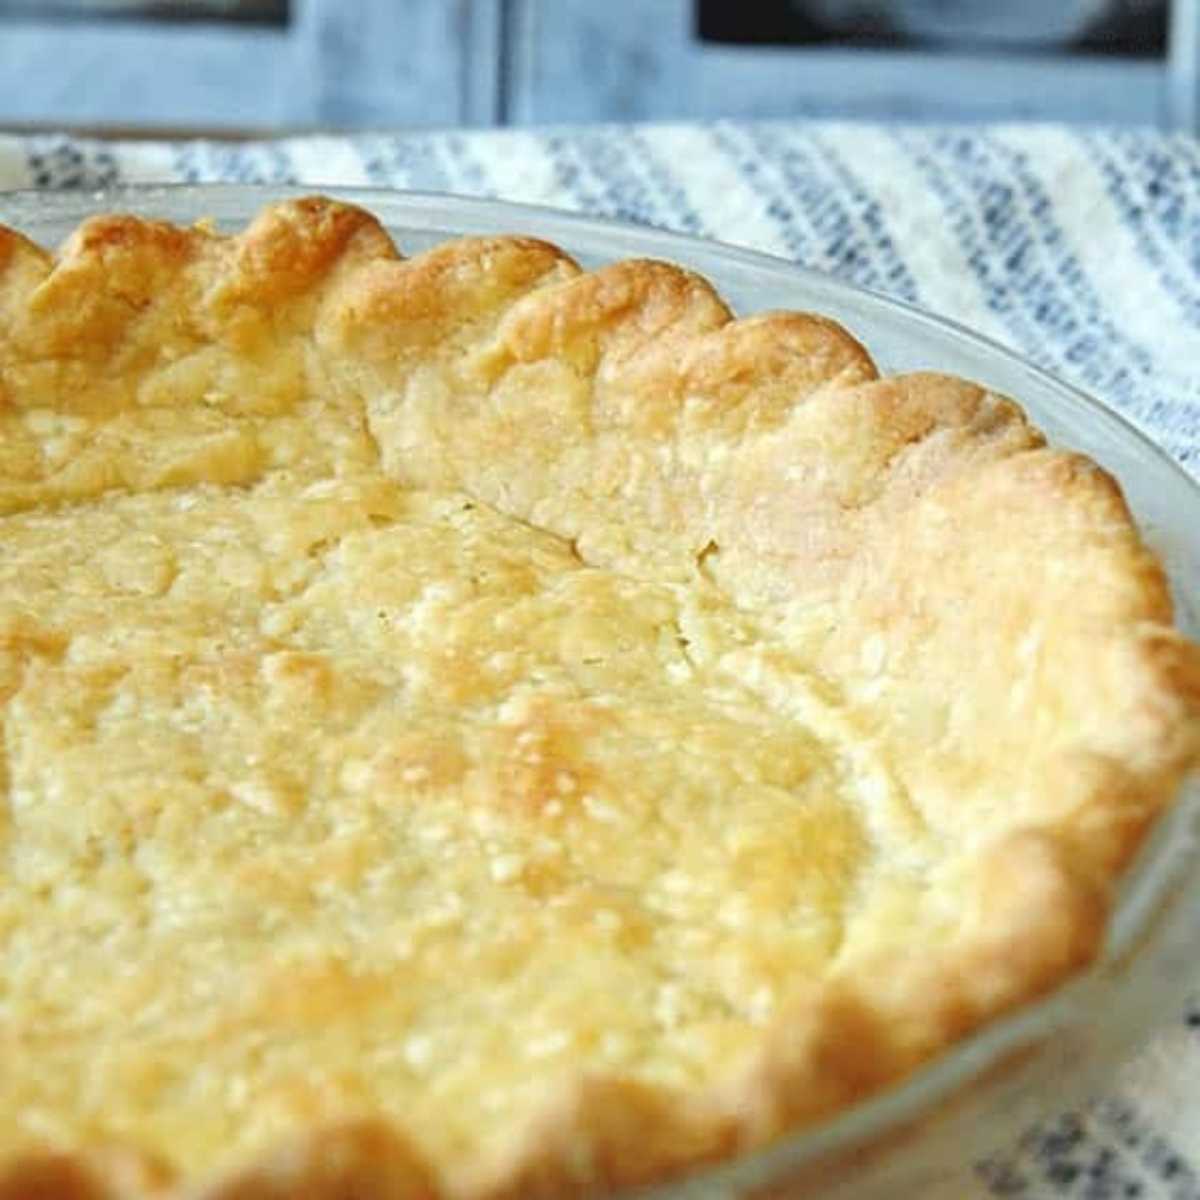
- Fit into the pan: Transfer the dough to a 9-inch pie plate without stretching it. Trim, fold under the edges, and crimp as desired.
- Chill again before baking: Refrigerate the shaped crust until well chilled before filling or baking.
- Bake as directed: Add your desired filling and bake according to your pie recipe. For a blind-baked crust, see the notes below.
Notes
Nutrition
All images and text ©️ Paula Rhodes for SaladinaJar.com
Final Thoughts
This flaky yogurt crust works beautifully for everything from fruit pies to savory quiches, so once you try it, you may find yourself reaching for it more often than your old standby recipe. If you need ideas for a pie to fill this crust, check out my entire collection of pies and mini-tarts here.
— Paula, Home Economist
Homemade Food Worth Sharing
Need help troubleshooting?
Email me: Paula at saladinajar.com — photos help!

This pie dough is amazing! It’s light and not heavy on the stomach.
Hi Sophie,
Thank you for coming back to leave a comment and thank you for the 5-star rating. Hope your pie was delicious!!
I’m curious. What’s the source of trans fat in the recipe?
That’s a good question. It really shouldn’t have any. The calculations are done by an outside source so it’s hard to say where they came up with that.
Great recipe! Delicious but to be honest i just blitzed the lot in my machine on dough function and added the cubed frozen butter and baking powder last for 2 minutes. I didn’t have to blind bake (but i will in future if time or recipe doesn’t permit) i used pastry straight out of chill and resting for traditional french quiche which is slow and low heat baked (3egg savoury no cheese custard essentially ) and the pastry performed extremely well and crisped accordingly after 2 and a half hours. Usually i use quark or cottage cheese but i had the yoghurt and gave it a go and followed the recommended and valid resting times, it was perfection, thank you so much!
Hi Marnie,
You are my kind of cook. The less fussy, the better. Glad your pie crust was “perfection.”
I am assuming I can put the filling in the unbaked pie crust and cook.
This looks like enough to make enough pie dough for 1 bottom crust.
the ratio of butter is high compared to my other recipes. Can I lower the amount of butter and still get a good result?
Hi Mary,
Whether or not you need to par-bake the pie crust depends on your pie. Do what the instructions say. Many recipes are better when partially baked before adding the filling. It depends.
I have not experimented with using less butter so I can’t say for sure if you will have a good result. The amount of butter is the same as many popular recipes including the pie crust recipe from King Arthur Flour.
Absolutely amazing! I used it for chicken pot pie and everyone loved it!
Oh YES! Love to hear this. Thanks so much for writing.
I’m assuming the baking powder gets added with the other dry ingredients.
Yes, you are right. I fixed the recipe. Thanks for taking the time to write. Hope your pie crust turns out good for you.
Forgot – one more question – the sock – just a regular cotton sock (Like a tube sock or crew sock) or is there such a thing as a “Pastry sock”?
I’m pie crust challenged? Can’t roll one out in a circle to save my life. Any tutorials on that?
I make all our pies at the holidays and would prefer homemade over Pillsbury. My Mom used to make them but even she quit making them when she got a pie crust that came in a little box and all she had to do was shape it. Don’t even think it’s made anymore.
Also, what is the purpose of the weights (chain) when baking the crust?
Can’t wait to try this!
Hi Kathy,
Check out my Traditional Flaky Pie Crust with Shortening (Easier for Beginners) where I have more detailed pictures.
The purpose of the weights is to keep the pie crust from rising up in the middle when you are baking it without a filling (something you would do for a cream pie). Is you buy a pastry cloth, it often comes with a “sock” or cover for your rolling pin. It’s open on both ends. Here is one.
Great recipe. Thanks for all your recipes and tip. I’m a much better bread maker thanks to you
Thanks for writing, Pamela. Comments like yours keep me going. Have a great week!!
I am not a great Baker but this recipe turned out magically for me. The pastry is buttery, flaky and crispy. Amazing!!
I have made this several times, and it is delicious. Where is the video on how to smoosh the pie crust on the plastic wrap? After smooshing, how do you get it into a nice ball? Thanks for helping me save money by making my own pie crust.
Oops! Looks like I was planning to do it and completely forgot. Moving that to the top of my to-do list.
Could this recipe be doubled to make a two crust pie? Or should I make two batches. I made this a while back, and it was delicious. Thanks for sharing.
I have tried it and decided I would just make 2 batches next time because it seems to turn out better when I make the batch twice instead of doubling. I’m not sure why. Doesn’t make sense to me. I may try it again.
What why….. This is my go to recipe.. so sad please repost soon!! Thank you for sharing amazing recipes!
Thank you for reposting the recipe!
You’re welcome, Kelly.
I read one comment that mentioned making cookies from pie crus……did not see that anywhere in this article.
I love the idea of keeping lettuce in glass jars & sealing. I eat more salads now.
I’ve never heard of pie crust cookies but you could easily use the pie crust dough and cut out “cookies” with a cookie cutter. Sprinkle with cinnamon sugar and bake. Invite me over to eat some.
Glad to hear you are eating more salad. The vacuum-pack technique did the same for me.
Dear Paula. I like the recipe but I would like to make it with non fat yogurt. Do you know what the nutitional values of the fat, protein, energy, etc might be if i use low fat yoghut? Do you know how I can calculate this? Perhaps you can direct me to a website that calculates this? Thank you very much.
You might take a look at Nutritionix. https://www.nutritionix.com/consumer
I’m a novice pie maker. This will be my first try at a crust. The one thing I wonder about is substituting a margarine for the butter? Do you think it would turn out or flop?
Hi Neal,
Substituting margarine for butter in pie crust can work but it may affect the taste and texture. You will probably have less flakiness because the water content of butter is different from margarine. The dough may become sticky and greasy,
I use this pie crust regularly…for apple pie, for peach pie, for chicken pot-pie, for pumpkin pie. Is is delicious…and a little bit different. It is also simple and “fool proof”.
I think I found my new way to make crust, so trying this out soon! Thank you!!
I have been making mine with all butter and cold water for the longest time. when you posted yours earlier this year with the yogurt i had to try and I keep coming back for it. Its the perfect crust for us and is my go to now. Just came back looking for it since I cant find my copy (we just moved across country). Thanks for the perfect crust for us!
I thought I was seeing doubles!! I read this exact recipe then realized one was supposed to be an adaptation. Not an adaptation to me! I know some people are very territorial about their recipes. I just read a review on one blog where an actual adaptation was ripped apart by the original author as not being adapted. Just thought you would like to know.
http://www.alaskafromscratch.com/2013/11/13/flaky-butter-greek-yogurt-pie-crust/
just wanted to let you know this has been my go to crust since you posted it. I usually use sour cream instead of the yogurt. Thanks so much.
Cool! Haven’t tried sour cream but why not? Sounds great.
I make my pie crust in a food processor, takes the work out of it and it always comes out perfectly in seconds. The mess is contained in the processor, less clean up. First, pulse the dry ingredients and the fat ingredients until it flakes into small crumply pieces then add your wet ingredients and put processor on slow to medium speed until the dough forms into a ball all by itself. I put my butter in the freezer for 10 minutes before using it for pie crust. I roll my crust between wax paper. I used apple cider vinegar in mine but I am going to try this pie crust recipe, it sounds and looks yummy.
For 30+ yrs I have made pie crust w/ lard and egg yolk and vinegar. I thought the vinegar was only to neutralize the lardy taste. Wow that acid must be what makes it flakey. What a revolation. I love the buttery taste and it is getting very hard to get pure lard. The only thing I would recomend (who am I to try to teach you ) is using a food processor instead of the stand mixer. I have tried both and seem to have more control w/ the FP. I think it’s because the dough is just handled less that way. Also it is so quick. I just assemble all measured ingredients in various containers and do one recipe at a time. I have very arthritic hands and I can still make 5-6 pastry disks ready for freezer in less than 40 minutes.
I enjoy your site and every recipe I have tried ( a good many) and always tell everyone where I got the recipe.
Meet you in person in heaven someday. Maybe we will share a kitchen.
I use this pie crust regularly…for apple pie, for peach pie, for chicken pot-pie, for pumpkin pie. Is is delicious…and a little bit different. It is also simple and “fool proof”.
I think I found my new way to make crust, so trying this out soon! Thank you!!
I’ve had this pinned for quite some time and I wish I had found it/did it sooner!! It turned out SO WELL!! I made it with greek yogurt {I followed your direction of thinning it down} and used it as the crust for a strawberry cream pie. My friends couldn’t stop complimenting!! So happy to have found a healthier pie crust! Thanks for sharing.
You’re welcome, Michelle. It is one of the best-kept secrets on this blog.
I just found your blog and recipes through Pinterest – I LOVE the sound of this pie crust! I have been on a very similar mission to find the perfect crust and I am super excited to try this one out! Thank you for sharing!! And, of course, I pinned both the crust recipe as well as those delicious looking crust cookies! Yum!! 🙂
Thanks Jade,
Hope you like it. It’s the flakiest pie crust ever! pr
I have been making mine with all butter and cold water for the longest time. when you posted yours earlier this year with the yogurt i had to try and I keep coming back for it. Its the perfect crust for us and is my go to now. Just came back looking for it since I cant find my copy (we just moved across country). Thanks for the perfect crust for us!
I’m the family pie maker at Thanksgiving- I can’t wait (but I will for the sake of my waistline) until the fall when I can pull out this recipe! Thanks! I’ll report back in November… PS I bought all the stuff I need to make yogurt- now I need to work up the courage to actually do it!
This looks so fabulous. It’s going on my must-try list!
I am pie crust impaired, but you can bet I am going to try this!
Vodka piecrust is my favorite, but I can’t wait to try this!
Hi Tamara, If you’re talking about the one in Cooks Illustrated, I’ve tried it too. Good. I think you would enjoy this one too.
Who need the filling when you have such a nice flaky crust.
Mimi
Perfect looking pie crust! I love the “cookies” – that’s what I call a cook’s reward. 😉
Paula, I learn so much from you!! This is brilliant! Love this post…your instructions are perfect. I have had my eye on the Flour book for a while now…I think its time to be added to my collection! Thanks for this…have a great week! xo
I’m not much of a pie crust making person but this looks so flaky, easy, and good. I’m still admiring not only the crust, but the banana custard pie too! 🙂
Looks like a very interesting recipe. I like the idea of the tang of the yogurt. I’ll bet you could also make the dough in a food processor.
A food processor would work or you could just make it by hand the old-fashioned way.
It looks and sounds just wonderful! Who needs filling, right?
wow, you are a very good cook, that looks delicious.
I have several excellent pastry recipes, but have never tried one with yogurt. Will definitely give this a try.
Yay! The crust recipe is here! Not that I’ll dare make it…but I can admire it from afar…
You are so smart! Your crust looks wonderful.
Pie crust and I have a love-hate relationship. I love eating it and hate making it. 🙂 I’ll have to try this one- I haven’t found one yet I couldn’t mess up but I hope this one will be the first!
By the way, my pastry cloth is so worn out there is a hole in the middle, but I cannot find a new one. Everyone seems to have gone to the silicone mats. Does anyone know where to find the old-fashion pastry cloth and roller stocking???
I just bought a new one at Ace Hardware. Have also seen them in the grocery store. You can always use a linen-like dish towel if it’s big enough.
It is sooooo good and easy too.