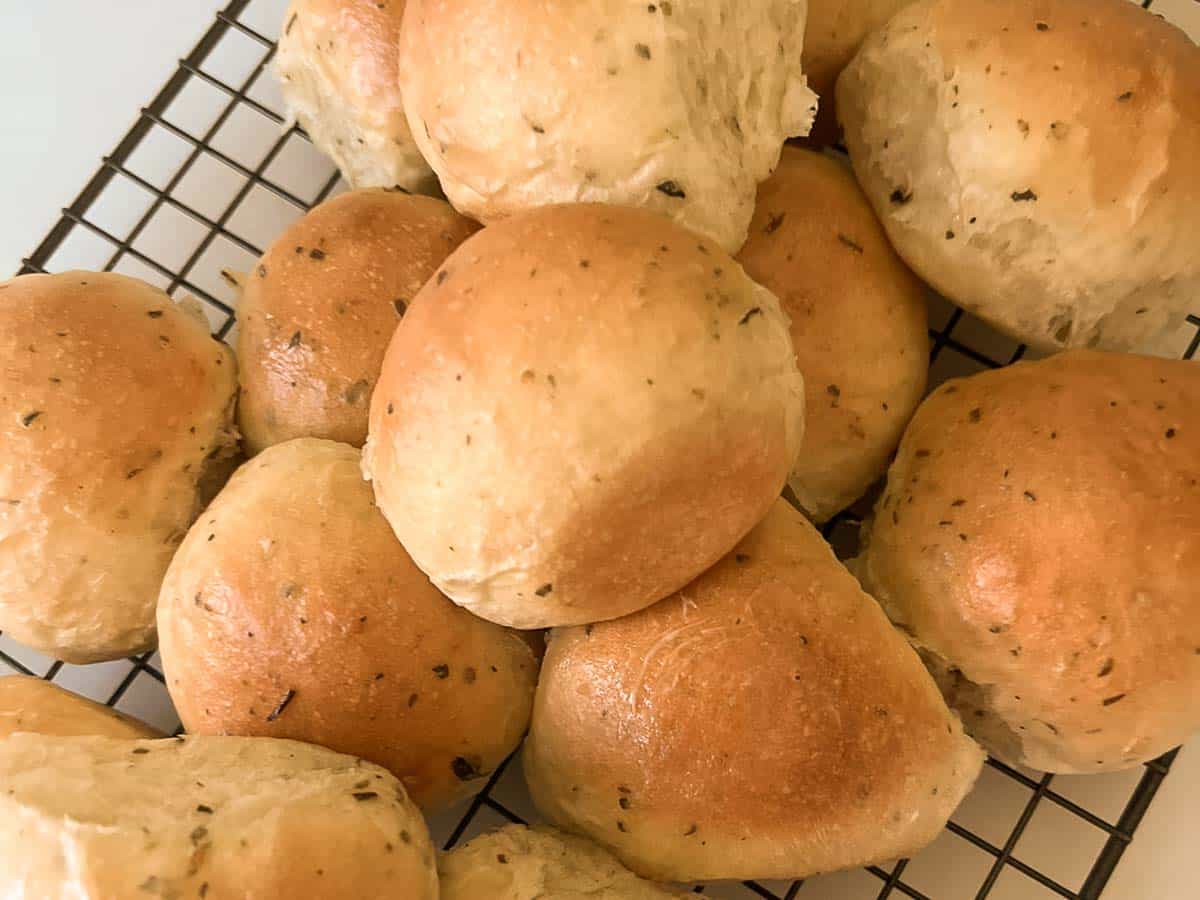
Herb and Garlic Dinner Rolls (Bread Machine Recipe)
Sneak Preview: Soft and buttery, these herb and garlic dinner rolls start with dough mixed in your bread machine. Shape, rise, and bake for warm, savory rolls that pair perfectly with weeknight dinners or holiday meals.

This post contains affiliate links. As an Amazon Associate, I earn from qualifying purchases at no extra cost to you.
Every year around Thanksgiving, I share a new dinner roll recipe. My goal? Rolls that are memorable but not fussy.
These soft, chewy herb and garlic dinner rolls are mixed and kneaded in your bread machine, then shaped and baked to golden perfection. They’ll make your house smell like you’ve been baking all day — and they’re just as welcome with a weeknight roast chicken as they are with a holiday turkey.
Ingredients & Substitutions
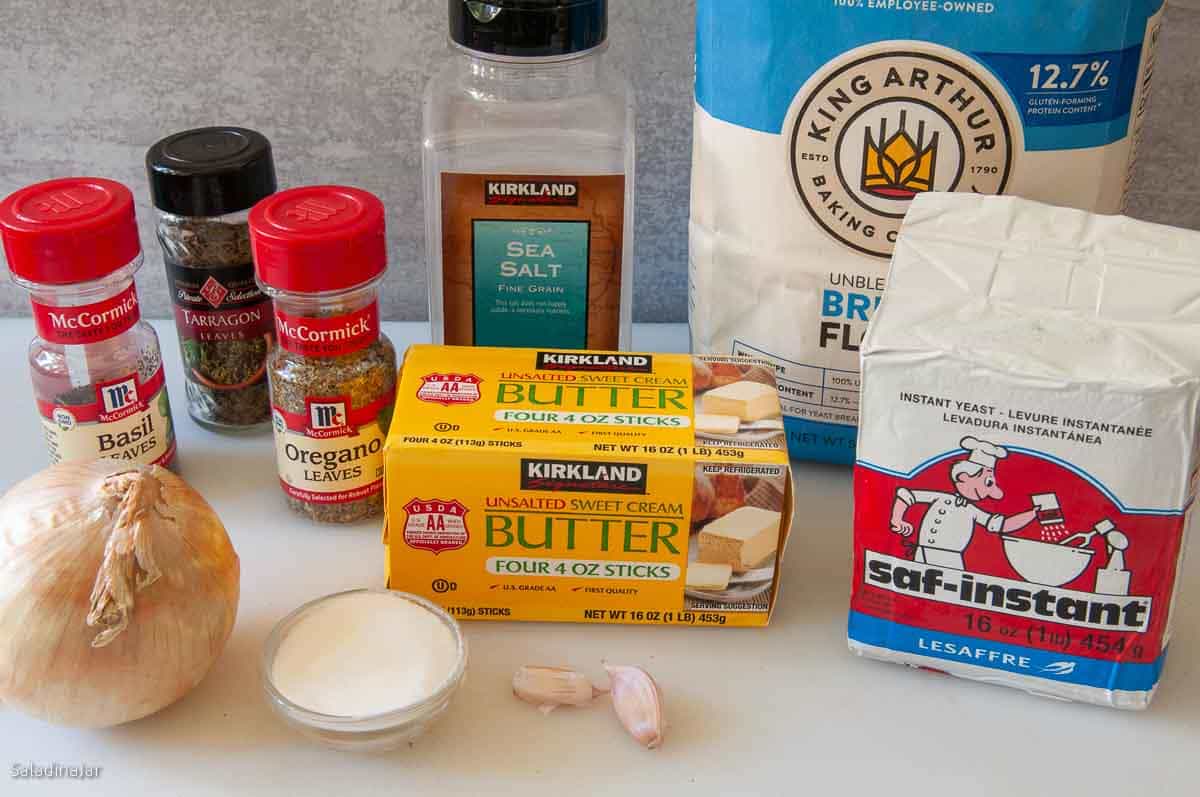
BUTTER: Unsalted for the best flavor.
ONION: Fresh, frozen, or dried minced onions all work.
GARLIC: One clove, minced; bottled minced garlic works too. Use garlic powder only in a pinch.
HERBS: Dried oregano, basil, and tarragon add depth; optional if missing one.
WATER: Cool tap water is fine when using a bread machine.
SALT: Table or sea salt; add ¼ teaspoon more if using kosher.
FLOUR: Unbleached all-purpose for softness; bread flour for a chewier roll.
YEAST: Bread machine or instant yeast preferred; active dry works but rises slower.
SUGAR: A touch for balance and yeast activation.

Step-by-Step: Herb & Garlic Rolls with a Bread Machine
⬇️ Jump to the recipe below for exact amounts and detailed instructions.


Tips That Make a Difference
- Check dough early: Open the lid at 1 minute to ensure paddles are engaged.
- Check texture at 15 minutes: Dough should stick, then pull away cleanly. Adjust with small spoonfuls of flour or water.
- Use dried herbs: Fresh herbs lose flavor during baking.
- Shape evenly: Smooth balls rise and bake more evenly.
- For a soft crust: Brush with butter immediately after baking.
Herb and Garlic Rolls (Bread Machine Recipe)
Video
Ingredients
- 4 tablespoons (57 g) butter
- 3 tablespoons (10 g) onion, finely chopped
- 1 clove garlic, minced
- ¾ teaspoon dried oregano
- ¾ teaspoon dried basil
- ¾ teaspoon dried tarragon
- 1 cup (227 g) cool water
- 1 teaspoon table or sea salt
- 2 teaspoons granulated sugar
- 3 cups (360 g) all-purpose unbleached flour
- 1½ teaspoon instant yeast
Instructions
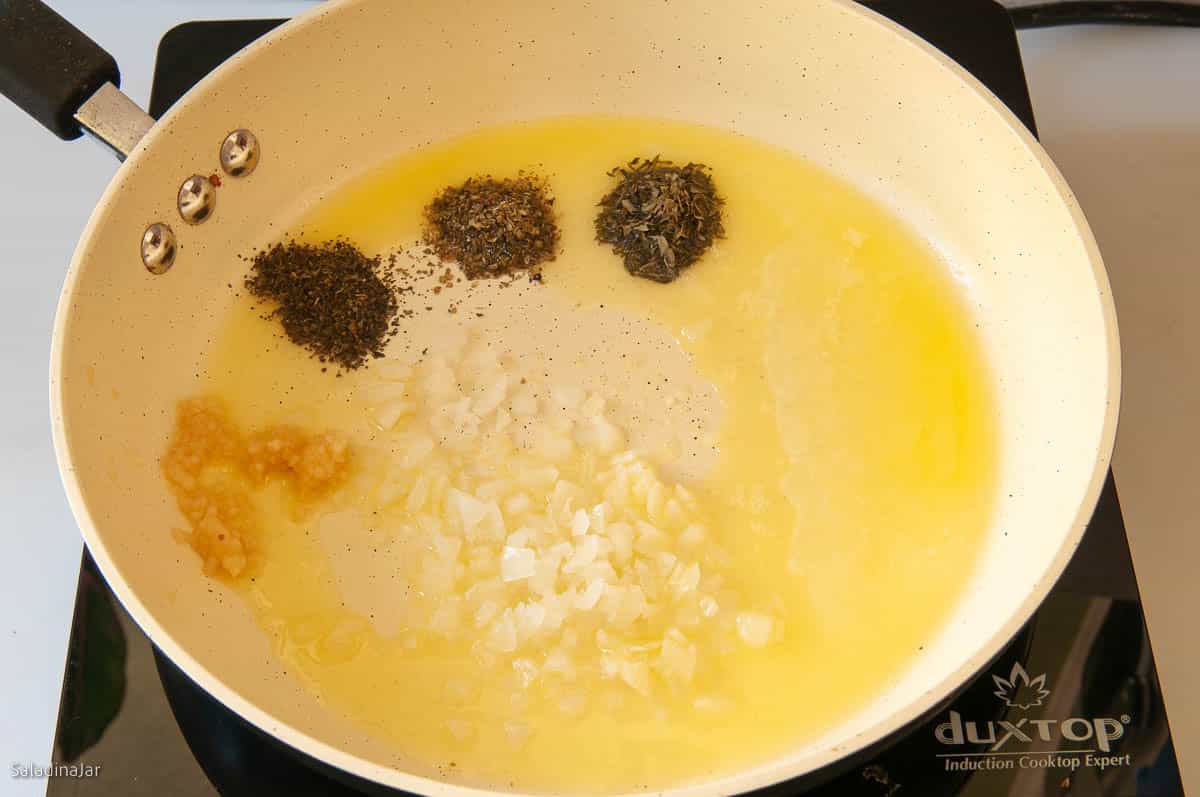
- Sauté aromatics: Melt 4 tablespoons (57 g) butter in a small skillet and sauté 3 tablespoons (10 g) onion, finely chopped, 1 clove garlic, minced, ¾ teaspoon dried oregano, ¾ teaspoon dried basil, and ¾ teaspoon dried tarragon, over medium/low heat until the onions are soft. Pour immediately into the bread machine pan to cool.
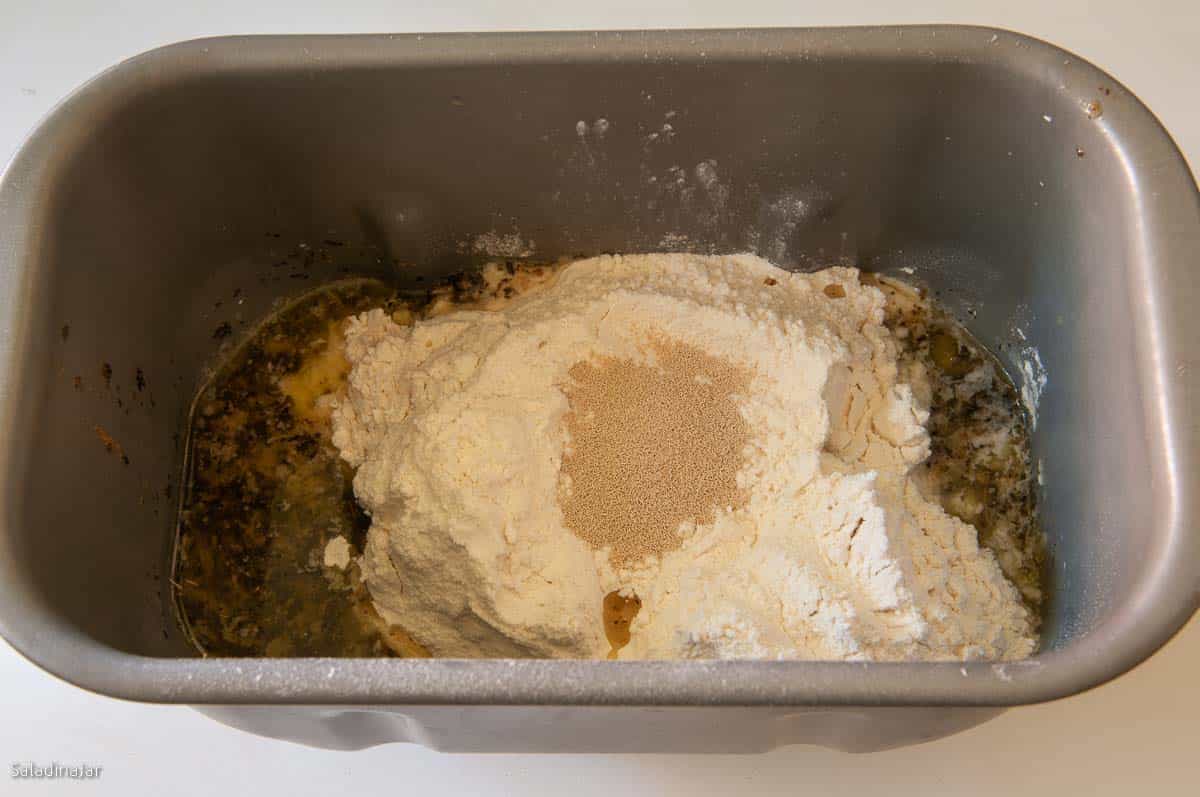
- Add ingredients: Add 1 cup (227 g) cool water (on top of the butter mixture to cool it down), 1 teaspoon table or sea salt, 2 teaspoons granulated sugar, 3 cups (360 g) all-purpose unbleached flour, and 1½ teaspoon instant yeast in the order listed.Select the DOUGH cycle, then push START.
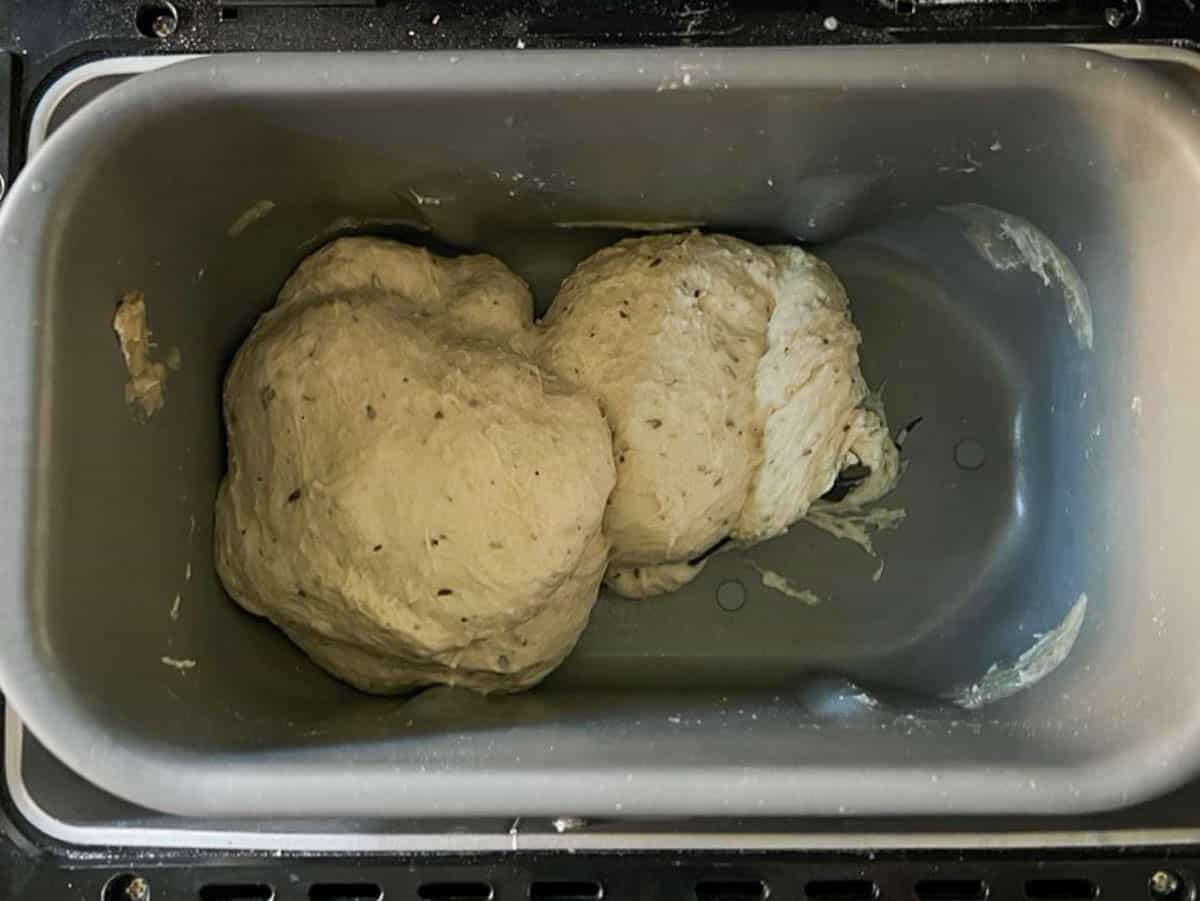
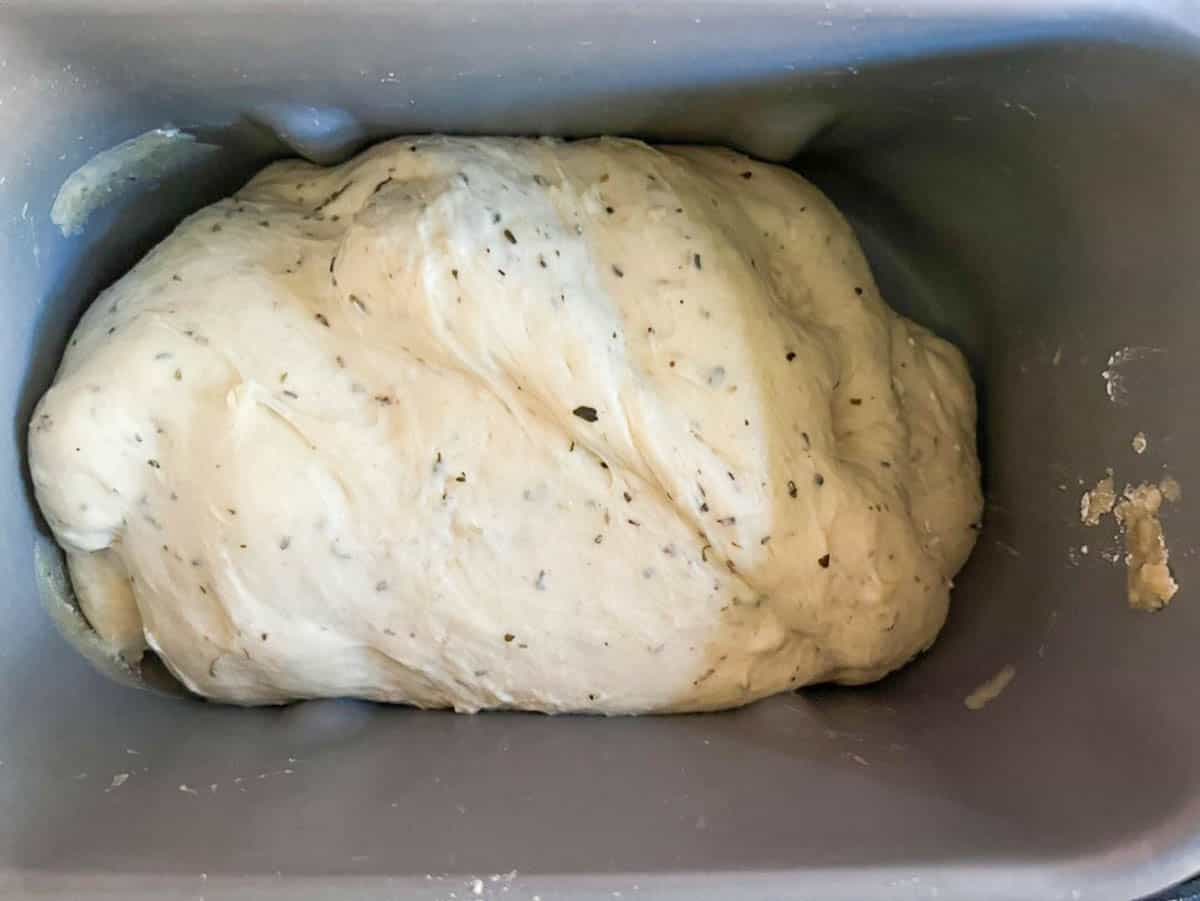
- Check after 1 minute: When the machine starts to mix, lift the lid and check the dough to make sure the paddles are engaged. The dough should start to clump immediately. Recheck 12-15 minutes later. Open the lid and watch the dough knead. The dough should stick to the sides, then pull away cleanly. If the dough is too wet, add flour one tablespoon at a time. If the dough is too dry, add one tablespoon of water. Allow time between each addition for the dough to absorb the water or flour before adding more.
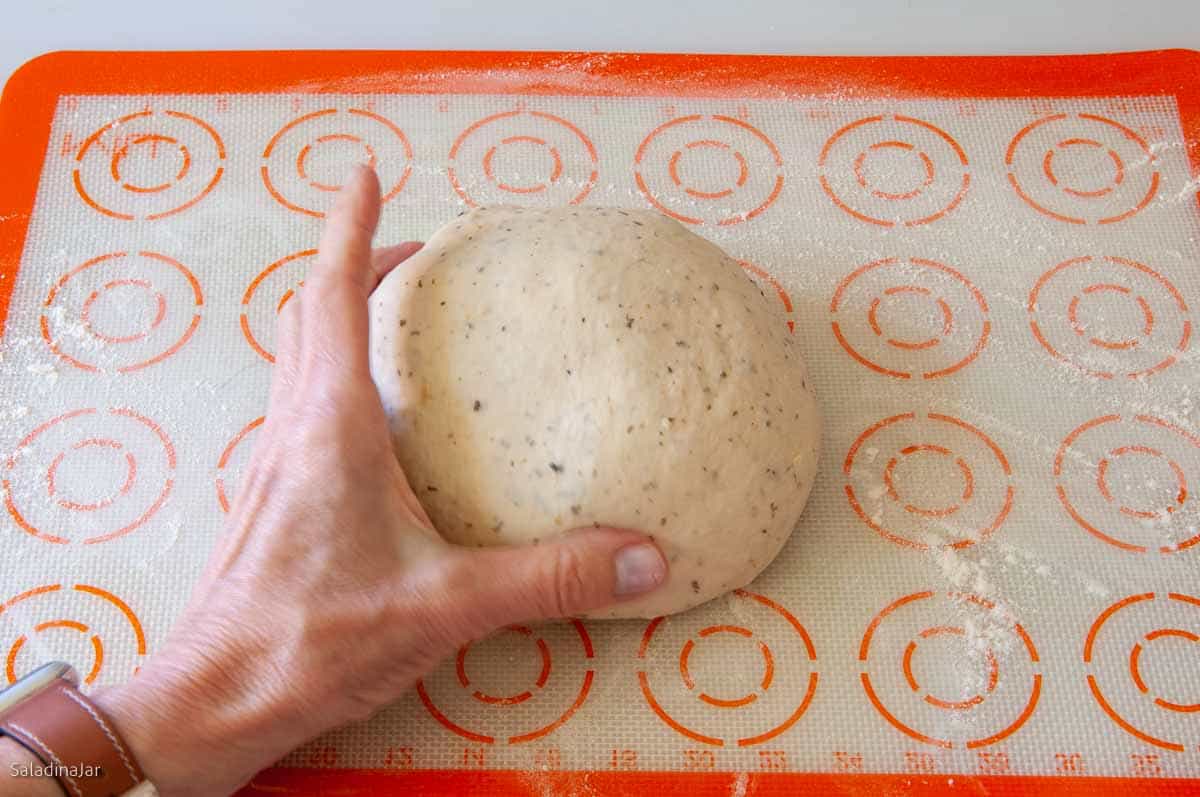
- Finish DOUGH cycle: Check to ensure the dough has doubled in size. If so, remove the dough from your bread machine pan onto a floured surface. (If your house is on the warm side, check the dough before the DOUGH cycle finishes.)
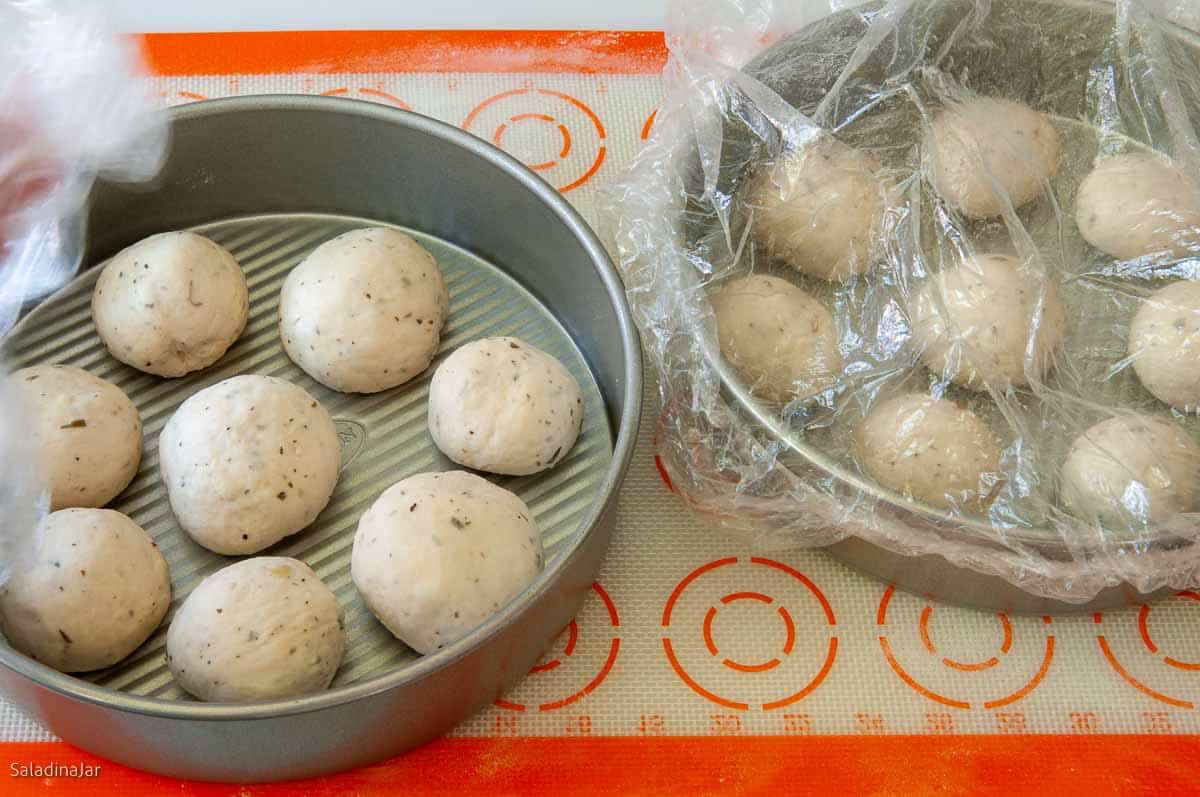
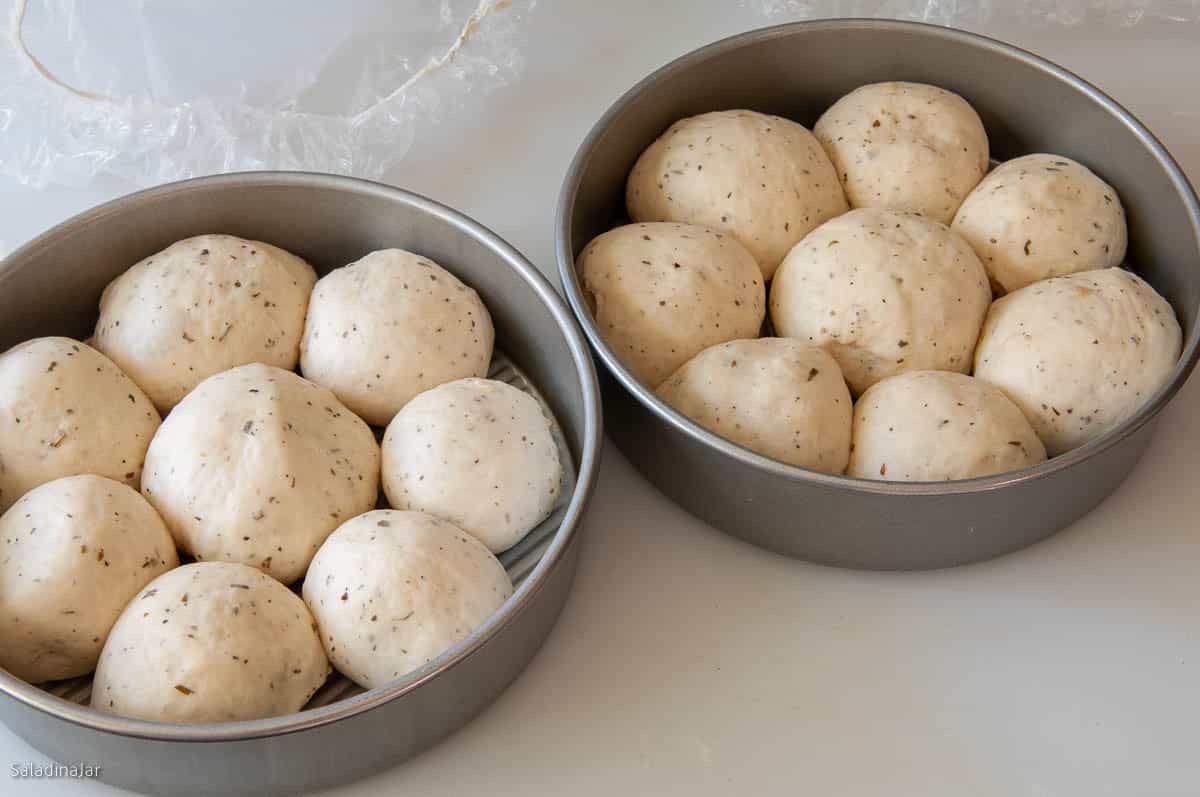
- Shape rolls: When the cycle ends, divide dough into 16 pieces. Shape into smooth balls and place 8 each into two greased 8-inch pans.
- Rise: Cover and let rise until almost doubled.
- Bake: Bake at 400°F (200°C) for 12–15 minutes, until golden brown.
- Cool: Move rolls to a wire rack and brush tops with butter if desired.
Notes
1️⃣ Add ingredients to the bowl in the listed order.
2️⃣ Mix on LOW until moistened, then knead on speed 2 or 3 with a dough hook for 5-10 minutes until smooth and elastic.
3️⃣ Cover and let rise in a warm place until doubled.
4️⃣ Gently deflate and shape as directed in the recipe. ? By Hand:
1️⃣ Mix all ingredients into a shaggy dough ball in a large bowl.
2️⃣ Turn onto a floured surface and knead for 10-20 minutes until smooth and elastic.
3️⃣ Place in a greased bowl, cover, and let rise until doubled.
4️⃣ Gently deflate and shape as directed. Yeast Tip: Using active dry yeast? Increase by ¼ teaspoon. It no longer requires dissolving, but you can if preferred.
-
- Begin mixing on low speed until all the ingredients are moistened.
- Switch to a dough hook attachment and increase the speed to 2 or 3.
- Continue beating/kneading until the dough becomes smooth and elastic, typically about 5-10 minutes.
- Cover the dough and let it rise in a warm place.
- Once risen, gently deflate the dough and shape it as the recipe directs.
- Combine all the ingredients in a large bowl until they form a shaggy ball.
- Turn the dough out onto a floured surface.
- Knead the dough with your hands until it becomes smooth and elastic. Depending on your experience, this may take 10-20 minutes.
- Place the dough ball in a greased bowl.
- Cover the bowl and allow the dough to double in size.
- After rising, gently deflate the dough and shape it according to the recipe’s instructions.
Equipment
Nutrition
All images and text ©️ Paula Rhodes for Salad in a Jar.com
FAQ About Herb Rolls with Garlic
- Can I make these ahead?
- Yes. Refrigerate the dough after the DOUGH cycle or refrigerate shaped rolls overnight. Bring to room temp, let rise, and bake.
- Can I use fresh herbs?
- Stick with dried for consistent flavor during baking.
- Should I butter before baking?
- No. Brush with butter after baking for a shiny, soft crust.
Final Thoughts
In case you are a new reader, here are some recipes I’ve introduced in past years specifically at Thanksgiving. They include Sweet Potato Dinner Rolls, Browned Butter and Rosemary Dinner Rolls, and Helen Corbitt’s Monkey Bread (this one is savory). Here’s a collection of 17 dinner roll recipes if you want more choices.
Need help troubleshooting? Email me: Paula at saladinajar.com—photos welcome!

Would it be possible to add the onion, garlic and spices to the whole wheat roll recipes?
Hi Jill,
Yes, I think that would be delicious. Let me know how your rolls turn out.
Excellent roll when you meal is plain these rolls take it to the next level.
Thank you Jacqueline. I could agree more. Glad you enjoyed them.
The rolls are perfect with hot soup or stew. The onion and herbs give the rolls a great flavor. They would be good with Italian dishes.
Can I make these in brownie pans? Since the pans are square do I just line the pieces of dough in rows?
Hi Jean,
Oh yes, but you may want to make 9 rolls instead of 8 so your rows turn out even. They will be delicious either way.
Love this recipe, the rolls are delicious and they freeze/defrost well. (I have a small family at home, we won’t eat 16 rolls in one sitting. ?) They’re also great for sharing with friends and family. We added on butter and some cheese on top and it was delicious too! Thank you so much for sharing!
Quick question- when I make this I set the loaf size to 1.5 lbs on my bread machine, is this right? Does it matter when you’re just using the dough cycle?
Hi Alex,
I’m thrilled to hear from you that your rolls were delicious.
The answer to your question is, “It doesn’t matter, when using the DOUGH cycle.”
8.5 – remove shower cap
Oh no!! Did you put the rolls in the oven covered? Yikes.
They are on their final rise and I’ll be putting them in the oven shortly. I do have a question though. I want to know how to time them to be ready for dinner. If I make them earlier in the day is there a way to slow down their second Rise? Can you do that? Should you do that? Thanks.
Hi Christine,
Yes, there are some ways to control the time-of-arrival:
1. Change the amount of yeast. If you want the dough to take all day to rise, reduce the yeast drastically. In a hurry, increase it a bit. This might take some experimenting to figure out the exact amount you need to use. Using less will only improve the flavor.
2. Manipulate the environment. Put the dough in the fridge after the DOUGH cycle ends to give you more time. But remember to allow time for the dough to warm up and rise again before baking. Of course, the longer the dough sits in the fridge, the more time you will need to allow on the other end before baking.
3. Temperature is not the only factor. Humidity can also speed things up. That’s why placing your bread inside a microwave oven with a boiling cup of water can cause a fast rise. (Don’t turn the oven on with the bread in there.)
4. You can make most bread dough recipes the day before and chill after the DOUGH cycle ends. The next day, remove the dough and make out your rolls. You may have to let the dough warm first so you can manipulate it. This will add an hour, plus or minus.
If you have any questions, write back.
Thank you for this wonderful recipe. It has been a staple at our Thanksgiving (and other meals, too!)since I saved it in 2014. Paula, I think of you as my kitchen smells like Heaven! Happy Thanksgiving!
Loved these rolls with lasagna for my family. They were so easy to make and for a fun presentation I shaped them like a wreath.
I’m so glad to hear you liked them, Chelsea. I make these rolls just to make the house smell good.
Hi Paula,
I was just reading your recipe for the Herb and Garlic Yeast Buns. I’d like to add more garlic. Would this affect the recipe?
Can this recipe be used to make as a loaf of bread instead? If so, what adjustments would be required to the recipe. I’m thinking that the bake time would be longer.
Would like to make this tomorrow. Hope to hear from you soon.
Hi Ruth,
I don’t think it would hurt anything to add more garlic.
I haven’t tried making a loaf with this recipe. The rolls are pretty soft. I’m sure you could make a loaf, but I’m guessing it wouldn’t be very sturdy. You might try making a loaf with 3-4 large rolls inside a loaf pan like you see in this brioche loaf (towards the bottom of the post. If you decide to try it, let me know how it goes
I’ve been making these since I saw the recipe in 2014! Have used for Thanksgiving and Christmas, as well as “regular” days! The fragrance while cooking is heavenly. We also enjoy using them for sliders. Thanks, Paula, for the recipe.
Thanks Barb! I agree regarding the fragrance. Worth making just to make the house smell good.
Paula, I love your cute story of chopsuey, that would be pretty funny. We sister-in-laws have been able to take control of holiday dinners for the last 10 or 12 years and one year we decided to do Mexican theme for Christmas dinner and my mother-in-law was not happy, and I think we kinda did it just because we knew we could 🙂 Love your rolls, one year I sent the link to one of the gals coming to our house for Thanksgiving and we all enjoyed your recipe for rolls!
Hi Suzanne,
Thanks for the good laugh about your Mexican dinner. One year I did a Cajun thanksgiving. We still had turkey (a turducken) and dressing (with a decidedly Cajun twist) but I could tell I was skating on thin ice.
Yummy
Thanks, Paula. These sound lovely, a real meal maker. I don’t know which one to try! Have a great holiday with your loved ones.
Ah…..so many choices. I have trouble making a decision most every time I decide to make bread, so often, I just ask the nearest person around me what they are hungry for.
This looks so yummy. I love bread machine recipes.
I tried to pin this but can’t find a pin for it on your boards. When I tried pinning it myself it won’t come up through the link to this post? I’d love to have save this to try for Thanksiving.
Thanks for the heads-up Jen. I pinned it to my board. Also, if you hover over the picture (and hold your mouth just right) a little pin-it button will appear.
Thankyou!
I didn’t thinka bout hovering over the picture though I did try that after your suggestion & th epin didn’t come up. I did pin it through your board though.
I’ve followed you for a long time now & love your blog.
“The aroma of the herbs and onion sauteed in butter will magically transport you to Paris.” You got me right there. Must make because I’d love to be back in Paris. 🙂
Please take me with you. 🙂