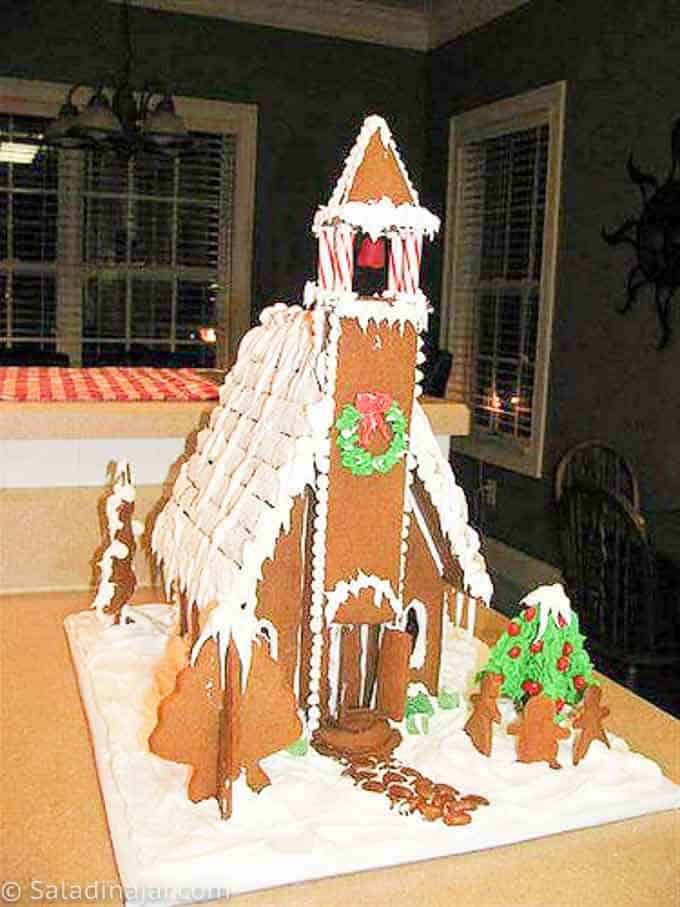
How To Make a Gingerbread Church House
Sneak Preview: How to Make a Gingerbread Church House includes patterns and directions for making a gingerbread church house to celebrate the holidays.
This post contains affiliate links. As an Amazon Associate, I earn from qualifying purchases at no extra cost to you.
Imagine what it would be like to build a gingerbread house with a parent or grandparent. What a memorable tradition!
My sister Kay has a legendary and longstanding reputation for making gingerbread houses.
How do I know?
The local newspaper published an article with pictures of her houses. In my book, that makes it official.
Her grandkids (Ellie pictured here) may not carry on the legacy, but the memories of watching and helping my sister work may be even more valuable.

She took pictures of the process recently and was gracious enough to write the instructions.
If you are looking for…
- a new holiday tradition,
- and you have a little bit of patience,
- and you have kids or grandkids who like projects in the kitchen
See the printable recipe for gingerbread at the end of this post. My sister has written a detailed tutorial to hold your hand through the process.
Happy Bakers Speak Up
I think this is THE go-to site for gingerbread church. Thanks so much.–Katie
How To Assemble a Gingerbread Church Hous e
Click here to see pattern pieces for making a churchhouse.
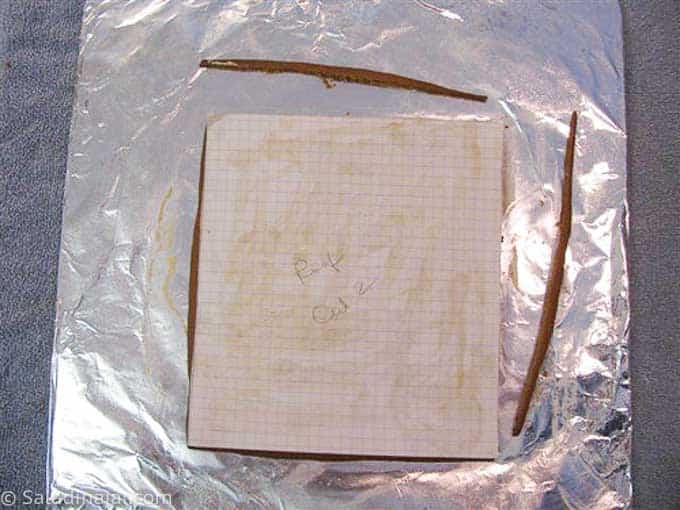
Preparing pattern pieces:
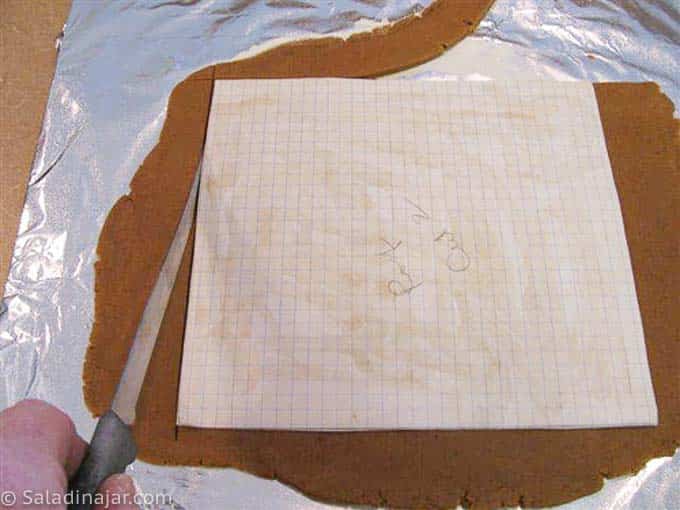
A manila file folder is a good weight of paper to use for the patterns. I prefer regular paper glued to the dull side of freezer paper (found in the foil, plastic wrap, etc., a section of your grocery store). The bottom of the pattern will then be the shiny side of the freezer paper and will resist moisture, flour, grease, etc. Write a description and the number you need to make on the top of each pattern piece. For example, “roof – cut 2.”
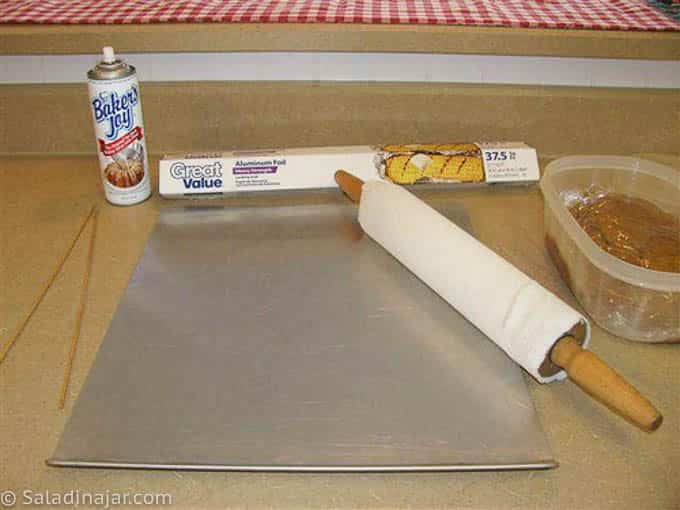
First: Prepare your baking sheets.
I prefer the air-insulated cookie sheets because they cook more evenly, and there are no rims on three sides. You can also use a jelly-roll pan turned upside down.
Cover the baking sheet with heavy aluminum foil and spray it with Baker’s Joy.
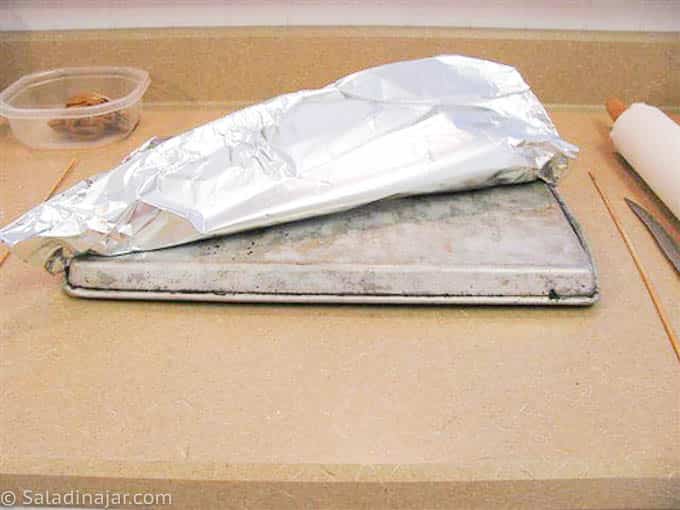
Second: Place your cookie sheet on a bath towel folded in half.
The towel prevents it from sliding around on the countertop. It will also catch some of the floury mess.

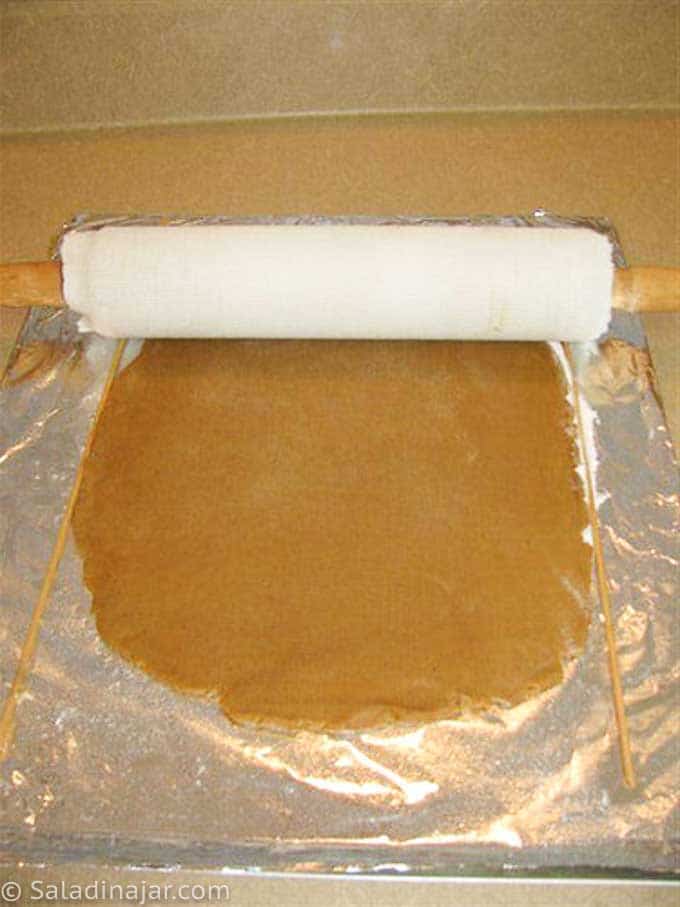
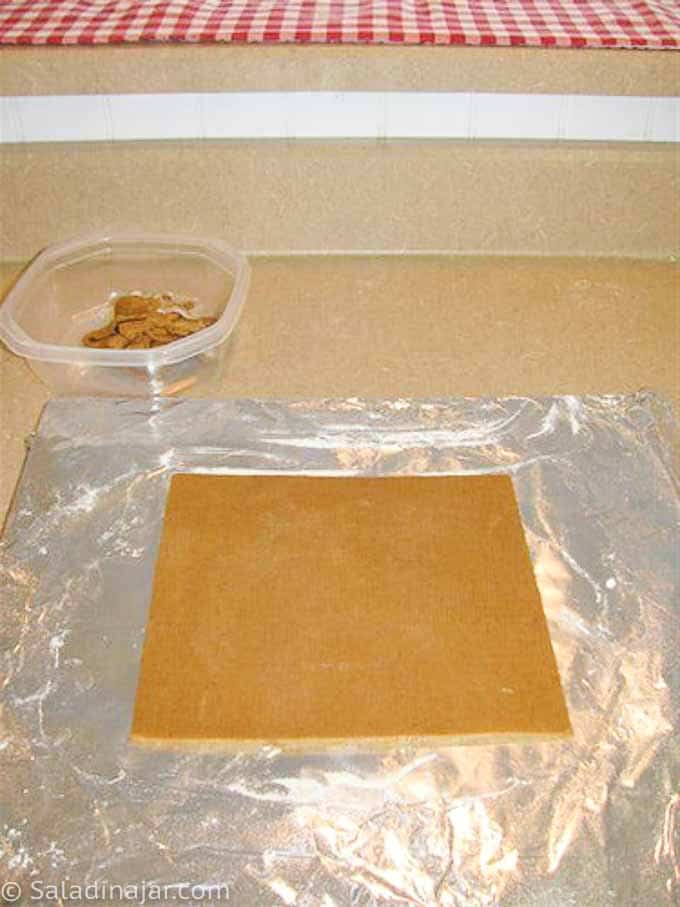
Third: Roll out the chilled dough directly on the prepared cookie sheet.
Make a ball of dough about the size of two fists and flatten it slightly with your hand into a rectangular shape. Using a rolling pin (preferably covered with a pastry stocking) and flour, as needed, roll the dough out to 1/8″ thickness.
Use two 1/8″ dowels (available at hardware or craft stores) cut the length of the cookie sheet. Letting the ends of the rolling pin rest on dowels gives a more even thickness. That’s important!
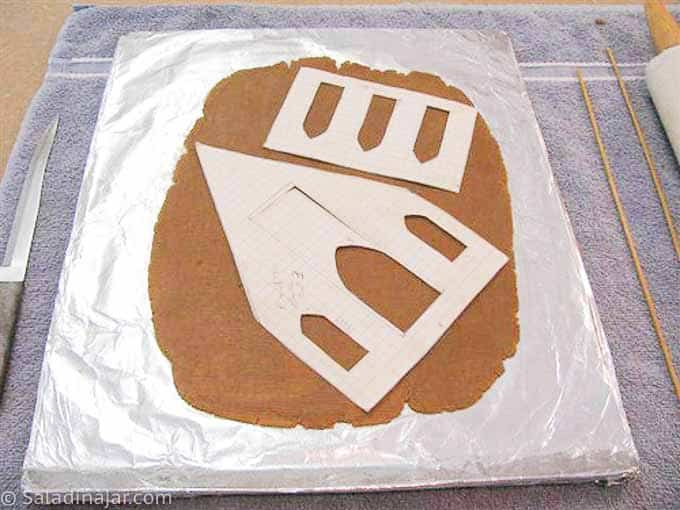
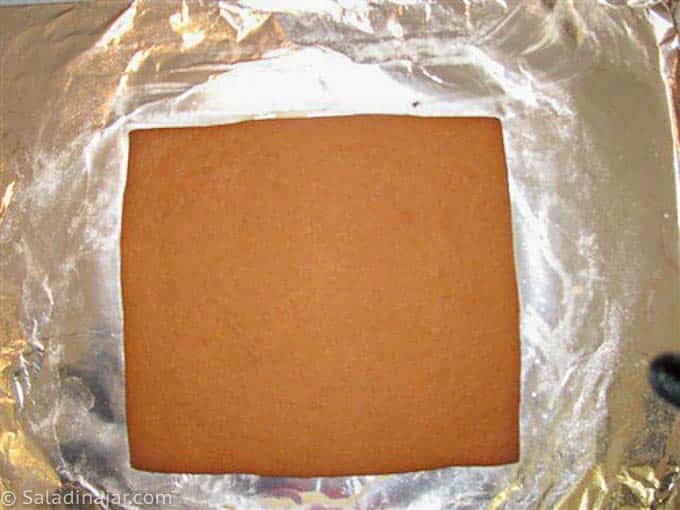
Fourth: Lay your pattern pieces on the rolled-out dough.
Allow about a half-inch margin around each piece to allow for expansion as it bakes. Cut around each pattern piece using your thinnest knife with a sharp tip. Carefully remove the dough between the cut pieces and return it to your dough bowl. Remove the paper pattern.
Make your largest pieces first, and since small pieces bake much faster than large ones, try to group pieces on each tray that are somewhat the same size.
The KEY to successfully cutting out gingerbread is to keep the dough chilled as much as possible.
Rolling out the dough and putting it in the freezer for 30 minutes before cutting the pieces works well. Keep the unused dough in the refrigerator as much as possible.
Working with 3 or 4 trays makes it easier to get a “system” going for rolling, cooling, cutting, baking, etc. If you still have trouble with the pattern pieces sticking to the dough, dust the bottom of the pattern lightly with flour before placing it on the dough.
Fifth: Preheat oven to 350 degrees.
Bake large pieces for about 14-18 minutes and small pieces for approximately 8-10 minutes.
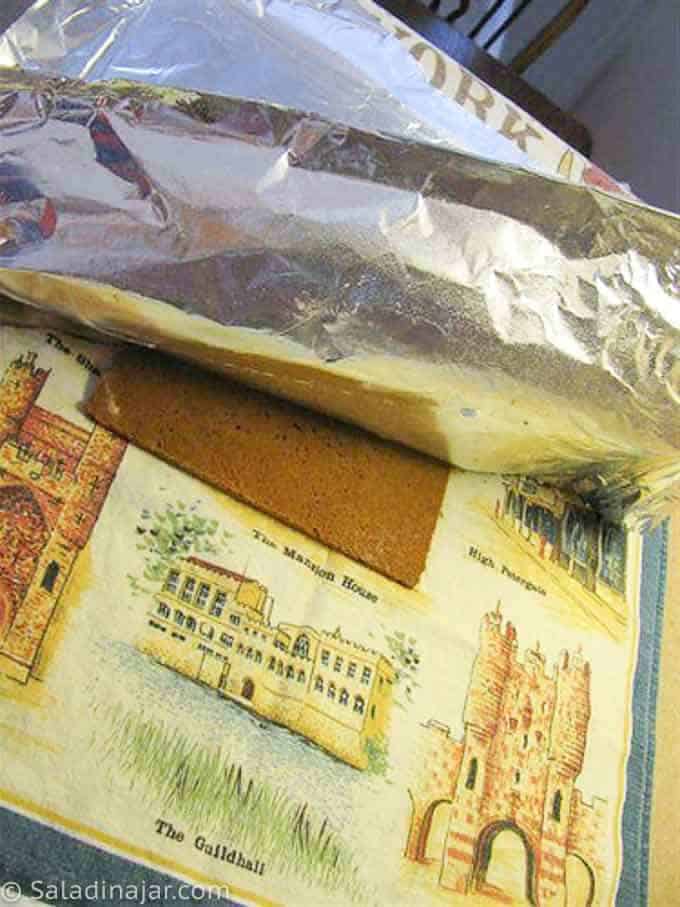
Sixth: When you remove the tray from the oven, IMMEDIATELY place it back on your towel.
Lay the paper pattern back on top of the gingerbread, and using your sharp knife, trim around the pattern piece again. The expansion during baking will cause it to be slightly larger and more irregular than the pattern.
This trimming has to be done while the gingerbread is hot because it hardens as it cools. Believe me, this will save you from frustration when you begin to assemble your house.
Once you have finished trimming, allow the gingerbread to cool for about 10 minutes, and then remove from the tray and lay it on a flat surface to finish cooling. If you have the time, put your pieces on flat trays and leave them in the oven overnight with just the oven light on. This will help the drying process.
A word of caution…
I strongly suggest you not bake gingerbread on rainy, humid days. One of my first houses suffered a severe earthquake because of moisture.
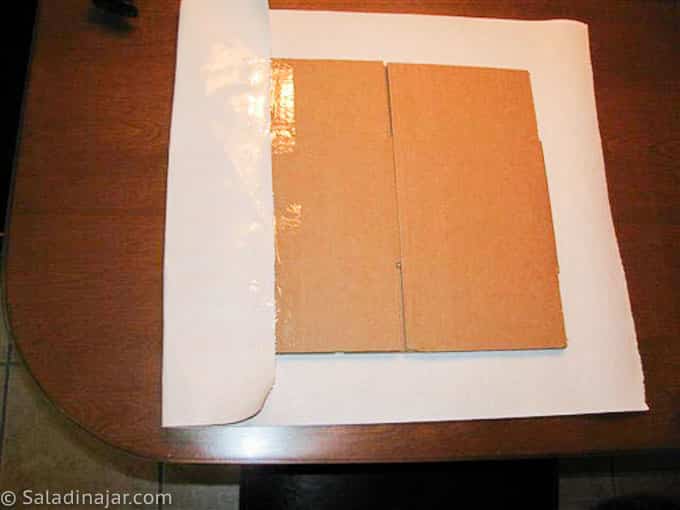
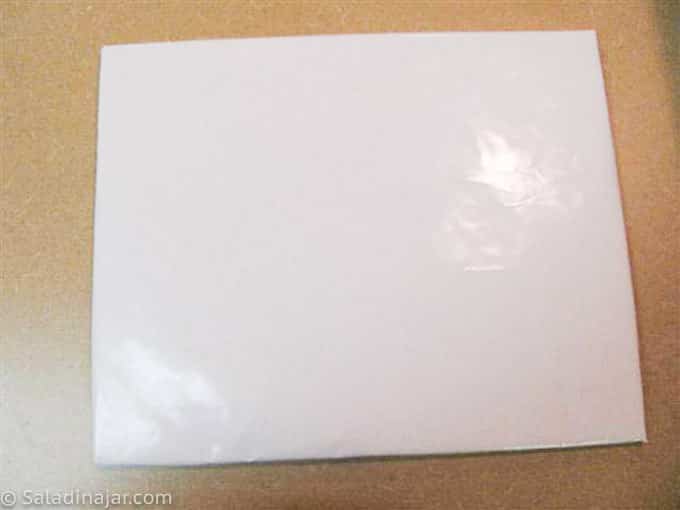
Seventh: Prepare your base.
I prefer a double layer of
Time to put the house together…
See the printable recipe for the “glue” frosting at the end of the post.
Let the fun begin!
Fill your pastry bag (or a plastic baggie will also work – but not as well) with icing, and use a medium-size decorating tip (found in the cake decorating section).
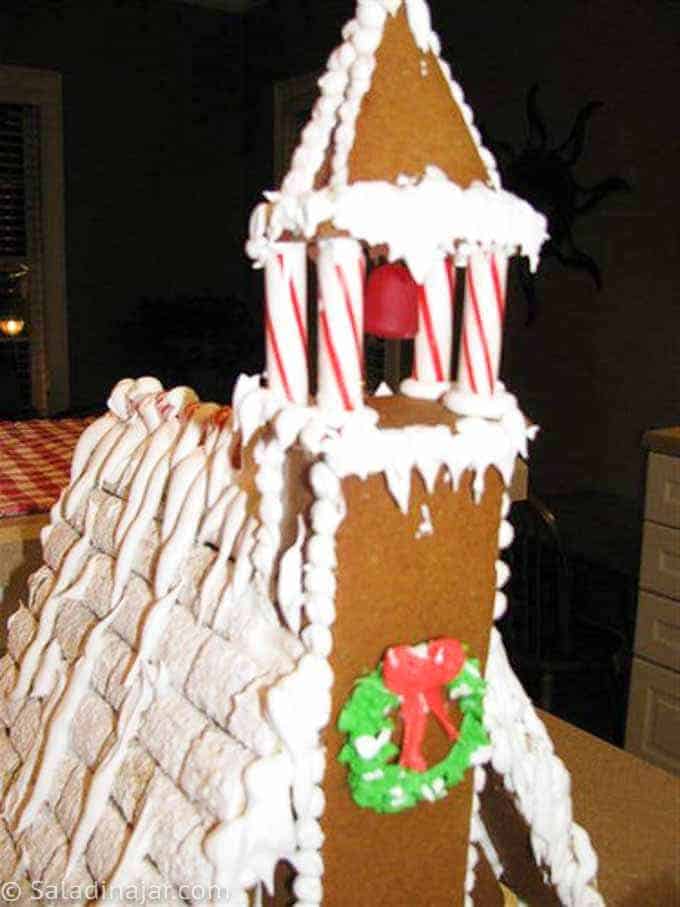
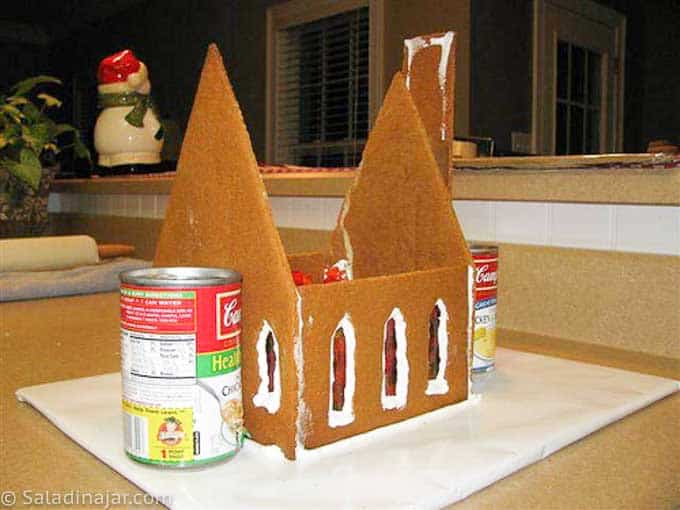
Assembling the Walls of the Gingerbread Church House
Note: Some people prefer to decorate the sides BEFORE assembling the house. For example, in this church house I was making, I wanted “stained glass” windows, and that was easier to do with the sides laying flat on the counter.
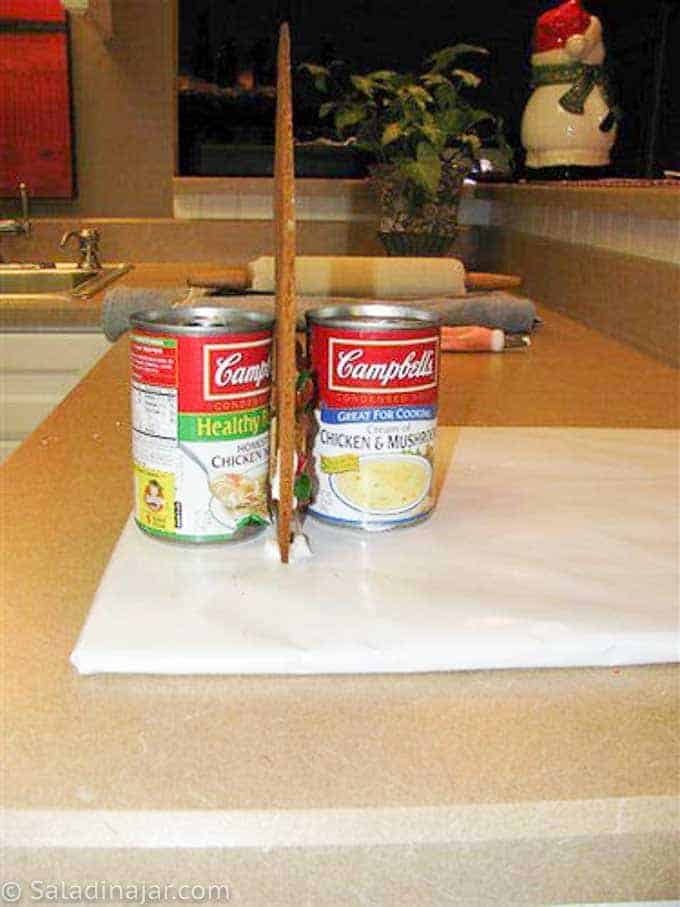
Have handy four unopened soup cans or something of similar weight and size.
Pipe a generous line of icing on your base where you want the first side to be. Pipe a smaller line of icing on the bottom edge of the gingerbread and set the piece in place. Prop the piece on each side with a soup can.
Continue until all sides are in place. Glue any place two pieces of gingerbread touch. The icing should dry fairly quickly, but you have several minutes to move the pieces to make it all fit together.
It’s a good idea to make a “dry run,” fitting the sides together before you apply the
While it sounds confusing, you will figure it out if you play with the pieces.
5 Hints for Making a Gingerbread House
#1
When piping becomes difficult…
If it seems hard to squeeze out enough icing when you are trying to pipe, or you can’t make a continuous line because it breaks off, you may need to thin your icing with a small amount of water, OR you need to use a bigger decorating tip.
#2
Interested in doing “replica” gingerbread?
If you are interested in doing “replica” gingerbread (in other words, not a gingerbread house all covered with frosting and candy), you might prefer to add some cocoa to your icing to color it. Your seams will not be obvious then and won’t have to be covered. The cocoa will cause the icing to be a bit drier, so you may have to add more water.
#3
Need a break?
At this point, allowing the assembled walls to dry overnight before proceeding is always a good idea. If it is a small house, you can go ahead and add the roof when the sides feel firm and then let it all dry overnight.
#4
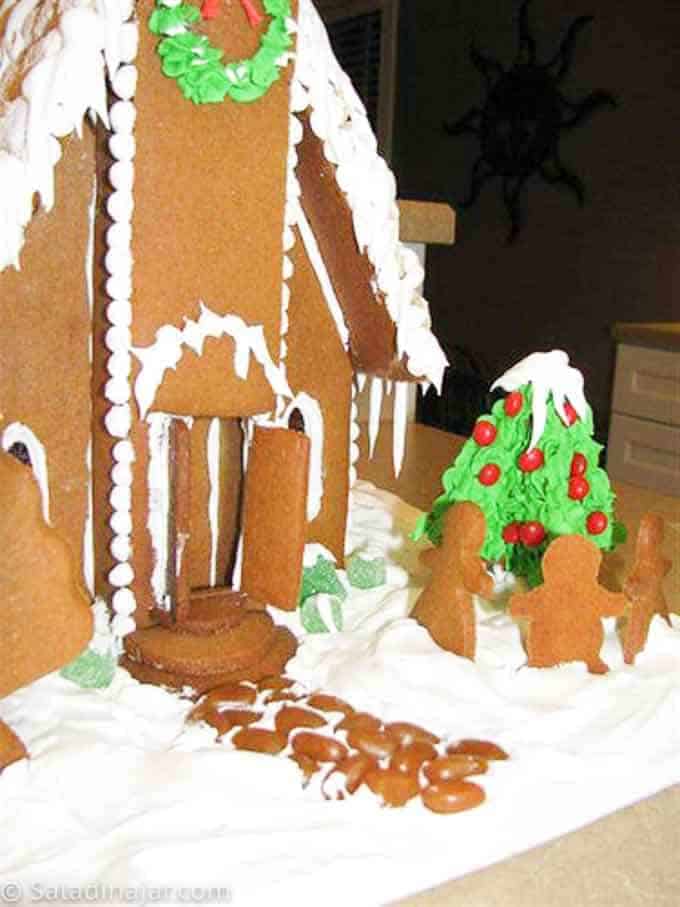
Let your imagination and creativity run loose.
Using your icing “glue,” decorate with candy, cookies, crackers, cereal, gum, etc. Color your icing for decorating details. The cake-decorating gel colors work best, but regular food coloring will work if it doesn’t thin the icing too much.
#5
Working with a preschooler?
If you are working with a pre-schooler, put the icing “glue” in place and let the child place the candy on it. Elementary students can probably handle both the glue and the candy with supervision. It is perfectly legal to lick the icing from your fingers!
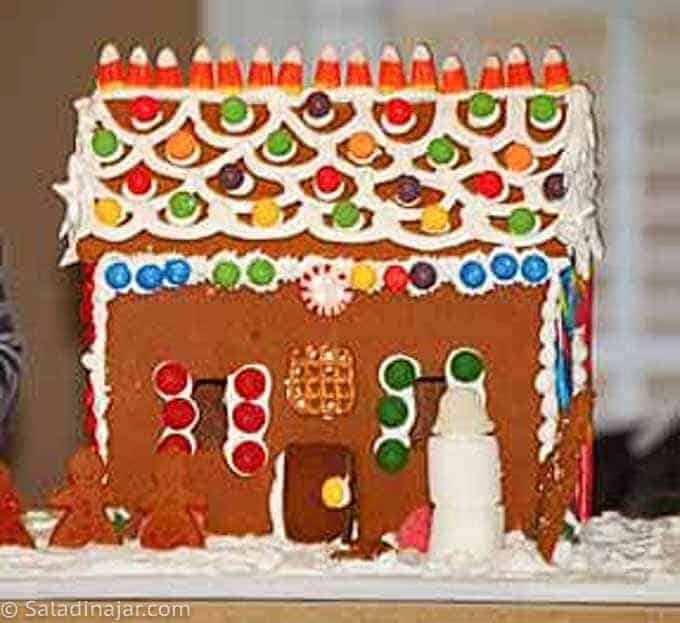
Take a look at the decorating a four yr. old can do. She decided on everything herself. All I did was assemble the house and apply the icing for her.

Thanks, Kay, for such an informative post.
What Is the Next Recipe You Would Like To See?
- Crunchy Gingerbread Bites (Pfeffernusse) for Christmas Giving
- Shamrock Shortbread Cookies
- Pink Shortbread Cookies
Need help troubleshooting? Email me: Paula at saladinajar.com—photos welcome!
How to Make a Gingerbread Church House
Ingredients
Gingerbread Dough
- 5 cups (625 g) all-purpose flour
- 1 ½ teaspoons baking soda
- 1 teaspoon salt
- 2 teaspoons ginger
- 2 teaspoons cinnamon
- 1 teaspoon nutmeg
- 1 teaspoon cloves
- 1 teaspoon solid white vegetable shortening
- 1 cup (200 g) sugar
- 1 ¼ cup (421 g) unsulphured molasses
- 2 (100 g) large eggs beaten
Frosting Glue
- 3 tablespoons meringue powder available anywhere they have cake decorating supplies – Hobby Lobby, Walmart, etc.
- 6 tablespoons warm water
- ½ teaspoon cream of tartar
- 1 pound (454 g) powdered sugar
Instructions
- Thoroughly blend 5 cups (625 g) all-purpose flour, 1 1/2 teaspoons baking soda, 1 teaspoon salt, 2 teaspoons ginger,2 teaspoons cinnamon, 1 teaspoon nutmeg, and 1 teaspoon cloves.
- Melt 1 teaspoon solid white vegetable shortening in a large saucepan. Add 1 cup (200 g) sugar, 1 1/4 cup (421 g) unsulphured molasses and 2 (100 g) large eggs; mix well. Cool, then gradually add the blended dry ingredients and mix well.
- Chill dough in refrigerator.
Frosting "Glue"
- Using electric mixer, beat the 3 tablespoons meringue powder, 6 tablespoons warm water, and 1/2 teaspoon cream of tartar, and water until slightly foamy.
- Gradually add 1 pound (454 g) powdered sugar and beat at high speed 5-7 minutes. While you are working, keep a damp towel over the frosting bowl to keep it from drying.
Assembly:
- Cover the baking sheet with heavy aluminum foil and then spray it with Baker’s Joy.
- Place your cookie sheet on a doubled bath towel to prevent it from sliding around on the counter top. It will also catch some of the floury mess.
- Roll out the chilled dough directly on the prepared cookie sheet. Make a ball of dough about the size of two fists and flatten it slightly with your hand into a rectangular shape. Using a rolling pin (preferably covered with a pastry stocking) and flour, as needed, roll the dough out to 1/8″ thickness. Use two 1/8″ dowels (available at hardware or craft stores) cut the length of the cookie sheet. Letting the ends of the rolling pin rest on dowels gives a more even thickness. That’s important!
- Lay your pattern pieces on the rolled out dough. Allow about 1/2″ margin around each piece to allow for expansion as it bakes. Using your thinnest knife with a sharp tip, cut around each pattern piece. Carefully remove the dough between the cut pieces and return it to your dough bowl. Remove the paper pattern. Make your largest pieces first, and since small pieces bake much faster than large ones, try to group pieces on each tray that are somewhat the same size.
- The KEY to successfully cutting out gingerbread is to keep the dough chilled as much as possible. Rolling out the dough and then putting it in the freezer for 30 minutes before you cut the pieces works well. Keep the unused dough in the refrigerator as much as possible. Working with 3 or 4 trays makes it easier to get a “system” going for rolling, cooling, cutting, baking, etc. If you still have trouble with the pattern pieces sticking to the dough, dust the bottom of the pattern lightly with flour before placing it on the dough.
- Preheat oven to 350 degrees. Bake large pieces about 14-18 minutes, and small pieces approximately 8-10 minutes.
- When you remove the tray from the oven, IMMEDIATELY place it back on your towel. Lay the paper pattern back on top of the gingerbread, and using your sharp knife, trim around the pattern piece again. The expansion during baking will cause it to be slightly larger and more irregular than the pattern. This trimming has to be done while the gingerbread is hot because it hardens as it cools. Believe me, this will save you from a lot of frustration when you begin to assemble your house.
- Once you have finished trimming, allow the gingerbread to cool for about 10 minutes and then remove from tray and lay it on a flat surface to finish cooling. If you have the time, put your pieces on flat trays and leave in the oven overnight with just the oven light on. This will help the drying process. I strongly suggest that you don’t bake gingerbread on rainy, humid days. One of my first houses suffered a Prepare your base. I prefer a double layer of corrogated cardboard covered with white freezer paper (shiny side out). Foam board or cake plates will also work for small projects. Decide where you want to place the house on the base, considering how much space you want around each side for shrubs, trees, sidewalks, etc.
Notes
Equipment
Nutrition
All images and text ©️ Paula Rhodes for SaladinaJar.com

Where are the pattern pieces for the sides of the church??
Hi Donna,
The sides are labeled as such and seen on the fourth (last) page of the patterns linked here.
Is this recipe ok to use for regular gingerbread cookies to eat? Or is it made specifically for gingerbread houses only? What about the icing…can that be eaten? Wondering because I’d love to double up & make gingerbread house along with cookies all at the same time. Does the 1 recipe included here make the entire gingerbread church? If not, how many recipes did it take to complete?
I may try this for the season. Any more patterns? This church looks a little intimidating to me. Need to start easy.
I don’t have the dimensions for the size of the gingerbread church. What are the dimensions of it?
Jamie,
I asked my sister about the dimensions. She says, “No bigger than 12 x 12 box because baking sheet limits size of pieces.” Hope this helps.
What great tips… I did NOT think to trim the gingerbread after taking directly out of oven. You provided many helpful hints that I will put to use this year. Thanks!
I think this is THE go-to site for gingerbread church. Thanks so much.
Excellent!
Thanks Kay and Romaine for sharing great tips on constructing a gingerbread house. Building a gingerbread house is one of those inspiring and impressive projects that I leave to the professionals, the incredible level of planning and attention to detail is a skill that I still need to hone. Although, I look forward to referencing this guide when I am ready to take on this challenge. Thanks again for sharing!
LOL when I saw those soup cans. The 1st year we made gingerbread houses we had to use soup cans to support the walls, of course there were several cans on the inside of the house that weren’t removed before the roof when on. That house weighed about 10 pounds!
Mimi
Awesome tips! I’m going to save these to refer to the next time I make a gingerbread house.
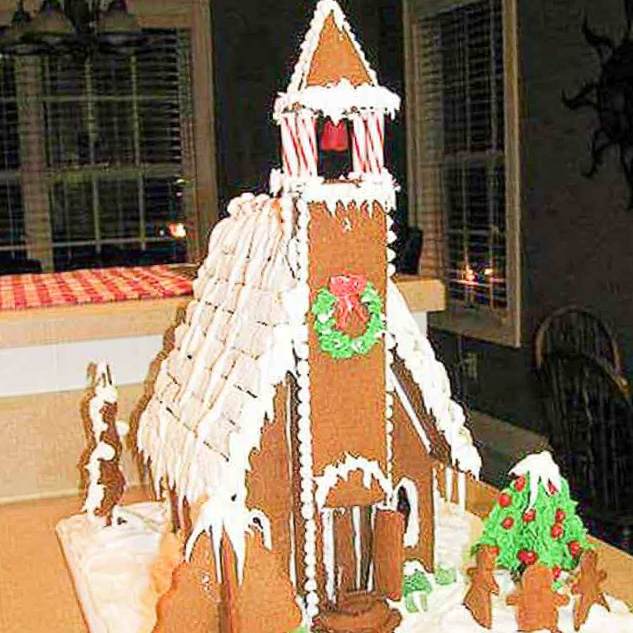
The church is amazing; I can’t believe how tall it is! The candy corn on the top of Ellie’s house is so cute!