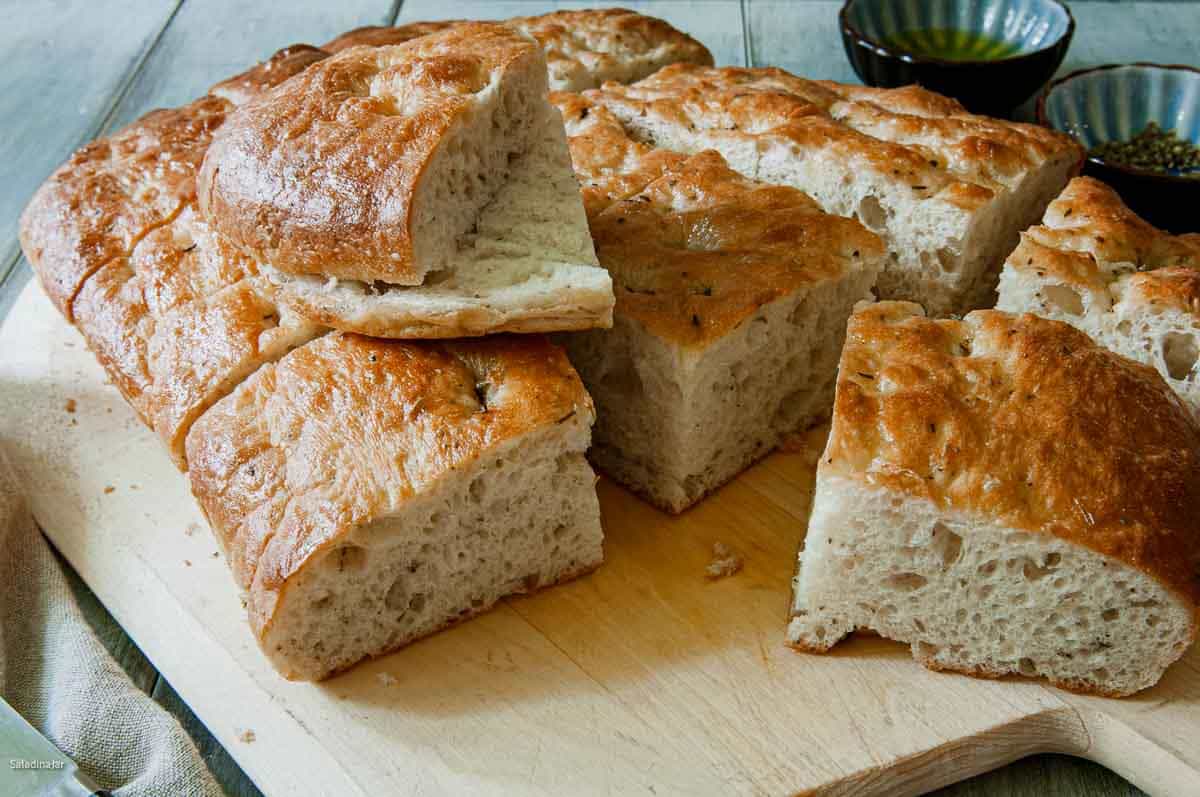
No-Salt Focaccia (Bread Machine Dough + Oven Bake)
Sneak Preview: This no-salt focaccia uses the bread machine DOUGH cycle and an oven finish for better texture than most salt-free breads. Ideal for low-sodium diets and versatile for sandwiches or pizza.
This post contains affiliate links. As an Amazon Associate, I earn from qualifying purchases at no extra cost to you.
Finding a great salt-free bread recipe isn’t easy—salt usually keeps yeast in line and adds flavor, so leaving it out can cause trouble. Most salt-free breads taste flat, but focaccia’s olive oil and herbs give this version plenty of flavor.
This one works because the bread machine handles the mixing, kneading, and proofing, while the loaf gets its final shape and bakes in the oven for the best crust and texture.
No bread machine? No problem—you can make the dough with a stand mixer or even by hand (see the notes).
Can You Make Bread Without Salt?
Yes. Bread can be made without salt, but the dough rises faster and has weaker structure. This recipe adjusts the yeast and uses oven baking instead of the bread machine’s bake cycle to produce better texture and more reliable results.
The Role of Salt in Bread
- Restrains Yeast
- Without salt, yeast overworks, causing bread to rise and collapse.
- Solution: Reduce yeast and monitor proofing.
- Strengthens Gluten
- Gluten struggles to hold air bubbles without salt, leading to poor structure.
- Solution: Use bread flour and avoid over-proofing.
- Retains Moisture
- Salt-free bread dries out faster.
- Solution: Bake smaller batches or freeze leftovers.
- Enhances Crust Color
- Without salt, browning is weaker. Olive oil helps compensate.
- Boosts Flavor
- Salt-free bread can taste bland.
- Solutions: Add herbs or spices or pair with flavorful sides like seasoned oils, soups, or gravies.
Ingredients & Substitutions
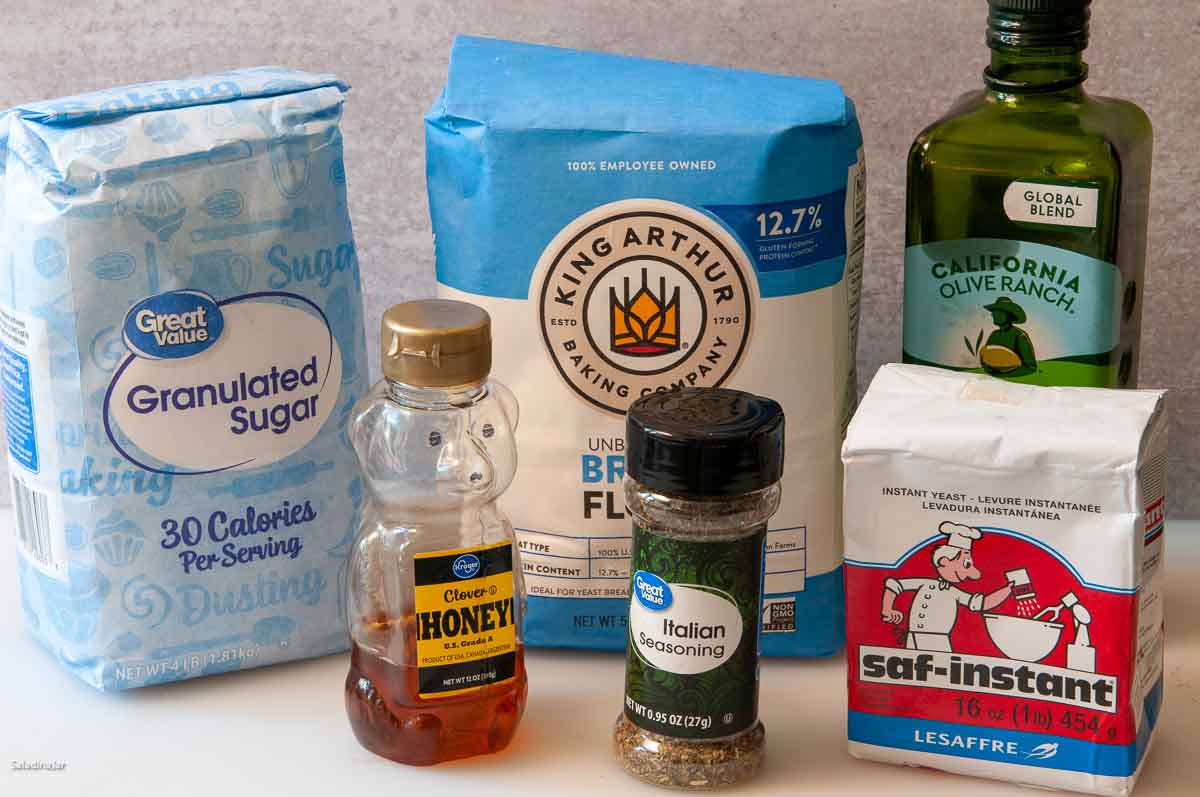
WATER: Tap, filtered, whey, or potato water works well; avoid icy or hot temperatures.
SUGAR: Granulated or brown sugar to feed the yeast.
OLIVE OIL: Adds flavor; substitute other oils sparingly.
HONEY: Adds natural sweetness and moisture.
FLOUR: Bread flour preferred for chewiness; all-purpose will work.
YEAST: Use instant or bread machine yeast; add ¼ tsp extra for active dry yeast.
Step-by-Step Photos: How To Make a Salt-Free Bread Machine Focaccia
⬇️ Jump to the recipe below for exact amounts and detailed instructions.

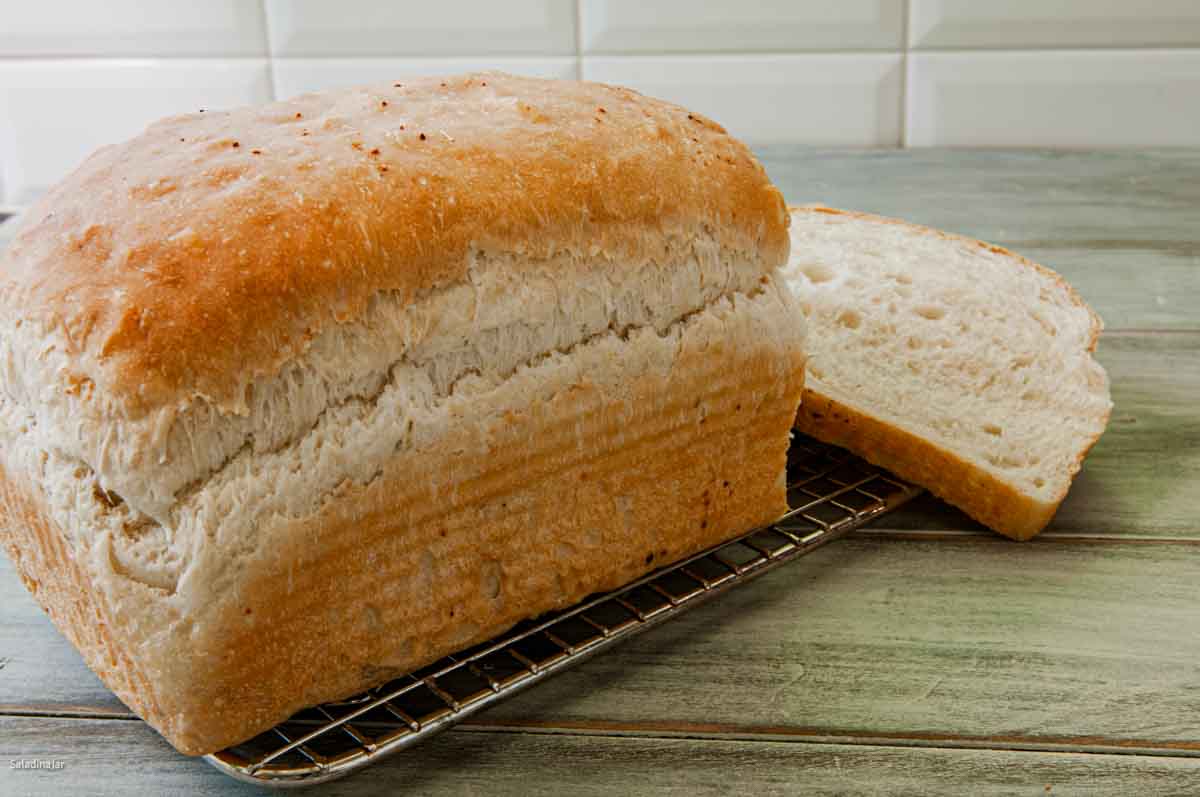
Baking Focaccia as a Loaf
- Shape dough into a rectangle.
- Roll dough into a log. Pinch the seams together to seal.
- Drop into a 9×5-inch loaf pan.
- Cover and let rise until almost double.
- Bake at 375˚F (190˚C) for about 35 minutes, until golden brown and the interior reaches 200˚F.
No-Salt Focaccia (Bread Machine Dough + Oven Bake)
Video
Ingredients
- 1 cup + 1 tablespoon (241 g) water
- 1 teaspoon granulated sugar
- 2 tablespoons olive oil
- 1 tablespoon honey
- 1½ teaspoon Italian seasoning, dried or use no-salt spices of choice
- 3 cups (360 g) bread flour substitute all-purpose flour
- 1¼ teaspoons instant or bread machine yeast
Instructions
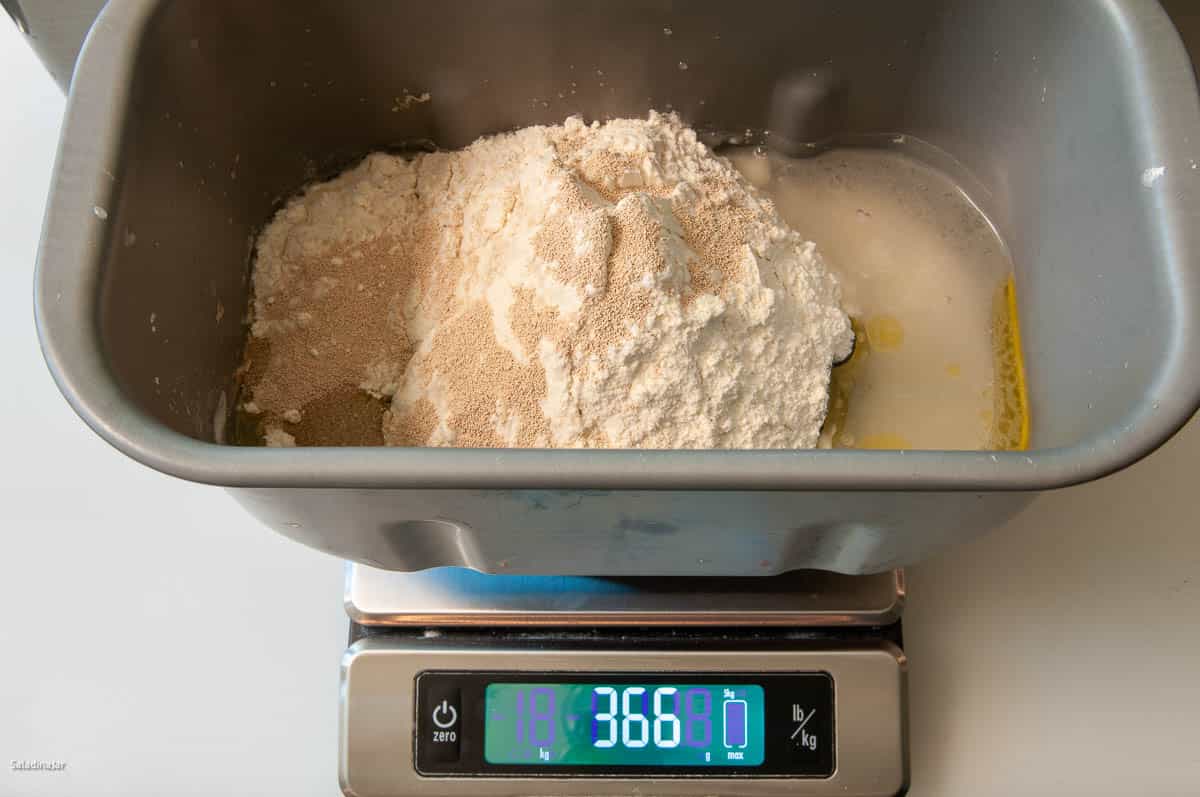
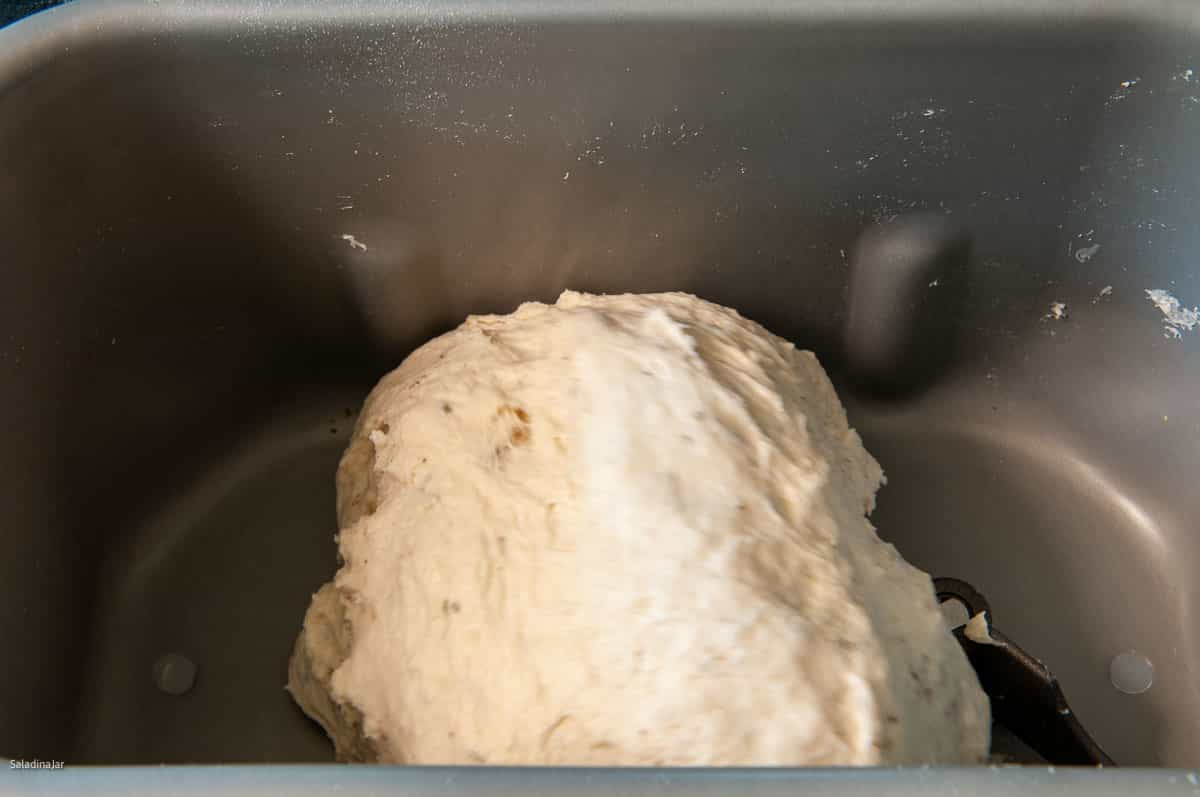
Making the Dough in a Bread Machine
- Add ingredients to bread pan: 1 cup + 1 tablespoon (241 g) water, 1 teaspoon granulated sugar, 2 tablespoons olive oil, 1 tablespoon honey, 1½ teaspoon Italian seasoning, dried, 3 cups (360 g) bread flour, and 1¼ teaspoons instant or bread machine yeast.
- Select the DOUGH cycle, then START.
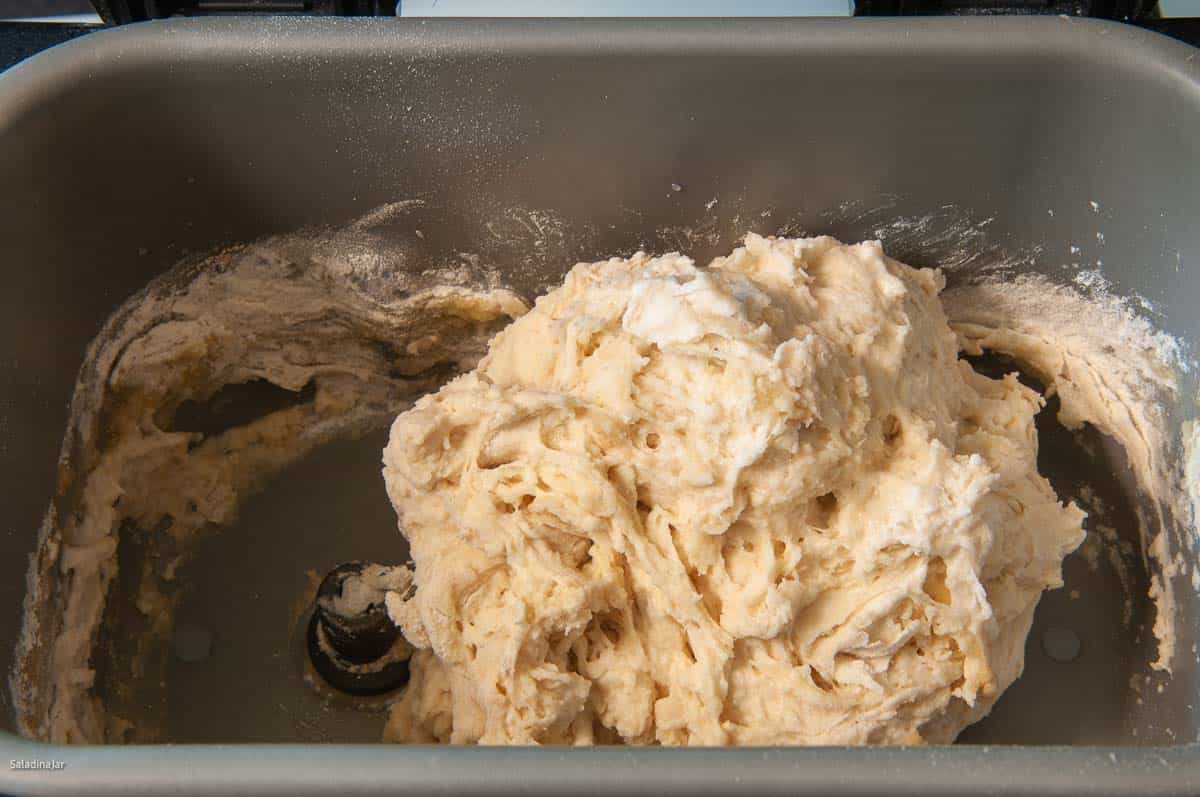
First Check (After 1 Minute):
- Open the lid as the machine kneads.Ensure paddles are engaged.Dough should clump together. If it looks too wet (like cake batter), add flour 1 tbsp at a time. If too dry, add water 1 tbsp at a time.
Second Check (After 15 MInutes):
- Dough should stick to the pan's edge, then pull away cleanly.If dough bounces off the sides, add 1 tbsp water. If it sticks too much, add 1 tbsp flour.
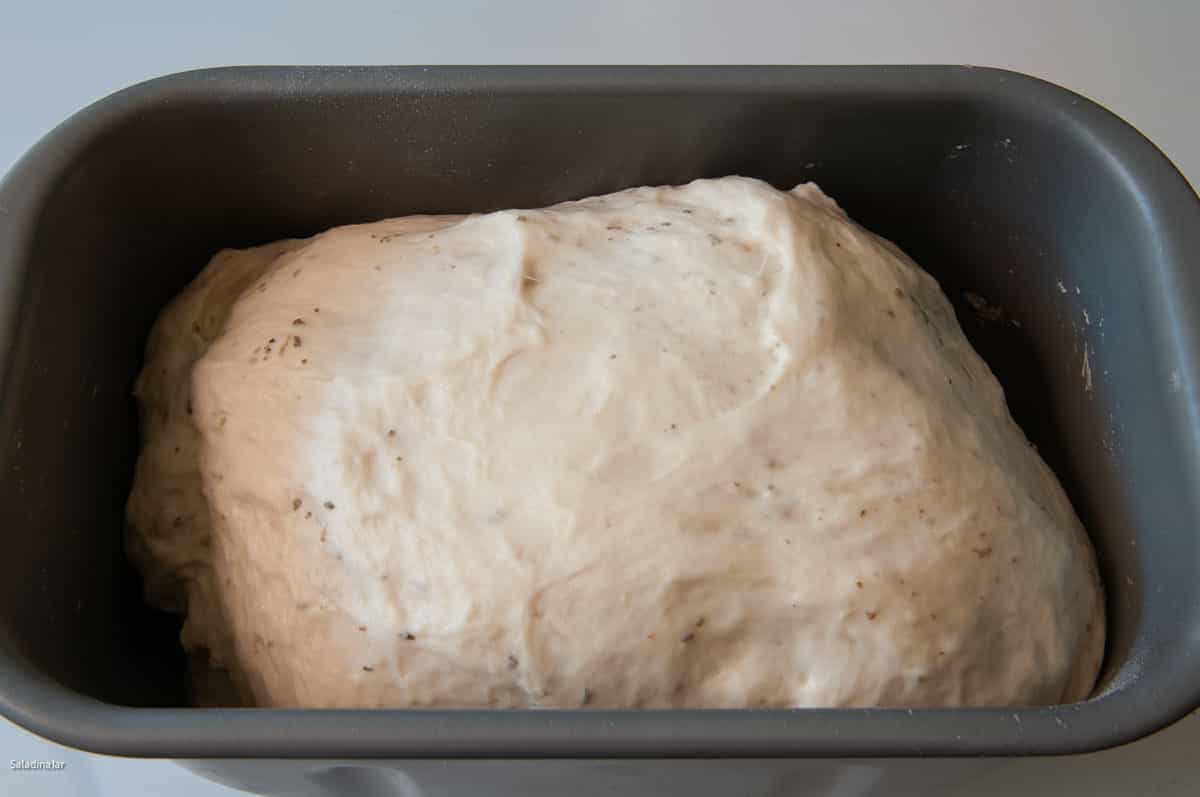
After the DOUGH Cycle:
- Remove dough to a floured surface, knead lightly to remove bubbles, and shape into a ball.Cover and let rest for 10-15 minutes.
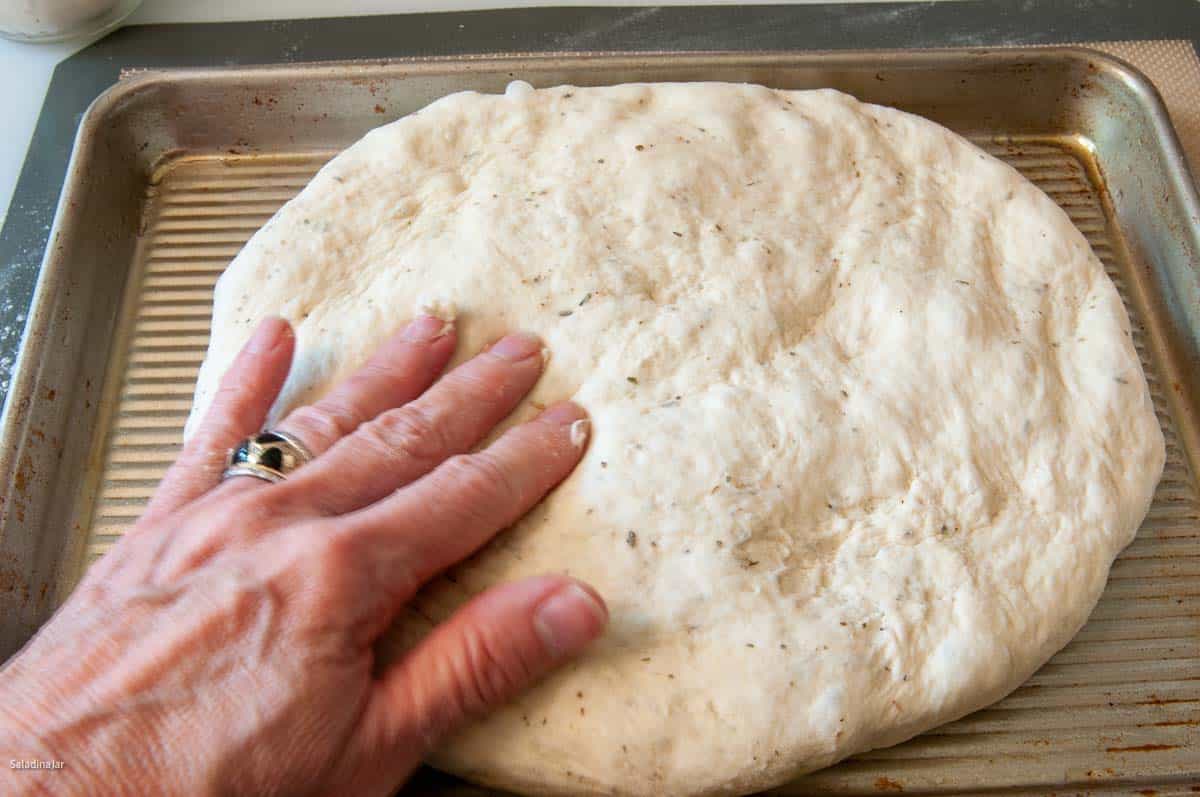
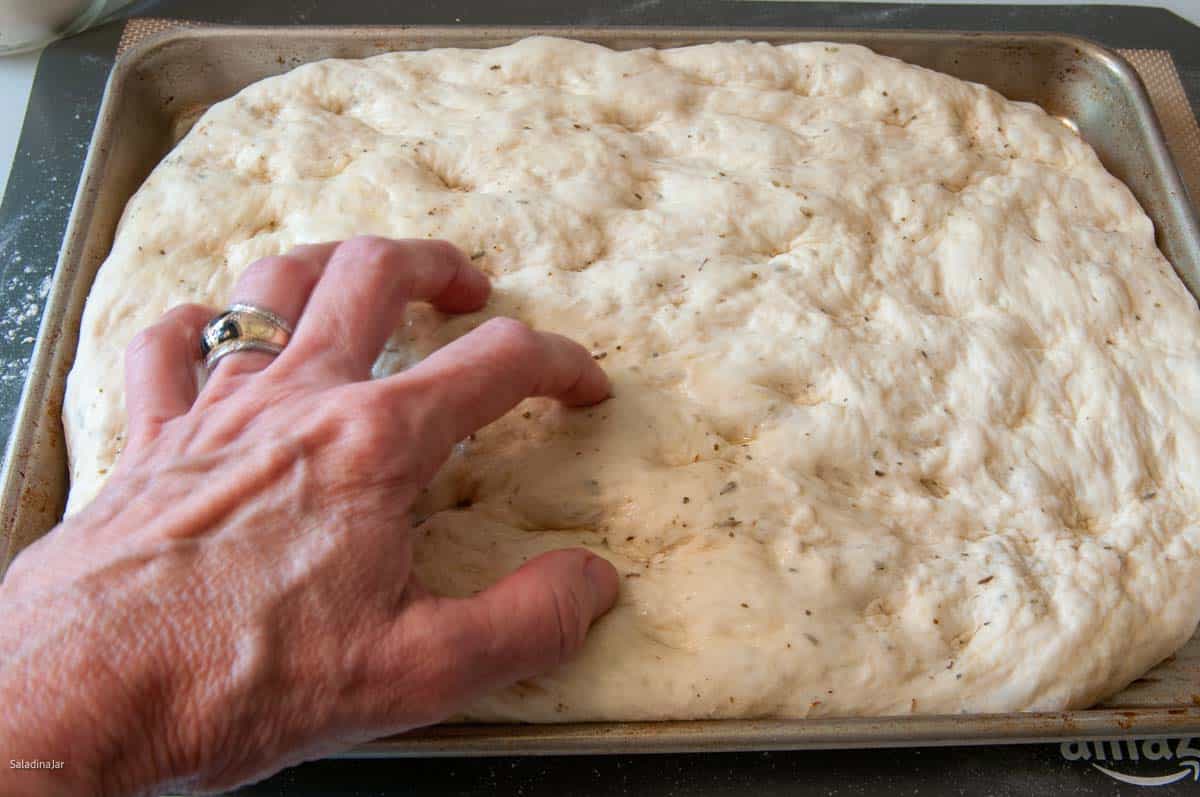
Shaping and Baking the Focaccia
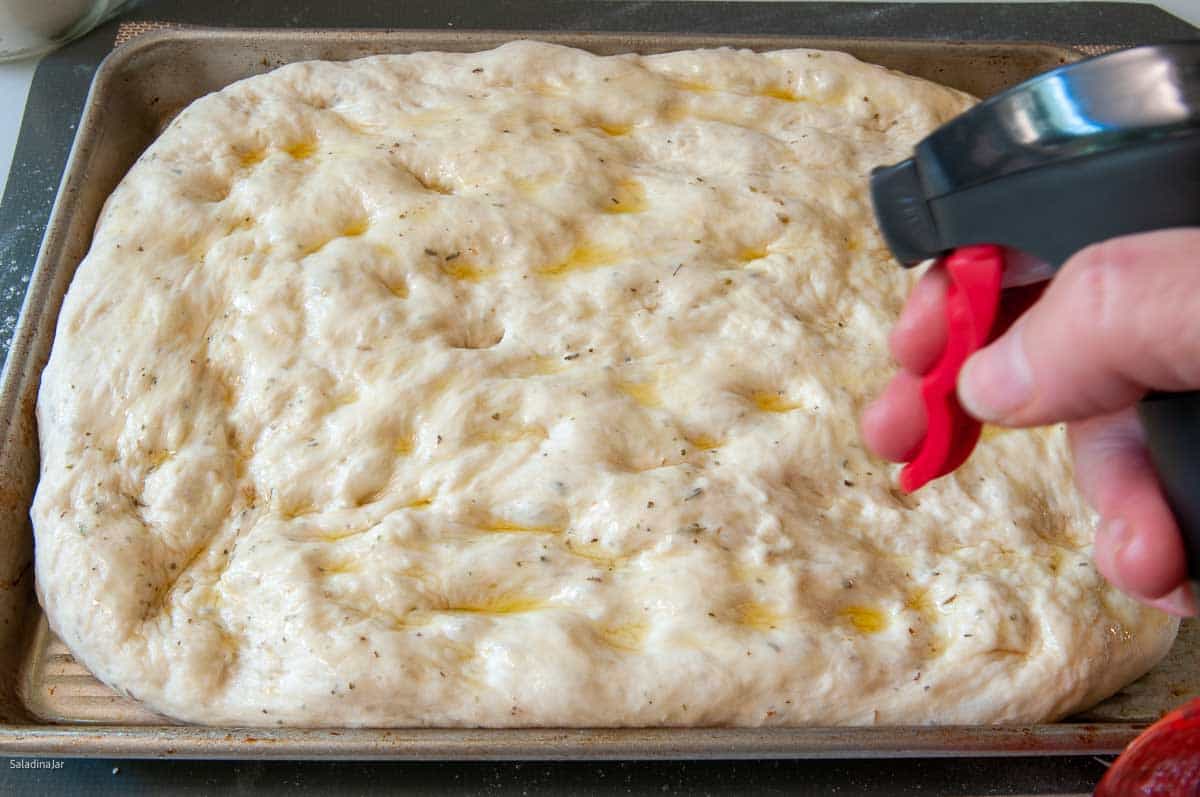
- Press dough into a greased 13 x 9-inch baking sheet or dish. For thinner focaccia, use a larger pan.Dimple the surface with your fingers (don’t poke holes).
- Cover and let dough rise until it reaches your desired thickness (10-30 minutes)
- Preheat your oven to 500˚F(260˚C) about 20 minutes before baking.
Bake:
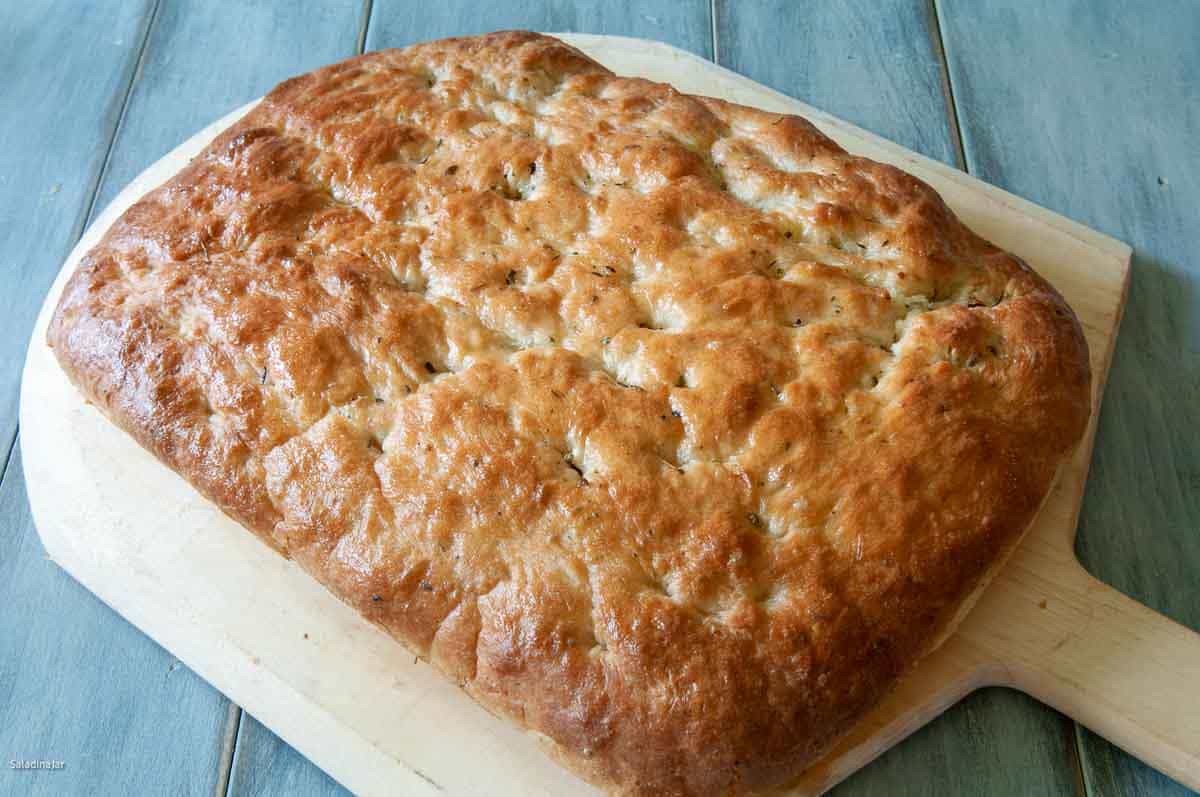
- Drizzle or spray olive oil generously on the dough.Bake in a hot oven, lowering the temperature to 450˚F (230˚C) once the focaccia is in.Bake until golden brown and internal temperature reaches 200˚F (93˚C).
- Let cool for 5-10 minutes before slicing.
Notes
- Divide Dough: After resting, divide dough into two balls.
- Shape: Stretch each ball into a thin circle. Cover and let relax if dough resists stretching.
- Add Toppings: Add sauce (don’t overdo it), cheese, and toppings sparingly.
- Bake: Bake at 450˚F (230˚C) for 10-15 minutes or until the crust edges are golden and toppings are browned.
- Stand Mixer: Add ingredients to the bowl in the same order. Mix on low, then knead with the dough hook on medium speed (2-3) for 5-10 minutes until smooth. Cover and let rise until doubled, then shape and bake as directed.
- By Hand: Combine ingredients in a bowl until shaggy. Knead on a floured surface for 10-20 minutes until smooth and elastic. Cover and let rise until doubled, then shape and bake.
- Substitute Active Dry Yeast: Use the same amount as instant yeast, but allow more time for rising.
Equipment
Nutrition
All images and text ©️ Paula Rhodes for Salad in a Jar.com
FAQ About No-Salt Bread
Why is sodium listed in the nutritional analysis?
Some ingredients, like flour and yeast, contain trace sodium.
Can I use salt substitutes?
Yes, although not tested with this recipe. Lite salt or potassium-based substitutes work. Adjust to taste.
Why does dough consistency vary?
Flour moisture content is affected by brand and the weather, human error in measuring, and substitutions. Adjust with water or flour during kneading.
Can I bake this dough in my bread machine?
Not recommended. Without salt to control the rise, the dough may overproof and collapse during baking. Bread machines are unpredictable, and salt-free dough increases the risk of poor results.
Does salt-free bread rise faster?
Yes. Watch the dough closely to avoid over-proofing.
Final Thoughts
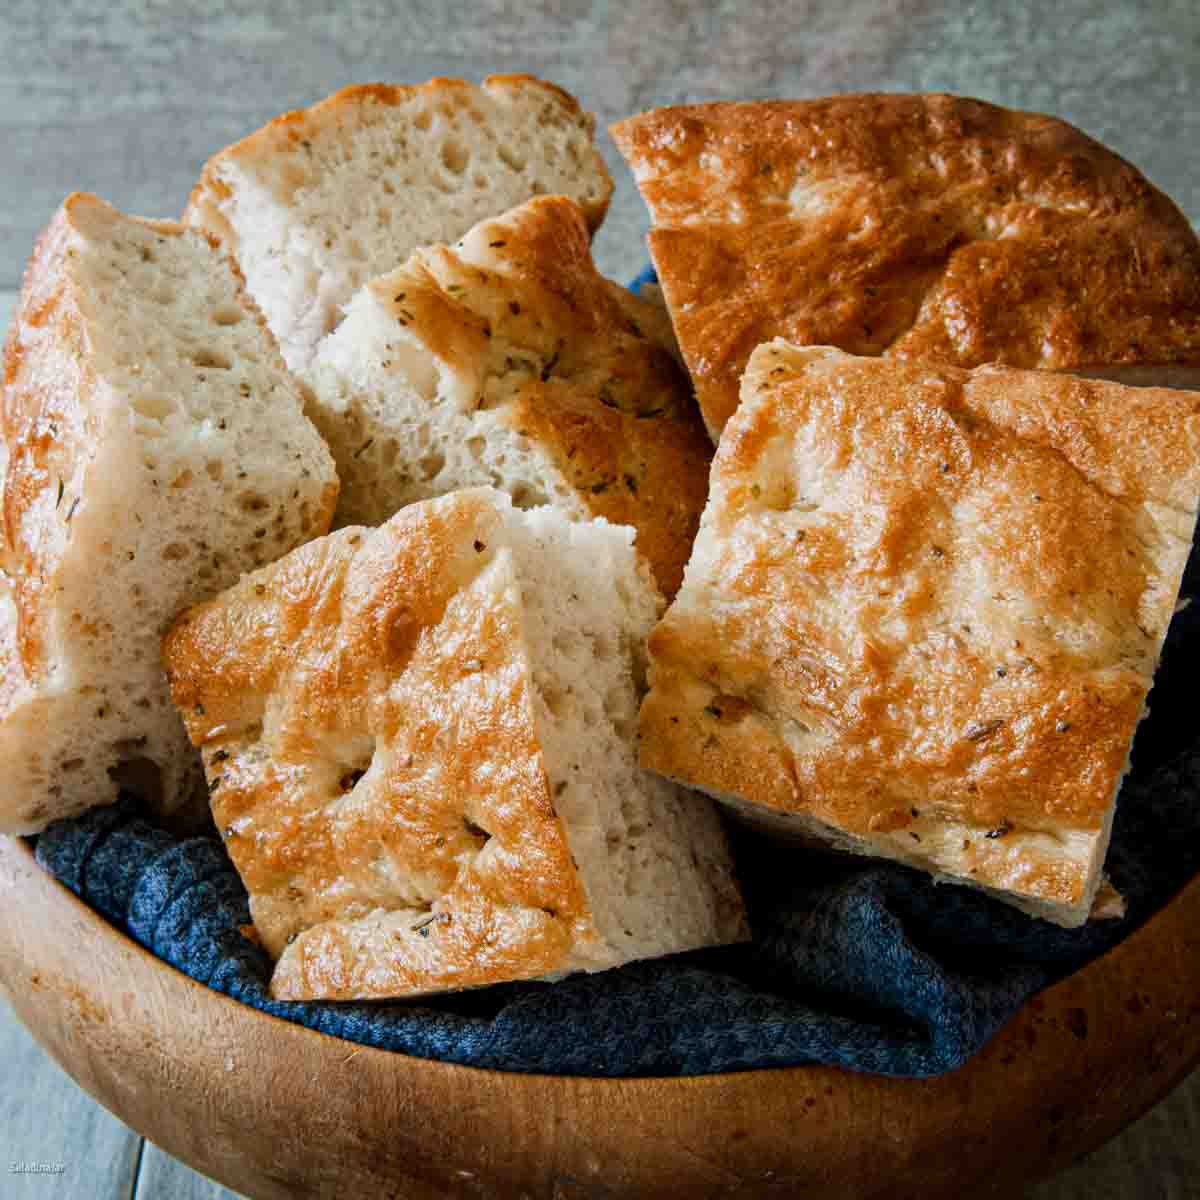
Whether you’re on a low-sodium diet or simply avoiding added salt, this no-salt focaccia is flexible enough for sandwiches, sliders, or pizza crust.
— Paula, Home Economist
Homemade Food Worth Sharing
Need help troubleshooting?
Email me: Paula at saladinajar.com — photos help!

If you are baking bread today, you are a better woman than I am!!??. Stayed in the low 70’s until noon, now it’s 82 here on the mountain. I did use you hamburger roll recipe last Sunday to make hot dog buns for the Nathan’s Hot Dogs we get at SAMs and they were delicious!!
Hope your heat wave breaks soon. My brother east of Dallas said it’s stinkin’ hot in Texas!!!
No, I am not baking bread. But I’m working on a sourdough loaf that I will bake in the morning at the break of dawn. Yep. Crazy hot! But I really don’t mind as long as the A/C works.
I’m truly thankful for my AC. I’ve been walking on our long porches….still careful about walking in the yard…..and decided to wait for early tomorrow morning. Sun isn’t above the trees until about 10 so I’ll water flowers and enjoy!!
Hi Paula,
I love your bread recipes and have made them many times. This is the first time I tried the no-salt pizza recipe. The dough kneaded as expected in the bread machine. I was surprised to find the dough sticking to my hands when I took it out. I added some flour. The stickiness went away but “came back”! It was so sticky I couldn’t get it off my hands. After adding flour a couple times and the stickiness came back soon after, I quickly shaped it to a dome shape and let it rest for 15 mins. Then, the stickiness did not come back and I was able to shape it into a circle. Might you know why this happened or what I might have done wrong? I followed your recipe but used Mrs. Dash in place of the no-salt Italian seasoning. It is a very hot and humid day today. Might that have contributed to the stickiness of the dough? Thanks for your help!
Michelle
Oh yes. Hot and humid weather has a huge effect on bread dough. You might need more flour and the dough will rise super quick, especially when there is no salt.
Did you make any substitutions? How did you measure the ingredients (by weight or with measuring cups)? Regardless of the answers to these questions, next time, reduce the water back to a cup if you like, and save the extra tablespoon only if you need it.
There are so many variables when making bread. Just using a different brand of flour than I tested with can affect the amount of liquid needed. That’s why it’s important to read the dough and make adjustments on the fly. Sounds like that’s just what you did.