Apple Cinnamon Bread Machine Recipe the Modern Way
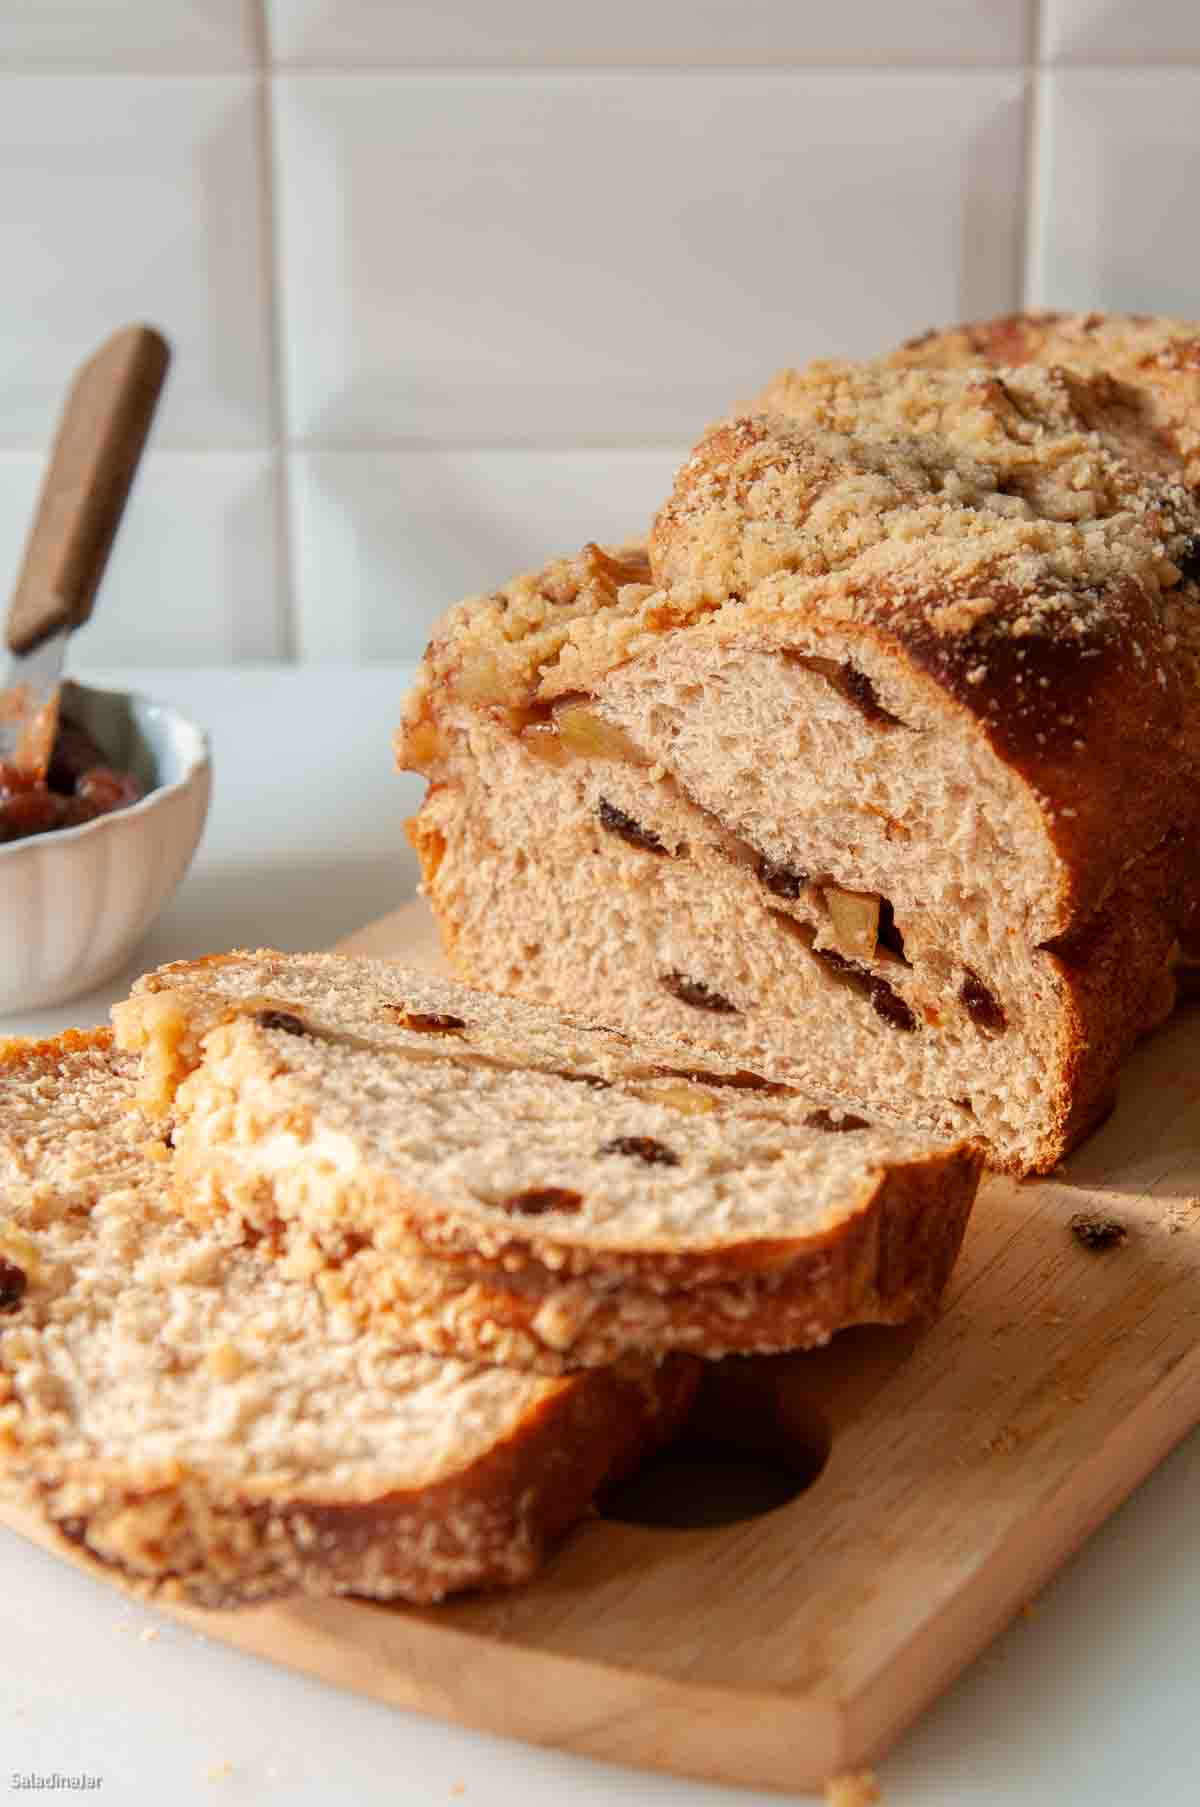
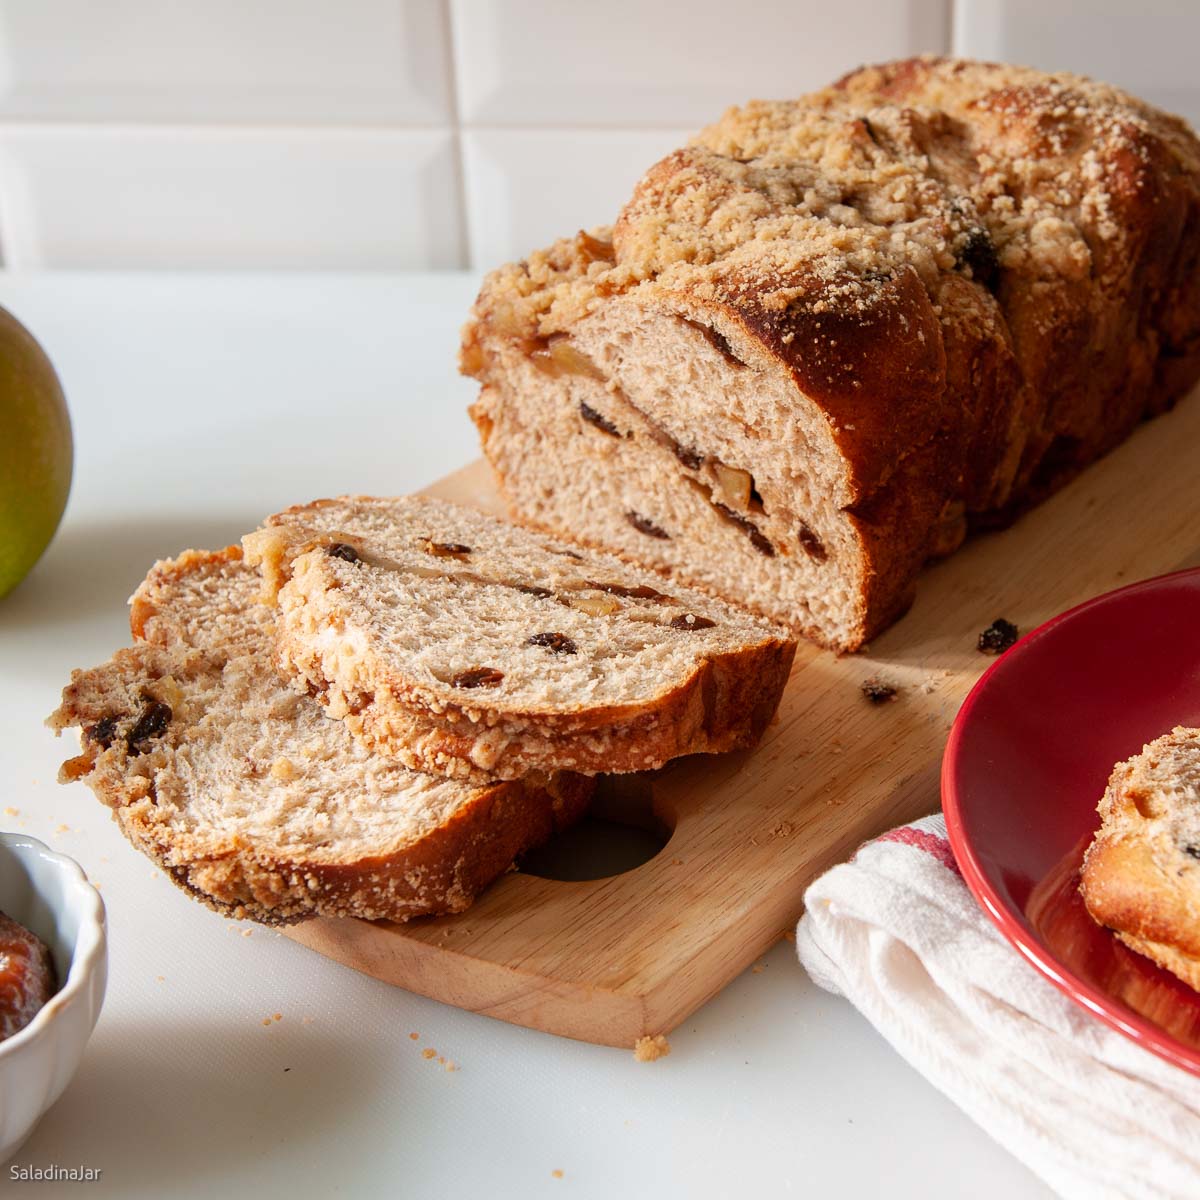
Sneak Peek: Make this Sweet Apple Cinnamon Bread Machine Recipe with a bread machine. Even though Grandma wouldn’t do it that way, I’m pretty sure she would love to eat it. Spiced apples and raisins make this whole wheat loaf incredibly moist.
As an Amazon Associate, I earn from qualifying purchases.
Are you lucky enough to live close to an outstanding farmer’s market? There’s usually a fresh-bread booth or table where I see things I want to go home and bake myself. This Sweet Apple Cinnamon Bread recipe is my response to seeing yummy-looking apple yeast bread at one of these markets.
Five Reasons Why This Recipe Will Become a Favorite
- Similar taste to cinnamon rolls
- Freshly cooked apples and cinnamon=incredibly moist bread
- Stays fresh for days
- Perfect for the DOUGH cycle on your bread machine to mix, knead, and proof
- Or, mix and knead by hand or with a stand mixer (details in recipe notes)
Happy Bakers Speak Up
“This is the best one I’ve made yet! I shared it with my parents and a couple of friends. The “mmmm” as soon as they all took the first bite sums it up nicely. 🙂 I’m making another loaf today to share at church tomorrow am.“– MARCUS
Recipe Inspiration
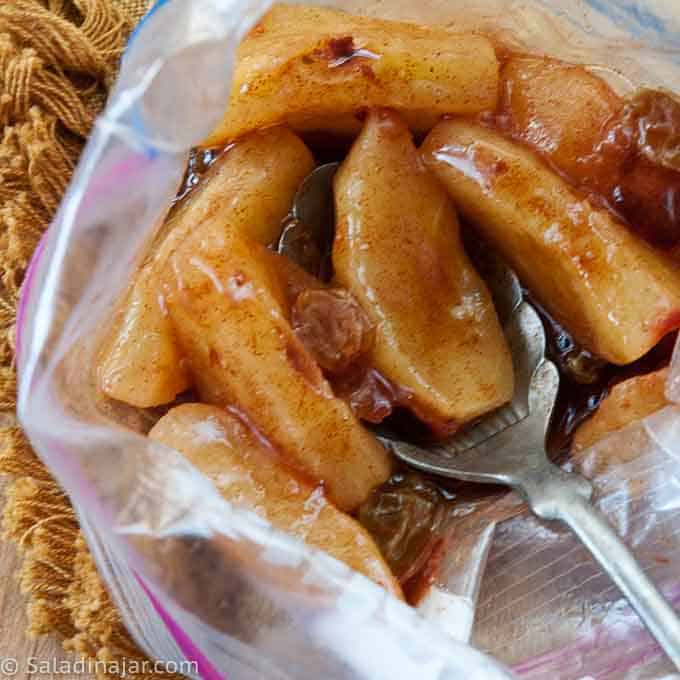
If you ask Pinterest, one of the most popular posts on my website is entitled “Microwave Cinnamon Apples.” It’s super easy with only four ingredients and makes a healthy snack or dessert for 1-2 people.
Since I’m a bread-machine freak and love cooked apples, it was high time to create a bread recipe incorporating these easy-to-prepare apples.
Because I’m a yogurt maker, you probably won’t be surprised to hear that this bread recipe includes Greek yogurt (or use buttermilk if you prefer). Either way, the result will be a tender crumb, not unlike my favorite cinnamon rolls.
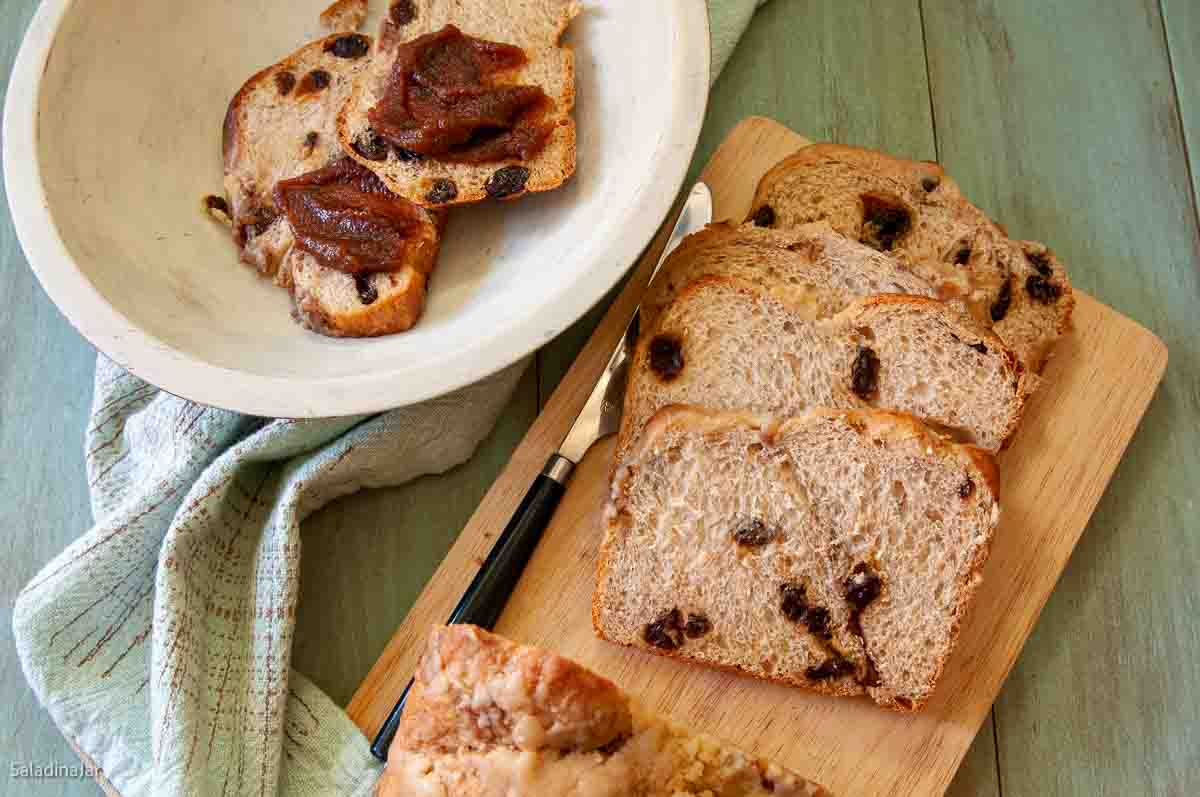
Top this apple-studded loaf with a streusel topping, or ice it with powdered sugar frosting. Frosting will make your loaf taste similar to a giant cinnamon roll. If you feel decadent, pour the frosting over a streusel-topped loaf.
📌KITCHEN TIP📌: Sweet apple-cinnamon yeast bread stores better without icing. You might want to skip the icing if you don’t have enough people to eat it on the first day.
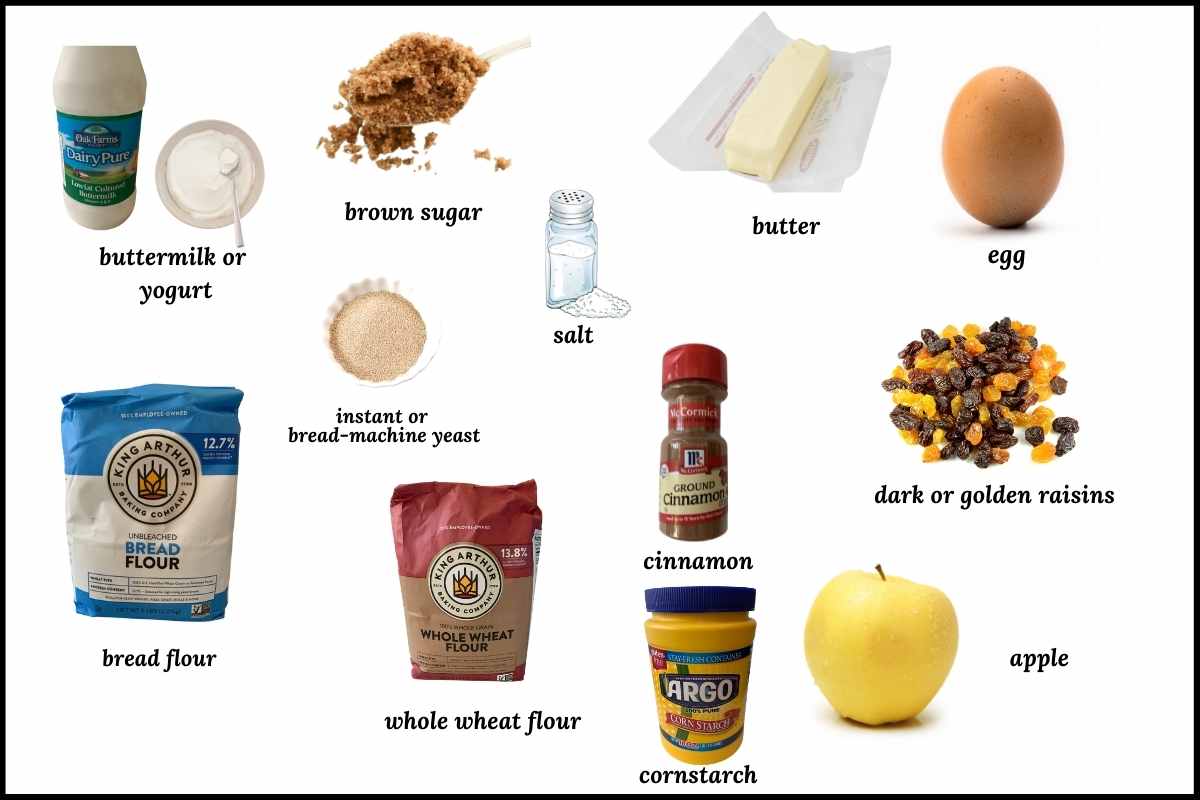
Ingredients and Substitutions
- BUTTERMILK: Yogurt thinned with milk to a buttermilk consistency is a good substitute. You could also use whey leftover from making Greek yogurt. No matter which you choose, it does not need to be warmed when using a bread machine.
- EGG: I use large eggs in all my bread recipes. If you use larger or smaller eggs, compensate accordingly with more or less liquid.
- SALT: Use table salt or sea salt. If you use Kosher salt, add 1/4 teaspoon more.
- BUTTER: Chop the butter into small pieces and dump it in the pan. The friction of the bread machine paddles will soften the butter, so it mixes in at just the right time.
- BROWN SUGAR: I used light brown sugar, but dark brown sugar is also acceptable.
- FLOUR: The whole wheat and bread flour combination make this bread extra flavorful. However, 100% all-purpose flour is also good.
- YEAST: I use bread machine or instant yeast in all my bread recipes. You can substitute active dry yeast if that’s all you have but the rise may be somewhat slower.
- RAISINS: Golden raisins, standard dark raisins, currants, or other dried fruit like dried cranberries are delicious here. On the other hand, omit dried fruit and use toasted nuts or nothing if you prefer. Also, don’t miss the discussion below about the best time to add raisins to the dough.
- APPLES: Use any apple that will hold its shape when cooked, like delicious yellow apples.
How To Make Sweet Apple Cinnamon Dough with a Bread Maker
This recipe may seem a bit complicated at first glance. Don’t let it scare you. Instead, I hope showing you every step will inspire confidence that you can do it.
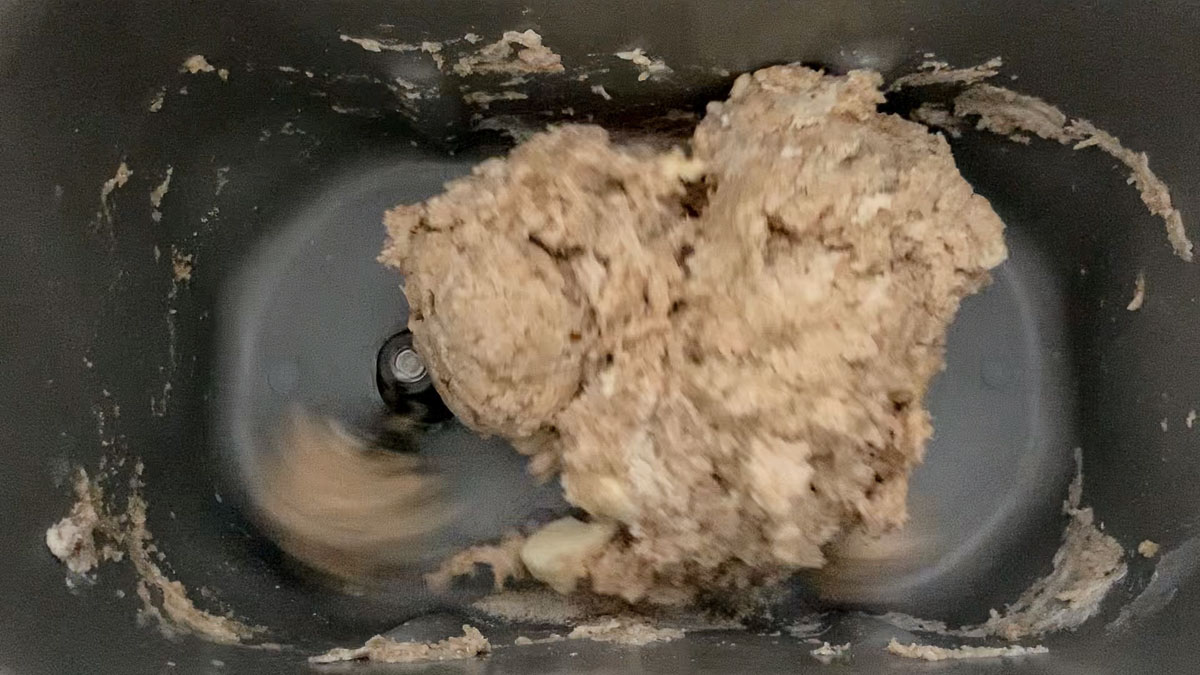
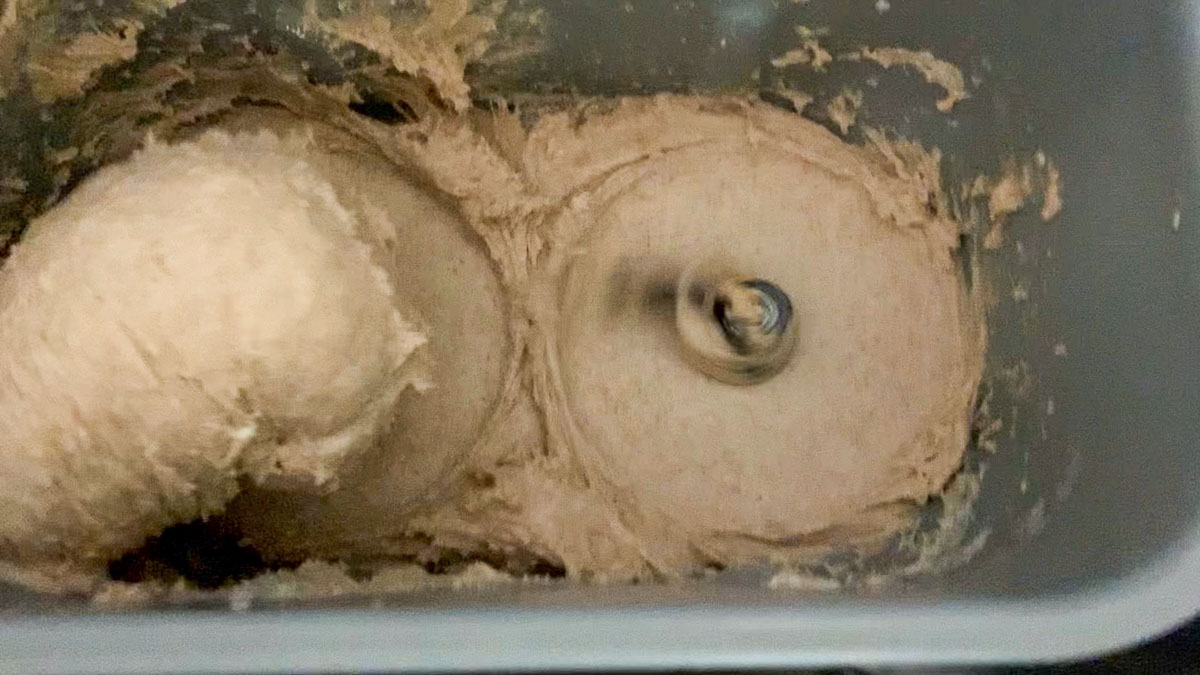
Add more flour, a tablespoon at a time, until the dough at the bottom is incorporated. (I had to add two tablespoons to correct the dough on this day.) The goal is for the dough to stick to the sides, then pull away cleanly. Read more about this surprising secret for making better bread with a bread machine.
MEANWHILE: Prepare the Apple Filling
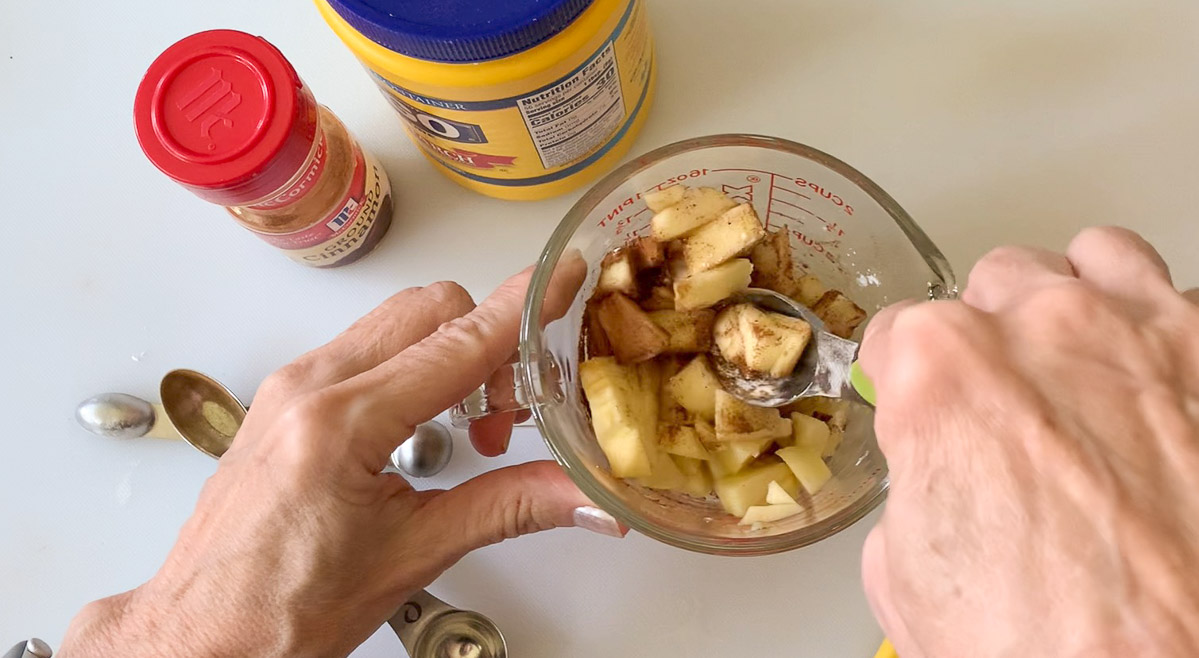
Microwave for 2 minutes on HIGH and stir well. (Times will vary for different microwaves.) Set mixture aside to cool.
Shaping the Bread After the DOUGH Cycle Finishes
The bread dough needs to double the size it was when the kneading finished. If the dough has not risen enough at the end of the DOUGH cycle, leave it sitting in the pan until it doubles in volume.
If your bread machine is sitting in a cold or drafty room, the time for rising will be longer. If you don’t wait for the bread to rise until it is doubled, it will be dense when baked. The decision to proceed is a crucial step.
If your bread machine is in a warm environment, the dough may rise faster than expected. Experienced bakers will anticipate this and check the dough before the DOUGH cycle finishes.
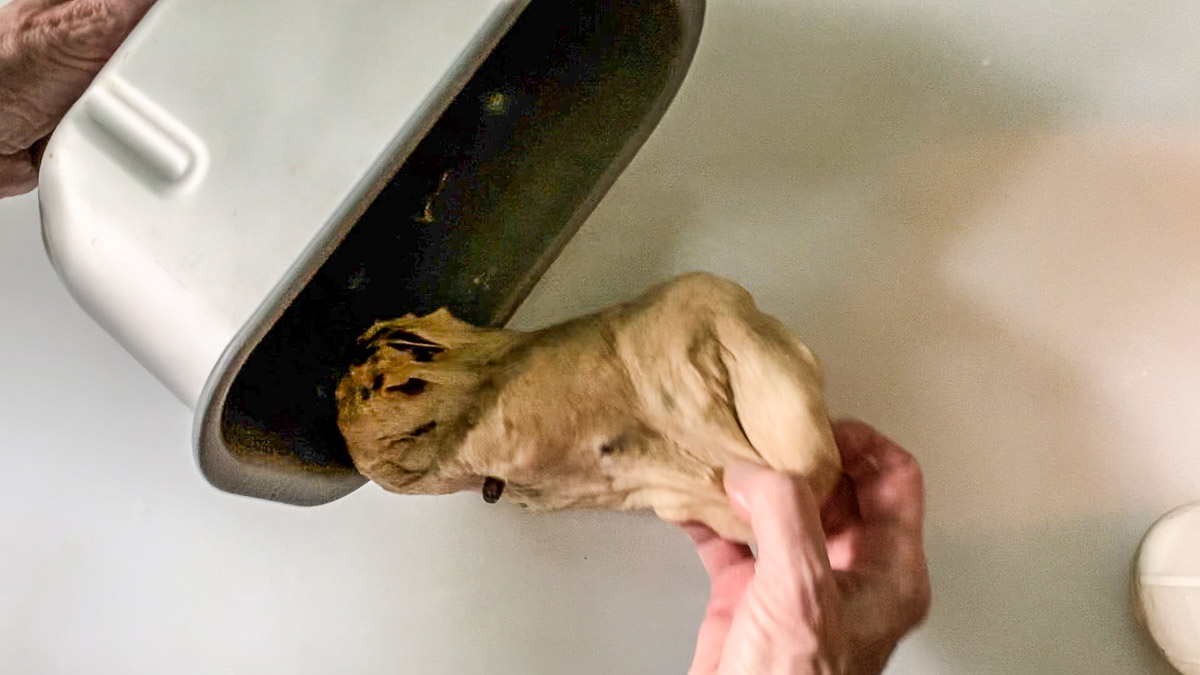
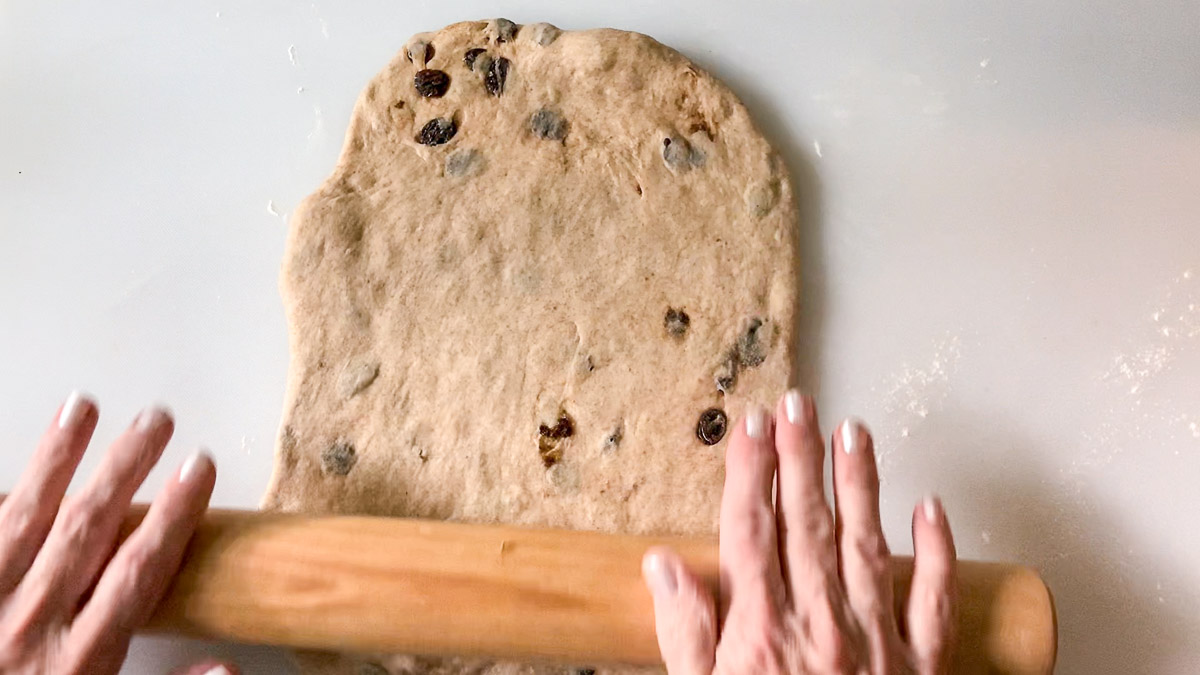
(If the dough seems “bouncy” and doesn’t want to stay in a rectangle shape, cover it with a tea towel and let it rest for 10-15 minutes. Come back and try again.)
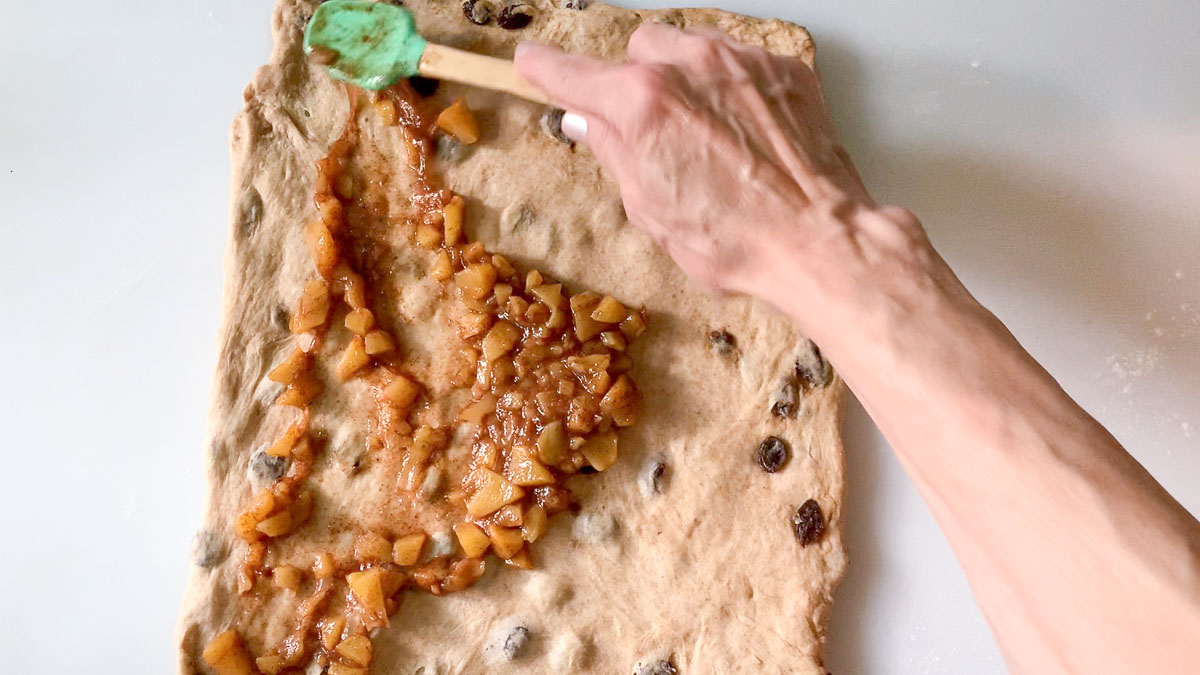
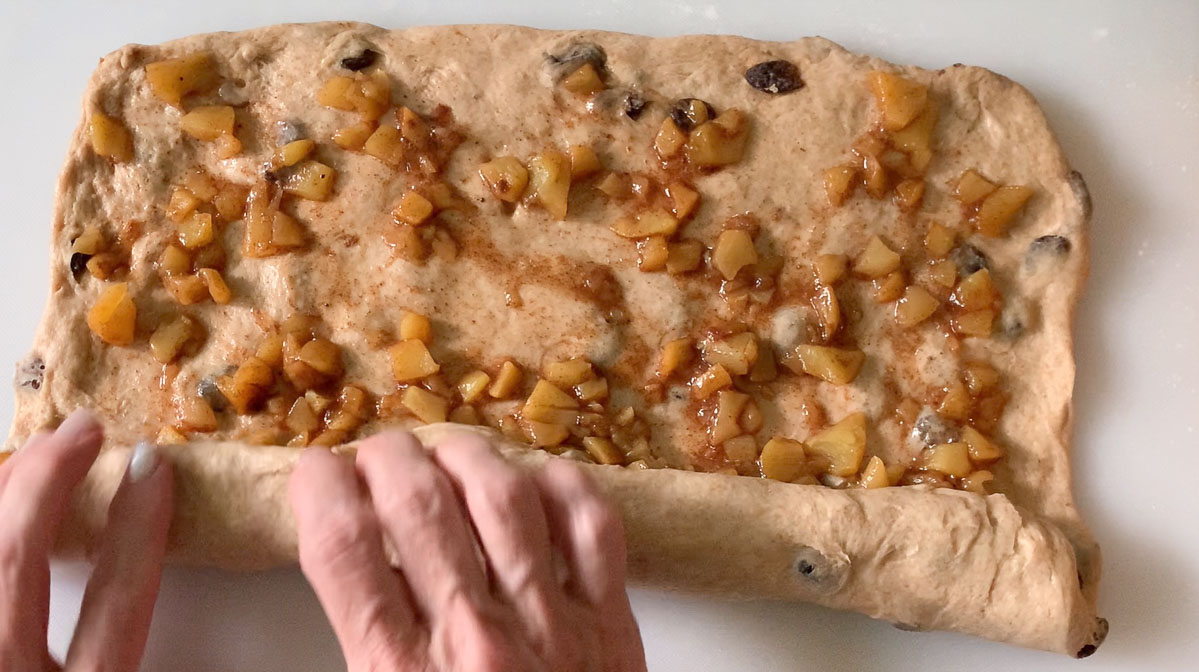
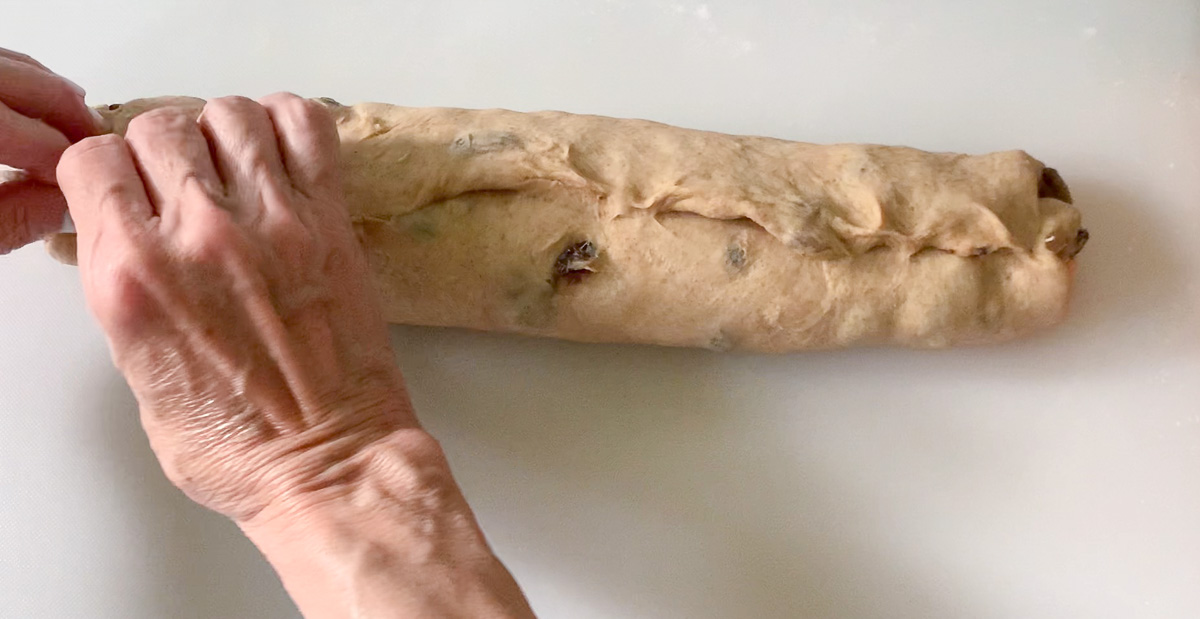
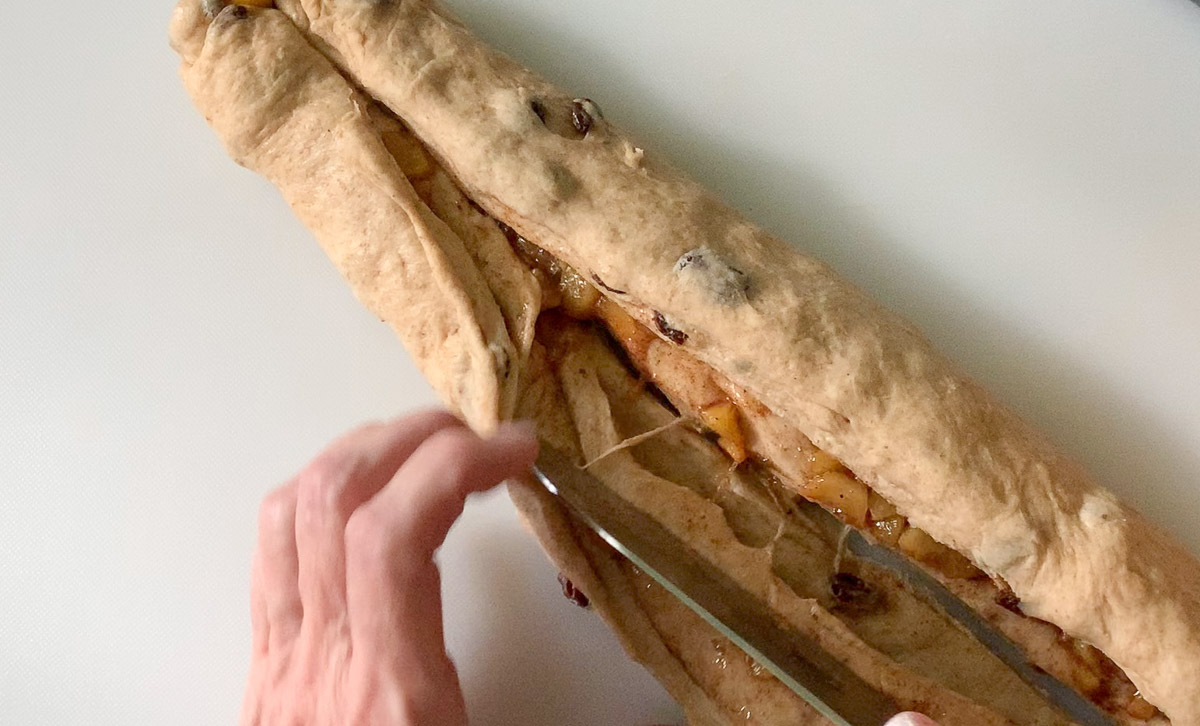
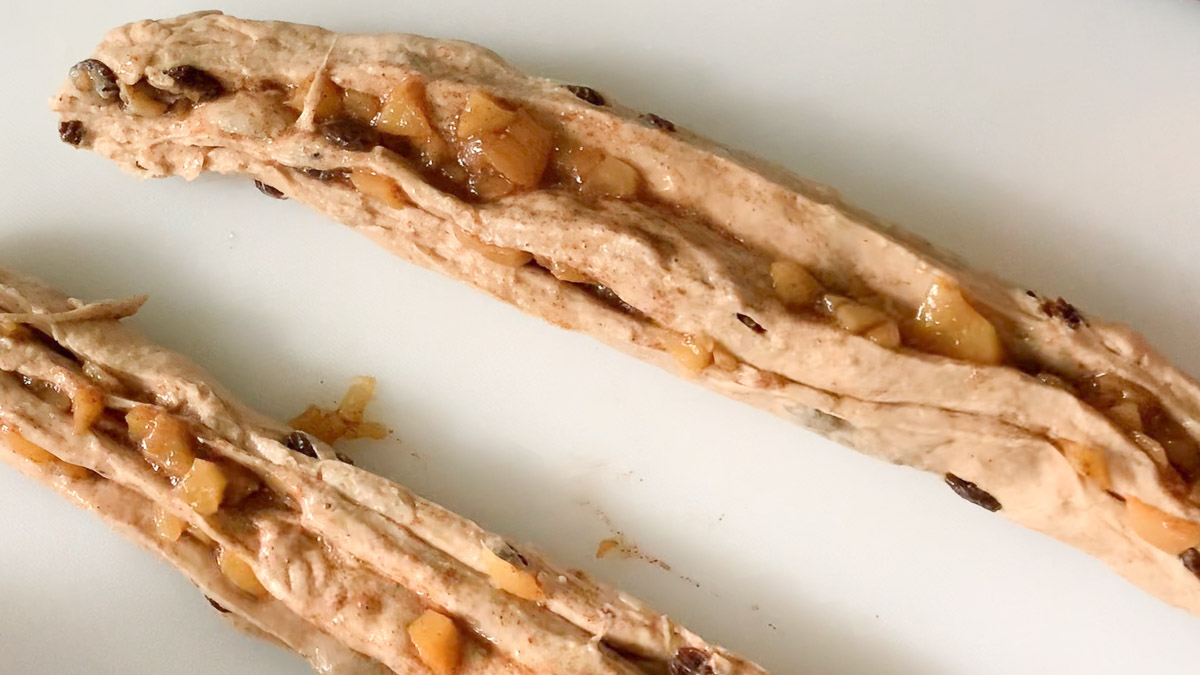
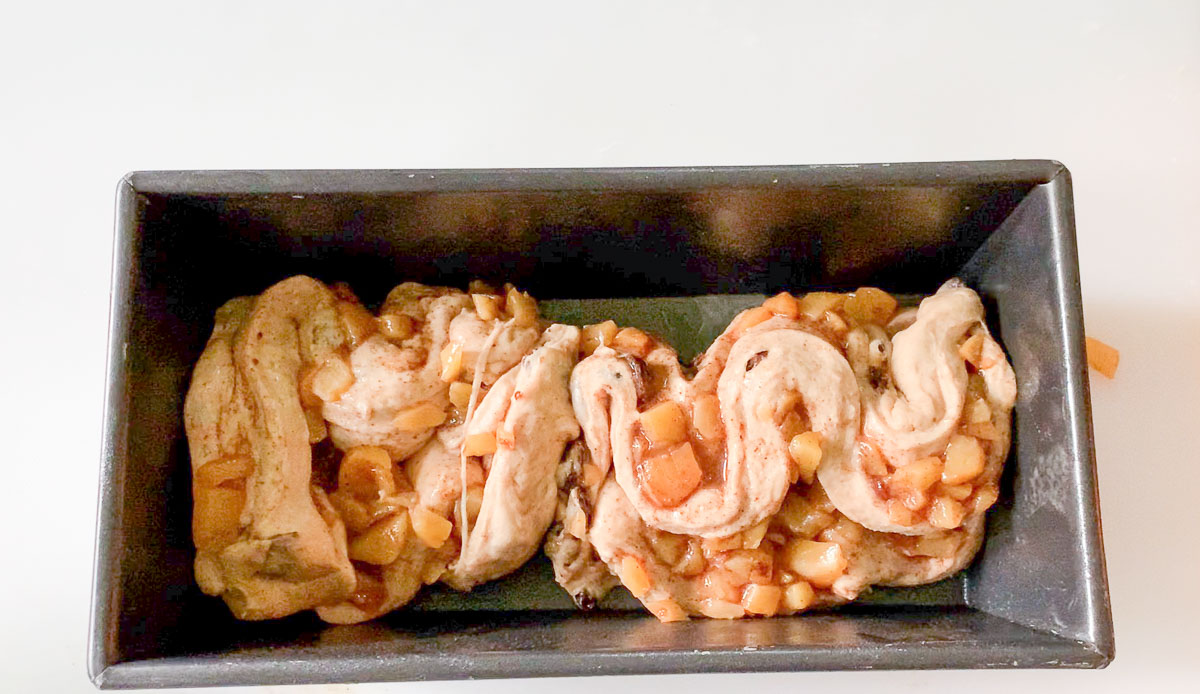
If you make a mess, no worries. You’re going to cover it up in the next step. Cover the pan and let the dough rise until it is about 2/3 of the original size.
Preheat your oven to 425˚F (220˚C) for about 15 minutes before your bread is ready to bake.
Make the streusel (if you use it) or icing while the bread bakes.
An Alternate Method for Shaping the Dough
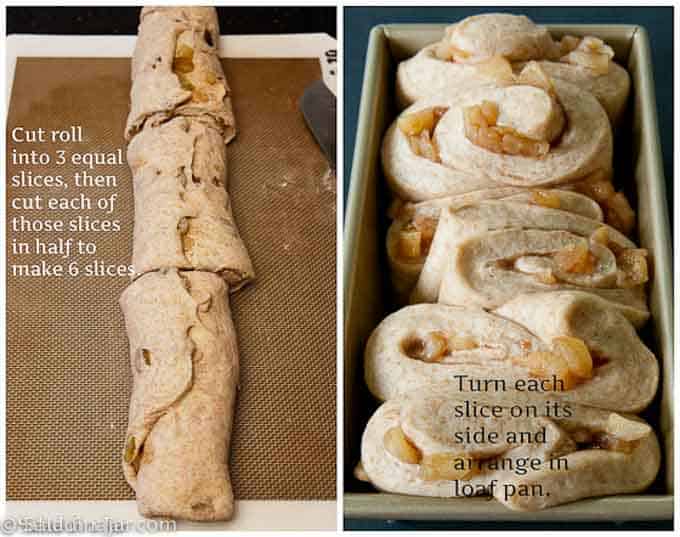
The method pictured below might be more straightforward if you are a novice baker.
- After rolling the dough into a long cylinder and sealing it (as seen in the pictures on the left side above), the same way you would for cinnamon rolls, slice the cylinder crosswise into six large slices and set it on end in a loaf pan.
- Cover the pan loosely with a tea towel or freebie shower cap. Remove the cover as soon as the dough is almost double in size.
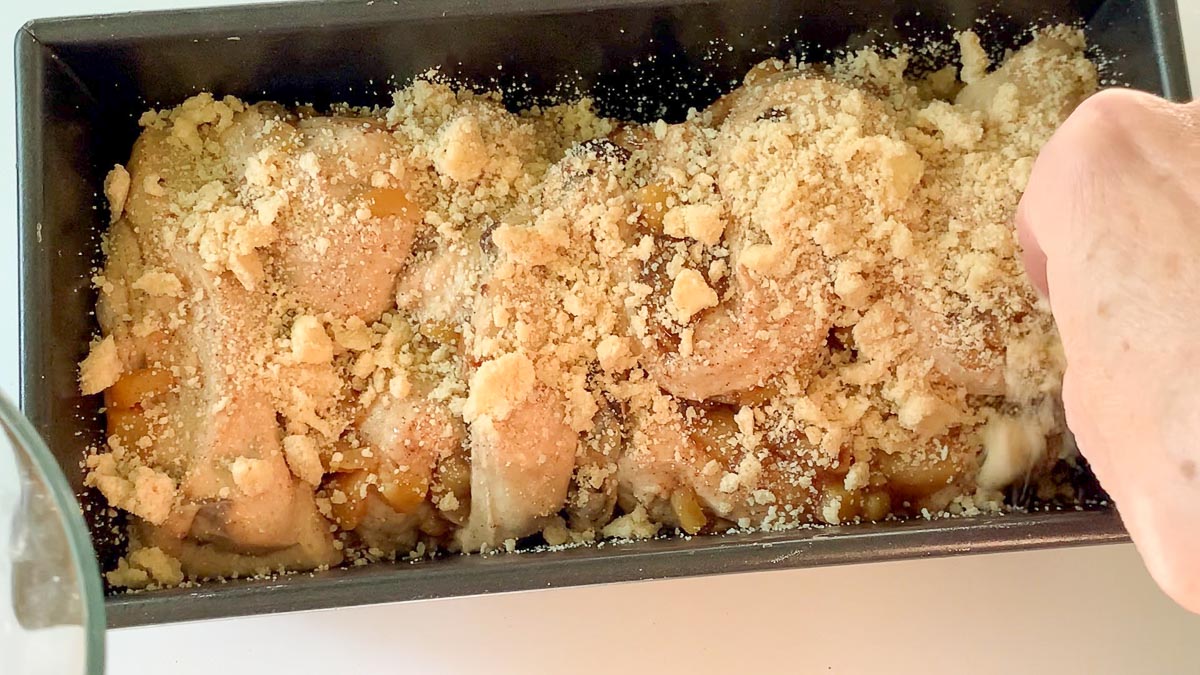
- Sprinkle with streusel if using, then bake as directed.
FAQ About Cinnamon-Apple Bread
Storing iced bread in a plastic bag can be a messy business. Consequently, I don’t recommend frosting this loaf if you don’t have enough mouths to eat it all in one sitting.
The best way to store most homemade bread is in a plastic bag at room temperature. Take a tip from King Arthur Flour: When keeping bread for a day or two at room temperature, plastic or foil (rather than cloth) are the best options.
Storing in the refrigerator can cause your bread to get hard.
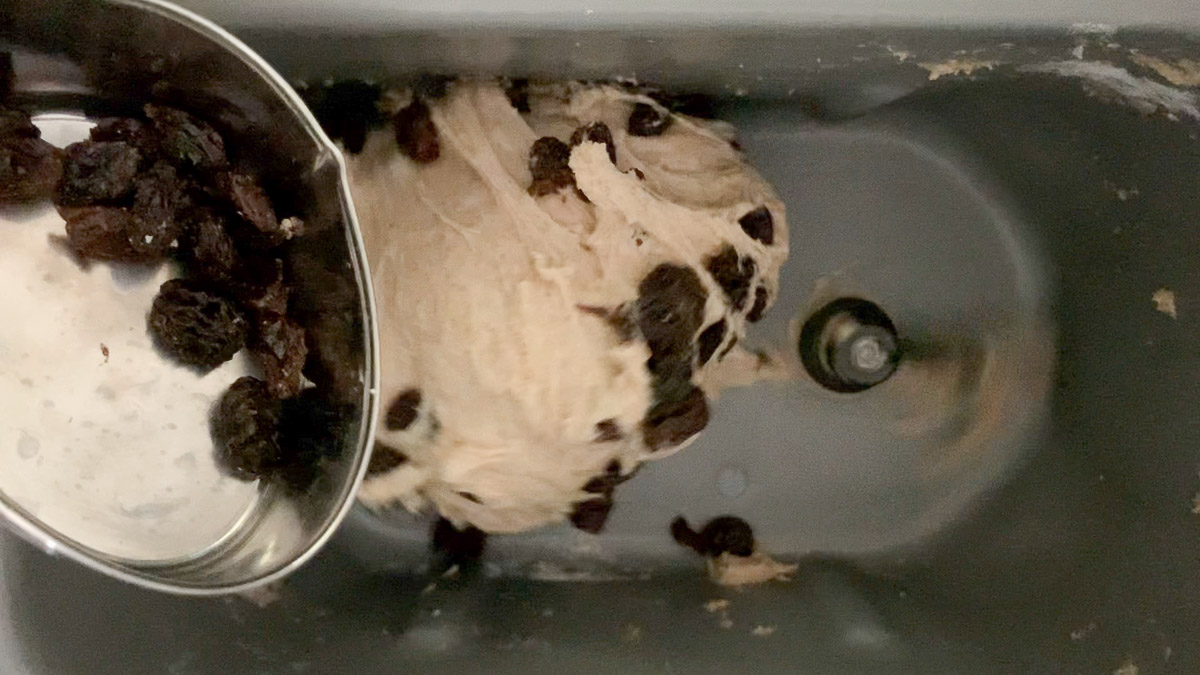
I prefer to add raisins close to the end of the kneading cycle. Doing this will distribute the raisins throughout the dough, not in the fruity swirl. In my experience, this keeps the raisins from falling out of the bread when you’re eating it. I use the same method with my Cinnamon-Raisin Bread, too.
Two other ways to add the raisins (or nuts if you prefer):
1. Knead them in by hand before you shape the dough.
2. Add them to the apples before you microwave them. Cooking them will plump them up if you like your raisins less chewy and more tender.
If the apples are sweet, you may not need more sugar. But if you have a sweet tooth, more sugar is always better.
Certainly! Make it and bake it. This moist bread only gets better the next day or two or three. It also freezes well after baking. It’s perfect for baking before Christmas because it only improves after hanging around for a day or two.
Yes. Be sure to chop the apples finely. The apples in commercial pie filling are usually too big.
Be sure your pan is well-oiled, or use a USA pan that doesn’t need to be greased. They are my favorite pans.
Parting thoughts: I hope the detailed directions will encourage you to give this modern recipe a chance. Please give yourself plenty of time the first time you make it, as you would any new recipe.
You will like this easy Crustless Apple Pie if you have many apples. For something savory with apples, this Ham Stew with Beef and Bacon (and apples that disappear in the broth) is my favorite soup on this website. If you like raisins, don’t miss this Cinnamon-Raisin Loaf made with a bread machine. If you want to read more tips for using a bread machine, start with this post.
p.s. This bread makes a tasty toasted cheese sandwich with apple butter and melty white cheese. YUM!!
Recipe Help at Your Fingertips: For questions or suggestions, email Paula at saladinajar.com. If you need help, I’m happy to troubleshoot via email (faster than leaving a comment). Attach pictures and as many details as possible for the best advice.
Sweet Apple Cinnamon Bread Machine Recipe
Rate this recipe
(5 stars if you loved it)
Video
Ingredients
- ⅔ cup (151 g) buttermilk or yogurt thinned with milk to buttermilk consistency
- 1 large (50 g) egg
- ¾ teaspoon salt
- 2 tablespoons (28 g) butter
- 2 tablespoons (27 g) brown sugar
- 1 cup (120 g) whole wheat flour
- 1-1/4 cup (150 g) bread flour
- 1-1/2 teaspoons (6 g) bread machine or instant yeast
- ½ cup (72 g) raisins
Apple Filling
- 1 medium golden delicious apple peeled and finely diced
- 1 teaspoon cinnamon
- ⅛ teaspoon allspice optional
- ¼ teaspoon cornstarch
- 1 tablespoon (14 g) sugar optional depending on how sweet your apples are naturally
- 1 tablespoon (14 g) water
Streusel
- 2 tablespoons (15 g) all-purpose or bread flour
- 1 tablespoon (12 g) brown sugar
- 1 tablespoon (14 g) cold butter
- ¼ teaspoon cinnamon
Frosting (if desired)
- ½ cup (60 g) powdered sugar
- 2 teaspoons (28 g) coffee
- 1 tablespoon (15 g) cream cheese
Instructions
Dough
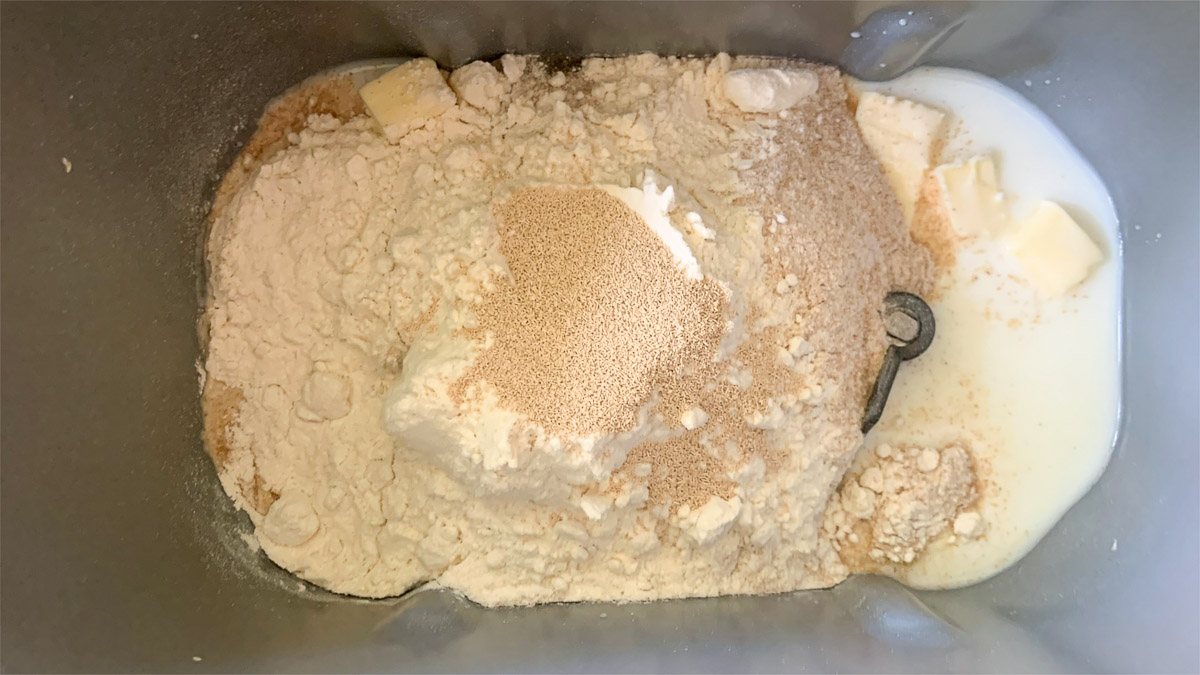
- Add all dough ingredients (except for the raisins) to the bread machine pan in the order listed: 2/3 cup (151 g) buttermilk or yogurt thinned with milk to buttermilk consistency, 1 large (50 g) egg, 3/4 teaspoon salt, 2 tablespoons (28 g) butter, 2 tablespoons (27 g) brown sugar, 1 cup (120 g) whole wheat flour, 1-1/4 cup (150 g) bread flour, 1-1/2 teaspoons (6 g) bread machine or instant yeast.
- Select the DOUGH cycle and push START.
- Check the dough at least twice during the mixing and kneading phase by lifting the lid to take a peek. The first time, look immediately after the machine starts mixing to ensure the paddles are engaged correctly. Look again 15 minutes into the DOUGH cycle to assess the consistency of the dough. For most recipes, The dough should stick to the side, then pull away cleanly.If your dough is too wet, add flour one tablespoon at a time.Conversely, if the dough is too dry, add one tablespoon of liquid at a time until the dough looks just right. Read more about this surprising secret to success with a bread machine here.
- Approximately 5 minutes before the kneading phase ends (or when you hear the sound signaling for add-ins), add 1/2 cup (72 g) raisins to the bread dough. If you miss this time, knead in the raisins by hand before you shape the dough.
- Cook the apple filling so it can cool. See the directions below.
- When the DOUGH cycle completes, check the dough to make sure it has doubled in size. If not, leave the dough in the pan until it does.
Shaping the Dough
- Remove the dough from the bread machine pan onto a lightly floured surface. Gently press the dough with your fingers to remove the bubbles. Shape it into a smooth ball.
- Roll the dough with a rolling pin into a rectangle approximately 9 x 13 inches. Distribute room-temperature apple-filling mixture evenly over the dough, leaving a 1-inch margin around the rectangle. If the dough resists your efforts, cover it with a tea towel and let it rest for 15 minutes.
- Starting with a long side, roll the dough up tightly (without stretching) and pinch closed at the seam, starting with the longer side. Hint: If the dough seems too soft to handle easily, slip the dough cylinder into the freezer for 10 minutes before proceeding.
- Make the half-pipe design: Use a large, sharp knife to cut the roll in half length-wise at the seam. You should now have two long “half-pipes.”
- Spray a nonstick 9 x 5-inch loaf pan with an aerosol flour/oil mixture like Baker’s Joy. Then, with the cut side up, make a snake or “S” shape going back and forth with one of the half-rolls and place into one end of your loaf pan (mine holds 2 quarts of water if you want to compare sizes).
- Make an “S” shape with the other roll and place it into the other end of the pan as pictured. It doesn’t have to be perfect but should fill the pan from one end to the other.
- Cover dough with a shower cap or tea towel and set in a warm place to rise for approximately 45 minutes. The dough should rise somewhat less than double.
Apple Filling
- Combine 1 medium golden delicious apple, peeled and chopped, 1 teaspoon cinnamon, 1/8 teaspoon allspice, 1/4 teaspoon cornstarch, 1 tablespoon (14 g) sugar, 1 tablespoon (14 g) water, 2 tablespoons (15 g) all-purpose or bread flour into a microwave-safe bowl and cover. Cook on HIGH for 2 minutes. Allow the cooked apples to cool while the dough is rising.
Streusel
- Combine all ingredients: 1 tablespoon (12 g) brown sugar, 1 tablespoon (14 g) cold butter, 1/4 teaspoon cinnamon, with a fork until crumbly. The mixture should resemble oatmeal.
Baking
- Fifteen minutes before the bread is ready to bake, preheat the oven to 425 °F (220˚C).
- If using streusel, sprinkle it over the top.
- Turn the oven temperature back to 350 °F (180˚C). Bake for 35 minutes or until the internal temperature reaches 190 °F (88˚C). About halfway through baking, cover the bread loosely with foil to prevent over-browning.
- Remove from oven and let stand for 15 minutes before turning out onto a cooling rack.
Frosting
- Combine 1/2 cup (60 g) powdered sugar, 2 teaspoons (28 g) coffee, and 1 tablespoon (15 g) cream cheese. Add more sugar if too thin, or add coffee if too thick. Drizzle over the cooled loaf.
Notes
- To make this recipe in a heavy-duty stand mixer, add ingredients to the bowl in the same order. Turn on LOW to mix until all ingredients are moistened. Then, turn the speed to 2 or 3 using a dough hook. Continue beating/kneading until the dough becomes smooth and elastic (about 5-10 minutes). Cover and allow to rise in a warm place. Deflate the dough gently and shape it as indicated in the recipe.
- If making by hand, combine all ingredients into a shaggy ball in a large bowl. Turn the dough out onto a floured surface. Knead with your hands until the dough becomes smooth and elastic. Kneading will likely take 10-20 minutes, depending on your experience. Place the dough ball into a greased bowl. Cover and allow to rise until double. Deflate the dough gently and shape as indicated in the recipe.
- Please note: If you only have active dry yeast, use 1/4 teaspoon more than is called for in the recipe. It no longer needs to be dissolved first, but you can if you prefer.
Equipment
Nutrition
All images and text ©️ Paula Rhodes for Salad in a Jar.com



Paula Rhodes, owner
As a retired home economist, I created Saladinajar.com to share my belief that you don’t have to be a chef to find joy in creating homemade food worth sharing. Bread machines (used in an unconventional way), homemade yogurt, and quick microwave recipes are my specialty.