Bread Machine Pita Bread (Oven-Baked with Oatmeal Option)
Sneak Preview: Use your bread machine to mix soft, flavorful pita dough, then shape and bake it in a hot oven for classic puffed pockets. An overnight chill improves flavor, but same-day baking works too—either way, these homemade pitas beat anything from the store.
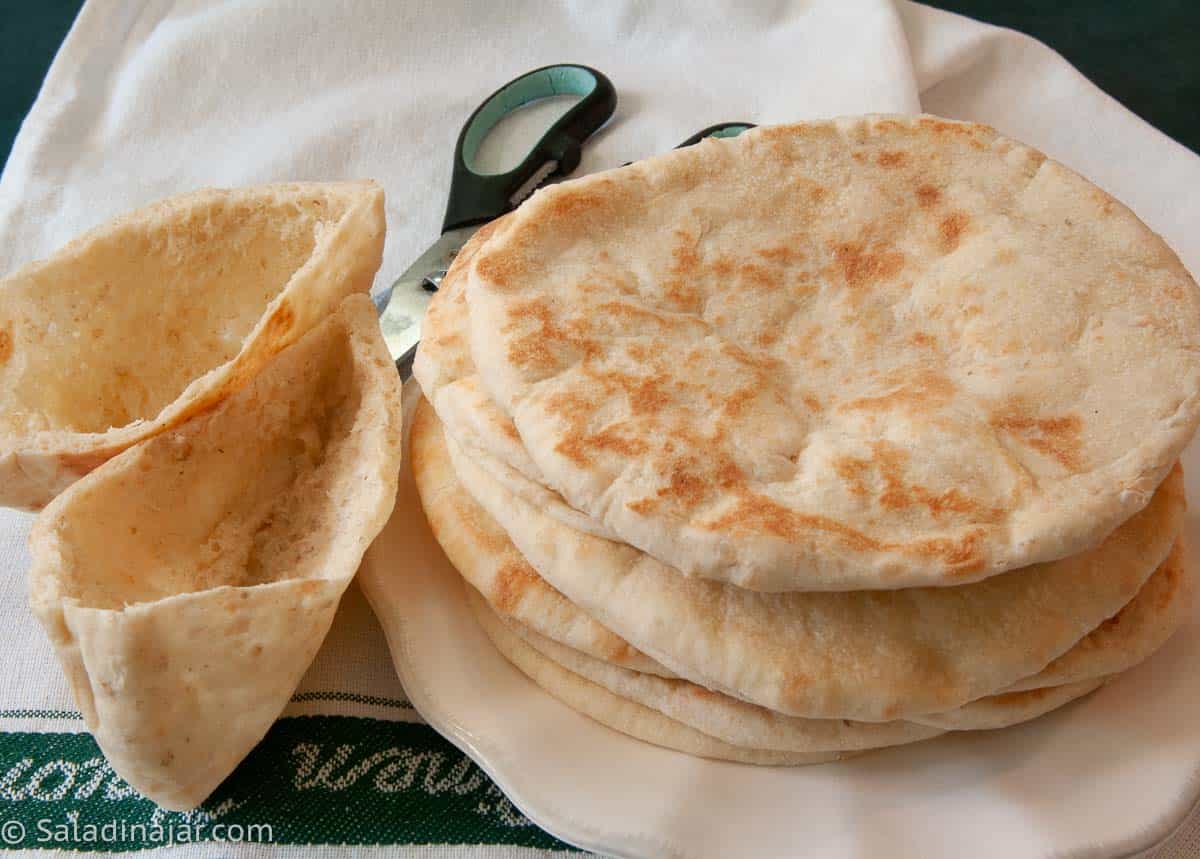
I never understood the fuss over pita bread until I walked into a Middle Eastern grocery and saw bags of warm, steamy pita stacked by the door. Fresh pita is tender, fragrant, and nothing like the dry, overpriced rounds at the store—but it doesn’t last long. That’s why making it at home (and freezing what you won’t eat right away) makes so much sense. Your bread machine handles the mixing, you shape and bake, and suddenly good pita is always within reach.
How I Use a Bread Machine for Better Bread
I use my bread machine (this is the model I use) to mix and knead the dough using the DOUGH cycle, then shape it by hand and bake it in a conventional oven. This approach takes advantage of the machine’s consistent kneading while giving me full control over shaping, rising, and baking—especially important for rolls, pizza, and other swirled and shaped breads.
My free Bread Machine Crash Course explains this approach in more detail.
Ingredients & Substitutions
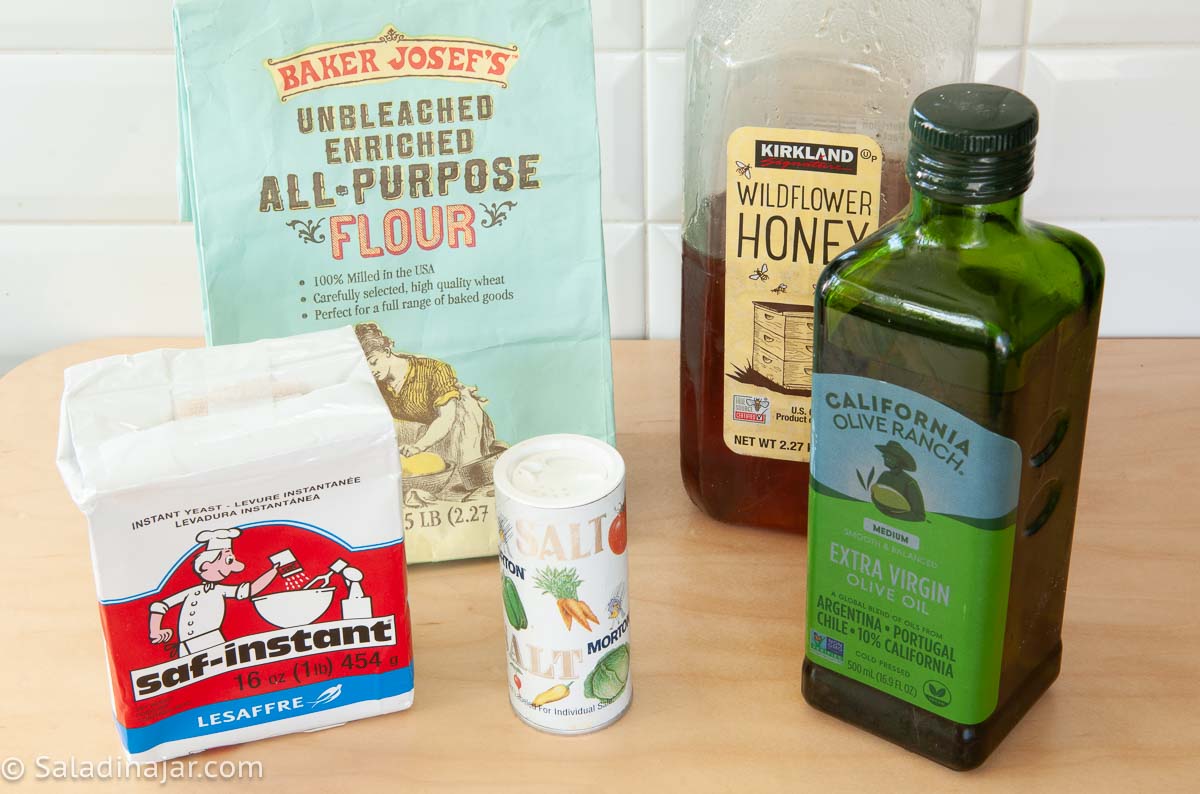
• FLOUR: All-purpose or bread flour works. The latter may require an extra tablespoon or two of water.
• OLIVE OIL: Extra-virgin is required to add flavor and tenderness.
• HONEY: Adds even more flavor. Substitute sugar.
• SALT: I like a lot of salt in my pita bread. You can cut back if necessary.
• YEAST: Instant yeast is always my first choice for bread machines. Replace with active dry yeast.
• OATMEAL: If choosing the oatmeal option, use quick oats. If you want to substitute old-fashioned oats, I recommend chopping them in a blender first. Other uses for quick oats include these waffles and these oatmeal cookies with coffee icing.
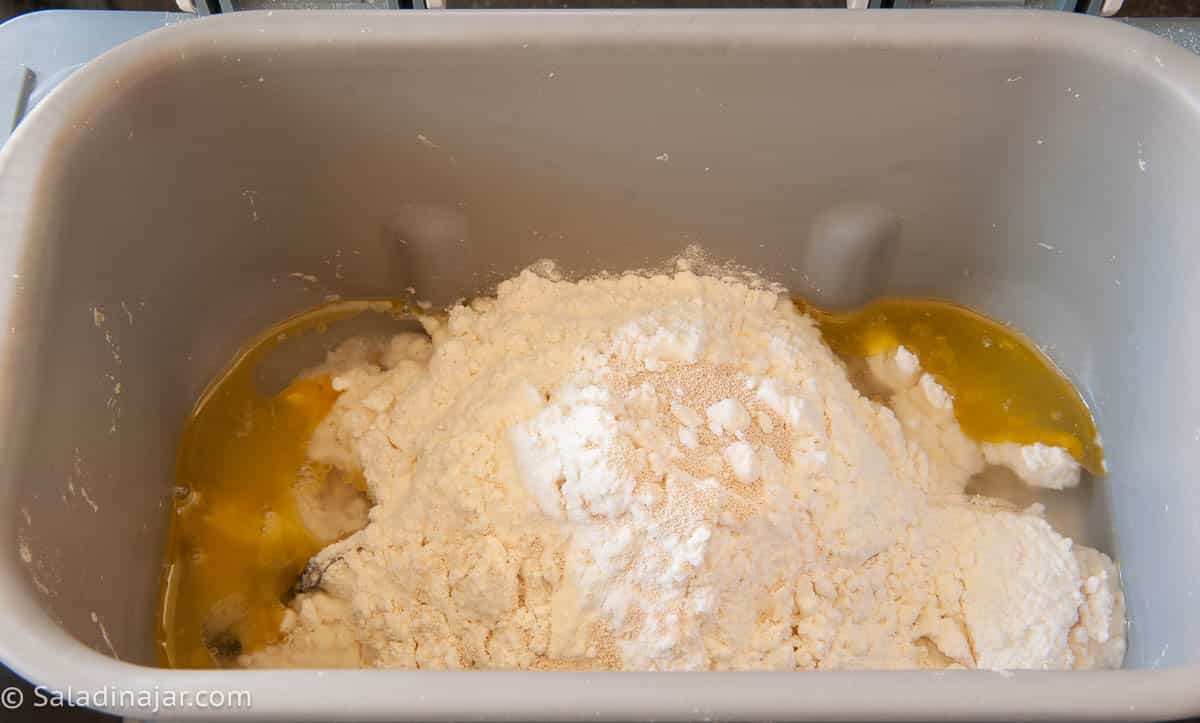
How to Make Pita Bread Dough with a Bread Machine
⬇️ Jump to the recipe below for exact amounts and detailed instructions.
Bread Machine Pita Bread (Oven-Baked with Oatmeal Option)
Video
Ingredients
- 1 cup (227 g) water
- 2.5 tablespoons (30 g) olive oil
- 3 teaspoons (21 g) honey
- 1¼ teaspoons table or sea salt
- 3 cups (360 g) all-purpose or bread flour
- 1½ teaspoon instant yeast
Instructions
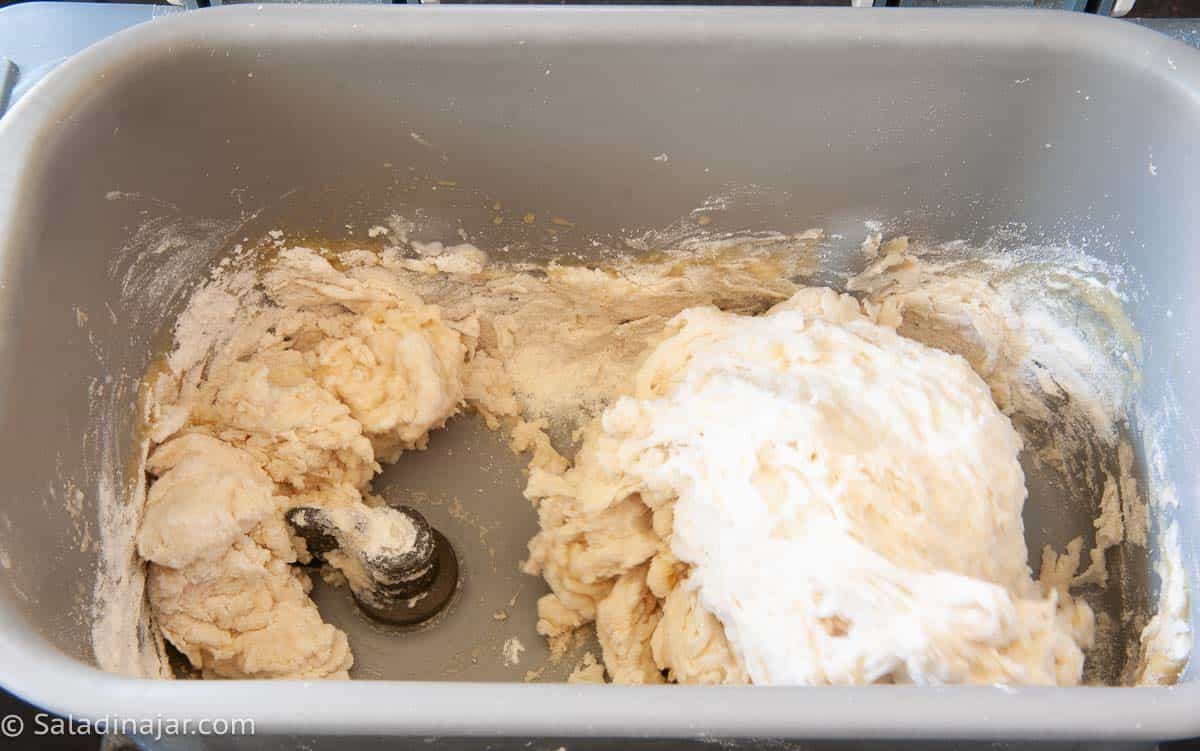
- Make dough: Add 1 cup (227 g) water, 2.5 tablespoons (30 g) olive oil, 3 teaspoons (21 g) honey, 1¼ teaspoons table or sea salt, 3 cups (360 g) all-purpose or bread flour, and 1½ teaspoon instant yeast to bread machine pan.Select the DOUGH cycle and start.First check: After a couple of minutes, check the dough to make sure it is coming together into a raggedy ball. If not, add more water 1 tablespoon at a time. If you see pancake batter instead of dough, you forgot some flour—just add it slowly until everything pulls together. Once all the ingredients come together into a ball, stop or unplug the machine and let the dough rest for 10-15 minutes. (This allows time for the water to soak into the flour so the kneading is more effective. This is especially important if using the oatmeal option.)After the 10–15 minute rest, restart your machine so it continues the kneading process. (All models are different—just restart the DOUGH cycle however your machine allows.)
- Check the dough: Open the lid and inspect it 15-18 minutes into the kneading phase. It should stick to the side of the pan, then pull away cleanly. If it is very sticky, add flour 1 tablespoon at a time, incorporating each before adding more. If the dough is bouncing off the side, it's too dry, and the gluten is not being developed. Add water 1 tablespoon at a time, incorporating each before adding more. NOTE: Bread dough is influenced by flour, humidity, and even your kitchen temperature—so use this step to fine-tune the dough for your environment.
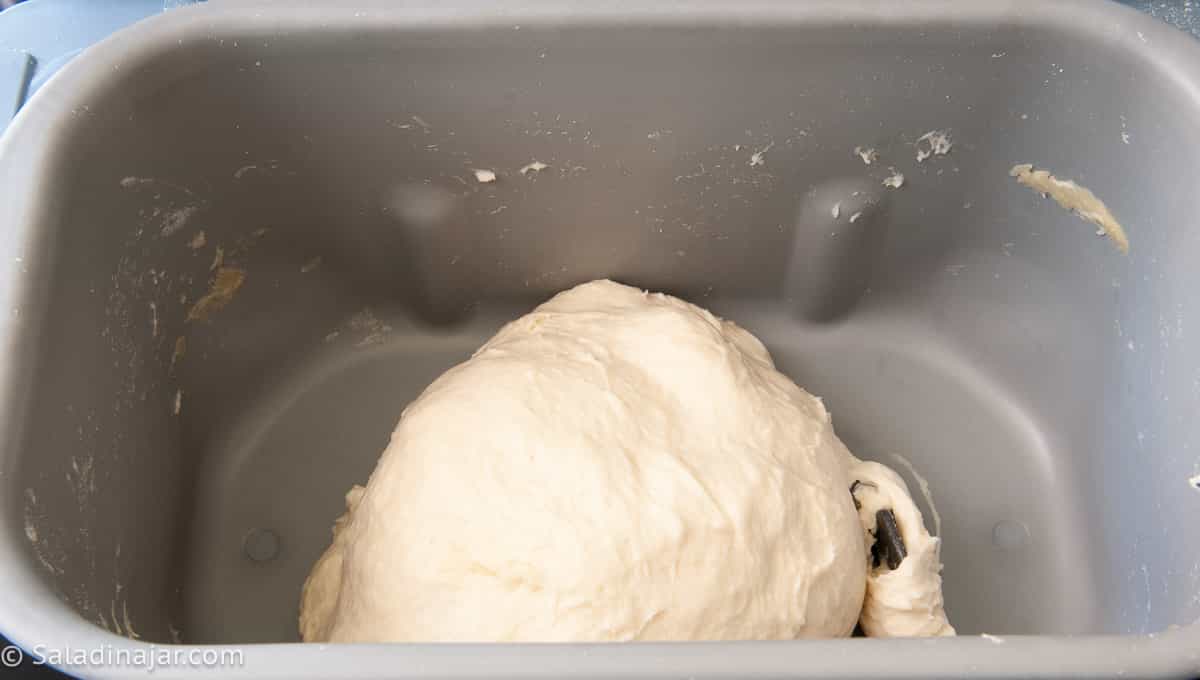
- End of DOUGH cycle: The dough should be doubled. If not, give it more time. Restart the DOUGH cycle and knead for 5 seconds to deflate the dough.Stop the machine and turn the dough out onto a lightly floured surface, shape into a smooth ball, cover, and let rest for 10 minutes.
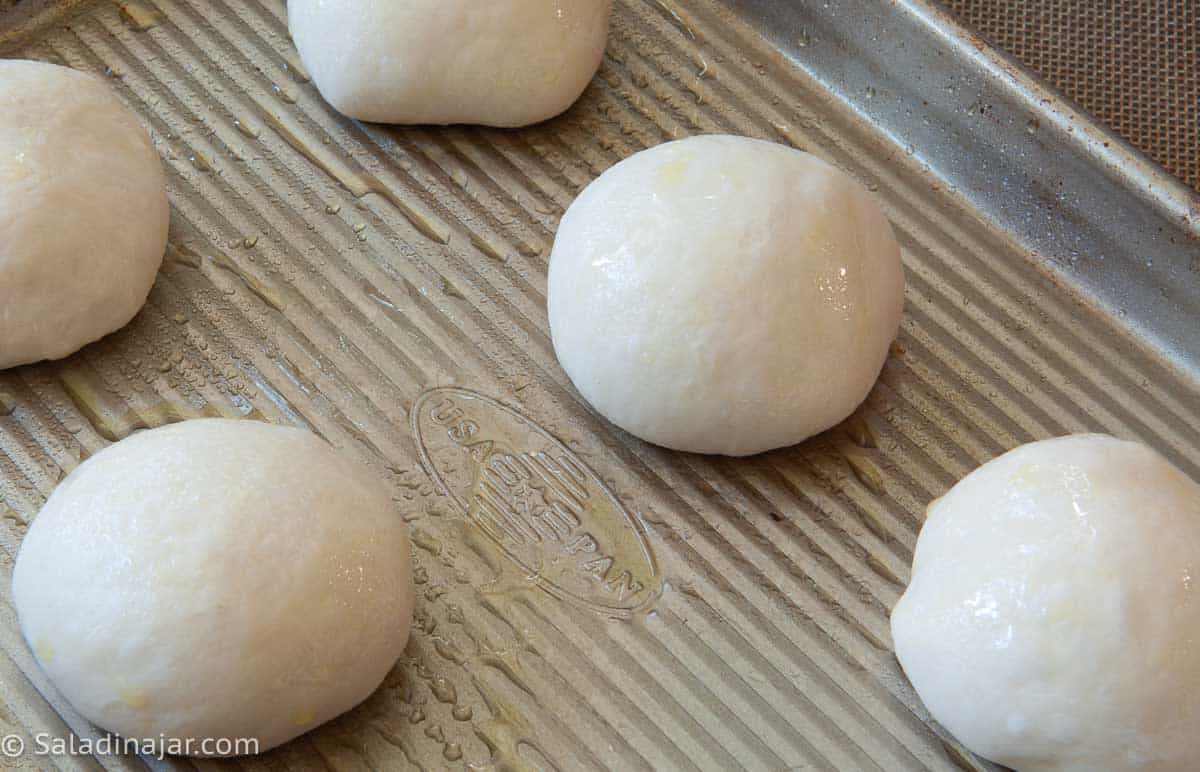
- Shape: Divide dough into 8 equal portions (use a scale if you are picky about uniformity). Form into tight and smooth balls. Place the balls smooth side up on a cookie sheet, cover, and refrigerate overnight.• In a hurry? Let the full DOUGH cycle finish, shape the dough balls, and bake right away. You’ll miss out on some flavor, but they still beat store-bought.
- Next Day: 45 minutes before baking your pita bread, preheat the oven to 450˚F (232˚C). Adjust oven rack to the lowest position and insert a baking steel, a pizza stone, or a heavy baking sheet that can withstand high temperatures without warping.
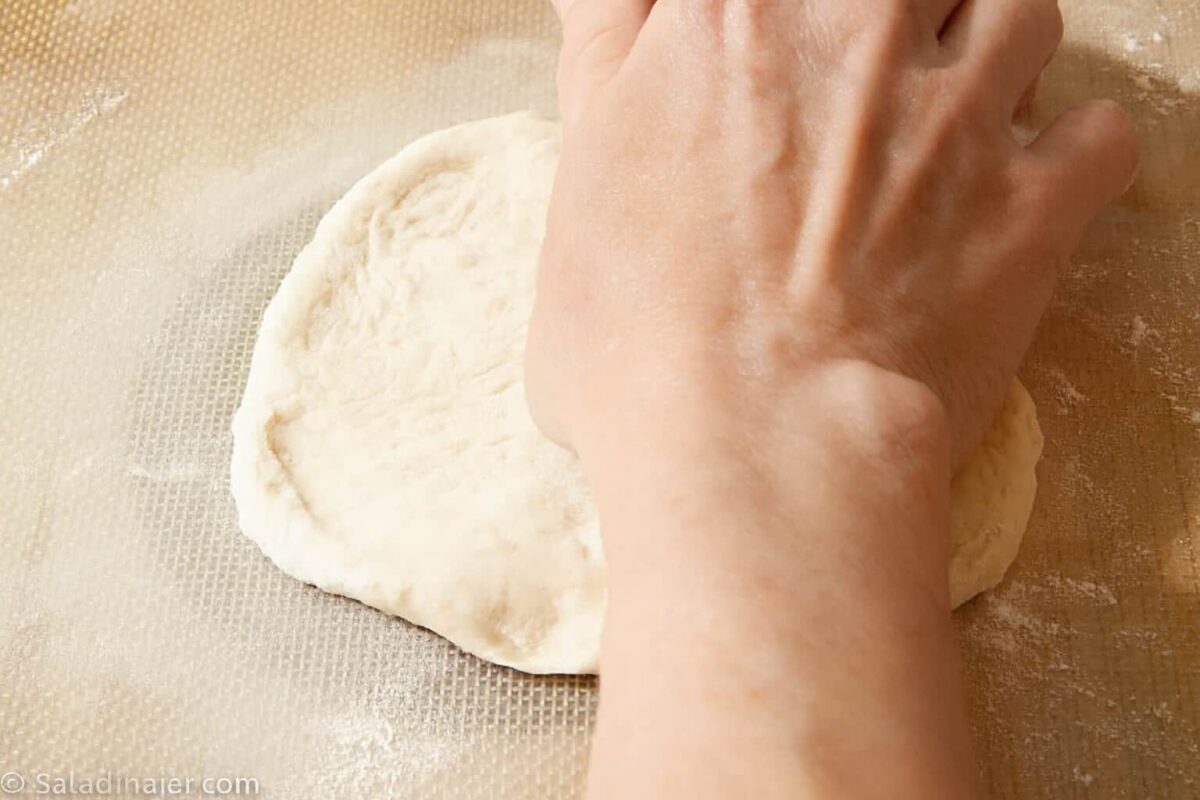
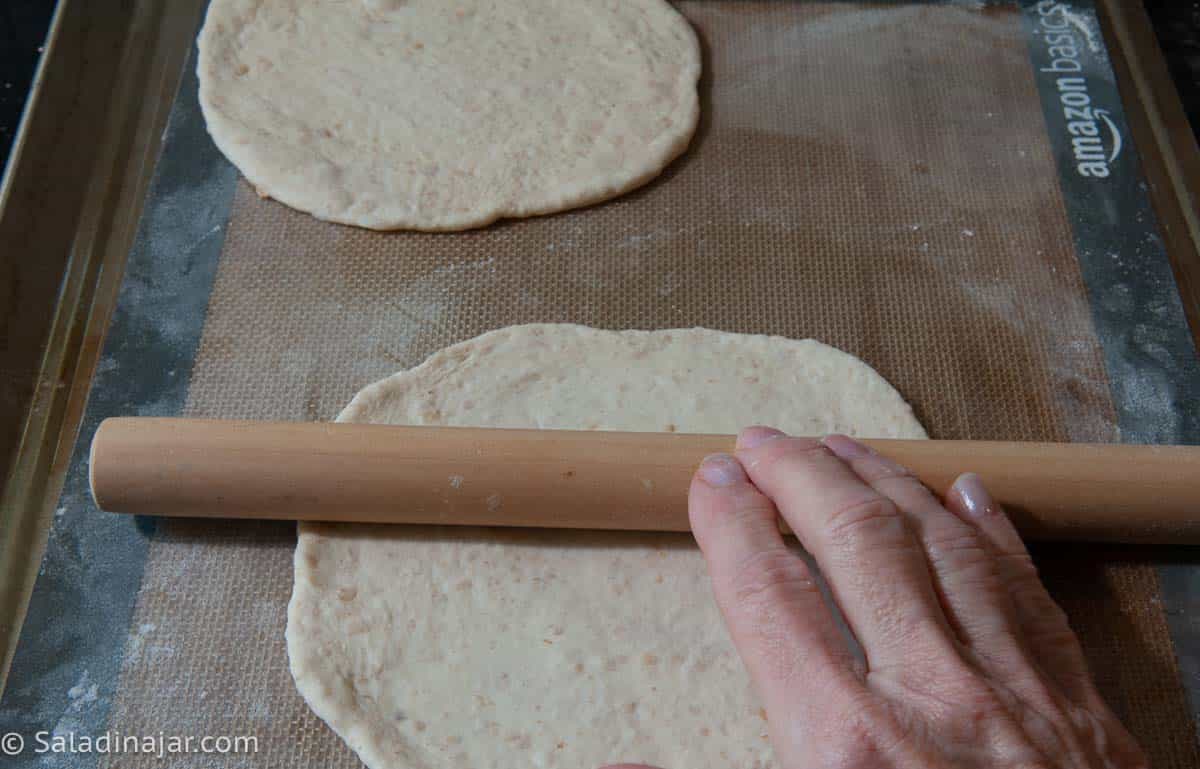
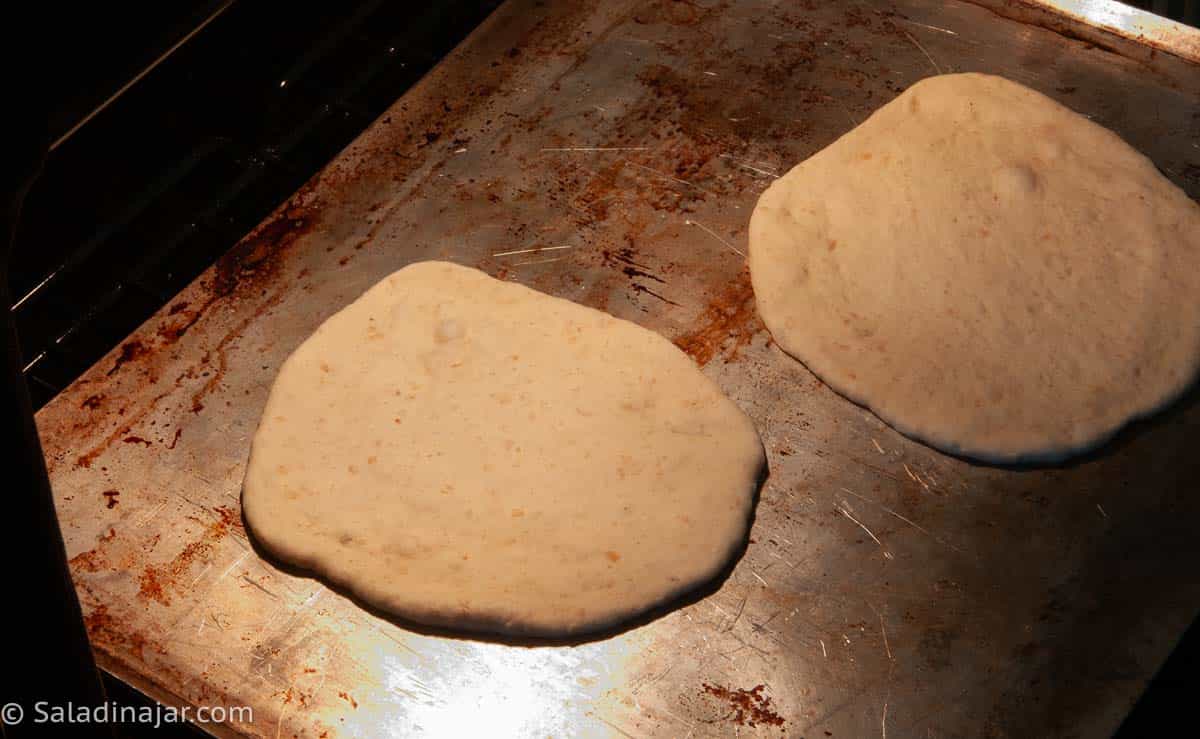
- Roll-out: Lightly flour your work area (I prefer a silicone mat because of the easy clean-up). Flatten a single ball of dough between your palms and press it into a 4-5-inch circle. Flip once or twice so both sides are lightly coated with flour and the dough isn’t sticky.Continue to roll the dough into a circle with a rolling pin until it is approximately 7 inches in diameter. Be careful not to make any creases while rolling, as this will prevent the dough from puffing up in the oven.
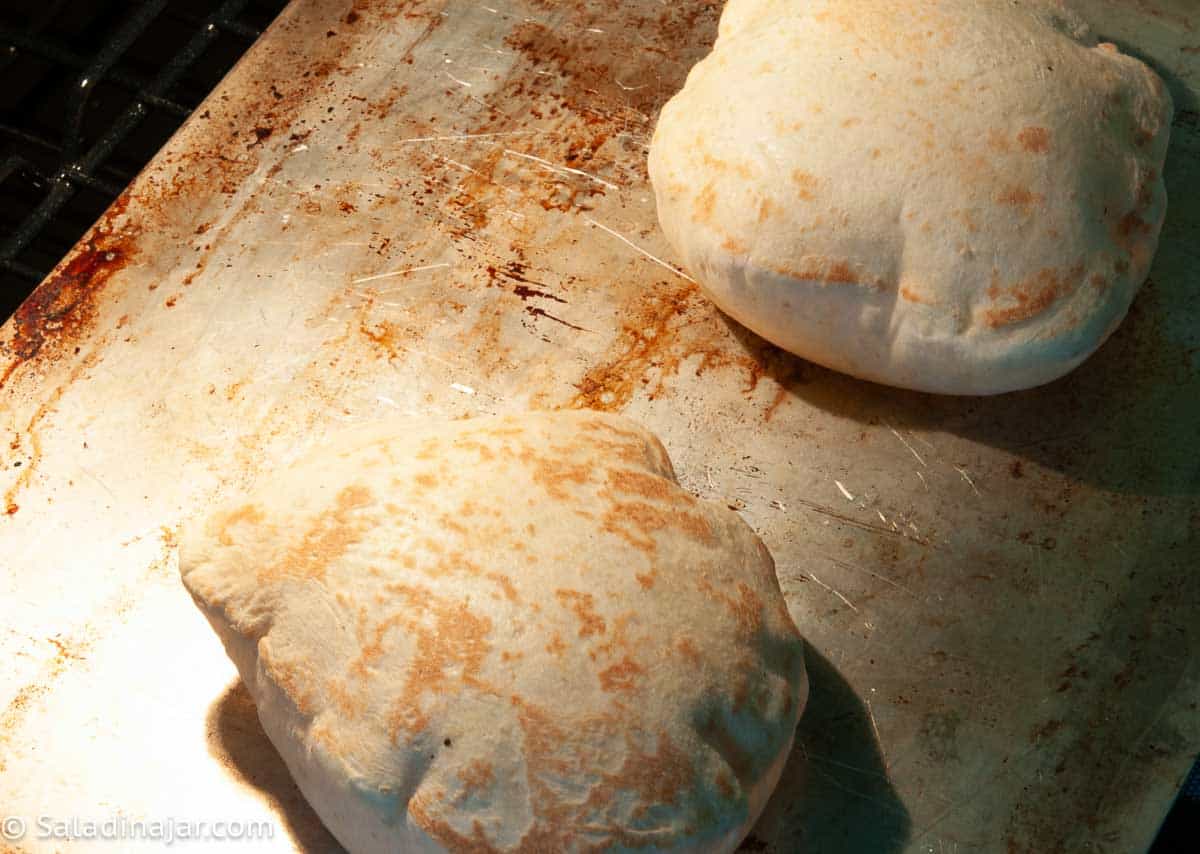
- Bake: Transfer 2-3 unbaked dough rounds onto the preheated steel, stone, or tray. Bake until fully inflated and evenly browned on the bottom. (1-2 minutes). Flip pita and continue baking until lightly browned in the center. (another minute). The flip isn’t required for pockets, but it does give a nicer color.• Don't bake the pitas too long. They should still be pliable. Total time shouldn't take more than 2-3 minutes if your oven is hot enough.Transfer baked pitas to a cooling rack and cover with a towel. Continue the shaping and baking process until all pita are baked.
- Cool: Allow pita breads to cool about 10 minutes before serving.
Notes
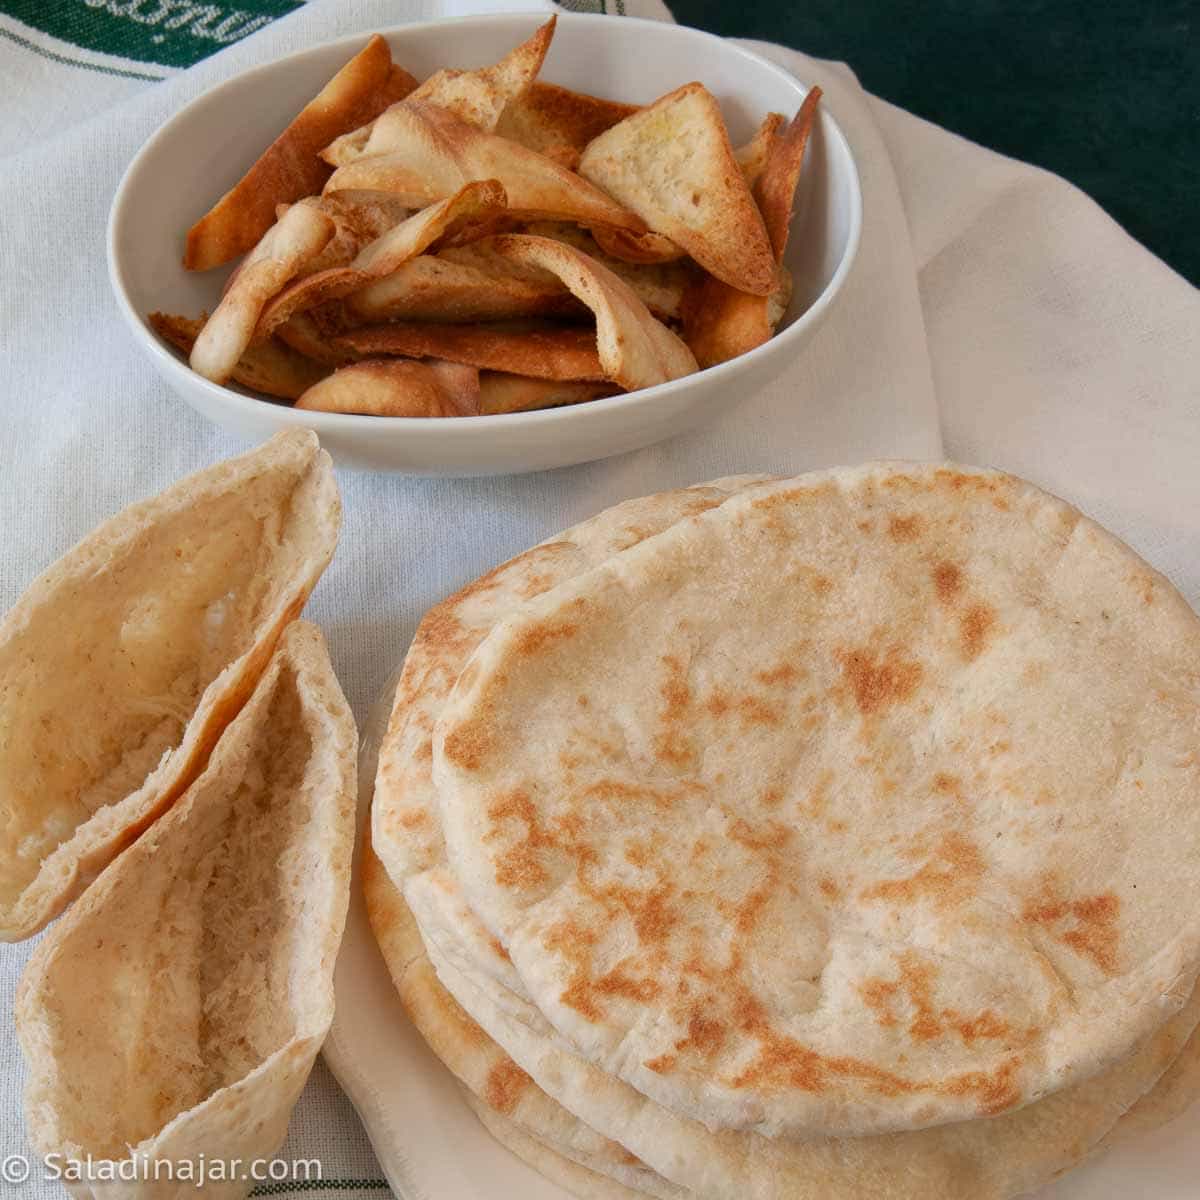
- Split the pita: Separate the two layers for thinner, crispier chips.
- Cut into uniform pieces: Triangles, strips, or shards—just keep sizes consistent.
- Light oil = best crunch: Brush or spray both sides with olive oil or melted butter.
- Season generously: Salt, garlic salt, za’atar, or cinnamon sugar all work beautifully.
- Bake at 425°F: 8–12 minutes, flipping halfway. Watch closely—they brown fast.
- Cool completely: They crisp up even more as they cool (if you can resist nibbling).
- Unbaked dough: Freeze after the DOUGH cycle or after shaping (before final rise). Defrost in the fridge overnight.
- Baked bread: Double-wrap and freeze up to one month. Reheat gently.
- Stand Mixer: Mix until moistened, then knead with a dough hook (speed 2–3) until smooth and elastic (5–10 minutes). Let rise, deflate, and shape as directed.
- By Hand: Mix to a shaggy dough, knead on a floured surface until smooth and elastic (10–20 minutes). Let rise, deflate, and shape as directed.
Equipment
- 1 Dumpling Rolling Pin (A short and skinny rolling pin–makes rolling smaller circles easier)
Nutrition
All images and text ©️ Paula Rhodes for Salad in a Jar.com

What Readers Ask Me About This Recipe?
1. Why didn’t my pita puff?
Common culprits: the dough wasn’t rolled evenly, the dough dried out before baking, the oven/steel wasn’t hot enough, or there were small creases that prevented steam from forming a pocket.
2. Do I have to chill the dough overnight?
No—the overnight rest improves flavor and texture, but you can bake the same day. Just let the dough rise fully (in the bread machine as part of the DOUGH cycle), then shape, rest briefly, and bake.
Final Thoughts
Once you get the rhythm of rolling and baking, pita night becomes downright fun. This is one of those recipes that rewards confidence—your kitchen will smell heavenly, the pitas puff like magic, and you’ll wonder why you ever bought the packaged kind. Make a batch, freeze a few, and enjoy fresh pita whenever the craving hits.
— Paula, Home Economist
Homemade Food Worth Sharing
Need help troubleshooting?
Email me: Paula at saladinajar.com — photos help!

Hi Paula! 🙂
I have a question. After the overnight refrigeration, do you take the dough out of the fridge so it can come to room temperature when you start to heat the oven? Or can the dough be still cold? I’m wondering if it will make a difference or not.
Hi Steve,
The dough can still be cold. It will warm up quickly as you roll it out thin enough to make a 7-inch diameter pita. I turn the oven on, take the dough out of the fridge, and roll it out. By the time your oven is hot and reaches 450˚F, you can start baking them.
Thanks again, Paula. 🙂
Hi Paula. Making these right now. Noticed recipe needs 3 tablespoons of olive oil or 30 grams. My oils all indicate 1 tbsp = 15g. 3 tbsps would equal 45g. Is yours correct? Thanks.
Hi Elizabeth,
That is a good question. First of all, I usually use King Arthur Flour’s conversion chart for measurements. But they don’t have everything, so then I just ask my Echo Dot. King Arthur says one Tablespoon is 12.5 g. Echo says 13 g. Then there is the amount on the bottle, which can vary as well. When I measured out 3 tablespoons of olive oil, it actually weighed 30 grams, so that is what I used for all my testing. As you can see, there is no gold standard. I also noted that my olive oil bottle says 15 milliliters, which is not quite the same as grams, but close. In the end, if you want the same results I got, use my weights. But that doesn’t mean I don’t sometimes make mistakes in the conversion, so I’m glad you asked. In this case, I used 30 grams. I don’t think a few more grams will make that much difference. Some pita recipes use much less oil, but I like it — it makes the dough easier to handle.
My niece wanted to use pita bread to make sandwiches for her men that were in the field. So many fillings can be added to a pita pocket for a sandwich. A little hand sanitizer, put fillings into the pita, and the men can keep combining! Thanks for the timely recipe. I hope lots of farm wives will read this tip and make a batch of pita pockets for the field and freezer. They would work for a great snack going to soccer and all kinds of games.
Hi Sharon,
These are great ideas! Thank you for sharing them.
Be sure to make this recipe more than once. They are SO MUCH easier the second time around. And don’t forget to make some pita chips with the leftovers. They are the BEST!