Pull-Apart Monkey Bread (Bread Machine Dough)
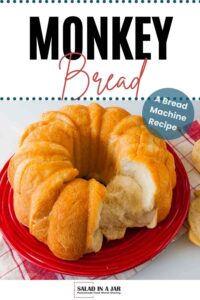
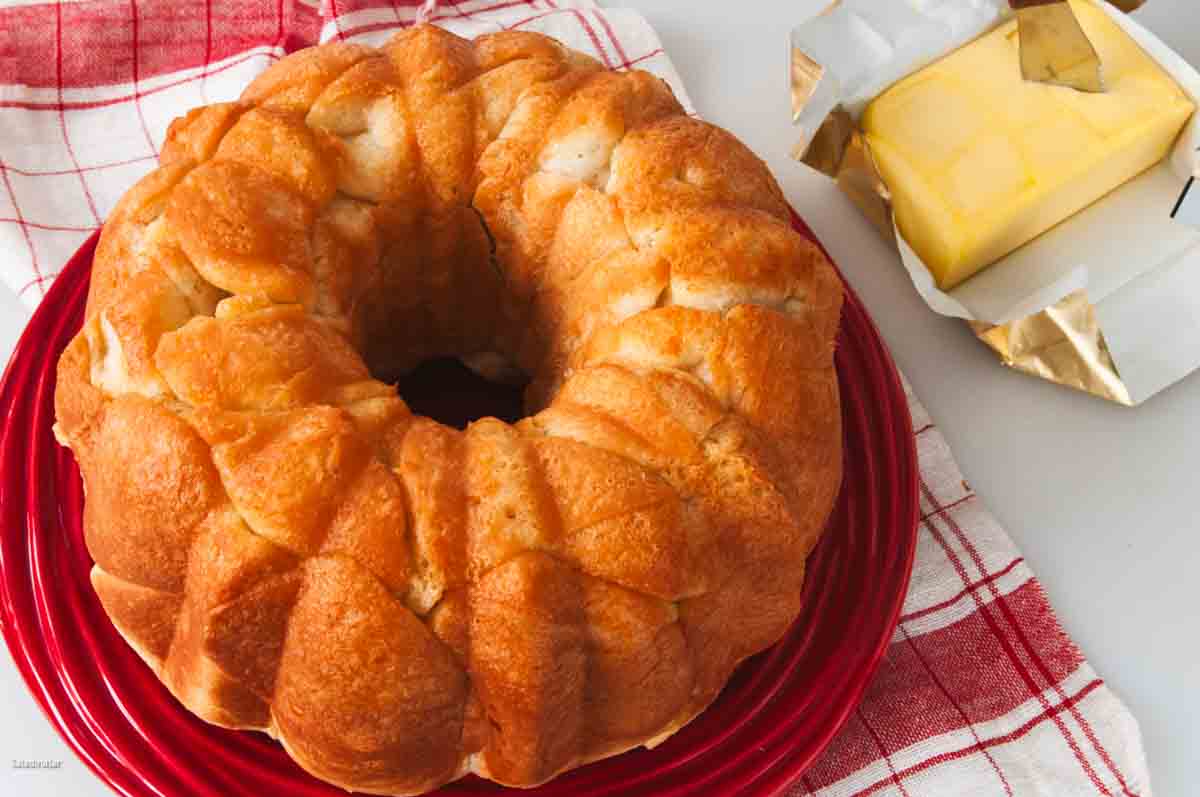
Sneak Peek: This pull-apart monkey bread starts with soft dough mixed in a bread machine, then baked in a Bundt pan for either a classic cinnamon-sugar version or a savory buttery variation.
This post contains affiliate links. As an Amazon Associate, I earn from qualifying purchases at no extra cost to you.
In the 1970s, I worked as a kitchen supervisor at the Greenhouse—a week-long health spa focused on nourishing food and wellness. Helen Corbitt designed the menus we followed, so I became intimately familiar with her cooking style.
This monkey bread is a modern nod to one of her signature recipes from Helen Corbitt Cooks for Company (paid link). I’ve adapted it for how I (and other cooks who want soft, buttery bread with a hands-on finish) use a bread machine to mix and knead the dough before shaping and baking in a conventional oven. Serve it warm as an unforgettable side dish—especially when plain dinner rolls just won’t do.
No bread machine? No worries. See the recipe notes for making this recipe with a stand mixer or by hand.
Ingredients & Substitutions
MILK: Whole or 2% preferred; non-dairy works too.
WATER: Cool tap water is fine when using a bread machine.
EGG: One large; sub flax egg if needed.
BUTTER: Salted or unsalted; plant-based is fine.
SUGAR: White sugar; honey or maple syrup also work.
SALT: Essential for flavor; it works in partnership with the yeast. Don’t leave this out,
FLOUR: Unbleached all-purpose for softness; bread flour gives a chewier bite.
YEAST: Bread machine or instant yeast preferred.
CINNAMON-SUGAR (optional): Use for sweet version; skip for savory.
Shareworthy Variations
• Classic Cinnamon-Sugar Monkey Bread
After dipping the dough pieces in butter, coat them with 1 cup of granulated white sugar and two teaspoons of cinnamon. Arrange pieces randomly in a bundt pan. Let rise until almost double. Bake as directed.
• Browned Butter Monkey Bread (in a Heart-Shaped Pan)

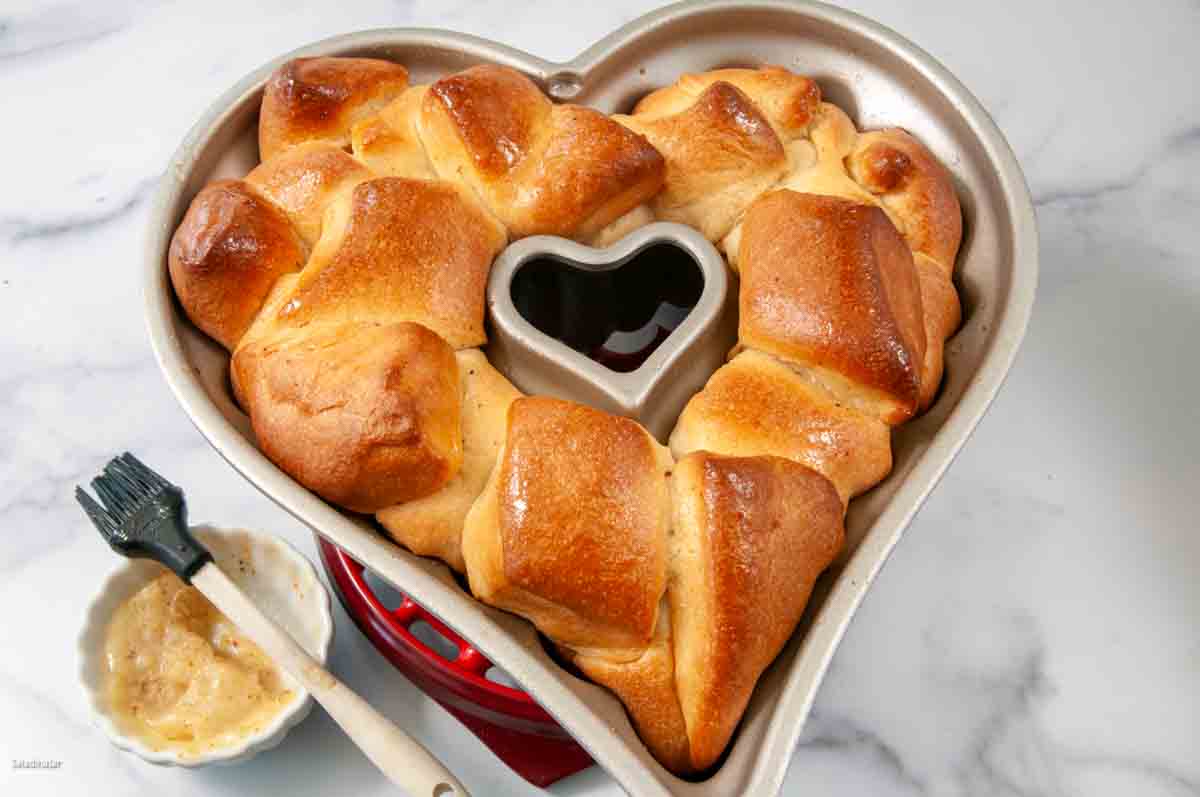

I used a heart-shaped pan to add to the festiveness. The dough is from the original recipe, but I dragged the dough pieces through browned butter instead of plain melted butter to take it to a celebratory level. If you want more sugar, try drizzling the baked bread with caramel syrup. Perfect for sharing.
• Savory Twists
Add chopped garlic to the butter or roll pieces in bacon bits or fresh herbs.

Step-by-Step: How To Make Bread Machine Monkey Bread
⬇️ Jump to the recipe below for exact amounts and detailed instructions.

Tips That Make a Difference
- Cut evenly sized dough pieces (a pizza cutter works fast) so the bread bakes evenly and pulls apart cleanly
- Don’t overfill the pan—leave room for the dough to expand during the second rise
- Cover loosely with foil halfway through baking if the top browns too quickly
- Use a thermometer if unsure—190°F in the center means it’s done
Pull-Apart Monkey Bread (Bread Machine Dough Recipe)
Video
Ingredients
- ¾ cup + 1 tablespoon (184 g) milk (cool)
- 1½ teaspoon salt
- 1 large (50 g) egg (cool)
- 3 tablespoons (36 g) sugar
- ½ cup (114 g) butter (divided–half for dough, half for dipping)
- 3 cups (360 g) unbleached all-purpose flour
- 2 teaspoons bread machine or instant yeast
Instructions
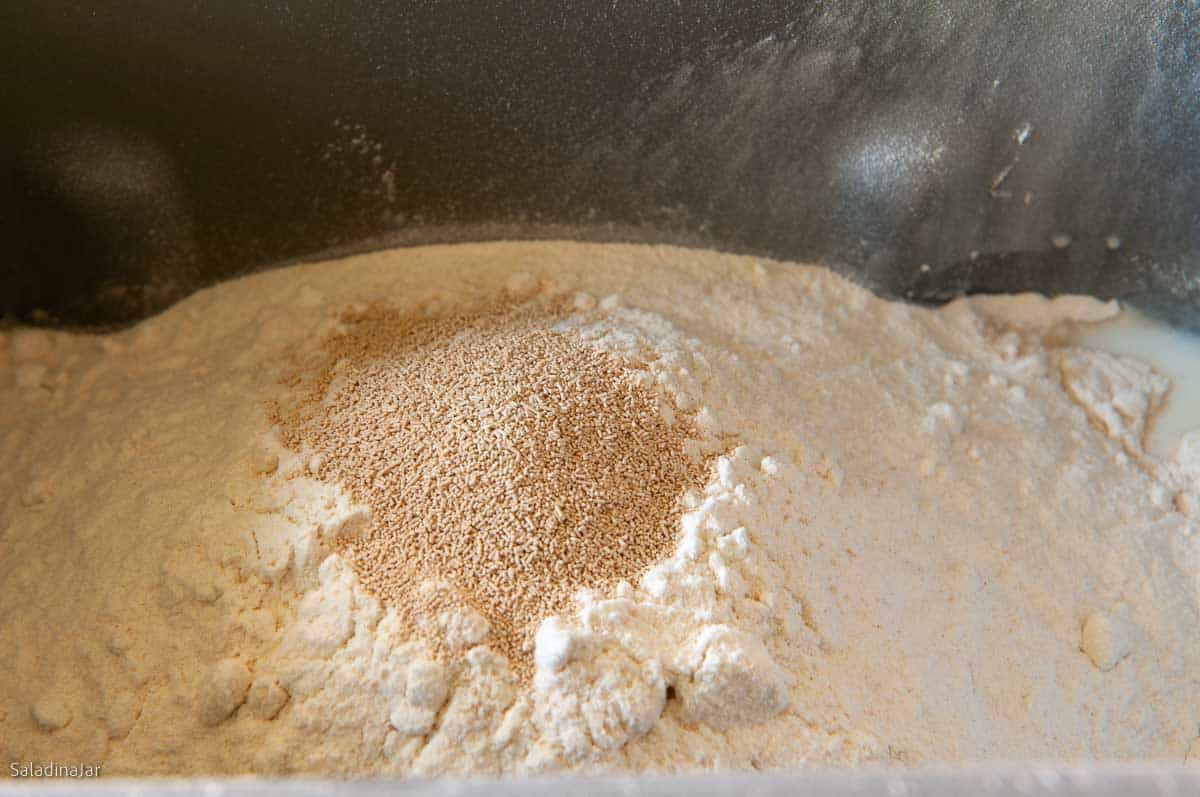
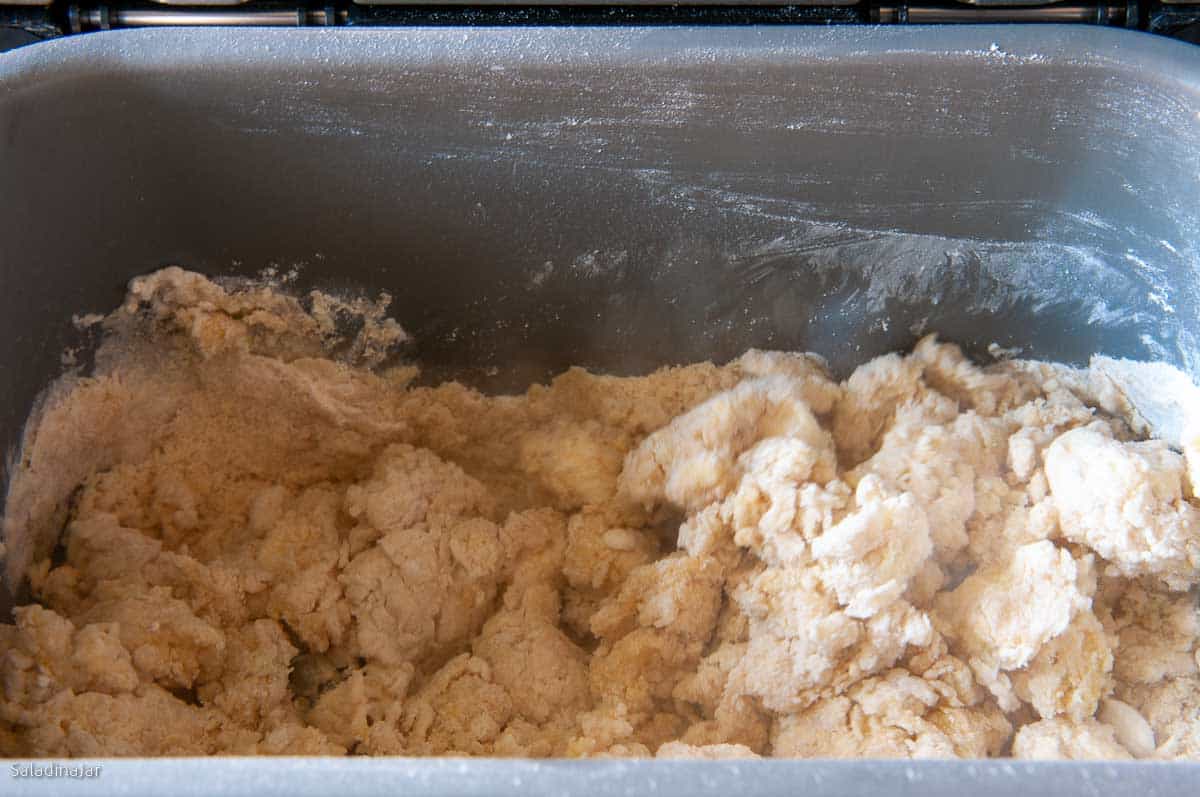
- Add ingredients to pan: ¾ cup + 1 tablespoon (184 g) milk, 1½ teaspoon salt, 1 large (50 g) egg, 3 tablespoons (36 g) sugar, ½ cup (114 g) butter (divided–half for dough, half for dipping), 3 cups (360 g) unbleached all-purpose flour, and 2 teaspoons bread machine or instant yeast in the bread machine pan. Select the DOUGH cycle and start.
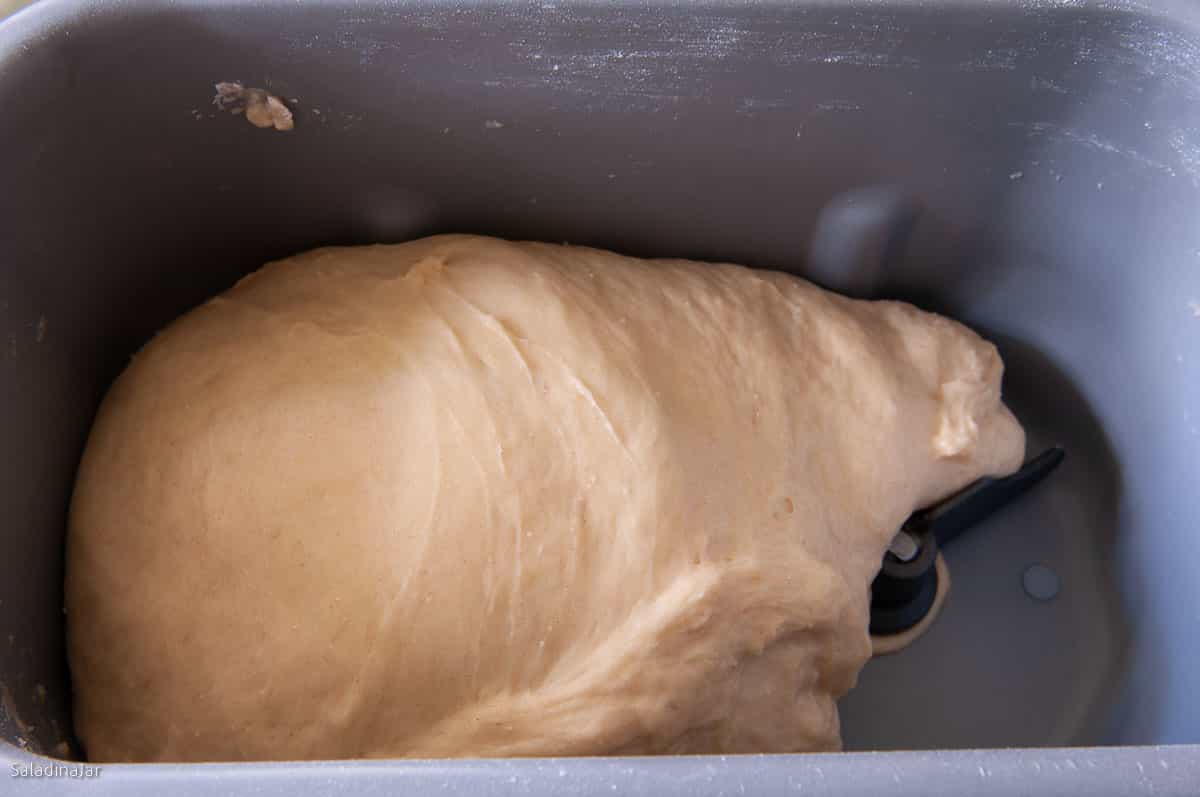
- First Peek (1 Minute In): Lift the lid to ensure the paddle(s) are moving and the dough is starting to clump.Second Peek (15–18 Minutes In): The dough should stick to the sides, then pull away cleanly.If it sticks without releasing, add 1 spoonful of flour at a time until it holds its shape. If it’s too dry (bouncing around or riding the paddle), add 1 spoonful of water at a time until it sticks briefly to the sides before releasing. Wait 1–2 minutes between additions to let the dough adjust. Read more about this surprising secret to success with a bread machine here.
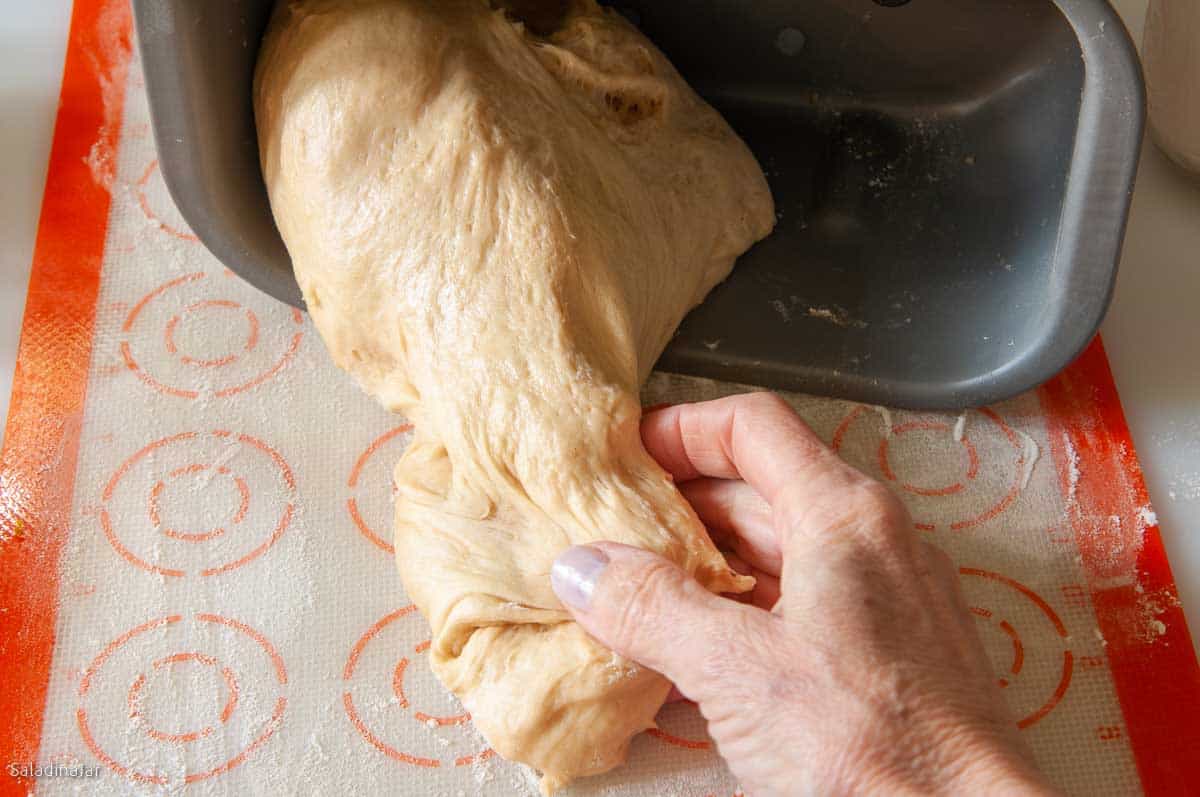
- Let dough finish rising: Transfer the dough to a floured surface. (It should be doubled in size. If not, leave it in the machine until it doubles.)
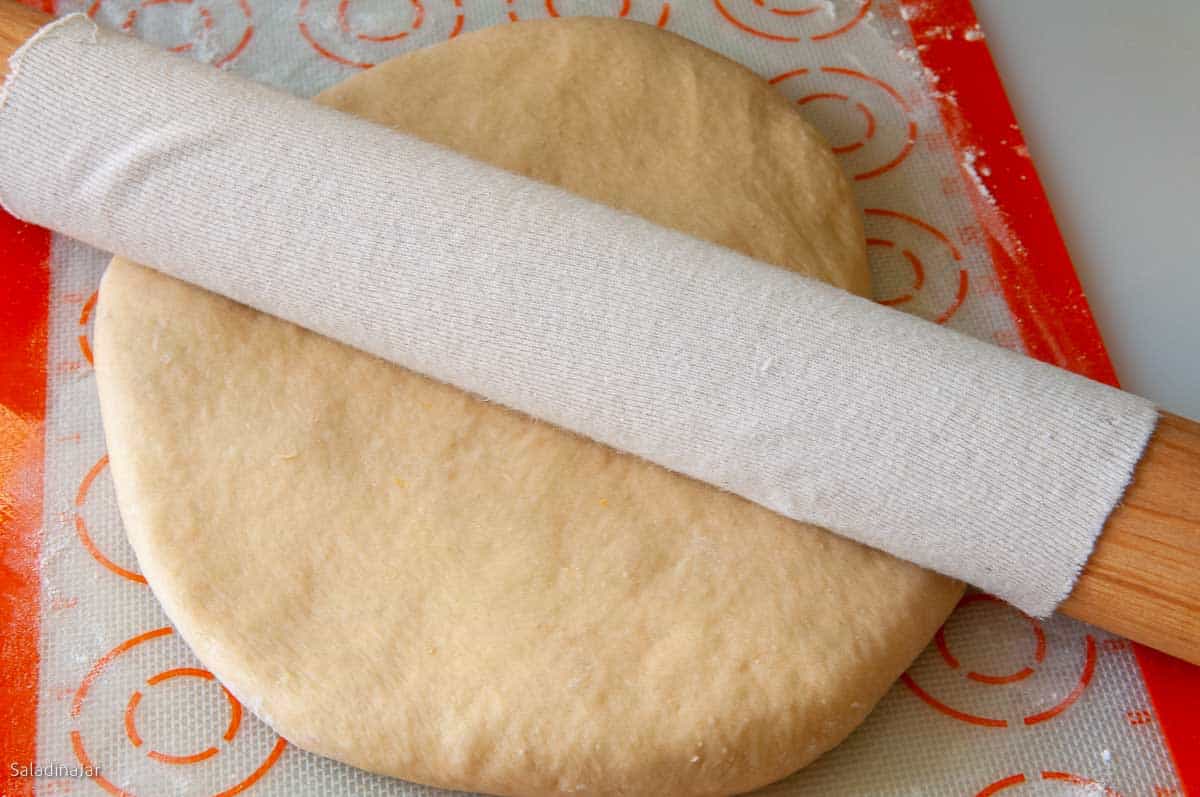
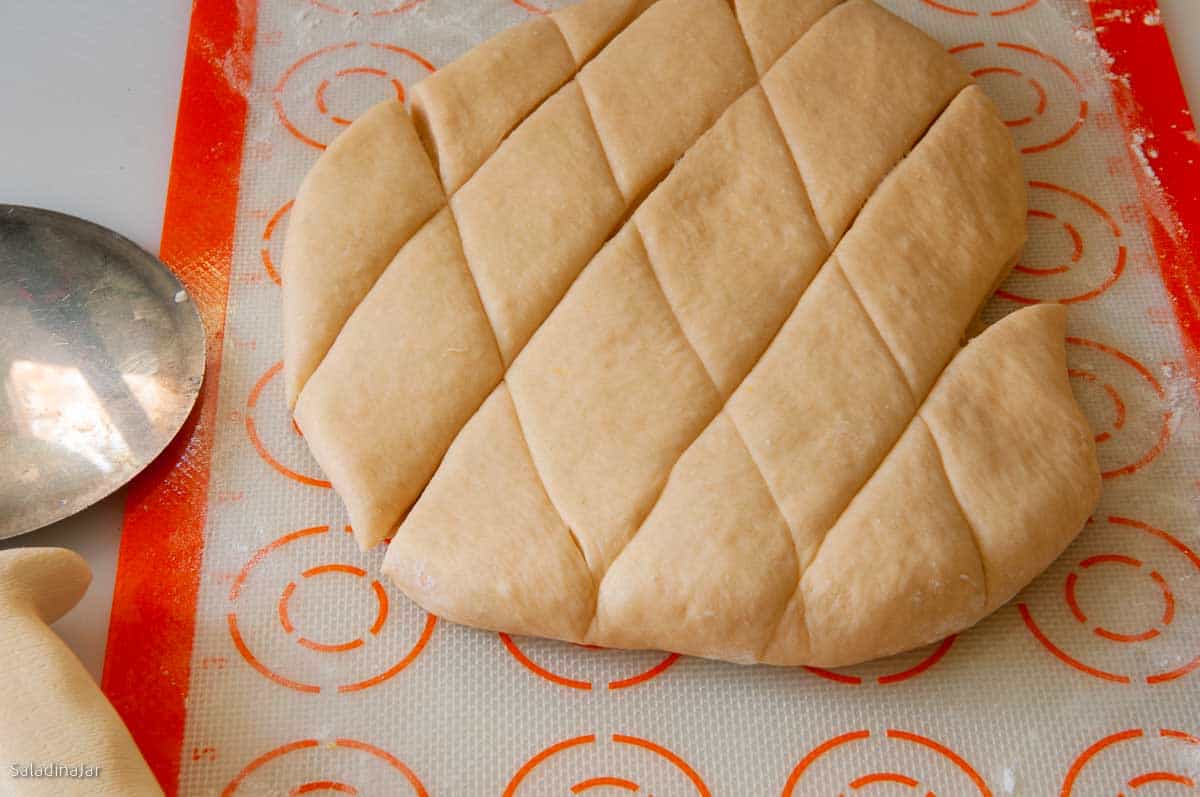
- Roll and cut dough: Roll to ½-inch thick and cut into 1-inch squares or diamonds.
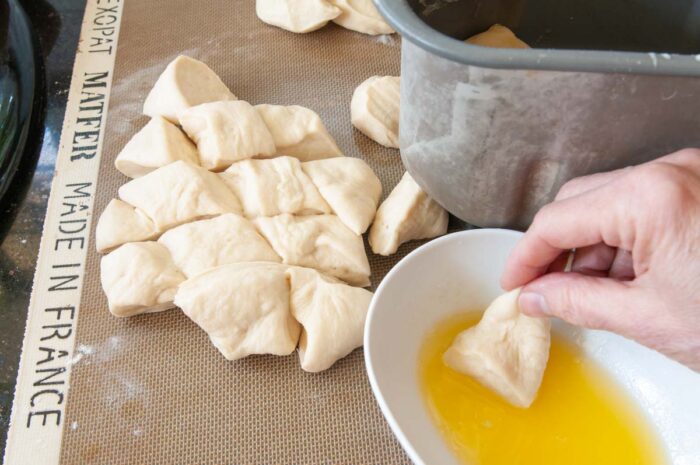
- Dip pieces in butter: Use the remaining butter (¼ cup, melted). For a sweet version, roll in cinnamon-sugar after dipping.
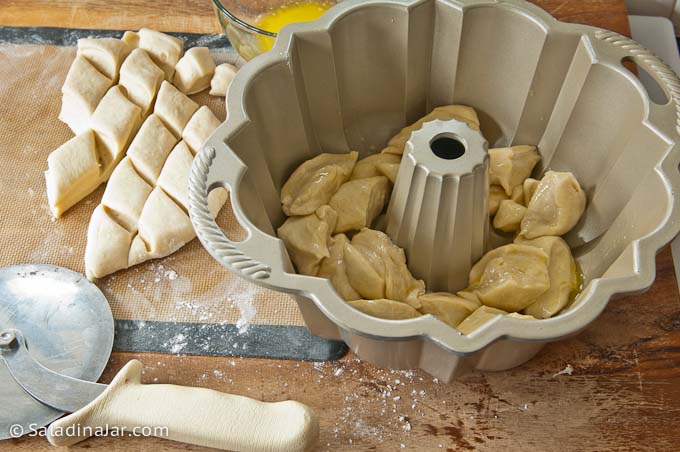
- Layer in bundt pan: Place dipped dough into a well-greased bundt pan.
- Let rise until puffy: Cover and let rise until almost doubled (about 30–45 minutes or longer if kitchen is chilly).
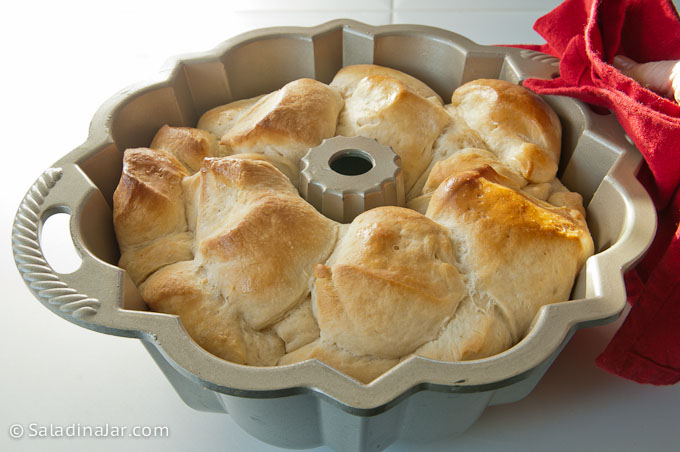
- Bake at 350˚F (177˚C) for 30-35 minutes or until golden brown and/or the temperature registers 190˚F(88˚C). Cover with foil after 10 minutes to prevent the top from over-browning.
- Cool and invert: Cool slightly, then invert onto a serving plate.
Notes
- Unbaked dough: Freeze after the DOUGH cycle or after shaping (before final rise). Defrost in the fridge overnight.
- Baked: Double-wrap and freeze up to one month. Reheat gently.
- Stand Mixer: Mix until moistened, then knead with a dough hook (speed 2–3) until smooth and elastic (5–10 minutes). Let rise, deflate, and shape as directed.
- By Hand: Mix to a shaggy dough, knead on a floured surface until smooth and elastic (10–20 minutes). Let rise, deflate, and shape as directed.
Equipment
Nutrition
All images and text ©️ Paula Rhodes for Salad in a Jar.com
What Readers Ask Me About This Recipe
Serve it warm, straight from the pan, or invert it onto a platter for a more dramatic presentation. You can drizzle with a glaze for a sweeter option, or pair the savory version with marinara or soup for dipping.
Yes. Assemble in the pan, cover, and refrigerate overnight. Let it rise before baking.
Not required. A loaf or deep round cake pan works—just adjust baking time.
Yes. Use the Basic or Sweet cycle. Remove the dough from the bread machine pan before the second rise, cut the dough into pieces, and layer it back into the bread machine pan. Return the pan to the machine to finish the cycle. It might not be pretty, but it works in a pinch.
Final Thoughts
My family has enjoyed this recipe for years. Whether you choose the cinnamon-sugar version or the savory variation, it’s a fun bread to serve and disappears quickly at the table.
I have another version of this recipe very similar to this with lemon flavor–see my Glazed Lemon Pull-Apart Bread (Bread Machine Recipe).
— Paula, Home Economist
Homemade Food Worth Sharing
Need help troubleshooting?
Email me: Paula at saladinajar.com — photos help!

Our Christmas tradition is to have Carmel Nut Breakfast Bread in a bundt pan made with frozen rolls, a package of butterscotch pudding (not instant); 1/2 cup walnuts or pecans (optional); & a stick of butter & 1/2 cup brown sugar that have been melted. Do you think I could use these ingredients with this recipe? Since it doesn’t sit overnight, I didn’t know if the melted butter/br. sugar would be a problem.
Hi Mary,
I haven’t tried it, but I feel certain your idea would work. Make the the dough using the DOUGH cycle. After the cycle finishes, remove the dough and make your rolls just like you always have in the past with this dough substituting for the frozen rolls. Cover and refrigerate immediately. The dough will likely rise quite a bit overnight. In the morning, remove the pan and allow the dough to warm up and get puffy. Bake as usual. I may have to try this myself. Thank you for writing.
if i want the bread machine to bake this what setting should I use?
Hi Sue,
That’s a good question. Because different brands of bread machines have different choices of ways to bake, it’s hard to make a blanket statement. You may have to experiment. I use the regular bread cycle. However, your machine might have a sweet bread setting that works better. Sorry, I can’t be more helpful.
Thanks for your kind words about the bread. Just thinking about your pork roast and that bread together makes my mouth water.
Yum yum yum!!! Served it with a pork roast sliced thin for folks to nosh on during a group get together and everyone agreed….yum yum yum!
You are my idol! I will try this monkey bread for our traditional Christmas Eve meal at the fireplace with our kids. They are in their 40s now, but since they were little, it’s been meat, seafood, and vegetable fondue with various sauces and crusty bread. We use hot broth instead of oil- and at the end of the evening, toss all the leftover veggies and a few rice noodles into the fondue pot. My question is “technical”. Because I wanted an air fryer, husband bought me for my 77th birthday a Vollrath commercial counter top convection oven. I’m committed to all of YOUR recipes, but do you have a rule of thumb for how to adjust time and temperature if I do the final baking in the convection oven? Or would you not recommend using a convection oven for bread at all?
Hi Daina,
I love your Christmas tradition at the fireplace. Baking bread in a convection oven is the best! It gives you the prettiest crust. My air fryer is not big enough so I haven’t baked much bread in it.
If you are using the same size pans, the time and temperature should be about the same. You probably already know this but convection temperatures are usually 25˚F higher. So if the recipe says to bake the bread at 375˚F, you would set the convection oven for 350˚F. Good luck!
Hi Paula,
Should we use bread flour or all purpose flour? Thank you!
Hi Quinn,
You can use either. Bread flour may give you a slightly higher rise and a chewier texture. All-purpose flour will still give you a light and fluffy bread that’s a little more tender.
I paused the machine, and took the dough out. I divided the dough into balls and rolled in butter and sugar cinnamon mixture. I put them back in the machine and continued baking. Wow – the smell was amazing the bread was delicious. I look forward trying variations on your recipe. Next I am going to try a babka. Thanks for the recipe this is so easy and so much fun.
@Suzy Charto,
Just got my bread machine today. Silly question but how do I know when to take the dough out of the machine to add the butter sugar and cinnamon? My machine is a Hamilton beach. I have it set on the basic bread setting but am still trying g to figure it out.
Thanks
Hi Kristi,
This recipe is written to use the DOUGH cycle, not the regular cycle. When the DOUGH cycle ends, take the dough out of the machine, cut it into squares and put the dough into a bundt pan. After if doubles in size, bake it in your oven. If you want to bake it in your bread machine, you will have to “catch” it at the end of the second rise (check your manual). Take the dough and the paddles out. Cut up the dough, dip in butter and cinnamon/sugar, then put the pieces back into the bread machine pan so the cycle will continue. Don’t stop the machine or it will mess up the cycle. I hope this works for you, but it’s rather complicated for a “first time.” I recommend my French bread recipe if you are a beginner. It’s hard to mess up. Let me know how it goes for you.
On Monkey Bread made entirely in bread machine, what bread setting is used?
Hi Bill,
Every machine bakes a little bit differently so you may have to experiment. I would start with the regular cycle and set for a medium crust.
This reminds me of my Aunt Mittie’s monkey bread. She never made a sweet version and she passed away before I became interested in baking. Thank you for bringing back a cherished childhood memory.
Food and memories go together, don’t they? Just like certain aromas and memories go together.
I’ve had my bread machine for a few year’s now, but as of yet,,, I’ve never used it. So today I went out 2 the market & purchased the bread machine flour & yeast. So later on today I’m going 2 try & fix, & make something that my family will enjoy. I was surprised that I found this link with recipes for my machine. Looking forward to seeing & trying out & finding more recipes. Thank you. Lynn
Made this (not in a bunt pan-spring form cake pan used) for a halloween party this weekend. Used red icing to top for a “brainy” look. It looked (and tasted) great!
I am new to bread machining. This was my 3rd time using the machine (bought used $10). I am SO glad that I found this website. Will be visiting often, probably making each and every recipe you got (maybe twice)!
Thank you
I just made this bread today and have just removed it from the oven. It is taking all that I have not to eat every bit of this. It is just lovely, sweet, and tender. I can hardly wait till my family can get to it. Thanks bunches. I am really enjoying my Zo….
Kathleen
Hello Paula is there a certain way to mix the dough when doing it by hand?
Hi Joni,
Look online or in a basic cookbook like Betty Crocker or Better Homes and Gardens for a basic loaf of white bread. Mix and knead it according to the directions. After the second rise, come back to my recipe to shape it.
One more question, how long does it take to rise?
Depends on several factors, especially the ambient temperature. First rise may take an hour or more. Second rise may take 30-40 minutes or more. You want dough to double in size first time and almost double after you put dough in the pan before baking.
I don’t have a bread machine help!!! Please
You can mix and knead dough with a stand mixer, or you can do it by hand if you have the time and energy in your arms.
Hi! I collect vintage cookbooks, but they have to have a story and Helen’s cookbooks all sit on my shelf. I loved reading everything about her! I found out about her in an article about the Zodiac Room and the Orange Souffle. I have the Cooks for Looks as well as the Greenhouse Cookbook! I can’t believe women were only given 850 calories a day!! With an exercise routine! For grins, I plan on starting the Greenhouse regime Monday, but I don’t see this amazing bread on the menus!!! =) Beautiful pictures, thanks for sharing!!
Hi! Question. Do you know if this recipie makes 1, 1.5, or 2 pounds of dough? My bread machine has to have that in the settings… I guess I could measure the ingredients?
3 cups of flour is roughly 1.5 pounds of dough when making bread.
Thank you! I ended up using the 2 pound setting. The bread turned out amazing and my whole family gobbled it up! thank you. I will be saving this!
Question – can the “making” part be done on one evening, and the ready to go in the oven Monkey Bread be covered and refrigerated until the following afternoon? I presume that one would have to take it out of the fridge 1 – 1 1/2 hours before you’d normally think it’d need to start rising? After reading so many of your recipes, I finally dusted off my bread machine which I’d used 2 times and my MiL had used once… and started out with the swirly dog recipe – which was voted to “remain on the island!” I was thinking I could prep this for our Wednesday night potluck on Tuesday night, and Mom/DH could pull it out mid-afternoon to warm/raise then bake as normal for potluck? Thought?
Hmmm. I’m not sure Bobbie since I have not tried it with this particular dough. Let me know if you do. My personal experience is that dough with potatoes in it works really good this way so I stick with that.
Paula,
Thanks for the response. I love “potato bread” and have the sweet potato rolls on my list of recipes to try. Think that dough would do OK in the “monkey bread” form?
Made this (not in a bunt pan-spring form cake pan used) for a halloween party this weekend. Used red icing to top for a “brainy” look. It looked (and tasted) great!
I am new to bread machining. This was my 3rd time using the machine (bought used $10). I am SO glad that I found this website. Will be visiting often, probably making each and every recipe you got (maybe twice)!
Thank you
Sylvia,
What a cool idea! Perfect for the season. Glad you are enjoying your bread machine.
I just made this bread today and have just removed it from the oven. It is taking all that I have not to eat every bit of this. It is just lovely, sweet, and tender. I can hardly wait till my family can get to it. Thanks bunches. I am really enjoying my Zo….
Kathleen
Thank you so much for your recipe! My mom would always make monkey bread when I was a kid! It’s just a buttery, pull apart bread! I am making this now for my husband and little monkey!
my grandmother use to make this bread for us when we were growing up many years ago but she didn’t use no bread machine nor do i it sitll turns out great.
I made this twice now and will definitely keep this recipe in the family. Bread was very light and delicious. Thank you
Esther,
Thanks for returning to say so. This is the most favorite bread recipe of both of my daughter-in-laws. I think they like not having to worry about making nice shapes.
WOW! I have been looking for a great (white) bread recipe for the bread machine for quite some time… I also like monkey bread, so this looks like an awesome recipe for me to try…. going to make this today for my “monkies” thanks!
Wow!! I don’t know what the original recipe tastes like but my non-dairy version is out of this world. I used soymilk and vegan “like” butter sticks and the results are excellent. I baked in a dutch oven and it’s delicious!!!! Thanks
Gracias por la receta se ve rica
Yum, this looks delicious! I may put it on my menu for next week when all the kids are home! I think you went to OCC with my sister, Suzette Hendrix Stephens. I work at OC now. My sister, Jane Buntley, sent me the link to your blog and I love it! I’m going to have to do the salad in a jar trick!
Thanks for the recipe sounds like what I was looking for (something fun for Thanksgiving)
It’s my first time here…what a lovely place to be.
Your recipe sounds wonderful…and I have 7 monkey children that will love to pull it apart with abandon!
thanks so much!!
Kimmie
mama to 7
one homemade and 6 adopted
Wow that looks wonderful- I think my husband would love that!
OOO SOUNDS SO GOOD !
I LOVE your monkey bread, such a great recipe! It is definitely a crowd pleaser (or should I say, husband pleaser?)