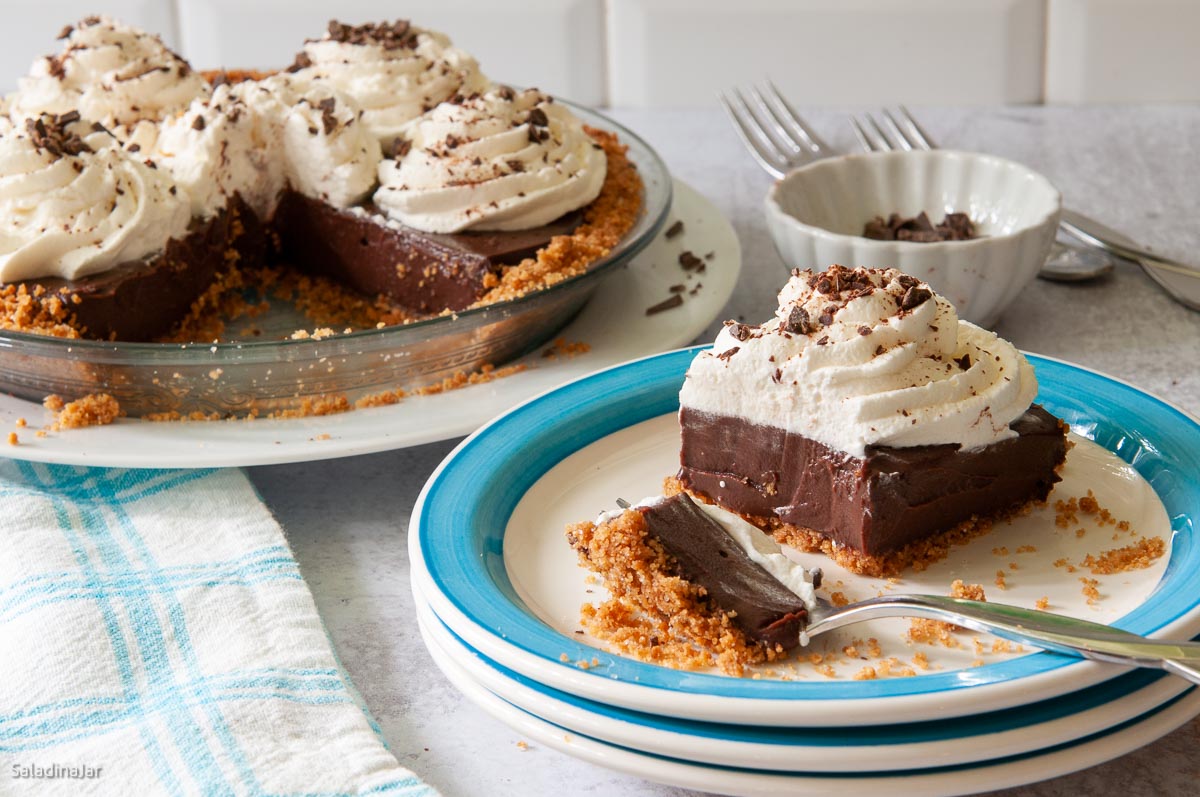
Microwave Chocolate Cream Pie Recipe
Sneak Preview: Make a silky-smooth chocolate cream pie filling in the microwave in less than 10 minutes. No double boiler, no scorching, and no lumps—just rich homemade chocolate pie poured into your favorite crust.

This post contains affiliate links. As an Amazon Associate, I earn from qualifying purchases at no extra cost to you.
Have you ever talked yourself out of making chocolate cream pie because the filling seemed like too much trouble? This microwave method takes the worry out of homemade pudding. In less than 10 minutes, you’ll have a smooth, rich chocolate filling ready to pour into a pie crust and chill.
This recipe came from my sister’s recipe box after being passed down by her mother-in-law. Over the years, I’ve adapted it for the microwave without sacrificing the rich, homemade flavor. We love it in a graham cracker crust topped with whipped cream, but it’s just as delicious in a traditional pastry crust.
Ingredients & Substitutions
• COCOA POWDER: Natural or Dutch-process cocoa both work in this recipe because there’s no chemical leavener.
• INSTANT ESPRESSO (OPTIONAL): A small amount deepens the chocolate flavor without making the pie taste like coffee.
• SEMI-SWEET CHOCOLATE: Use a good-quality chocolate bar or chips that melt smoothly. This is what gives the filling its rich finish.
• GRAHAM CRACKERS: Make your own crust or use a store-bought graham cracker crust to save time. A pre-baked pastry crust also works well.
• HEAVY WHIPPING CREAM: Homemade whipped cream is my favorite, but thawed whipped topping works if you’re short on time.
Graham Cracker Pie Crust
⬇️ Jump to the recipe below for exact amounts and detailed instructions.
Microwave Chocolate Filling


Microwave Chocolate Cream Pie
Video
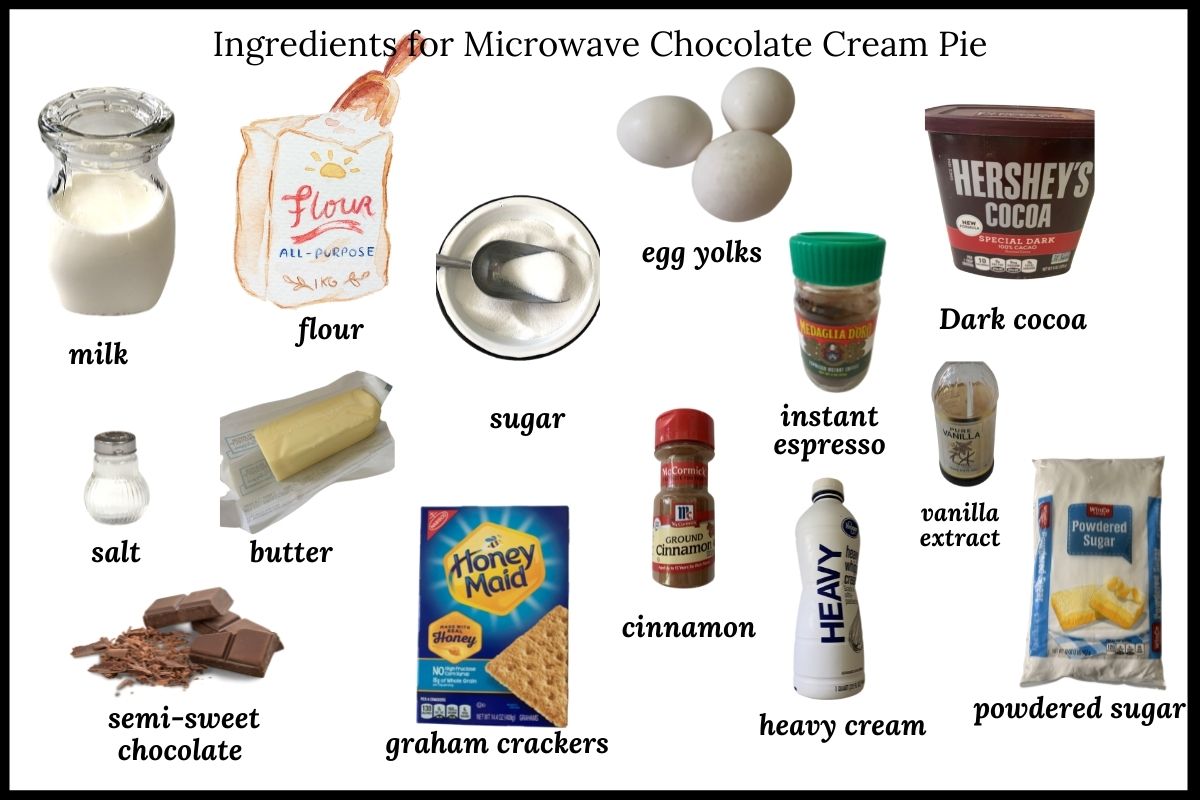
Ingredients
- 2 cups (488 g) milk
- 4 tablespoons (30 g) unbleached all-purpose flour
- ¾ cup (150 g) granulated sugar
- ⅛ teaspoon table or sea salt
- 3 tablespoons cocoa (I prefer Dutch-process Cocoa)
- ½ teaspoon instant espresso optional
- 3 (54 g) egg yolks
- 4 tablespoons (56 g) butter
- 1 teaspoon vanilla extract use Mexican vanilla if you have it
- 2 ounces (56 g) semi-sweet chocolate bar, coarsely chopped (coarsely chopped)
Graham Cracker Crust
- 20 (156 g) graham cracker squares or 1½ cups of graham cracker crumbs
- 5 tablespoons (70 g) melted butter
- ¼ cup (50 g) granulated sugar
- ⅛ teaspoon cinnamon optional
Topping
- 1 cup (227 g) whipping cream
- 2 tablespoons powdered sugar
- 1 teaspoon vanilla extract
Instructions
Graham Cracker Crust:
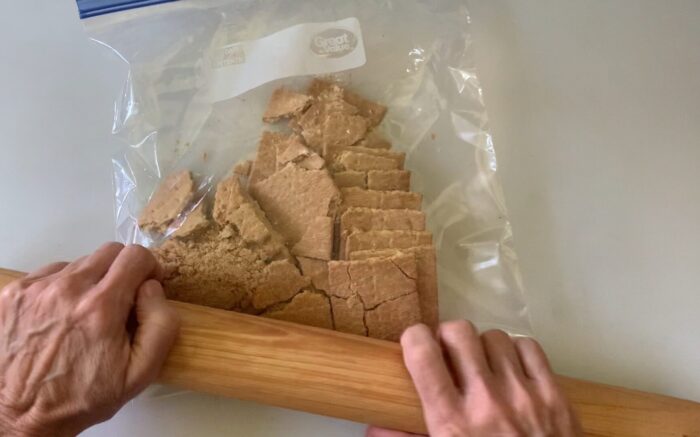
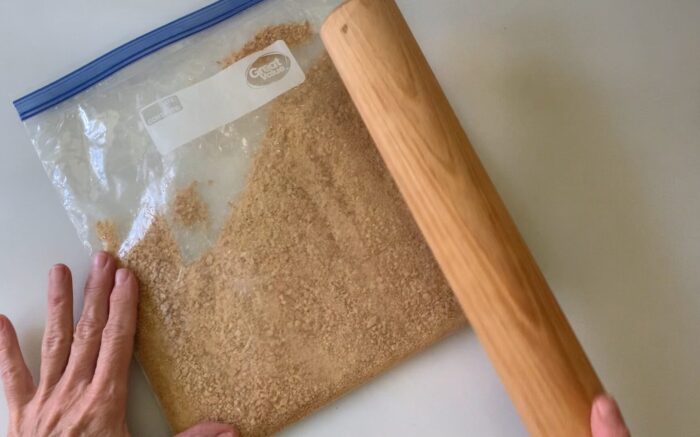
- Make the crumbs: Crush 20 (156 g) graham cracker squares into fine crumbs.
- Mix the crust: Stir the crumbs with 5 tablespoons (70 g) melted butter, 1/4 cup (50 g) granulated sugar, and 1/8 teaspoon (⅛ teaspoon) cinnamon.
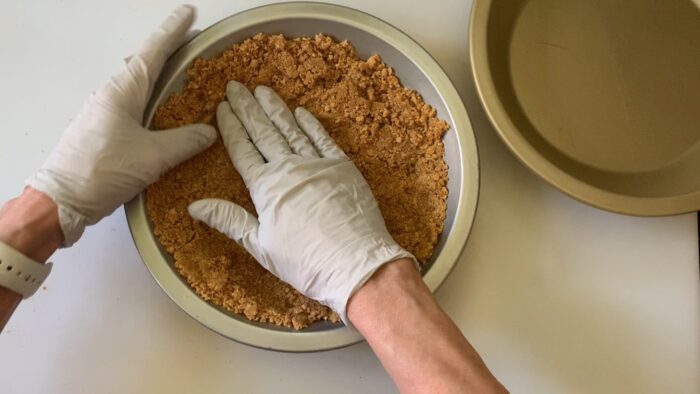
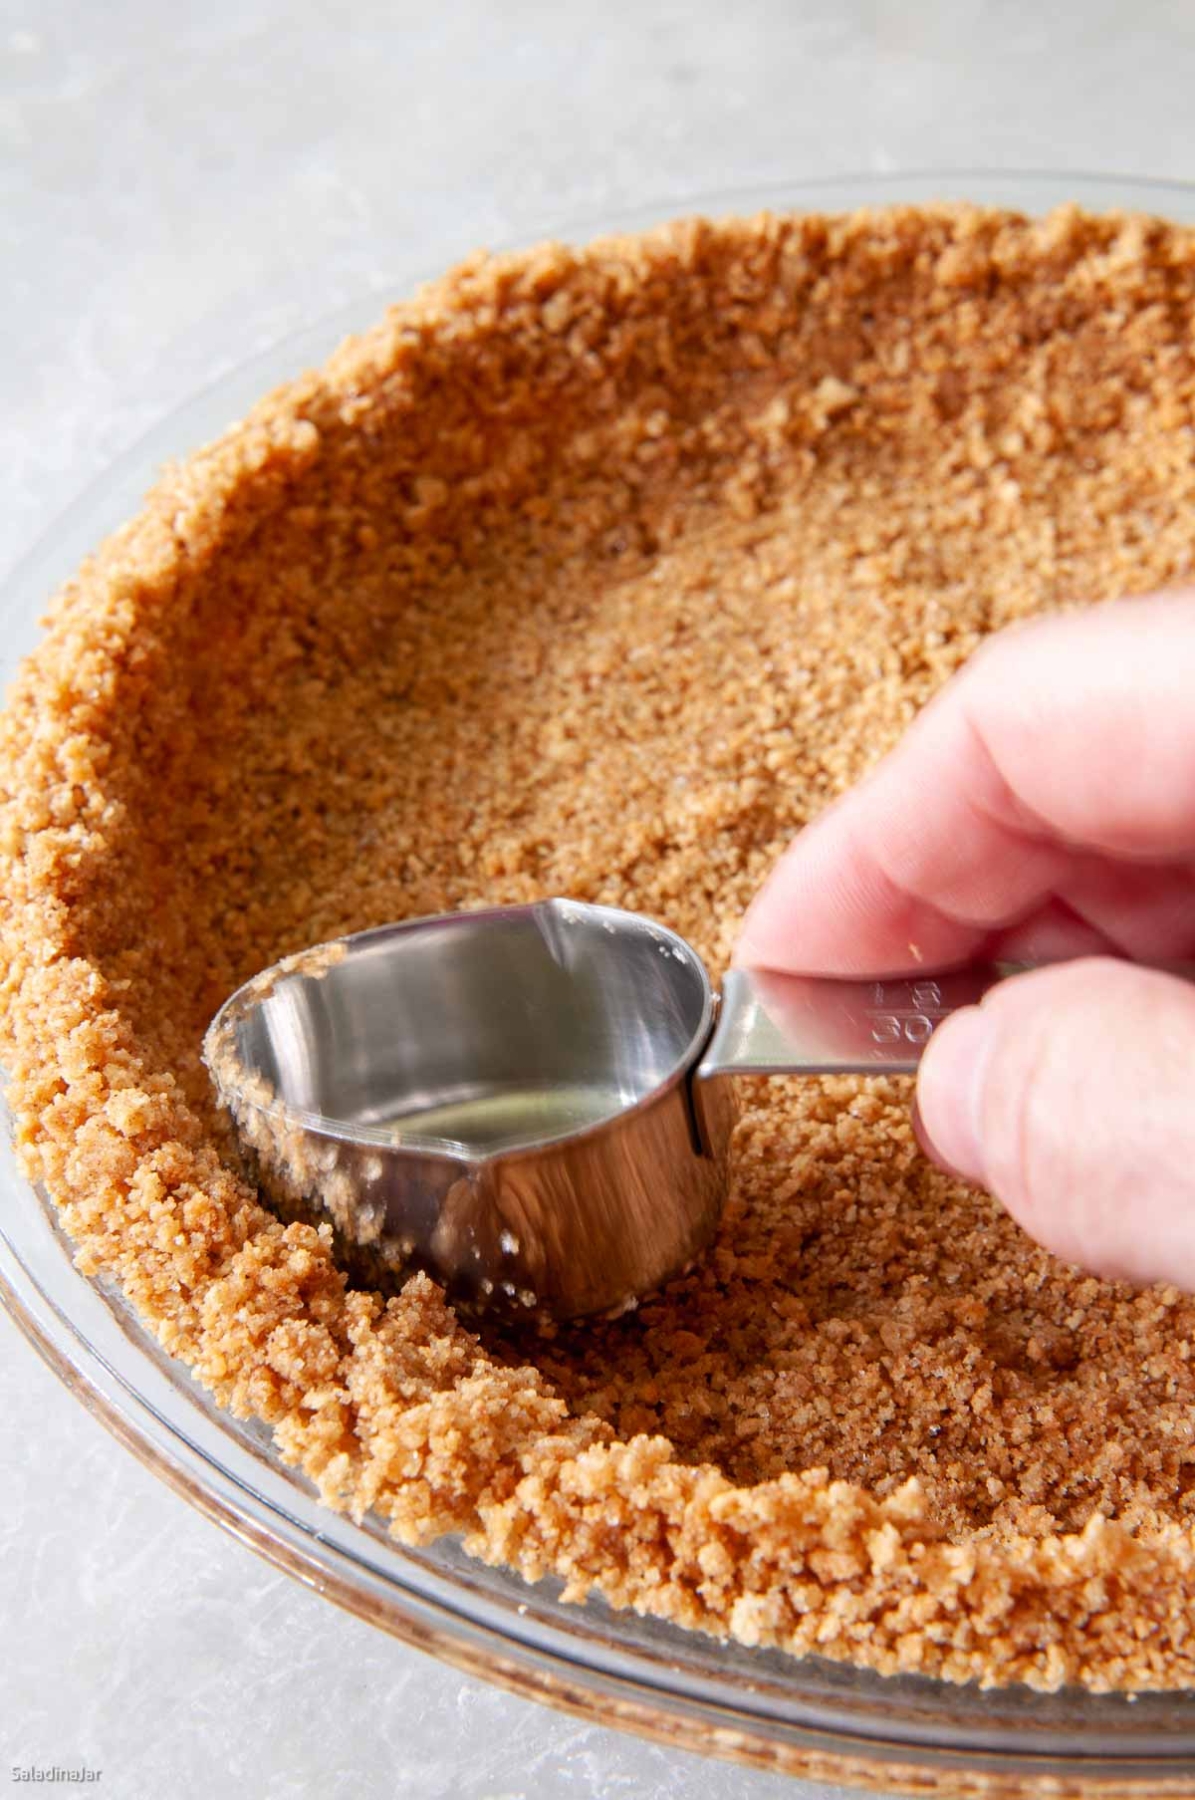
- Shape the crust: Press the mixture into the bottom and up the sides of an 8- or 9-inch pie plate.
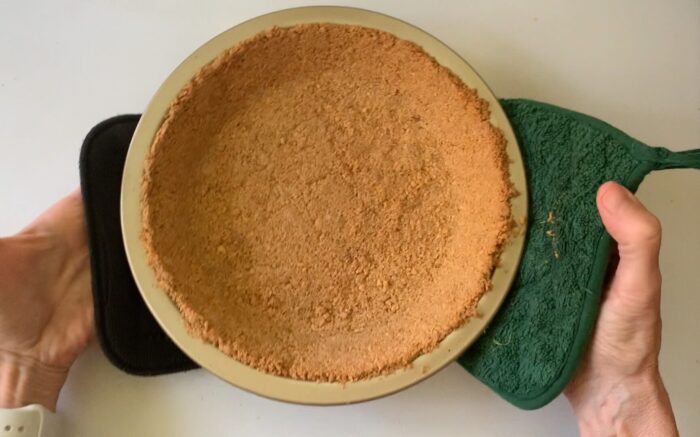
- Bake: Bake at 350°F until lightly browned, about 10 minutes. Cool completely before filling.
Chocolate Filling
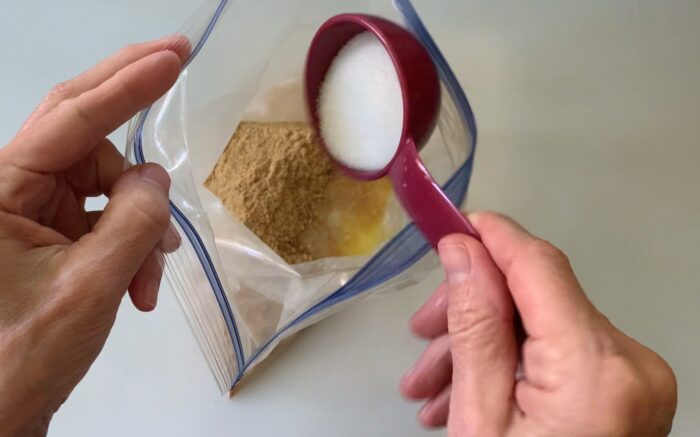
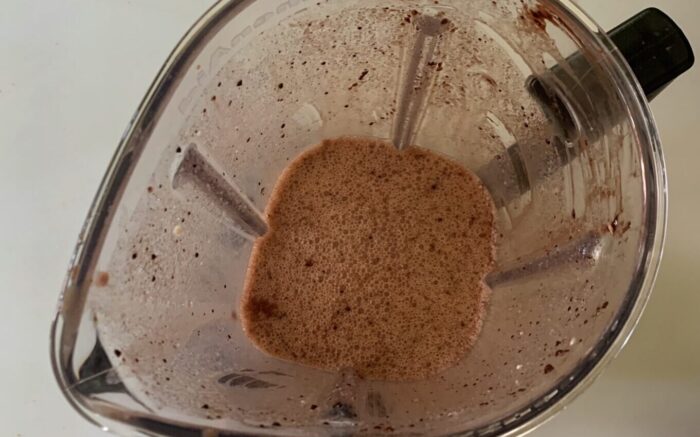
- Blend the filling: Combine 2 cups (488 g) milk, 4 tablespoons (30 g) unbleached all-purpose flour, 3/4 cup (150 g) granulated sugar, 1/8 teaspoon (⅛ teaspoon) table or sea salt, 3 tablespoons cocoa, 1/2 teaspoon (½ teaspoon) instant espresso, and 3 (54 g) egg yolks in a blender. Blend until completely smooth.
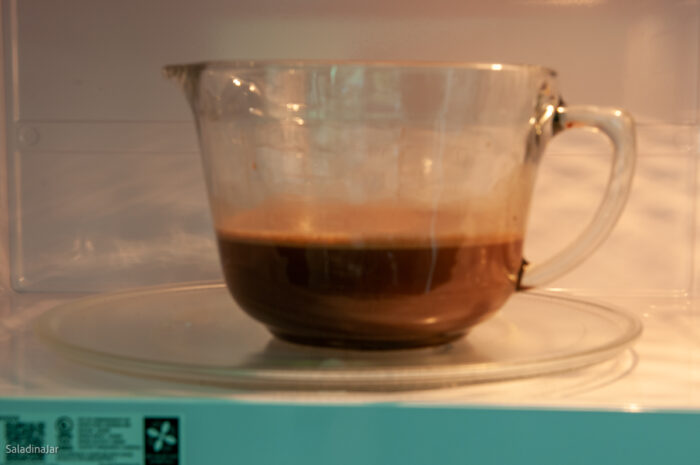
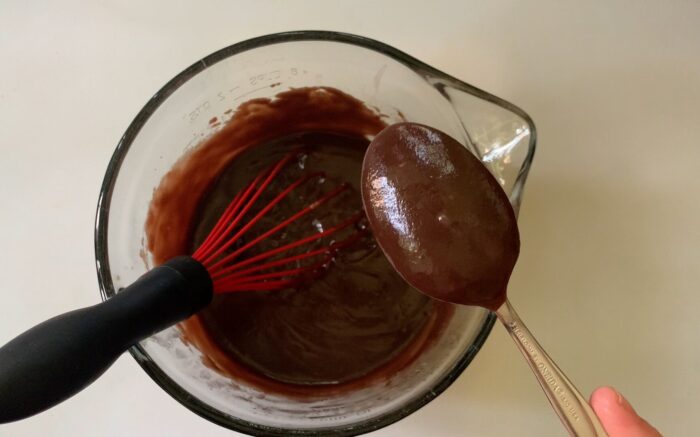
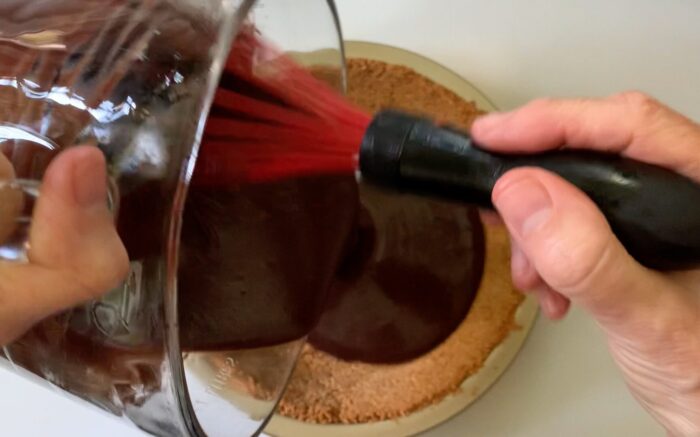
- Cook the filling: Pour the mixture into a 2-quart microwave-safe bowl. Microwave on HIGH for 6–8 minutes, whisking after 2 minutes and every 30–45 seconds after that until the filling coats the back of a spoon.
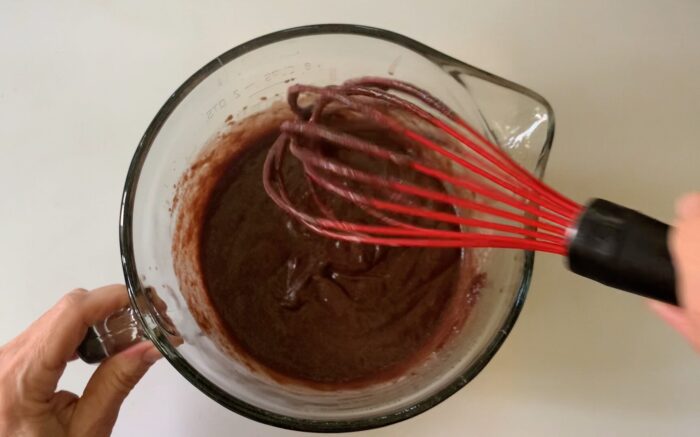
- Add remaining ingredients: Whisk in 4 tablespoons (56 g) butter, 1 teaspoon vanilla extract, and 2 ounces (56 g) semi-sweet chocolate bar, coarsely chopped.
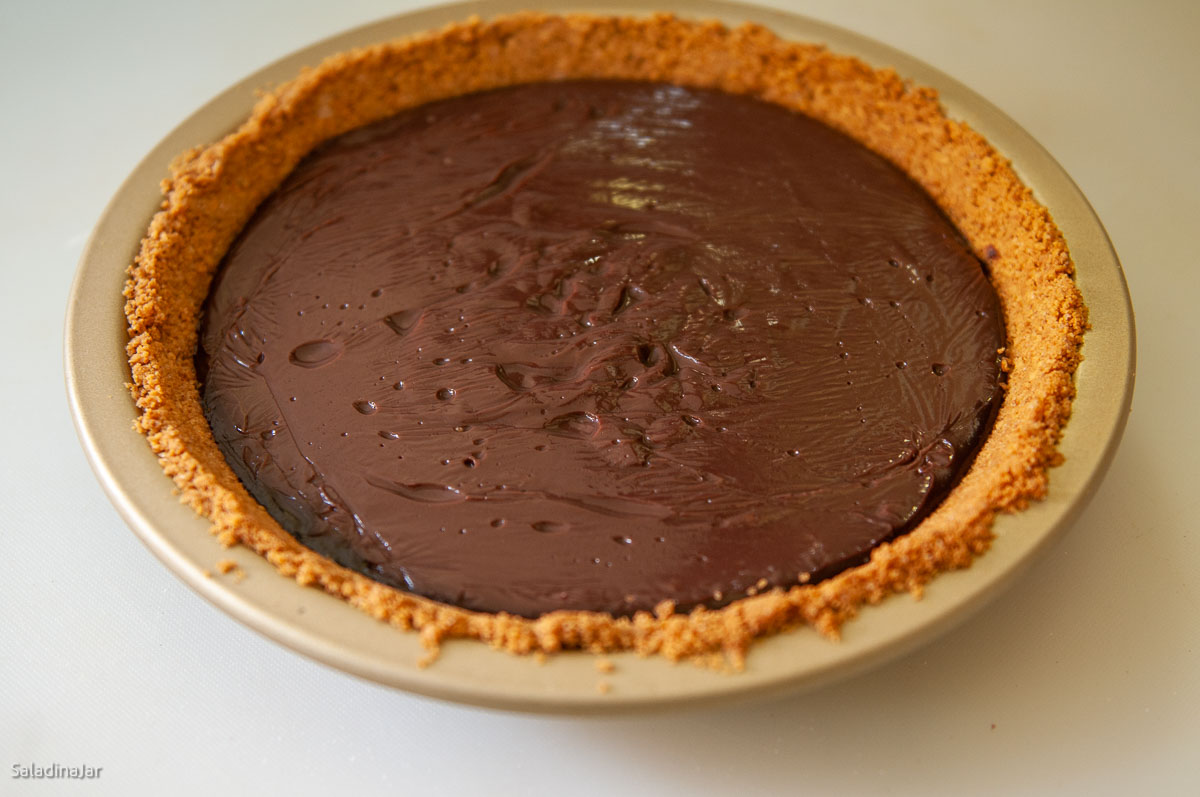
- Assemble pie: Pour the warm filling into an 8 or 9-inch graham cracker or pre-baked pastry crust. Cover top with plastic wrap, pressing it directly onto the surface of the filling to prevent a skin from forming. Chill for several hours or until the cream filling is firm.
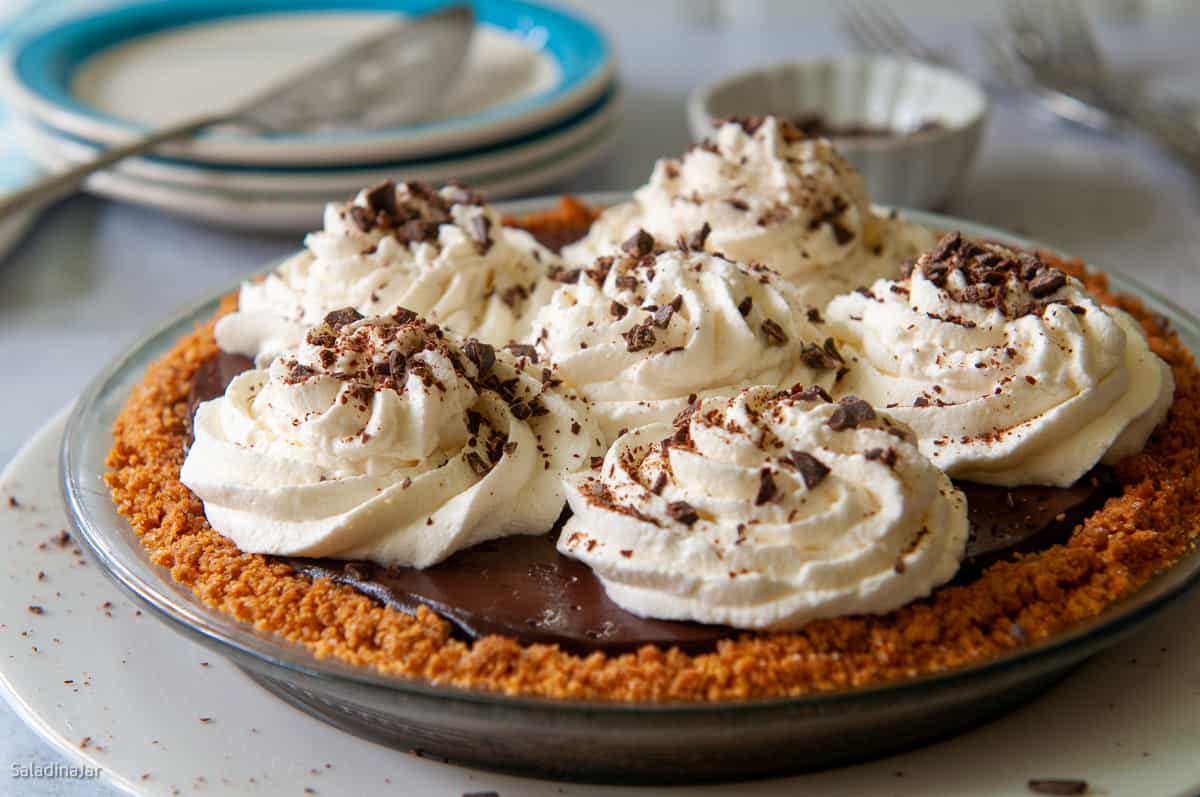
- Topping: Whip 1 cup (227 g) whipping cream until soft peaks begin to form. Add 2 tablespoons powdered sugar and 1 teaspoon vanilla extract and continue beating until stiff peaks form. Pipe or spoon the whipped cream over the top of the chilled pie. Keep refrigerated until serving.
Notes
- No blender? Whisk the filling thoroughly before microwaving. A blender simply makes it easier to eliminate lumps.
- Still have lumps? Strain the hot filling before stirring in the butter, vanilla, and chocolate.
- Using a graham cracker crust? If the crumbs seem too dry to hold together, mix in an extra tablespoon of melted butter before pressing them into the pie plate.
- Make ahead: This pie is even better after chilling overnight.
- Freezing: Freeze the pie without the whipped cream topping for up to 1 month. Thaw overnight in the refrigerator before serving.
- Pastry crust option: Prefer a traditional pie crust? This filling is just as delicious in a fully baked 9-inch pastry shell.
Equipment
Nutrition
All images and text ©️ Paula Rhodes for SaladinaJar.com
Final Thoughts
Once you discover how easy homemade chocolate cream pie is in the microwave, you may never make it another way.–Paula
p.s. In case there is just one or two of you at home, and you want only a small batch of pudding, check out this post for 2-Minute Microwave Chocolate Pudding in a Jar.
— Paula, Home Economist
Homemade Food Worth Sharing
Need help troubleshooting?
Email me: Paula at saladinajar.com — photos help!
More Desserts You Can Make in Your Microwave
- Microwave Banana Pudding
- Microwave Vanilla Cream Filling or Pudding
- Microwave Brownies: Great for Emergencies
- Microwave Apples and Cinnamon
- No-Fuss Browned Butter Icing (Microwave Method)
- Crunchy Candied Nuts You Can Make in Your Microwave

I love the idea of making this pie filling in the microwave. However, I would need a substitute for the flour. Could I substitute cornstarch?
Hi Kathryn,
I suspect it’s too late for your question. You can substitute cornstarch. Here’s my vanilla cream pie recipe that uses cornstarch.
I will never make cream pies any other way! This a game changer. My two granddaughters (14 and 8) loved helping and didn’t lose interest from having to stir so much!
Thank you.
Yes! I love this. Thank you for writing, Carole. You have some blessed granddaughters.
Ok!!! I cannot even look at the cake beacuse I just want this China!!!!!! Do you by chance know what it is called, who makes it, or where I can get it?!??! I am absolutely in love!!!!!
This is a gorgeous website! So glad I found you! Going to try your yogurt pie crust recipe!
Welcome Sarah. If you try the pie crust, I hope you like it.
Looks wonderful! Will have to remember next Christmas as my guys love the chocolate pie for the holidays!
Love this story! The old drawing of HJ is just what I remember. When we traveled to China to adopt our daughter, I rolled my eyes when I was told we were going to stay in a Howard Johnsons in China! Imagine my surprise when we get there and find the most fabulous hotel. 5-Star! Not like USA HoJo’s at all.
What a wonderful post. Loved the story and the recipe. I will have to make this soon. It looks so easy and my family will wonder who made this. Tee Hee. I know where you get your love for ice cream now! I should have known. Anytime I have been at your moms home she serves us ice cream. By the way, I know who Kent looks like now. Great picture of you and your mom. Happy Mother’s day.
That pie is beautiful. On a side note, does Mexican vanilla ever go bad? I have a rather large bottle of it in my kitchen.
Good question Kirstin. As long as it smells good, I would keep using it. But that’s just me. Check out this link for more specific information. http://www.globalgoods.com/mexicanvanillafaq.html
Thank you for the information! This post brought back happy memories of stopping at Howard Johnson’s during summer road trips, by the way. : )
This pie looks scrumptious and I enjoyed picturing the scene with the 28 scoops of icecream. You website is inspiring and I love and have never heard of the salad in a jar idea. Thanks for stopping by my blog as well.
Paula, what a fantastic post and fun, fun memory. I miss Howard Johnson’s! Your tart looks delicious…the whipped cream topping is perfect for it. Happy Mother’s Day to you! xo
What a blast you must have had with your Mom that day! I don’t know of any other Mom’s who have driven all that way to eat all that ice cream. Hilarious.
Your chocolate cream tart looks delicious (can’t believe it’s made in the microwave!)
Oh.my.goodness. I LOVE chocolate pudding and chocolate cream pie and will be trying this for sure. Your ice cream memory is hilarious! I guess your mom was a trendsetter: maybe Ben & Jerry’s Vermonster was copying her?! Have a great Mother’s Day!
How I miss Howard Johnson’s. When we travelled from Indiana to Long Island to see my grandparents, it was HJ’s all the way! Beautiful pictures!
I tried your cream pie only made mine coconut. Wonderful!! I’ll never make it anyother way now. I think the recipe called for some cream which I didn’t have so I used a little van. yogurt. I didn’t put it through the sieve either and it was still as smooth as when I make it on top of the stove. I probably will try this choco. tart too or the French Silk one.
Thanks again.
I have never tried the yogurt, but why not? Great idea. I didn’t use to put mine through a sieve either–and I still don’t with coconut. But I’ve found it really smooths out the chocolate.
What a terrific story about Grandma… I can just picture the whole event!
I have also decided that ANY pie tastes better with graham cracker crust.
This sounds delicious!
Happy Mother’s Day to you.
You might be right about the graham cracker crust. Happy Mother’s Day to you too.
I can just picture the faces around the table at that very special birthday celebration- what fun you must have had! 🙂 Your tart is lovely, and looks like something that could cause smiles around my table. Thanks! 🙂