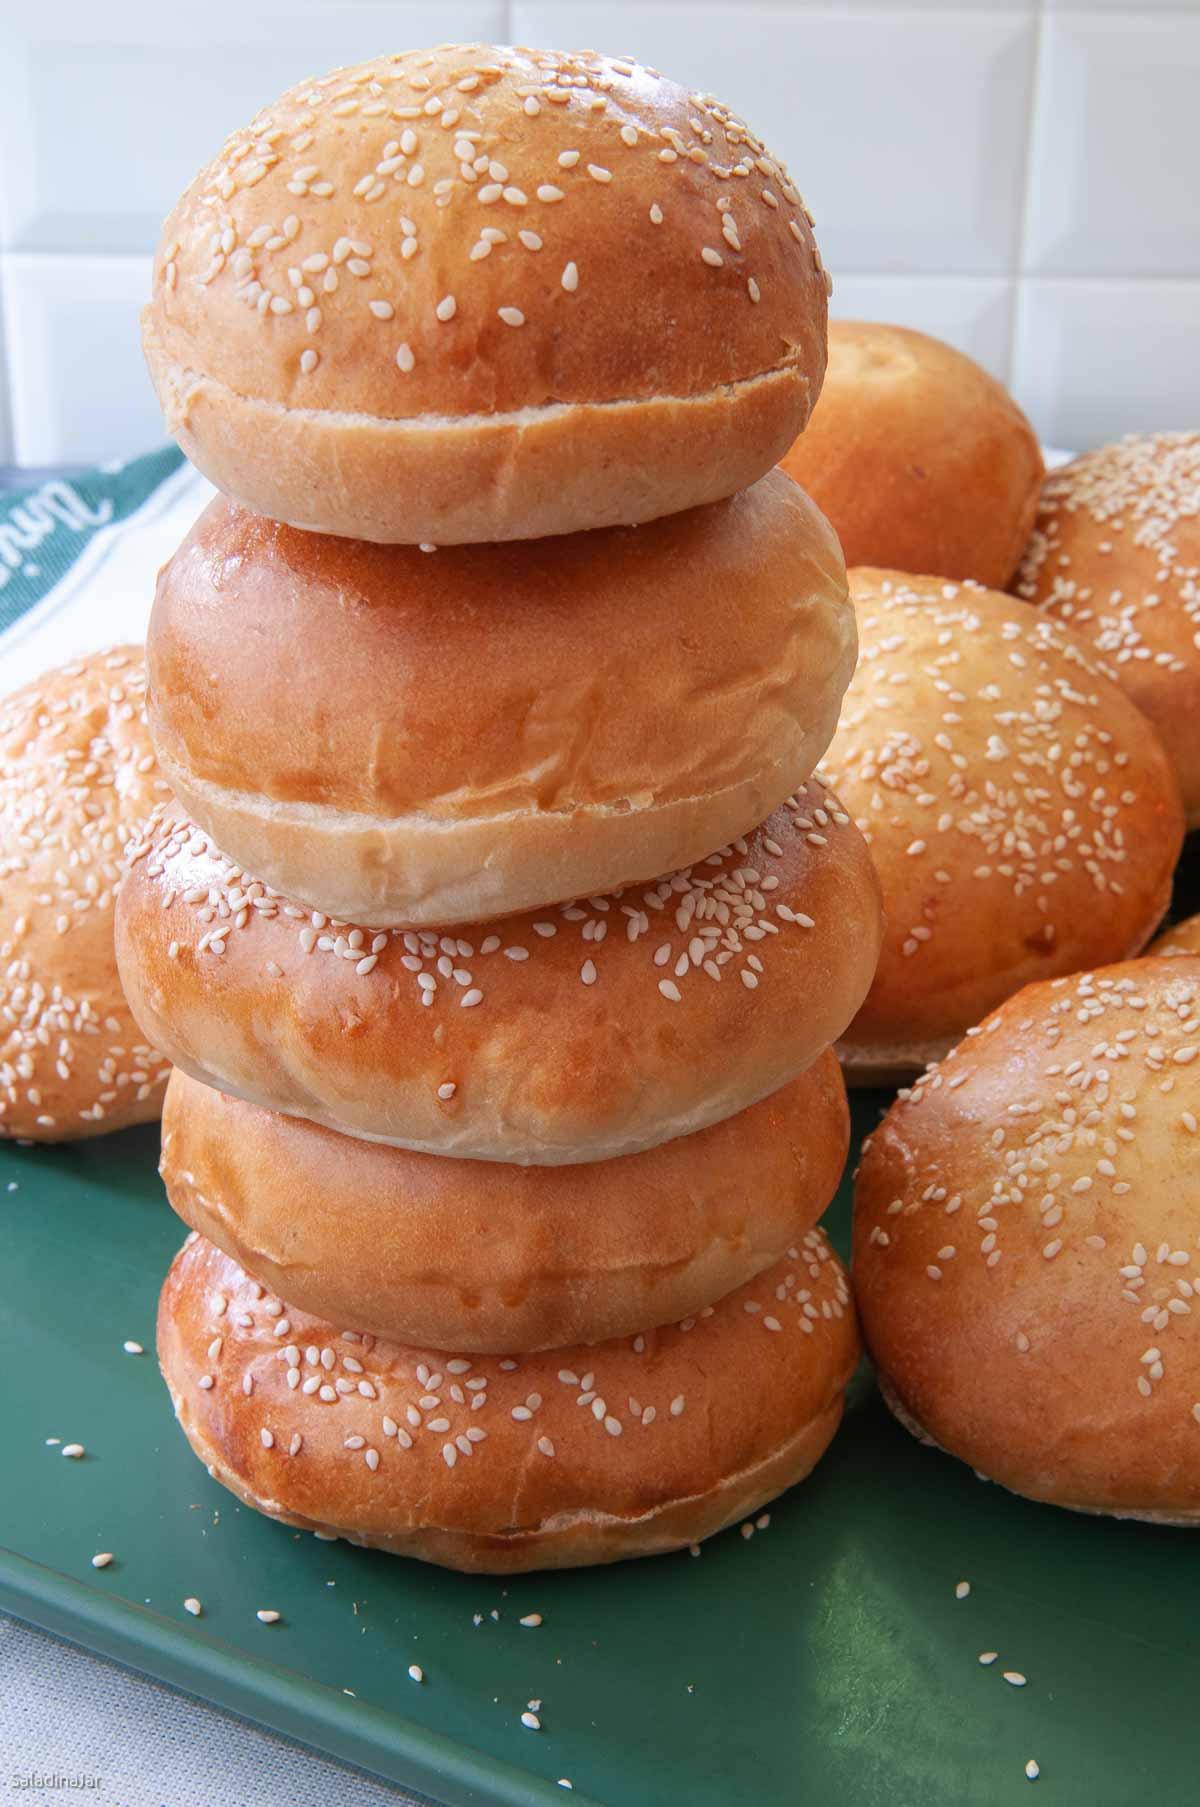
Potato Hamburger Buns (Bread Machine Dough)
Sneak Preview: Make these light-textured Potato Hamburger Buns using your bread machine to mix and knead the dough. Shape by hand and give them a rise on the counter before baking in your oven for fresh buns in a little over 3 hours.
This post contains affiliate links. As an Amazon Associate, I earn from qualifying purchases at no extra cost to you.
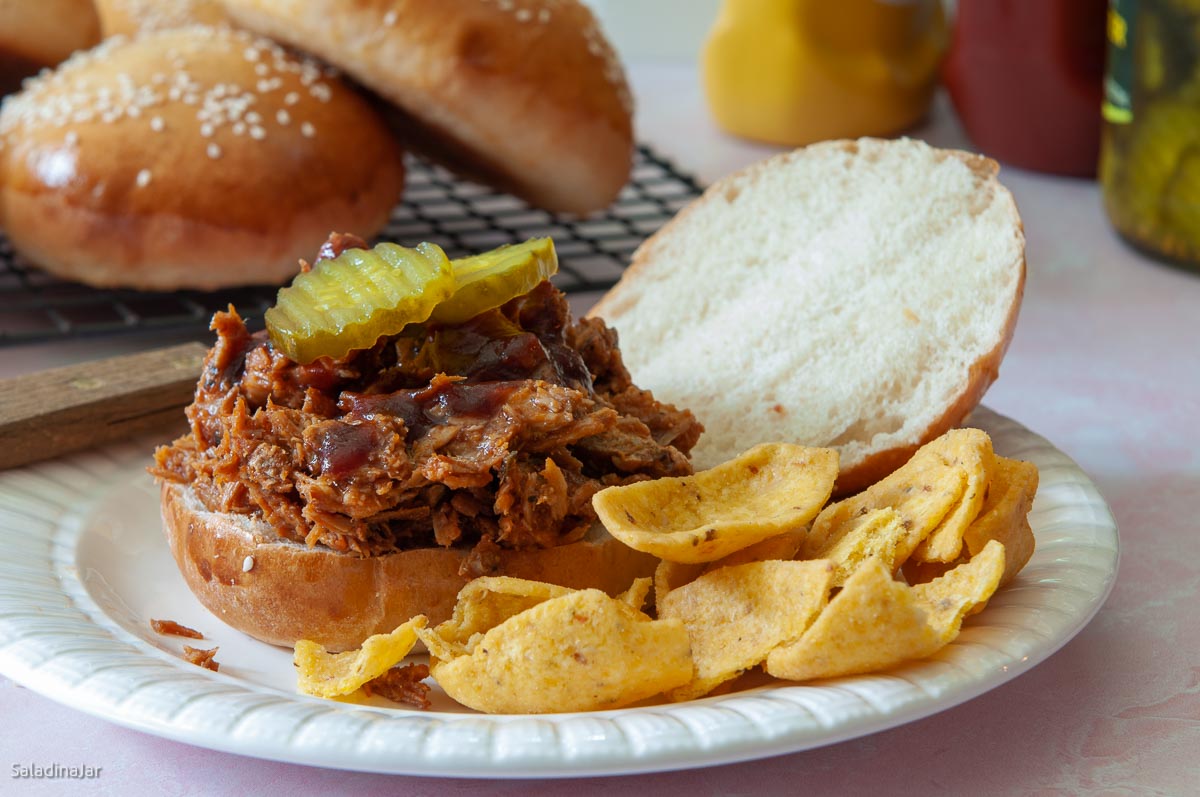
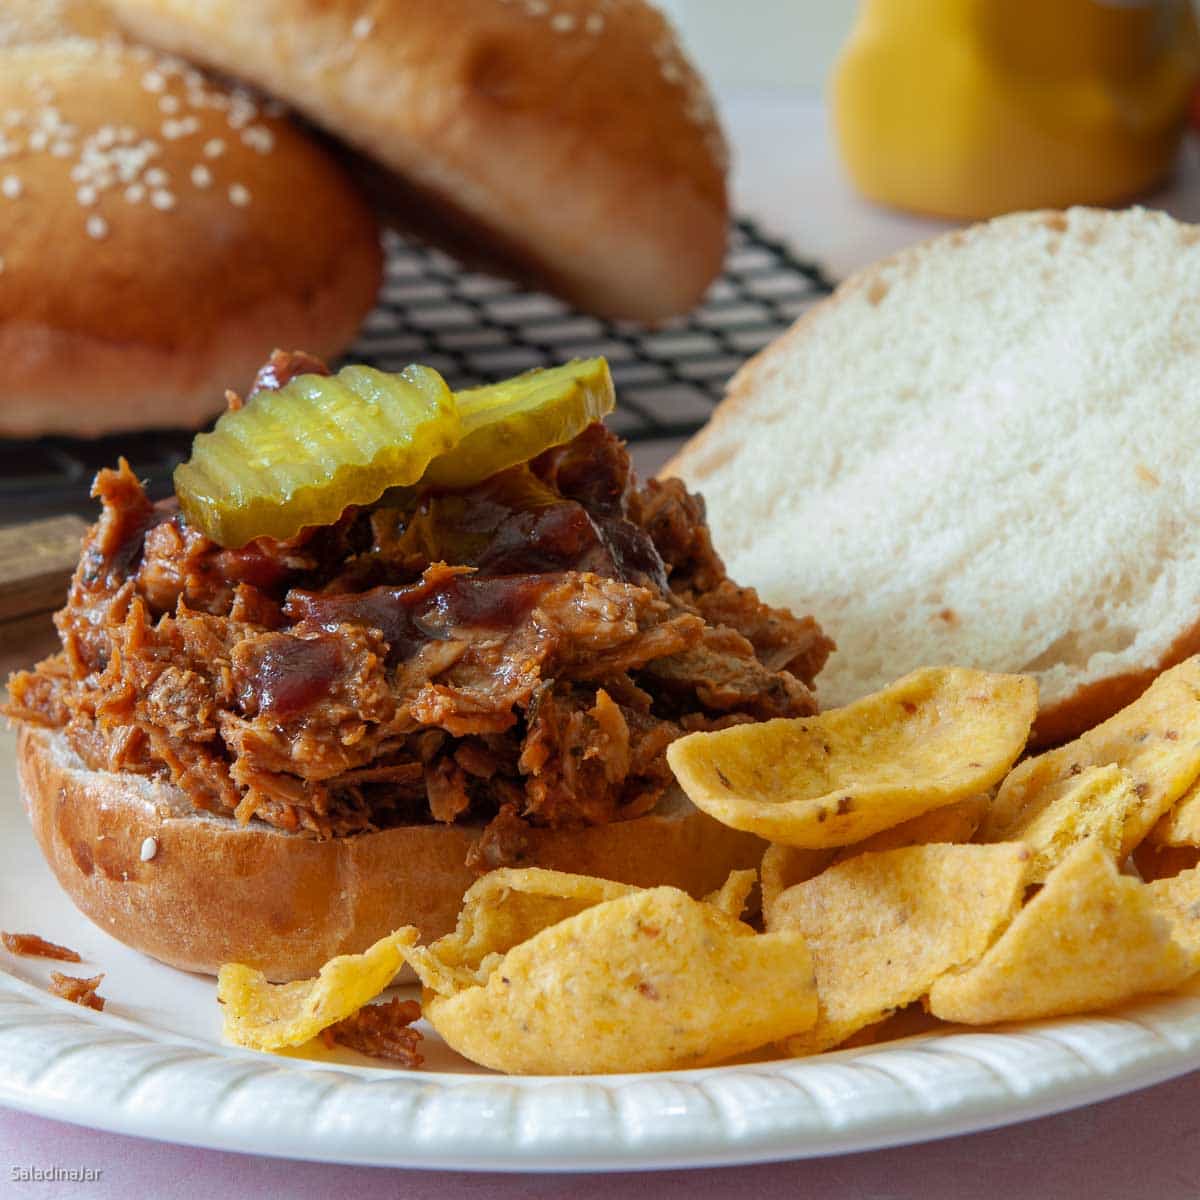
Need an idea to make your next meal or cookout stand out? Whether you’re flipping burgers, grilling chicken, or stacking up leftover meatloaf sandwiches, these homemade potato hamburger buns—made with bread machine dough—always steal the show.
When the texture is light and the flavor is spot on, nobody cares if your shaping skills aren’t bakery-perfect. I’ll walk you through two simple shaping methods that consistently work for me.
This recipe uses the DOUGH cycle on your bread machine to do the hard work. Prefer to mix by hand or with a stand mixer? See the recipe notes.
Ingredients & Substitutions

• RUSSET POTATO: Best for texture; Yukon Golds or leftover mashed work—adjust moisture as needed.
• MILK: Any dairy or non-dairy; water works but rolls will be less tender.
• EGG: Use a large egg; adjust dough texture if using a different size.
• BUTTER: Salted or unsalted; chop and add cold—no need to melt.
• SUGAR: White sugar preferred; honey or syrup untested and may need extra flour.
• SALT: Table or sea salt; add ¼–½ tsp more if using kosher salt.
• BREAD FLOUR: Best for structure; all-purpose makes softer rolls. Limit whole wheat to 1 cup.
• INSTANT YEAST: Ideal for bread machines; sub active dry yeast with ¼ tsp more.
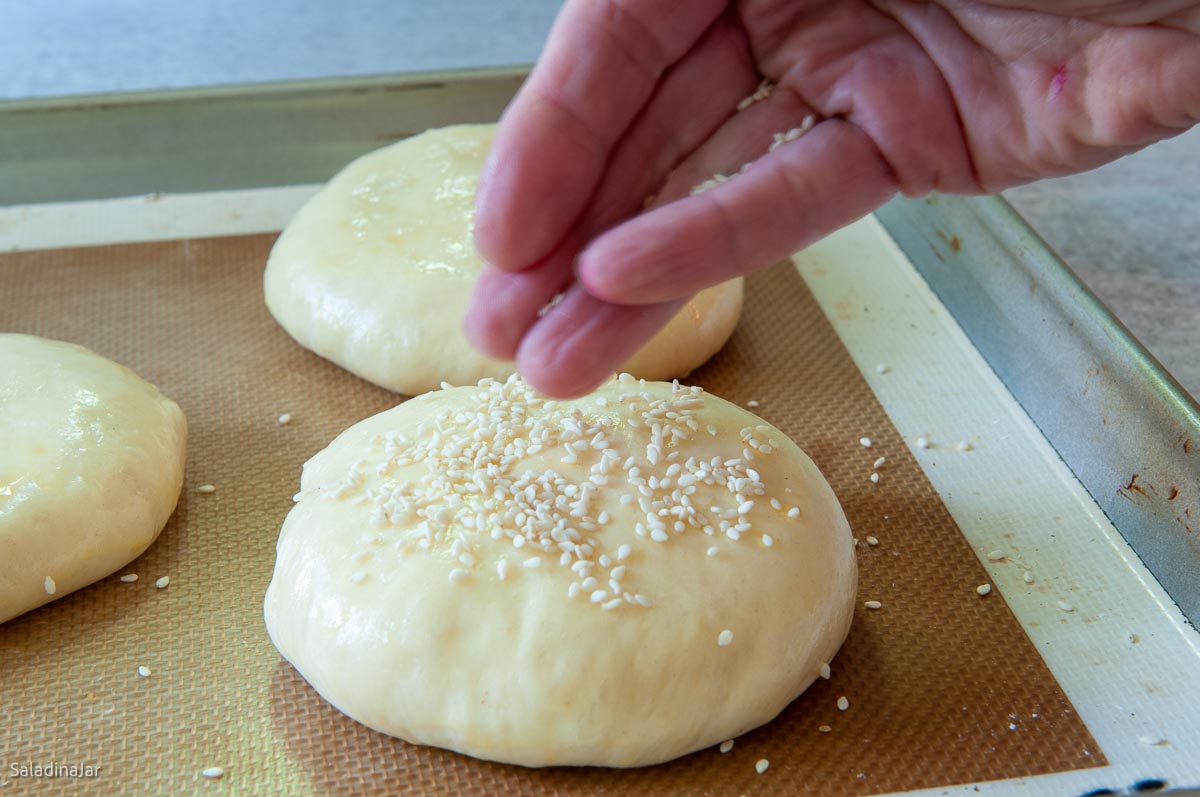
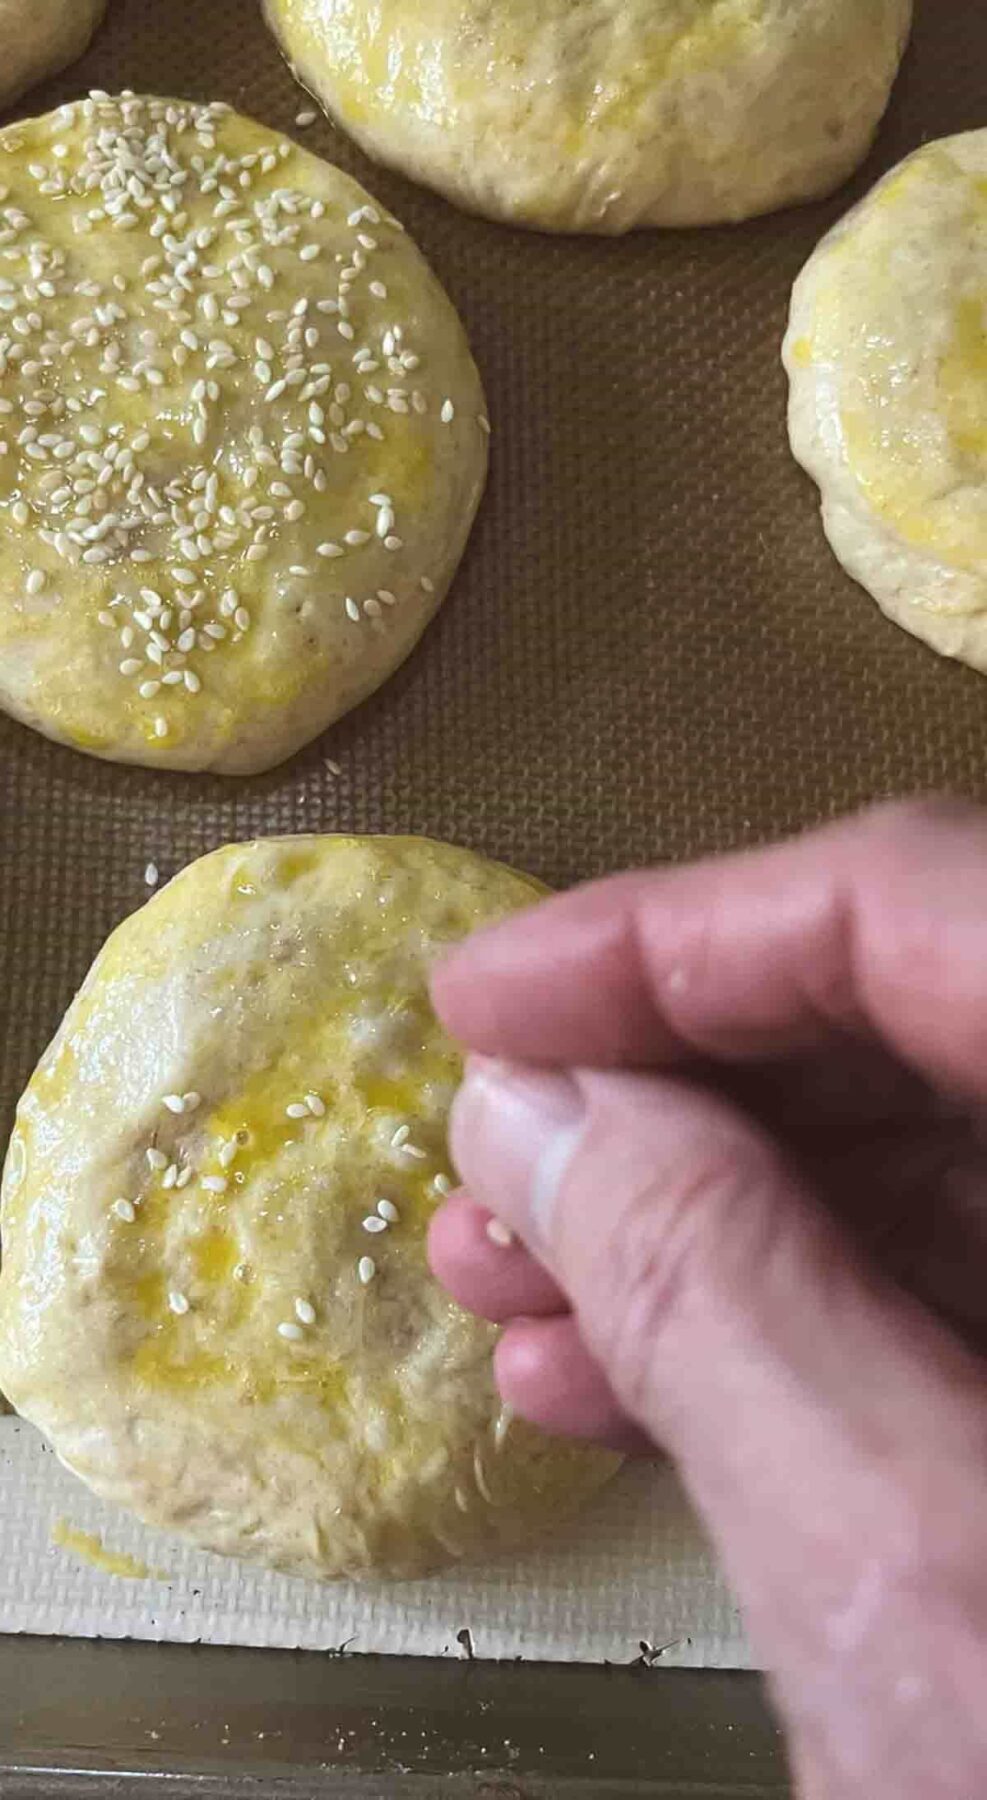
• OPTIONAL TOPPINGS: Brush with egg wash or butter, then add sesame seeds, dried onion, or your favorite finish.
Tips That Make a Difference
- Shape on a silicone mat for easy cleanup—just toss it in the dishwasher when you’re done.
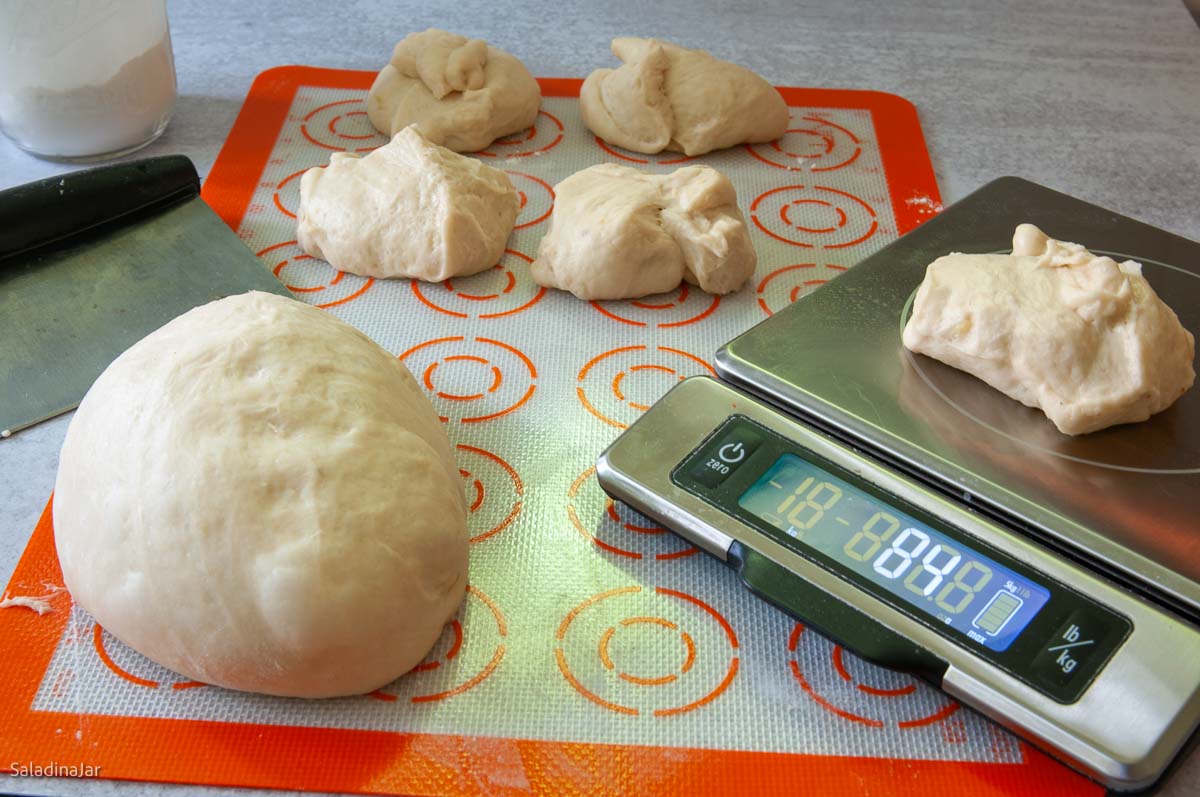
- Weigh your dough if you want uniform buns. Or go with mixed sizes—guests love options, and so do waistlines.
- Seeds hide shaping flaws. Optional, but helpful if your shaping isn’t bakery-perfect.
Step-by-Step Photos for Making Potato Hamburger Buns
⬇️ Jump to the recipe below for exact amounts and detailed instructions.
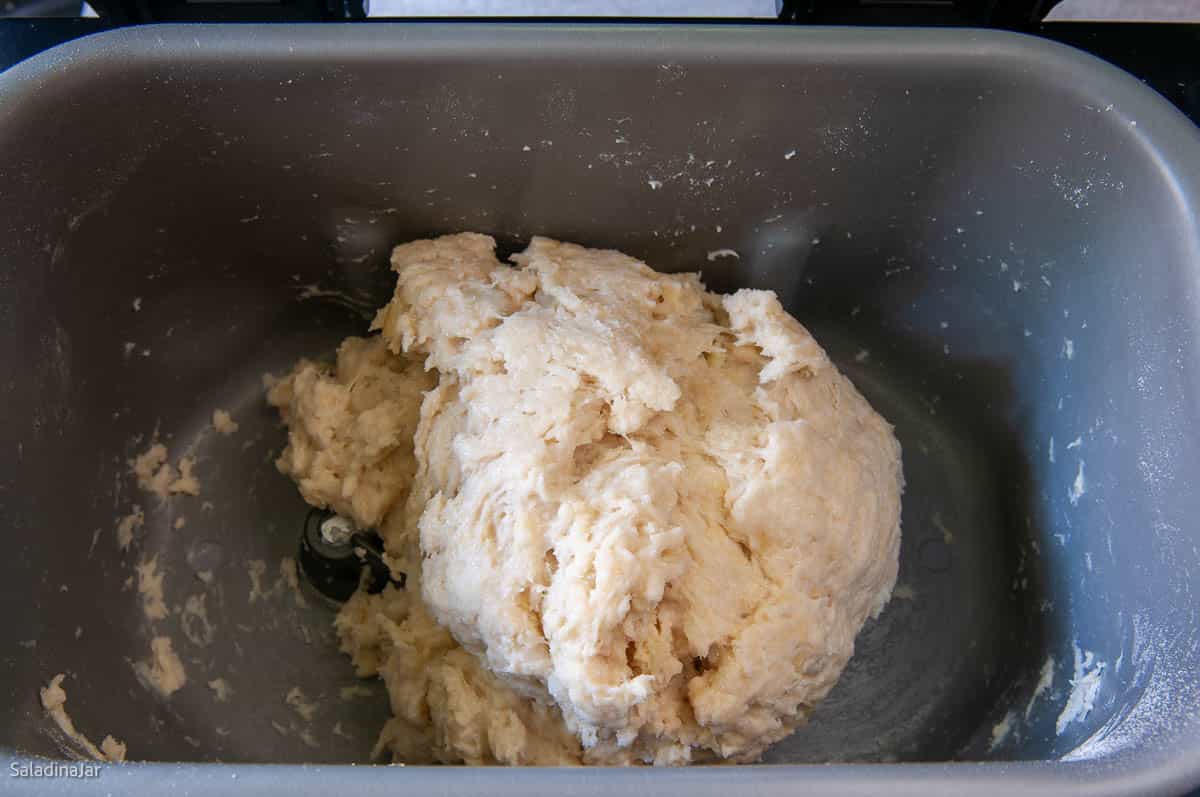
How To Make the Dough
How To Shape and Bake Potato Hamburger Buns
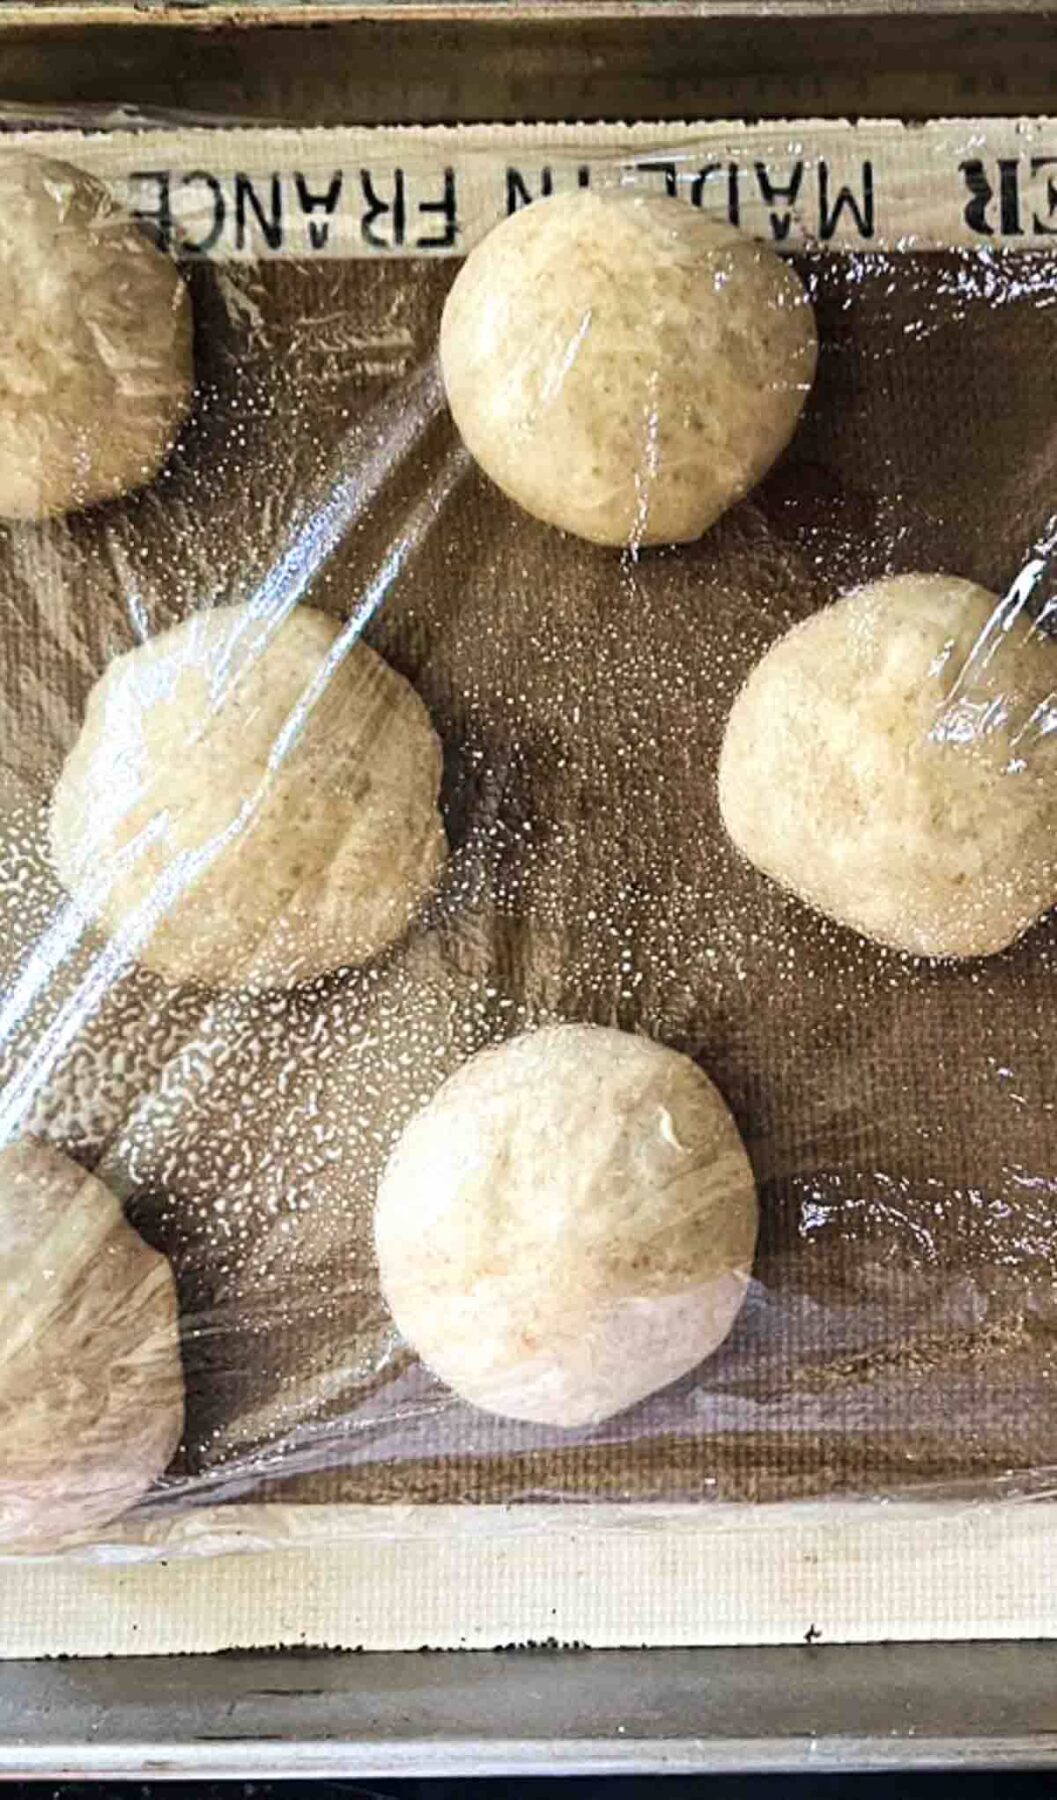
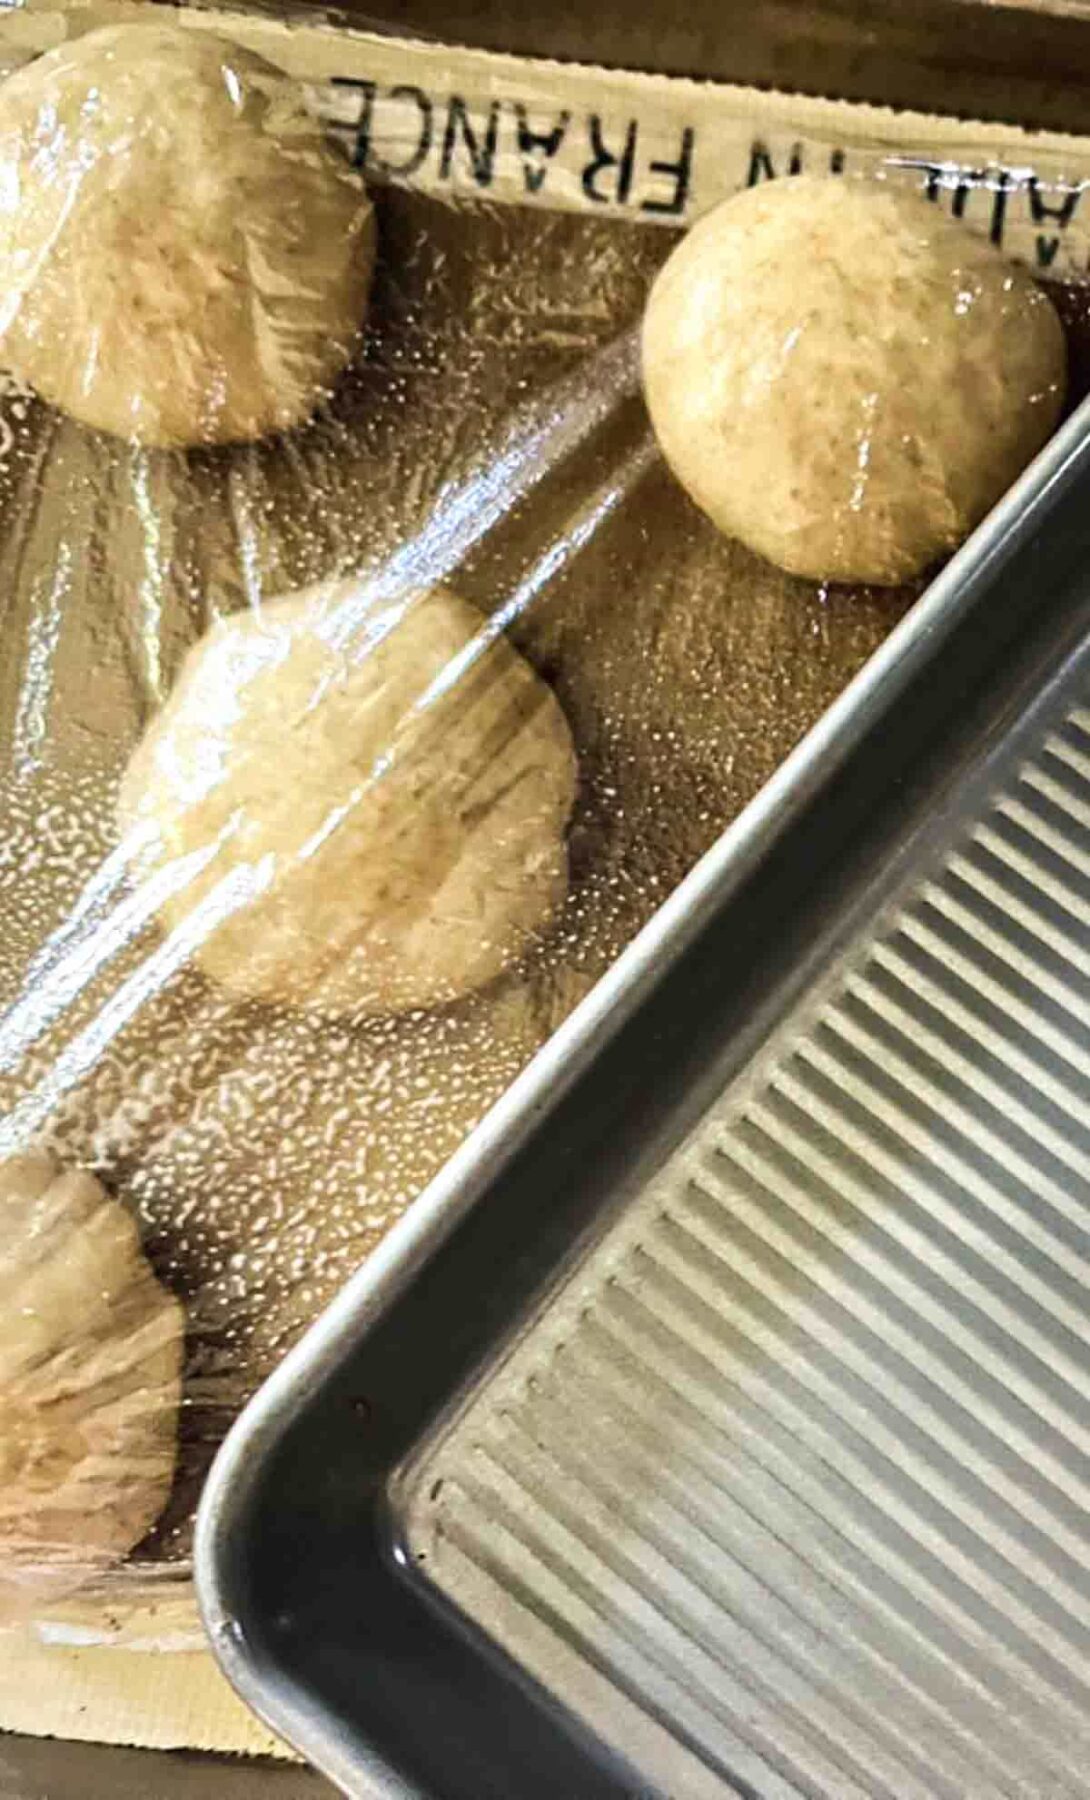
Alternate method for shaping hamburger buns
Below is an alternate method for shaping buns I learned while developing an English muffin recipe for a bread machine.

✦ ✦ ✦
Potato Hamburger Buns (Bread Machine Dough)
Video
Ingredients
- 1 medium russet potato (7-8 oz)
- ¾ cup + 1 tablespoon (184 g) milk (any fat content)
- 1 large (50 g) egg
- ¼ cup (57 g) unsalted butter (chopped)
- 2 tablespoons granulated sugar
- 1½ teaspoon table or sea salt
- 3 ⅓ cups (400 g) bread flour
- 1 ½ teaspoons instant yeast
Egg Wash
- 1 large (50 g) egg
- 1 tablespoon milk
Instructions
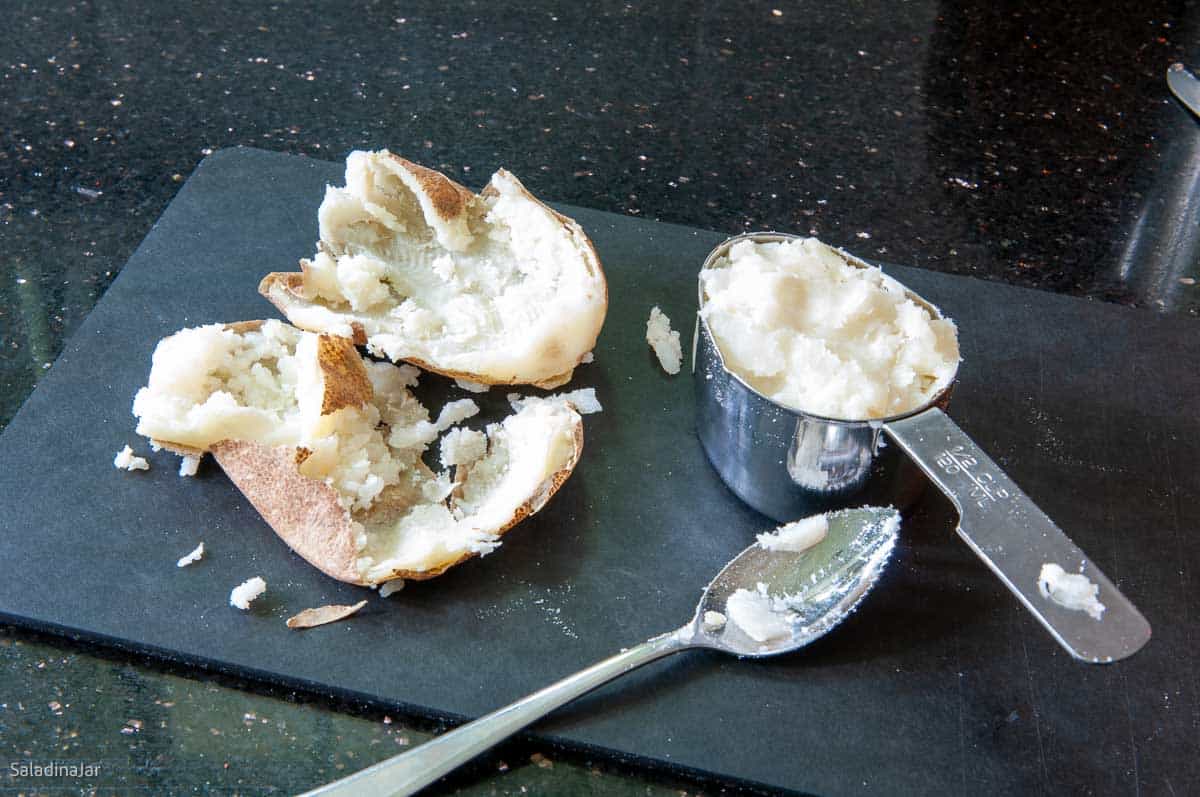
- Microwave the potato: Place a clean and unpeeled 1 medium russet potato (7-8 oz) into a microwave oven. Cook on HIGH for 3-4 minutes (time may vary according to the size of the potato and the wattage of your oven) until the potato is soft and squishy. Let rest, then scoop out ½ cup of flesh.
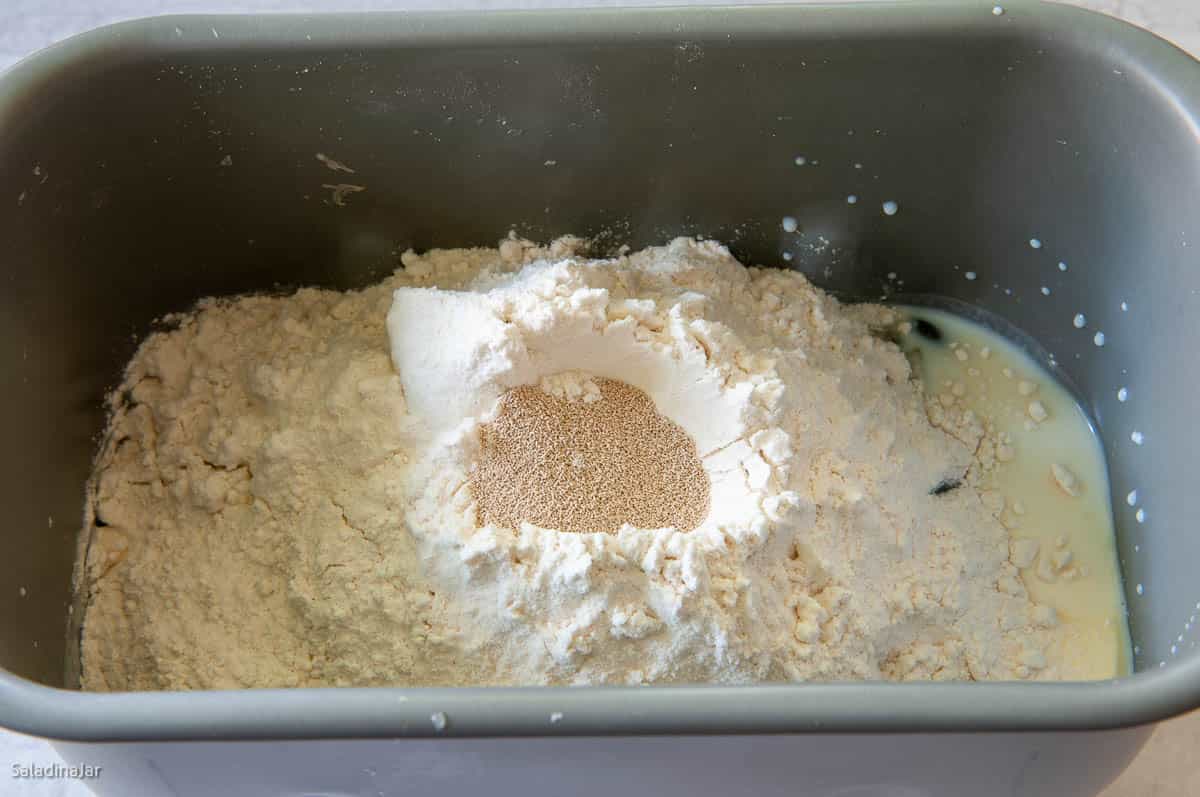
- Add ingredients to bread machine: ¾ cup + 1 tablespoon (184 g) milk (any fat content), 1 large (50 g) egg, ¼ cup (57 g) unsalted butter (chopped), 2 tablespoons granulated sugar, 1½ teaspoon table or sea salt, 3 ⅓ cups (400 g) bread flour, and 1 ½ teaspoons instant yeast in the order listed. Select the DOUGH cycle and press START.
- Check the dough twice: Lift the lid to take a peek. Do this right after the machine starts to see if the paddles are correctly engaged and the dough is starting to form a ball.Recheck the consistency of the dough again 15 minutes into the DOUGH cycle.If your dough is too wet, add flour one tablespoon at a time. The dough should stick to the side, then pull away cleanly.Conversely, if the dough is too dry, add one tablespoon of liquid at a time until the dough looks just right. Find out more about this surprising secret to success with a bread machine here.
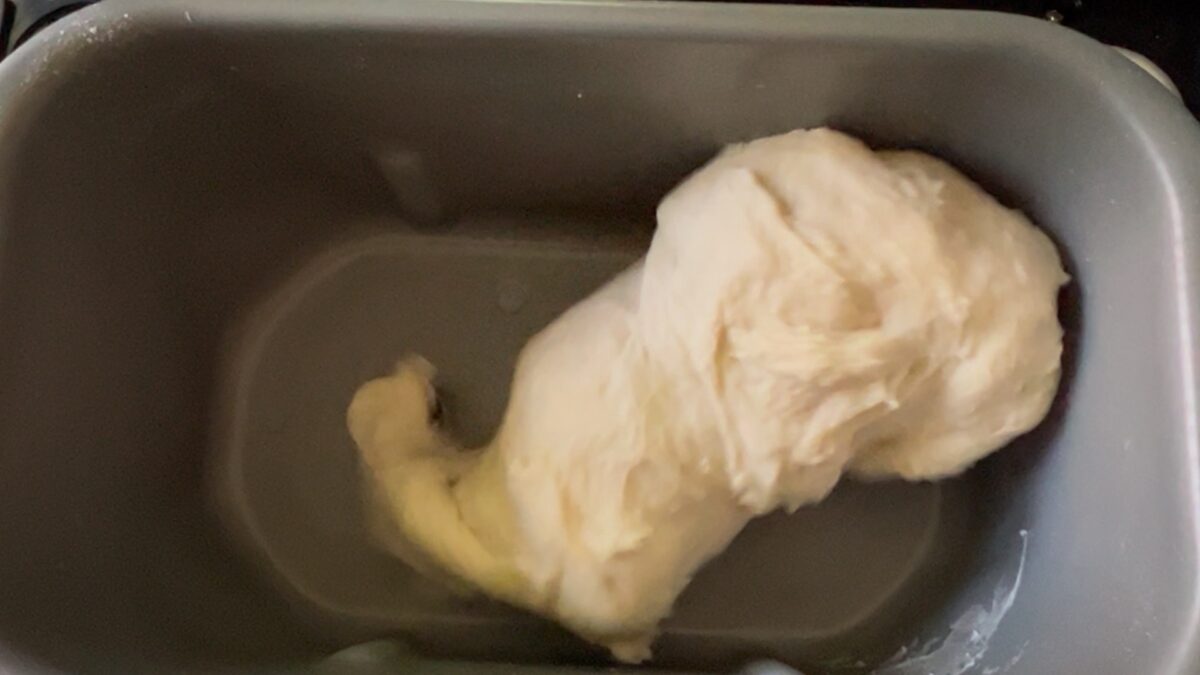
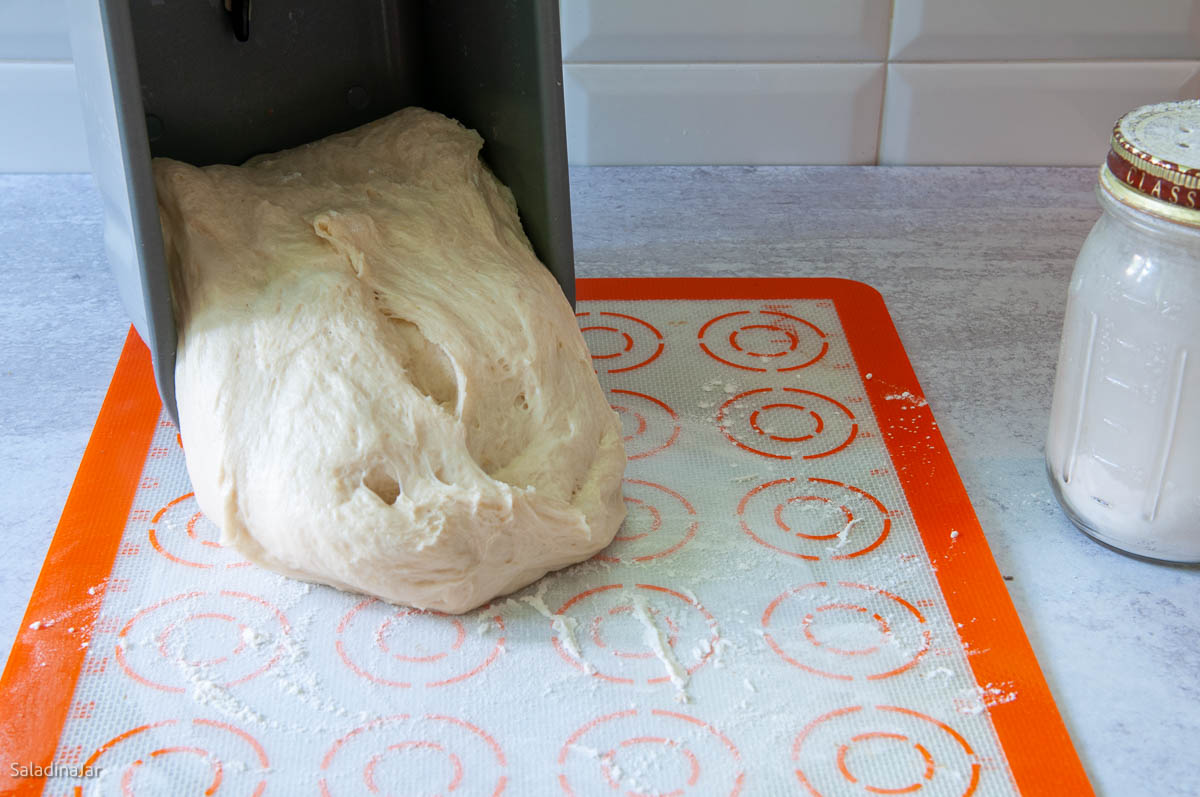
- End of DOUGH cycle: The dough should be doubled. If not, give it more rise time until it is. Restart the DOUGH cycle and knead for 5 seconds to deflate the dough. Stop the machine and turn the dough out onto a lightly floured surface, shape into a smooth ball, cover, and let rest for 10 minutes.
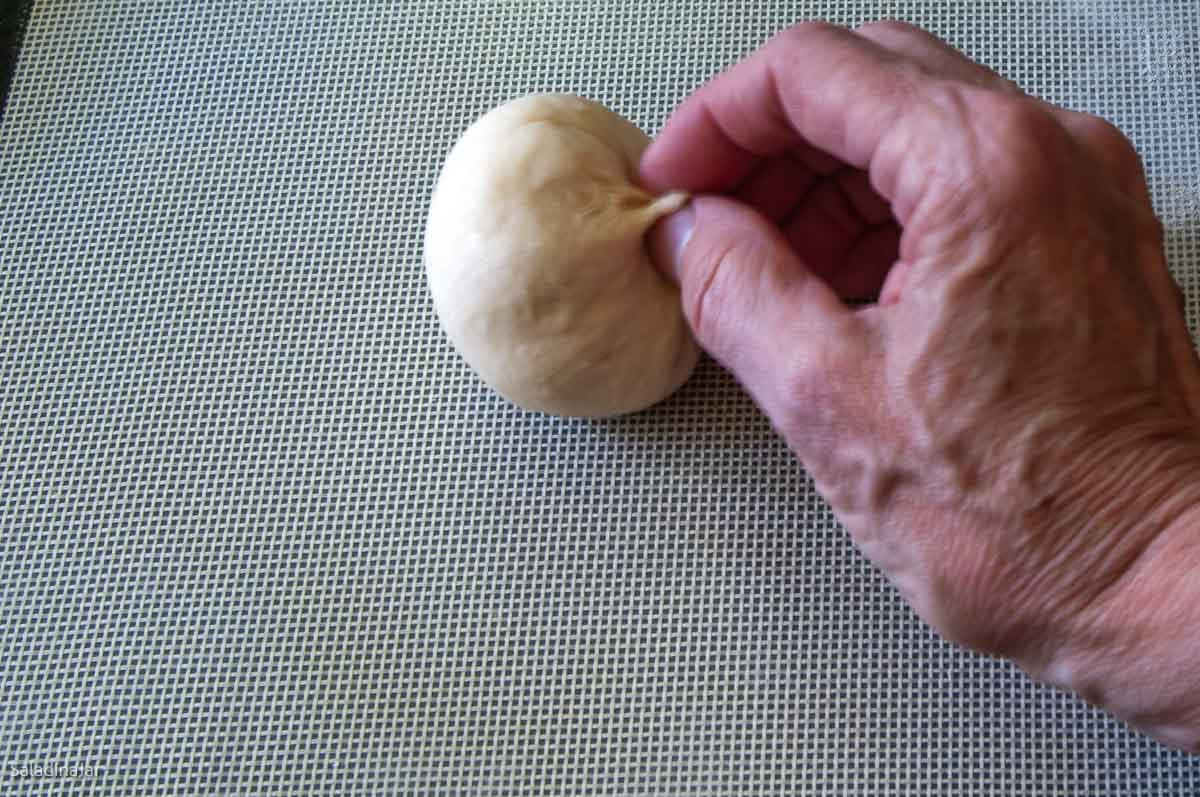
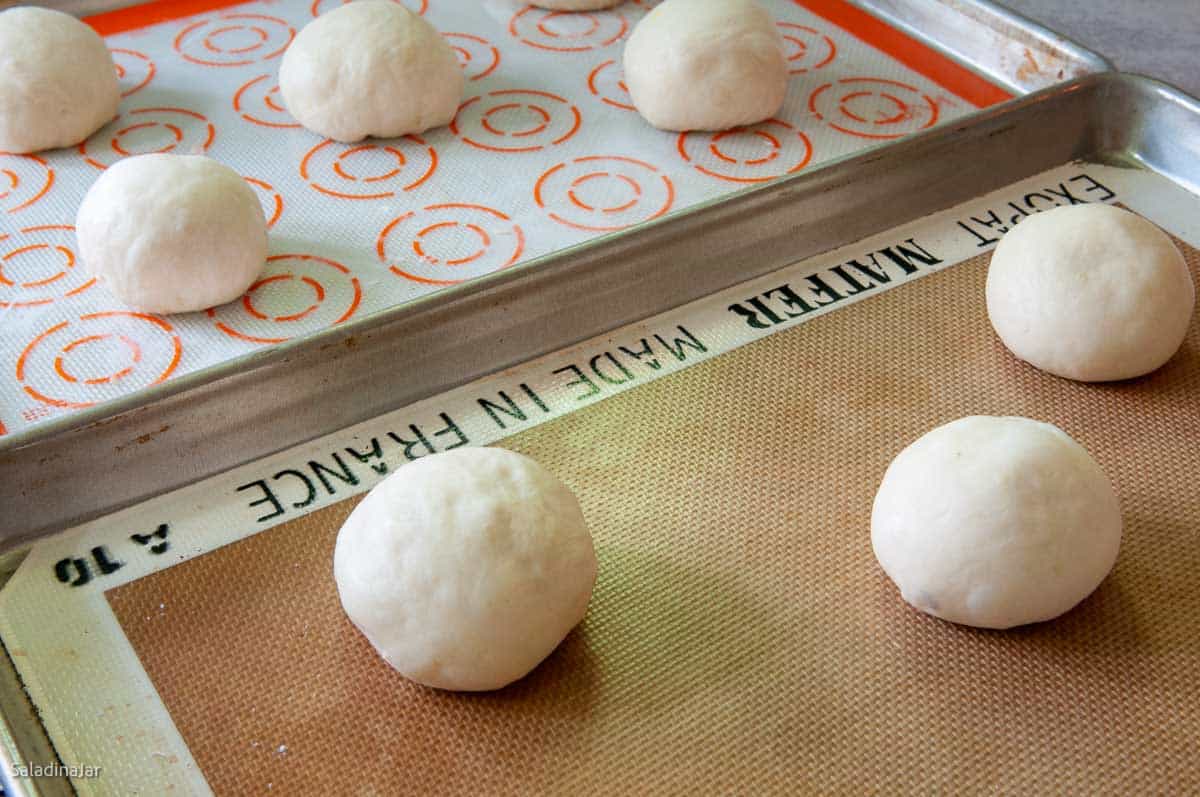
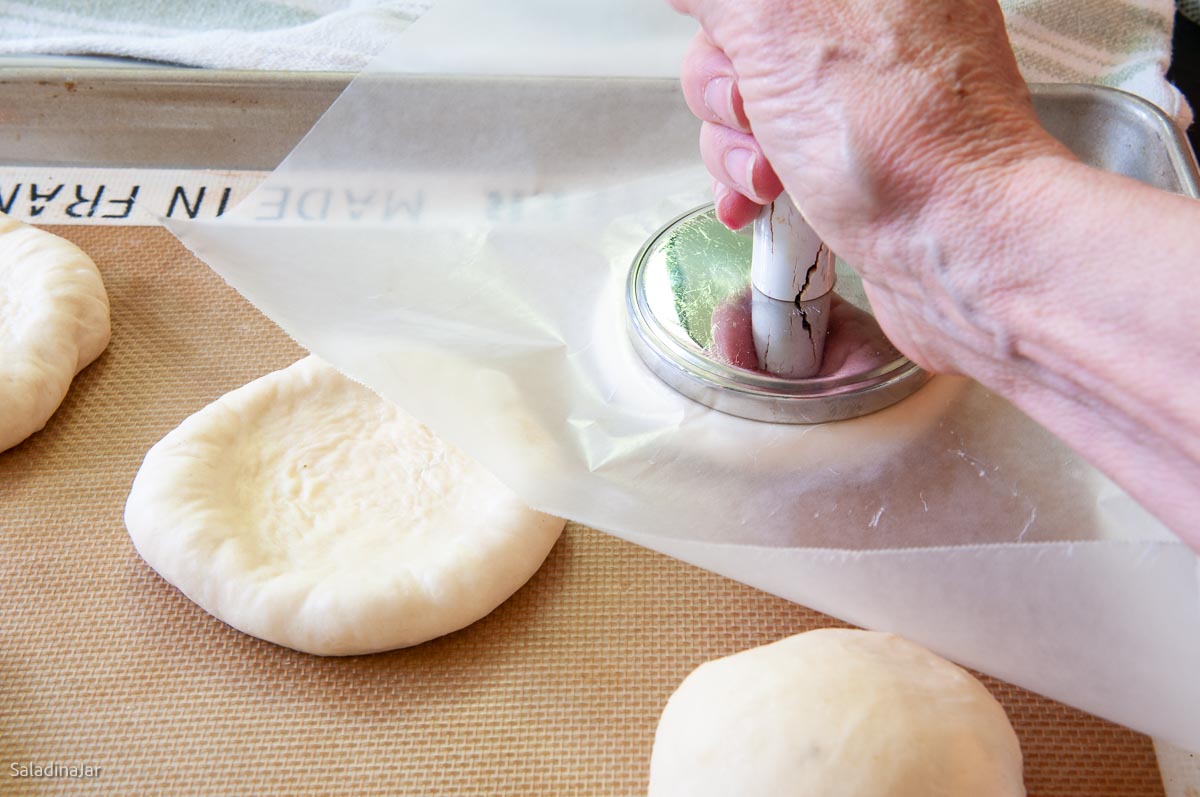
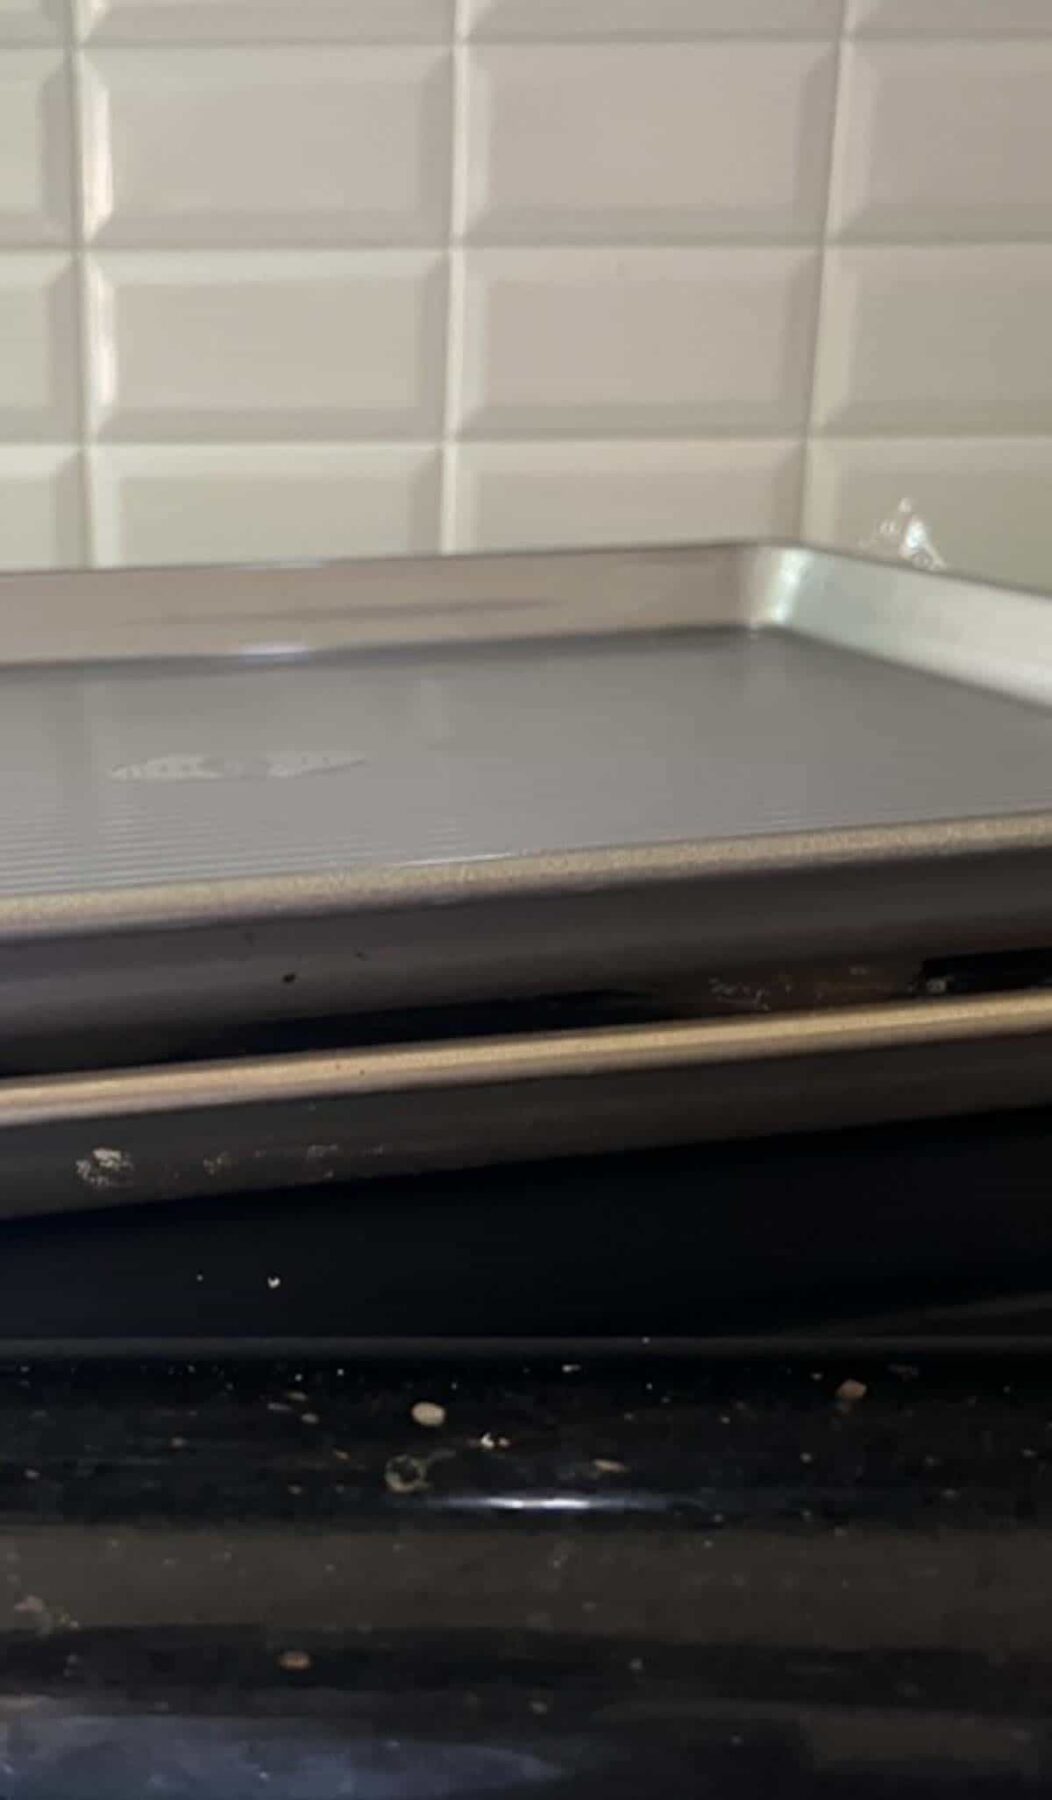
- Shape the buns: Divide the dough into 10 pieces, more or less depending on how big you want your buns to be. (Your buns will be more like slider buns if you divide the dough into 12 or more pieces.) Shape into round balls by pulling the dough from the bottom to the top and pinching it shut to create tension when you turn them over. Watch the video if you want to see how I do it. Place 5 buns on each of two prepared cookie sheets. (To prepare cookie sheets, cover with a silicone mat or grease with Baker's Joy. Parchment paper didn't work for me because it tends to wrinkle during the flattening process.)Cover and allow to rest for 15 minutes. Flatten the dough balls to less than 1-inch thickness with your palms or a small flat plate. I do this with a piece of wax paper between the dough ball and a flat meat pounder. (See picture above.) Cover with a tea towel to rise one more time.
- Preheat oven: About 15 minutes before you think the rolls will be ready to bake (when they are quite puffy), preheat the oven to 400˚F (200˚C).
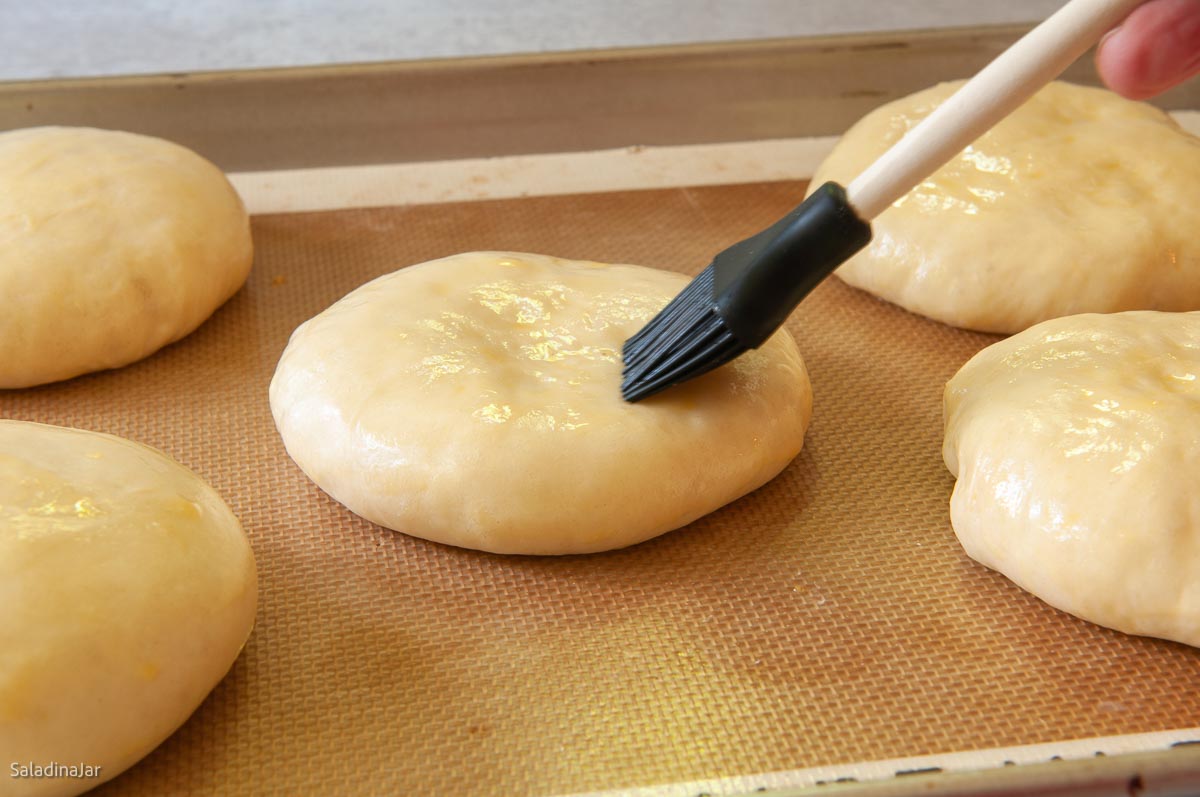
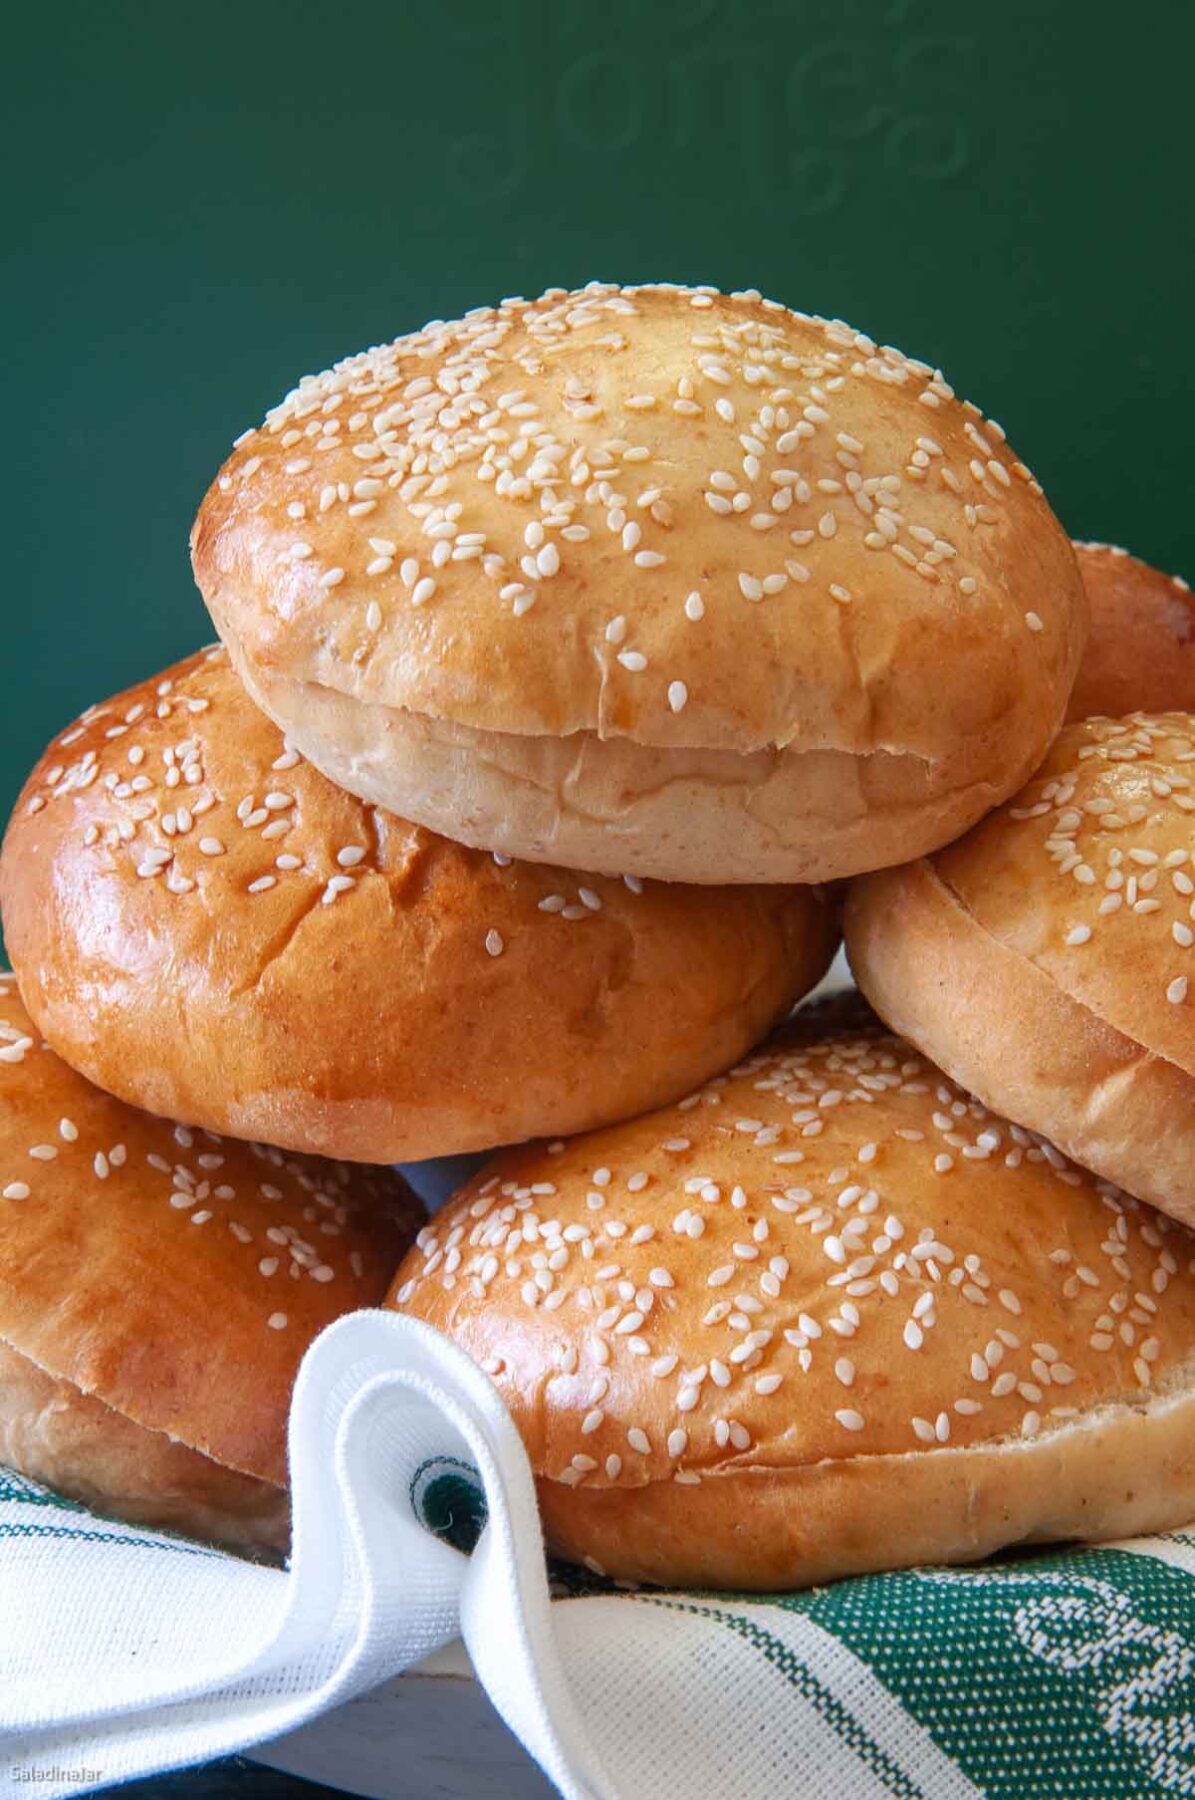
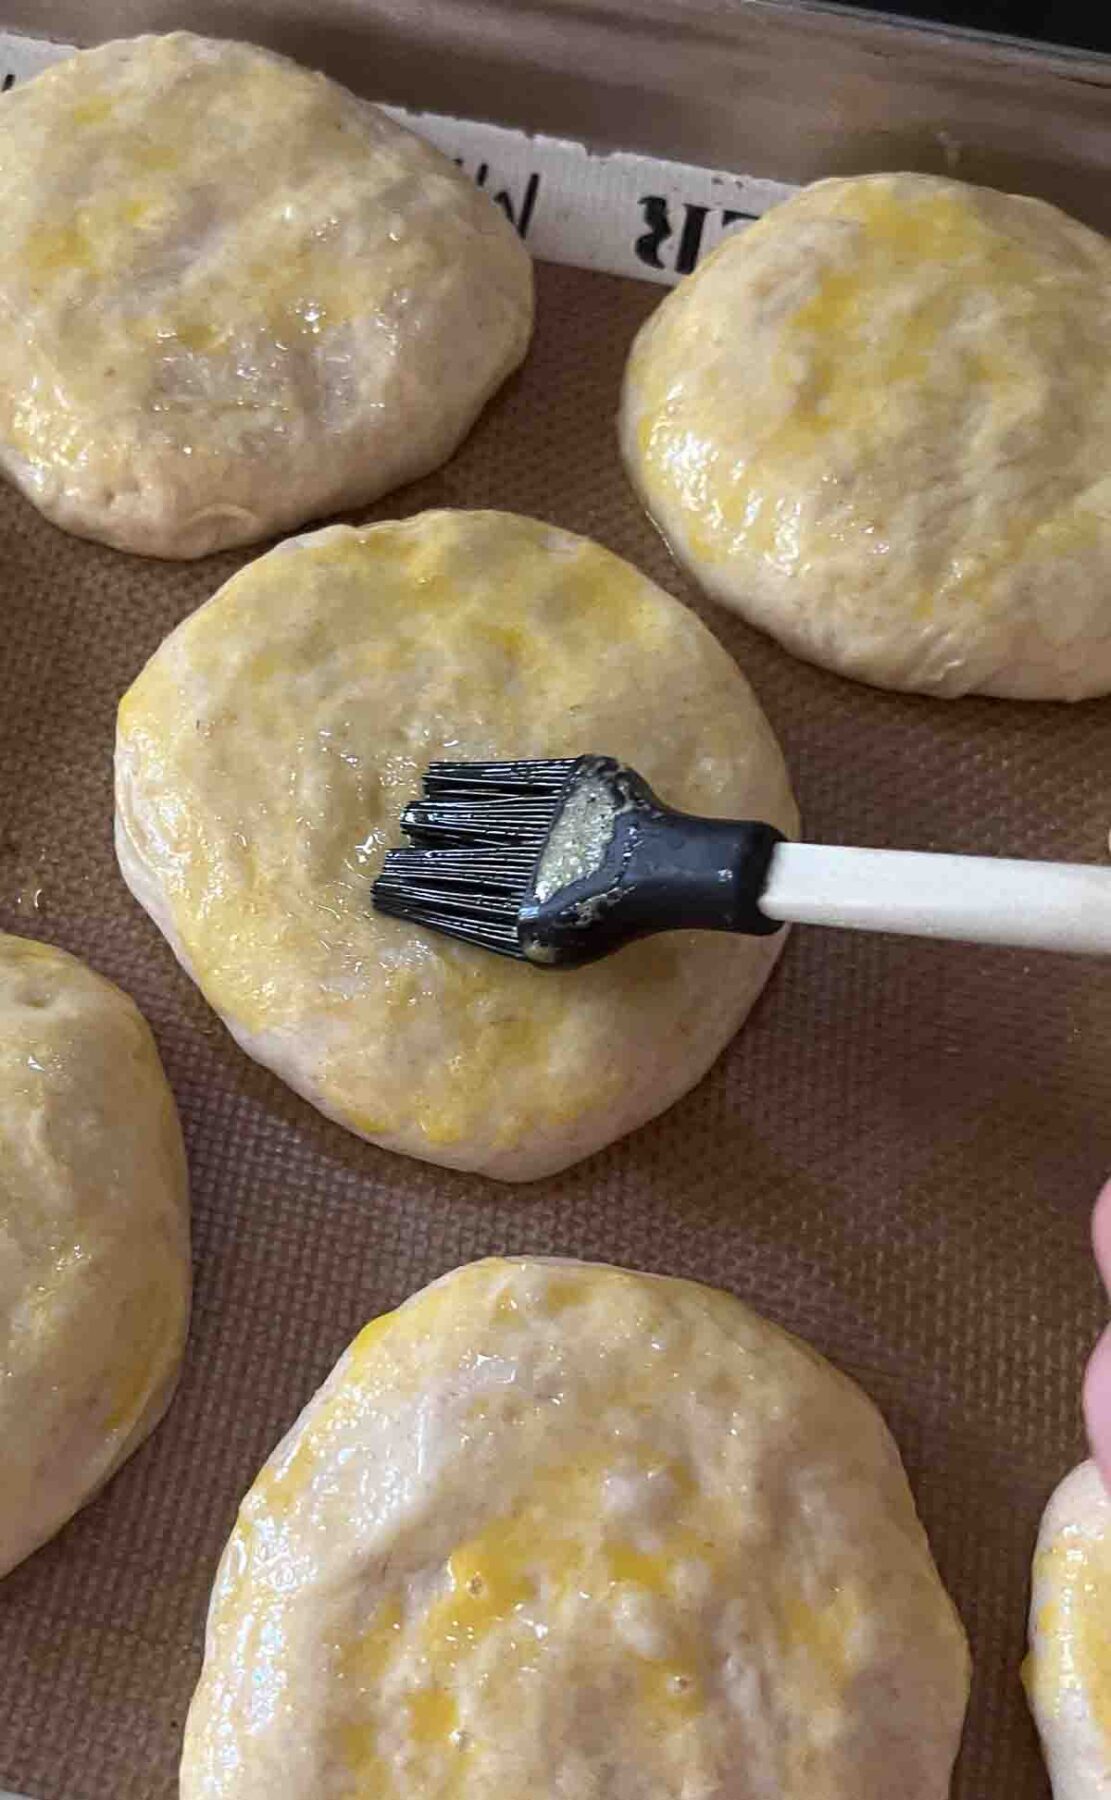
- Glaze and bake: Whisk 1 large (50 g) egg and 1 tablespoon milk together in a small bowl. Brush the glaze over the rolls immediately before you put them into the oven. Try not to leave any unglazed surface. Also, don't use so much glaze that it drips onto the tray. Bake the rolls for 12-15 minutes or until the internal temperature reaches 190˚F (or 88˚C) and the rolls are golden brown all over.
- Cool and slice:Transfer to a wire rack. Cool completely before slicing with a serrated knife.
Notes
- Unbaked dough: Freeze after the DOUGH cycle or after shaping (before final rise). Defrost in the fridge overnight.
- Baked bread: Double-wrap and freeze up to one month. Reheat gently.
- Stand Mixer: Mix until moistened, then knead with a dough hook (speed 2–3) until smooth and elastic (5–10 minutes). Let rise, deflate, and shape as directed.
- By Hand: Mix to a shaggy dough, knead on a floured surface until smooth and elastic (10–20 minutes). Let rise, deflate, and shape as directed.
Equipment
Nutrition
All images and text ©️ Paula Rhodes for Salad in a Jar.com
FAQ
What’s the best way to toast homemade hamburger buns?
Slice in half and brush the cut side with melted butter or spray butter. Toast cut-side-down on a hot skillet or grill just until golden—watch closely to avoid burning.
Keep Reading
Love baking with potatoes? Try my Parmesan Potato Rolls (Bread Machine Version) for a slightly more indulgent option.
Looking for more roll or bun recipes? Check out these reader favorites:
- Multigrain Hamburger Buns (Bread Machine Dough)
- Whole Wheat Dinner Rolls (Bread Machine Dough)
- Cuban Bread (Pan Cubano)
Final Thoughts
If this is your first attempt at homemade hamburger buns, don’t stress about perfect shape or a flawless glaze. If they taste great and aren’t too dense, nobody will mind a few drips or a lopsided roll—especially when they’re warm and fresh from your oven.
— Paula, Home Economist
Homemade Food Worth Sharing
Need help troubleshooting?
Email me: Paula at saladinajar.com — photos help!

The rolls were delicious and so easy to make!
I bet those made some delicious sandwiches! Thanks for writing.
Fantastic and easy to follow. I used the Roll function on my Corsori machine. Every recipe of yours that I have tried has worked well!!
Anne,
I’m so encouraged to hear this. I haven’t heard it called the “Roll function” before. Good to know.
After you’ve rolled them into 10 balls, placed on cookies sheets, waited 15 m, then flattened them… usually how long does it take for them to rise that 3rd time before you put egg wash&seeds on and bake?
Hi Meredith,
I always hesitate to give rising times because it varies wildly. A good guess might be 30 minutes. But if it’s warmish in the house, it might only take 20 minutes. If it’s cool in the house, it could take 45 minutes or longer. You’ll have a better idea after making the recipe a couple of times. Experience is the best teacher when it comes to homemade bread.
Thank you for writing. I’ll go back and add this to my instructions.
You are the best , now I can bake all kind of bread & the best dinner rolls , thanks a million ?
Hi Reinhold,
You’re so kind! Thank you. Enjoy those buns.
Hi:
Is it possible to substitute dried instant potatoes in this recipe?
Thanks! Love this technique!
Hi Spring,
So nice to hear from you.
I haven’t tried it myself, but it would probably work. Since real potatoes contain more moisture, you will need to pay attention to the moisture content. If you haven’t already, be sure to learn how to judge the moisture in the dough as it kneads and how to fix it here.
Another great recipe. Perfect hamburgers buns to serve with chicken or beef burgers. Thank you Paula.
Thank you Jacqueline. You’re the BEST!
Hello Paula! Thank you for spending your morning, with me, making hamburger buns. As per usual with me, additions and substitutions occurred. Even with those, thanks to your step by step approach and excellent video, these look and smell as if they came from a really good bakery. They are cooling now. The wonderful aroma says these will be wonderful. Thank you very much!
As an aside, you helped me feel worthy of a bread machine. After quite a while reading your blog and your suggestions I felt comfortable ordering the Zojirushi. I’ve practiced with all the included recipes. With your support I am now venturing into recipes I’ve made for decades by hand that suddenly failed me. I thought my bread making mojo was lost forever. Thank you for your recipes, your knowledge and your deep kindness. Everything I’ve tried has been a taste pleaser. Many, many thanks!
Hi Melinda,
What a pleasure to hear from you. I’m so glad you are once again back in the bread game. Your family and friends will be blessed. So happy your hamburger buns were good.
I always use “Sandwich Thins” beca use we don’t like a lot of bread on our burgers. But I’m wanting to try these. Only problem is where is states “See video here” under “How to make round balls” there isn’t a hot link and even copying it takes me nowhere.
TIA, Kat
Hi Kat,
The video is actually in the recipe. Scroll down a bit farther in the post. I’m sorry I didn’t make that clear in the post. I’ll fix that as soon as I’m back home.
I can relate to thinner buns. Cut the dough in smaller portions and smash them thinner. I do it all the time. Hope they turn out good for you.
Thank you for this great recipe!
Would it be better to freeze the uncooked dough balls or the cooked buns?
Either will work. See the letter I sent to your email.
The crust on mine isn’t as soft as what one buys packaged. How can I keep them softer?
Hi Martha,
Try putting them into a sealed plastic bag. I’m betting that will make the crusts softer as long as they weren’t baked too long to begin with. I’m hoping that works for you.
Two of my grandkids are with us for the weekend so we’re having sloppy joes for dinner! I made these buns and they turned out looking great with such little effort on my part. I made one little change – substituted one cup of bread flour with one cup of whole wheat flour. They look perfect! Thanks for the recipe and tips.
Thank you for all the tips and tricks. I have been using my Mom’s bread machine for years, with lots of luck. Thank you again.
You’re welcome! Don’t hesitate to reach out if you have questions in the future.
Very much appreciate the level of detail and photos you provide. You are making me a better bread maker. Thank you.
You’re welcome, Lori. Glad to hear it!