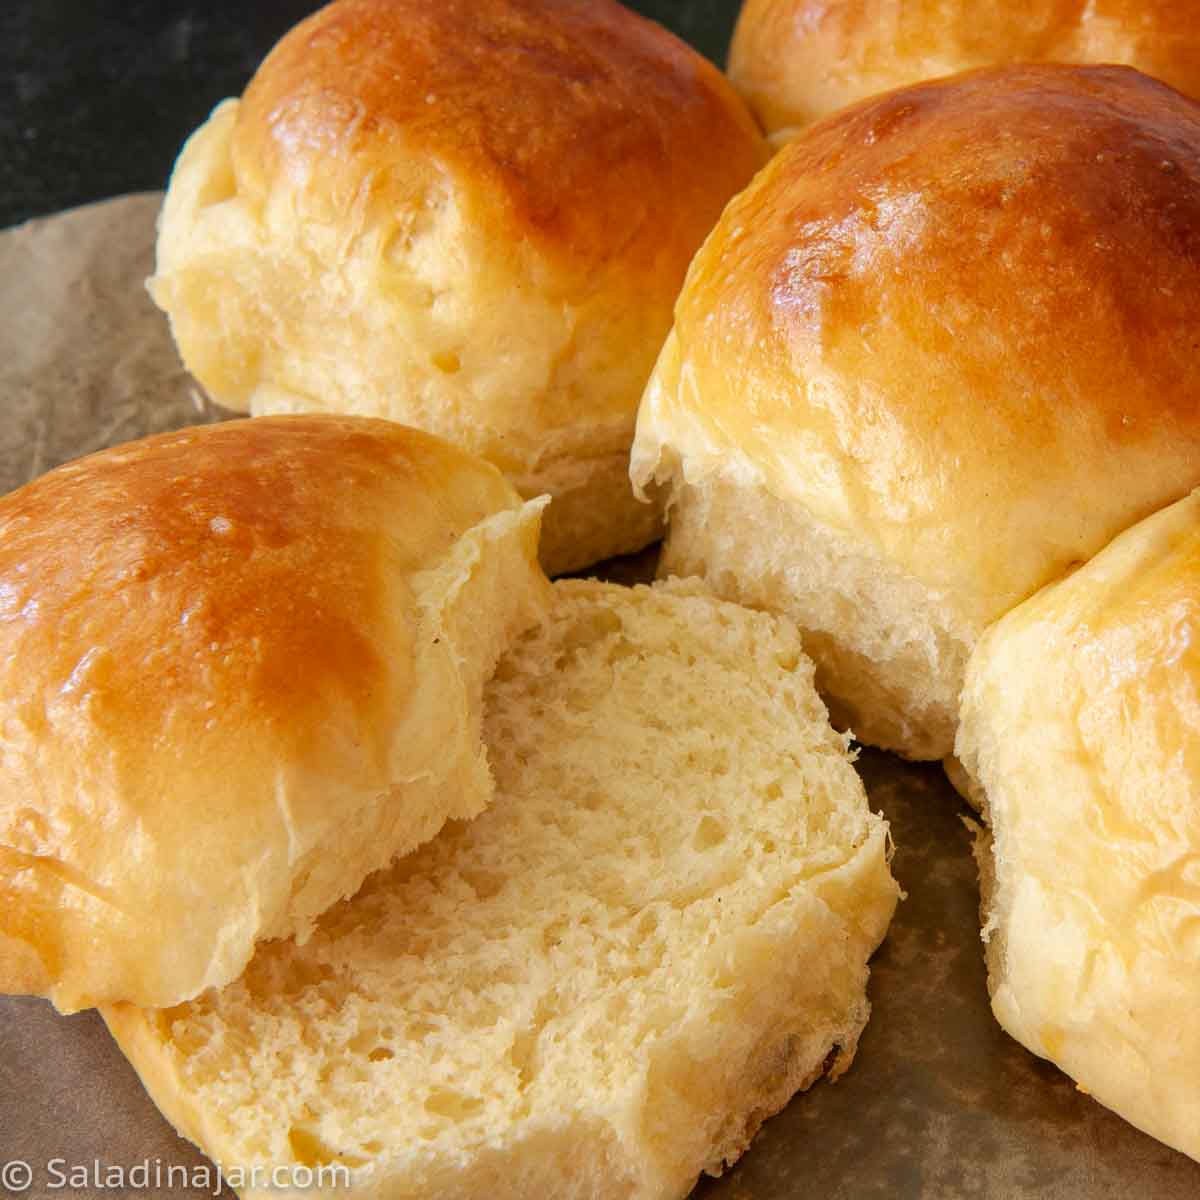
Bread Machine Hawaiian Rolls (Soft, Sweet, Like King’s)
Sneak Peek: These soft, sweet bread machine Hawaiian rolls use pineapple juice, honey, and a touch of ginger for the classic flavor of store-bought favorites. Mix the dough in your bread machine, shape by hand, and bake in the oven. Ready in about 3 hours.
This post contains affiliate links. As an Amazon Associate, I earn from qualifying purchases at no extra cost to you.
If you love the flavor of store-bought Hawaiian rolls but want to make them at home, this recipe comes surprisingly close. Pineapple juice, honey, mashed potatoes, and a small splash of cake batter extract create the signature sweetness and feathery texture.
Use your bread machine to mix the dough, then shape and bake the rolls in your oven for the best results.
Ingredients & Substitutions
PINEAPPLE JUICE: Adds sweet-tart flavor; sub milk or water (no warming needed in bread machine)
DRIED MILK: Adds softness and flavor. If using liquid milk instead, substitute it for the pineapple juice and omit the milk powder.
EGG + EGG YOLK: Adds color and tenderness; freeze whites for angel food cake
MASHED POTATOES: Use fresh, leftover, or instant; or microwave a whole potato, peel and chop
HEAVY CREAM: Rich texture; sub half-and-half or milk
SUGAR: Granulated; adjust to taste
HONEY: Adds flavor and improves texture
BUTTER: Use cold, chopped pieces—don’t melt
GINGER: Ground ginger from spice aisle
CAKE BATTER EXTRACT: The secret ingredient that gives these rolls their classic Hawaiian-roll flavor. Substitute vanilla-butter-nut or vanilla if needed.
FLOUR: Unbleached all-purpose preferred; bleached OK; avoid bread flour
INSTANT YEAST: Use bread machine or instant yeast; active dry works with adjustment (see notes)

Step-by-Step: Making These Rolls with a Bread Machine
⬇️ Jump to the recipe below for exact amounts and detailed instructions.
Bake in a preheated 375°F (190°C) oven until golden brown.
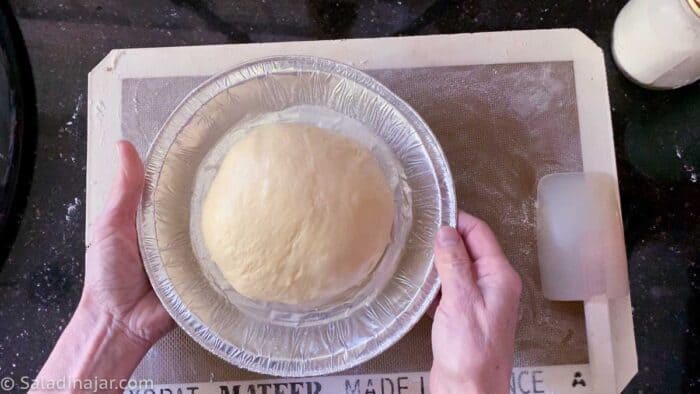
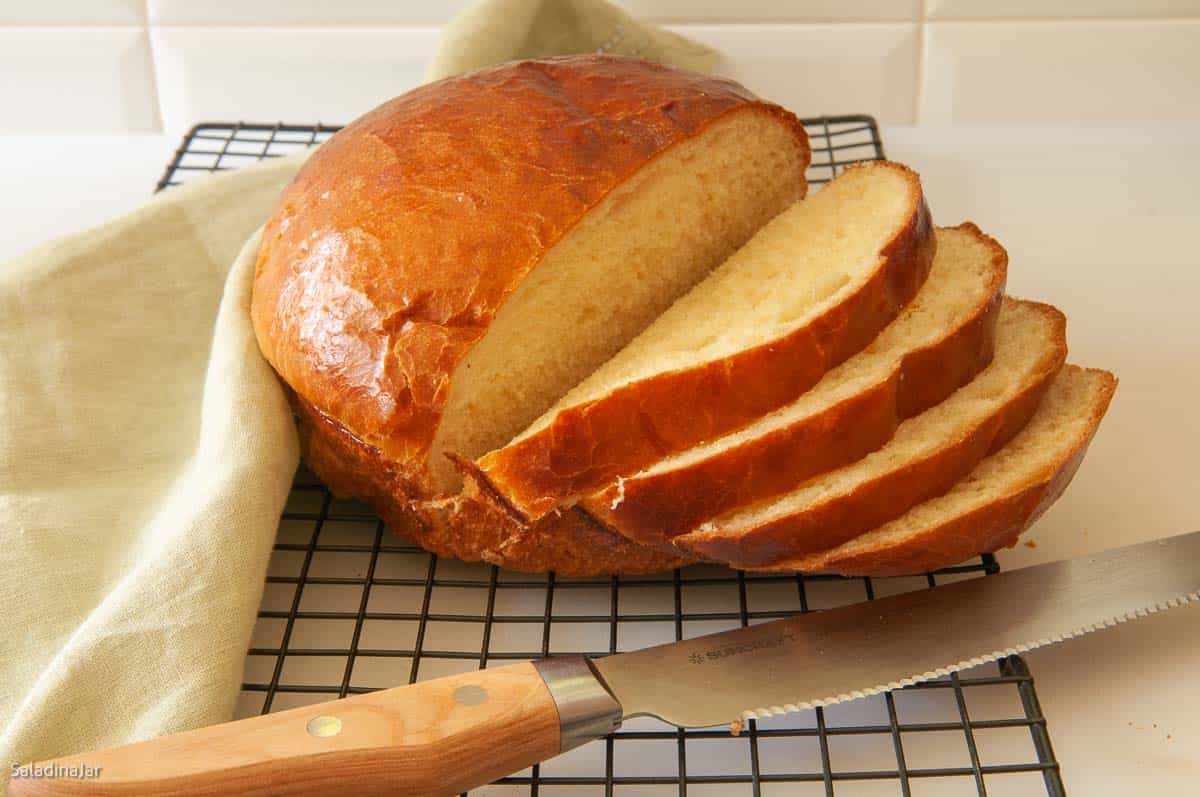
Make a Round Loaf
Use about two-thirds of the dough for the round loaf and the remainder for rolls. Trying to bake the entire batch as one loaf often prevents the center from baking through evenly.
Bread Machine Hawaiian Rolls (Soft, Sweet, Like King’s)
Video
Ingredients
- ⅓ cup (76 g) pineapple juice (can substitute water or milk)
- ½ cup (125 g) mashed potatoes
- 2 tablespoons nonfat dried milk powder (or use milk instead of pineapple juice and leave the milk powder out)
- 1 large (50 g) egg
- 1 (18 g) egg yolk
- 3 tablespoons (36 g) sugar
- ⅓ cup (76 g) heavy cream
- ¼ cup (58 g) unsalted butter chopped
- 1 tablespoon (21 g) honey
- 1 teaspoon salt
- ¼ teaspoon ground ginger
- ½ teaspoon cake batter-extract
- 3 cups (360 g) unbleached all-purpose flour
- 2 teaspoons bread machine or instant yeast
Glaze
- 1 (18 g) egg yolk
- 1 tablespoon (14 g) milk
Instructions
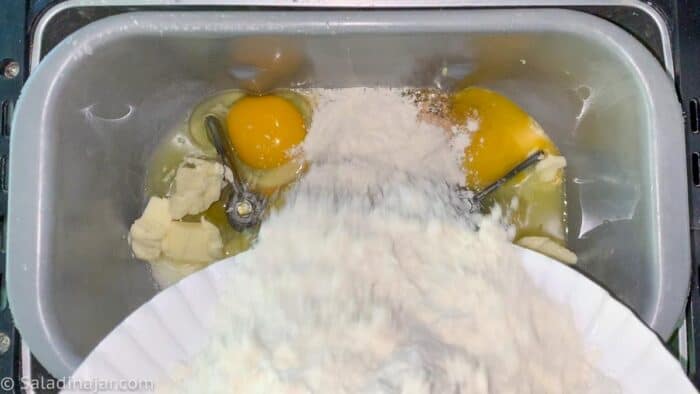
- Add Ingredients to Bread Machine Pan: 1/3 cup (76 g) pineapple juice, 1/2 cup (125 g) mashed potatoes, 2 tablespoons nonfat dried milk powder, 1 large (50 g) egg, 1 (18 g) egg yolk, 3 tablespoons (36 g) sugar, 1/3 cup (76 g) heavy cream, 1/4 cup (58 g) unsalted butter, 1 tablespoon (21 g) honey, 1 teaspoon salt, 1/4 teaspoon ground ginger, 1/2 teaspoon cake batter-extract, 3 cups (360 g) unbleached all-purpose flour, and 2 teaspoons bread machine or instant yeast Select the DOUGH cycle and push the START button.
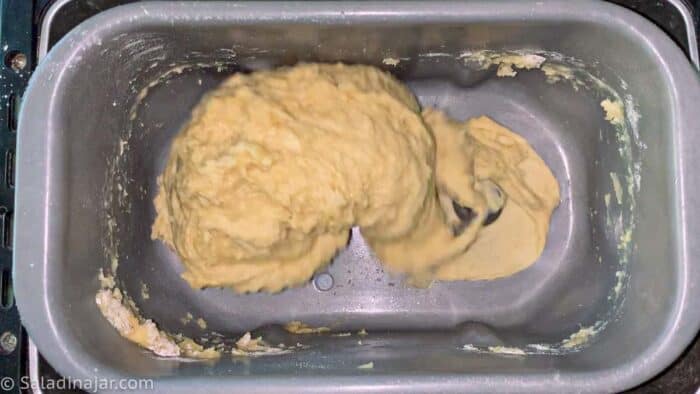
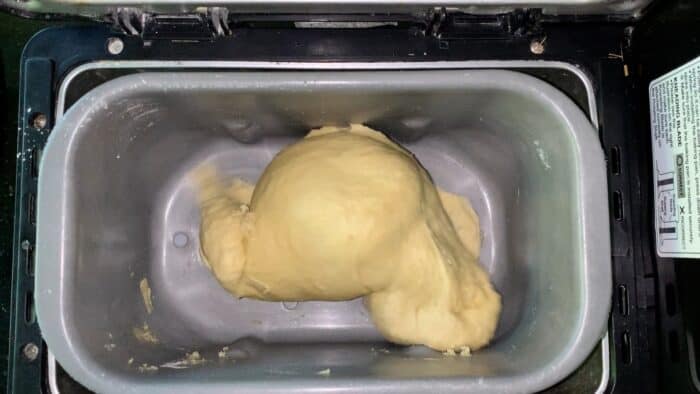
- Check the Dough (Twice): First Peek (1 minute in): Lift the lid to confirm the paddles are turning and the dough is clumping.Second Peek (15–18 minutes in): The dough should feel soft and slightly tacky but not sticky. Adding too much flour will make the rolls heavier instead of fluffy. If it's too sticky, add 1 spoonful of flour at a time. If too dry, add 1 spoonful of water at a time. Wait 1–2 minutes between additions to let the dough adjust.Read more about this surprising secret that will help you make fabulous bread every time.
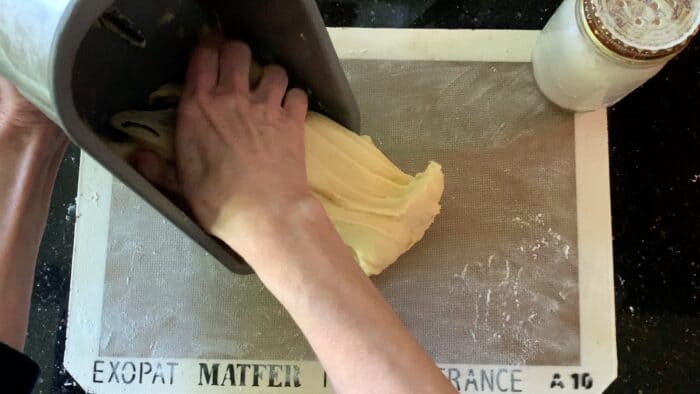
- Finish the DOUGH Cycle: When complete and dough has doubled, transfer it to a floured surface or silicone mat.
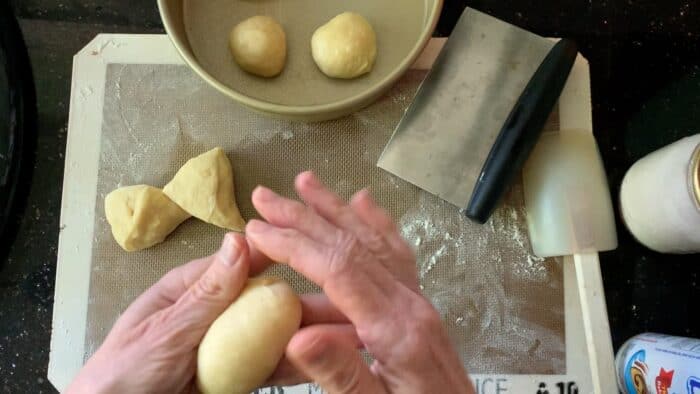
- Shape the Rolls: Spray two 8-inch round pans with baking spray. Form dough into a large ball, divide in half, then cut each half into 8 pieces. Shape each piece into a ball and place into pans.
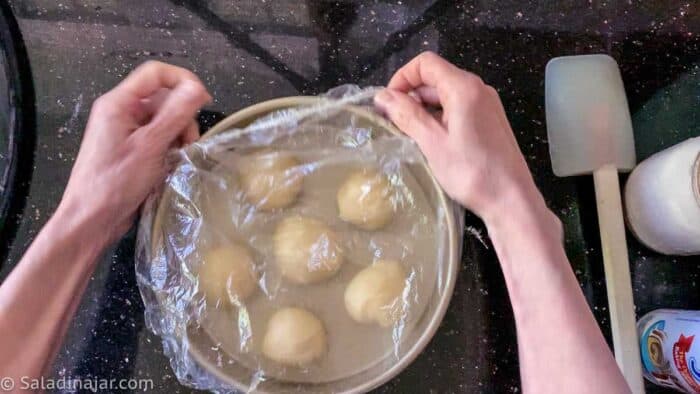
- Let Rolls Rise: Cover loosely and let rise until about 50% larger and puffy. Don’t let them overproof, or they may lose their shape and bake up dry.
- Preheat the Oven: Heat to 375˚F (190˚C) while rolls rise—about 15 minutes before baking.
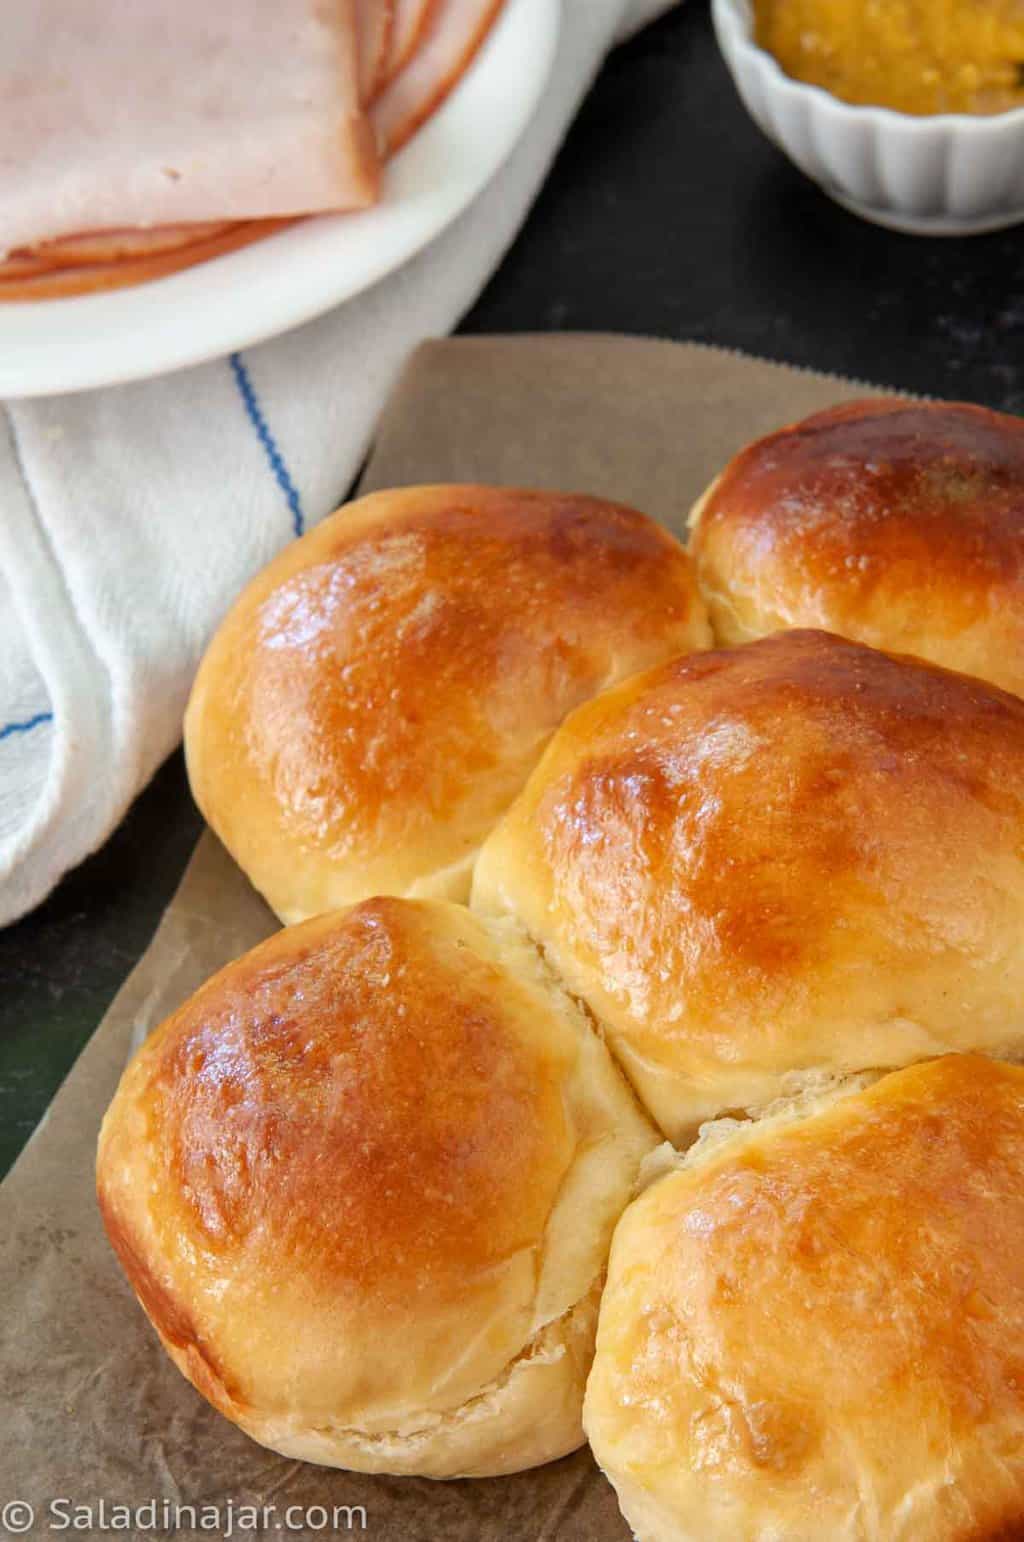
- Brush with Glaze (Optional): Whisk 1 egg yolk with 1 tablespoon milk and lightly brush onto rolls just before baking.
- Bake and Cool: Bake for 13–15 minutes until golden and internal temp reaches 190˚F (88˚C). Cool 1–2 hours, then place rolls in a plastic bag to keep the crust soft.
Notes
- Knead 1 cup of raisins or other dried fruit into the dough after removing it from the bread machine for a flavorful twist.
- For a round loaf, divide the dough into three parts—use two parts for a round loaf and the remaining dough for rolls. A larger single loaf may not bake through evenly without drying out on the edges.
- Unbaked dough: Freeze after the DOUGH cycle or after shaping (before final rise). Defrost in the fridge overnight.
- Baked bread: Double-wrap and freeze up to one month. Reheat gently.
- Stand Mixer: Mix until moistened, then knead with a dough hook (speed 2–3) until smooth and elastic (5–10 minutes). Let rise, deflate, and shape as directed.
- By Hand: Mix to a shaggy dough, knead on a floured surface until smooth and elastic (10–20 minutes). Let rise, deflate, and shape as directed.
Equipment
Nutrition
All images and text ©️ Paula Rhodes for Salad in a Jar.com

Final Thoughts
These rolls make excellent slider buns. They’re especially popular for holiday meals, potlucks, and make-ahead sandwich trays. Because the dough is mixed in a bread machine and baked in the oven, they’re easier to shape and more consistent than most homemade Hawaiian roll recipes.
— Paula, Home Economist
Homemade Food Worth Sharing
Need help troubleshooting?
Email me: Paula at saladinajar.com — photos help!

These come out SO GOOD!! And easily. I tend to struggle with bread but this recipe makes it look like I know what I am doing!! Thank you for sharing!! Wondering if I can split the dough in half to make 2 small round loaves? And would I put on a cookie sheet or loaf pan??
Hi Meghan,
Yes, I think you could split the dough in half. You could use either a cookie sheet or loaf pan–depending on the shape you are going for. I like making smaller loaves with this dough because it is easier to get it cooked all the way through without the top getting to dark. I would have some foil ready to cover the bread if it starts to get dark before the internal temperature reaches 190-195˚F.
These rolls are excellent. I followed the recipe exactly except for the number of rolls. I made a dozen instead of 16 so these babies were big. I did not need to add extra flour or liquid. The dough itself is soft, but if handled gently, come together nicely to form rolls. The texture is soft and fluffy and the egg wash creates a beautiful deep, golden color, The taste is less sweet than I expected so if you’re aiming for a sweeter roll, add a little more sugar.
I tried this recipe 3 times with exact measurements snd it came out so wet after my dough cycle I couldn’t do anything with it….why is it like this??? it looks like it’s risen, then I touch it and it Sinks to the bottom of bread maker. I tried adding a little flour to no prevail.
Hi Bob,
Thanks for reaching out! Let’s troubleshoot together.
Exact measurements in a yeast bread recipe are a great starting point, but dough consistency can vary. In step 3, I recommend checking the dough near the end of the kneading phase. If it’s too wet, add flour 1 tablespoon at a time, letting it absorb before adding more. The goal is dough that sticks to the sides briefly, then pulls away cleanly. If you haven’t already, you might take a look at this post about my surprising secret for making better bread in a bread machine. It will give you more details on how to do this.
Flour formulations vary depending on location, and temperature and humidity can affect how much flour is needed. How did you measure your ingredients—by weight or cups? Measuring by weight is more accurate and can prevent overhydration.
The sinking issue sounds like overproofing, likely due to excess hydration. A warm kitchen can also accelerate proofing, causing the dough to collapse. Ideally, proofing temperatures should be around 74–76˚F.
I hope this helps! Let me know if you have more questions or need clarification.
These are fantastic – we’ve tried numerous recipes, and these are easily the closest we’ve gotten to King’s Hawaiian Rolls. Subbed sweet potatoes, subbed 1/4 tsp almond extract and 1/4 tsp vanilla extract, and bumped up the sugar a touch. Using the temp probe ensured they were baked perfectly. SO good
Hi Chris,
Thank you for the great comment. I like your idea about using sweet potatoes. I don’t know how people experiment with bread with a quick-read digital temperature probe. Every kitchen should have one.
I’m so confused, the recipe says that it yields 20 rolls but in the video the dough only yielded six. I feel like the ball of dough from the bread machine would not make 20 balls unless they were very tiny. Is this correct? Should I make them really small to get 20?
Hi Amy,
I’m so sorry for the confusion. I have corrected the recipe. Hope this helps.
I want to make this bread. 1 question. If I just make 1 loaf, do I bake it at the same temperature and for the same length of time. If you posted this, I must have missed it. Thanks so much. Can’t wait to make as I love the store Hawaiian rolls!
Hi Lynda.
I have tried making it as one round loaf and had trouble getting it done in the middle without drying out the edges. That’s why I only used 2/3 of the dough to make a loaf. However, I didn’t try more than once or twice. If that’s what you want, start experimenting. One thing I haven’t tried is a loaf pan–a Pullman pan might work great. (Sorry for the delay in answering. We have been on vacation.)
These were amazing!! Thank you.
Can’t find Vanilla Butter Nut Extract anywhere. Will not having alter the taste of the rolls. Thanks for your help. Barb
Hmmm. I looked online and the only Vanilla Butter Nut Extract I found were so high-priced that I would call it extortion. Incredible!
So, what to do now? I haven’t tried it but wondering if butter extract would be a good substitute or perhaps the new cake batter flavoring from McCormick.
The rolls will definitely be delicious without the flavoring. You might go ahead and try them to see what you think. However, there is something about that extract that makes them taste more like the ones at the store. Meanwhile, I will try to find a substitute and let you know.
This is a great recipe! I’ve made these twice with instant mashed potatoes with extra protein and they’ve been a hit. Next time I’ll try sweet potatoes like others have mentioned. I will say I’ve had to add an extra 5+ minutes to the baking time to get browned tops but I think that’s dried the insides up a bit. Any tips to get the tops browned quicker?
Hi Rachel,
Regarding the tops of your rolls, I would play around with the placement in your oven. Maybe move them closer to the top? Or the front or back? Every oven is different.
I hope you’re using a thermometer. It’s easy to overbake dinner rolls, but using a thermometer will tell you exactly when to take them out so they don’t get too dry. 190˚F is perfect for these rolls–they are delicate.
I just recently found you and am amazed at the knowledge you share. Thank you for all your recipes, tips, and tutoring! I made your french bread and ate almost all of it myself. (not necessarily a good thing). First really successful recipe in a long time. Best wishes! God Bless. Barb
Barbara,
How kind of you to say those nice things about the blog! I’m so glad you found it. Thank you for writing back about the bread. It is definitely a family favorite around here.
Paula,
Is there a substitution for the heavy cream that I may try as my children are lactose intolerant?
Thanks,
Devin.
If they can tolerate lactose-free milk, use that. Otherwise, you could use water. The rolls won’t be as rich and soft but they will still be delicious.
America’s test kitchen has a great bread pudding with bourbon sauce made out of challah bread!
UPDATE! I just pulled these out again– my kids raided the kitchen the other night and ate them all– and they taste better than the store bought ones! Before, I said they weren’t sweet enough for my taste but still the fluffiest rolls ever. Now, they are sweeeeeeeet and fluffy! My differences are thus: mashed SWEET POTATO in place of a regular one, 1/4 tsp each of vanilla and almond extract in place , and bread flour for AP flour.
Thanks so much for sharing this recipe, Paula! I swear I’m going to make this every other day 🙂 If I happen to make a loaf, I’ll let you know. So far, I’ve made dinner rolls and hamburger-style buns.
Hi Kristin,
Always happy to hear about the successes. I love sweet potato in rolls. Great substitution.
I just made these, and they are wonderful! Thank you so much for this recipe! I looked all over town for butternut extract, (no luck there), so I used 1/4 tsp of almond extract, and 1/4 tsp of Butter extract, and it hit the nail on the head! They taste even better than the store bought King’s rolls!
Thank you again for sharing this recipe!
So glad to hear you liked them, Shealeigh.
Just pulled these out of the oven, let one cool for a few and popped it in my mouth. Although very fluffy (the most pillow-y rolls I’ve ever made!), I was disappointed that they just weren’t that sweet to me. The only substitutions I made were thus: bread flour, and like a reviewer suggested, used 1/8 tsp of almond extract and the rest vanilla. Perhaps I could up the sugar to a half cup, or use honey instead?
Still, these rolls are fantastic, and I will definitely be using this recipe again! Thank you so much!
Could I substitute bread flour instead of AP flour? I’m going to bake the for Christmas.
These are superb! Thank you for all the work you put into creating the recipe. I must confess that I didn’t have the vanilla nut extract (I used 1/8 tsp almond extract and the rest vanilla), a bread maker (just lots of elbow grease!), or the shiny aluminum pans, but the rolls were still delicious. Well done, Paula! I will definitely make these again.
Thanks for sharing your bread recipe. I’ve a bread machine sitting at a corner of my kitchen collecting dust until I stumble on your blog. Great recipe and explanation on how to make them and beautiful photos to accompany each recipe!
Beautiful photo work!
These look awesome! I can’t wait to try the recipe! I am an absolute convert to using the bread machine to mix the dough and then baking in the oven. My never used bread machine has turned into an appliance I use often! Thank you for that!
Thanks, Paula, I have been looking forward to this recipe! It must have been an adventure to come up with this, the recipe list of ingredients is fascinating.
I love those Hawaiian Rolls! I can’t always find them when I need them to make ham and cheese sliders- It’s nice to have to option to make them myself. Those look even better than the originals. 🙂