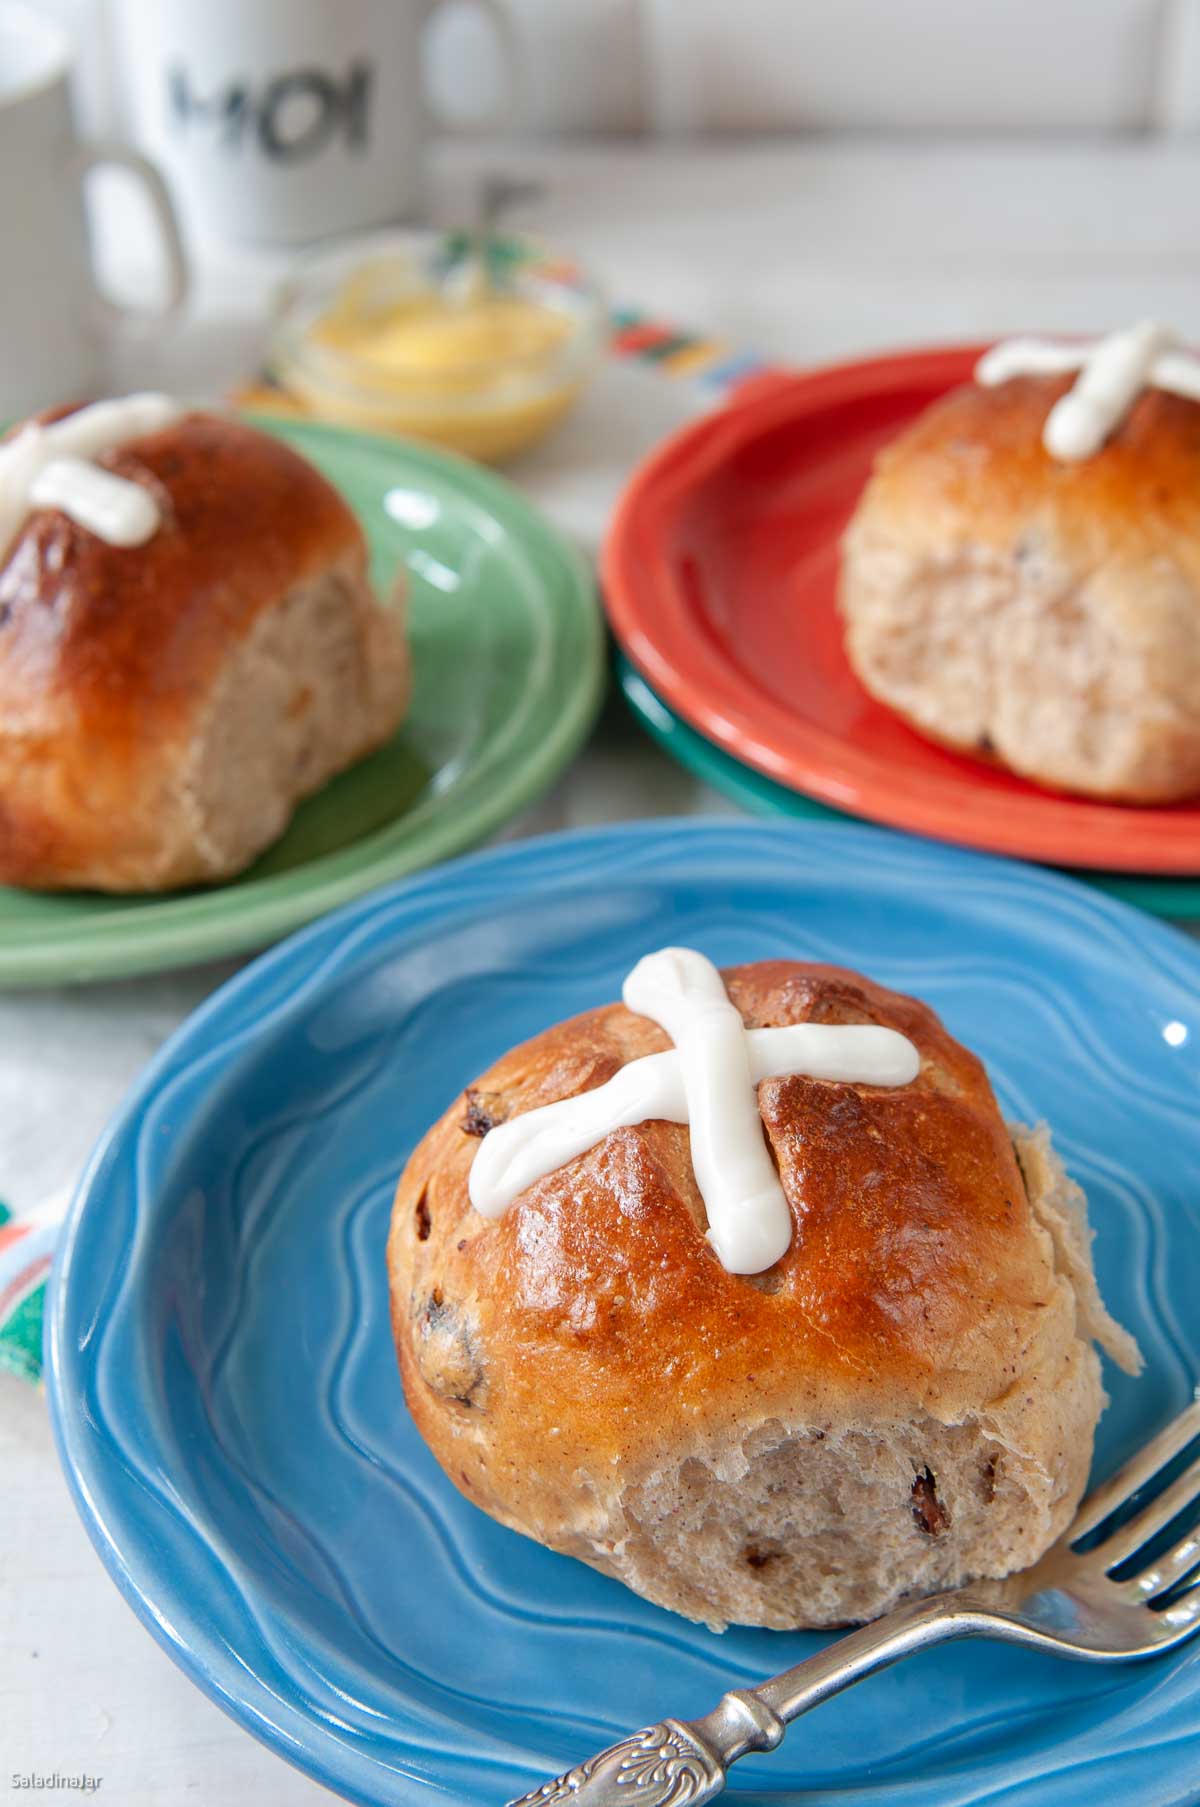
Bread Machine Hot Cross Buns: A Classic Good Friday Treat
Sneak Preview: Celebrate Good Friday with these spiced, raisin-filled Bread Machine Hot Cross Buns—soft, flavorful, and easy to make using your bread maker, stand mixer, or by hand. Bake in your oven for soft centers, golden tops, and a shape worth sharing–ready in 3 hours.
This post contains affiliate links. As an Amazon Associate, I earn from qualifying purchases at no extra cost to you.
Do you have memories connected with Hot Cross Buns? One of my co-workers brought them to work every year on the Friday before Easter. I still think of her on Good Friday, although I haven’t seen her in years. Shared food has a way of doing that.
It’s no surprise that most Hot Cross Buns from the grocery store don’t hold a candle to the ones you make yourself.
How I Use a Bread Machine for Better Bread
I use my bread machine (this is the model I use) to mix and knead the dough using the DOUGH cycle, then shape it by hand and bake it in a conventional oven. This approach takes advantage of the machine’s consistent kneading while giving me full control over shaping, rising, and baking—especially important for rolls, pizza, and other swirled and shaped breads.
My free Bread Machine Crash Course explains this approach in more detail.
Ingredients & Substitutions
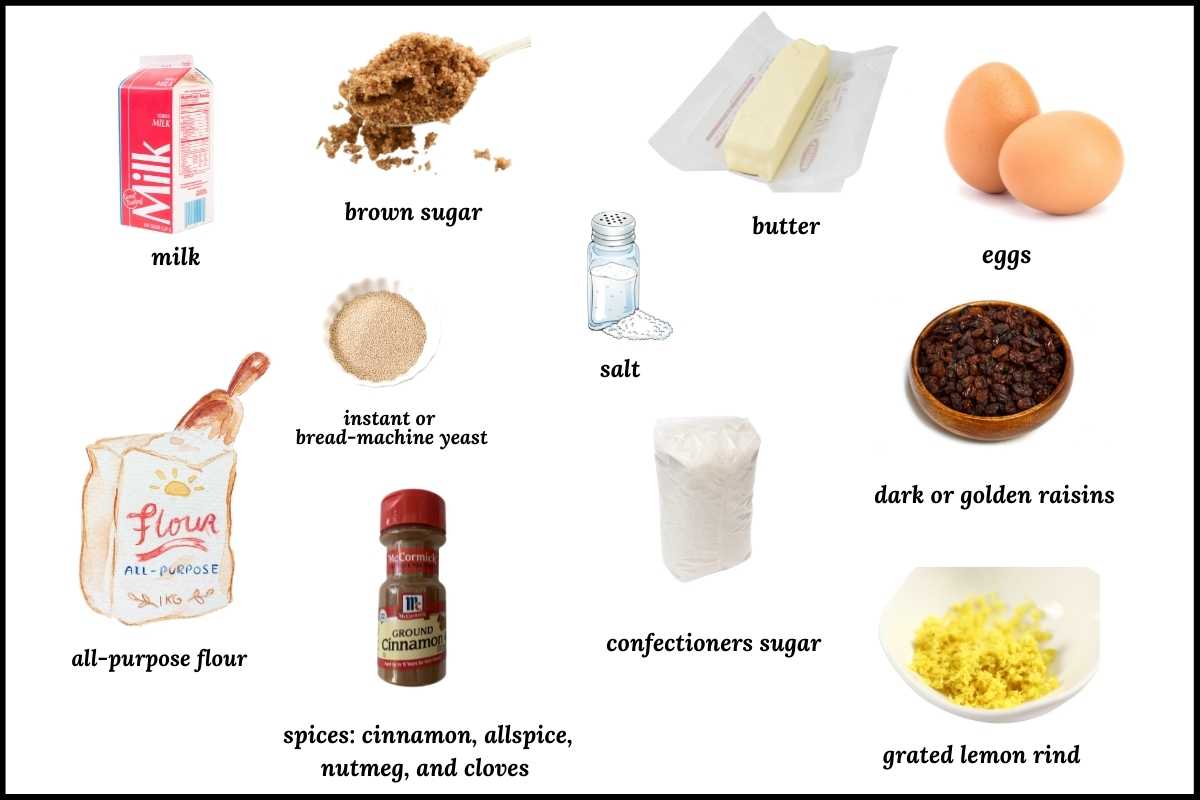
• MILK: Any variety, cool temperature; plant-based options work well.
• BUTTER: Unsalted is best; try oil or non-dairy butter. Chop finely before adding.
• SPICES: Use cinnamon or apple pie spice blend.
• FLOUR: All-purpose or up to one-third whole wheat.
• RAISINS: Substitute dried cranberries or currants.
• YEAST: Instant or Bread Machine yeast; Sub active dry yeast
No bread machine? See the recipe notes for how to make this recipe with a stand mixer or by hand.
Step-by-Step: How To Make Bread Machine Hot Cross Buns
⬇️ Jump to the recipe below for exact amounts and detailed instructions.
Making the Dough:
Shaping the Dough:
Bake and Decorate:
Bread Machine Hot Cross Buns: A Classic Good Friday Treat
Video
Ingredients
Dough
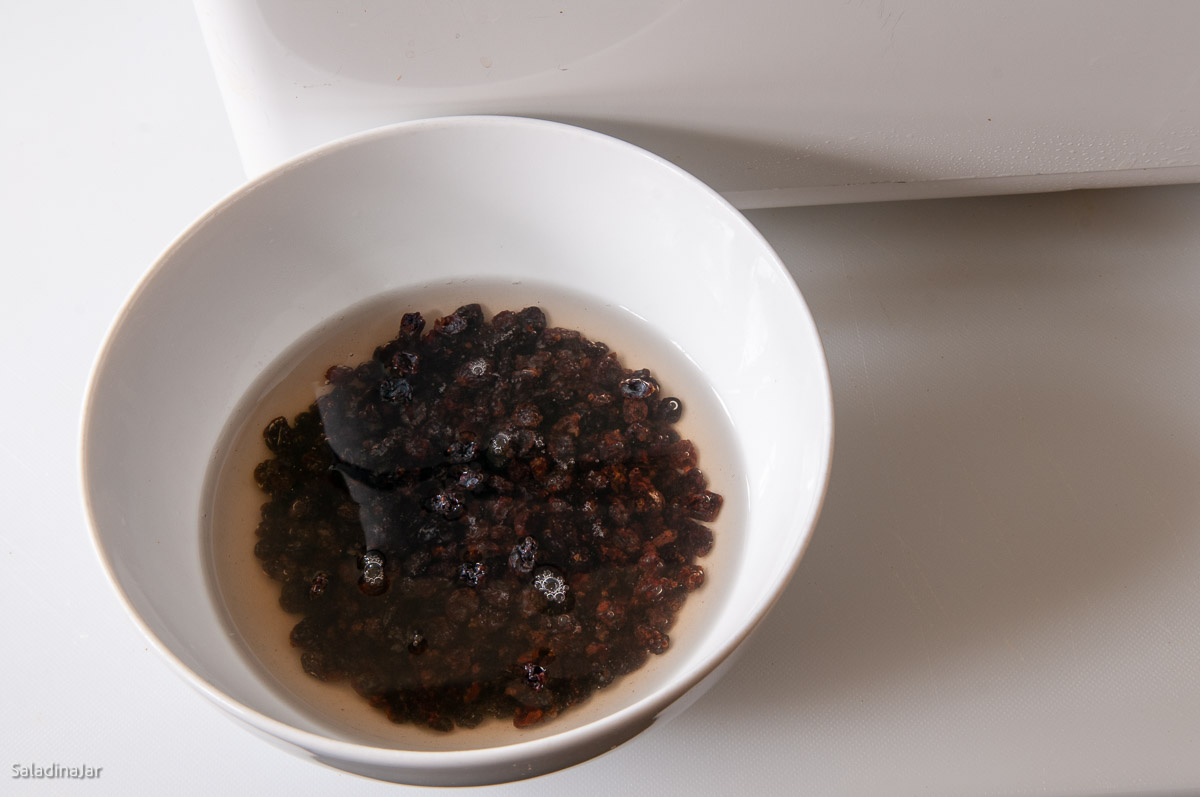
- ½ cup (72 g) raisins or currants
- ⅞ cup (198 g) milk (7 oz) (any kind, but whole milk is best)
- 1 large (50 g) egg
- 1 large (17 g) egg yolk (save the egg white for the glaze)
- 3 tablespoons (36 g) brown sugar
- 1 teaspoon salt
- ½ teaspoon cinnamon
- ¼ teaspoon allspice
- ⅛ teaspoon nutmeg
- ⅛ teaspoon cloves
- ¼ cup (57 g) unsalted butter, finely chopped
- 2 teaspoons grated rind of one lemon (or grated rind of a small orange)
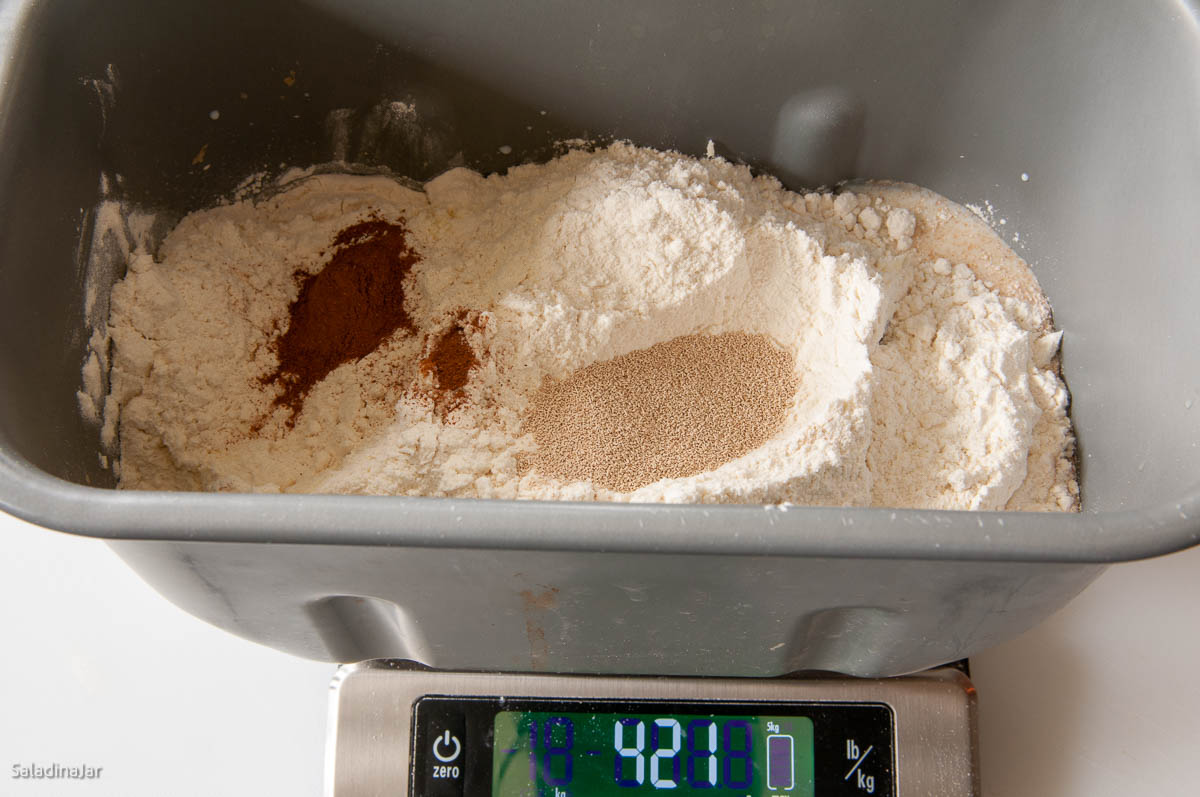
- 3 cups (360 g) unbleached all-purpose flour
- 2¼ teaspoons bread machine yeast
Glaze:
- 1 tablespoon milk
- 1 (33 g) egg white from a large egg
Frosting
- 1 cup (114 g) powdered sugar
- ½ teaspoon vanilla extract
- 1 + tablespoon milk to make a thick icing
Instructions
- Soak Raisins: Pour hot water over a ½ cup (72 g) raisins or currants and let while preparing the dough.
- Prepare Dough: Add ⅞ cup (198 g) milk (7 oz), 1 large (50 g) egg , 1 large (17 g) egg yolk , 3 tablespoons (36 g) brown sugar, 1 teaspoon salt, ½ teaspoon cinnamon, ¼ teaspoon allspice, ⅛ teaspoon nutmeg, ⅛ teaspoon cloves, ¼ cup (57 g) unsalted butter, finely chopped, 2 teaspoons grated rind of one lemon, 3 cups (360 g) unbleached all-purpose flour, and 2¼ teaspoons bread machine yeast, to the bread machine pan.
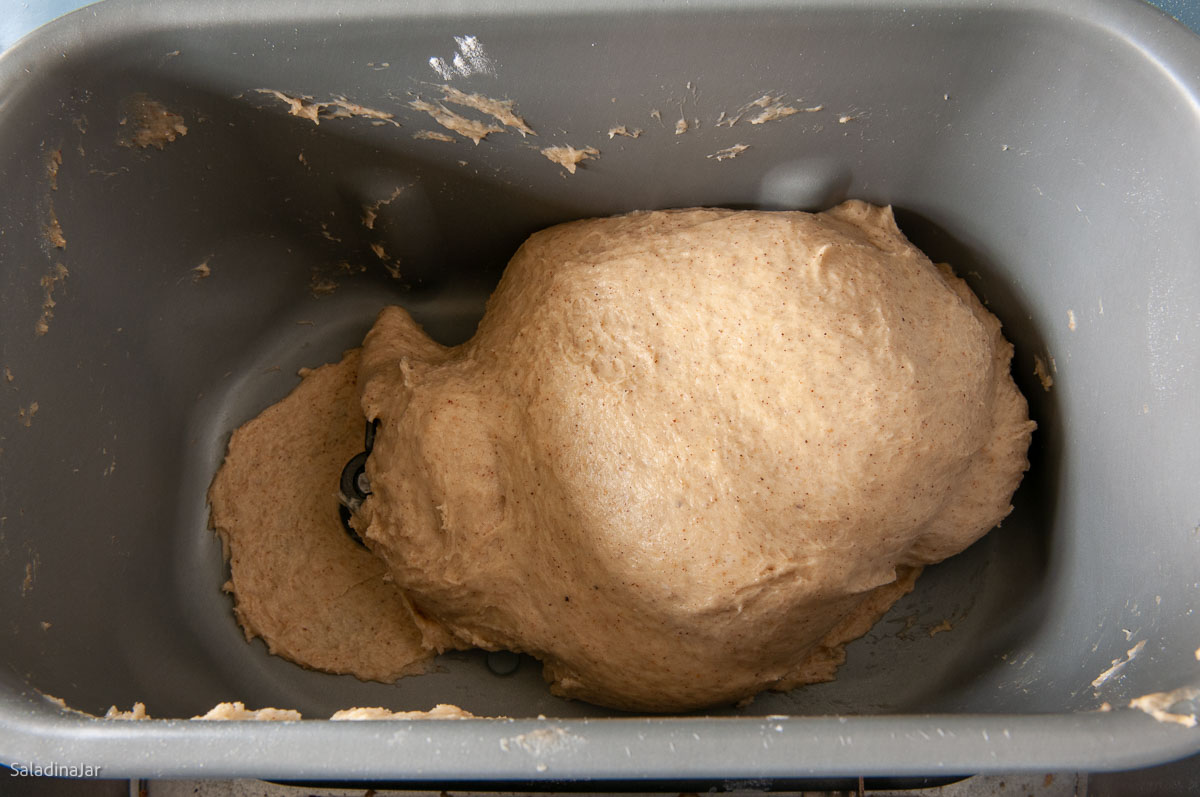
- Select the DOUGH cycle and start.First check: After a couple of minutes, check the dough to make sure it is coming together into a raggedy ball. If not, add more water 1 tablespoon at a time. If you see pancake batter instead of dough, you forgot some flour—just add it slowly until everything pulls together.Second check: Check the dough again after about 15 minutes. The dough should stick to the sides of the pan, then pull away cleanly. If too wet, add flour 1 tablespoon at a time. If too dry and the dough doesn't stick at all, add more liquid. See more details–Surprising Secret for Making Better Bread with a Bread Machine.Note: Getting the dough consistency right makes all the difference in how light and tender these rolls turn out.
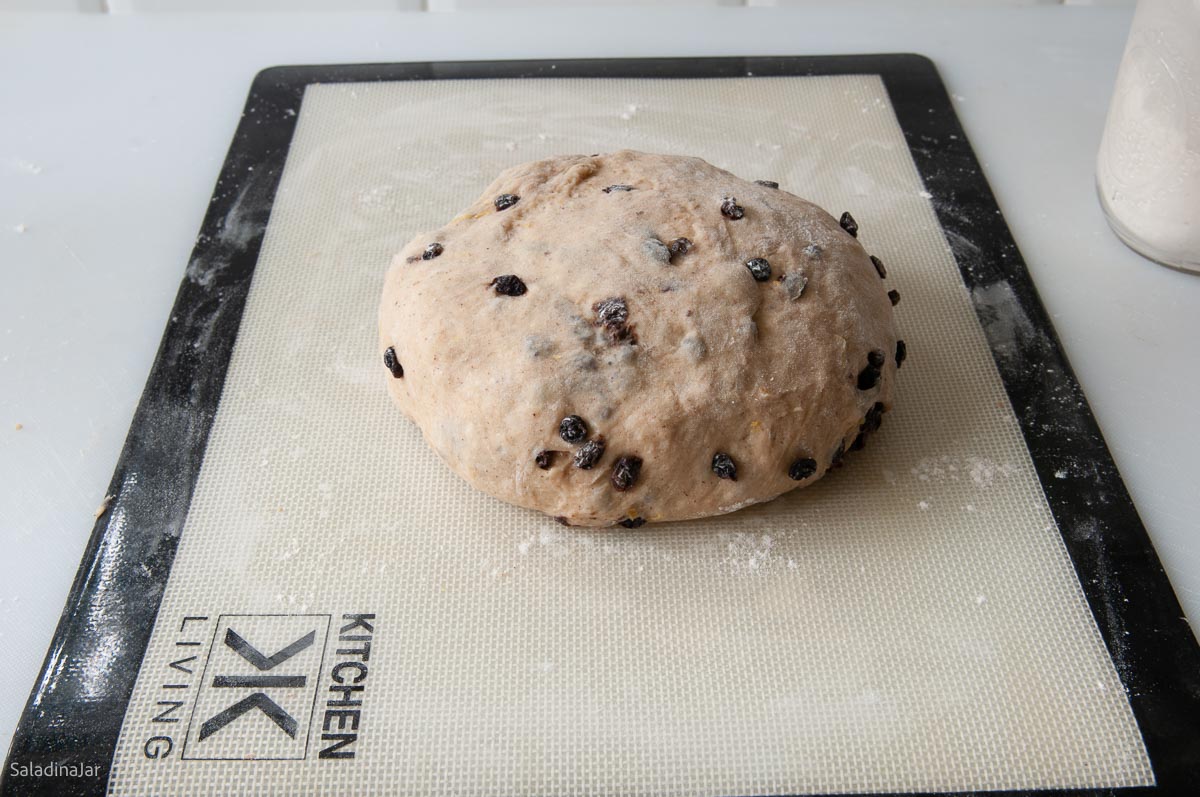
- Add Raisins: Drain and squeeze out excess water. Add when the machine beeps for mix-ins or knead in by hand before shaping.
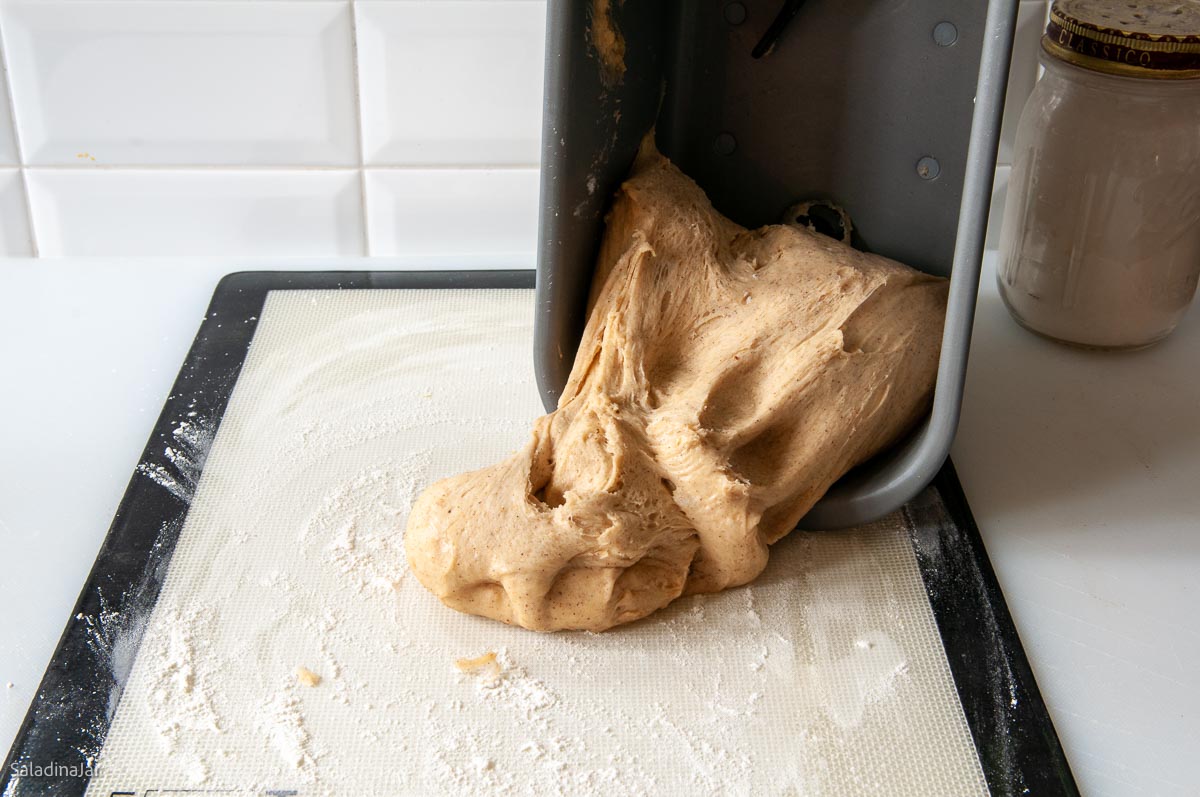
- End of DOUGH cycle: The dough should be doubled. If not, give it more rise time until it is. Restart the DOUGH cycle and knead for 5 seconds to deflate the dough. Stop the machine and turn the dough out onto a lightly floured surface, shape into a smooth ball, cover, and let rest for 10 minutes.
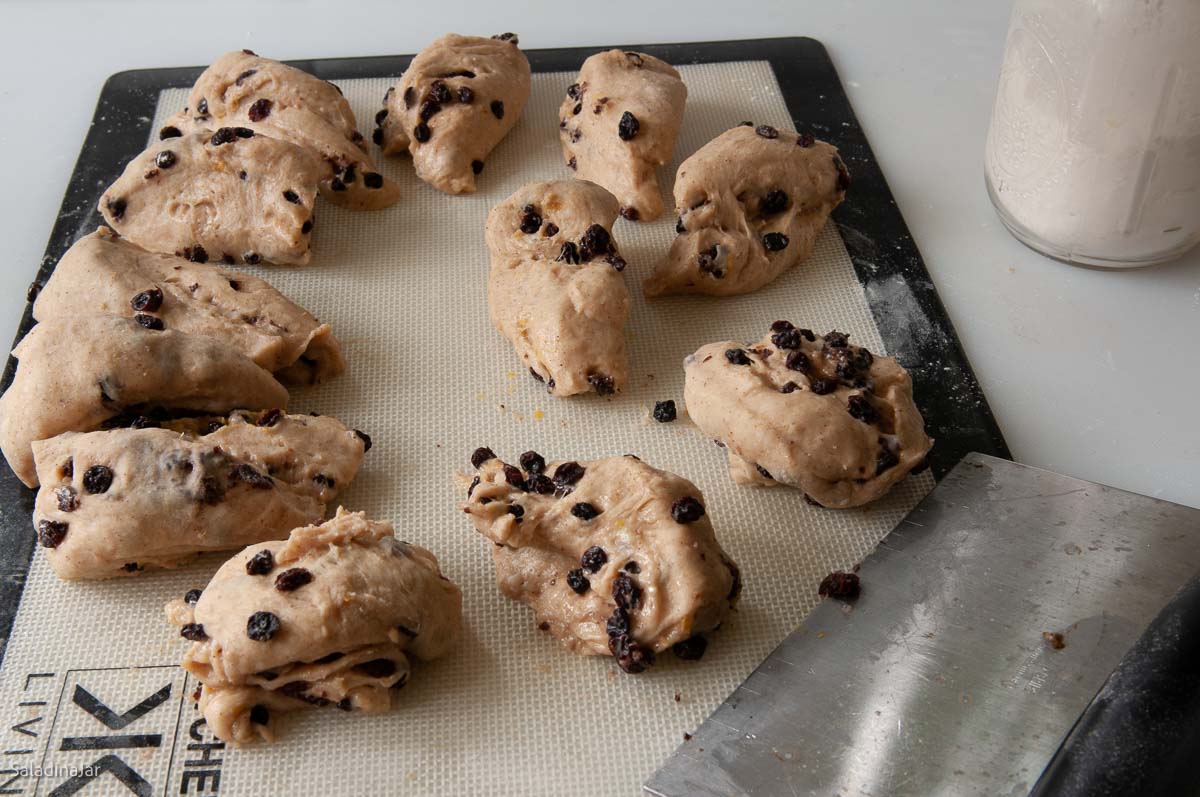
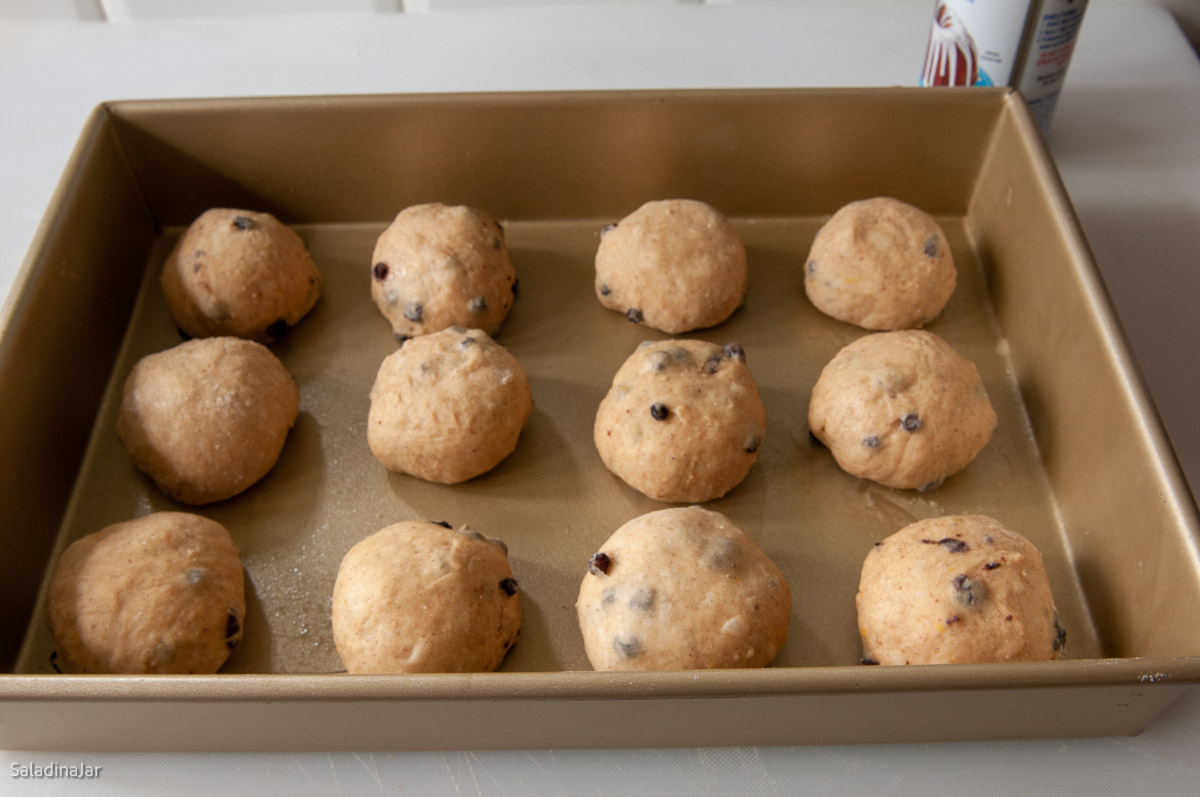
- Shape Rolls: Divide into 12 portions, shape into balls, and place in a greased 9×13-inch pan. Lightly cover the rolls with a tea towel and allow the rolls to rise until almost double.
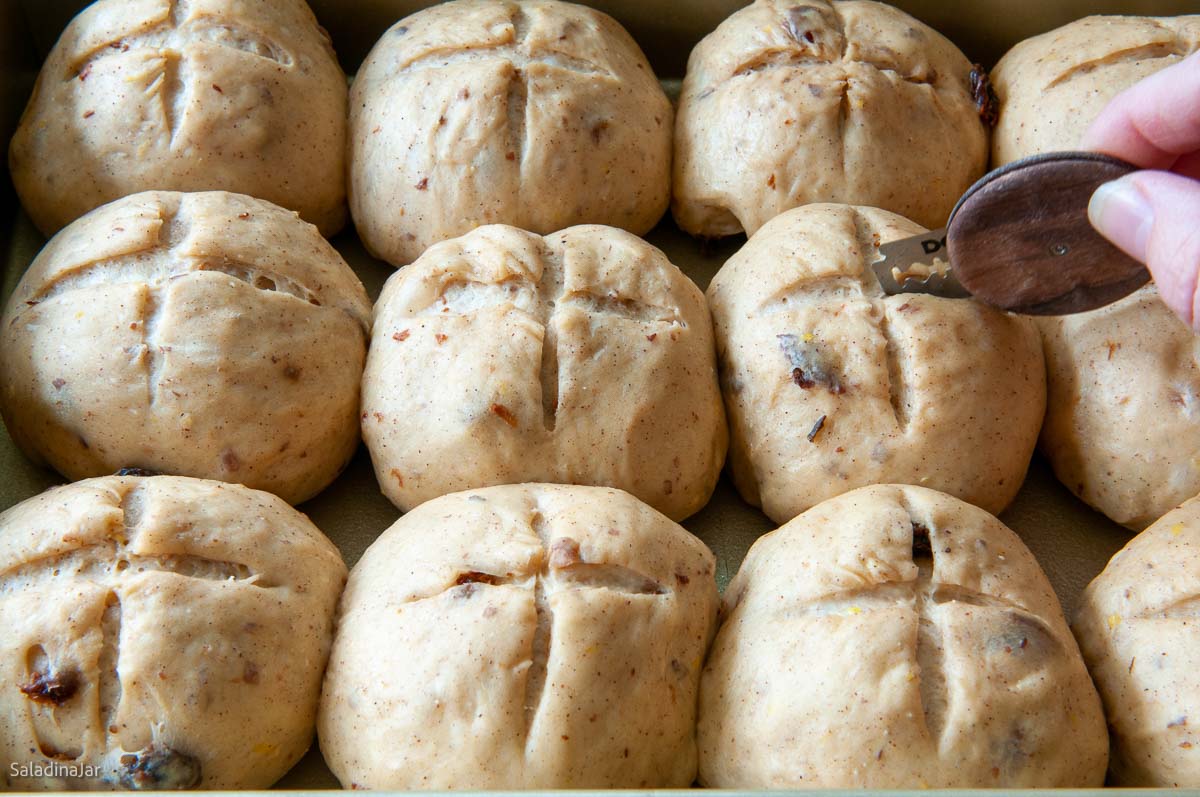
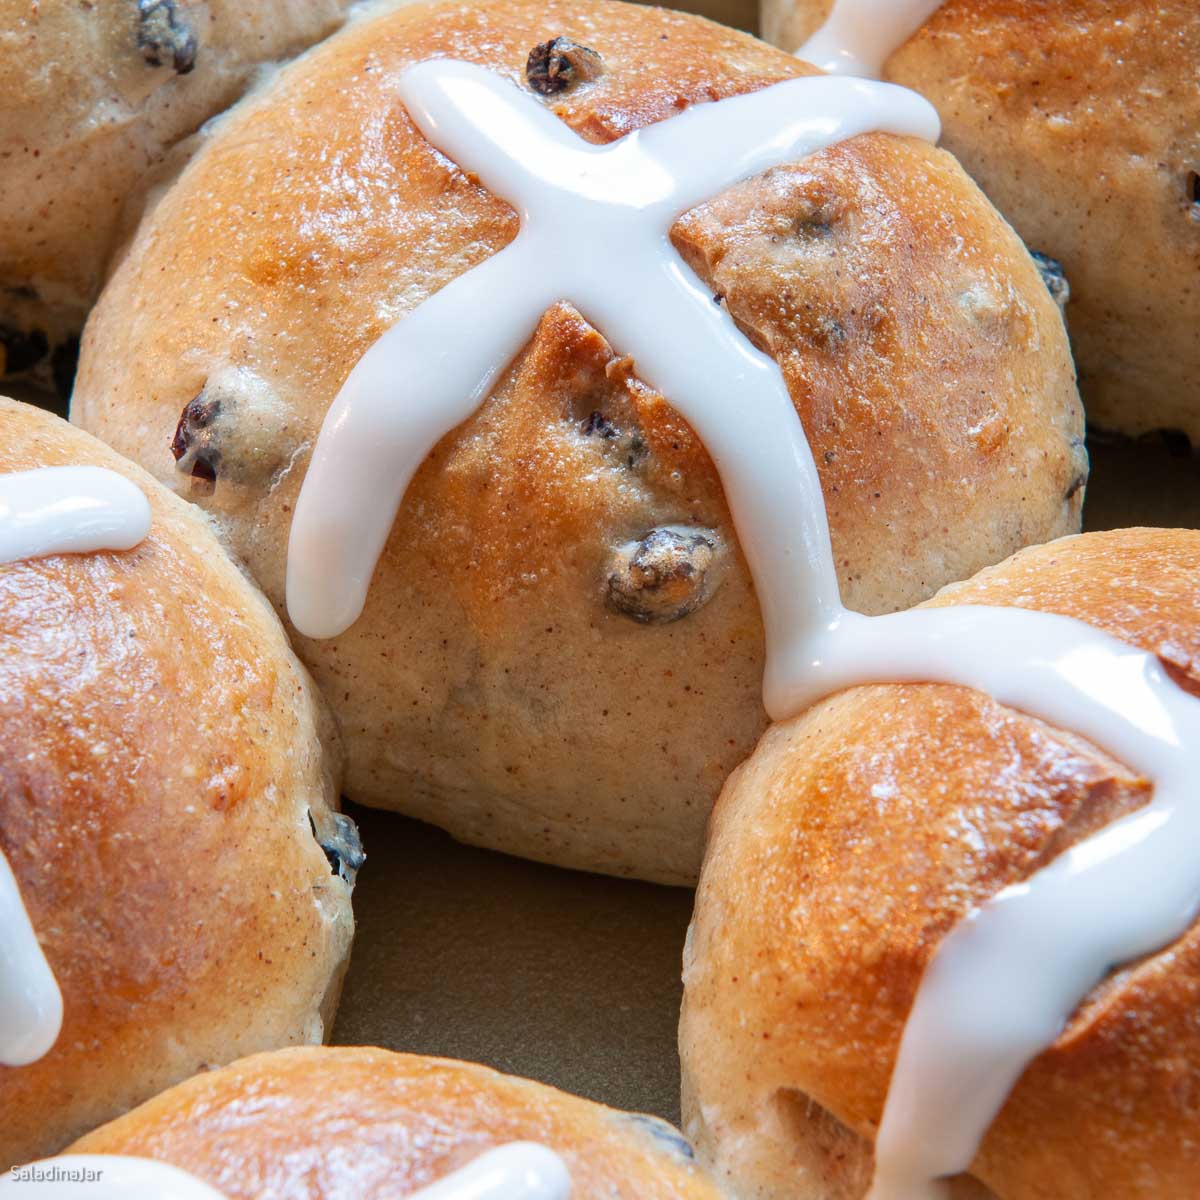
- Slash & Glaze: Score a cross on each roll, brush with glaze.
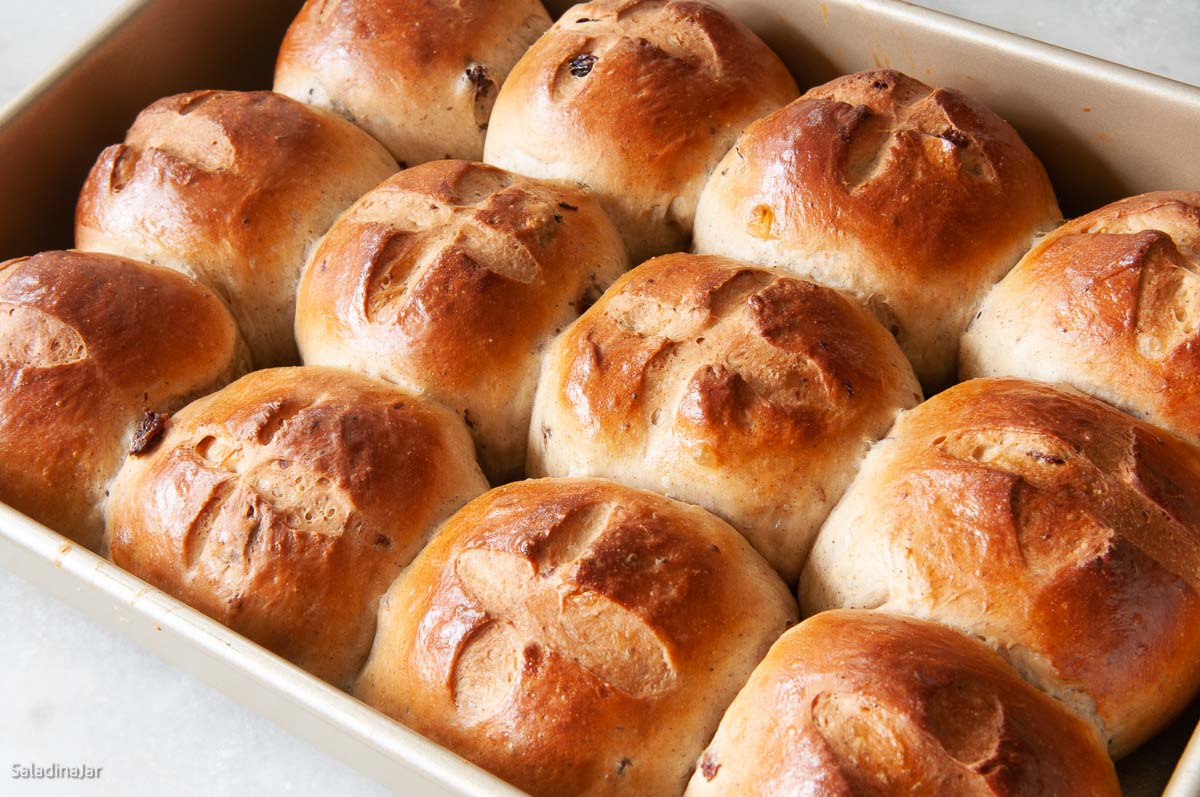
- Preheat oven to 350˚F or 180˚C.
- Bake: Bake at 350˚F (180˚C) for 20 minutes or until rolls reach 190˚F (88˚C). Let cool.
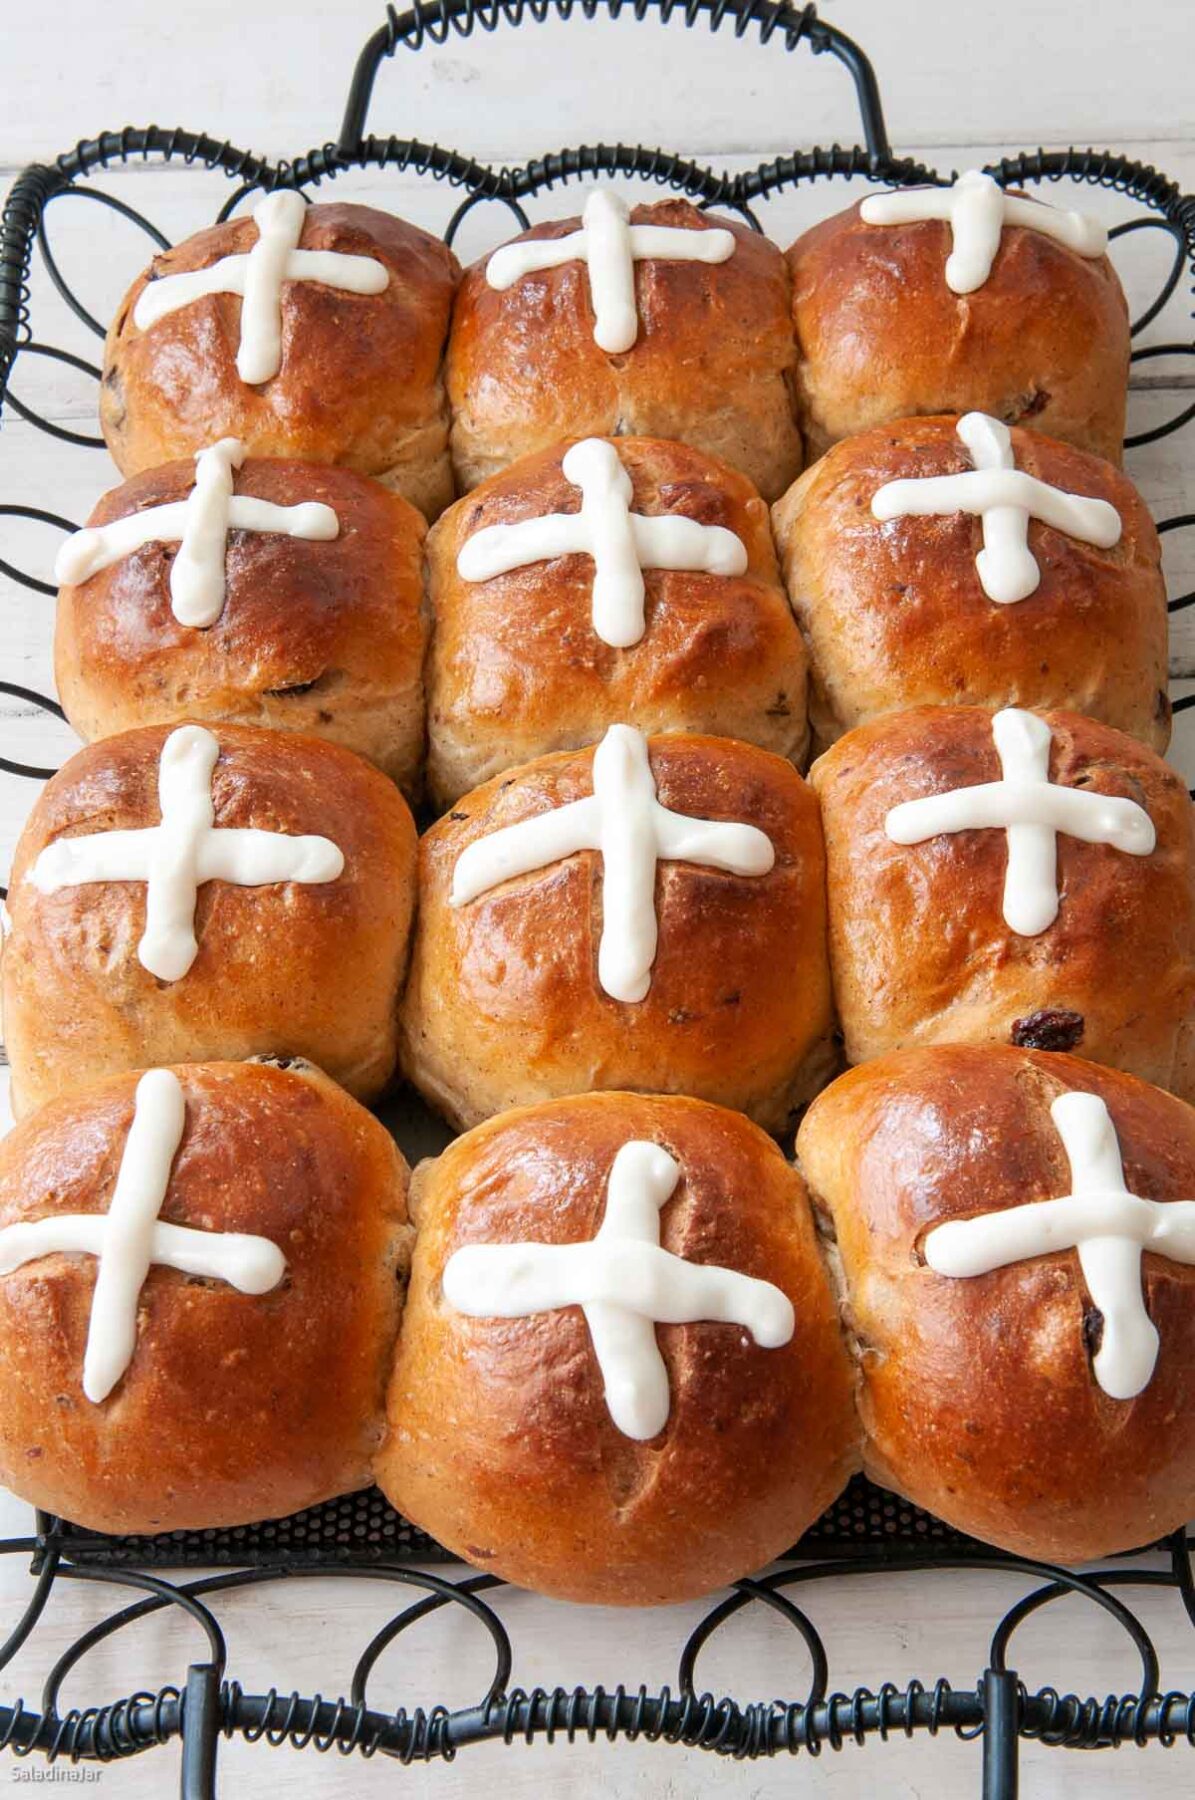
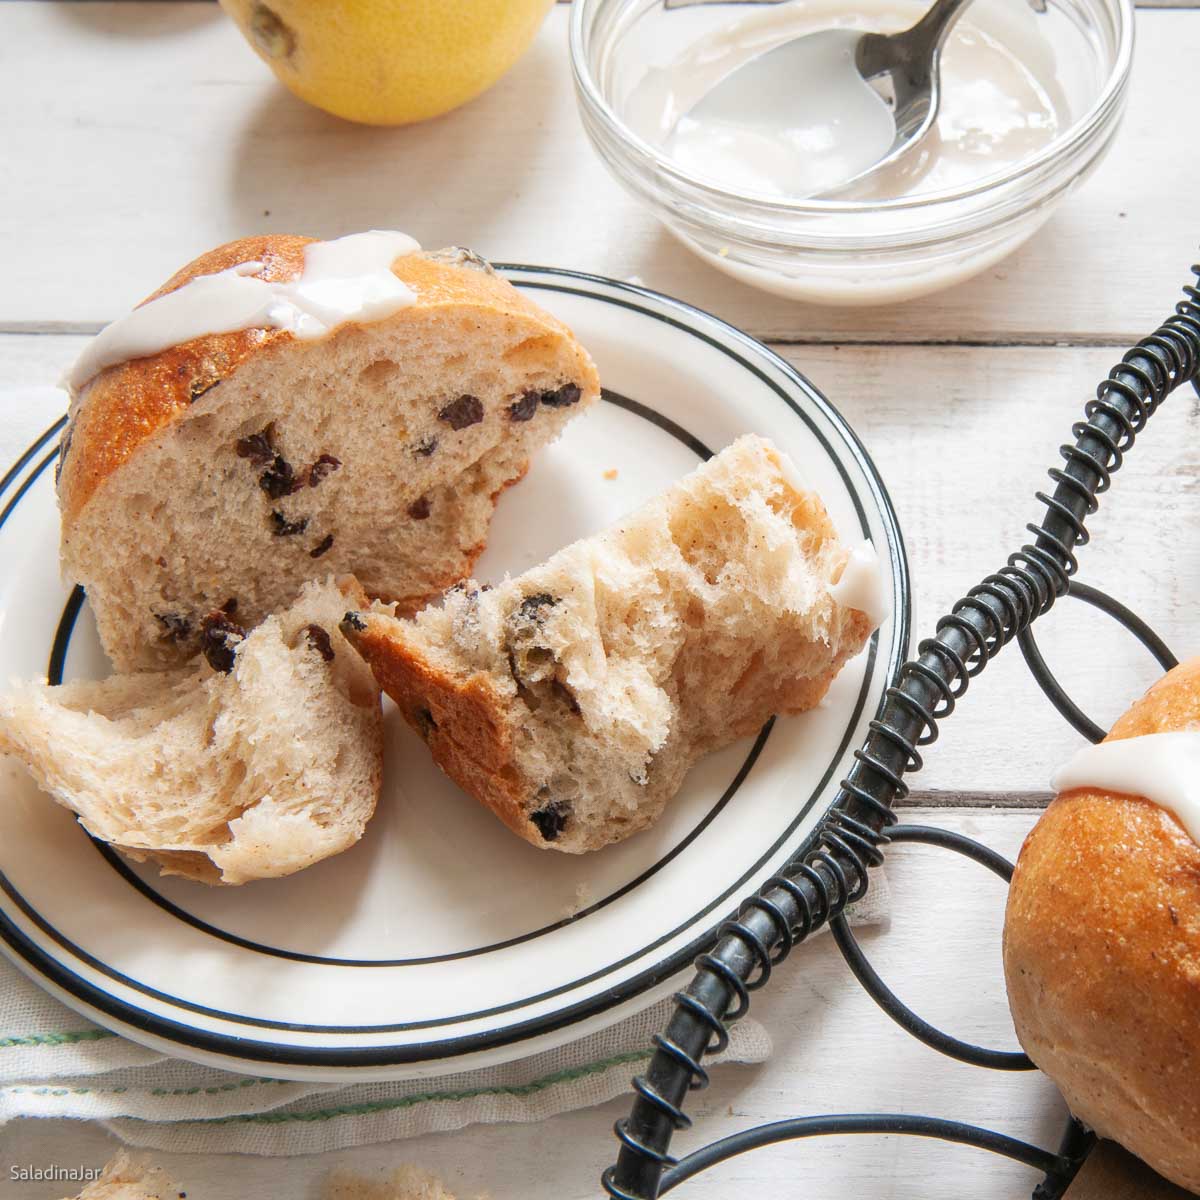
- Decorate: Pipe icing crosses using a small zippered bag or drizzle with a spoon.
- Glaze: Whisk together1 tablespoon milk and 1 (33 g) egg white from a large egg. Brush the rolls after slashing them immediately before putting them in the oven.
- Icing: Combine 1 cup (114 g) powdered sugar, 1/2 teaspoon vanilla extract, and 1 + tablespoon milk to make a thick icing, stirring until smooth. Pour over cooled rolls
Notes
- Add ingredients to the bowl in order.
- Mix on low speed until moistened, then use a dough hook on speed 2-3.
- Knead until smooth and elastic (5-10 minutes).
- Cover, let rise until doubled, then shape as directed.
- Mix ingredients in a large bowl until a shaggy dough forms.
- Knead on a floured surface until smooth and elastic (10-20 minutes).
- Place in a greased bowl, cover, and let rise until doubled.
- Deflate, shape, and proceed with recipe instructions.
Equipment
Nutrition
All images and text ©️ Paula Rhodes for Salad in a Jar.com
Final Thoughts
I don’t know about you, but making these rolls inspires me to sing and clap to “Hot Cross Buns.” I hope you have fun with them.
Although I’m no expert in English teacakes, I’m told these buns are similar. Let me know what you think.
— Paula, Home Economist
Homemade Food Worth Sharing
Need help troubleshooting?
Email me: Paula at saladinajar.com — photos help!

I would leave 5 stars if I could.
I’ve made these twice in the last week.
Just doubled the spices because I like more.
Otherwise, perfect as far as instructions.
Hi Lois,
Good job! Adding extra spices is always the baker’s prerogative. Something to note: Extra cinnamon can slow down the yeast a bit. Watch for that.
Wonderful recipe, turned out perfectly, only cooked for about 16 minutes at 350
I added 1/2 cut of mixed dried fruits along with the raisins. They were gone before I could even finish icing them!
Ooooooh, I love mixed dried fruit in bread. Good idea. Glad they were a hit!
In your instructions, it says “6 1/2 t” of cinnamon (which I put in). I went back to list of ingredients to see it should have been 1/2 tsp. I tried to get most of it out. Still in machine – not sure what I’ll get. Maybe you could change that in the instructions.
Thank you, Jean. I have erased the “6”. Seems like no matter how many times I check, I still miss something. I appreciate you taking the time to let me know. Hope you like the rolls even if they are rather cinnamon-y.
@Paula, time will tell. Also had the other spices in so probably lost most of those as well. It is a good trial run for Easter!
If a recipe calls for homestyle white bread flour, can I use WHOLE WHEAT BREAD FLOUR using the same measurement for all ingredients?
Hi Miles,
I wish it were that easy. Because there is not as much gluten in whole wheat flour, it’s easy to go from light-and-fluffy to “bricks” in a hurry. I recommend you start out by substituting a third of the white flour with the same amount of whole wheat flour and see how that goes. If that works well, increase it a little more the next time. If you are a beginner, I recommend you stick to recipes designed for whole wheat flour until you understand how whole grain flour acts differently. It really is a different game and it takes experience to understand the rules. Good luck!
@Paula, thank you. I’ll heed your advice.
Thanks for listing the measurements by weight and adding the nutritional info! To this recipe I added 25g candied peel (using up the last of the holiday fruitcake mix) and subbed mixed spice. A great recipe!
Hi Sharon,
You’re welcome on the measurements by weight and nutritional info. Glad you liked the recipe. I can imagine the candied peel took these rolls over the top.
Oh i am so going to make these! I love them but cant make much due to a frozen shoulder so this is ideal.
Thank you for posting the recipe, i will add it to my file of your wonderful, well written easy to follow and make breads ?
Oh no, Ann. I’m sorry to hear about your frozen shoulder. Hope you are back to normal and baking bread soon.