Bread Machine Cheese Buns: Grandkid-Approved
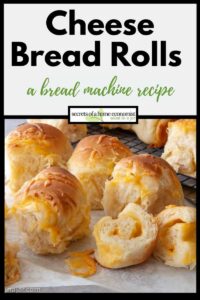
Sneak Preview: Make pillowy, cheese-loaded buns using your bread machine, then shape and bake in your conventional oven! These soft, cheesy rolls can be ready to eat in less than 3½ hours.
This post contains affiliate links. As an Amazon Associate, I earn from qualifying purchases at no extra cost to you.
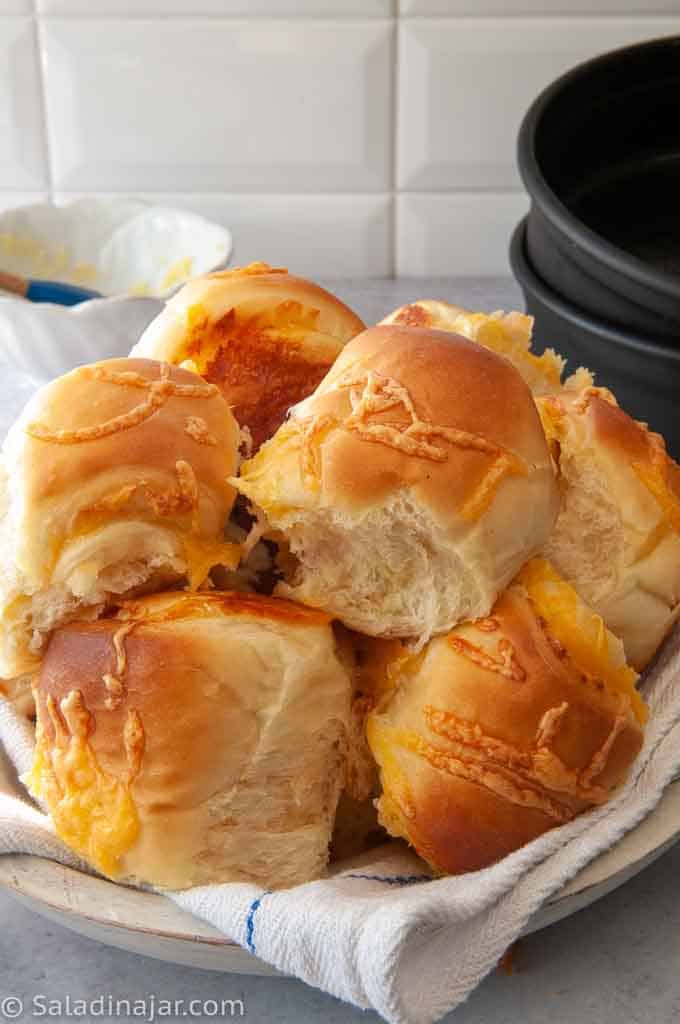
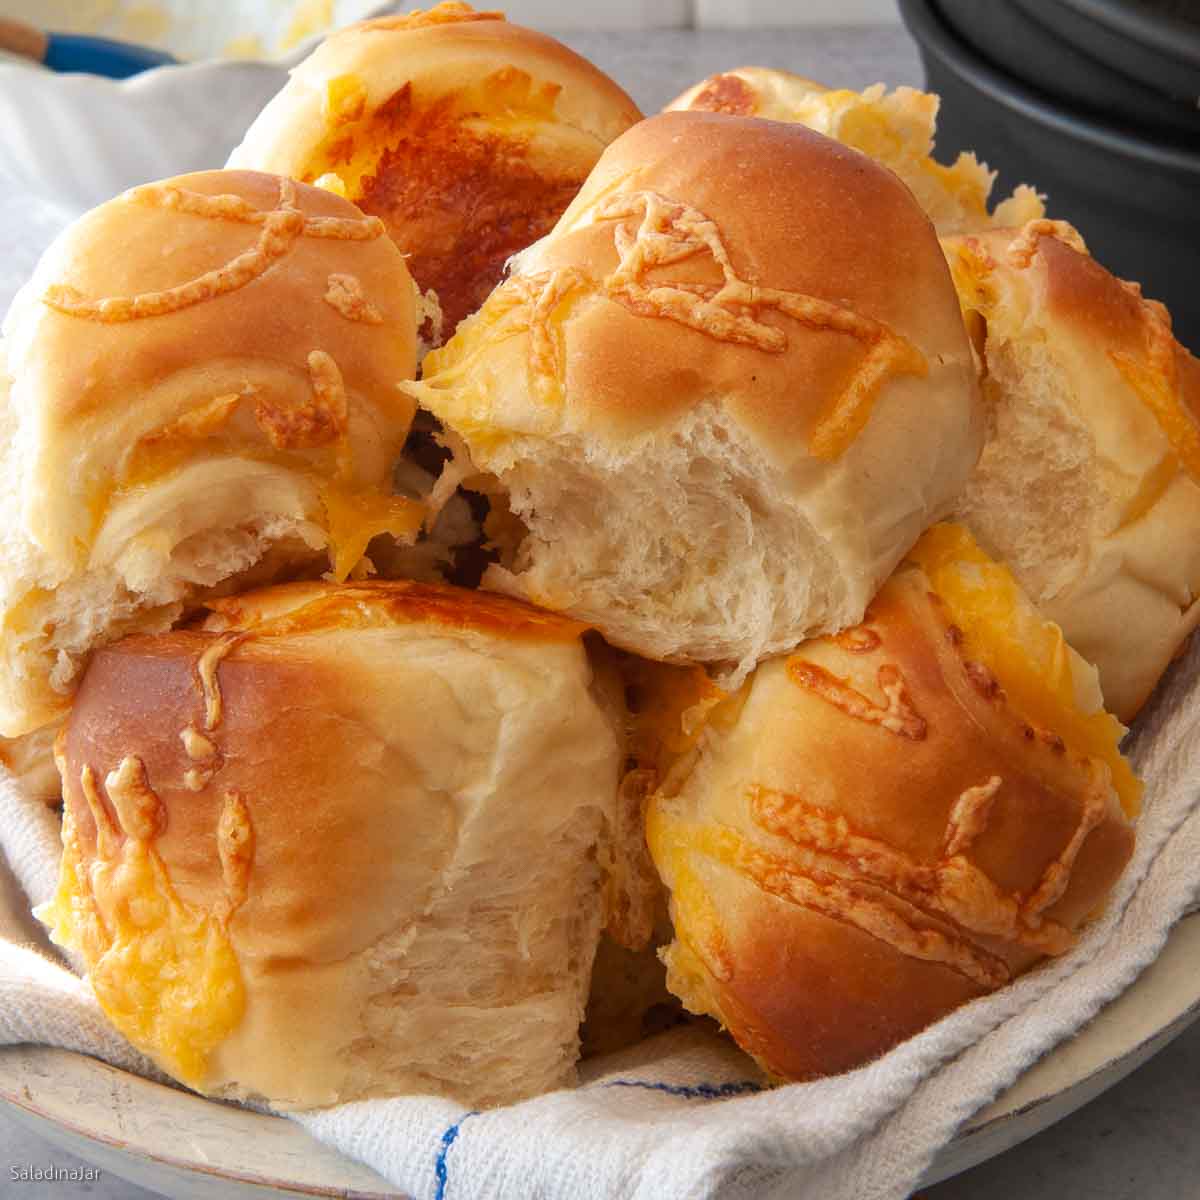
My family thinks these Cheddar cheese buns are the best dinner rolls on the planet. They always win extra points with my youngest grandson. I hope they become a favorite at your house, too.
Unroll hot, cheese-filled rolls to reveal melty Cheddar in soft, flaky bread. Enjoy crispy, crunchy cheese bits on top for an extra layer of texture and taste. Eat with dinner or use as slider buns with ham, turkey, or mini burgers.
The recipe for these rolls uses the Tangzhong technique to keep them soft and fluffy for days. It starts with a simple milk-and-flour paste that thickens in the microwave in under a minute. It’s not fussy or complicated—don’t let the fancy name scare you.
Ingredients & Substitutions
FLOUR: Unbleached wheat flour is my favorite. Substitute bread flour for chewier rolls.
MILK: Whole or 2%; no need to warm when using a bread machine
SUGAR: Adds a hint of sweetness and helps the dough rise. Substitute honey if desired (adjust flour as needed).
SALT: Use table or sea salt; add ¼ tsp more if using Kosher
EGG: One large; If using a different size, may need to add or subtract liquid
BUTTER: Unsalted; Don’t warm but instead, chop finely so it mixes easily
INSTANT YEAST: Recommended for speed; active dry also works with extra time
CHEDDAR CHEESE: Sharp or mild Cheddar both work. Gouda, Swiss, or Pepper Jack are good alternatives.
Step-by-Step Instructions for Making Cheese Buns
⬇️ Jump to the recipe below for exact amounts and detailed instructions.
Make Dough
Shape Cheese Buns By Hand


Bread Machine Cheese Buns: Grandkid-Approved Favorite
Video
Ingredients
Tangzhong Paste
- 2 tablespoons (15 g) unbleached all-purpose flour
- ½ cup (113 g) milk divided
Dough
- ½ cup (114 g) cool milk
- Tangzhong paste from above
- 1 large (50 g) egg
- 1 tablespoon (14 g) heavy cream OR 1 egg yolk
- 2 tablespoons (24 g) sugar granulated
- 1¼ teaspoon (7 g) salt table or sea salt
- 4 tablespoons (56 g) butter cold, chopped
- 2¾ cups (330 g) unbleached all-purpose flour
- 2 teaspoons (8 g) instant yeast
- 2 cups (226 g) Cheddar cheese shredded (8 ounces)
Instructions
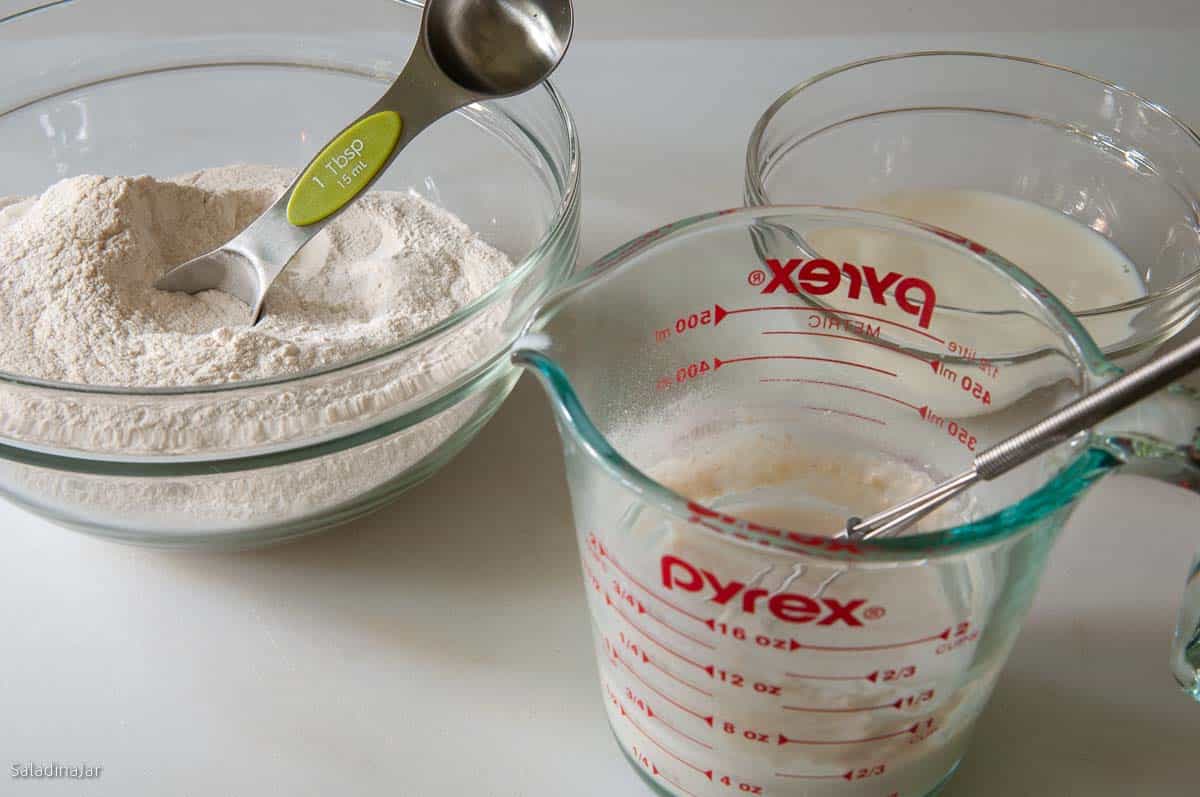
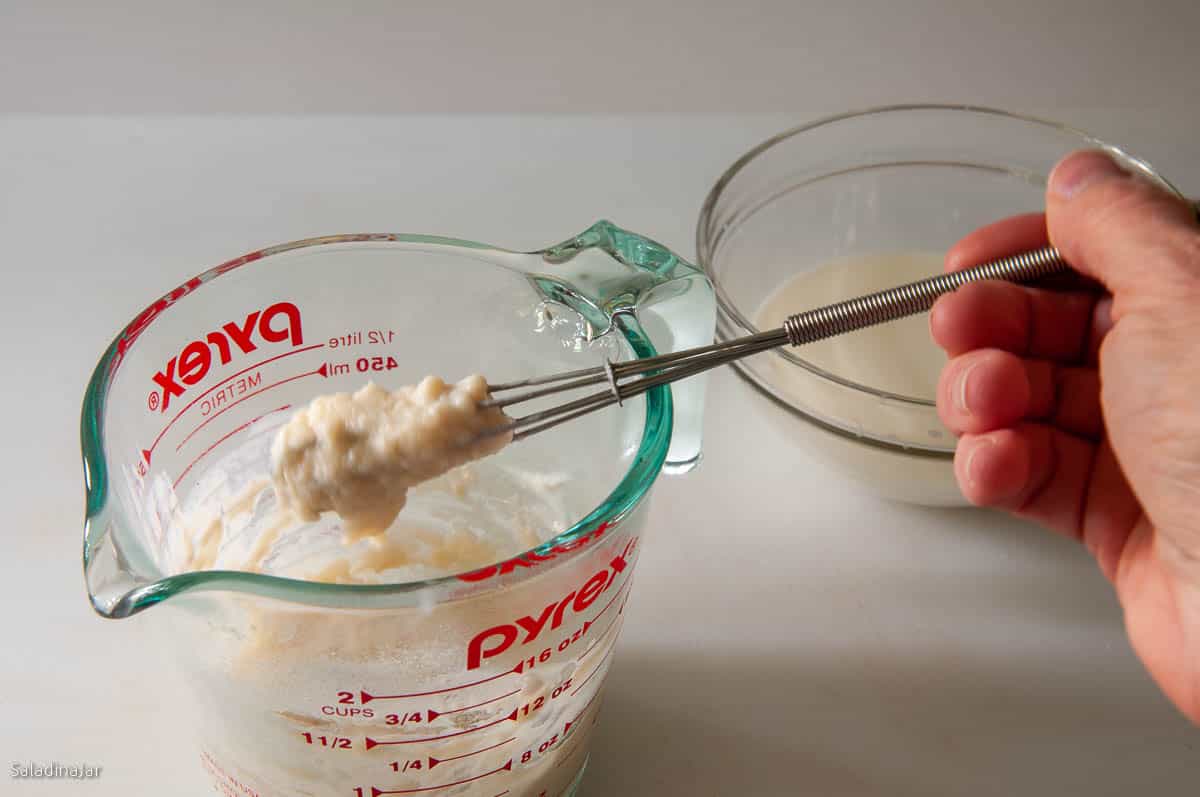
- Make Tangzhong: Whisk 2 tablespoons (15 g) unbleached all-purpose flour and ½ cup (113 g) milk in a microwave safe container; microwave 45-60 sec, stirring until thick.
- Add Milk and Combine: Add ½ cup (114 g) cool milk to the Tangzhong paste and whisk energetically. It's OK if there are still some lumps. They will disappear in the mixing process. Add to the bread machine pan.
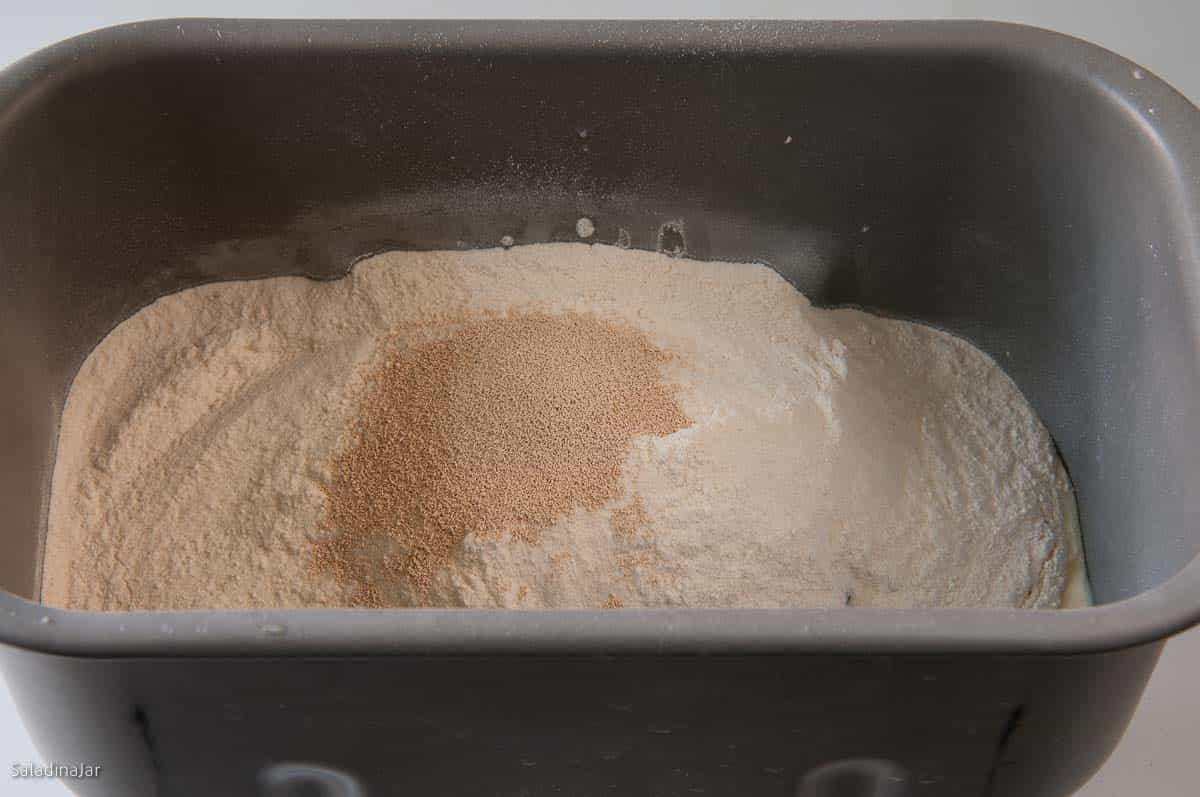
- Mix Dough: Add 1 large (50 g) egg , 1 tablespoon (14 g) heavy cream OR 1 egg yolk, 2 tablespoons (24 g) sugar , 1¼ teaspoon (7 g) salt , 4 tablespoons (56 g) butter, 2¾ cups (330 g) unbleached all-purpose flour , and 2 teaspoons (8 g) instant yeast to the bread machine pan. Select the DOUGH cycle and press "Start."
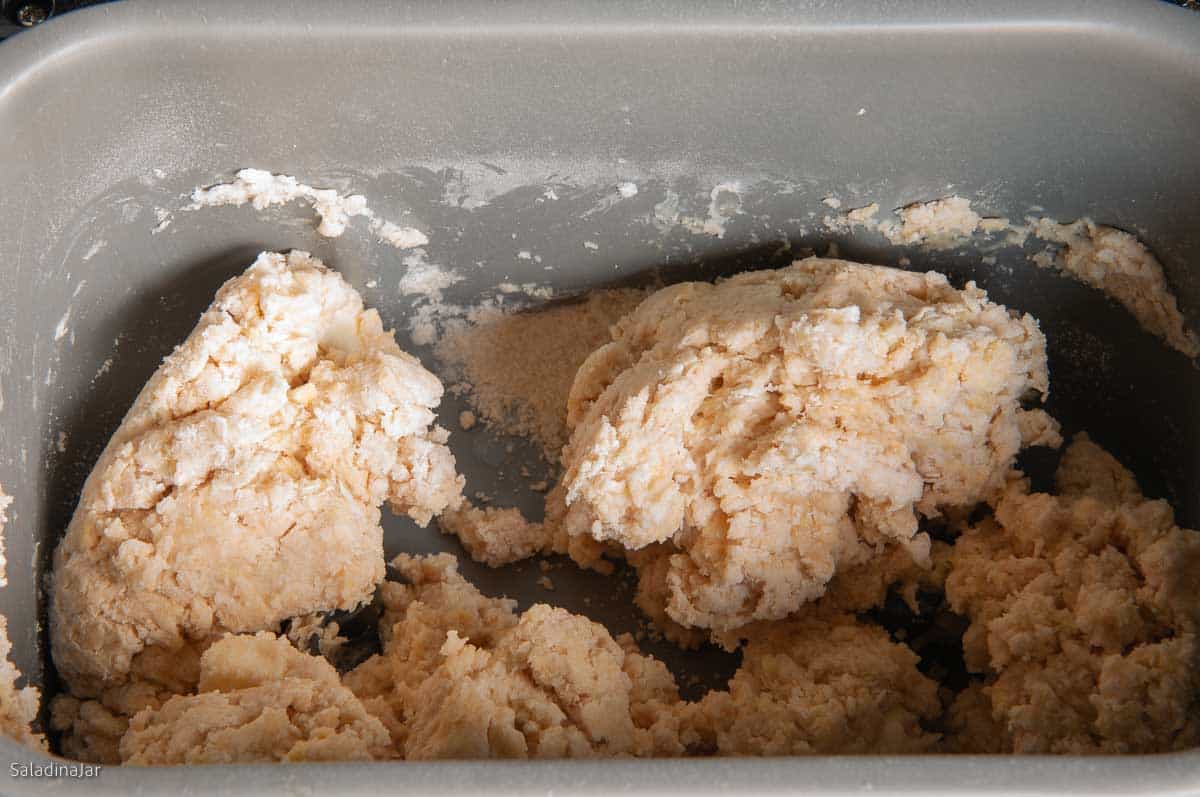
- Check the DOUGH in the First Minute: Lift the lid to make sure the paddles are engaged and working correctly. Dough should start to clump and begin to form a ball.
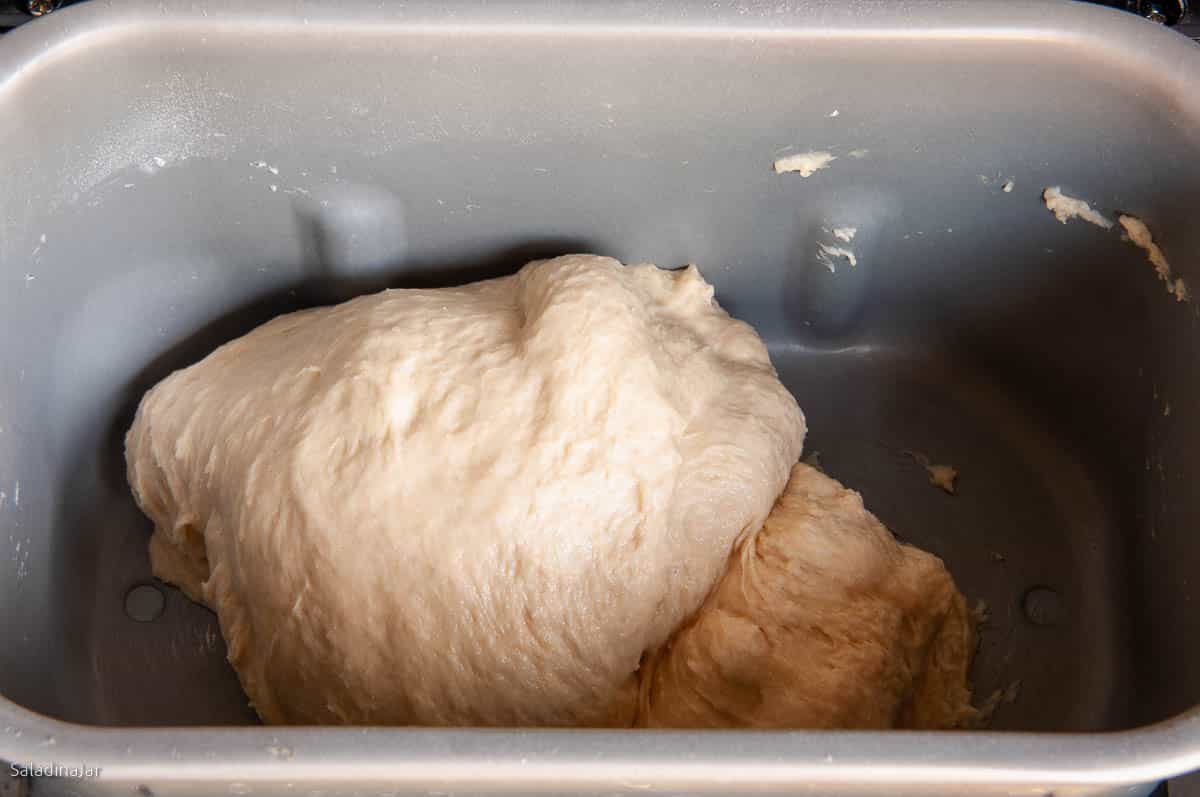
- Recheck Dough 12-15 Minutes Later to ensure the dough is the correct consistency. It should stick to the side, then pull away cleanly. If the dough is too dry it may thump against the side of the pan or ride around freely on top of the post. Add milk one tablespoon at a time. If the dough is too wet, impossibly sticky and won't pull away from the sides, add flour one tablespoon at a time. Give the dough time to absorb the flour or milk between each addition.
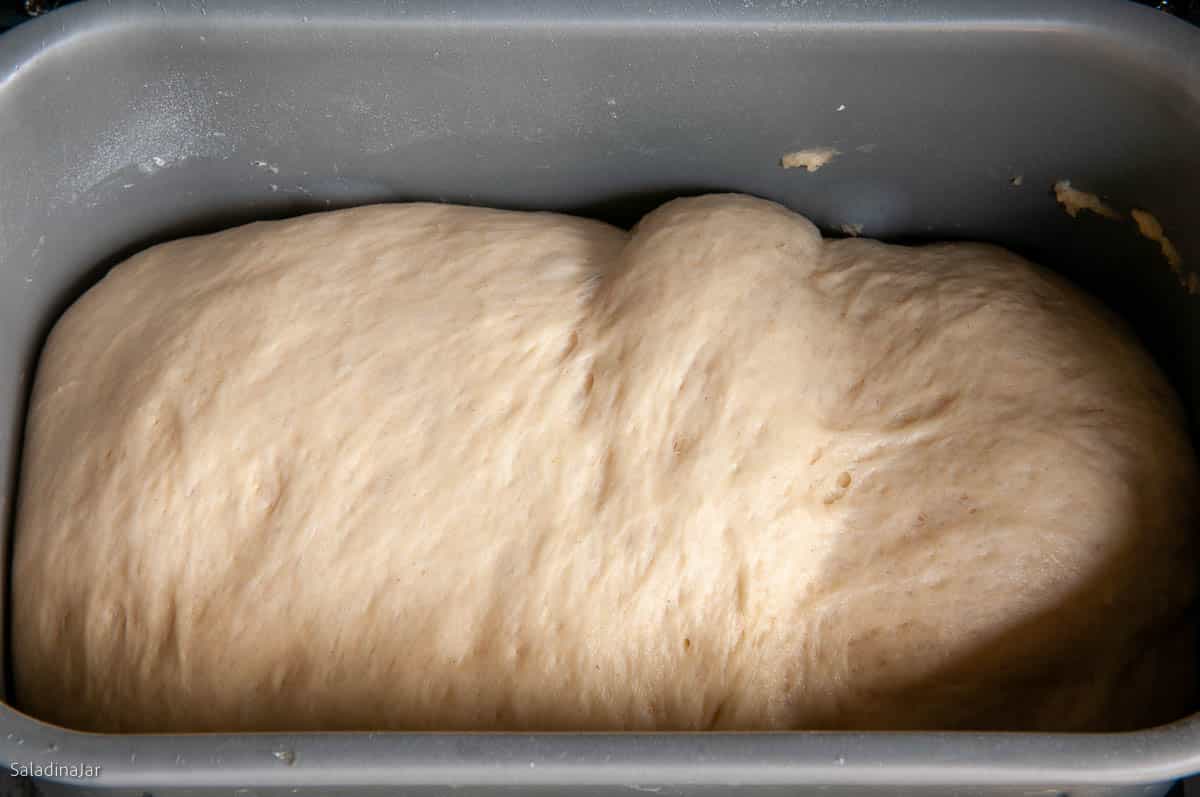
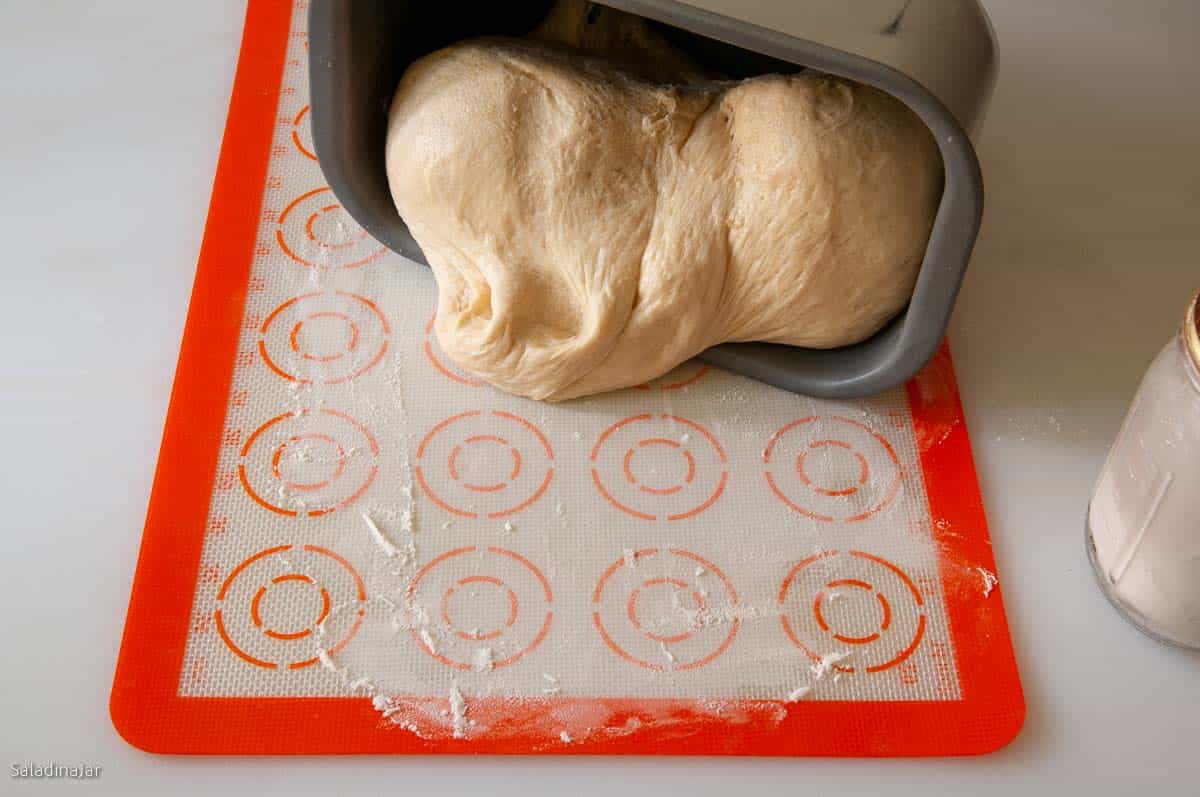
- When the DOUGH cycle Finishes, check to see if the dough has risen to double its original size. If so, remove it to a floured surface. If not, allow the dough to remain in the machine until it is doubled.
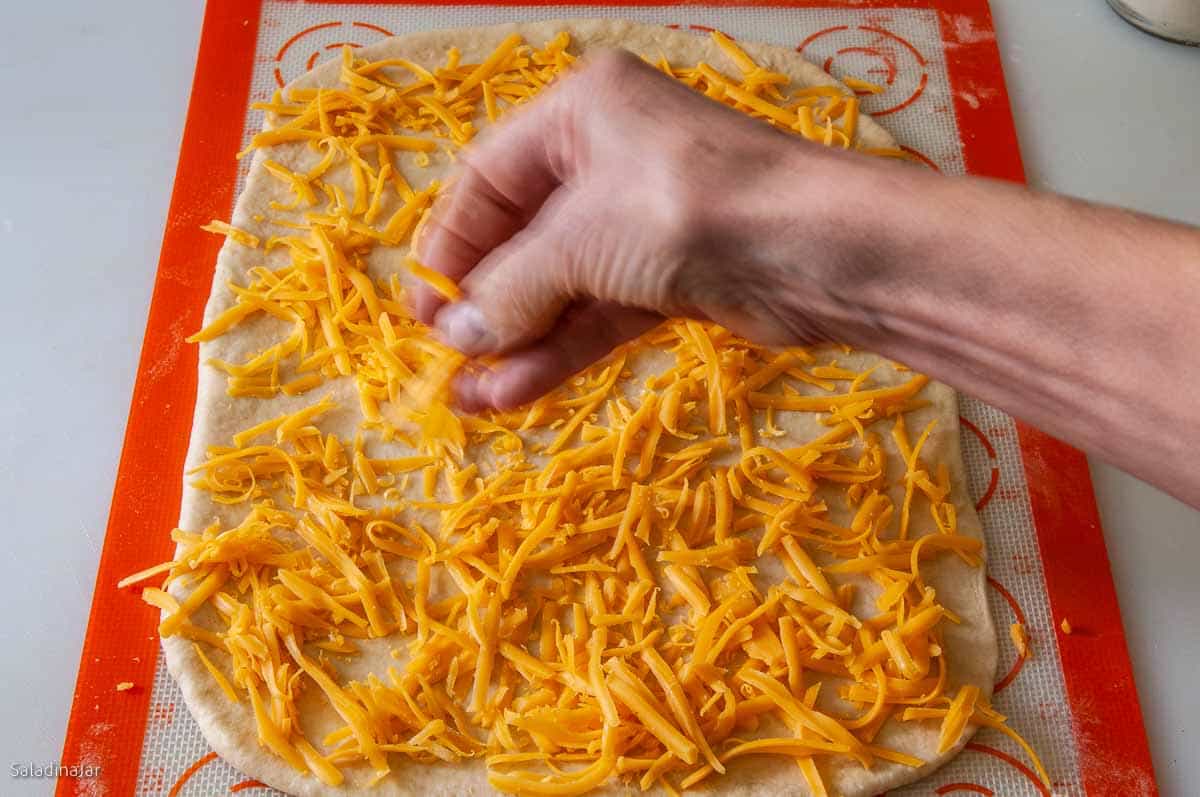
- Grate Cheese: While the machine is doing all the hard work for you, grate 2 cups (226 g) Cheddar cheese so it has time to come to room temperature.
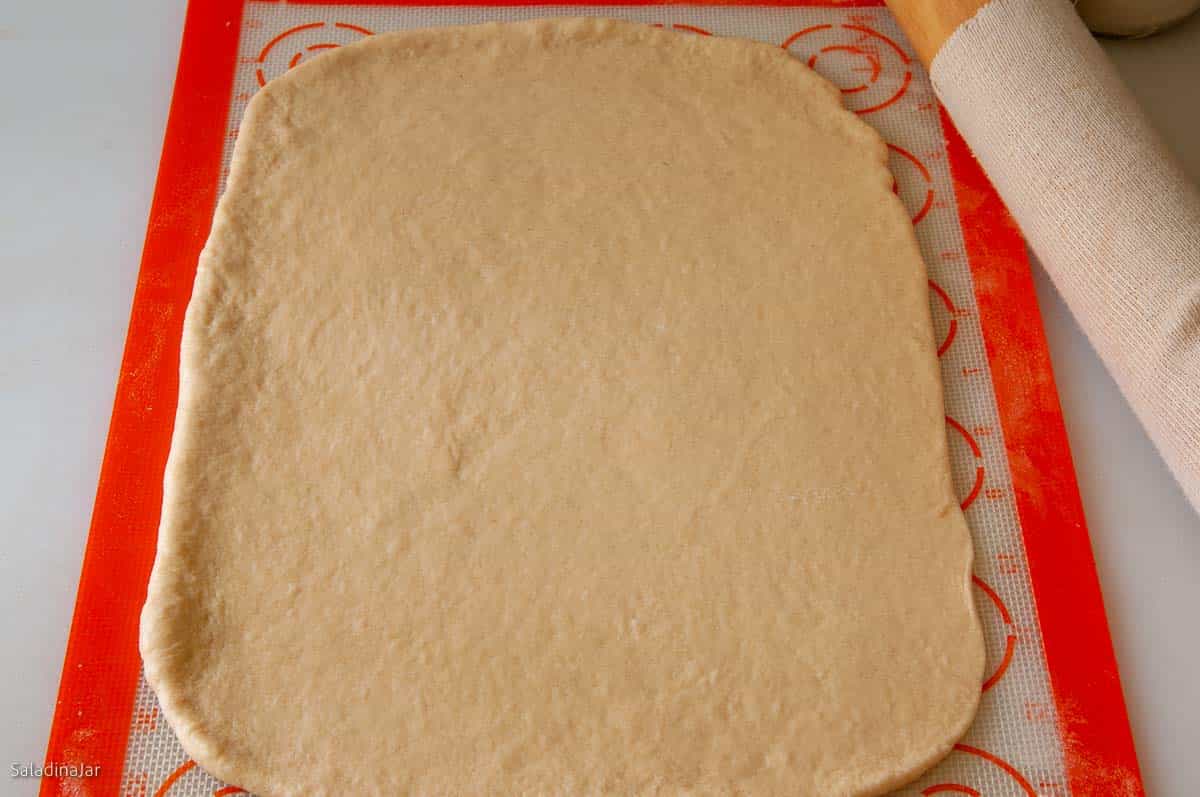
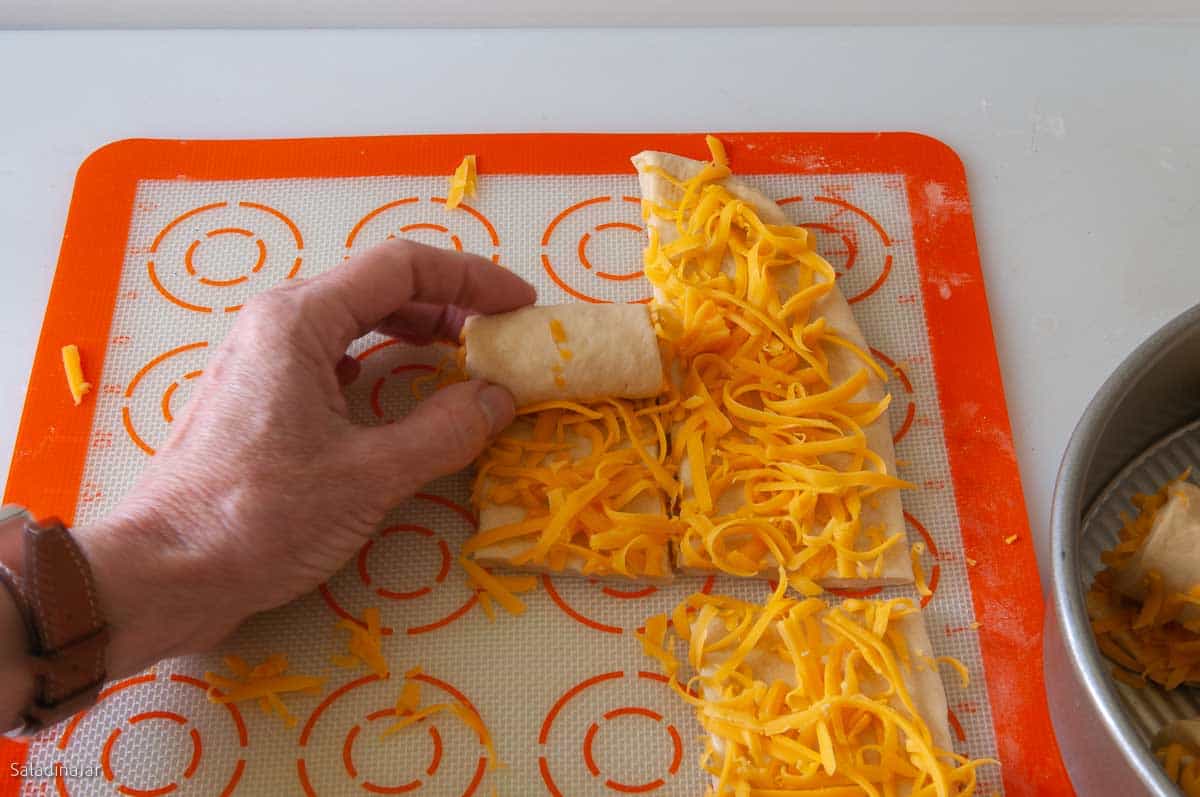
- Roll and Fill: Transfer dough to a floured surface and divide in half. Compress with your hands. Roll one half into a 12×9-inch rectangle and sprinkle with half the cheese.
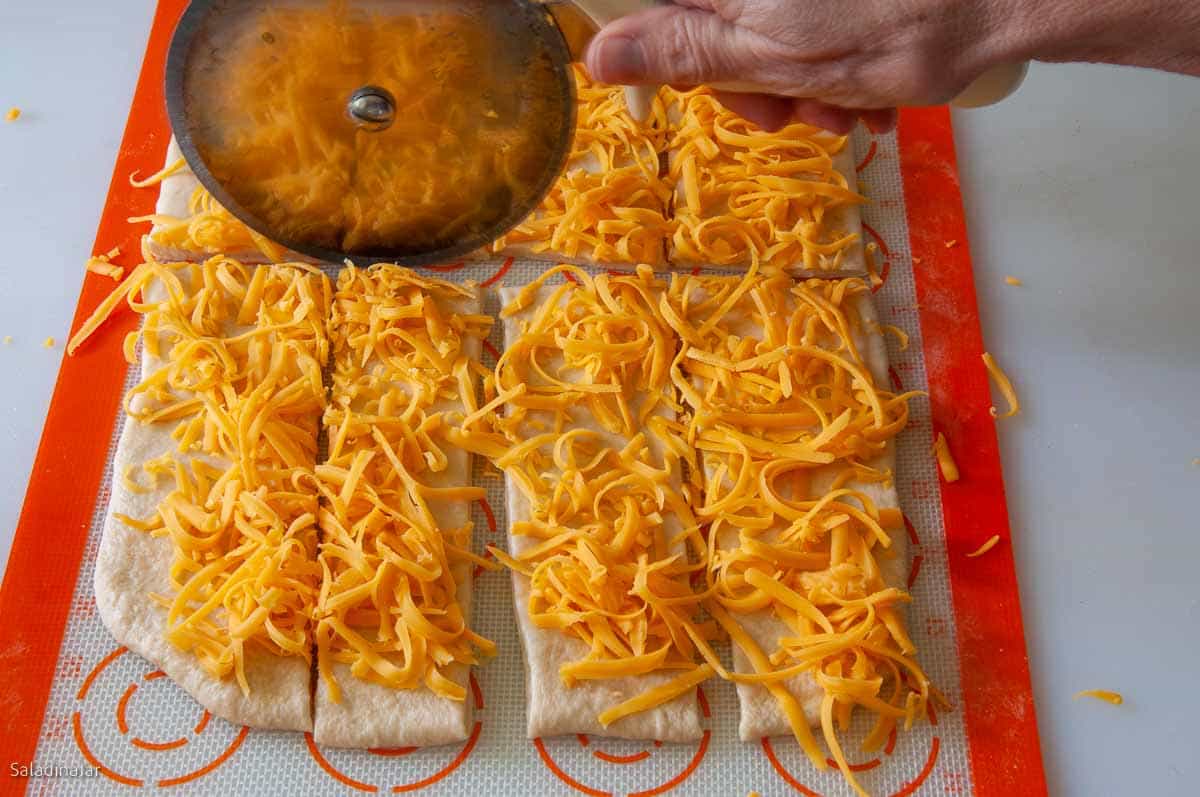
- Cut and Roll: Slice into 4 strips lengthwise, then each in half crosswise for 8 strips. Roll up each strip from the short edge.
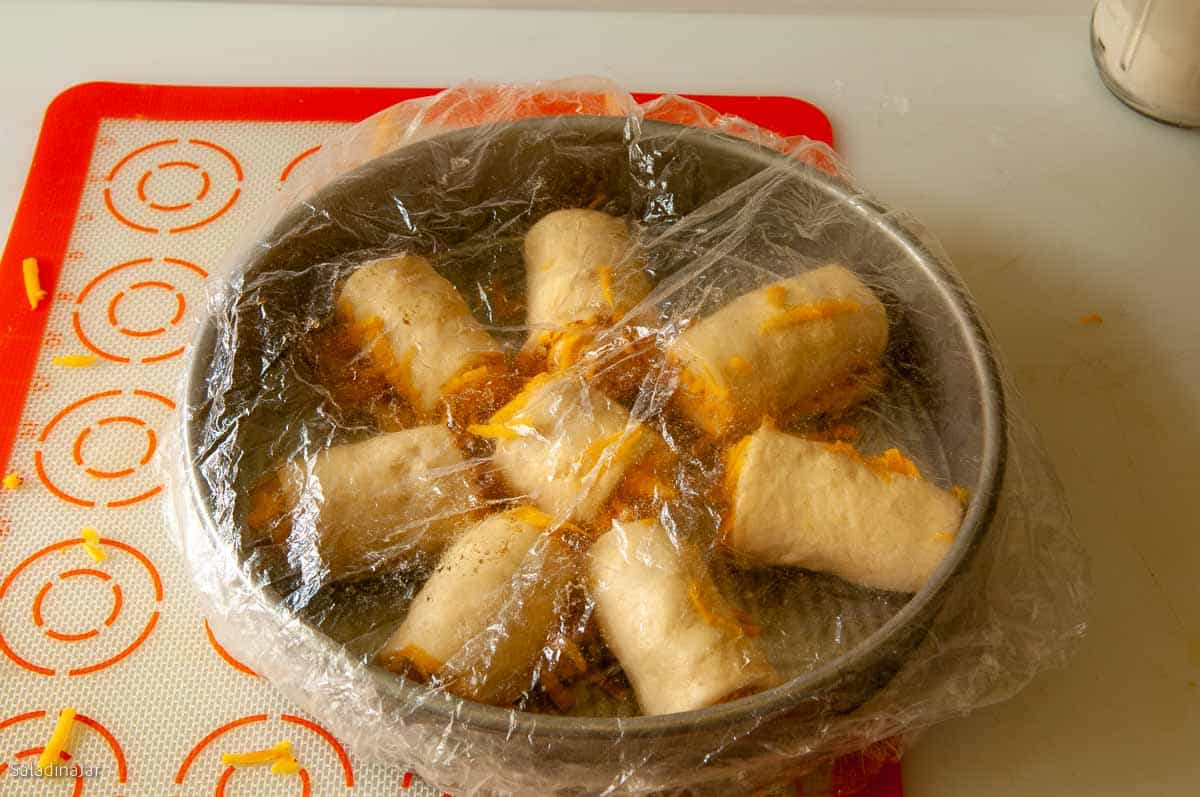
- Prepare Pans: Spray two 8- or 9-inch pans (Baker’s Joy or grease well). Arrange rolls in a spoke pattern. Repeat with the remaining dough and cheese.
- Proof Rolls: Cover with tea towels or cheap shower caps and let rise until nearly doubled, about 1 hour depending on room temperature. Watch the rolls, not the clock.
- Bake: Preheat oven to 375 °F (190˚C) when you think the rolls are almost ready to bake. Bake on the middle shelf for 14-17 minutes or until golden brown and the internal temperature reaches 190˚F (88˚C).
- Cool and Finish: Remove from the oven and allow to sit for 5 minutes. Run a plastic knife around the edge to loosen any cheese stuck to the edge. Turn rolls out onto a wire rack for another 10-15 minutes (so they won't get soggy on the bottom). Cool with the tops up so their shape is not affected. Brush all over with melted butter, if desired.
Notes
- Unbaked dough: Freeze after the DOUGH cycle or after shaping (before final rise). Defrost in the fridge overnight.
- Baked: Double-wrap and freeze up to one month. Reheat gently.
- Stand Mixer: Mix until moistened, then knead with a dough hook (speed 2–3) until smooth and elastic (5–10 minutes). Let rise, deflate, and shape as directed.
- By Hand: Mix to a shaggy dough, knead on a floured surface until smooth and elastic (10–20 minutes). Let rise, deflate, and shape as directed.
Equipment
Nutrition
All images and text ©️ Paula Rhodes for Salad in a Jar.com
Final Thoughts
May your family enjoy these rolls as much as mine do. We’re a cheese-loving family, so these rolls never last long around here. If you bake for the same kind of people, I recommend this Jalapeno-Cheese Loaf. It’s particularly nice to serve as an appetizer.
— Paula, Home Economist
Homemade Food Worth Sharing
Need help troubleshooting?
Email me: Paula at saladinajar.com — photos help!
Are you curious about what else my family loves most? The following recipes are all popular: My Favorite Cinnamon Rolls, Bread Machine Monkey Bread: A Savory Version, and Crusty French Bread Mixed in a Bread Machine.

I love these recipes you have conducted I am very interested in the bread ones since now I have a Breadmachine. I can’t wait to try out some of your recipes, especially the savory bread recipes.
As usual your recipes and instructions have lead to a serious bread addiction!
Added some jalapeño rounds to the top for some kick.
very very good!
Thank you so much! I’m thrilled to hear you’re enjoying the recipes (and embracing the bread addiction—welcome to the club! ?). Adding jalapeño rounds on top sounds like a fantastic idea for an extra kick. I’ll have to try that myself! Let me know if you experiment with any other toppings or twists. Happy baking!
Made these today and they are amazing!! So soft and silky and smooth!!! So totally gonna keep this recipe!! Kept them in the loaf form and put garlic oil on top. Used sharp cheddar because that’s all I had… must make again. Thank you so much
Hi Catherine,
Thank you for taking the time to write. I’m so glad you like these as much as my family does. The garlic oil on top sounds fabulous!
Really liked these. they turned out great. I used sharp cheddar, but will make more trying other cheeses.
If I wanted to add garlic or herbs, how much would you suggest I add?
Thanks for this recipe.
Hi Kerry,
I would add garlic or herbs during the add-in phase of your bread machine.If your machine doesn’t have that feature, add it when you pull the dough out of the machine and knead it into the dough by hand. Thank you for the 5-star rating!
Just made these today to go along with homemade chicken orzo soup. Thanks again. Your directions are so easy to follow. Such a lovely soft dough to work with.
Hi Lois,
Your soup sounds wonderful!! Thanks for coming back to leave a rating and comment. Appreciate it.
Hi, could these be made to the point of baking and then frozen? Defrost and bake when needed? They’d be perfect to make ahead for Christmas if I can.
Hi Erin,
I am not usually a fan of freezing dough or rolls ahead of time. Seems like they just aren’t as good and usually don’t rise as much. However, I decided to really test this with this specific recipe. The rolls are in the freezer as I write this. I’ll get them out of the freezer in about three days and see how they turn out. I’ll get back to you.
Can you make these without a microwave?
Hi Barry,
Yes, you can make the Tangzhong mixture on top of the stove. Use low heat and stir often to avoid scorching. Hope you love them!
They are delicious and easy to make thanks
Thanks so much for coming back to say so.
These cheese buns turn out absolutely wonderful. The recipe and instructions are so precise and easy to follow.
I also tried stuffing them with roasted red peppers and garlic butter along with a little bit of cheese and the result was delicious. My family just cannot keep their hands off of them.
Thank you for all the wonderful recipes.
Your idea to add roasted red peppers and garlic butter sounds wonderful! I want to try that myself. My grandkids go crazy for these rolls, so I’m not surprised that your family also loves them. Thanks so much for taking the time to share your variation.
Your recipes and site are so appreciated. The pictures make it so easy to make and they always turn out perfectly. Thank you!
Thank you Patti. Your kind words are motivating!
I love your site,
and the recipes, but why don’t the picture’s of the breads or rolls print out with recipe?
I make my own loose leaf cookbooks of different things and a picture is always nice with the recipe.
Rita,
Well, Rita, you are the first person to ask for them. So I changed my settings to include the picture. Although you may not see the change right away, it should be there within 24 hours. Thank you for writing.
These were fantastically fluffy. My family adored them!
I did notice that some of the cheese would fall out when I rolled up each bun. Any ideas how to prevent the cheese loss?
Hi Becky,
Hmmm. Practice maybe? We actually love when the cheese falls out and gets brown and chewy or crunchy. Glad you liked the rolls.
I was a bit skeptical about the method of adding some flour to the milk before the bread machine setup but I’m a believer now! These were the fluffiest rolls I’ve ever gotten! Hallelujah! This will be my new standby with or without the cheese.
We love beef and cheese sandwiches. After making these rolls, I added thinly sliced left over rump roast and home made bread and butter pickles. No extra cheese needed! We have out of state friends who have a little cottage near our home and will travel here in three weeks. When I make different kinds of rolls, l always freeze 6 of each kind so we can have a delicious variety of rolls for our brunches. Thanks for another “keeper” recipe, Paula! Wishing you and yours a happy and safe holiday!!
You have some lucky friends. My husband LOVES to eat any kind of meat with mustard and bread and butter on a dinner roll–using it as a bun.
p.s. I would love to have a peak in your freezer. I bet it’s super interesting.
@Paula, we try to keep it stocked in this unsettled time and it’s a ways to the grocery store. I’m counting on not having to do a lot of baking right at Christmas. Still have biscotti to make for gifts and looking forward to dipping it my orange spice tea! Your recipes are the absolute best.
Thank you for such a great page Made them yesterday Didn’t have milk so used Powdered Milk but compensated by using more butter Next time will wrap them in an all beef wiener
Trent,
High-5 for your brilliant substitution. Please let me know when you wrap a beef wiener inside these rolls. I will come and help you eat them.
Made these beauties this morning.
Not only I didn’t have to hold back any amount of flour, I need to add 4 additional tbsps.
Thanks to Paula’s note on how to know I’ve gotten the ‘perfect’ dough – stick to the wall of pan and pull away – I wouldn’t know what to do ???
Hi Ju,
Sounds like you’ve got the hang of adjusting your dough! HIGH FIVE!
Absolutely the best! I’ve made cheese buns before but nothing compared to these…is it the tangzhong method? You squeeze them in any direction and they spring right back. The mouth texture is so nice too. I’m now looking for a whole wheat recipe that uses the tangzhong method as well. Thank you for the recipe.
Yes. I think so. Makes a difference.
@Paula, I DID make a whole wheat loaf using tangzhong and it worked beautifully. Hallelujah! That was three days ago and the bread is still fresh, the texture like the white loaves and buns I’ve made. Such a neat technique…lucky to have found it on youtube: Japanese milk bread and your site too, of course. Thanks, Paula.
Way to go, Vivian. Wish we were neighbors so I could come over and help you eat it. Have a great week!
Best cheese buns ever! Way better than store bought!
Hi Alison,
So glad I’m not the only one who thinks so.
All my Thanksgiving guests gave these rolls rave reviews. They are to-die-for delicious.
Can you make this recipe into a loaf of bread? If so how long would you bake it?
Kathleen,
The dough for these rolls is very soft so I wouldn’t advise it for a loaf of bread. paula
If I don’t have a stand mixer, what do you recommend? Can I mix it all by hand?
Also, I made these once before and they got too brown on top without being all the way cooked inside. What am I doing wrong?
Hi Daneka,
Yes, you can make these rolls by hand. It will be a little more work but should taste just as yummy. Not for sure why your rolls got too brown. Possibilities: Rack too close to top heating element. Move down. Your oven temperature could be calibrated or mistakenly runs too high. Have you checked it in awhile with an oven thermometer? If you continue to have a problem, set your timer for half way through baking time and cover loosely with foil to prevent further browning, if necessary. I frequently have to do this with loaves of bread but not with rolls. What kind of pan are you using? If using a lightweight aluminum pan or foil pan (cheap?), the rolls may not bake right and have a nice brown crust so they will get too brown on top while you are waiting for that to happen. Good luck! Glad you wrote. paula
I am thrilled with your instructions and recipes for rolls, the cheese rolls especially. The pictures are so real looking, you feel that you can pick up a roll and eat it.
I am making a note of your website and will return to it often to see “What’s cooking.”
Doris
Just wanted to say I love your blog!! Keep up the good work! Your videos are awesome and now I can make perfect dinner rolls!! 🙂
Thanks Jennifer,
Glad to hear it!
i’m going to make these at school for a practical i sure do hope they are winners and i can clearly see that they are already 🙂
Hope they turn out for you. We totally love them! pr
I just made these. They are wonderful and not too difficult to make. Thanks for sharing the recipe.
so the flour that you use here is what kind? all purpose? or bread flour?
I have used both successfully. I usually use all-purpose, unbleached just because it’s what I keep in the canister on the counter.
These look wonderful! Cheese+bread=perfection! That’s all the math for today:)
WOW! They were delicious!!!!!! We saved them to feed to our volunteer help on Saturday and everyone LOVED them! Thanks for thinking of us…and thanks for posting the recipe so that I can make them now too!
Wow! Your rolls are beautiful….and I love the little cheesy bits left over for the cook.
Everything is better with cheese! These look so fluffy and delicious.
Your blog makes me soooo hungry! These look delicious! I want some right now.
It looks very fantasitc.May be the best cheese rolls on the planet!
These look fantastic and are a must do! Love them with the cheese! Thanks!
Mmm… cheese and rolls – very comfort food-ish! They also look so light and fluffy. Must be the “baker”. Are these going on your Easter table? I’m planning on popovers… but maybe these might show up instead!