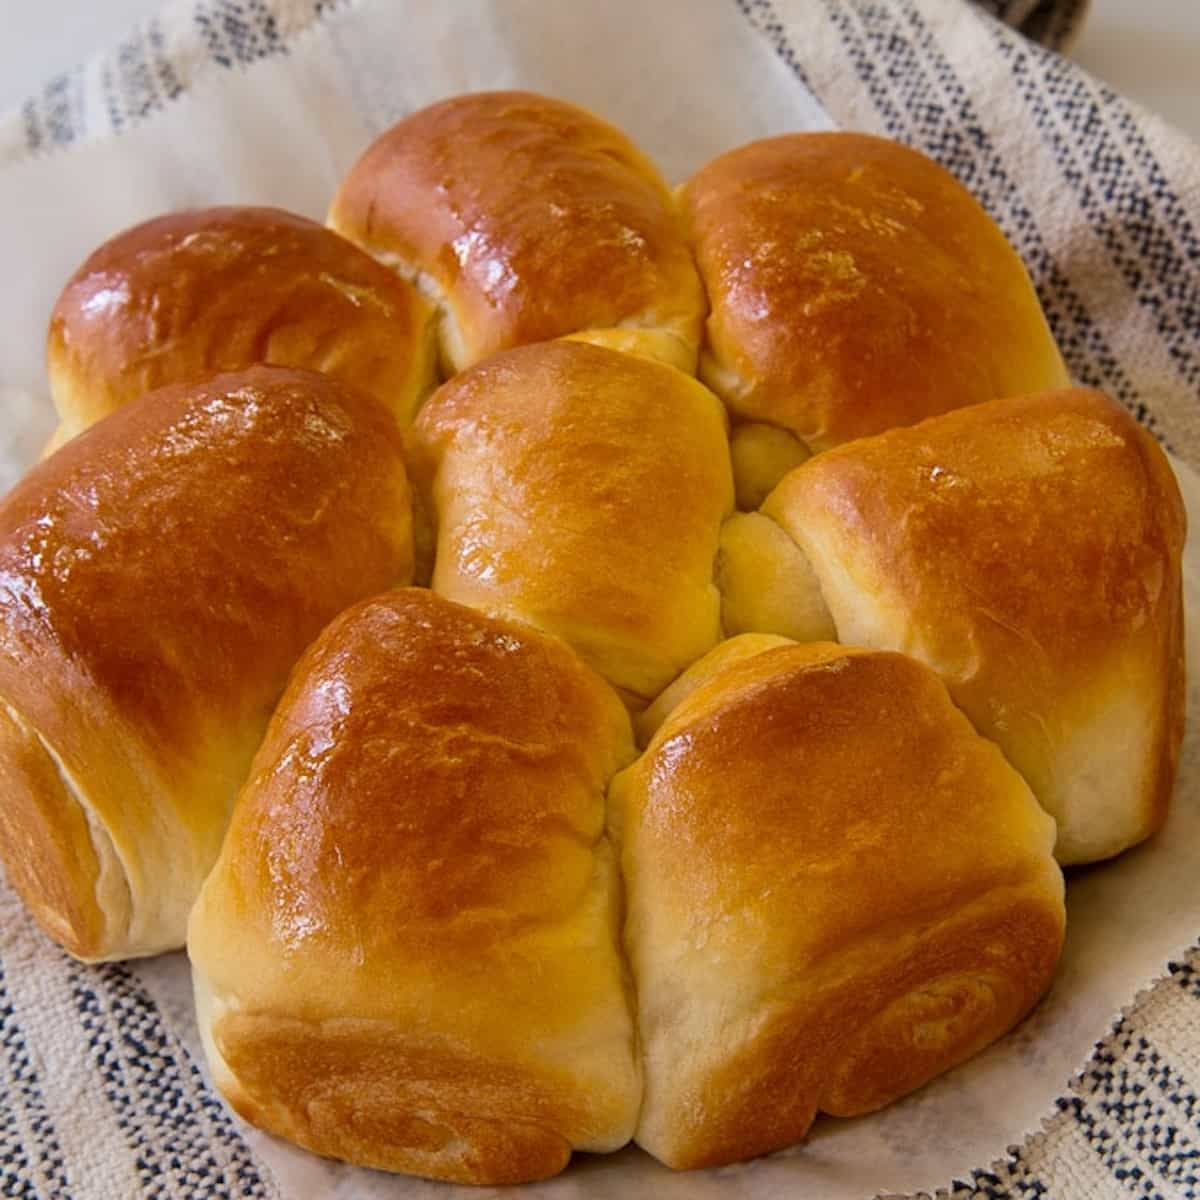
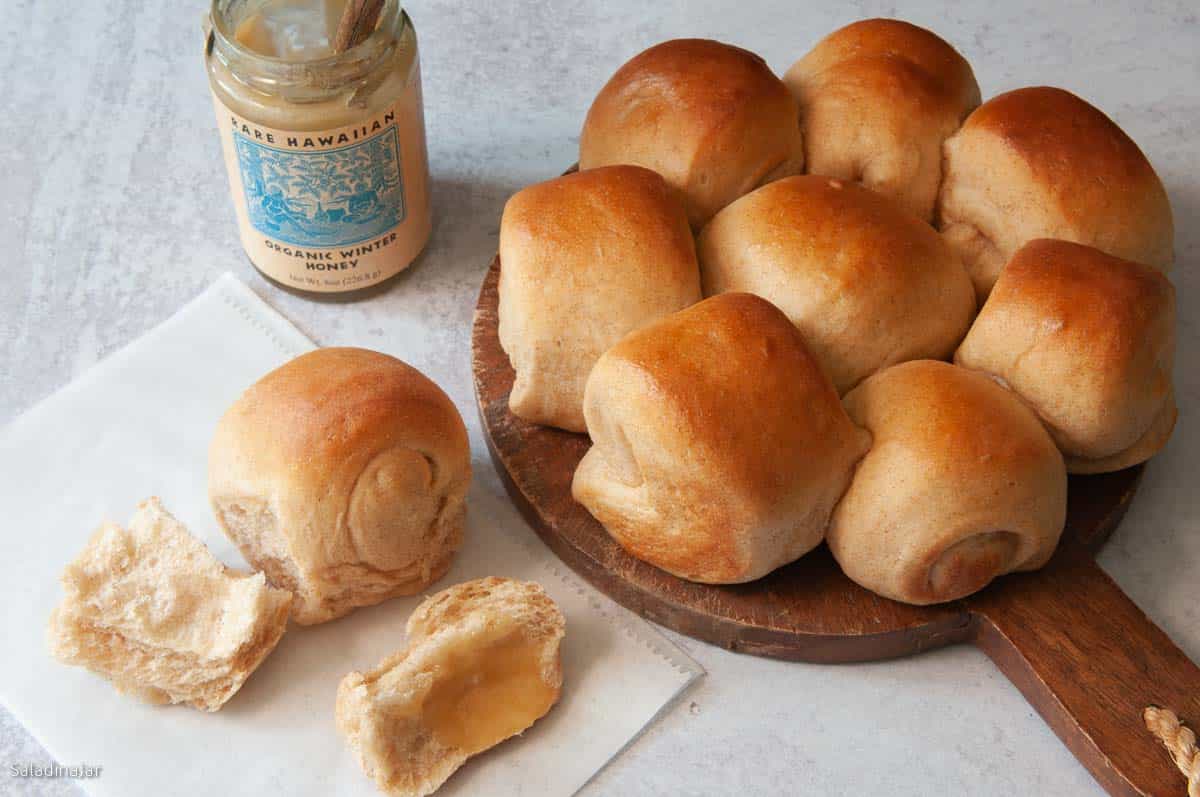
Soft & Fluffy Japanese Milk Bread Rolls (Bread Machine Friendly)
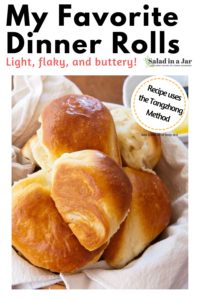
Sneak Preview: These soft and fluffy Japanese milk bread rolls get their pillowy texture from a simple Tangzhong paste. The bread machine handles the mixing and kneading, and the rolls stay fresh and tender for days.
This post contains affiliate links. As an Amazon Associate, I earn from qualifying purchases at no extra cost to you.
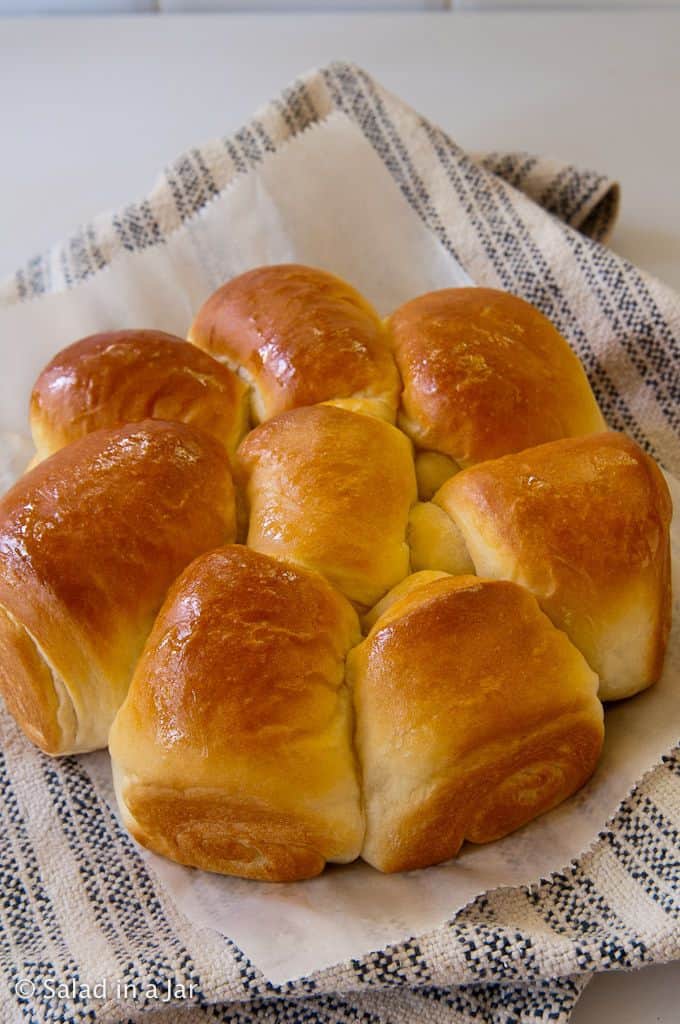
Ever strolled past a bakery window, eyeing those golden, pull-apart rolls? These Japanese-style dinner rolls deliver the same tender crumb at home. Tangzhong keeps them soft for days, and the bread machine does the mixing and kneading. (See recipe notes to mix with a stand mixer or by hand.)
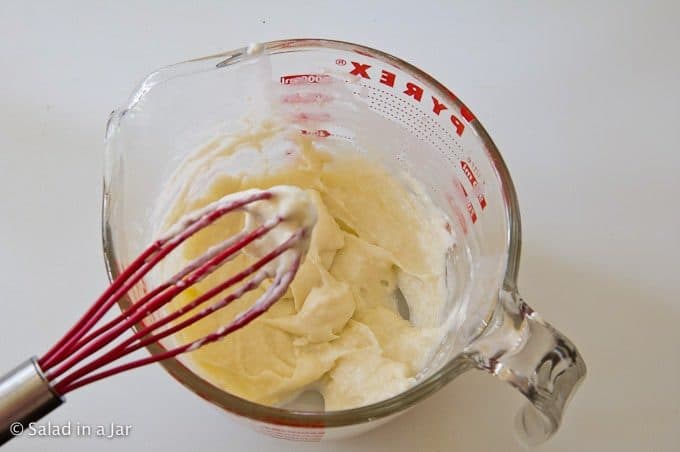
What Is Tangzhong?
Tangzhong is a simple paste of milk + flour, cooked briefly until thick. Added to dough, it traps moisture for rolls that are fluffy, layered, and long-lasting.
- Microwave version: under 1 minute.
- Stovetop version: stir until thickened.
Why Use a Bread Machine?
I use the DOUGH cycle to mix and knead the dough, then shape and bake the rolls in a conventional oven for the best texture and appearance.
Ingredients & Substitutions
MILK: Whole milk makes the richest rolls, but low-fat or nonfat works. No need to warm it.
FLOUR: Unbleached all-purpose flour gives the softest rolls. Substitute 1 cup whole wheat flour for a heartier version.
EGG: Use 1 large egg (about 50g). Adjust dough texture slightly if using a different size.
HEAVY CREAM or YOLK: Adds richness—either works fine.
SUGAR: Use plain granulated sugar. No substitutions tested.
SALT: Table or sea salt is best. If using kosher, add ¼ teaspoon more.
BUTTER: Use cold, chopped unsalted butter (reduce salt if using salted). No need to soften—it melts as the machine kneads.
YEAST: Instant or bread machine yeast works best. Add ¼ teaspoon extra when using active dry yeast.
Step-by-Step for Japanese Milk Bread Rolls
⬇️ Jump to the recipe below for exact amounts and detailed instructions.
Making the Dough

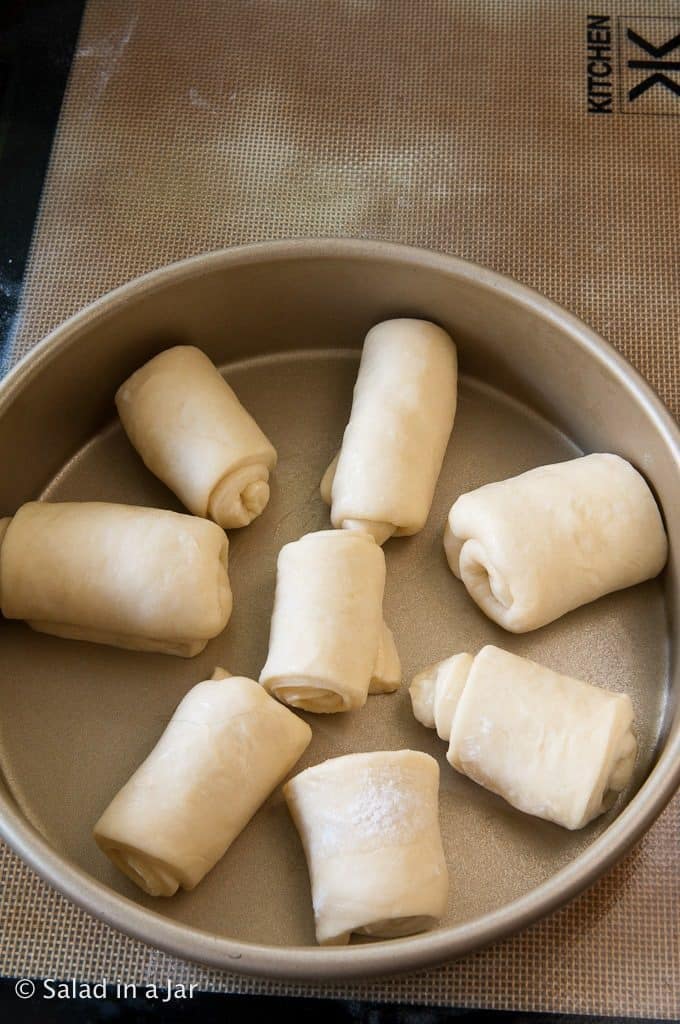
Shaping the Rolls
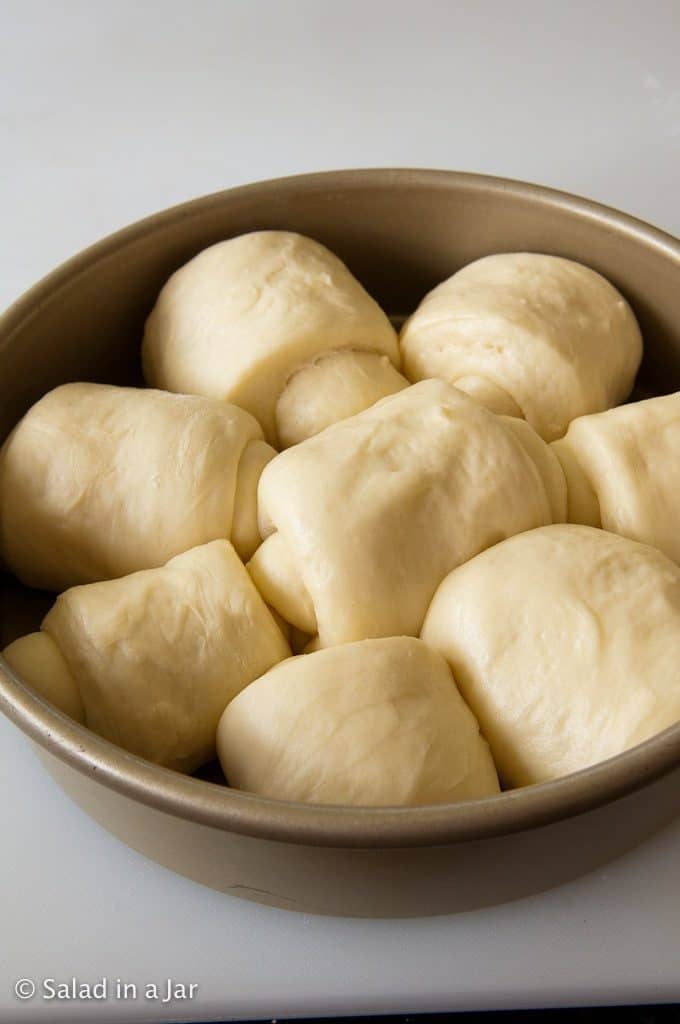
Rise & Bake

Tips That Make a Difference
• Cool Tangzhong fast: Stir in remainder of cold milk to cool Tangzhong.
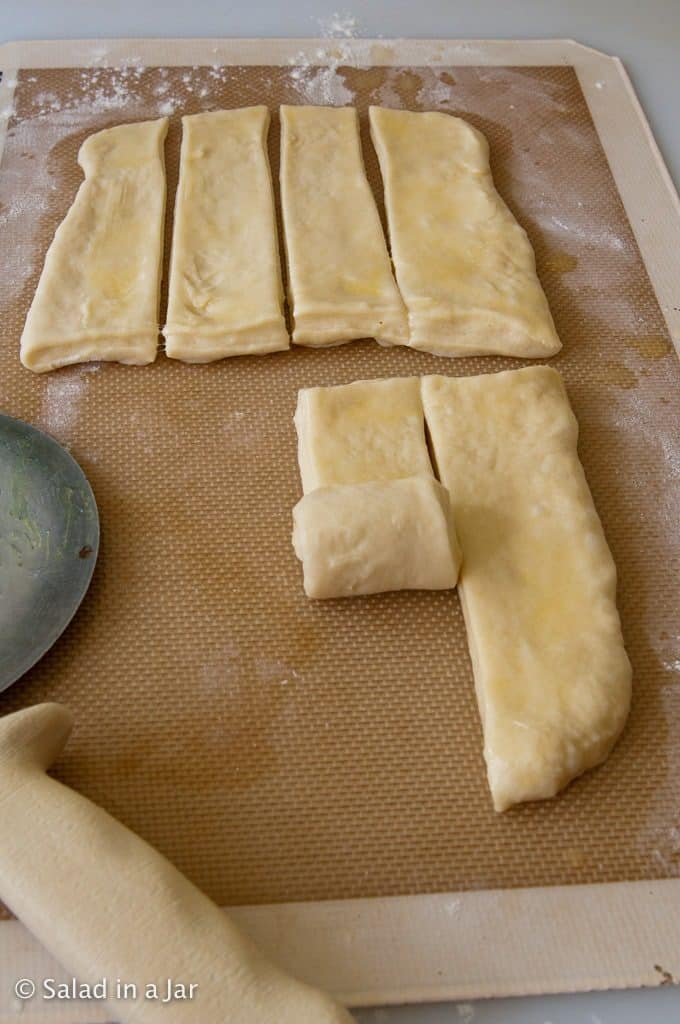
• Pinch the seam: After rolling, pinch it closed and place rolls seam-side down so they bake up neat and pretty.
• Don’t leave baked rolls in the pan more than a few minutes or they will get soggy bottoms.
Soft & Fluffy Japanese Milk Bread Rolls (Bread Machine Friendly)
Video
Ingredients
Tangzhong Paste
- ½ cup (113 g) cool milk–whole, 2%, or nonfat
- 2 tablespoons (15 g) unbleached all-purpose flour
Dough
- ½ cup (114 g) cold milk
- 1 large (50 g) egg
- 1 tablespoon (14 g) heavy cream OR one egg yolk
- 2 tablespoons (24 g) granulated sugar
- 1¼ teaspoon (7 g) table or sea salt
- 4 tablespoons (57 g) cold butter, chopped
- 2¾ cups (330 g) unbleached all-purpose flour
- 2 teaspoons (6 g) bread machine or instant yeast
Filling (optional)
- 2 tablespoons (28 g) softened butter (28 gr)
Instructions
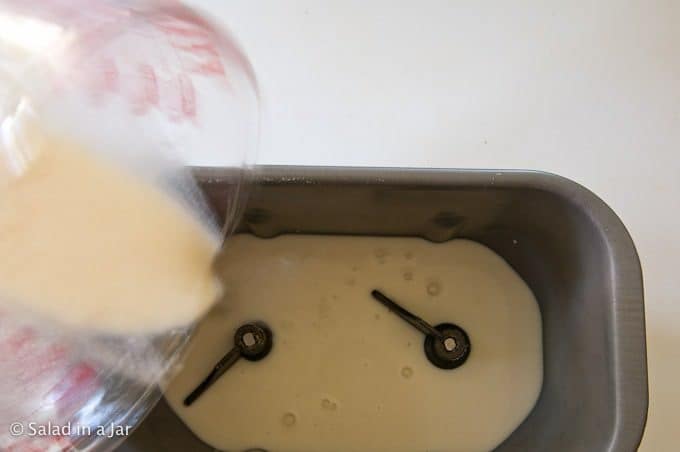
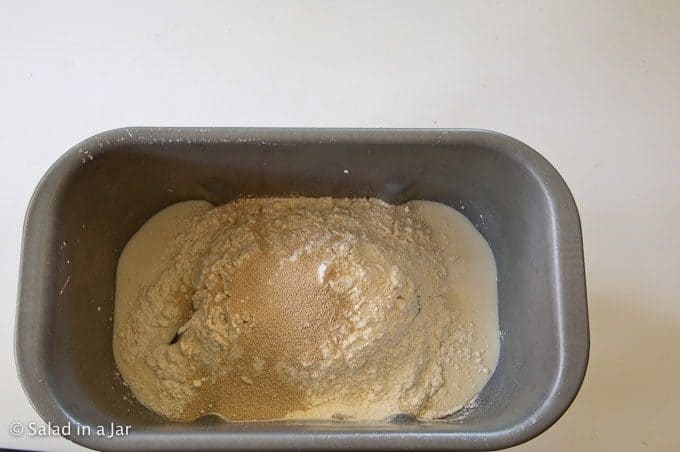
- Make Tangzhong: Whisk ½ cup (113 g) cool milk–whole, 2%, or nonfat and 2 tablespoons (15 g) unbleached all-purpose flour in a microwave-safe bowl. • Microwave: Heat in 15-second bursts (45–60 seconds total), whisking each time, until thick like pudding.• Stovetop: Cook over medium heat in a small saucepan, whisking constantly, until thickened (about 1–2 minutes).Let cool slightly before adding to the dough Pour Tangzhong into the bread machine pan, then add ½ cup (114 g) cold milk to cool it down.
- Load machine: Add 1 large (50 g) egg , 1 tablespoon (14 g) heavy cream OR one egg yolk, 2 tablespoons (24 g) granulated sugar, 1¼ teaspoon (7 g) table or sea salt , 4 tablespoons (57 g) cold butter, chopped, 2¾ cups (330 g) unbleached all-purpose flour , and 2 teaspoons (6 g) bread machine or instant yeast to the pan. Select the DOUGH cycle. Press "Start."
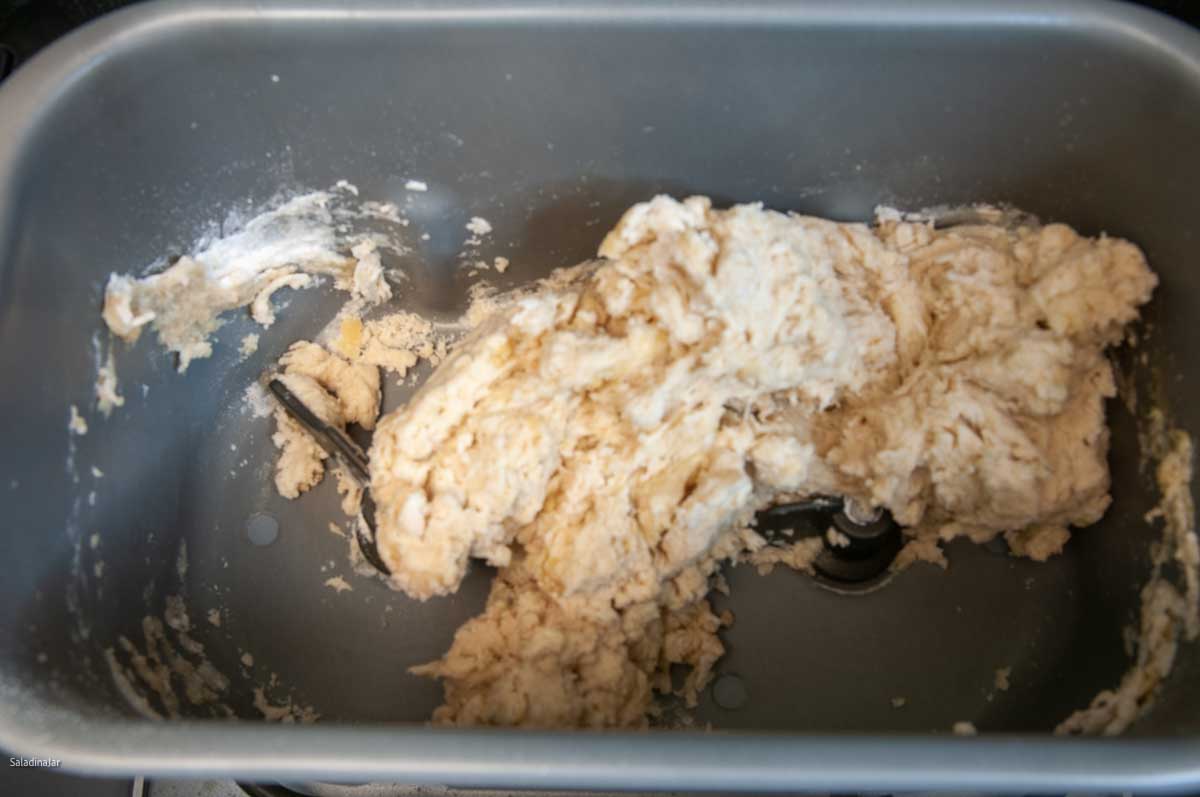
- Check dough: After 1 minute, the dough should start clumping. After 15–18 minutes, it should be smooth, elastic, and slightly sticky—sticking to the sides but pulling away cleanly. If too dry, add milk 1 tablespoon at a time. If too wet, add flour 1 tablespoon at a time, waiting between additions.Find out more about this surprising secret to success with a bread machine here.
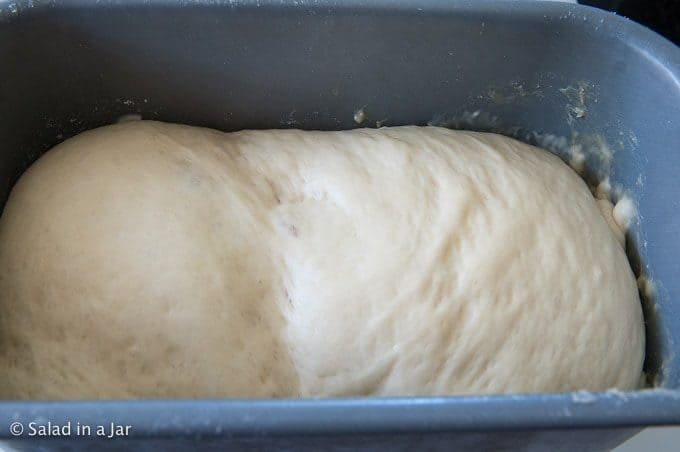
- First rise: Let the cycle finish. The dough should double in size. Leave in the machine longer if needed.
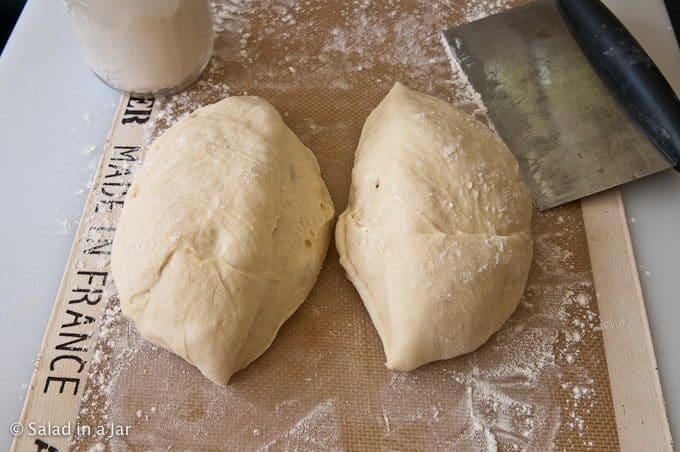
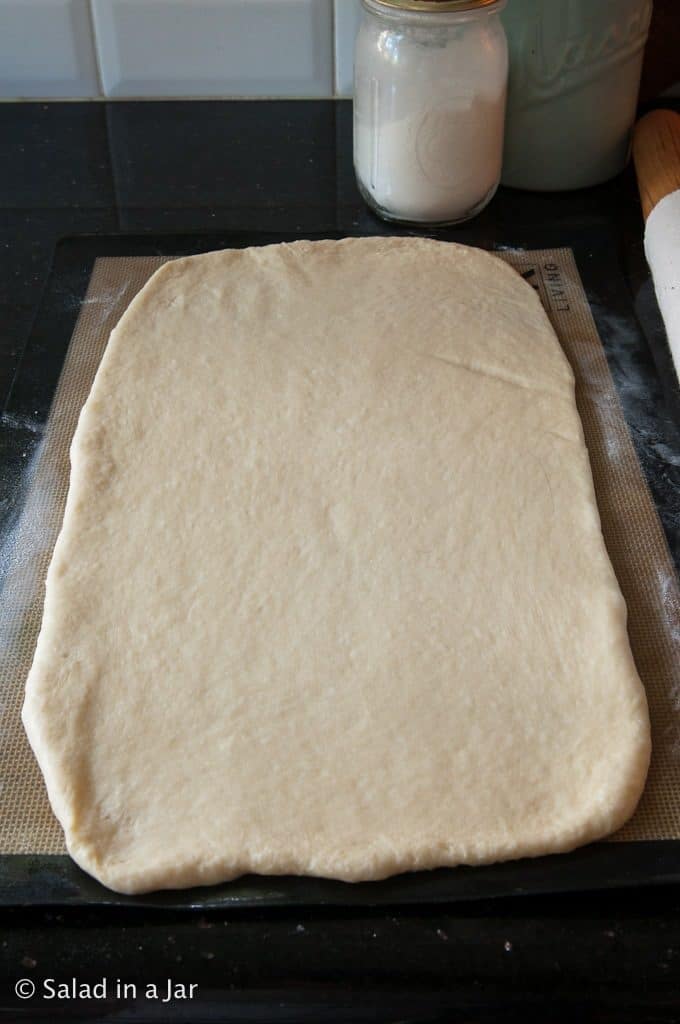
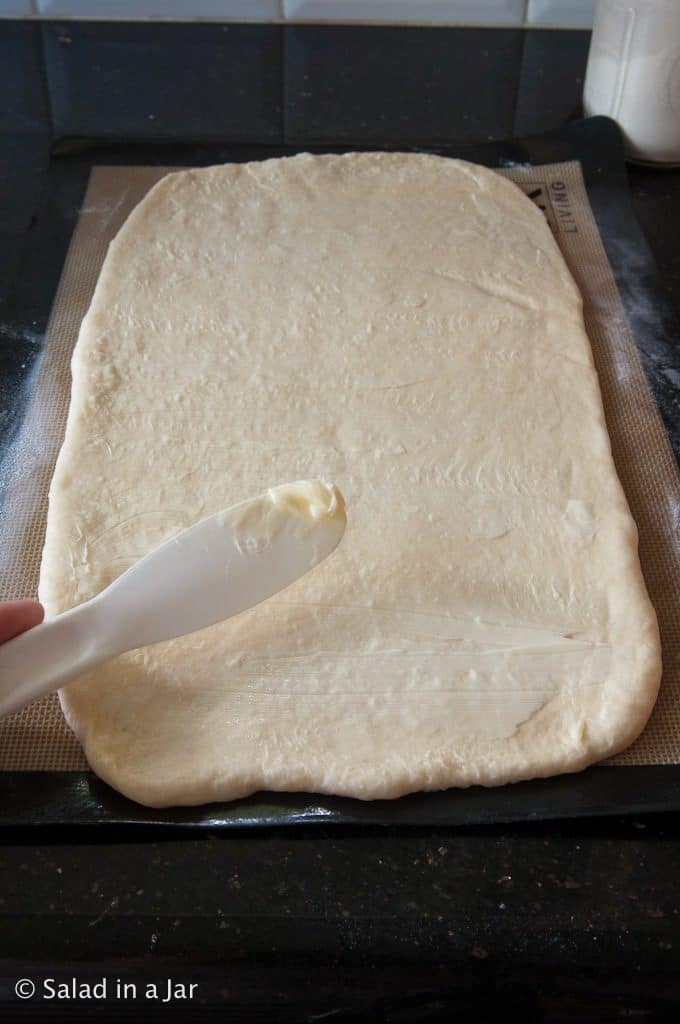
- Divide and roll: Turn dough out onto a floured surface. Divide in half. Roll each half into a 13×9-inch rectangle. (Optional: spread with 2 tablespoons (28 g) softened butter (28 gr).)
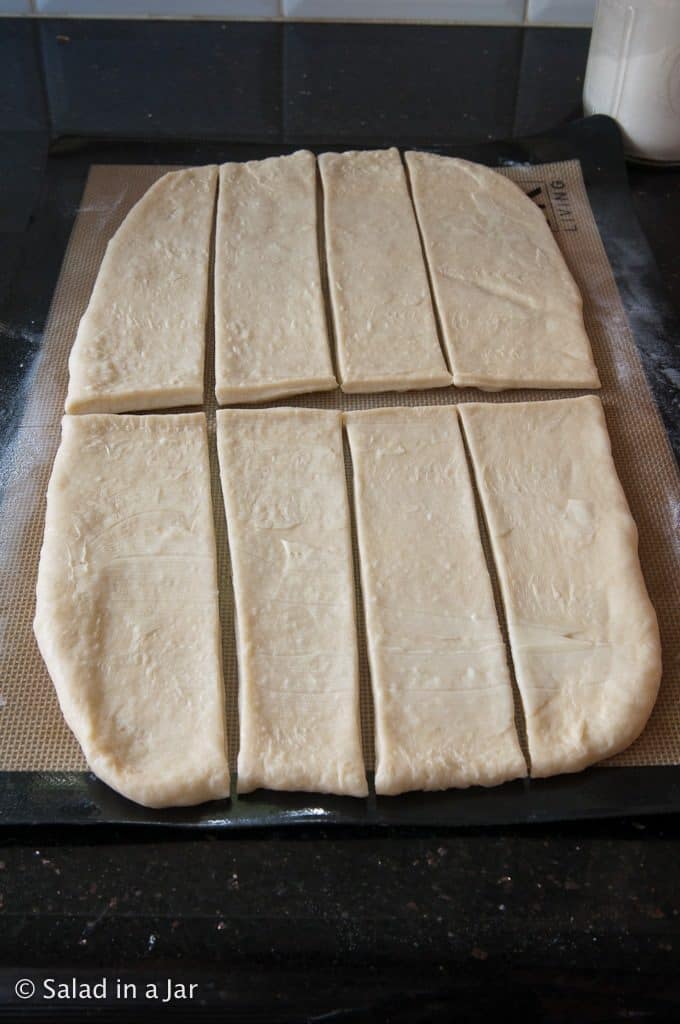
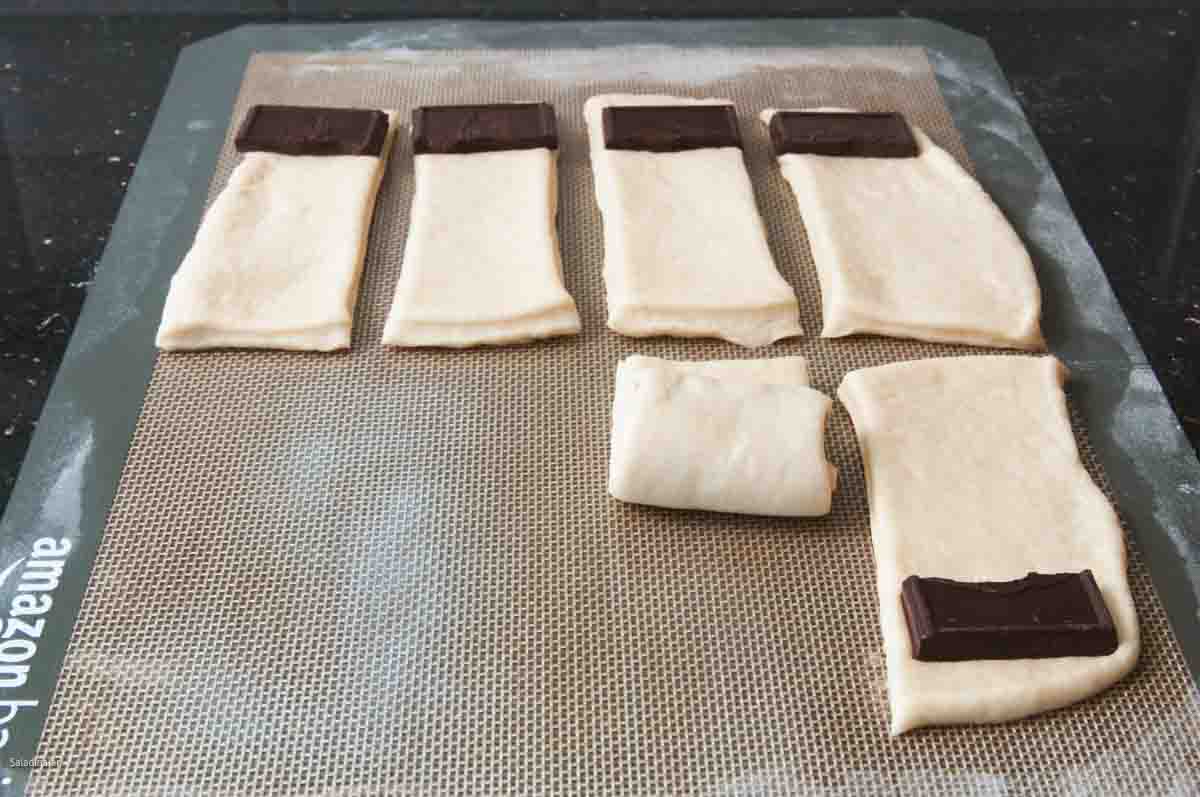
- Slice and shape: Cut each rectangle into 8 strips. Roll each strip tightly into a spiral and pinch the seam. Place seam-side down in greased 8- or 9-inch round pans.
- Second rise: Cover loosely and let rolls rise until nearly doubled.
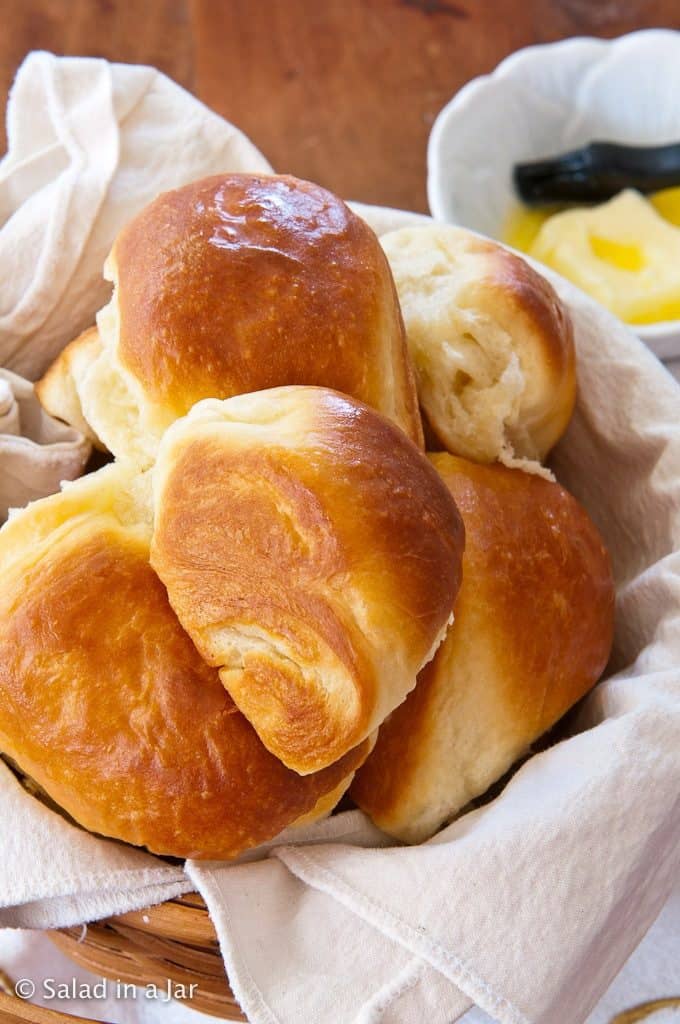
- Bake: Preheat oven to 375°F (190°C). Bake 15–17 minutes, until golden and internal temp reaches 190–195°F (88˚C)
- Finish: Let cool in pan 5 minutes, then transfer to a rack. Brush with melted butter while warm.
Notes
- Stand Mixer: Mix until moistened, then knead with a dough hook (speed 2–3) until smooth and elastic (5–10 minutes). Let rise, deflate, and shape as directed.
- By Hand: Mix to a shaggy dough, knead on a floured surface until smooth and elastic (10–20 minutes). Let rise, deflate, and shape as directed.
Optional Variations
Whole Wheat Tangzhong Rolls: Substitute 1 cup of flour with whole wheat. Everything else stays the same. Chocolate Surprise Rolls: Before rolling, place a piece of semi-sweet chocolate on each dough strip. Roll up as usual and bake. Serve warm while the chocolate is gooey.Equipment
Nutrition
All images and text ©️ Paula Rhodes for Salad in a Jar.com
Shareworthy Twists
Whole Wheat Tangzhong Rolls:
Chocolate Surprise Rolls:

Final Thoughts
Tangzhong is the secret to the soft, feathery texture that makes Japanese milk bread so memorable. Once you try it in these rolls, don’t be surprised if you start looking for other ways to use it. I suggest these Tangzhong Cinnamon Rolls or my grandson’s favorite, Bread Machine Cheese Buns.
— Paula, Home Economist
Homemade Food Worth Sharing
Need help troubleshooting?
Email me: Paula at saladinajar.com — photos help!

I mentioned i would comment when I actually made one of your breads and I finally have!
What you call Tangzhong Paste, I learned as roux (not toasted). I now know the proper term for it. But, knowing they sounded similar helped me to be able to get the correct thickness for this recipe.
I tried it in the microwave, but my timing took twice as long as I only did it for 10 seconds at a time after it started getting warm because I knew that flour and milk can seize up pretty quickly and make unfixable lumps. I think I prefer stovetop for control. but I was trying something new, right?! lol
The recipe is very straightforward and easy to follow. I followed the directions exactly. I did weigh things out versus measuring. I ended up adding almost 3 tablespoons of flour during kneading (just for others to know as all kinds of things can affect the dough).
my zojirushi turns off when opened (I saw a comment on another page that said do you had not heard of that). Yes, the turning off is irritating! lol
I made 2 loaves instead of rolls. they turned out beautifully. I would add a Pic, but, sadly, I cannot. the bread was incredibly soft.
my whole family loved it. I was slightly less enthusiastic due to the slight milky/flour taste that the roux gives it. I am picky about flavors. BUT the recipe was perfect and it came out like it was supposed to!
thank you for these posts.
Thank you for coming back to report.
You’re right that tangzhong is similar to a roux, just cooked to a thicker stage. I aim for the texture of mashed potatoes so it blends smoothly into the dough. Whisking the flour and milk very well before heating usually keeps lumps away. Microwaves vary a lot, so your stovetop method is completely fine if it feels more predictable.
If the bread felt slightly “milky” to you, try cooking the tangzhong a bit longer next time or using water instead of milk. Both mellow that flavor.
I’m so glad your family loved the loaves.
update. I did the Tangzhong on the stove and did not thicken it quite as much as the microwave try. flavor and texture were both great. not hard to make either!
Hi Patricia,
I’m glad you found the method that works best for you! So glad you reported back.
These are the softest rolls ever!!! I’ve been baking for over 50 years…these are “the best” full stop!!!
Hi Debbie,
Thank you for the affirmation. I couldn’t agree more! Appreciate you taking the time to come back and leave a comment and 5-star rating.
Hello, I always love to make this recipe. This time I plan to try it in the flaky roll shape as pictured. Can you tell me the dimension you are rolling it out to? Sorry if I am missing it somewhere. Thank you.
Hi Lana,
I’m so glad to hear you enjoy this recipe. It is my favorite roll recipe on this website. I never measure the size, since precision doesn’t matter in this case, but if you’ve never rolled out the dough this way, I can see how that would help. Go for a rectangle somewhere around 9 (short side closest to you) x 12 inches (the vertical sides as you are looking it the square). If you use a silicone mat to roll out the rolls, look at the process picture and you will get a good idea of the size based on a silicone sheet for a half-sheet baking pan. Hope this helps.
They are perfect!! Bake a little longer but overall really the perfect roll and bread recipe.
Hi Nicole,
So glad to hear this recipe turned out well for you. Every oven is different, so sometimes it takes a little more or less than it does in my oven. Thank you for writing.
Although your recipe has half the sugar I’ve seen in other recipes it still seems a lot! I’m not a fan of sweet breads like brioche so reluctant to try it without sugar in case it’s a waste. Have you ever tried it without?
Hi Elaine,
You could definitely cut the sugar in half or just use a teaspoon. Yeast bread doesn’t need sugar to work. Milk contains natural sugar, which helps. Here is an article you might find interesting. I haven’t tried this particular recipe without sugar, but I would love to know how it turns out.
10 out of 10. no notes
I don’t ever do this, but I’ve been trying different versions of milk bread for years. Haven’t been able to master it, but this one came out perfect did a loaf with one and rolls with the other and. I wish I could sleep on them. They’re so pillowy.
I love that word “pillowy.” I couldn’t agree more. So happy you like them as much as I do.
Could I use half all purpose and half bread flour in order to get just a little more chew? Also, can these rolls be rolled, tucked and pinched like a traditional roll, instead of flattened and rolled up?
Yes to any of these combinations of flour. Remember to check the moisture in the bread toward the end of the kneading phase.
You can also shape the dough however you like–balls, butterhorn, like cinnamon rolls without the cinnamon and sugar, etc. The reason I like the way the dough is shaped in that post is because it highlights the flakiness but they are good no matter how you do it. Enjoy.
Just wanted to wish you and your family a blessed Happy Thanksgiving ?. Also want to thank you for your wonderful bread recipes that will make an appearance on our Thanksgiving table. Enjoy your holidays.
Thank you so much, Connie. You’re so kind to say that. I hope your Thanksgiving was a good one. Thank you for writing. Paula
My family loves these rolls! I just came back to the website to get the recipe for our dinner tonight. I don’t remember adding a whole egg. Is that something new? I thought it used to be an egg yolk or cream? Thanks!
Hi Jessica,
Thank you for writing. Since I have a habit of tweaking my recipes (because I use my own recipes all the time), I don’t mind you checking at all. In this case there has always been 1 whole egg + an egg yolk or cream. I did adjust the amount of milk and flour slightly to make the rolls even lighter and fluffier–but not significantly. These are my favorite rolls, too. Can’t wait to make them for Thanksgiving.
First attempt at using the Tangzhong method. Followed all the steps and added an extra egg yolk instead of cream. The dough was very wet so I added 3 x heaped tbs of flour. Reset the dough setting to incorporate flour. The buns were light and fluffy but had a sad light alcohol taste.
Hi Tracy,
It’s nice to hear from you. Did you make any substitutions to the recipe or use a different-sized egg(s)? Did you weigh or measure the ingredients? This can make a huge difference. What bread machine are you using?
The alcohol taste indicates that the dough probably over-proofed at some point. High humidity or high altitude could be the culprit, but there are other reasons. Too much yeast can also cause over-proofing. Was the flour fresh?
Yes, the dough can be sticky. Depending on your experience with shaping dough (and the weather), adding a bit of flour to make it manageable (like you did) is always an option. Of course, you may want to check the dough at 15 minutes so there is still time for the dough to assimilate the flour if you decide to add some.
They turned out moist and fluffy! For years we’ve alway made the same betty crocker bread machine rolls that we loved but i decided to try this recipe because i heard about theTangzhong method. My bread machine broke but I was able to scrap it together lol. Although when I was forming the balls it was a bit sticky so I had to add 1/4 to 1/2 ish cup more flour.
Hi Sarah,
It’s so good to hear from you. I’m so sorry about your bread machine. Hopefully, you will get to replace it soon.
The failure of your bread machine is likely why you had to add so much flour to the rolls. When the dough is properly kneaded with a bread machine, it normally requires no extra flour—maybe a tablespoon or two at the most.
Best of luck, and write back anytime.
the rolls turned out great but I have a question about the recipe that has me baffled. thats not hard to do tho. I printed out the above recipe and it was great. my friend wanted the recipe so I printed her out one and on the tangzhong paste it said 2 tbl(15g) flour and on my recipe that I printed out two weeks prior said 1/4 cup flour(30g). they were both printed from the same recipe I saved to pocket. the 1/4 cup recipe was great, but which one is the right one? Just wondering…….. thanks Jack
Because I make my own recipes frequently, I can’t stop tweaking them when I find a better way. This is why I may never print a cookbook.
If the ¼ cup works for you, keep doing it. I found that my rolls were even lighter and better with only two tablespoons of flour in the paste. Also, the Tangzhong paste doesn’t get quite so thick and is easier to blend with the remaining ½ cup of milk.
The “1/4 cup” dough may be a little easier to work with because it contains more flour. Probably better for beginners. But the “2 tablespoon” version is the lightest and fluffiest, in my opinion.
If you try the new version, please let me know what you think.
I used this recipe to make two small loaves. They were so soft that they collapsed in the pan while cooling. They were baked to 200 degrees and were quite brown on top. I didn’t knead the dough much after coming out of the machine. Was the gluten not developed? Did it need a cold rise? Should I have kneaded it much more? I have made this several times and it happens every time. Is the hydration too high? What should I do?? I love the taste and texture of this bread, but want to fix this problem. Thanks for your help.
Hi Carol,
This recipe is designed for small dinner rolls. When I tried baking this recipe in a loaf pan, the sides could not support it. It might be OK if you use a larger pan so the dough won’t stand as high. Try looking for another recipe that is designed for a loaf. I do have a recipe that is absolutely wonderful for a loaf that I think you would like: Sweetened Condensed Milk Loaf. Exceptional Condensed Milk Bread: Mix in a Bread Machine. It is my favorite white loaf on this website.
Thank you for this glorious recipe. The rolls were delicious~soft and fluffy. Made them for Thanksgiving dinner and everyone loved them. They were easy to make and easy to devour!
Hi Enza,
Glad you like the rolls. They are certainly easy to devour—too easy. Not heavy at all. A huge thank you for the 5-star rating.
These rolls were the most beautiful and delicious things I ever baked! Very easy and guarantied success! Thank you!!
Thank you for the 5-star rating, Annie. I couldn’t agree with you more.
Two questions:
1. Can you form these into regular round shaped rolls rather than rolling up rectangles?
2. Can you freeze the formed rolls before second rise?
With thanks
Nancy
Belwood Ontario ??
Hi Nancy,
Yes. You can shape them any way you desire. I like the rolled shape because they seem flakier as they are unrolled when eating, and I like to emphasize that quality. But round-shaped rolls will work, too.
Yes. But remember to allow extra time for the rolls to thaw and rise before baking.
If you try them, I hope you love them as much as our family does.
You gave us this recipe once before and I’ve made it at least twice – once when we had company for dinner. They were and always are a hit. Soft and fluffy, delicious and excellent for sandwiches as the rolls stay fresh for at least three days without refrigeration. And really easy to make. My go-to dinner roll. Thanks for the recipe.
My family loves this recipe, I’ve made it a few times, I found that putting garlic butter rolled inside and baking it for 25 minutes creates a fluffy, garlic-y roll that is very well pared with spaghetti or other noodle dishes. I tried cooking it for the 17 minutes it said but it just never got cooked enough
I’m so glad to hear that your family likes these as much as ours does. Garlic butter sounds so good. I want to try that.
I’m not sure about the cooking time. It could be your oven. Every oven is different. Did you preheat it? Make a note so you’ll know for next time. Do you use a quick-read thermometer to check the internal temperature? That’s the best way to know for sure when your rolls are done. Otherwise, it’s easy to overbake them.
My family and I love this recipe! I’ve made it several times and discovered that adding a little chocolate to the middle makes for a delicious chocolate bun. I would like to make this recipe in loaf form and was wondering if you had any tips for temp and bake time. Thanks!
Hi Liani,
That is a fantastic idea about the chocolate. I’m going to try that myself. What kind of chocolate did you use? Semi-sweet?
About making a loaf with this recipe, I haven’t tried it. The bread is so soft, I’m afraid the sides would cave in. If I was trying it, I would start with bread flour to give it a little more strength. Oven temp would be 350-375˚F–I would start at 350˚F because this is a delicate dough. Be sure that the pan you use is big enough. The dough should not fill the pan more than half full when you shape it. If you try this, please send a picture to my email. I would love to hear how it goes for you.
I just made them today, absolutely delicious, thank you for the recipe. I bought a bread machine this spring and have not bought a loaf of bread since then at the store. Being from Switzerland I miss all the wonderful different breads that we have over there. This recipe is great and I will certainly bake those a lot. I even sprinkled some sesame on top.
Hi Patricia,
Sesame seeds are a wonderful idea. Glad you like the rolls. Thank you for coming back to say so.
May I say the bread is delicious? It is indeed.
Please think about making whatever changes are necessary for formatting within the body of the recipe–when you choose to double, etc. the recipe, the ingredients are doubled in the list of ingredients at the beginning of the recipe; however, the amounts referred to within the body of the recipe don’t change and this has caused some confusion and frustration. Thank you!
Hi Tammy,
You make a good point. I never double my bread machine recipes, so I honestly didn’t think about that. I will give this some thought.
These rolls were super yummy! Soft with a good flavor. I also tried making this recipe as a loaf (1.5 lb, white bread setting) and it was perfect! It will be my new go to!
Thank you for taking the time to write a note. These are my favorite dinner rolls. Glad you liked them.
I made these and shared them with a friend who lives in the same building. What a treat! and so easy to make. Thanks for the recipe.
You’re welcome, Stephen. Your friend is lucky to live close to you.
Thank you for a delicious and easy-to-follow recipe. I completed this recipe without alterations in my bread machine and they came out perfectly. They looked and tasted like professionally-made rolls, very fluffy and fun to pull apart and quite delicious.
The only thing I may do differently in the future is to cut the dough into triangles vs. cutting rectangles so that they come to a point to pinch. The rectangles held together very well, though! Thank you for a great recip.e
Hi Emily,
What you describe will work just fine. My only issue with the triangles is that this dough gets so puffy, the points have a tendency to unroll and point in a random direction. They still taste good no matter how you shape them.
Thank you for sharing your recipe! I am a novice baker, but despite that the rolls turned out great.
High-Five Gem! Maybe you’re a natural-born baker.
I can’t seem to find the ingredient list? it can be sorted out by your instructions, but its easier to have a list to follow along with the instructions, am I just missing it somehow?
Oh my goodness, Candice. Thank you for writing. I was just in there last weekend making some updates. Looks like I inadvertently deleted the actual recipe. NOT GOOD. Hugs for letting me know! ? It should be showing now.
@Paula, thanks so much! i made this recipe a couple weeks ago, turned out beautifully!
I split the recipe into two , made half cinnamon buns, and half your dinner rolls, being only two in my house this works well splitting it up like this, thanks again for the lovely recipe 🙂
Hi Candice,
This is my favorite bread recipe of all time. And the cinnamon rolls are just the best. Obviously, we are of like mind. I like your idea of splitting the batch. Are you a cheese lover? Have you tried the version with Cheddar Cheese rolled up in it? https://saladinajar.com/recipes/bread/cheesy-crusted-yeast-rolls/ Now I need to go make some Tangzhong rolls. Just thinking about them makes me realize it has been too long. Thanks so much for writing.
Paula, have you ever made this into a loaf? Just wondered. I don’t know why it wouldn’t work, but thought I would ask the expert. Thanks!
I’ve never made this recipe into a loaf, but I’m pretty sure it would work. It is the same thing as Japanese Milk Bread which is sold in loaf form all the time. Have you ever tried my Condensed Milk White Bread? Very similar but baked as a loaf.
When using the TANGZHONG method, do the 3T flour and 1/2 cup milk replace the measurements of my recipe, i.e., if my recipe calls for 1/2 cup milk and 3 cups flour, should I reduce the ingredients by the amount of the Tangzhong?
Thank you.
I think I found the answer to my question. From Kingarthurbaking, here’s how to convert a bread recipe to Tangzhong. It’s about hydration of liquid to flour (75%)
https://www.kingarthurbaking.com/blog/2018/07/23/how-to-convert-a-bread-recipe-to-tangzhong
Hi Miles,
Glad you found your answer.
These truly are the BEST dinner rolls ever. I made them yesterday for my grown son’s birthday, to accompany Shepherd’s Pie. I also made an Irish Soda bread to take.
When I took them out of the oven, my husband could not keep his fingers out of the pan! We took eight to my son’s house and we kept eight for ourselves. They were amazing! Best ever. I had attempted a Tangzhong Cinnamon Buns recipe in the past (not using my bread machine, however) and found it a little fussy. Not this one! Easy peasy and sooooo delicious.
I have tried many of your recipes and have enjoyed each of them. Your directions are clear and concise.
Hi Carol,
Your comment started my week off with a bang! Thank you for your kind words. I agree with your husband that those Tangzhong rolls are hard to resist–especially straight out of the oven.
I’m also glad to hear that the directions seemed clear and concise. I’m constantly looking for ways to make my recipes easier and often rewriting the instructions. Tangzhong Cinnamon Rolls are at the top of my list for another look. :-). Thanks.
Happy Birthday to your son. He’s lucky to have a mom who will make him Shepherd’s Pie–one of my favorites!
This recipe is amazing. The best bread machine recipe I have found. We make it into rolls, buns, baguettes. We skip step 2 in shaping the dough, and don’t add the extra butter. We just cut and shape the dough into whatever we are making. It is a foolproof recipe.
Hi Jennifer,
Thanks for the 5-star rating and kind words. So happy you liked the recipe. It is so versatile. I hope you enjoy it for years to come.
Paula, thank you so much for your email advice for making tangzhong rolls in a traditional shape instead of rolled up. I did use my stand mixer and tripled the recipe since I’m making them for Thanksgiving. It worked beautifully, light, fluffy rolls!
I really appreciate all of your work creating recipes!
I’ve used a bunch of different bread machine (and hand made) dinner roll recipes of the years. This one is my new favourite! The rolls came out just a little crispy on the outside and light and fluffy on the inside. I haven’t been able to get quite as light of a roll out of the bread machine before.
I had reverted back to making handmade rolls to stuff when making Ukrainian Pyrizhky, but I’ll be trying this recipe for them next.
Hi Paula, I don’t usually post comments but your bread posts have inspired me to try again as hand kneading is a hit and miss… and bread baked in the bread maker is…well, it could be better!
So thank you for the most detailed and wonderful recipes & explanation!!!
I’ve tried the tangzhong dinner rolls & condensed milk bread loaf (adding ham & cheese) and it’s a resounding success! Love the tangzhong method! Indeed the best dinner rolls ever! ? God bless!
P.S. I’ve made 3 recipes today! Sharing with family & neighbours but so delighted to find a fab reliable recipe!
Hi Elysia,
Your family and neighbors are so blessed to have you around. I can tell you love to bake bread. Glad you like the tangzhong method. It’s truly amazing, isn’t it? Thank you so much for writing.
An unqualified success!
First time making these. They were an unqualified success! The Tangzhong technique was super easy.
I agree. Tangzhong is not really hard at all after you do it once or twice.
We are really enjoying these rolls. As you say the Tangzhong method adds very little time. I am currently on my own, and while I could put half the recipe in the freezer, I also love cinnamon buns, so I have been dividing the dough in two and making half rolls and half cinnamon buns. There isn’t a big difference in the doughs and it works well!
My one minor concern is that I can never roll out the dough to 9 x 13”. Should I be letting it rest before rolling?
Hi Mary,
Wish you were my next-door neighbor. I would help you eat those rolls.
Yes, resting the dough will make your dough much more compliant. The only reason to roll it that thin is to more evenly distribute the filling. It will taste good either way.
@Paula,
Thanks Paula. There is another batch in my machine as we speak. Unfortunately my nearest neighbours are several miles away and we haven’t been able to get to know them as we moved during the pandemic. On second thoughts maybe a delicious batch of rolls would break the ice!
I wanted to try your sour dough recipe, but went for an easy option and made sourdough light in my Zojirushi, using the sourdough and then dough option. Turned out really well.
My favorite dinner roll recipe!
Which dough cycle on your Zo do you use?
Thanks for a wonderful recipe.
Dave M.
The regular DOUGH cycle. Glad you liked the recipe. It’s my favorite, too.
These rolls are easy to make and my family loves them. They last several days if you have leftovers.
Why do you mix the flour and milk then microwave it? My bread machine says liquid first
Hi Stan,
Mixing the flour and milk is part of the Tangzhong technique. Making the thickened mixture allows you to use a lower percentage of flour which makes the bread lighter and softer. Many people love the effect on their bread. If you prefer a more traditional method (the basis for this recipe), check out this dinner roll recipe.
Hope your rolls turn out great!
Thank you for all your wonderful information regarding bread machine baking. A lot of tangzong recipes calls for bread flour only and not all-purpose flour even for soft and fluffy milk bread. What is your opinion?
Hi Judy,
I think I may have answered you before, but I don’t see it now. My opinion is that you can use the tangzong technique with either type of flour.
I’m so excited to find your recipe! Will be making this tomorrow. Can I substitute bread flour for the unbleached all-purpose flour? If yes, 1-1 ratio? TIA!!
Yes, you can use bread flour instead. 1-1 ratio is good. Check the dough in your machine after it has been mixing 10-15 minutes and adjust if necessary.
Thank you so much!!
Just made this last night.. half dough on round pan as written on recipe and half on a 9×5 pan for a loaf. This was phenomenal… Incredibly pillowy soft!!! Everyone in my family raves about it. I’m going to make more and start reading your blog for all your bread-making tips. I’ve had my Zojirushi machine for more than 10 years but I hardly use it because I can never get it to taste as good as this. Thanks so much!!
Congrats Weiwei. So happy these worked out for you. Thanks for taking the time to write.
After seeing your list of “ 53 Bread Machine Recipes To Make Any Occasion Special”, I was telling myself : Maybe I can try to attempt ALL these – 1 bread at a time ??
Since I’ve made the 1st recipe more than once, I started with this recipe which is 2nd on the list .
I’ve never “bothered” with Tang-Zhong 湯種法 method for making bread (too much extra work), but I’m so glad I gave it a try!!!
These rolls spelled S-O-F-T! And super-d-super delicious too!!!
Yum ?
Hi Ju,
I’m glad to hear you loved the rolls. The Tangzhong technique really works, doesn’t it. Good luck with your next bread recipe.
I just made these and they are delicious! So soft and light. My husband said they melt in your mouth. He looked at a pan I just put on the rack to cool and said they were really pretty. Thanks so much. Now to try something else.
Hi Cathy,
This is music to my ears. This recipe is my go-to more than any other these days. Thanks for writing.
Easy to follow instructions and the best yeast rolls I’ve ever made
I have made this recipe twice, for Thanksgiving and Christmas dinners. The first time they were perfect second time, not quite as perfect. But I will keep making them. Many reasons for the differences. The first batch was made in Michigan, furnace running, in a gas oven and different bread maker. The 2nd batch was made in Florida, air conditioning running, electric oven (temperature could be off), different bread maker. This is why I think some recipes don’t always turn out like the pictures on the post. With that being said, the rolls are delicious and this is my go to recipe for rolls.
I love this sight and detailed recipes. After reading this post I pulled out my lonely bread machine that was hidden away for years. I made my first batch of rolls and they were a Wow! Next, I made the white bread with sweetened condensed milk. Another hit! When I came to Florida for the winter! I didn’t bring my old bread machine but was having bread withdrawal so I headed to the resale shops and found an Oster, like brand new for $5! I made my second batch of rolls and at this moment, I have the French bread in the bread maker rising. Can’t wait!
I have never been good with kneading. I used my bread maker for many years but never sold on the square loaf and tough crust. Then I came across Salad In a Jar. My bread maker will not be hidden away ever again! Thank you for teaching mow to make fantastic bread!
So great to hear from you. Glad you liked the rolls. I’m envious that you are in Florida now. Would love to join you. Enjoy your “new” bread machine.
I made these for Thanksgiving and now will make them for Christmas! They are so soft and buttery. I’m a novice with yeast breads and they actually turned out like the pictures. I didn’t have an 8” pan so had to use 9” and they were perfect! East to follow directions and I didn’t change anything. I used the cream instead of the extra egg yolk. Love these rolls!
Thanks for the confirmation, Bonnie. My favorite roll!!!
My husband can’t have milk. Can I substitute almond milk and still get great rolls?
Thanks
Hi Dianne,
I haven’t tried it but I know you can use water instead of milk so I’m guessing you could use almond milk if you want. Let me know how it turns out if you try it.
These are by far the most amazing dinner rolls I have ever had!!!! Light, fluffy, buttery (but not greasy). Absolute perfection! I can not thank you enough (neither can my family).
Thanks for posting this update. If they are anything like the original dinner rolls (which has become my gold standard bread recipe), I know they will be a hit in my house!
Hi Paula. I make your oatmeal sunflower bread all the time and have also made rolls from your recipe for the holidays. Could you use the tangzhong method with the oatmeal sunflower recipe? Love all your recipes and enjoy reading your blog so much. Thanks for sharing.
Thank you for your kind words, Connie. They brightened my day. Yes, you could apply the Tangzhong method to that bread. You would just have to work out the proportions of dry to wet ingredients. King Arthur Flour has some good advice for doing that.
Thanks for this update! My son likes those Pillsbury crescents –me,not so much. Maybe the increased flakiness of these will satisfy him. I’m always looking for ways to get away from “convenience” foods that seem more like”Frankenfood” to me.
I avoid using the microwave whenever possible. Could I do the floor and milk thing in a small sauce pan over low heat on the stovetop?
Thanks again!
Tere,
Yes, you can do it on the stovetop. I would probably burn it but suspect you are more careful. Have a good holiday. paula
Thanks for posting this update. If they are anything like the original dinner rolls (which has become my gold standard bread recipe), I know they will be a hit in my house!
Hi Robin,
I would love to know what you think after you try them. Thanks for writing!
I am very excited to try this recipe, I loved the original.
But I am confused as I’m reading it. The recipe says
1 c milk, divided
3 c flour, divided
Step 1 says use 3 T milk and 1/2 c flour to make the paste
Step 2 says add 1/2 c milk which = 8 T
These 2 amounts of milk only equal 11 T,
3 T + 8 T, and 1 c is 16 T.
So I looked at the pictures to see if they would clarify things. The caption under the first picture says 3 T flour with 1/2 c milk. Now I am more confused than ever.
Have people just been using the 3 T and 1/2 c of milk?
Help!!
Dear MaM,
Oh my. Huge mistake on my part. The captions on the pictures are right. However, I got it backward regarding the paste mixture in the recipe. And I can’t even tell you how many times I proofread that recipe. Anyway, I have corrected it now. It should be 3 Tablespoons of flour and 1/2 cup of milk to make the paste. Then add the other half cup of milk to the paste mixture. You will add the remainder of the flour along with the other ingredients. If that is not clear, please write back.
Thanks for the clarification. That’s what I figured because all of the milk added to 1 cup. I cannot wait to try this recipe. I have a recipe for the best frosting ever that starts with a paste of flour and milk too…
Thanks again for alerting me to the error. Hope you enjoy the rolls.
(And then you would also need to adjust the flour in step 3.)
I think you have a typo in step 1. Shouldn’t it be 1/2 c. milk and 3 T. flour?
YES, yes, yes. You are right, Commonsensemom. I have corrected the recipe. So sorry for the mix-up.
I don’t know what to say.
My mom has passed on for some years now and these rolls are the closest I’ve tasted to her recipe. They literally brought tears to my eyes.
I’m the only one to have kept most of her recipes in the family but she never shared her dinner rolls recipe with anyone, it went with her.
Thank you, Thank you, Thank you!
oh and the recipe was just fine in my mini breadmaker.
I just got my first bread maker and tried this recipe for the very first rolls I’ve ever made in my life. I’m the worst cook and always have disasters in the kitchen… I’m beyond proud to say that these turned out absolutely perfect!!!!!! Thank you for the recipe and advice!!! :)))
This recipe is a keeper 🙂 I just made tonight and it’s very good. My husband love it! I used all purpose flour coz I run out of bread flour, it turns out good.
Seriously, these are THE best rolls/bread that I have ever made….and I’ve made a lot. They are so light and fluffy and buttery…Omg! All 4 of my kids (8-17) LOVED them. Thank you so much!
are you leaving the dough in machine entire dough cycle ? or just for a short time?
Linda,
Good question. I leave the dough in the machine for the entire cycle. The object is to allow the dough to rise until double before you remove it, punch it down, and shape it. You can remove the dough anytime after it has been kneaded to a different bowl to rise in a warm place if you want. For example, if you need to make two batches for a large dinner party: Mix and knead first batch, remove dough to greased bowl and set in a warm place, then start over again with a second batch.
Hi Paula, I would like to add chocolate chips into the bread…should I just add it together with other ingredients before the dough cycle OR after the dough first proof and knead in?
Definitely do not add them in the beginning. Either add them when your machine beeps for “add-ins,” or if you miss that or your machine doesn’t beep, knead in by hand after the dough cycle completes. Sounds yummy.
Thanks Paula, appreciate it….will try it out this weekend, fingers crossed 😛
I made the same the other night and my husband loved them so much I am no longer allowed to buy rooms in a store! He enjoyed them so much I decided to make a leftover pot pie and use the recipe instead of a pie crust.. Needless to say that was a huge hit also! I baked the bottom of the crust slightly first so it wouldn’t be doughy and it turned out perfect!
I can’t thank you enough for this post! I’ve tried both bread and buns in my bread machine and they are always too dense and hard. These buns came out beautiful, soft and fluffy. The tip to check the moistness during the first 10 minutes was the reason I finally succeeded as I added extra water. We live in a dry climate. I also sifted the flour this time.
Wonderful web site! Thanks again 🙂
What would happen if I don’t use heavy cream and just skim milk?
Just made these tonight to go with dinner and we LOVE them! The perfect go to roll! These will definitely be replacing my usual roll recipe that I use for Thanksgiving this year. The only thing I wish I would’ve had thought to do was to use half of the dough for dinner and the other half for cinnamon rolls (I spotted your recipe after they were already in the oven!) instead, but oh well, next time!
I made these finally, and was so impressed by how they turned out. My husband loved then, and I loved the confidence they gave me!! Thanks for the recipe! Off to try some sweet bread!
Uh oh! Another successful bread maker on the loose. Enjoy!
Tonight I made your Favorite Dinner Rolls for the first time and they turned out so well! (I attached a link to a picture on facebook) Your video on how to make the rolls round was so helpful. I actually baked them in a whoopie pie pan (which is why there is a rim around the bottom.) I will definitely make these again!
Hi, Paula. I have been baking for friends for 20 years, which is kind of funny given that I myself eat an extremely limited diet due to food allergies. Nonetheless, I have always produced a product that others love—–until now. Now, I am unable to make the bagels that I have been making for years because the dough that comes out of my bread machine is unbelievably sticky, bubbly, and “strange.” I have tried checking the ambient conditions in my apartment and I have tried replacing all ingredients with fresh products. I have also cleaned the oxidation off the heating coil in my 20-year-old bread machine. I have not yet tried baking a different bread or replacing the bread machine. Before I get a new bread machine or experiment with a different bread are there other things I should check? Is there a way of checking the heating cycle of the bread machine, such as by putting it on the dough setting without the pan in place? Have I just lost my touch? 🙂
Susan,
Are you saying your dough is sticky and strange with your usual bagel recipe and only that recipe? My first inclination would be to add a little more flour. Humidity differences due to seasons and weather conditions can really affect how much flour you need. You talk about the heating coil but I’m assuming you don’t bake bagels in your bread machine so not sure what you mean about that. Temperature issues should make no difference in the quality of your dough–only the time which it takes to rise. I wonder if the belt is slipping on your machine (a common problem on old machines) and not really kneading the dough like it used to. In that case, I think you have a valid excuse to treat yourself to a new machine. 🙂
You make an excellent point about the belt, which I had not thought of. I am eager to fix this problem so that I can try your rolls—that is what this is REALLY about.
Hi! I happily ran into your website! I am a self-taught breaf machine user and I also have more than one machine and I also refuse to bake iside the machine, because honestly. . . Yuck. But, yes. . . Beautiful loaves in the right pans 🙂 So, I want to knmow about your technique regarding the dough setting. Do you use the 45 minute setting or the 1 and 50 minute setting when you say “dough setting.” I have often wondered about which one I should truly be using. Also, how long do you leave your loaves in the oven. I am always second guessing this. I use a meat thermometer to check once it is out, but always wonder. . . Anyway thanks so much! God bless.
Hi Tricia,
Please forgive my delay in answering. Somehow, your question fell through the cracks.
I always use the longer dough cycle for best flavor. The time varies with each machine but usually a minimum of 1 hr. 30 min.
Yes, you kinda have to guess at how long to leave the loaves in the oven and at what temperature. You might find this post helpful.
Hi, Thank you so much for such a wonderful recipe. I used the variation 2 cups unbleached and 1 cup whole wheat flour. They were a BIG HIT in the dinner I took them to. Yummy !!! Sure will make again again. Thanks again.
You’re welcome, Mona. Thanks for writing.
Glad to hear it Mona. Sounds yummy AND healthy.
Rolls are rising now…. very anxious to try! Such wonderful reviews.
I borrowed my mums bread machine last week and made a very poor first loaf of bread in it, but then discovered your website – I agree -why would you cook the bread in the machine and end up with a funny shaped loaf with a hole in the bottom? I tried your dinner rolls as my second ever attempt at bread. OMG they were amazing – so quick and easy to do, I just kept saying…I cant believe I actually made these!! My kids loved them too so tonight we are trying your pizza dough which is churning in the bread machine as I write. Fingers crossed it wasn’t just beginners luck!! Thanks!
I’m curious if I’m supposed to melt the butter before adding or just dollop it in it’s solid state.
Emily, No need to melt the butter. I use room-temp butter and slice it small. OR if my butter is cold, I slice it up, put it in the pan first, and pour the hot milk over it so it can get soft while I’m measuring the rest of the ingredients.
Paula, how would you prepare these for baking tomorrow? Put in fridge before they rise them let them rise next day? We tried letting them rise first then put in fridge. Ha ha ha. That was a no go. Snicker. 🙂
Hi Jacqueline,
I do not normally prepare these a day ahead. They are just so much better when all done the same day. I have occasionally used the dough for cinnamon rolls and prepared them up until the final rise and then refrigerated. You have to allow a lot more time for the rolls to come to room temperature and rise if you do that. I much prefer to use this dough or this dough when I want to make rolls the day before. Something about having potatoes in them is magic. Both of these recipes make great dinner rolls and cinnamon rolls. Again, do every thing the day before including the roll-out. Then refrigerate. Allow a couple hours for rolls to rise the next day before baking although the time will vary a lot depending on the ambient temperature where you let them rise.
They are so delicious. Thank you Paula for sharing.
Thank you for the great recipe! I tried these dinner rolls twice already, and my entire family really enjoyed 🙂 Thank you, Paula! I’m having such a great time in your blog!
My husband got me a Bread Machine ( just like yours) and I am struggling to make bread. He is from the US so loves and misses fresh bread his Mom made. So, it was lucky to find your Blog. I am going to follow your suggestions and try again to make dinner rolls.
Hi Sangeeta,
Practice makes perfect when it comes to yeast bread. You’ll get the hang of it quickly. Write back if you run into trouble.
Could you use whey (from strained yogurt) in part of this recipe??
Hi Christopher,
I’ve never tried it. I like milk because of it’s tenderizing effect. Where I would use it is in French bread.
Made these yesterday for my bella familia for the first time!! 16 rolls were NOT ENOUGH for our familia of 6! Better cooled down but still warm. These rolls don’t even need butter put on them!!! Thank you for sharing your recipe. One question…mine stuck in baking dish 🙁 was I suppose to grease bottom and sides of dish? Familia wants to make again and a batch of cinnamon rolls with this dough! We have a keeper recipe! Grazie!! Ciao!
YES! You must grease the pans. I usually spray with PAM or similar product. Even better is Baker’s Joy. I also use non-stick pans. They they will fall out in one beautiful piece and nobody will believe you made them because they look so perfect.
BTW, these do make absolutely fabulous cinnamon rolls, as you may have already figured out.
Jacqueline,
I added the part about greasing the pans to the directions. Thank-you so much for alerting me.
Looks good. I recognized the music in the background. Instrumental version of Gordon Lightfoot’s Early Morning Rain. My mom’s a big fan.
Any good proven substitute for the shortening in these dinner rolls? I just can’t bring myself to use it, and not sure how butter would work or eliminating altogether? Has anyone tried, or any suggestions?
Kathleen,
Butter is a wonderful substitute for the shortening. I don’t use the shortening anymore myself.
I LOVE these rolls! My parents want me to make them for Thanksgiving but because I’m going to need 2 batches of them I was wondering if they can be frozen before they are cooked, so that I can easily pull them out and cook on Thanksgiving? Please let me know at what point can they be frozen? After they have gone through the complete dough cycle, then made into balls, then frozen before they are set out to rise?
I’m having fun again with my bread machine because of your website.
Thanks so much
Hope
Hope,
I have tried freezing the dough balls. While they are good and better than store-bought, I don’t think they are as good as the fresh. A better option is to make the dough the night before and let it rise once before making it into balls. Refrigerate overnight. Remove from the fridge a couple hours before you want to bake them. Thankfully, you have some time to experiment if you like. Have you tried the cheesy rolls? They are fabulous for ham sandwich sliders.
Thank you Paula for this amazing blog. I am new to bread baking and have made your garlic bread yesterday and they were amazing. I have tried many other recipes before and something was always wrong. I am planning to make these dinner rolls and my only question is can I use butter instead of margarine.
thanks again.
Anu.
With the summer season coming up it is time for hamburgers and I was wondering what recipe do you use. I have tried a few of your other recipes with great results. Hope you can help. Love your recipes keep up the great job in helping us beginners.
I used this fabulous recipe as the dough for our Easter “Empty Tomb Rolls.” (To make them, dough is wrapped around a marshmallow, then dipped in butter and cinnamon sugar. After cooking, the rolls are hollow inside with a sticky marshmallow coating.) The original recipe calls for frozen bread dough, but Paula’s recipe is so much better. Thank you, and Happy Easter!
I saw recently on Pinterest that you can also put your pans on a heating pad to help the dough rise. Has anyone tried that?
I like to do as much prep work in advance. Is there any way to make the dough and then not bake these rolls for a few days? Or do you need to bake right way? If so, can you bake the night before serving? Any suggestions? Thanks!
Nothing beats rolls made immediately from fresh dough. You can bake the night before, and they are still fabulous, but there’s something about the smell of fresh bread that makes them taste so much better. I have tried refrigerating the dough and then roll out and let rise just before dinner. It works, and they are better than store-bought, but they don’t seem to rise as high as the fresh dough. Let me know if you come up with a method that works really good. pr
This reply is very late but maybe the comment will help someone. When I want to make rolls ahead of time, I make them until they are shaped. Don’t let them rise. Place saran wrap directly on top of the rolls and put in the fridge. They can stay there for up to 48 hours (but really, 24 hours is better). Pull out of fridge and let rest at room temp for 30 minutes before baking. I’ve done this countless times with much success. I got the tip from a cookbook years ago. Hope it helps!
Hi Megan,
Thanks for sharing this trick. I agree that 24 hrs is better than 48.
Sorry for a silly question but do you beat the egg at all before you put it in or just put it in whole? Thanks.
Always beat the egg.
Christopher,
I never beat the egg. Comes out perfect anyway. 🙂
Thanks for that tip Paula! 🙂
I made these on Monday and my kiddos are already begging for more! What a hit! Thanks so much for the great recipe and the video tutorial for this inexperienced baker!
Uh oh! Now you’ve started something you may have to continue for the rest of your life. It’s a great tradition–mama’s homemade rolls. Makes any meal more special and delicious. It’s also cheap. When my boys were young and we were poor, we ate a ton of homemade bread. Filled them up and saved money.
I just wanted to let you know, that I make the round pieces and then I put them in a cupcake pan and let them rise and bake in there. I love the shape…reminds me of brown and serve rolls my mom used to buy at the store.
Cheryl, Thanks for writing. Good idea. I have done it myself in the past but I prefer the softer crusts you get when you put the rolls all in one pan. They look cool though. pr
I am so glad to have found you. Just began making bread, grinding my own wheat etc. and have not had much success. My baked bread looks nothing like yours and while it is good it’s not delicious. I have so many ideas from you I am actually looking forward to trying again and being able to use my bread machine just for dough! Keeping my fingers crossed.
Hi Karen,
Welcome! So glad to hear from you. I have not tried grinding my own wheat although my sister keeps encouraging me. I know it takes longer to rise so it may have to sit in your bread machine longer than the cycle to rise to double before you make it out. Let me know how it goes. Paula
My dough is in the bread machine right now. I’ve not used this recipe before so I thought I had better make a test run before tomorrow. Nothing like waiting until the last minute. My husband is disappointed that I am not making my grandmothers angel biscuits (really soft rolls- don’t know why they are called biscuits). They are soooo labor intensive that I am hoping these will win him over and he will be a convert!! I love, love, love your site. Especially the microwave shortcuts. (made the brown butter icing last week for cinnamon rolls…AMAZING! Took them to a whole nother level.
Suzanne sent me this link to these rolls. I love this recipe. Super easy and fast. And I love the whole wheat option. Thanks you for publishing these.
Thanks for the tutorial on making rolls. I’m 73 but didn’t start making yeast bread until I purchashed a bread machine a few years ago. Now I use my mixer and love to make yeast bread. I need to make rolls for our small group Christmas Dinner and I wanted them to really be nice so the tutorial really helps. I will try it soon. I am always anxious to look at your blog every time it hits my mail box. Thanks again. We’re never too old to learn new trick. : )
Hello!
First, I have to say, your website is just jam packed with amazing recipes.
Actually, I’ll be making some cheesy dinner rolls for Thanksgiving.
Second, have you ever heard of Malt Powder? It’s supposed to help the yeast mature
to its fullest and enhance flavor. Maybe this will help in the making of wheat bread.
I’ve never used it though. I believe I’d have to buy it at a specialty shop or natural
food shop.
I don’t think I ever commented on your blog how much I LOVE these rolls! They turn out so tender and soft. Thanks so much for sharing! Just noticed you make cinnamon rolls with the same dough, looking forward to trying that myself!
Stacie,
Thanks for coming back to say so. I’m working on a whole wheat version right now. Just as good.
Hello, I’m a newbie to the bread machine and so this question may seem silly: Can I put the ingredients for any recipe in there and press the dough cycle if I don’t want it to bake in there? I have a book with recipes, but the directions explain what buttons to push for it to bake inside… And as you’ve suggested, I’d like it to only make the dough so I can shape it and bake in the oven. Thanks!
I love your recipes. You are amazing. Thank your for being so kind to share and spreading happiness all over the world. Is there a stage of the sweet milk bread, where you could freeze it and take it out and let it thaw, rise and bake?
I followed the link to this recipe from your post on bread machines (I love mine for the exact same reasons!). Have you ever tried freezeing these for future use? Thanks
Cecelia
Cecelia, I have frozen them before. Not as good as straight out of the oven but good enough if you don’t keep them more than a couple weeks.
Thanks for the feedback Paula. There are only two of us in the house and it’s nice to be able to freeze some items for future use! I’m making these tonight for dinner with friends.
These dinner rolls are the absolute best! My family thanks you for the recipe… I have made them twice a week for the past few months, and they never get tiring. They are light & fluffy, and a definite keeper. Thanks!
Hi Paula,
I would like to share your dinner rolls recipe with my sister in lawabroad. Can she use all purpose flour instead of bread flour since she can not find bread flour at her local grocery store? It would be her first time to bake bread and she is very excited to do it. Thanks.
Yes, she can definitely use all purpose. Unbleached is better than bleached but bleached will also work. Normally, you have add a little more flour if using unbleached instead of bread flour and maybe even more if using bleached flour. I hope it works out for her. Working with yeast dough is a little tricky and takes practice.
I always use all purpose flour instead of bread or cake flour. I find that if I sift it first…It makes it really light and fluffy and the bread/cakes come out perfect. Good luck 🙂
Agreed Linda.
The chocolate mini bundt cakes look so good. Would it be possible to request for the recipe? My 3 1/2 year old son loves chocolate cakes. I would like to bake it for him. Thanks
Thank you for your favorite dinner rolls recipe. I used your dinner roll recipe tonight with the use of bread flour. Like you said, it was so soft, tasty and light. Everybody in my family enjoyed it.
these look truly delicious.