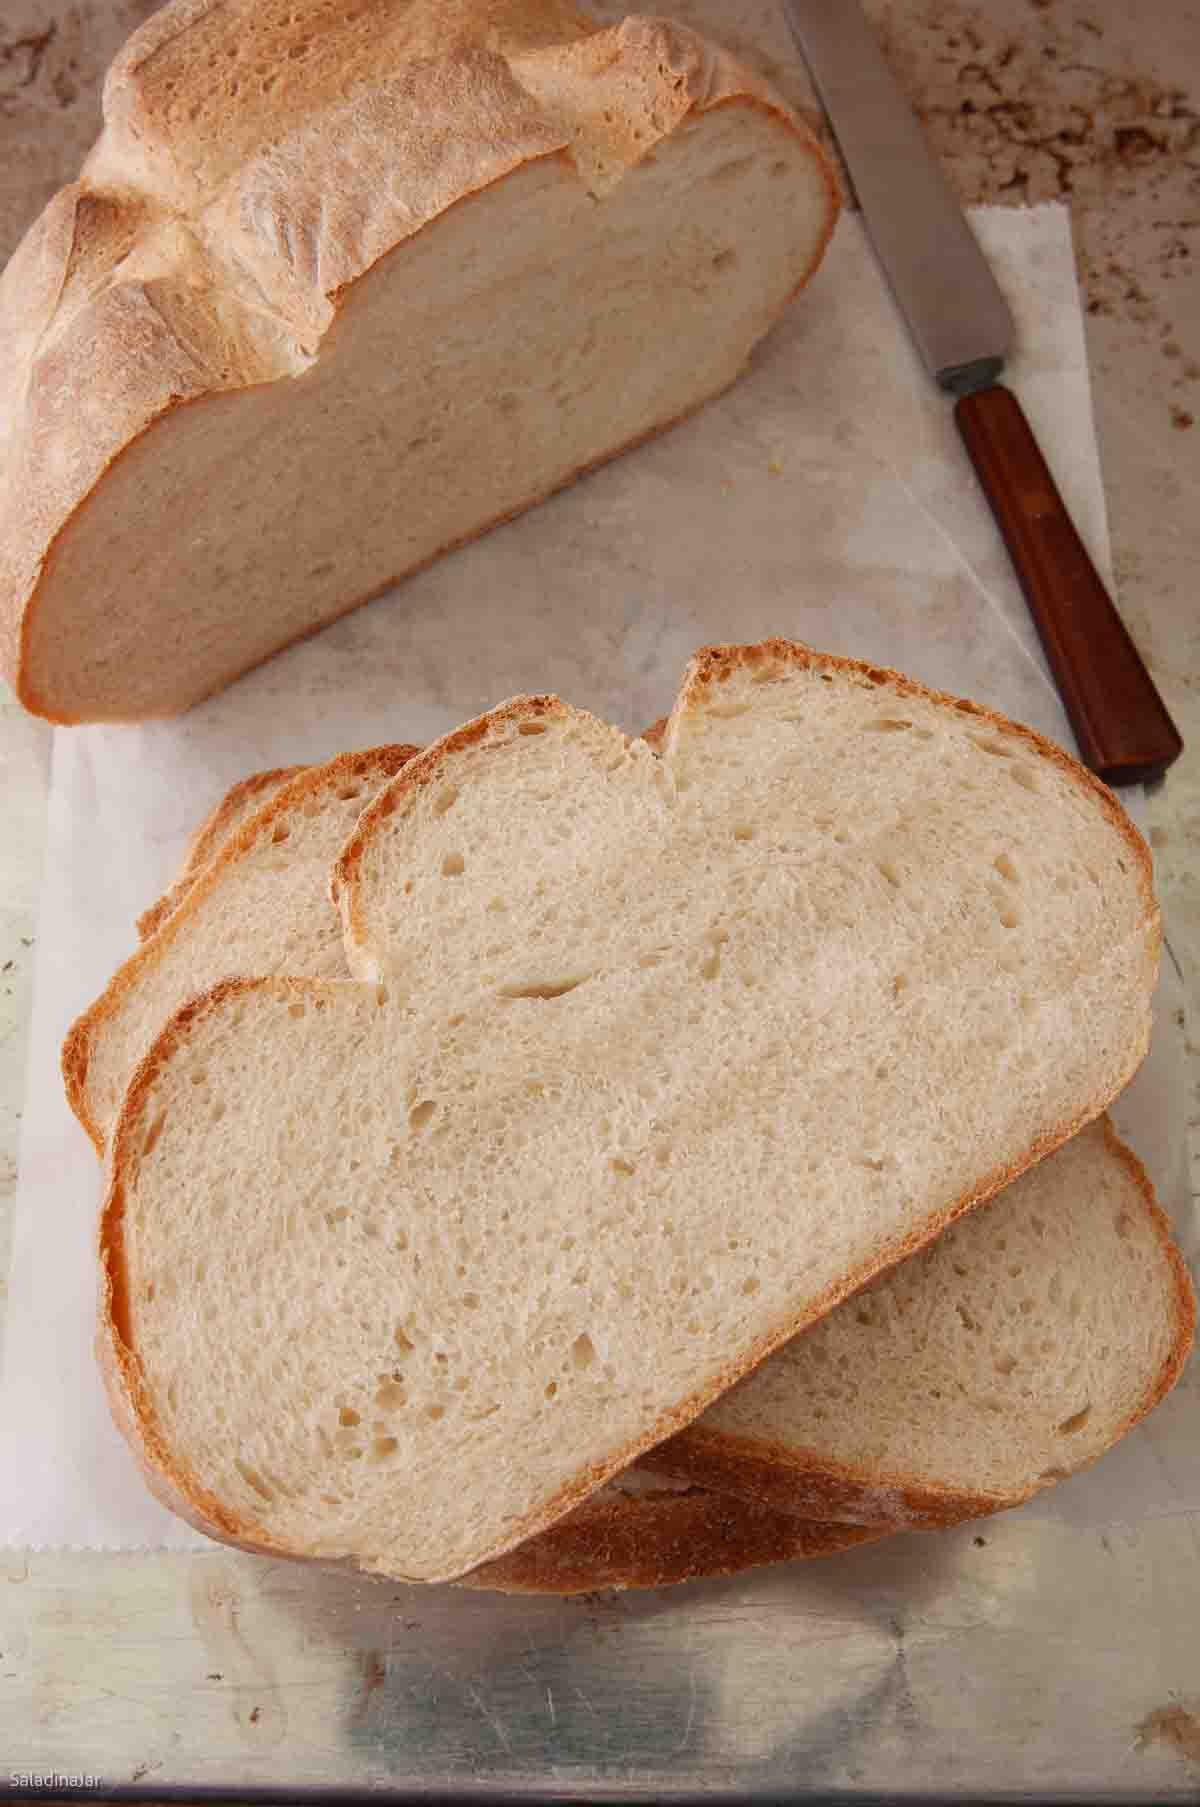
Rustic Crusty Bread: Simple Bread Machine Recipe You’ll Love
Sneak Preview: This rustic Crusty Bread Machine Recipe starts life with a simple sponge mixture the night before. Complex, yeasty flavors and a crusty exterior are your payoff for thinking ahead.
As an Amazon Associate, I earn from qualifying purchases.
Are you looking for bread to dip into olive oil or sop up the tasty juices from your entree? Do you want rustic bread that won’t require you to knead by hand? What if it only has five ingredients?
Please note: You won’t get big holes and spider web texture with this recipe. It’s not that kind of bread. If that’s what you’re after, check out my Ciabatta Bread for a bread machine.
Why This Bread is Especially Tasty
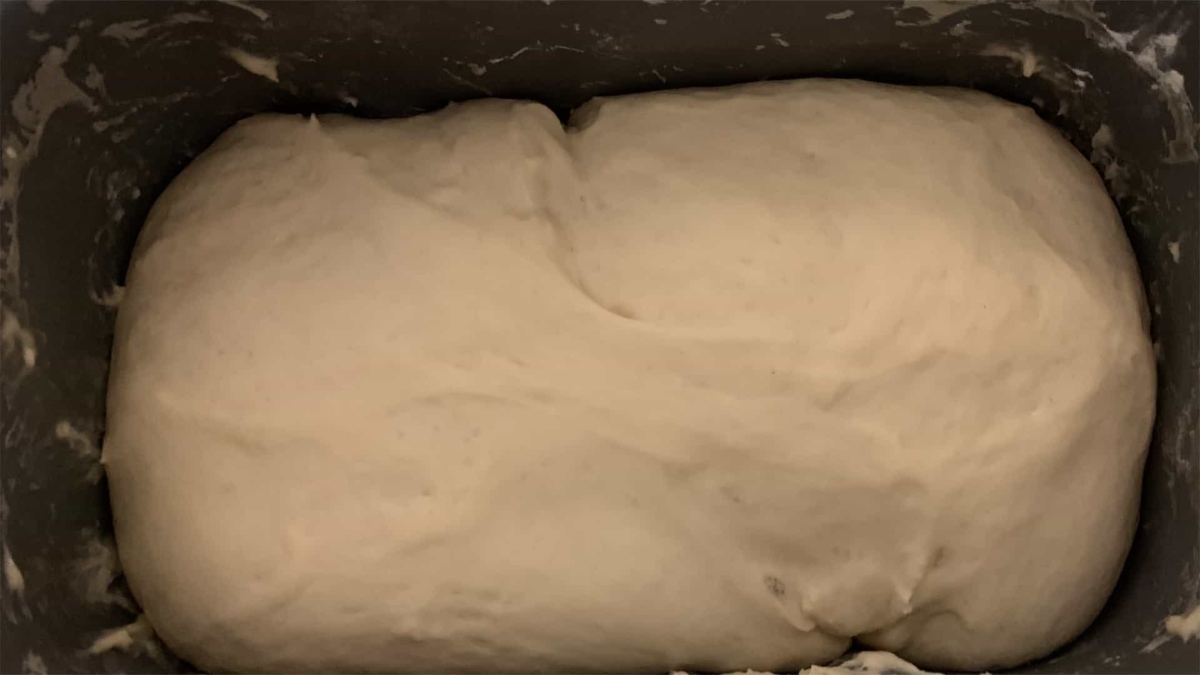
This crusty bread starts life as a “sponge,” also referred to as a biga.
A “sponge” sounds gross, but this mixture looks like a sponge after it rests for several hours. Don’t you think?
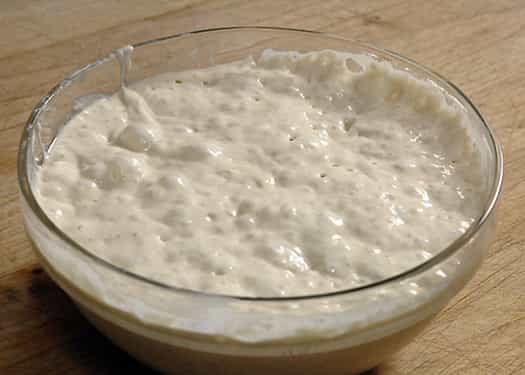
After the sponge has developed for 6-8 hours (or overnight), add the remainder of the flour, water, and salt to the bread machine pan to make the dough.
Ingredients and Substitutions
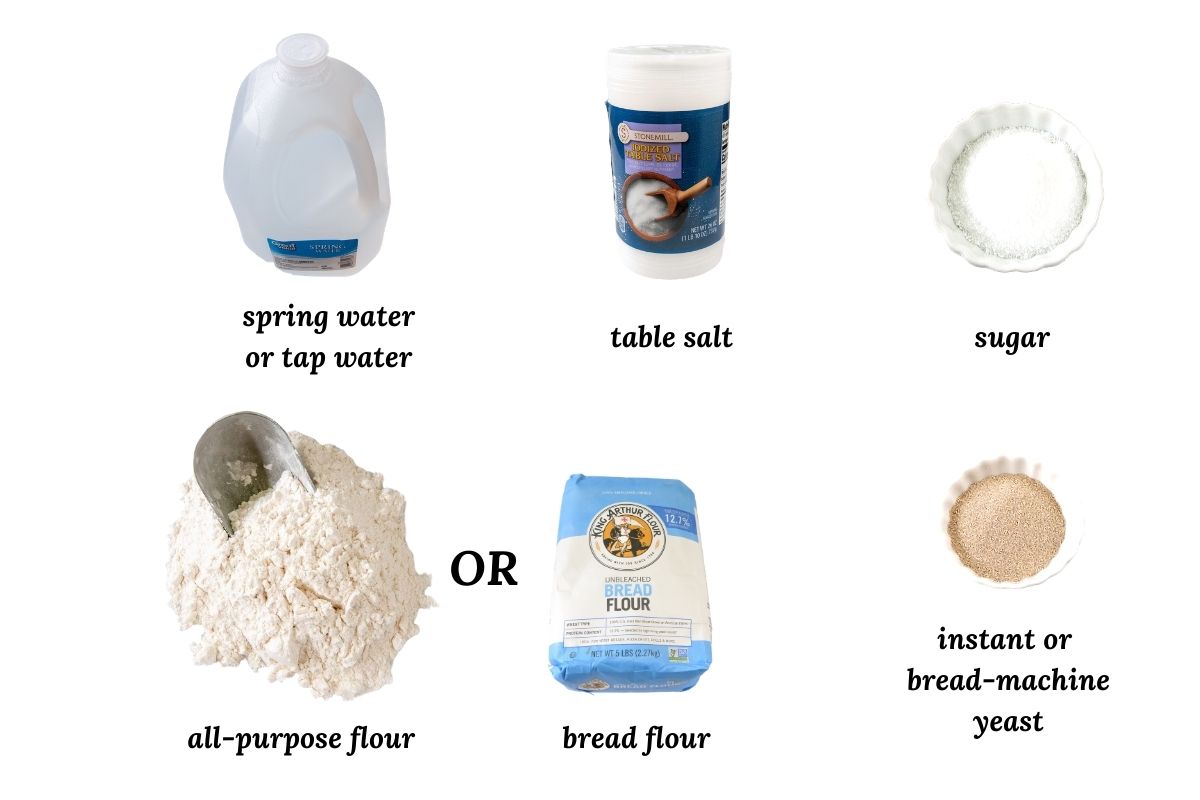
FLOUR: Use all-purpose, unbleached flour. Substitute bread flour. Please weigh flour for best results.
YEAST: Instant, bread machine, or rapid-rise yeast. They’re interchangeable.
WATER: Spring or tap water. No need to preheat the water when using a bread machine.
SUGAR: Optional–adds a touch of sweetness and enhances the crust color.
SALT: Use table or sea salt. For Kosher salt, add ¼ teaspoon more. For traditional Tuscan bread, omit salt entirely (affects the rise time).

How To Make the Dough Using a Bread Maker
⬇️ Jump to the recipe below for exact amounts and detailed instructions.


Rustic Crusty Bread: A Simple Bread Machine Recipe You’ll Love
Video
Ingredients
Sponge or Preferment:
- 1 cup (227 g) cold water
- 1½ cups (180 g) unbleached, all-purpose flour
- 1 teaspoon instant or bread machine yeast
Dough:
- 3 tablespoons (43 g) cold water
- 1 teaspoon sugar optional, but it makes a nice crust
- 1½ teaspoons salt
- 2 cups (240 g) unbleached, all-purpose flour
- ¼ teaspoon bread machine or instant yeast
Instructions
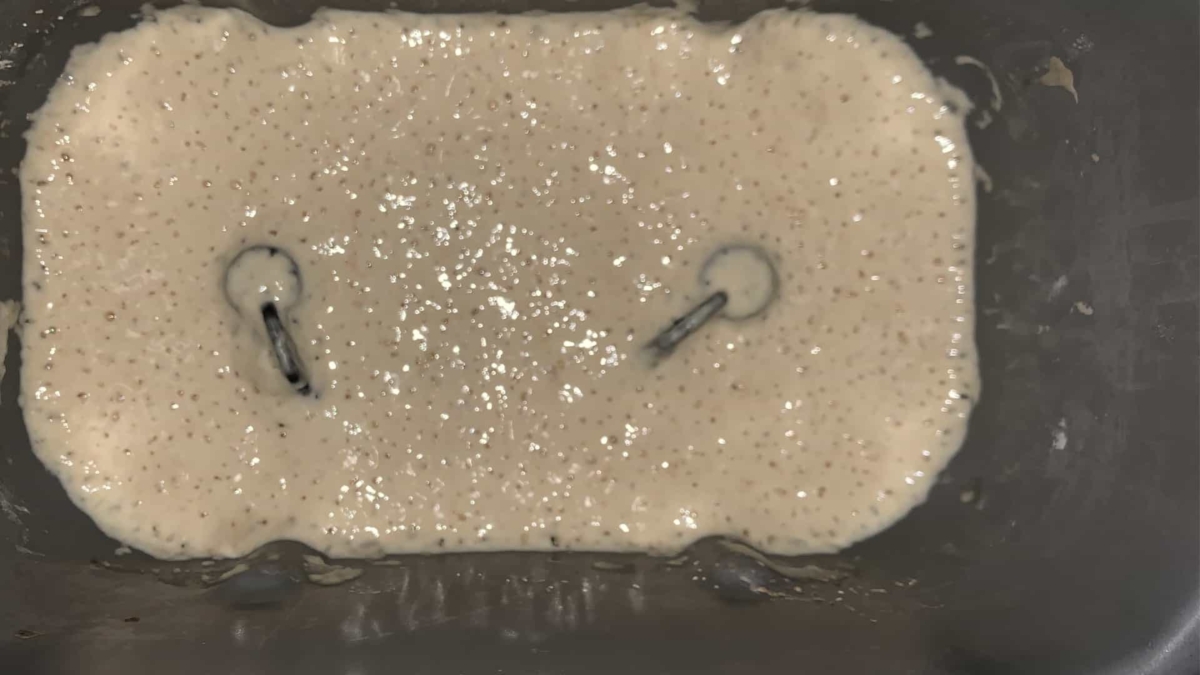
- Make the Sponge: Add 1 cup (227 g) cold water, 11½ cups (180 g) unbleached, all-purpose flour, and 1 teaspoon instant or bread machine yeastt to the bread machine pan. Select the DOUGH cycle and let it mix for 1 minute. Use a small spatula to push any dry flour from the corners into the mixing area.Unplug the machine, close the lid, and let the sponge sit at room temperature overnight (8 hours). Do not let it sit for more than 16 hours.
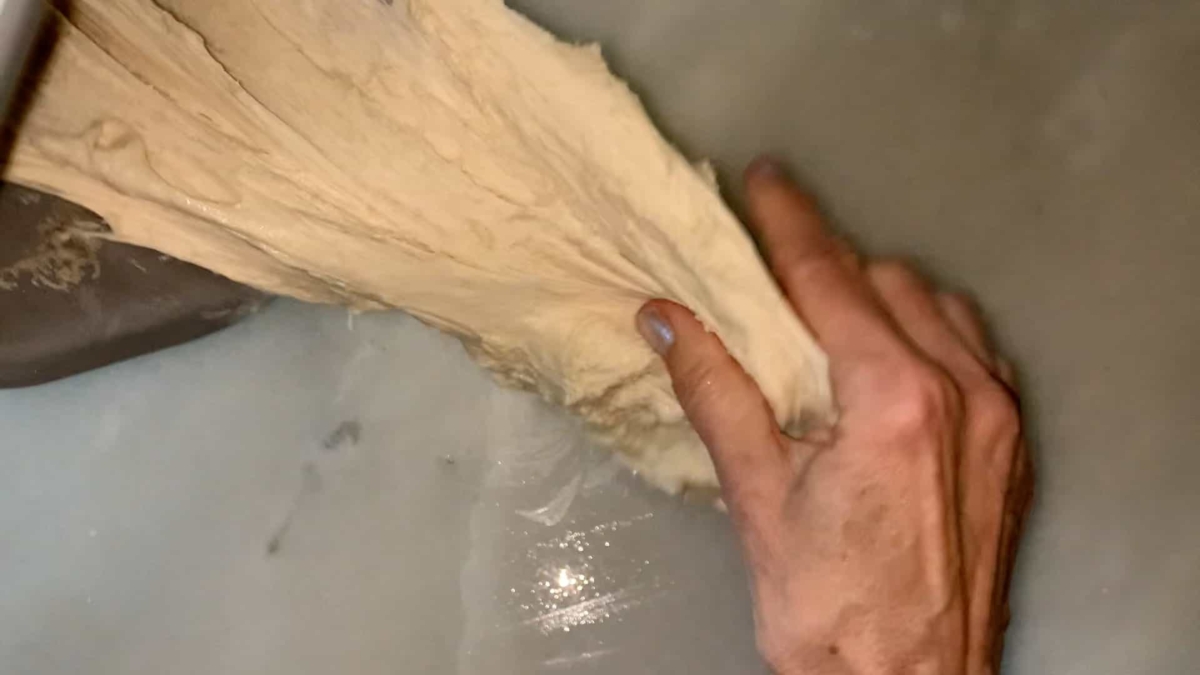
- Make the Dough: Open the lid and add the remaining ingredients: 3 tablespoons (43 g) cold water, 1 teaspoon sugar, 1½ teaspoons salt, 2 cups (240 g) unbleached, all-purpose flour, and ¼ teaspoon bread machine or instant yeast. Restart the DOUGH cycle.After 5–10 minutes of mixing, check the dough: It should form a smooth, slightly tacky ball. If too dry and bouncing off the sides, add water 1 tablespoon at a time until the dough sticks to the sides, then pulls away cleanly. If too wet, add flour the same way.When the DOUGH cycle ends, check if the dough has doubled in size. If it hasn’t, leave it in the machine (turned off) to rise longer. Rising may take more time in cool kitchens.
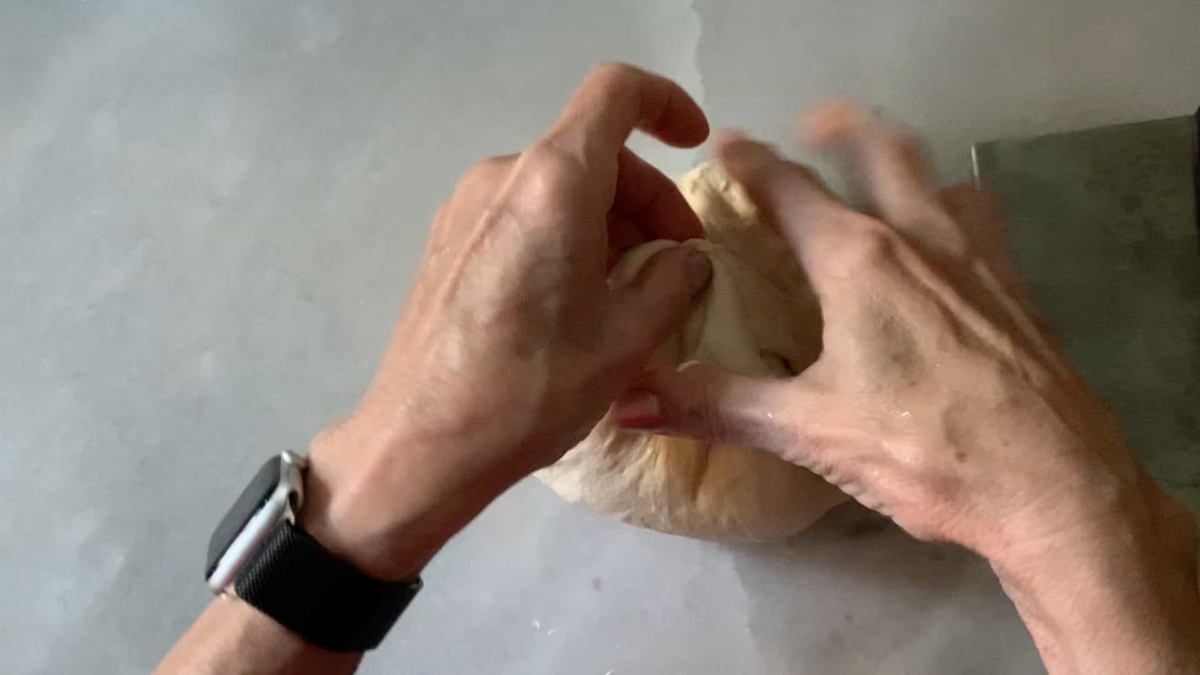
- Shape the Loaf: Transfer the dough to a lightly floured surface or silicone baking mat. Shape it into a smooth ball by pulling the dough edges underneath until the top is smooth. Pinch the bottom to seal.Place the shaped dough on a parchment-lined baking sheet. Cover loosely with oiled plastic wrap or a tea towel. Let rise in a warm spot until almost doubled.
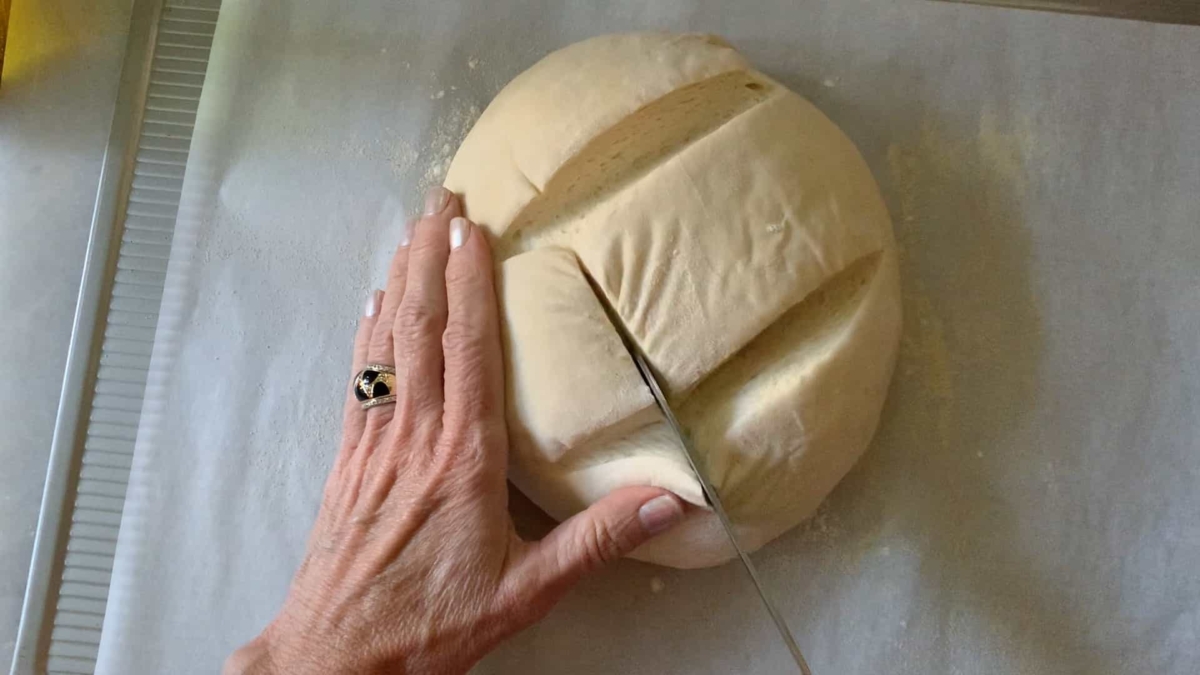
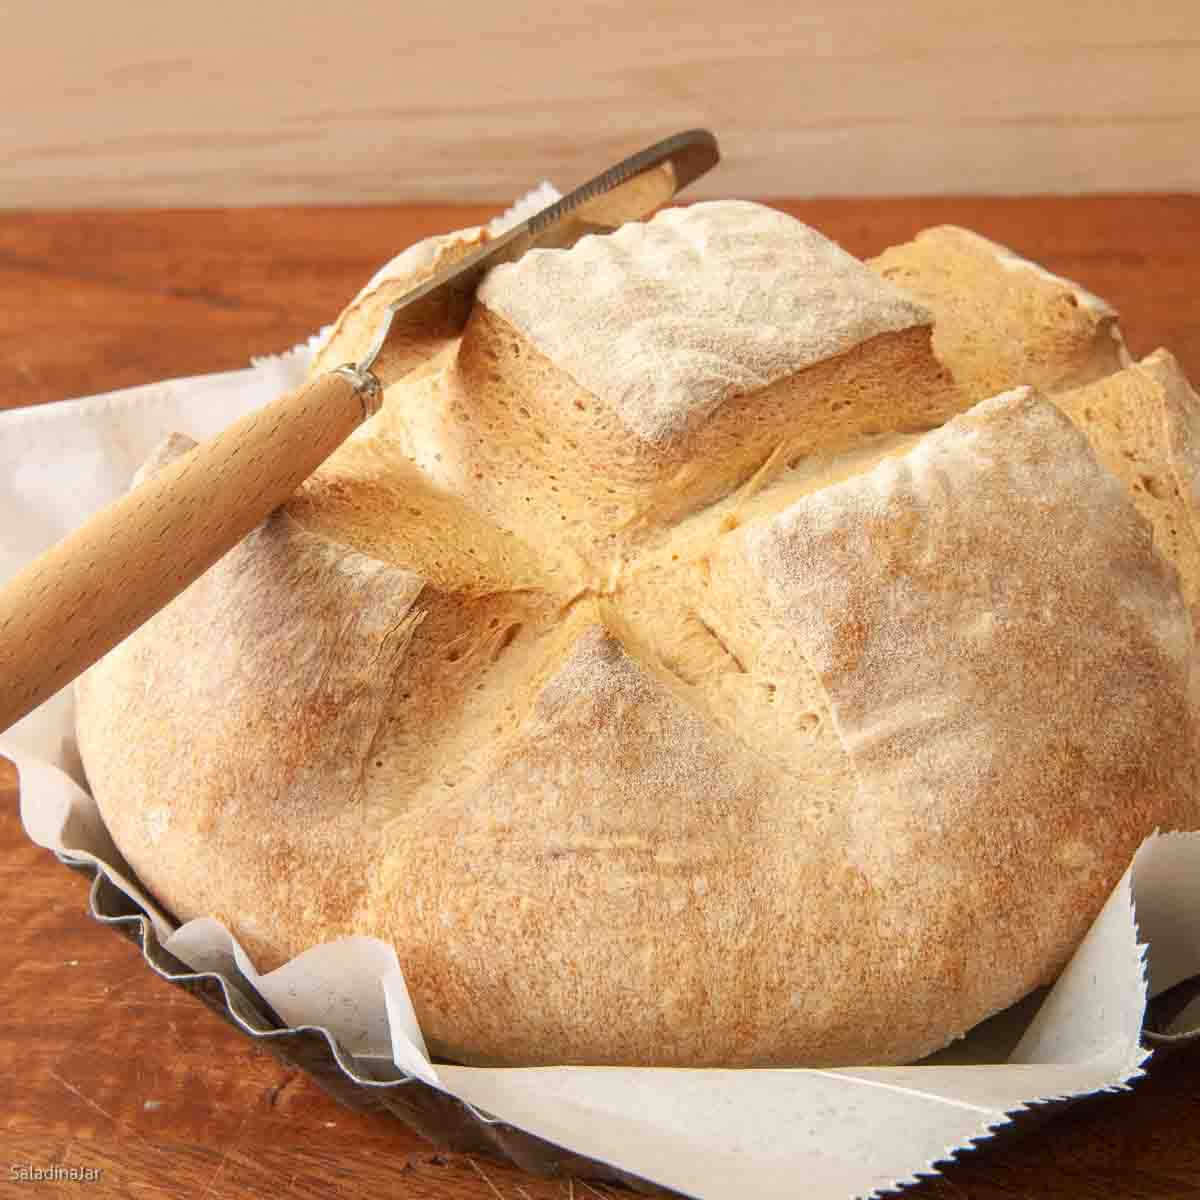
- Baking the Loaf: Preheat the oven to 500˚F (260˚C) about 15 minutes before baking.Just before baking, sprinkle the loaf with flour if desired.Make several slashes across the top (½ to 1 inch deep) using a sharp serrated knife or razor blade.Lower the oven temperature to 425˚F (220˚C) and bake for 30–35 minutes.The loaf should be golden brown and have an internal temperature of 200˚F (93˚C).
- Cool completely before slicing. For clean slices, wait at least an hour before cutting.
Notes
1️⃣ Add ingredients to the bowl in the listed order.
2️⃣ Mix on LOW until moistened, then knead on speed 2 or 3 with a dough hook for 5-10 minutes until smooth and elastic.
3️⃣ Cover and let rise in a warm place until doubled.
4️⃣ Gently deflate and shape as directed in the recipe. ? By Hand:
1️⃣ Mix all ingredients into a shaggy dough ball in a large bowl.
2️⃣ Turn onto a floured surface and knead for 10-20 minutes until smooth and elastic.
3️⃣ Place in a greased bowl, cover, and let rise until doubled.
4️⃣ Gently deflate and shape as directed. ? Yeast Tip: Using active dry yeast? Increase by ¼ teaspoon. It no longer requires dissolving, but you can if preferred.
Equipment
Nutrition
All images and text ©️ Paula Rhodes for Salad in a Jar.com
FAQs
- Can I bake this entirely in a bread machine?
- Yes, but the crust won’t be as crisp.
- The loaf will always be the shape of your bread machine pan.
- Do I need a bread machine for this recipe?
- No, you can mix by hand or use a stand mixer. See the recipe notes.
- How long will it stay fresh?
- Best eaten within 2–3 days. Freeze for longer storage.
Final Thoughts
This bread requires a bit of planning, but the payoff is a flavorful, chewy loaf with a golden crust. The hands-on time is minimal—most of the magic happens while you sleep.
Need help troubleshooting? Please email me: Paula at saladinajar.com–photos welcome!

I have been making my own bread using a bread machine for years, and like you, the extra effort of baking in the oven is the only way to go. I love your website and can’t wait to try some of your recipes, especially this one. I was recently given a mill and some hard white wheat berries. I have only made one batch of bread and it was definitely worth the effort. However, I know that freshly milled flour is thirsty, and have no idea how to make the adjustments. Any guidance would be appreciated.
Hi Nancy,
Freshly milled flour is one of my favorite subjects although I don’t talk about it much on this website because it’s not the best place for beginners to start. Since you have made bread for years, I won’t go into detail, but here are some quick tips. 1. How coarse or fine your flour is will make a big difference in the texture of your bread. I go for “baby powder” texture. Grinders vary greatly in what they produce. 2. When making 100% whole wheat recipe, a pre-soak (without yeast or salt) will make the texture softer if that’s what you like. 3. My habit of checking the dough after 15-18 minutes of kneading in the bread machine is super important with fresh-milled grains. This is the time to add more water or liquid to enable the dough to “stick to the sides, then pull away cleanly.” See this post if you haven’t read it before. Hope this helps. p.s. Whole grains make bread dough rise faster. Watch the rise and pay no attention to the clock.
Can this bread be baked in a cast iron skillet for more crispy
Hi Barb,
Baking in a cast iron skillet would make the bottom more crusty. To get the rest of the loaf crispy, try using steam in the oven, especially during the first part of the bake. Or, you could try baking in a Dutch oven with the lid on for the first half of the bake which will essentially steam it. Remove the lid halfway through the bake so the top with brown and crisp. If you try these things, I would love to hear how it works for you.
Do you think I could use freshly ground white whole wheat in the sponge? I have had the best bread when I use your recipe. Is bread using a sponge as nutritional as sour dough bread?
Hi Jill,
Nutrition is a loaded word, so I’m not sure I can make any grand claims about that. You can use the white whole wheat in the sponge, but you might want to add a touch more water since we both know freshly ground grains are thirsty!! The rustic crusty bread won’t have the same predigested flour that you find in sourdough. The sponge mostly adds flavor. I haven’t tried this bread with fresh grains, but I think I will give it a go.
I like having a sponge or biga to make the day before making bread. It’s so good toasted. My family likes the bread made using a sponge.
Hi Jill,
I’m beginning to think I want to join your family since you make so much good bread. Thank you for the great testimony.
Hi Paula. I love your site and recipes. I have the Zojurshi (sp?) bread machine and how do I start the dough cycle mixing right away? Usually it heats up for a bit. Do I wait until it heats up and then make sure it only mixes for 1 minute when it starts the mixing portion? Hope my question makes sense. Thank-you Paula!
Hi Linda,
If I’m understanding you correctly, you are asking how to disable the preheat cycle. See this post for how to do it (with a Zojirushi, of course) and why. That explanation is close to the end of the post.
I made this exactly as you said and it turned out perfect. Served it with ratatouille and it was wonderful. I love all of you recipes.
That sounds like a fantastic meal! So glad you enjoyed it.
All the previous recipes I have tried have come out amazing! I’m not sure what went wrong but, when I took the dough out of the bread maker the whole thing collapsed. I would appreciate any words of wisdom. Thanks!
Hi Andi,
It sounds like the dough may have overproofed. This can easily happen as the weather gets warmer. See the letter I sent you for whaat to do.
Can this be baked in a loaf pan?
Hi Linda,
I haven’t tried it. Let me know if you do.
I thought Tuscan bread was supposed to be made without salt?
Hi Sue,
Yes, you’re right. Traditionally, Tuscan bread is also eaten with salty accompaniments like prosciutto and salty cheese. Without salt, bread is bland. That’s why I don’t advertise this recipe as “Tuscan bread” in the title. However, because of your question, I did add a bit more explanation to the post as to why this crusty bread is not a traditional Tuscan bread recipe. Thanks so much for writing.
Beautiful! I usually have bad luck with bread machine crusty loaf. The sponge is the key to this bread’s success in my opinion. Worth the extra step for such good results.
Thanks!
Hi DFG,
I agree. Although some people think it’s too much trouble, the sponge improves the flavor and texture exponentially.
Your bread recipe. Is a thumbs up! I’ve made it 3 times and it’s always wonderful! Thank you!
Sandra, Thanks for writing. Glad you love it!!
I’m new to this breadmaking game and, after several disappointing results, I stumbled upon your site. I avidly read all your tips and tricks and decided to try this round loaf. It had a lot to live up to because we live in France and regularly buy the French ‘boule’.
I finished baking this bread today and we ate some tonight with our meal. My goodness, it’s EQUALLY as good as any bread we’ve bought in the 22 years we’ve lived here. I’m SO pleased and relieved that I can finally lay claim to baking a cracking good ‘boule’ – yippeee!
Merci, Paula! I’ll be using this recipe on a very regular basis!
Hi Ruth,
What a day-brightening email! I’m so glad you found my site. I appreciate you taking the time to write and let everybody know how much you liked it. May you enjoy many more delicious boules.
Can this dough be frozen?
Hi Carol,
I have not experimented with freezing this dough. In general, I don’t freeze raw yeast bread dough. It never seems to rise as well in my experience. However, I know that grocery stores sell frozen dough. Who knows what kind of additives they add to preserve it.
On the other hand, this dough can be chilled in the refrigerator after the first rise. I would try to use it within a day or two.
Hi, In “This Crusty Bread Machine Recipe” how much water do I use ?
The amount is listed in the recipe at the very end of the post. You will need approximately 270 grams of water. 1 cup to make the biga and an additional 3 tablespoons when you go to make the dough the next day.
Makes a great loaf
Hi Paula, which herbs or spices enhance the flavor of the different bread? Thank you for your help. Blessings.
Hi Elizabeth,
For this recipe, a teaspoon or two of Italian herbs would be interesting. Roasted garlic or toasted dried onions would also be fabulous. The great thing about making your own bread is you can experiment to your heart’s content.
@Paula, Thank you so much for answering. I will try all three, of course, at different times. They all sound so delicious.
I love your recipes and this one is a family fave. What I’ve done is when ready I split the dough into four sections and stretch then out into a baguette and cook that way. I get four of them and they last about 36 hours in my kitchen.
Since my scale was handy, I measured three ounces of water. Here’s what I determined. Please correct me if I’m wrong!
3 Tbl water = 1.5 fl oz
3 fl oz of water = 6 Tbl.
Is there an error in the ingredients? Fortunately, since I was unsure what to do, I put in 4 T of water, then I kept adding a little flour as the dough mixed to come up with, what I thought, looked like the dough consistency that it was supposed to be. Bread still in bread maker…to be continued (lol). Hope this turns out well–I’m eager to bite into it.
Susie,
You are right. I just added those weights a few days ago and messed up on that one. I’ve changed the recipe.
But you did the right thing to just add more flour until the consistency is right. I’m guessing your bread will be fabulous!
@Paula, thanks so much. The bread was a good first effort for an Artesian loaf. I will try it again. I love your recipes and insight.
Thanks, Susie. Experience always helps.
The loaf rise nicely and hold the shape ??????
Good texture and taste — perfect to go with Lamb Shank Stew last night!!!
Gotta skip Recipe #3 for the moment…
Due to the current Movement Control Orders in my area, am still trying to buy some of the ingredients from the least crowded shop near my house.
I’ve made Recipe #4&5 before, thus making Recipe #6 (this one ☝?) to go with stew lamb shank dinner tomorrow.
The ‘sponge’ is sitting on my counter top as I typed… ???
love this recipe! i thought the soft bread rolls was your best recipe, but I made this today and it exceeded my expectations! i love every one of your bread machine recipes!
HI Paula,
I love your site. I’ve been spending hours reading about making bread and yogurt there.
I was all ready to try your Crusty Round Bread (made in a bread machine) recipe when I remembered that I read that Canadian all purpose flour and American all purpose flour are not the same. I read that Canadian all purpose flour contains more gluten and can therefore, be substituted for bread flour, but American flour is different. I see that you are writing from the U.S., so I thought I would ask you before trying the bread to see if Canadian all purpose flour can be used in your recipe.
Sincerely,
Teddi
Bread machine newbie
That recipe will work with all-purpose unbleached or bread flour so I think you should be good. Hope you like it.
This turned out great except I had to add two or three more tablespoons of water for the kneading or else it was much too dry and wouldn’t knead. Very chewy and yummy!
Sounds like you are a good and experienced bread baker who knows that the amount of moisture (water) and flour needed to make the perfect loaf can vary with the weather, measuring techniques, mixing method, etc. Glad you like the bread. I just made it myself this weekend. We ate it way too fast.
Just follow the directions & the bread comes out amazing. My husband loves it.
Hi,
Really love this bread and tidy experimenting with it as a pizza base…. Just wondering if I could delay second rise, after biga, in the fridge as I don’t want to bake it for ~8hrs (10am now). Would this be OK do you think?
Hi Jen,
I haven’t tried it so can’t say for sure. Definitely think it’s worth a try. It would allow more time to develop the flavor for sure.
I have made this bread about 5 times now and all of them turned out just perfect!! This usis my favourite bread recipe!! Thank you
Thank you Pia for coming back to leave a comment. Happy bread-eating!
Paula, I am making the French Bread Today. I made the Sweet loaf bread yesterday. I am making pizza dough this afternoon. I just love making bread in my bread machine, Paula’s way. Thanks again for the tips, knead in the machine and cook in the oven. Hope you’re having a great day!
Hi! I wanted to thank you for this recipe and the great instructions. I had never made bread before or even knew anyone who makes bread and I was able to make it as my first loaf! My friends told me it was as good as “the expensive fancy stuff” and we ate ourselves sick. (To any other newbies out there, I did YouTube the look of proper dough and how to shape it. It helped a lot.)
So thank you so much and here’s hoping I can repeat my experiment! I am very glad I dared to be adventurous and didn’t just stick to baking in my machine for my first go.
I have made the crust round bread three times. The first time it turned out perfectly and tasted amazing. The second time was for company…. it didn’t rise as much and afterwards was very thick and heavy… went over the recipe and couldn’t remember doing anything differently at all.
So I have just made it a third time…. looks like it is the same thing – didn’t rise much and very heavy! Yeast is good and followed directions to a tee. Any ideas on what I could be doing wrong. The first time it was the best bread in the world… sigh…
@margaret wyatt, Are you using the same flour? It sounds like a gluten issue to me Or rather lack of Gluten, all else being equal. Try using a good quality bread flour which is higher in gluten than all purpose flour.
Hello, I just wanted to say that I really enjoy your bread recipes (and website!). I made Crusty French Bread last week and am going to make Crusty Round Bread this week. I always get a ton of compliments when I make your soft garlic sticks!
The Crusty French Bread is a family favorite. Hope the Crusty Round Bread turns out just as well for you. Thanks for writing.
I love your website. I bought my bed maker from Craigslist for $50 bucks, same brand as your favorite. I found a yogurt maker at the Sally store for $3 and now am making Greek yogurt. I started making my own granola about a month ago. Get’in domesticated after all these years. This is a great website to read about bread
http://cooking.nytimes.com/recipes/11376-no-knead-bread
Hi, by mistake I put 1 tablespoon instead of 1 teaspoon of yeast in my starter
I’m using your recipe once a week with great success. I live in Northern California so I have to add vital wheat gluten or I get a door stop instead of a loaf. I can’t use salt so I’ve been experimenting with additives to get some great flavor. Today’s loaf has Parmesan cheese, fresh chopped rosemary, and a tsp of butter flavoring. The aroma is driving me wild. I’m striving to make Nancy Silverton (La Brea Bakery) type breads without all the work. I’m ooooold so the easier it is the more likely I am to do it. Thanks for a wonderful recipe.
I love your bread recipes and have been working through them since I came across your site.
I’ve got tendonitis in my forearms and slightly arthritic fingers, neither of which can cope with kneading any more, so this is how I use my bread maker too – to do all the heavy lifting in preparation. I hadn’t seen this version of italian bread before but it makes great sense to use the machine to knead then store the mix (biga, preferment, whatever!) overnight with no messing around between bowls.
Thank you.
I NEVER KNEW I COULD MAKE SUCH DELICIOUS BREAD! Thank you for this recipe and instructions. I made my first loaf today and it turned out AMAZING! I may never set foot in the Whole Foods bread section again!
Your first loaf? Congratulations!! Glad it worked for you.
Hi again. So, I have successfully made this bread twice. It is gorgeous and delicious and makes me so happy. BUT. In both cases I have what I think is mold on the bottom of the loaf. They’re just like dark-ish spots, only on the underside. With the first loaf, I just ignored them, figuring it was a weird fluke and it couldn’t possibly be mold. But the same spots appeared the second time. Is it possible that mold is growing on the underside of the loaf, during the rising period? Maybe I’m allowing it to rise for too long? I’m letting it rise for many hours, like 4 or 5 hours. Is that too long? Also, I put it to rise in the bathroom, which is the warmest room in the house. Maybe it’s just to warm and/or humid in there? Has this ever happened to you? Any thoughts or ideas for me? Thank you!
It was great. Paula this bread had become my husband’s favorite. I just follow your instructions and it comes out as it looks on the website. A question though-
Can I use whole wheat flour to make this ?
Thanks for a wonderful website.
Sangeeta,
I haven’t tried using whole wheat in this particular recipe. You might swap out one cup and see how it goes.
Dear Paula, Is sponge bread same as a sourdough bread?
Not exactly. Some people call sponge bread the “poor man’s sourdough.” Sponge bread has somewhat the same texture as sourdough but is not nearly so sour. I love both.
For a much thicker, crisper crust I bake inside a Dutch oven:
1. Let rise on a large square of parchment paper, cover dough w/ plastic wrap.
2. At final 30-40″ of rise, place a round 8 qt Dutch oven w/ lid into 475F oven.
3. When dough is ready and slashed, remove 475F Dutch oven from oven.
4. Carefully/rapidly remove top, and holding bread by edges of paper ‘sling’, plop into Dutch oven, quickly place top back on. Minimize length of this step., you want oven to stay hot.
5. Bake on top 1/3 of oven for 30 min w/ top on.
6. Bake w/ top off, another 30 min or until temp is 190-200F. Enjoy the crunch!
Can’t wait to try this Ellen. Reminds me of No-Knead Bread.
This bread is amazing. It doesn’t last long when I make it!
Hi Paula, in this recipe you say all purpose unbleached flour – is that the same as bread flour? I am in the UK and we have the bread flours (wholemeal, strong white etc) and then normal flour – either plain or self-raising. For the dinner rolls and the pizza dough I used Strong white bread flour, will this work for this bread too? Also in stage 1 of preparing and baking – how long does it usually take to double in size?
thanks!
sarah
Sarah,
Bread flour has a little more protein and gluten than all-purpose flour but bread flour will work fabulously in the recipes you mention. Our all-purpose flour is probably the same as your “normal” flour although I don’t know that for certain.
I do the first rise in the bread machine on the dough cycle so that takes 1 hour and 30 minutes. But machines vary. The second rise after I have formed the dough also varies–anywhere from 30-50 minutes depending on the room temperature, kind of dough and how it is formed. Hope that helps.
Thanks, will stick to the bread flour then. Yes my machine takes about the same time to do the kneading and rise. For the dinner party rolls I only left them about 15 mins for the second rise…but in my warming drawer which seems perfect for it. Will let you know how it goes!
I just finished making this bread and it was fabulous. We all loved it. Thank you again, so very much. You bring me and my family so much joy!
THANK YOU, THANK YOU, THANK YOU Paula!! I have tried way too many recipes to mention for that great crusty edge, to no avail until your recipe. The bread was amazing! Super easy, literally two minutes hands on time, I will try to shape into a bagette next time for an even crunchier crust ( I know I am a breadie- like a foodie, but bread is my it food) So keep the awesome recipes coming!
Happy cooking!
Thanks Jen
Hi Jen,
So nice to hear from another breadie. Glad the recipe worked for you. It’s a winner with my family too. pr
It just came out of the oven-looks beautiful, sounds hollow-can’t wait for the loaf to cool.
A note on the biga (or whatever it’s called :-))…..
For an even more complex flavor, you can make the biga in a separate container (I use a plastic food storage box that holds at least 8 cups volume), let it do it’s thing at room temp for 12 hours or so, then put in in the fridge for up to three days before you use it. If you were making by hand, you’d want to let the biga warm up before continuing with the recipe, but the bread machine warms it up for you in the initial stages.
Made this bread last night with a 2 day old biga (fermented about 12 hours; in the fridge the rest of the time) and it was awesome! I need to dig out my bread stone so I can get it even crustier.
That is one beautiful loaf of bread.
Mimi
This fabulous loaf looks like it came straight from a Parisian bakery! Yum!!
beautiful looking loaf of bread!
What beautiful bread! I love the scored pattern on top, and you make it look so easy. (I know it’s not because the dough resists being cut!) Also love your new profile pic.
Hi Gaye, I just now got what you mean about the dough resisting being cut. A little slow here. Actually, it can be somewhat resistant if it wants to stick to the razor. Have to dip it in flour when that happens.
Oh.My.Word! Just the photos have me drooling! I could literally make a meal off of some of this with a glass of wine. Oh yes!
Hugs,
Kat
Looks just like it came from a bakery! I remember making italian crusty bread back in Seattle – I bought unglazed tiles for the oven and sprayed the bread down with a mister…. well worth the time and effort – but this looks even easier! I love that criss-cross pattern with the razor. It gives it such a professional look – and speaking of look – looking forward to the gumbo recipe!
Gumbo is coming? Oh, please hurry! 🙂
No snow days here yet this year, and with last week’s 70 degree temps I’m beginning to wonder if we will have one! I do have Monday off though, and it would be the perfect day to try this. (I’ll have to write myself a note to start it tomorrow night.) I’ve never used this method with a bread machine- sounds delicious!
Ohhhh, Paula….your bread looks heavenly!! Wow. Beautifully done…have never made bread before. Photos are fantastic.
Amazing looking loaf! Thank you for posting!
Smart kid! I wish my parents had made me homemade bread… I love the way preferments can give bread that almost-sourdough flavor that’s just enough to make you wonder.
looks yummy! i can see why this is brett’s favorite!