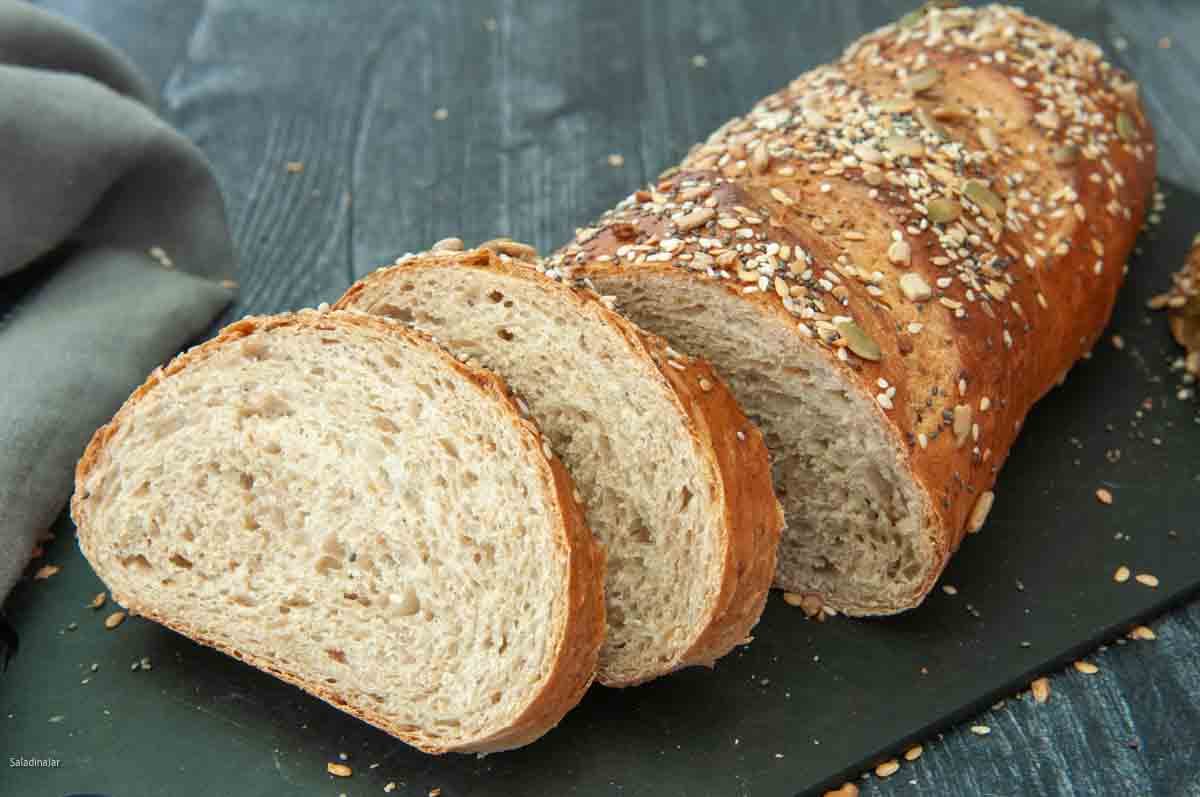
11 Ways to Add More Flavor to Your Bread
Sneak Preview: Disappointed in bland bread? Here are 11 simple tips to make your homemade bread more flavorful, whether you’re using a bread machine, stand mixer, or mixing by hand.
This post contains affiliate links. As an Amazon Associate, I earn from qualifying purchases at no extra cost to you.
If you have been disappointed in the flavor of your bread, whether made with a bread machine or otherwise, I have some insights and ideas for you.
But first, a parable…

A Tale of Two Trees
Our neighborhood has both majestic oaks and fast-growing cottonwoods. Oaks grow slowly, rewarding patience with strength and beauty. Cottonwoods, with shallow roots and weak wood, quickly exhaust themselves and cause problems.
The lesson? Like oaks, great bread takes time. Allowing dough to rise slowly creates better flavor and texture. Bread-making, like nature, thrives on patience.
1. Slow Down the Fermentation Process
Like the beautiful oak in my story, extraordinary results take time! The first three tips are about ways to build more time into the breadmaking process.
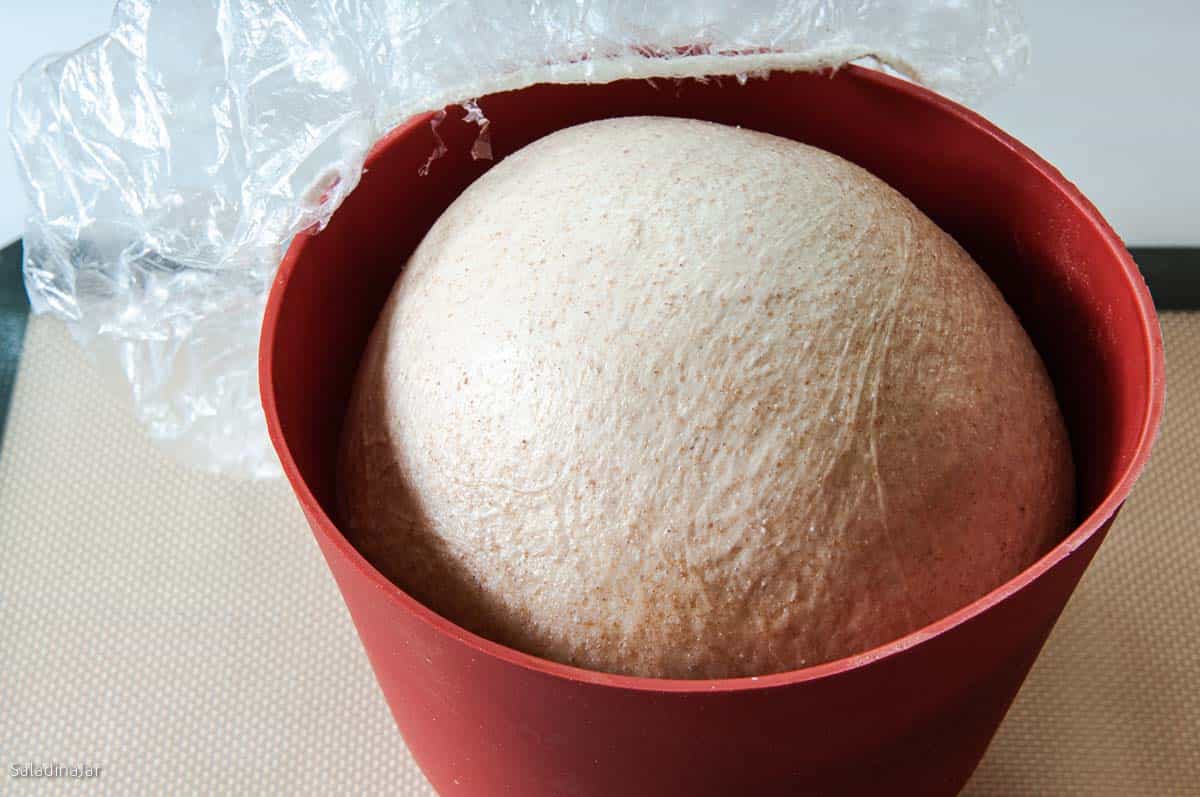
- Ferment dough in the refrigerator overnight to develop complex flavors.
- Keep proofing temperatures between 75–78°F (24–26°C). Use a quick-read digital thermometer (paid link) to find an ideal proofing spot.
- Avoid using the QUICK DOUGH cycle on your bread machine, as it doesn’t provide enough time for flavor development.
2. Decrease the yeast
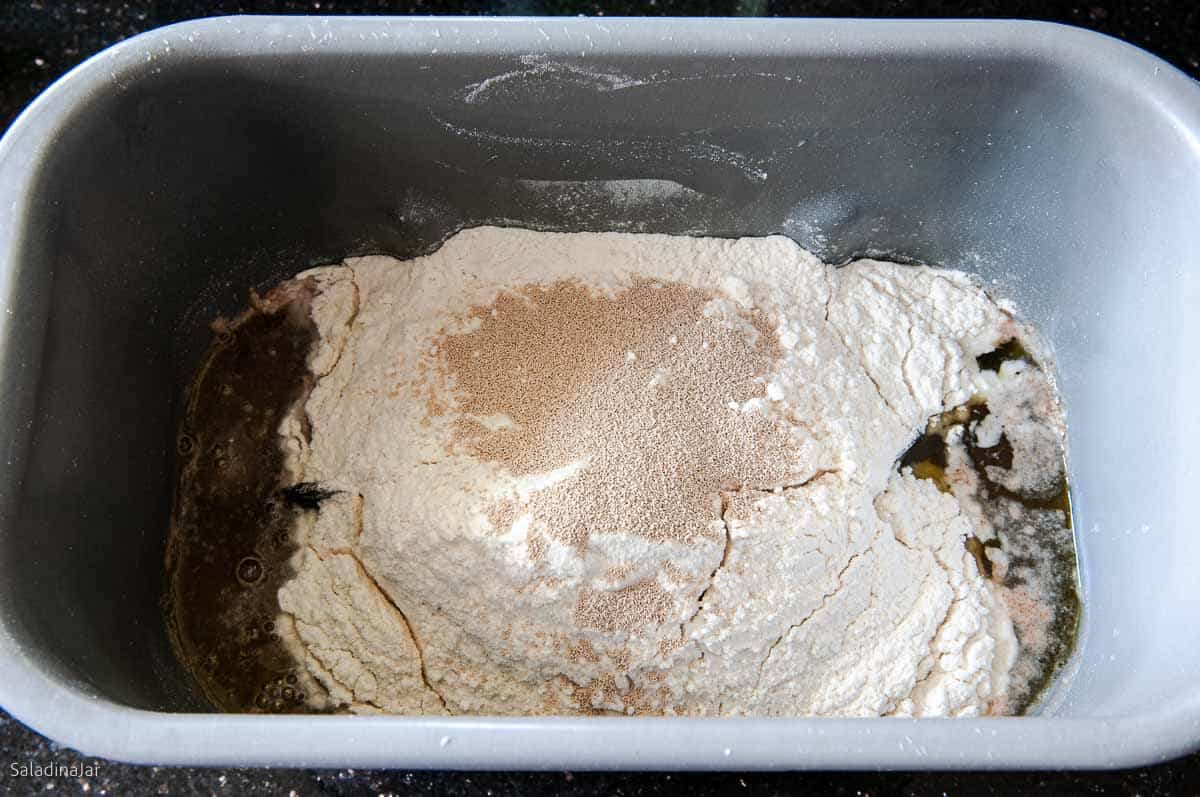
- Yeast does not add flavor. It only serves to make the dough rise faster, which is unnecessary and counterproductive. (See #1)
- Reduce the amount of yeast in older recipes.
- Any time you use the more potent instant yeast (perfect for use with a bread machine), use less, at least a half teaspoon less than active dry yeast.
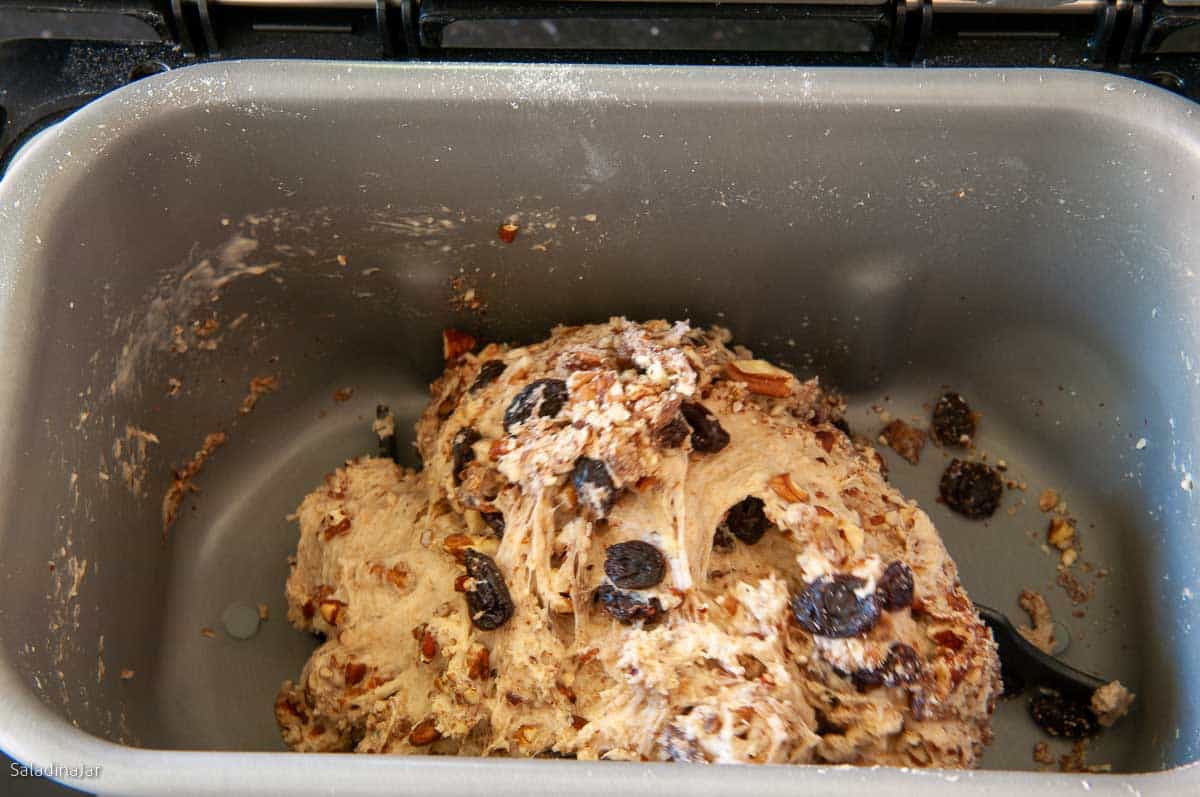
4. Add Flavorful Ingredients
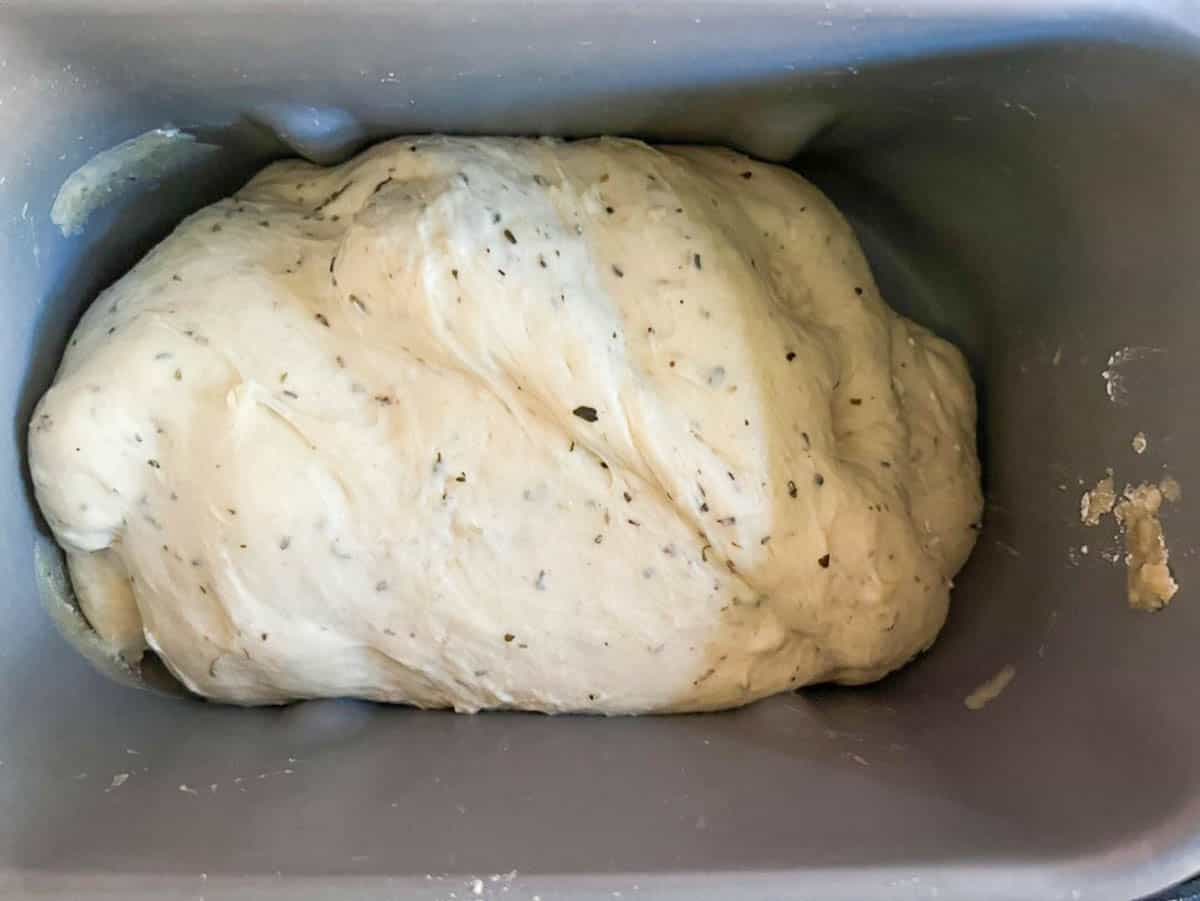
Flavorful add-ins can transform a basic loaf into something memorable—but timing matters.
Good choices:
Cheese, seeds, nuts, herbs, olives, dried fruit, or fresh fruit
When to add them:
- Soft ingredients (mashed bananas, pumpkin, yogurt): add at the beginning with the liquids
- Sturdy add-ins (nuts, cheese cubes, dried fruit): add during the last 5 minutes of kneading
- Small or delicate items (fresh herbs, chocolate pieces): mix in by hand just before shaping
Adding ingredients too early can break them down or stain the dough; adding them later keeps their texture and flavor intact.
5. Use Fresh, High-Quality Ingredients
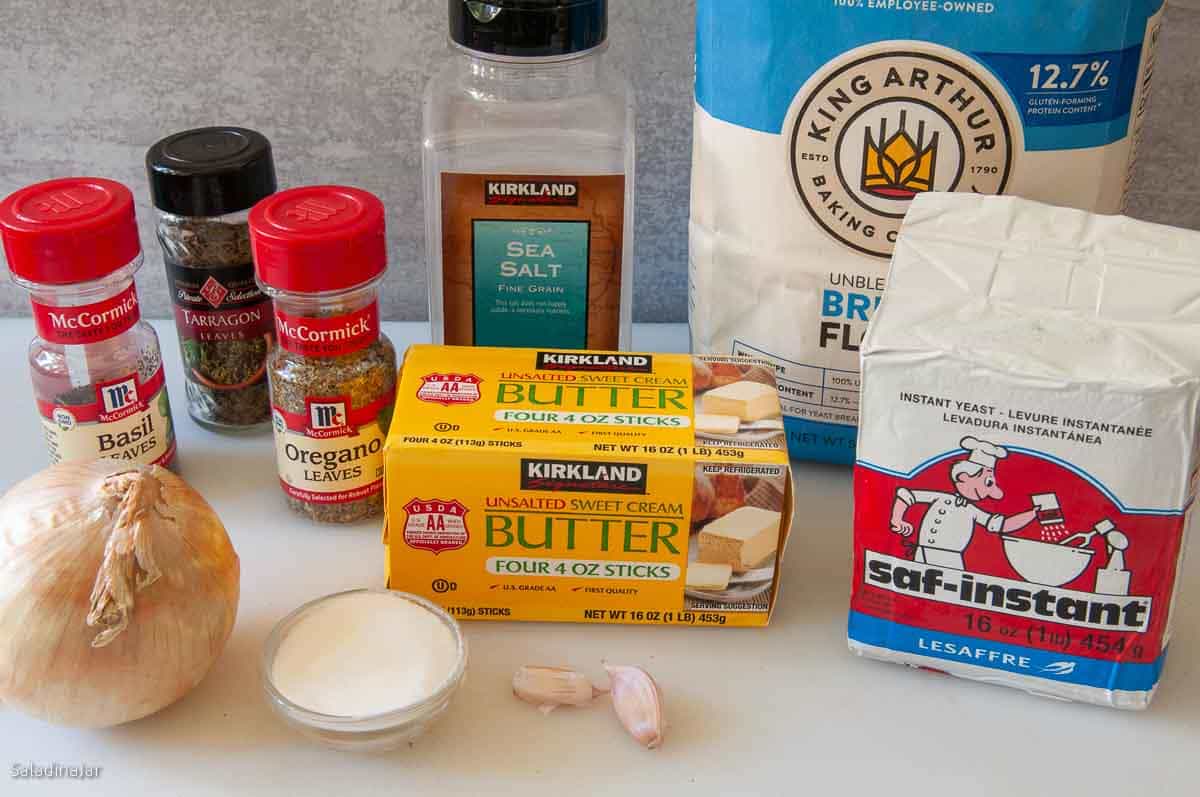
- Check expiration dates on flour and yeast.
- Store whole-grain flour in the fridge.
6. Don’t Skimp on Salt
- Salt enhances flavor and balances sweetness.
- Start with 1 tsp of salt for every 3 cups of flour, adjusting to taste.
- Watching your salt intake? See this post about cutting back salt in bread.
7. Use a Sourdough Starter or Starter Discard
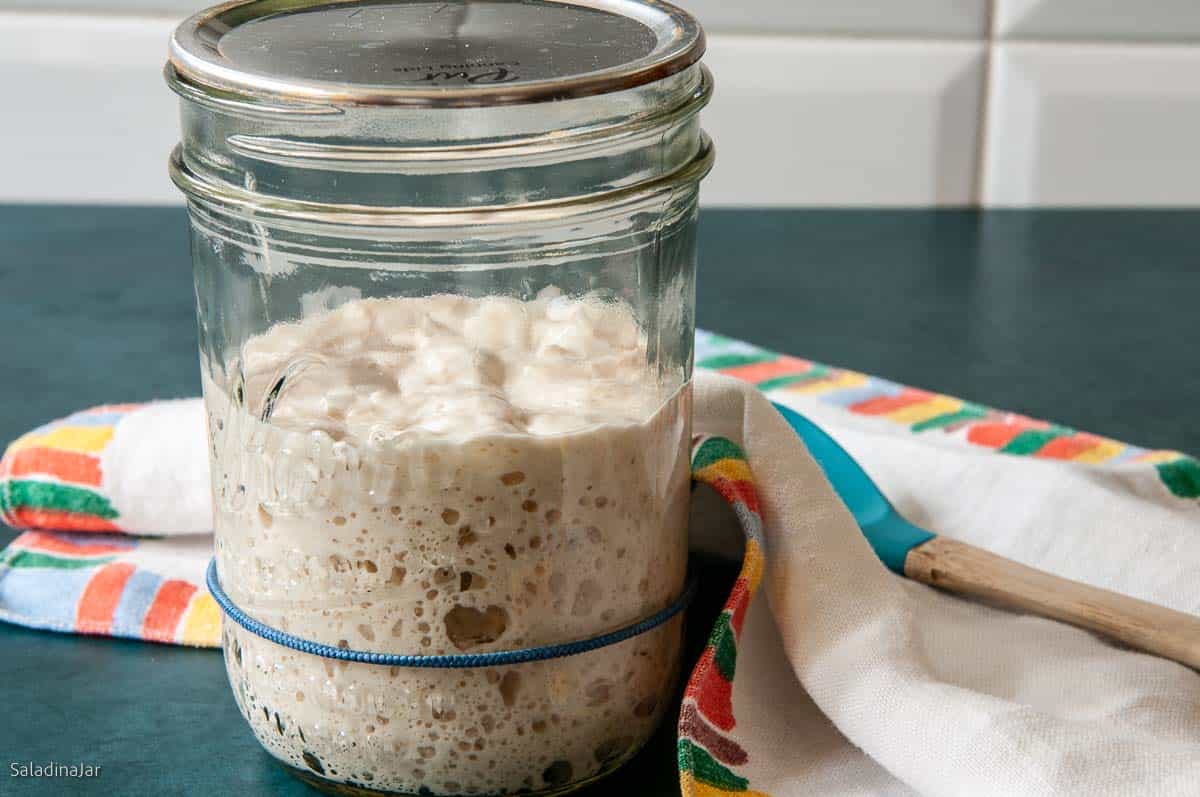
- Sourdough starter or discard adds tangy, complex flavors.
- Use starter in bread machine recipes like these sourdough rolls or sandwich bread.
8. Experiment With Baking Methods
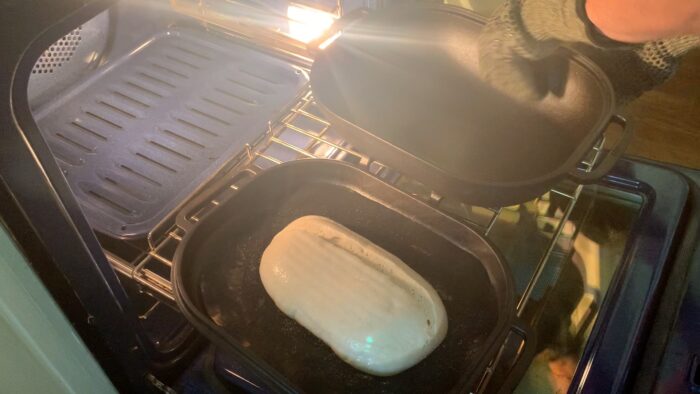
- Use a Dutch oven or pizza stone for a better crust and deeper flavor.
- Invest in high-quality pans (like these USA Pans -paid link) for even browning and better crust texture.
- Note: I avoid baking bread in glass pans. The glass gets hotter and tends to dry the bread, especially in the corners. Decrease the oven temperature by 25˚F.
9. Try Different Glazes
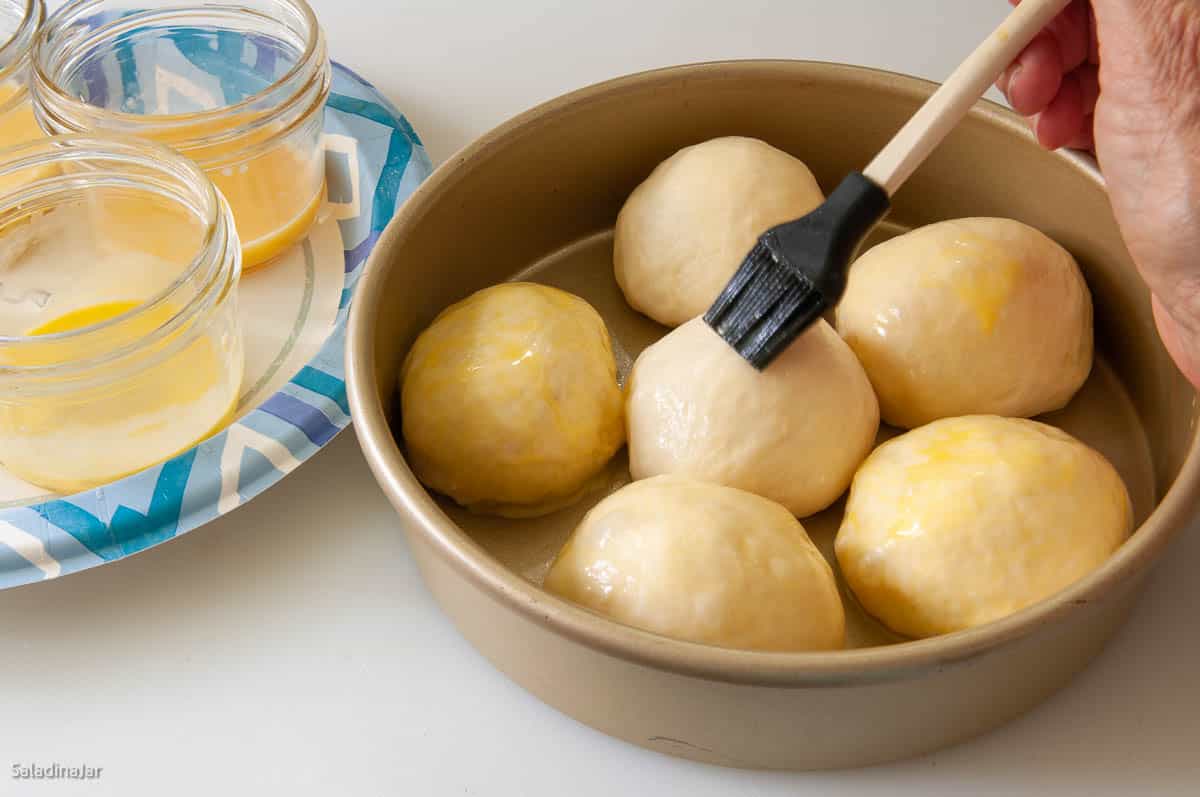
- Add flavor and shine with glazes like honey butter or sugar syrup.
- Use glazes to “glue” seeds, spices, or coarse sugar to the crust.
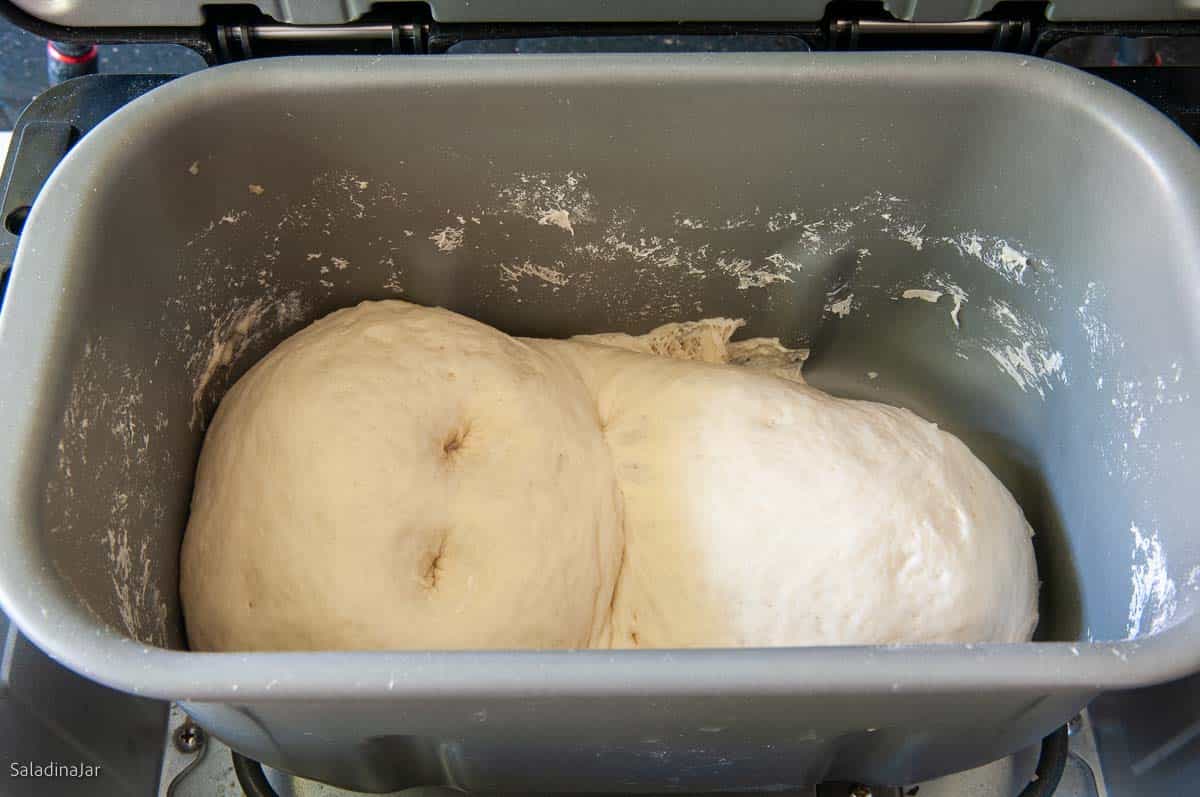
10. Avoid Underproofing or Overproofing
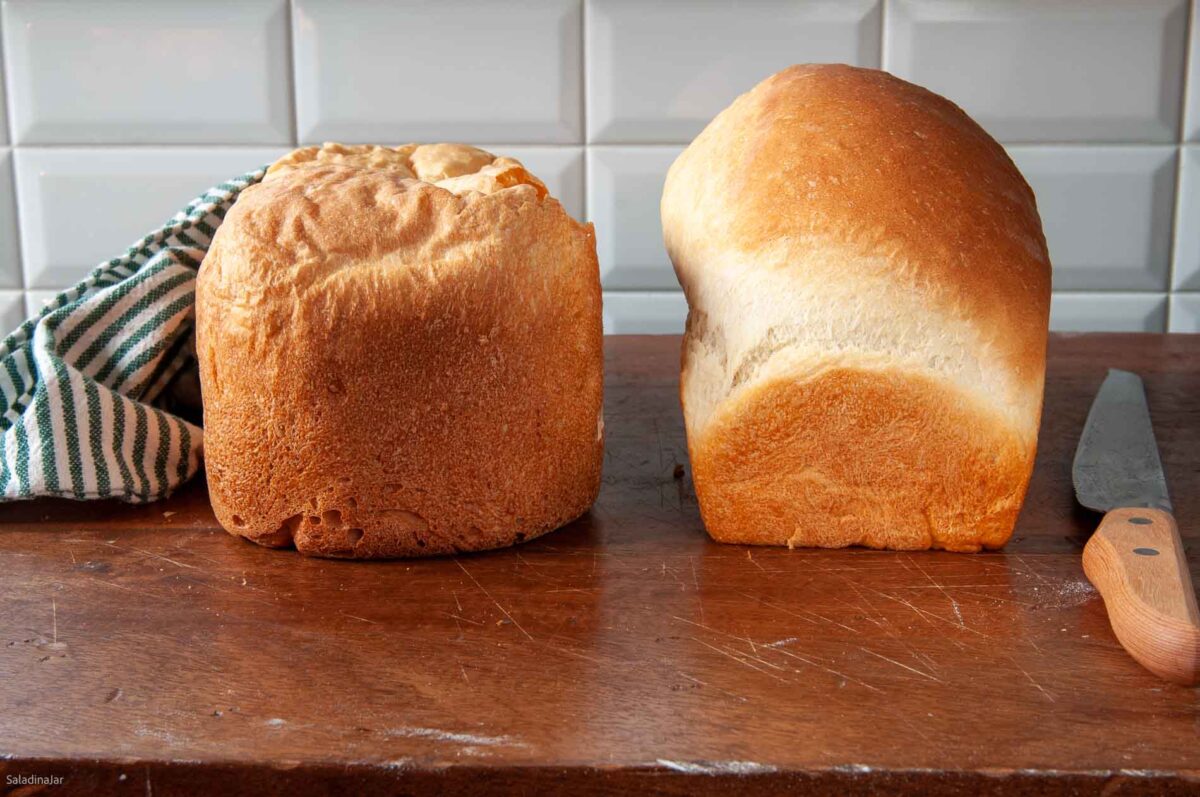
- Overproofed bread: Bland, deflated, and often a volcano or flat top. This often happens when using a bread machine to both mix and bake your bread.
- Use the finger test: Press two fingers into the dough. If it partially fills back in, it’s ready to bake.
- Over-kneading destroys gluten, reducing flavor and structure.
- Under-kneading leads to weak gluten that can’t hold flavor compounds.
- Bread machines rarely over-knead, but monitor closely with stand mixers.

Final Thoughts:
Great bread isn’t as simple as making brownies—yeast has its rules, and respecting them makes all the difference.
If you’re in the mood for something different, try my Hearty Wild Rice Bread with wild rice, thyme, and browned butter; Yeasted Banana Bread with Whole Wheat made from ripe bananas and whole-grain flour; or Chewy Bread Machine Bagels with Barley Malt Syrup for authentic bagel flavor at home.
— Paula, Home Economist
Homemade Food Worth Sharing
Need help troubleshooting?
Email me: Paula at saladinajar.com — photos help!

I was interested in seeing your tips on flavour I often overnight proof my dough in the fridge, in the past I’ve added sourdough discard (never had much luck with sourdough, so gave up on that).
One of the ways I add flavour is to keep back some of the dough, after first proof, I put it into a container with a little olive oil and stick it in the fridge for a few days, then I either bake again and add it in during kneading stage, or I freeze it till next time I want to bake.
Sadly I don’t make bread as often as my son has been diagnosed with celiac disease and I can’t find a good bread recipe
Hi Sue,
Your method of holding back a little bit of dough is a wonderful way to add flavor. I’ve tried that in the past and it works IF, you make bread fairly often. I can’t remember freezing it as you mentioned but maybe that would be the answer.
In regard to gluten-free bread, I’m with you. I’ve never found a good recipe. It appears that the average consumer doesn’t have access to some of the special ingredients used in grocery story gluten-free bread. You might find this post interesting about making gluten-free bread in a bread machine.
Thank you for writing.
Hi Paula,
I have made so many of your wonderful bread & roll recipes but I have one question. My husband’s favorite is the crusty French bread. I made 13 loaves over the holidays to send home with my kids and we had them for Christmas dinner and now New Years Eve. My question is. I’d like to add some roasted garlic and herbs but don’t know when to add them? If I add them in the beginning will it mess up the integrity of the loaf?
Thank you for your time and yummy recipes!
PS I have now got 3 of my kids making bread!
Patty O
Hi Patty,
That’s a good question. Garlic can be problematic and inhibit the rising of the dough unless it has been baked or roasted in some way. Some people say you can get away with using a little bit. Experimentation may be in order.
I would add parsley during the last 5 minutes of the kneading phase so the dough doesn’t turn green. If you’re using dried parsley, it probably doesn’t matter.
I’m so impressed that your kids are making bread. Good job, Mama!
Great article, Paula…as usual! 🙂
Thank you, Steve. Your feedback means a lot.
I hope you have a wonderful New Year! 🙂
Hi Paula
I have read, but have not yet tried, using whey from straining homemade yogurt (which is how you make Greek yogurt at home).. I’ve read this gives bread that sourdough taste without using sourdough starter.
Have you read about or tried this?
Hi Dave,
So glad you wrote.
Yes, I’ve tried it—several times. 18+ Uses for Yogurt Whey You May Not Have Thought Of Yet. This is one of the first posts I wrote when I started my website back in 2009.
If you’ve ever eaten authentic and excellent quality sourdough bread, you will not think bread made with whey tastes much like the real thing. It’s not bad at all, just a slightly different taste. I make authentic sourdough bread every week with my bread machine. Yes! Make Sourdough Bread (Without Yeast) Using a Bread Machine
Fantastic post, Paula! I have never considered doing a pre-ferment in my bread machine, but I will explore this. I do very long rises at times, and it definitely improves flavor. My favorite loaf is whole grain spelt sourdough bread, but I have not discovered a way to easily incorporate this into my typical day as yet. It may not require lots of hands-on time, but making really good bread requires some focus. I bought a grain mill a couple of years ago, and it does make an incredible amount of difference in flavor. I have explored many types of grains that are not available as flour, and some of them are so much flavorful than those commercially available. Milling can be a fiddly process, and I recommend Breadtopia for grain mill education and trouble-shooting. I don’t mill flour for all my breads. You and Breadtopia are responsible for all my bread baking advancements and success. You are a jewel!
Hi Becky,
Using your bread machine to make the preferment is super-convenient.
I make spelt sourdough bread, too. Every week, sometimes more often.
Here’s my schedule. Place spelt, bread flour, and organic AP flour in my bread machine along with water. Run the Dough cycle for 1 minute and stop the machine. Add the starter on top of the mixed-up flour and water, the salt in one corner where it doesn’t touch the dough, and a couple of tablespoons of olive oil and 1 tablespoon of honey in the corner by the salt.
Then I set the Bread machine timer on my Zoji to start the DOUGH cycle 30 minutes later. (Some people call this the autolyse). So I have two hours before I have to come back to the machine. I always intend to take the dough out as soon as the kneading phase ends, but it doesn’t always happen. It doesn’t matter.
When I finally remove the dough from the bread machine pan, I do 2-3 stretch-and-folds by hand to strengthen the dough. Then I put the dough into a covered container for the bulk rise. This usually lasts all day since I don’t use a lot of starter. Around 4 or 5:00 pm, I shape the dough and then put it into the fridge to bake the next morning.
This requires so little attention that I have to make a reminder or I will forget about the dough completely.
Where do you buy your spelt? I’m curious.
Happy New Year!!