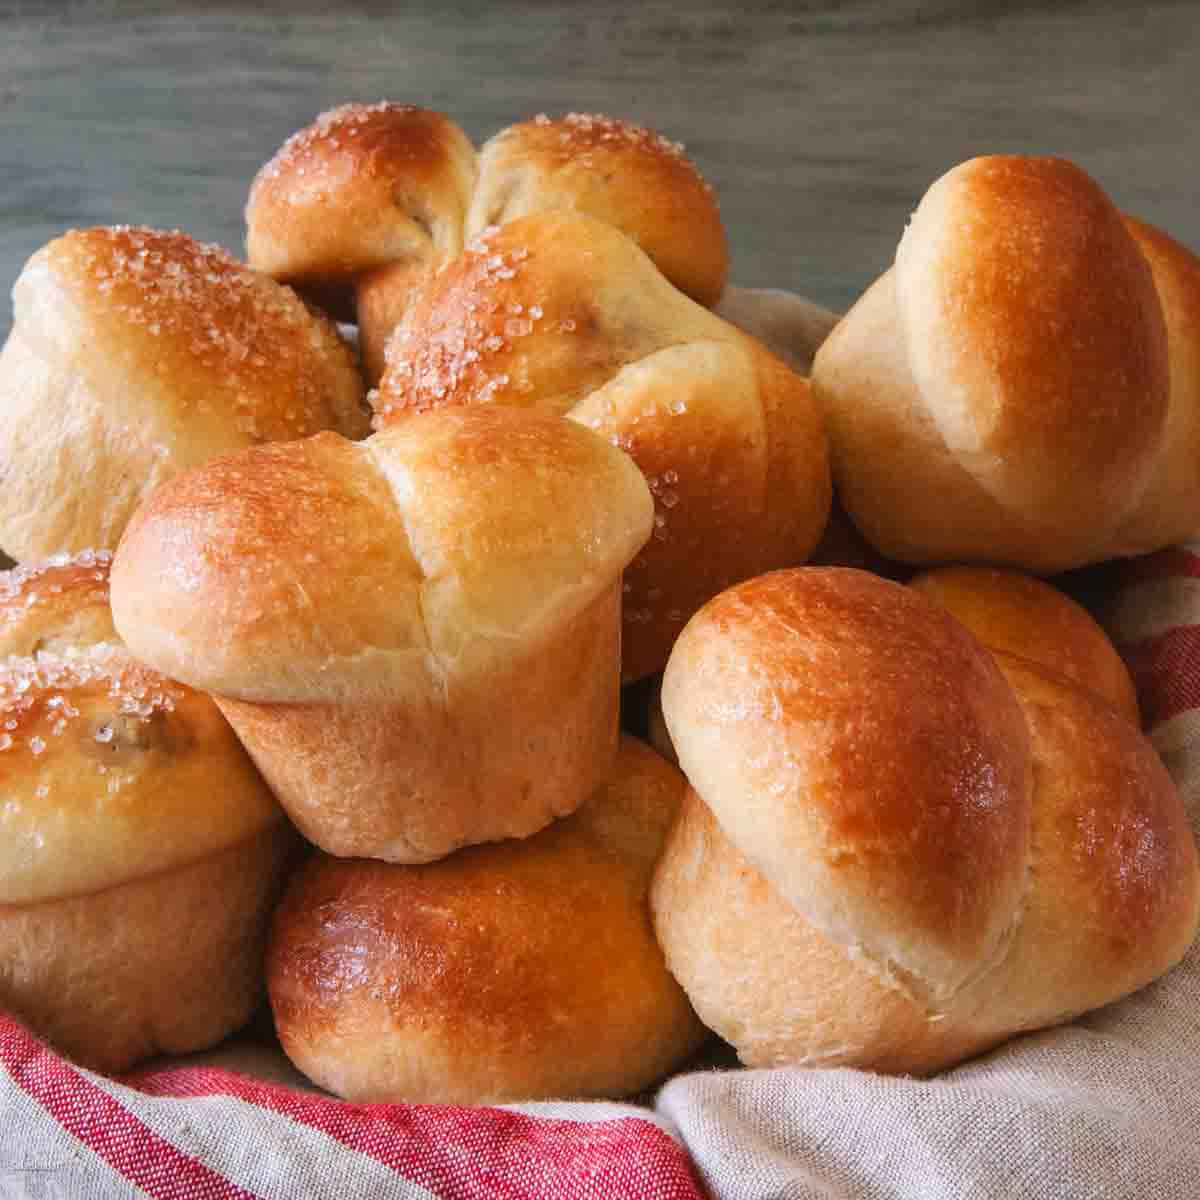
Pull-Apart Brioche Rolls (Bread Machine Dough)
Sneak Peek: Let your bread machine do the heavy lifting, then shape this rich brioche dough into balls nestled together in a muffin pan. After a good rise and a golden bake, you’ll have buttery, pull-apart rolls that are as charming as they are delicious.
This post contains affiliate links. As an Amazon Associate, I earn from qualifying purchases at no extra cost to you.
This brioche dough stays true to what makes brioche special—plenty of butter, rich with eggs, and chilled overnight for flavor and easy shaping. The bread machine makes the process more doable, and I’ve included tips, tricks, and a video to guide you every step of the way.
Brioche is a buttery, tender bread that may remind you of Challah or Egg Bread, but its soft layers and slightly flaky crust set it apart. Many bread machine recipes claiming to be “brioche” cut corners, but this one holds onto the richness and texture that define classic brioche.
It’s not diet bread—but it’s bread worth sharing.
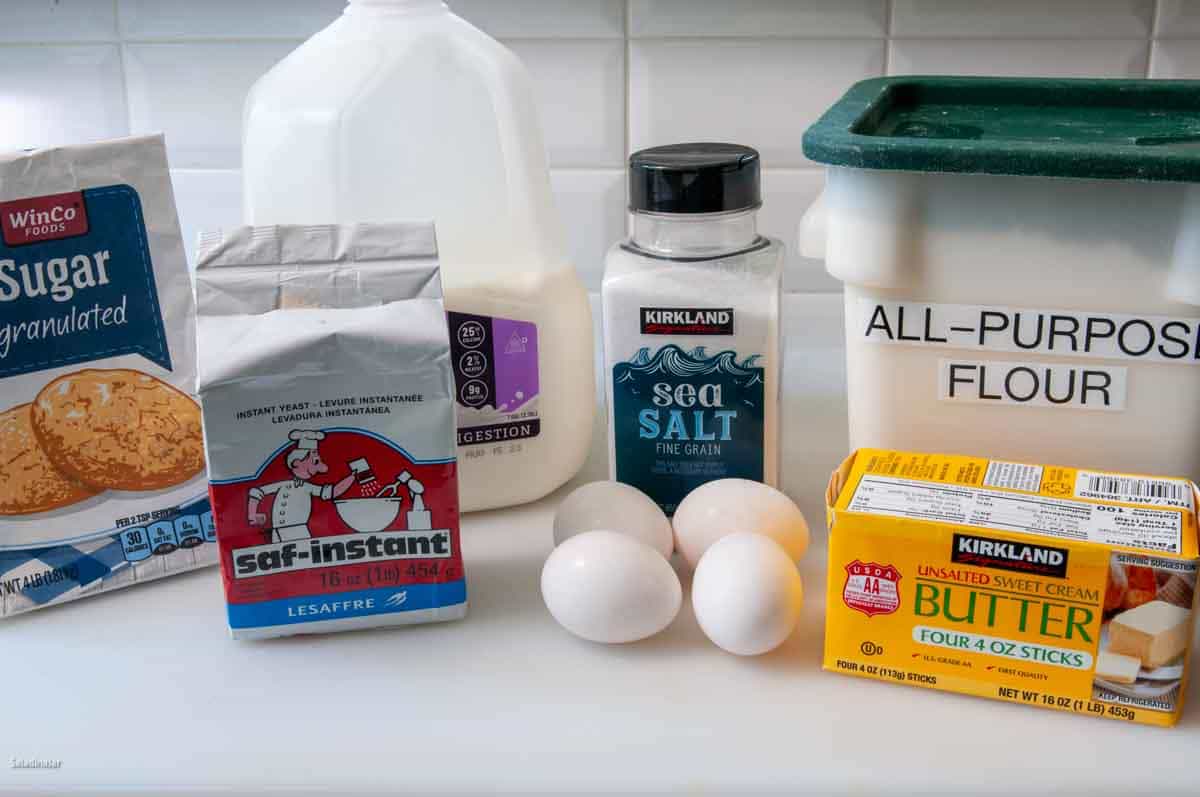
Ingredients and Substitutions
Ingredients and Substitutions
UNBLEACHED ALL-PURPOSE FLOUR: Bread flour works too, but will make the crumb slightly chewier.
EGGS: Large eggs (50 grams) are standard. Don’t reduce the amount—brioche depends on them.
BUTTER: Use unsalted. Do not substitute oil or margarine.
MILK: Whole milk is preferred. 2% will work but avoid skim.
SUGAR: Granulated sugar only. Reducing the amount will affect yeast performance.
SALT: Table or sea salt is fine.
INSTANT YEAST: Don’t skip it—it helps control the yeast.
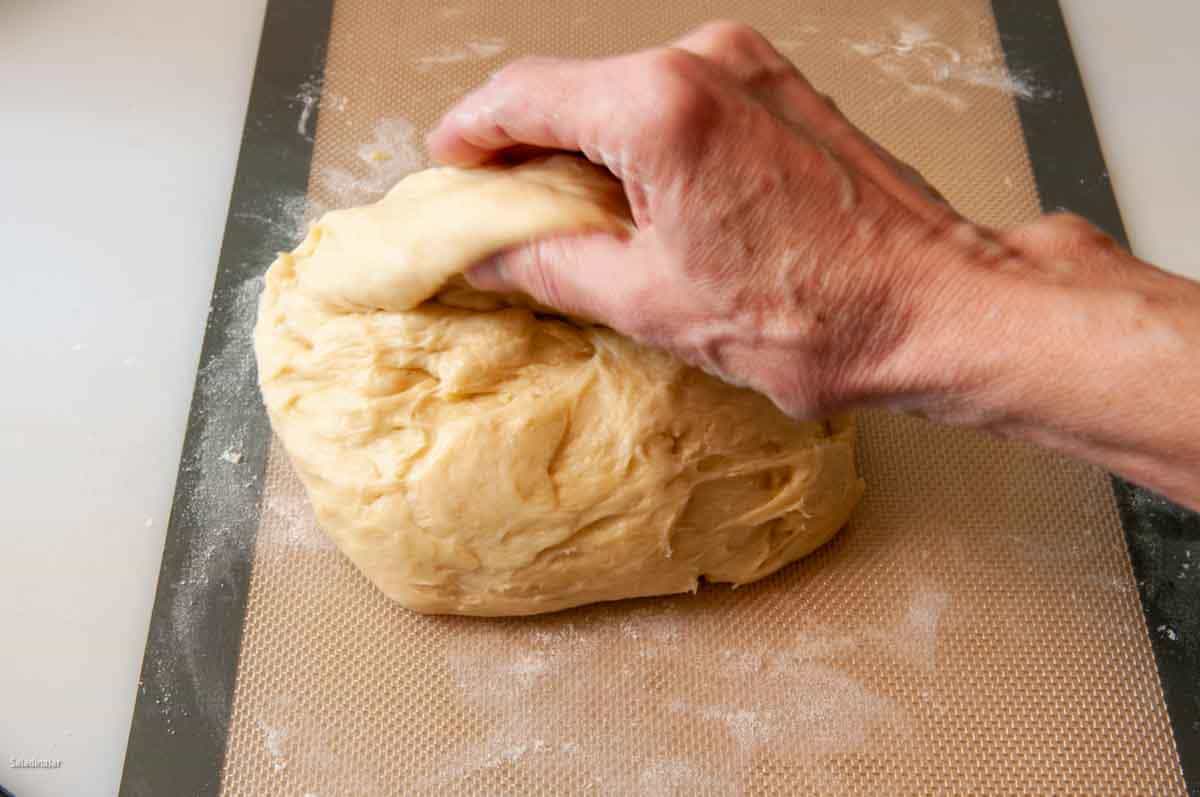
How To Mix and Knead Bread Machine Brioche Dough
⬇️ Jump to the recipe below for exact amounts and detailed instructions.
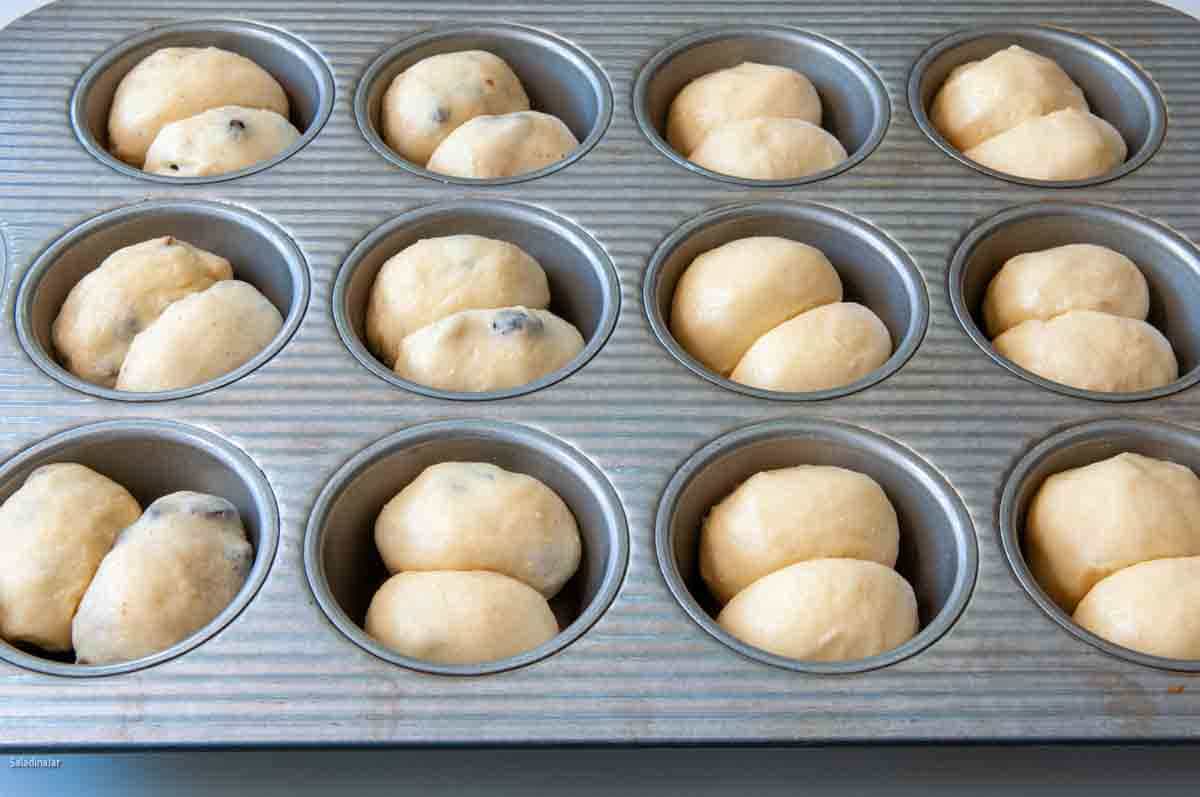
How To Shape Easy Pull-Apart Rolls Using a Muffin Pan
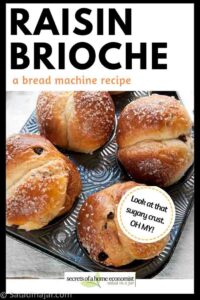
Shareworthy Variation
If you look closely at the picture above, you’ll see that I kneaded raisins into some of the rolls. After glazing, I sprinkled them with sparkling sugar. What a treat!!
? Tips That Make a Difference
• Cold butter and eggs keep the dough from turning greasy.
• Sticky dough is expected—don’t add extra flour; let the machine knead and chill the dough for easier handling.
• Cook tangzhong until thick like pudding, not lumpy.
• Grease pans well with butter/flour spray or choose nonstick options like silicone molds or USA pans.
• Roll all the dough into balls first, then pair balls of the same size before placing them in the pan for a neater look.
• Food-safe gloves keep dough cool and your hands clean.

Pull-Apart Brioche Rolls (Bread Machine Dough)
Video
Ingredients
Tangzhong Paste
- ⅓ cup (76 g) milk
- 1 tablespoon all-purpose unbleached flour
Dough:
- 4 large (200 g) eggs cold
- 2 tablespoons granulated sugar
- 1 teaspoon table or sea salt
- 2½ cups (300 gr) all-purpose unbleached flour
- 2 teaspoons instant yeast
- ¾ cup (168 gr) unsalted butter (1½ sticks) cold but pliable
- ½ cup (60 g) all-purpose unbleached flour
Glaze:
- 1 large (50 g) egg
- 1 tablespoon heavy cream
Instructions
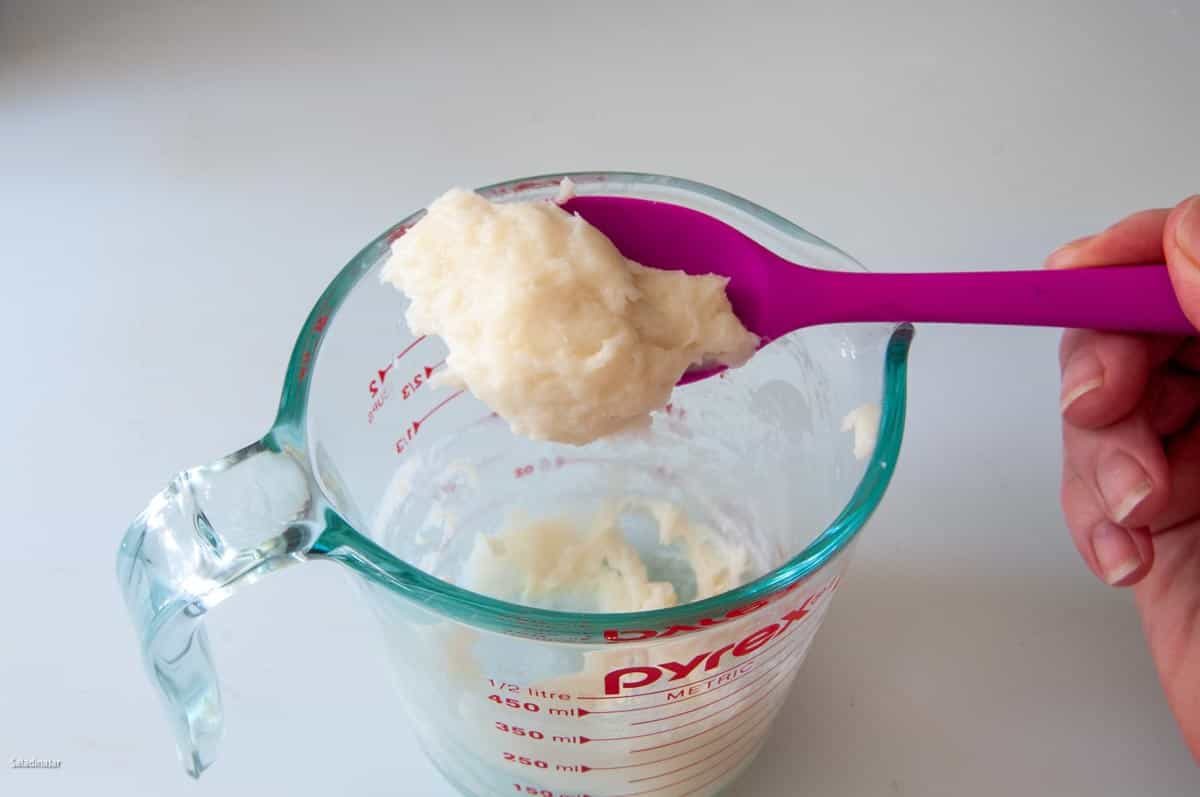
- Make the tangzhong paste: Whisk ⅓ cup (76 g) milk and 1 tablespoon all-purpose unbleached flour in a microwave-safe bowl until smooth. Microwave for 45-60 seconds, stopping halfway to stir. The paste should be thick, like gravy. Cool completely before adding to the bread machine pan. (Tip: Chill the pan in the freezer to cool the paste instantly.)
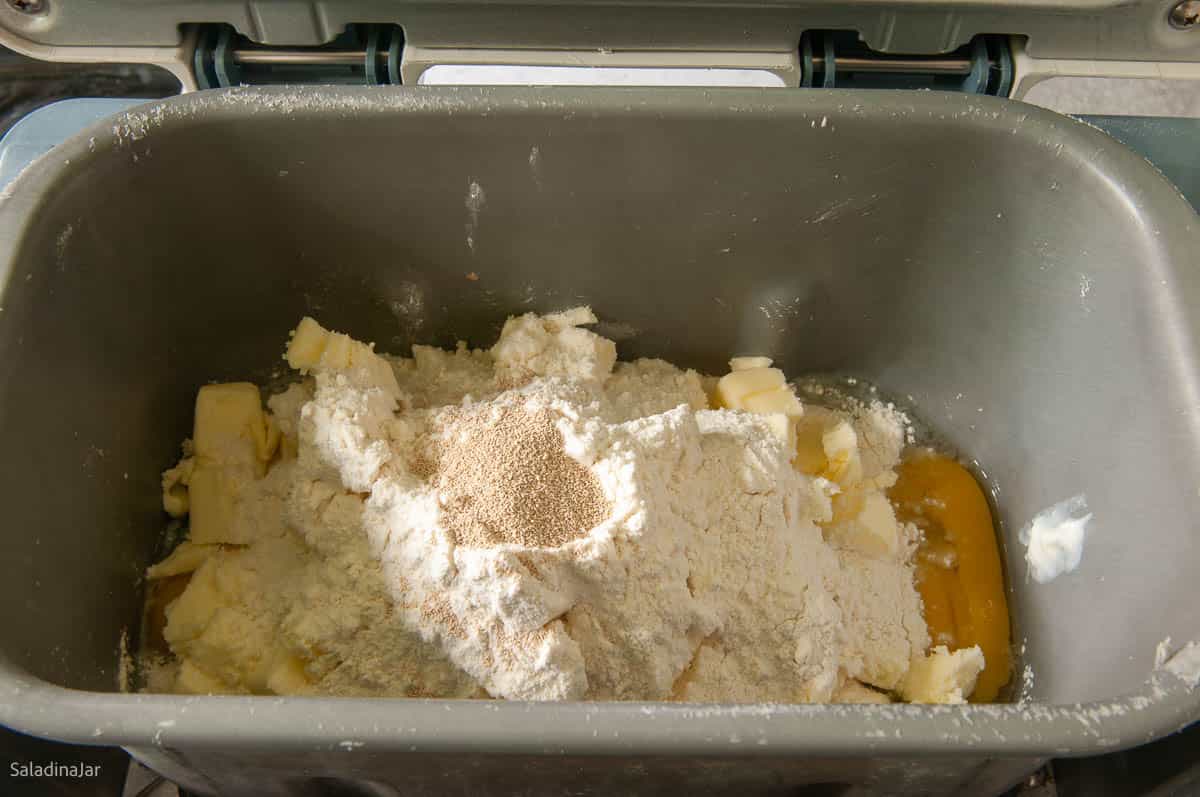
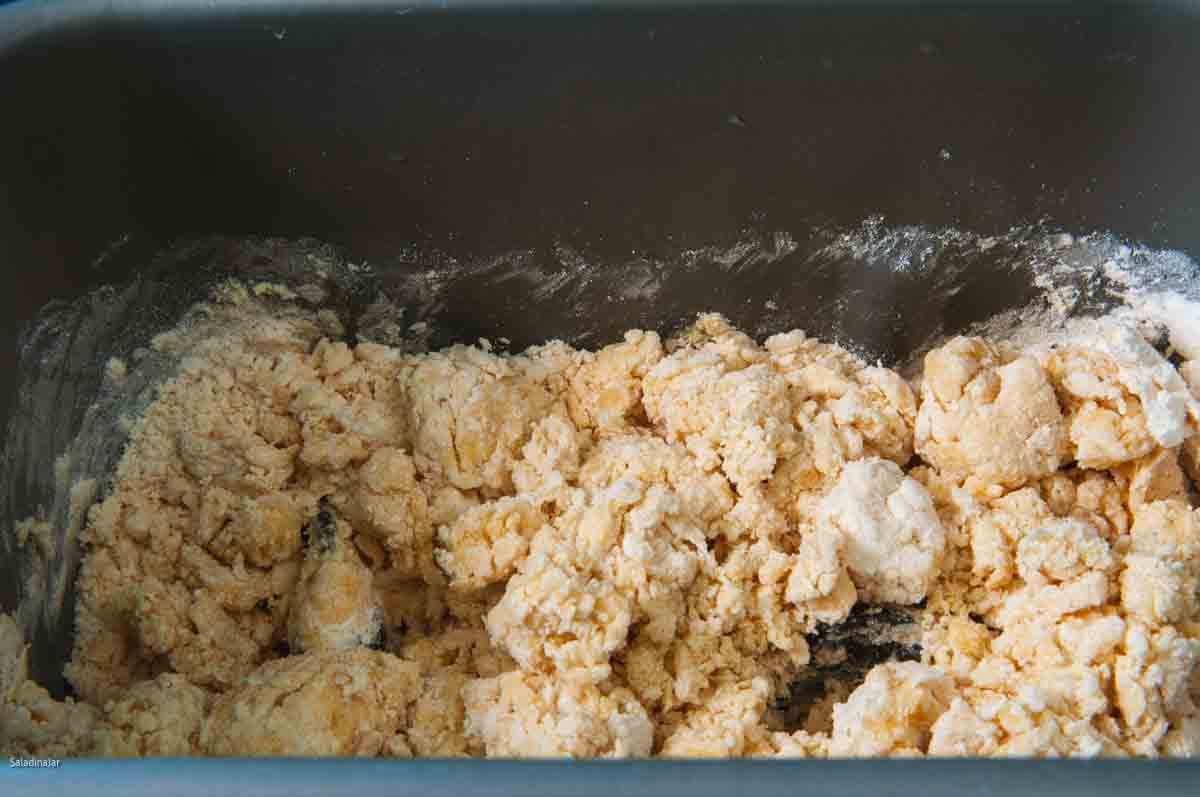
- Build the Dough: Add Tangzhong, 4 large (200 g) eggs, 2 tablespoons granulated sugar, 1 teaspoon table or sea salt, 2½ cups (300 gr) all-purpose unbleached flour, and 2 teaspoons instant yeast to the pan. Select the DOUGH cycle and press START. After 1–2 minutes, use a spatula to help incorporate all the flour. The dough will look sticky and rough.
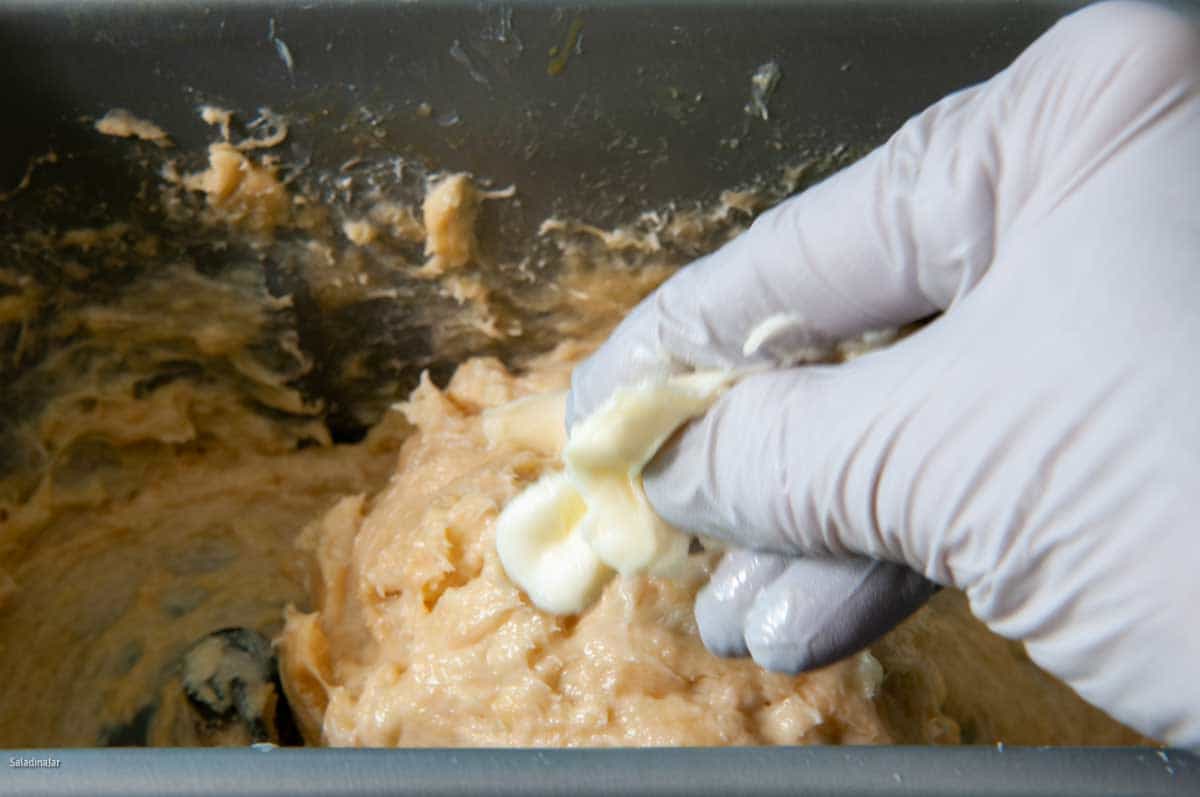
- Add the Butter: Once the dough starts clumping, add chopped cold ¾ cup (168 gr) unsalted butter (1½ sticks) a little at a time while the machine kneads. Squish each piece with your fingers into the dough as it mixes. Work quickly to avoid warming the dough.
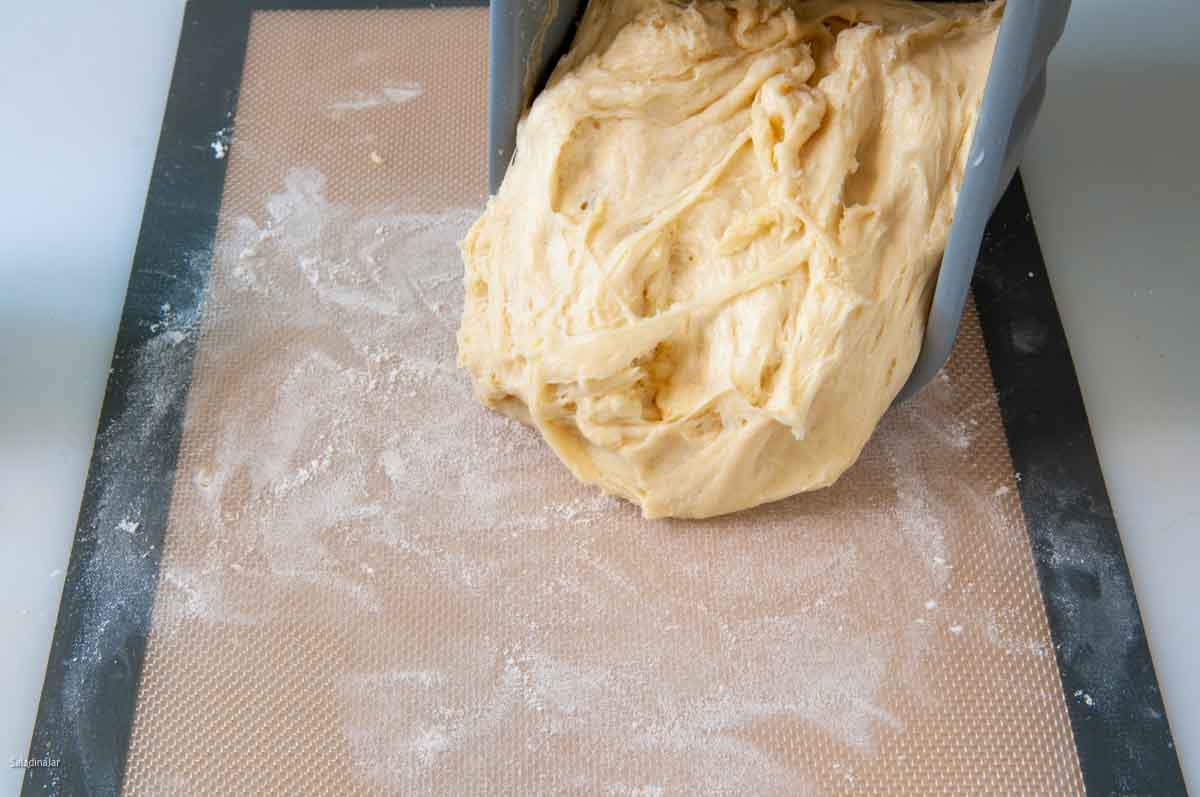
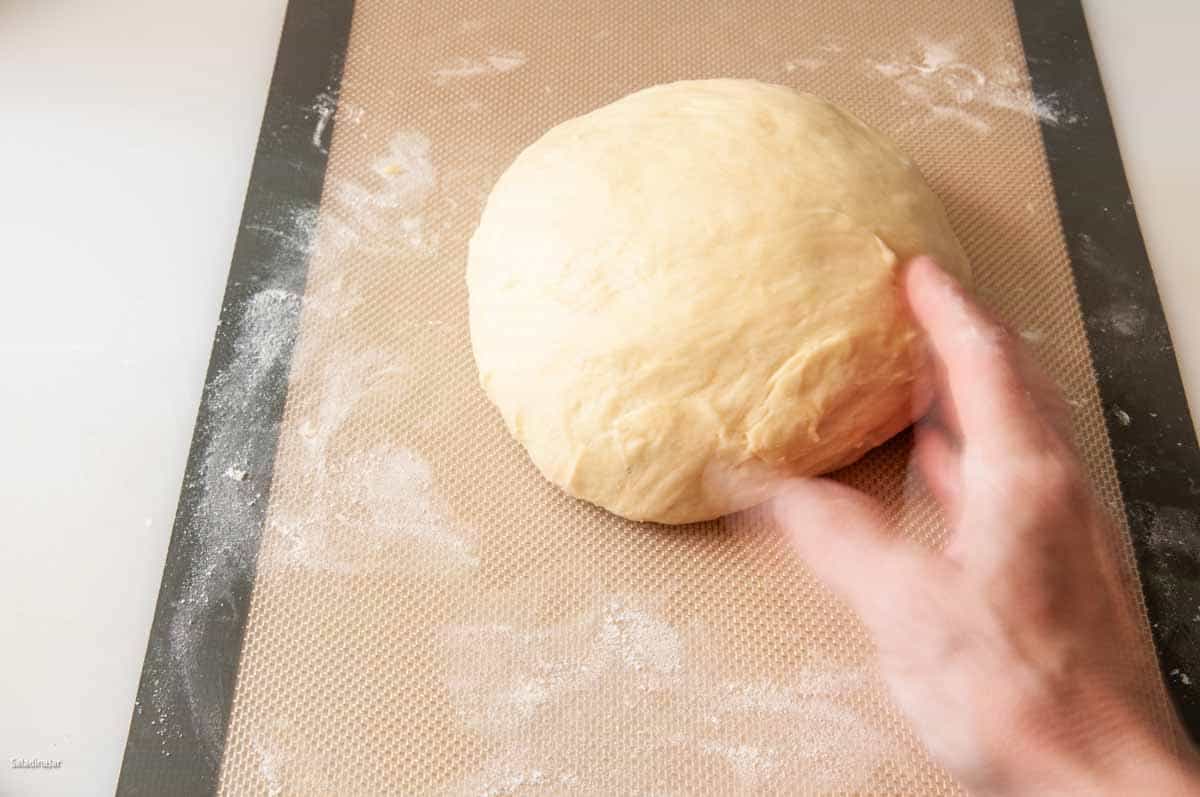
- Finish the Mix: After the butter is incorporated, add the remaining ½ cup (60 g) all-purpose unbleached flour. The dough will be sticky but should pull away from the sides—but not cleanly. Add no more than 1 tablespoon of flour if needed.
- First Rise: For best results, remove the pan from the machine and let it rise at room temp, no warmer than 75°F (24°C), to prevent greasy dough.
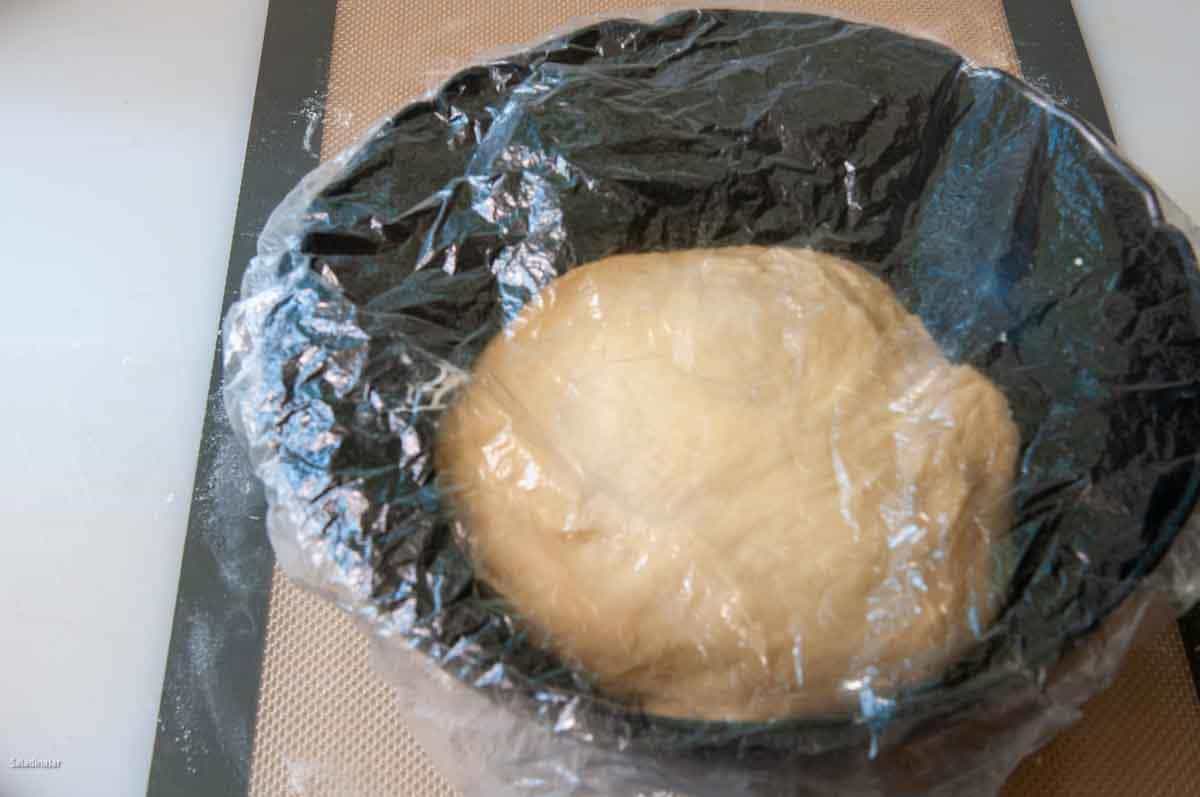
- Chill the Dough: Turn the dough onto a lightly floured surface. Compress it to remove bubbles. Fold it a few times into a smooth ball, then place it in a large covered bowl. Refrigerate for 4–24 hours. Don’t skip this step.
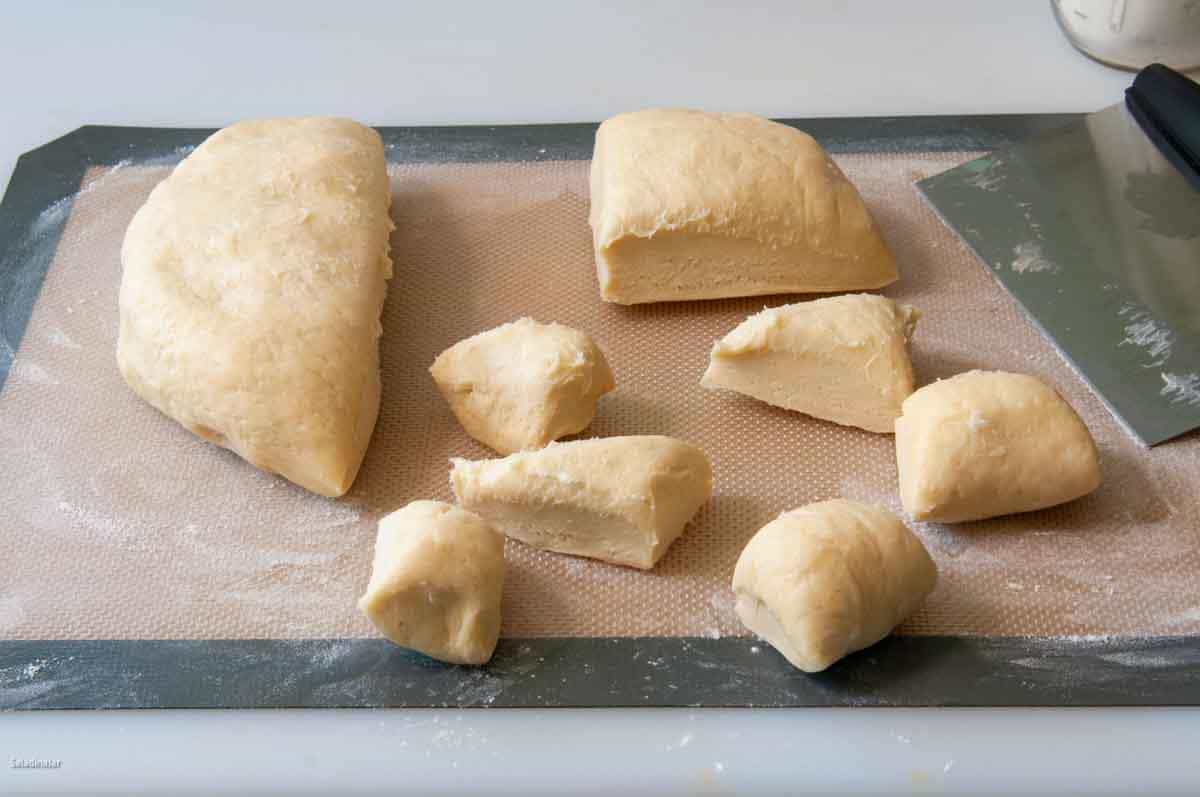
- Shape the Rolls: Remove chilled dough to a floured surface. Divide into 12 equal pieces, then divide each piece in half. Roll into 24 smooth balls. Place two balls per cup into a greased muffin pan. Cover and let rise until nearly doubled.
- Make the Glaze: Whisk together 1 large (50 g) egg and 1 tablespoon heavy cream.
- Bake: Preheat oven to 400°F (200°C) while rolls finish rising. Brush rolls with glaze. Bake at 375°F (190°C) for 15–18 minutes or until golden brown.
- Cooling: Allow the rolls to cool for a couple of minutes. Turn out onto a cooling rack.
Notes
1️⃣ Add ingredients to the bowl in the listed order.
2️⃣ Mix on LOW until moistened, then knead on speed 2 or 3 with a dough hook for 5-10 minutes until smooth and elastic.
3️⃣ Cover and let rise in a warm place until doubled.
4️⃣ Gently deflate and shape as directed in the recipe. ? By Hand:
1️⃣ Mix all ingredients into a shaggy dough ball in a large bowl.
2️⃣ Turn onto a floured surface and knead for 10-20 minutes until smooth and elastic.
3️⃣ Place in a greased bowl, cover, and let rise until doubled.
4️⃣ Gently deflate and shape as directed. ? Yeast Tip: Using active dry yeast? Increase by ¼ teaspoon. It no longer requires dissolving, but you can if preferred.
Equipment
Nutrition
All images and text ©️ Paula Rhodes for Salad in a Jar.com
FAQ
Keep cooled rolls in an airtight bag at room temperature for up to 3 days. For longer storage, freeze them well-wrapped and reheat gently before serving.
No. Brioche needs different timing than standard loaves. Use the machine for mixing and kneading, then shape and bake in the oven for best texture and flavor.
That’s normal. Brioche stays sticky until it’s chilled. Avoid adding extra flour or the bread will turn dense instead of light.
Final Thoughts
Make cinnamon rolls or braided loaves if you are more adventurous. Just about anything you can do with a standard sweet-roll recipe, you can do with brioche, including a loaf of bread. The variations are truly endless.
Need help troubleshooting? Please email me: Paula at saladinajar.com–photos welcome!

Hey, Paula! I am intrigued, but I just can’t do bread experiments in this heat! I am impressed that you can. I have been baking extra loaves on cooler (NOT COOL) days and freezing them. However, I may try this when it gets cooler. It looks fabulous! I have never tried brioche, but I do make a bread that is similar called Portuguese Sweet Bread.
Hi Becky,
I love Portuguese bread. My Cardamom bread is similar in texture and sweetness. I understand about heat and bread. It can be challenging.
Instead of making rolls, I’d like to make a King Cake. Do you think this recipe would lend itself to that?
Hi Rose,
Possibly. I looked at a traditional recipe, and they seem to be similar. Sounds like a fun experiment.
Hi Paula,
The dough cycle for my bread machine (West Bend) begins the first rise 10 minutes into the cycle. So, by 15 minutes, the dough has already formed into a ball, as one commenter has observed. I attempted to correct this by restarting the cycle and adding it in the kneading phase.
Should I just start over and add the butter around 5 minutes of the knead cycle?
Thanks,
Madeline
Hi Madeline,
Yes, start over and add the cheese. You may have to help the machine a bit by pushing the butter into the dough with a spatula as you add it.
Absolute disaster. I followed your recipe to the letter and came out a buttery mess! Maybe this recipe works for some people but not for me! Ouch!
Hi Rick,
I’m so sorry your bread did not turn out. Brioche can be tricky with all that butter. If you will send me an email, I am eager to troubleshoot with you. Give me as many details as you can.
I have my bread in my machine right now, but I’m following your directions, I don’t think it will come out correctly. I set timers to check the dough and to add the butter, but by the time I added the butter it’s not incorporating because the dough is already in a ball. I’ve restarted the knead cycle in hopes to salvage it, but I don’t think there’s any hope. I guess I’ll try again at some point and adjust my times. Do you have any other suggestions?
Hi Melissa,
You may need to help the butter incorporate into the dough by pushing it into the dough with a small spatula as you add it. See the video.
My bread machine has a receptacle for adding the dry yeast. Can I still add it there or should I bypass that and add according to the instructions?
Hi Margaret,
I would bypass it. Just lay it on top of the flour as long as flour is the last ingredient you add.
Wonderful recipe. I wanted a slightly more cake like stollen, so thought I would try this recipe and add red & green candied cherries. It was just what I had hoped for. Thank you!
Fantastic Jori. You’re my kind of cook. Experiment until you figure out what suits you perfectly. Good job!
I just wanted to say that this is a really fantastic recipe, I’d tried others before that didn’t work but this really does. I even managed to make it using dairy free butter for my son who’s allergic to dairy and it worked a treat. Thank you!
Oh Lissie, I’m so glad to hear this. I’ve never made these with dairy-free butter. Happy to know that’s an option.
Can I use unbleached enriched artisan bread flour For the brioche recipe? I plan on making the brioche with the raisins and sanding sugar…The brand of the flour is bobs red mill..Also, can the milk be either whole milk or low-fat milk? Thanks for your reply!
Hi Ingrid,
Yes, that flour should work just fine. Regarding the milk: whole milk will result in a richer (and more delicious) product, but low-fat will work, too.
Hi. I plan to try the brioche recipe, but I have a question before starting. Milk is listed as 1/3 cup in the ingredients section, but the instructions indicate making the tang zhong with 1 tablespoon of flour and 1/3 cup of milk, and then adding an additional 1/4 cup of milk. So which is correct, (a) 1/3 cup of milk or (b) 1/3 + 1/4 cups of milk?
Mel, You are very observant. I tested and changed this so many times. Looks like I missed deleting the instructions to add additional 1/4 cup of milk. I have corrected the recipe.
Let me say it another way so there will be no misunderstanding. You will need only 1/3 cup of milk to make the Tangzhong. You WILL NOT need to add any more milk.
Let me know how these turn out for you if you try them.
Hey there! I found your brioche recipe via a search for brioche on Foodgawker. I simplified it even more but baking it in a pullman loaf pan. The result is most beautiful toast ever to grace the planet.
I wanted to thank you for posting this recipe. I have made many types of bread before but never tackled brioche as I thought it would be too complicated (I don’t know where I got this idea!) and your encouragement to just dump in all the stuff and mix for 15 min – really worked! It was a very beautiful dough, I couldn’t believe it. I didn’t cool the dough, against your warning, and still achieved a slice of toast the likes of which I have never encountered.
Really, thanks so much!