Honey Wheat Bread Machine Recipe (Oven-Baked)
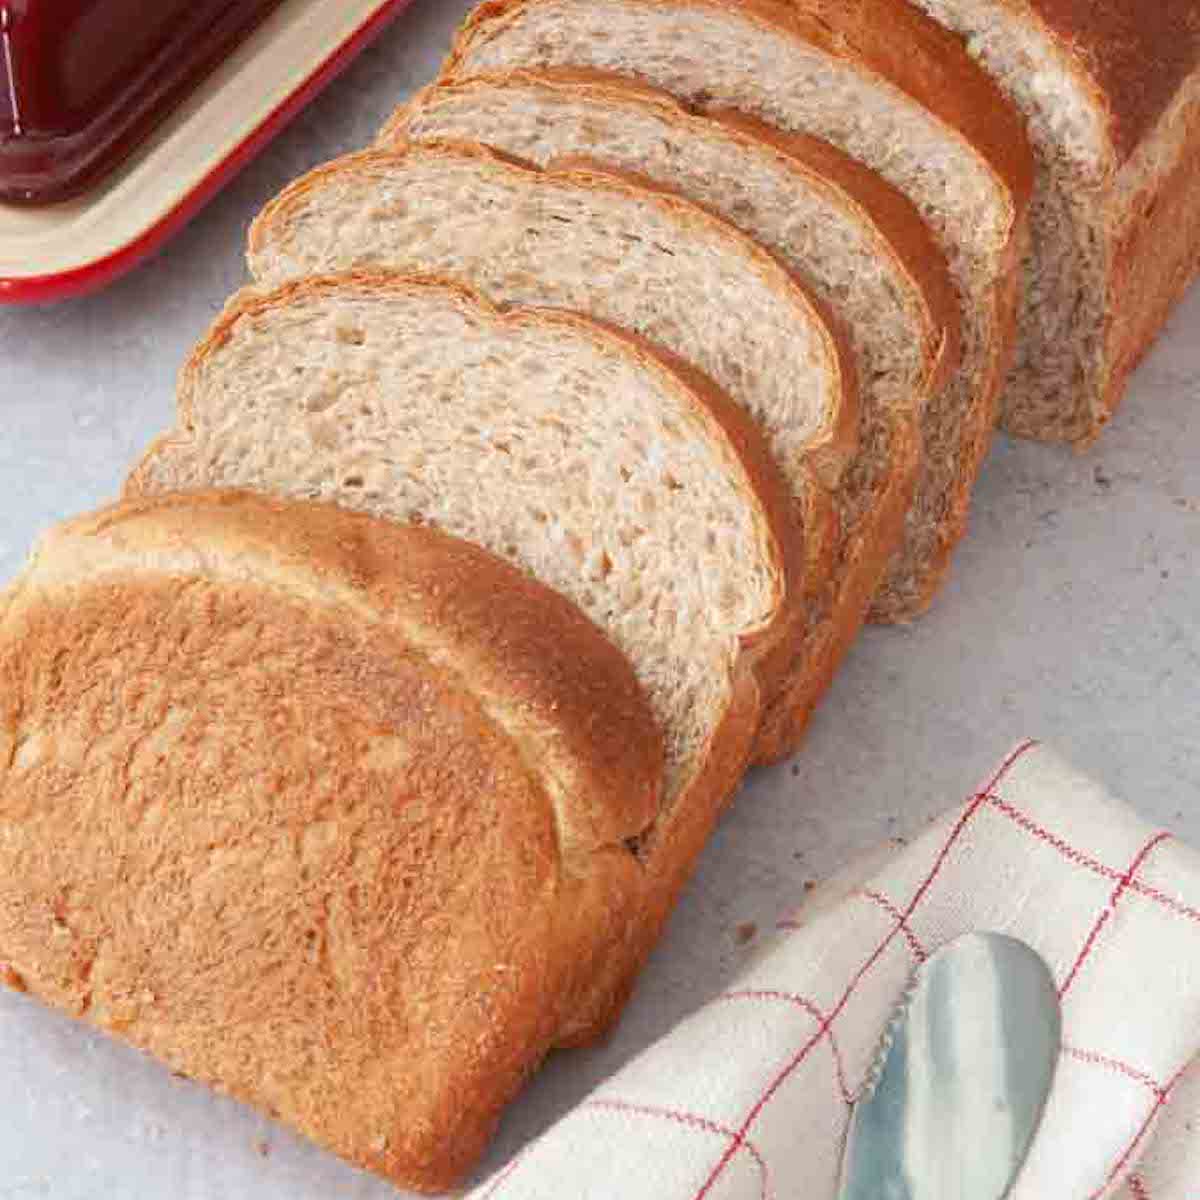
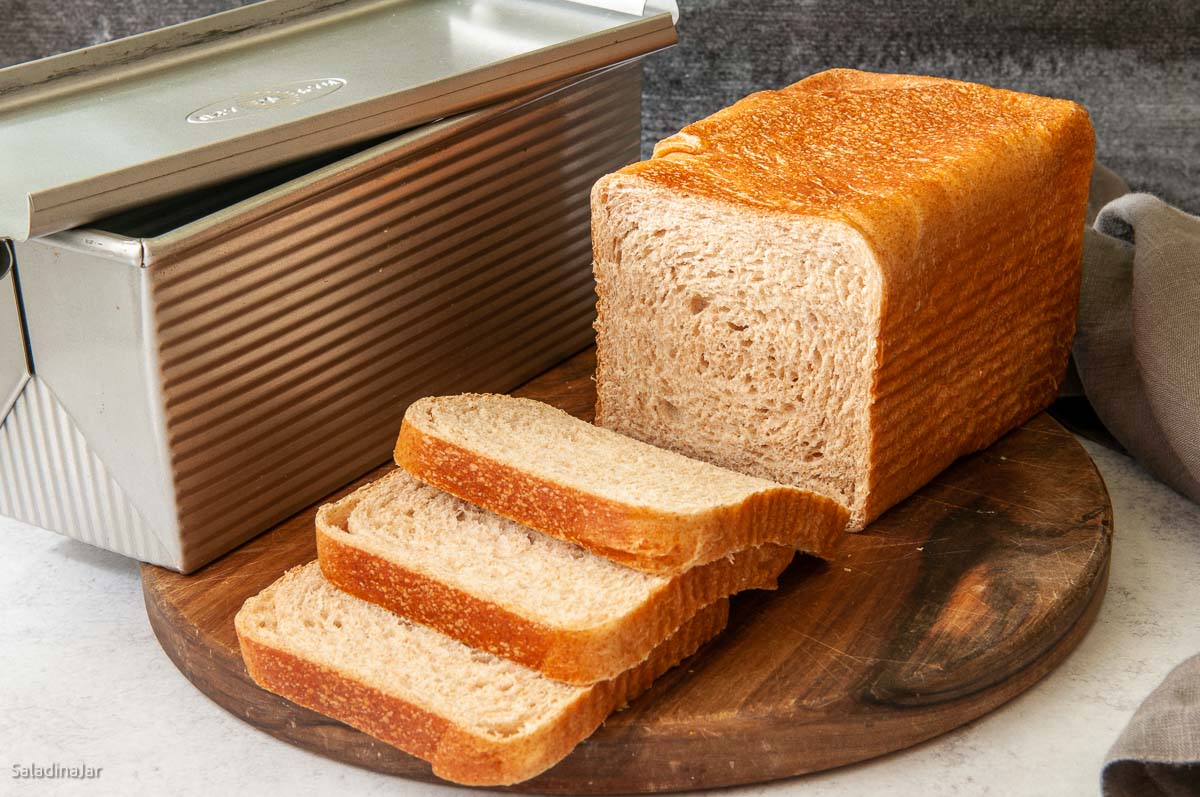
Sneak Preview: This honey wheat bread machine recipe makes a soft, sliceable sandwich loaf with a blend of whole wheat and white flour—ready in about 3½ hours.
This post contains affiliate links. As an Amazon Associate, I earn from qualifying purchases at no extra cost to you.
If you’re easing away from white bread, this honey wheat loaf is a gentle transition: lighter texture, great flavor, and beginner-friendly.
It’s not squishy-soft like white bread, but it’s lighter than most 100% whole wheat loaves—and much easier to make.
How I Use a Bread Machine for Better Bread
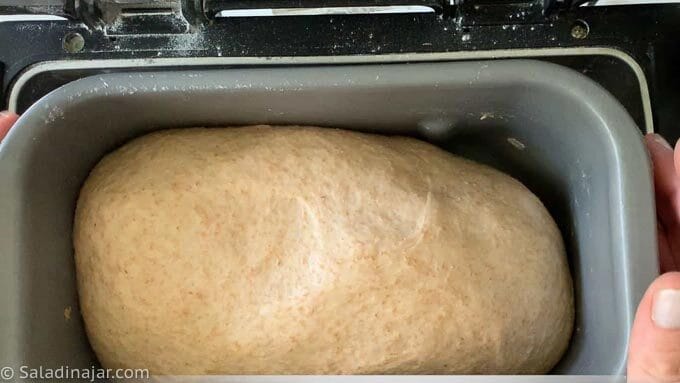
I use my bread machine (my favorite) to mix and knead the dough using the DOUGH cycle, then shape the loaf and bake it in a conventional oven. This approach gives me better rise, structure, and crust — results I’m happy to share with family and friends.
If you prefer to bake bread entirely in your machine, you can—but results will vary depending on the recipe, humidity, and your bread machine model. My free Bread Machine Crash Course explains my approach in more detail.
Ingredients &Substitutions
• WATER: Cool tap water is fine; overnight rest helps reduce chlorine.
• MILK: Any dairy or non-dairy milk works; higher fat = more tender loaf. No need to warm.
• HONEY: Adds sweetness and moisture. Sub with maple syrup (less sweet) or brown sugar.
• BUTTER: Adds richness. Sub with vegetable oil if needed.
• SALT: Use table or sea salt; increase slightly if using Kosher salt.
• WHOLE WHEAT FLOUR: White whole wheat is a milder-tasting substitute.
• BREAD FLOUR: Can sub all-purpose, but bread may be denser.
• BREAD MACHINE YEAST: Use instant or bread machine yeast. For active dry, increase slightly—no need to dissolve.

How To MakeThis Honey Wheat Bread Machine Recipe in a Breadmaker
⬇️ Jump to the recipe below for exact amounts and detailed instructions.

Honey Wheat Bread Machine Recipe (Oven-Baked)
Video
Ingredients
- ½ cup (114 g) water, cool
- ½ cup (114 g) milk, cool
- ¼ cup (84 g) honey
- 1½ tablespoons (21 g) unsalted butter, cold and chopped
- 1½ teaspoon salt
- 1½ cups (180 g) whole wheat flour
- 1½ cups (180 g) bread flour
- 1½ teaspoon bread machine or instant yeast
Instructions
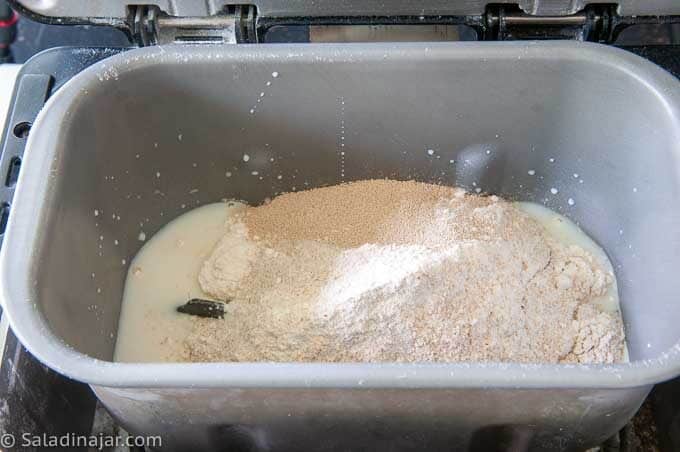
- Load Ingredients: Add ½ cup (114 g) water, cool, ½ cup (114 g) milk, cool, ¼ cup (84 g) honey, 1½ tablespoons (21 g) unsalted butter, cold and chopped, 1½ teaspoon salt, 1½ cups (180 g) whole wheat flour, 1½ cups (180 g) bread flour, and 1½ teaspoon bread machine or instant yeast into the bread machine pan in the order given.
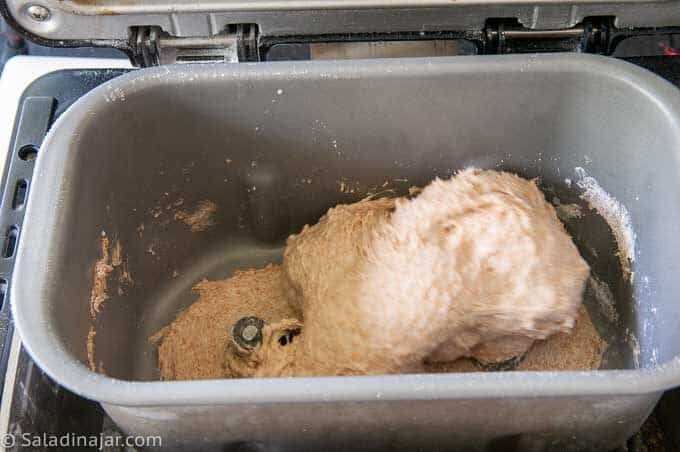
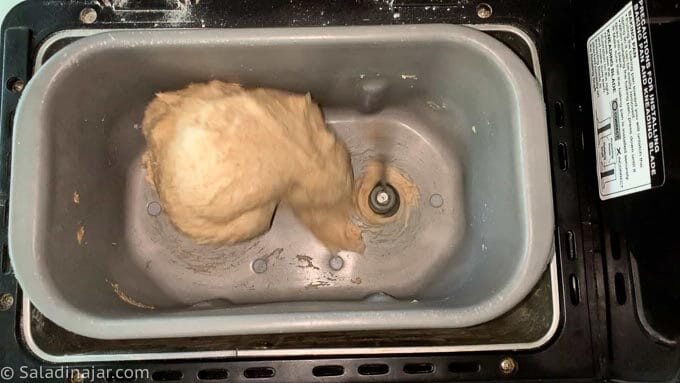
- Select the DOUGH cycle and start.First check: After a couple of minutes, check the dough to make sure it is coming together into a raggedy ball. If not, add more water 1 tablespoon at a time. If you see pancake batter instead of dough, you forgot some flour—just add it slowly until everything pulls together.Second check: Check dough again after about 15 minutes. The dough should stick to the sides of the pan, then pull away cleanly. If too wet, add flour 1 tablespoon at a time. If too dry and the dough doesn't stick at all, add more liquid. See more details–Surprising Secret for Making Better Bread with a Bread Machine.NOTE: Bread dough is influenced by flour, humidity, and even your kitchen temperature—so use this step to fine-tune the dough for your environment.
- End of DOUGH cycle: The dough should be doubled. If not, give it more rise time until it is. Restart the DOUGH cycle and knead for 5-10 seconds to deflate the dough. Stop the machine and turn the dough out onto a lightly floured surface, shape into a smooth ball, cover, and let rest for 10 minutes.
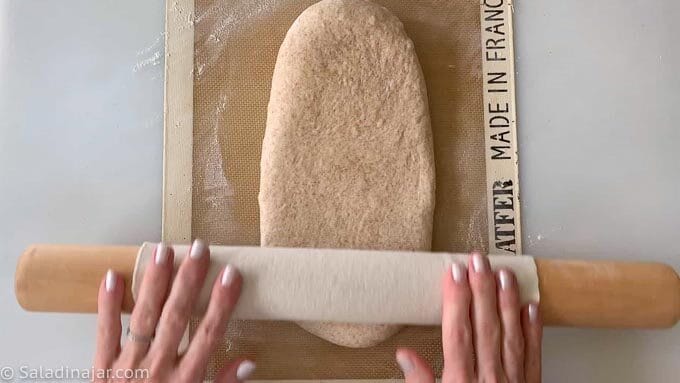
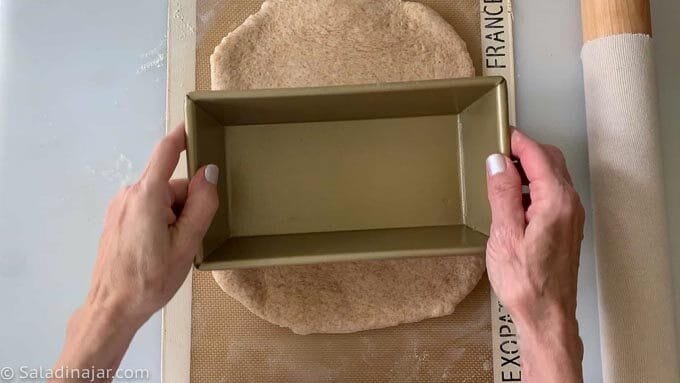
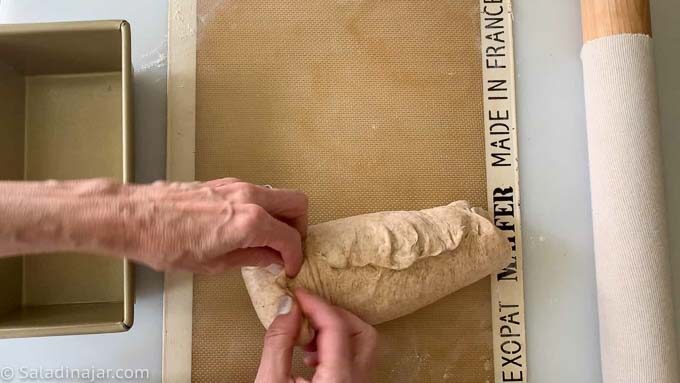
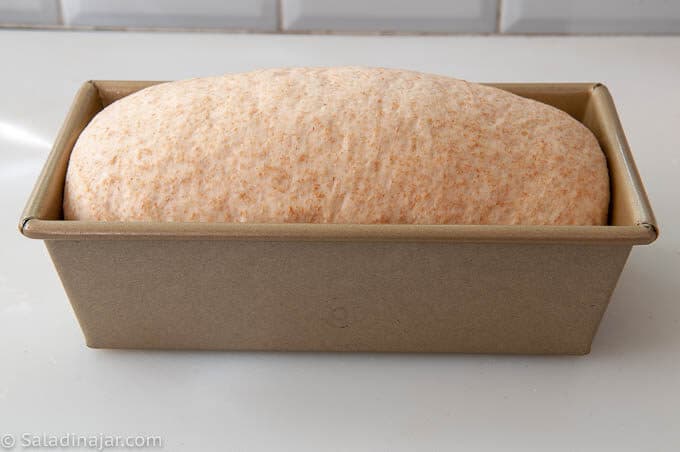
- Shape the Loaf: Roll into a rectangle (about 9×14 inches), then roll tightly from the short side. Pinch seams and tuck ends under.
- Second Rise: Place into a greased loaf pan (1-quart capacity or 8½x4½ inches) with the seam side down. The dough should fill the pan halfway. Cover with a tea towel or wax paper.
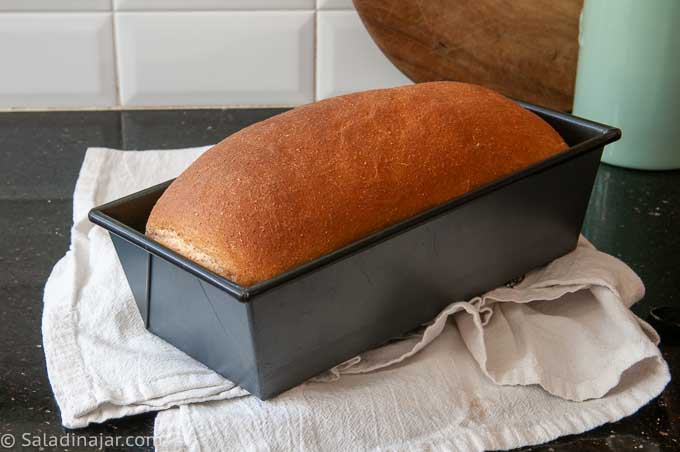
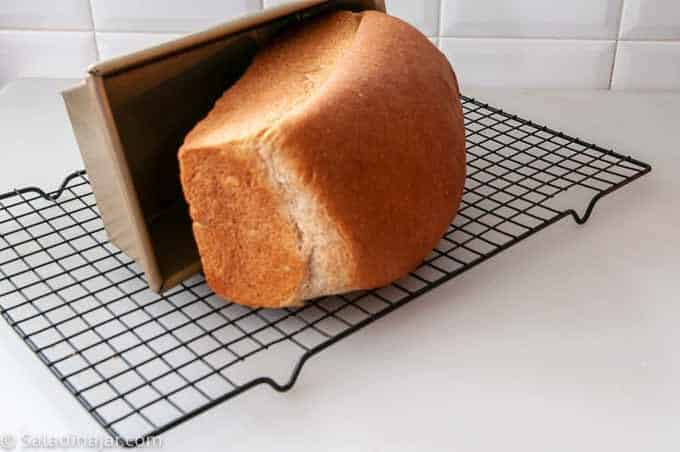
- Bake: Preheat the oven to 375˚F (190˚C) and bake for 25-30 minutes until the internal temperature reaches 190˚F (88˚C). Cover with foil halfway through baking time to prevent excessive browning.
- Cool & Slice: Let cool in the pan for 15 minutes, then transfer to a rack. Wait at least an hour before slicing.
Notes
- Unbaked dough: Freeze after the DOUGH cycle or after shaping (before final rise). Defrost in the fridge overnight.
- Baked bread: Double-wrap and freeze up to one month. Reheat gently.
- Stand Mixer: Mix until moistened, then knead with a dough hook (speed 2–3) until smooth and elastic (5–10 minutes). Let rise, deflate, and shape as directed.
- By Hand: Mix to a shaggy dough, knead on a floured surface until smooth and elastic (10–20 minutes). Let rise, deflate, and shape as directed.
Equipment
Nutrition
All images and text ©️ Paula Rhodes for Salad in a Jar.com
What Readers Ask Me About This Recipe
Can I use 100% whole wheat flour?
Not in this recipe. Whole wheat needs more hydration and adjustments. Try a tested 100% whole wheat bread recipe instead.
Do I need to add vital wheat gluten to get a good rise?
No. The bread flour in this recipe provides enough gluten for a good rise.
Final Thoughts
This is the kind of whole wheat bread that earns a permanent spot in your rotation. If you’re easing into whole grains or just want a reliable loaf for sandwiches, this one delivers. Don’t forget: mastering the dough consistency check is the secret to bread worth sharing.
Got leftovers? turn the stale crumbs from this bread recipe into Bread Crumb Pudding. Serve with whipped cream for a memorable treat.
— Paula, Home Economist
Homemade Food Worth Sharing
Need help troubleshooting?
Email me: Paula at saladinajar.com — photos help!

Hello!
I’m curious as to why cool milk and water instead of slightly warmed or room temp? Same question with the butter please.
I can’t wait to make this recipe with the kids!
Nathalie
Hi Nathalie,
Good question. It’s because of the “friction factor” caused by the paddles in a bread machine. The ingredients will warm up quickly once the paddles go into action. If you use warm liquids and your kitchen is even moderately warm, you’re dough can easily jump to 82-85˚F or higher as it mixes. This is not particularly good for the gluten and often leads to stickiness causing people to add too much flour. You can read more about it here. I live in Texas, so this is a big issue year-round. Others only need to think about it in the summertime when their kitchen is warmer.
Regarding the butter: To some extent, it’s the same friction issue. But there’s something else. If you use melted butter, it can make the dough seem too sticky and it’s tempting to add more flour. If you just chop up the butter finely, it will blend perfectly into the dough as it’s kneaded without getting greasy or coating the yeast before it’s mixed. Hint: I always chop the butter with a table knife because that means the butter is the perfect temperature–not too hot(soft) and not too cold (hard). Try it and you’ll see.
Hi Paula, I attempted to make this bread this morning, but after I started the dough cycle I was reading your notes and to my dismay i read that I used the wrong whole wheat flour. I used King Arthur 100% whole wheat flour. My question is..isn’t whole wheat flour all the same? Is there a brand I need to purchase? Thank you ..love your recipes!
Hi Marlene,
You’re not alone—this is a common question! King Arthur’s 100% whole wheat flour is a traditional red wheat, which has a stronger flavor and can make denser bread. White whole wheat flour (like King Arthur’s or Gold Medal’s version) is made from a lighter-colored wheat and gives a milder taste and softer texture while still being 100% whole grain. Both are great—but they do behave a little differently in recipes. Your bread should still turn out fine, just a bit heartier. Different brands will vary but any brand should work fine with this recipe.
Thanks for baking with me!
This bread is a winner. I make it at least once a week, much to the delight of my family. One question- what can you do if you accidentally over proof it to bring it back down, either with 1st or (more commonly) 2nd rising? I set timers to check my bread, but if the dog runs off, the neighbor’s chimney is on fire, or the power goes out, is there a fix? I’ve tried refrigerating the dough to calm it down, but it seems to rise even more. Thanks!
Hi Laurie,
Thanks for the kind words—I love knowing this bread is a weekly favorite at your house!
About over-proofing:
If it happens during the first rise, just punch the dough down, reshape, and let it rise again. It often bounces back just fine.
For the second rise, it’s trickier. If the dough starts to collapse or feels fragile, gently reshape it, rest it 15–20 minutes, then bake. It won’t be quite the same, but still tasty.
Refrigeration can help if you catch it early, but once it’s over-proofed, the cold doesn’t always reverse the damage—it sometimes makes it puff more as it warms up again.
Hope that helps.
This honey wheat bread was delicious. I’ve tried 4 recipes and they were not good. They would not taste good or would fall apart. I made this exactly like you said.
Hi Mary,
I”m so glad it worked for you. Enjoy!
I made this bread as instructed and it turned out wonderful. Great texture and the taste is so delicious.
Thank you Paula! I finally have a bread machine honey wheat that tastes more like the honey wheat I have made the old fashion way.
Hi DJ,
This is my favorite kind of comment. So glad you landed on this recipe. Hope you enjoy this recipe for years to come.
First time making this bread and was wondering if you could use half the amount of honey and it would still come out ok? Have been making your pizza dough and really like it!
Hi Jeanne,
Your bread will probably be fine, but there is a tradeoff. Just so you know what to expect, I wrote about it here. I would love to hear how your bread turns out if you try it.
Can I use the bread machine for the entire process?
Hi Mary Ann,
I’ve never tried it, but you are welcome to give it a go. I’m very picky about my bread because I either share it or sell it, so I never bake bread in my machine. However, even if it works in my machine, it might not work in yours because: 1. All machines are programmed slightly differently 2. The temperatures at your house are probably different than mine 3. The flour we have available to use probably varies and 4. The user’s experience in reading the dough and making adjustments can make all the difference. If you try it, I hope you’ll leave a comment to help other readers. Thank you.
Can I double this recipe? I use a 2 lb. bread machine, and like to mix 2 loaves at a time, then bake in 8 1/2 x 4 1/2” pans. Thanks.
Hi Sara,
Since that is a 3-cup-of-flour recipe, that would be 6 cups. It depends on your machine if you can do this. If it is a good, heavy duty machine with two blades, it will probably be OK, as long as you don’t try to bake that much in your machine. But watch it carefully. If you notice that it starts to squeak or make strange noises, or gets hot, abandon the idea immediately. If your machine only has one blade, observe the dough carefully to make sure the dough is kneaded properly. If necessary, repeat the kneading phase before the first rise. I wrote a post about doubling recipes in a bread machine here. .
Hi to both Mary Ann and Paula, I have made this recipe in my bread maker (1.5 lb loaf) yesterday and it came out wonderfully! So nice that, in fact, I am currently making another loaf to share with my neighbour :). I only have active dry yeast in my house so I did add the 1/4 tsp more as directed. Thank you for the recipe, Paula!
Carla
Thank you so much for your lovely comment! I’m thrilled to hear that the recipe worked so well for you, and how kind of you to bake a loaf to share with your neighbor—what a thoughtful gesture! ?
Great job adjusting for the active dry yeast—it sounds like you nailed it. I hope your neighbor enjoys the bread as much as you do. Let me know if you try any other recipes or fun variations.
Hi Paula , I have a bag of very strong whole meal bread flour can I use this
For this recipe .Thanks for this and all your other recipes and help .
Jules
Hi Jules,
It’s great to hear from you. This is probably a good recipe to try for your flour. Be sure to let me know how it goes.
I am going to make this loaf today and I will leave comments after. Assuming I love it, you are the bread queen so I gather I will, is there a way to make the dough then freeze half the dough for another day and bake half now? My son and I are the only one eating it and we rarely finish a loaf before it starts to mold. Would I just thaw it, shape it, let it rise once then bake? Also how long do you think you would bake a half loaf?
Hi Megan,
Yes, you could freeze half of the dough, but I would shape it before you freeze it and then freeze it in the pan you would bake it in. After the dough is frozen, you could take it out of the pan, double-wrap it, and put it back in the freezer.
I can only guess how long it would take to bake. If the whole loaf takes 35 minutes, I would check the smaller loaf at 20 minutes. Using a quick-read digital thermometer removes all the guesswork, and your bread will be cooked all the way through every time. Use the some temperature for a big or small loaf.
Love this recipe for a sandwich loaf. I have made it multiple times and it is always great. My husband really likes it. I made it into rolls the other day and they were wonderful. I divided the dough into 16 balls and used 2 cake pans. I cooked both pans. We ate one pan over the next few days but once the 2nd pan was cooled I froze the rolls. Took a couple out of the freezer last night, wrapped loosely in foil and heated for about 10 minutes in my toaster oven. They were just as delicious as they were fresh. Thanks for a great recipe.
Hi Shirley,
I’m so glad you took the time to write and share your experience with this recipe. Others have asked me about it. Now we know.
Hi Paula, I am going to make this bread today. I do have 1 question. In your zojirushi bread maker do you use the Active dry yeast dough cycle or the Instant yeast dough cycle. From having other bread makers my dough cycle was always much longer even using instant,rapid rise, bread machine yeast. I used the instant rise yesterday on your condense mild bread and it just didn’t do the trick. What would you suggest. I am going towards the Active yeast dough cycle but I am not sure. Thanks so much
Hi Lynda,
I have never seen cycles on a Zoji labeled “Active Dry Yeast Dough Cycle” or “Instant Yeast Dough Cycle”? Maybe you are talking about the “DOUGH” cycle and the “RAPID CYCLE.”
You could use either cycle for either yeast. However, I NEVER use the rapid cycle. It does not allow enough time for flavor development. See this post.How To Add More Flavor to Homemade Bread. I always use the DOUGH cycle for all bread machine recipes on my website. I don’t recommend Active Dry yeast for the bread machine. Instant yeast is the perfect match. You don’t have to dissolve instant yeast, and it starts working quicker than active dry yeast. You can read more about using yeast in bread machines here: 5 Keys To Using Yeast with Confidence in Your Bread Machine.
I hope this answers your question.
I made the honey wheat loaf today and it’s a huge success, thank you particularly for giving weights as well as cups. It’s so much easier for those of us in the UK. I wondered though, would it work just as well with quite a lot less honey when making it for sandwiches? It’s delicious with butter or a sweet spread but I think it’s maybe too sweet for savoury fillings. Thanks again.
Hi Val,
You’re welcome on the weights. I have so many readers in Canada, Australia, and the UK, that it’s totally worth the trouble. And it makes better bread, too. But it’s a hard sell to Americans. ?
I think your bread would be just as good with less honey. I love this bread for a ham sandwich. I guess it’s the sweet and salty that calls my name. But you get to do it how you want when you’re the bread baker. I wouldn’t cut it out completely because the yeast likes a bit of sugar to eat and grow although it’s not absolutely necessary.
can you use powdered milk instead? our family goes through SO much milk, without needing to use it to bake with …
Yes. It won’t be quite as rich (less fat), but many people don’t care about that.
Can I add nuts or seeds to this recipe?
Hi Geri,
Oh yes, of course. Add them in the last 5 minutes before the kneading phase ends when you hear your machine beep. Be careful of the amounts you add. Too much and your bread will be dense. I recommend you start about with 1/2 cup or nuts or seeds. If that goes well, try a little more the next time.
Hope this helps.
Hi Paula , I’ve been making a lot of your recipes for a few years now and never had a failure! Your detailed write ups and recipes are great. I have been looking for a whole wheat bread recipe for a long time and this weekend I tried your honey whole wheat! I have to say it never disappointed. The crumb was close, rose perfectly and the taste was out of this world! We eat w w bread mostly and I have been trying to find the one recipe was the hubby would love.! Well I found it in yours! It’s a keeper and thanks so much for you recipes and your time you put into them so we can have success making bread with bread makers!
Daphne,
You made my day!! Thank you for writing such a kind and encouraging note. I love that recipe, too. However, I suspect you are a good baker who knows how to make adjustments as you go. I know too well that the recipe isn’t everything.
I’ve come back to say this is my go to recipe for my everyday bread – sandwiches, toast or just with butter and sometimes a bit of sugar – I used to eat this as a kid while Mom got dinner ready. Love it so tasty and the texture is perfect.
Thanks, Kathy. Sounds like comfort food for you,
If I use White Whole Wheat flour I stead of regular Whole Wheat flour, would there be any change in the amount I use??
No, it should be the same. However, you always want to check the moisture in your dough as you knead it. You can read more about that here.
Beautiful AND delicious loaf of bread! I’ll definitely be making this one again. Now onto the Oatmeal Bread with Sunflower Seeds!
This is a great loaf of bread. Wish I could add my photos of it. Gorgeous loaf ?
Hi Doreen,
So glad to hear that your bread turned out great. High five!! It’s a satisfying feeling, istn’t it. I love to see pictures. If it’s convenient, you can always send them to my email: Paula at saladinajar.com. Wonder what you will try next.
I made your Sourdough Bread Machine Bread: A Simple Loaf Recipe and it came out wonderful. I like using my Sourdough could I add it to this recipe? but I don’t know how change the recipe. Thank you
Hi Margaret,
Yes, you can add sourdough to almost any recipe. It will change the texture depending on the amount and strength of your starter. A standard rule when adding sourdough to a recipe is to count half of it as liquid. In other words, if you add a cup of starter, deduct 1/2 cup of the liquid. As with all bread machine recipes, I always check while the dough is kneading to see if I need to add more flour or liquid to make the dough stick to the sides, then pull away cleanly. It’s especially important in this situation since everybody’s starter is slightly different. I would probably add somewhere between 1/4 to 1 cup of starter and then make the appropriate adjustment with the liquid.
Can’t wait to hear how it goes if you try it with the Honey Wheat bread recipe.
⭐️⭐️⭐️⭐️⭐️
Perfect loaf of bread!
Thanks for your wonderful recipe. My confidence is higher than before. The bread is yummy.
Great!! That is my goal. Glad you are enjoying the bread.
when using sproutedspeltflour can I use all spelt or do I need to add something else w the spelt?
You can absolutely use 100% sprouted spelt flour, but since spelt has a lower gluten content, your dough might be a little more delicate and result in a slightly denser loaf. If you want a bit more structure, you can add a teaspoon of vital wheat gluten per cup of flour or mix in a little whole wheat or bread flour.
Either way, it’ll still turn out delicious—just with a softer, more rustic texture. Hope that helps! Let me know if you have any other questions.
I love this recipe it is so easy my family enjoys it I’ve made this over a dozen!!!
What a great testimonial, Naomi. Thanks so much!
I’m loving this recipe! Thank you for sharing. Easy and delicious ?
Thanks for coming back to say so, Lee.
Hi Paula,
I’ve just taken this loaf out of the oven, and it’s everything you said it would be..so soft and delicious! My wholewheat bread flour had various seeds in it, which have only added a little to the texture.
Thanks so much Paula, I love your recipes and have never had one turn out badly….I just have to decide which one to try next now.
Great news Elaine. It’s so fun to pull a wonderful loaf of bread out of the oven. Don’t you think? Thanks for coming back to report on the results.
Hi!
I’m trying this recipe for the first time today…in the instructions at the top you say to hold back half a cup of flour. In the recipe you say to hold back a tablespoon. I’m thinking the tablespoon is correct? I’m going to try that since I’m ready to start now!
Thanks!
Hi Lisa,
So glad you wrote. I hope your bread turned out good and totally delicious. I corrected the actual recipe to say “hold back 1/2 cup.” Most people will probably need to add the whole 1/2 cup to get the right consistency. Flours vary as well as temperature and humidity. All these things make a difference.
Hi I just made this and am thrilled with the consistency. I do have a question about flour…I buy stone ground whole white hard wheat bread flour and whole white winter wheat flour. What do you mean when you say bread flour? It didn’t rise very high with the first rising. Should I have waited longer? Sadly I was out of time to wait longer and so rolled it up and covered it for the second rise which was about an hour. Regardless I’m happy with the bread. It’s the lightest whole wheat flour I’ve had thus far.
Thx so much!
Cheri
The bread flour I use and commonly refer to is not whole wheat flour. It’s still white flour but it has more protein than all-purpose flour which helps the bread rise. Are you using 100% white whole wheat flour? Since whole wheat flour is lower in gluten, you might consider adding vital wheat gluten to the mix so your bread will have a better rise and texture. Follow the directions on the package for the amount you should add per cup. In general, I think 1 tablespoon per cup of flour is common. You may have to add extra water when you use it. Vital wheat gluten absorbs moisture.
Can I completely just use the bread machine to bake this bread instead of having to bake it in the oven? Thank you.
Hi Magdalene,
You can try, but it will be quite different from the pictures on my post. You may not care if you are just using it for toast and aren’t too particular about looks. If all goes well, you’ll get a loaf that is the shape of your bread machine with holes in the bottom from the paddles. Loaves baked in a bread machine are usually much lighter on top than the sides and bottom. The crust will most likely be thick and a little tough. Be sure your bread machine is not sitting in a drafty location. Don’t forget to open the lid and check the consistency during the kneading process to avoid any big surprises. See this post for more information.
Does it make a difference what mile you use? Whole, 1% 2% or skim?
You can use any kind of milk. However, the more fat in the milk, the richer and tastier the bread. Choose your priority. ?
Just made this yesterday. Absolutely fantastic! So light, fluffy and delicious. Substituted buttermilk for regular milk. Super easy. Thank you!!
Buttermilk? Great idea. I must try that, too. Buttermilk seems to make everything better. Thanks for writing.
Just made this today to go with some homemade honey mesquite Turkey lunchmeat! Paula, your recipes are always exactly perfect from instructions to measurements of ingredients. Thank you!
Hi Chelsea,
Well, thank you, my friend. I’m so glad it worked for you. I try to give all the details anybody could possibly need, but sometimes those little yeasty bodies can be unpredictable. Have a great week!
Where did you get a 2 qt pan? Or what is it’s dimensions? I’m having a hard time finding one big enough
Hello Alice,
I’m sorry I made a mistake. You need a pan that will hold 1 quart of water. I will correct it on the post I’m so sorry for any inconvenience this has caused you. My pan measures 8 1/2 x 4 1/2 inches around the top. It’s this one: https://www.williams-sonoma.com/products/usa-pan-goldtouch-nonstick-loaf-pan/?catalogId=44&sku=1983915&cm_ven=PLA&cm_cat=Google&cm_pla=Bakeware%20%3E%20Bread%20%26%20Loaf%20Pans®ion_id=680400&cm_ite=1983915&gclid=Cj0KCQiAqo3-BRDoARIsAE5vnaKVM9pSyR8aDynkSdujksQM3nfsq4r7z0afYk1XQOxDA7SVFYsF_rYaAoAEEALw_wcB
I just now noticed that Willams-Sonoma is saying this pan is appropriate for a 1 lb. loaf. The recipe actually makes a 1 1/2 lb. loaf. Perhaps if you are making white bread the larger size would be better. But since this is wheat bread and it doesn’t rise as much, the 1-lb pan will work.
I was gifted a beautiful compact bread maker and was very anxious to test it out as I made bread the traditional way and it was just so time consuming. Well I tried the soup to nuts method using solely the machine and what it produced was a piece of bread that resembled a broken chunk of concrete. Not easily defeated, I found your website this morning read through a few tips and tricks and attempted the whole wheat honey loaf. I cannot tell you how simple your bread machine/oven method is and how fool proof it is. I made the most beautiful loaf of bread that is very tasty with a slight sweetness from the honey. Thanks for letting me know that I should use Bread Flour instead of AP, my machine recipe calls for AP and I just was not happy with the results. I look forward to baking more of your recipes. You rock!
I was gifted a beautiful compact bread maker and was very anxious to test it out as I made bread the traditional way and it was just so time consuming. Well I tried the soup to nuts method using solely the machine and what it produced was a piece of bread that resembled a broken chunk of concrete. Not easily defeated, I found your website this morning read through a few tips and tricks and attempted the whole wheat honey loaf. I cannot tell you how simple your bread machine/oven method is and how fool proof it is. I made the most beautiful loaf of bread that is very tasty with a slight sweetness from the honey. Thanks for letting me know that I should use Bread Flour instead of AP, my machine recipe calls for AP and I just was not happy with the results. I look forward to baking more of your recipes. You rock!
If I am a little sorry on honey, is it ok or should I use something in place of it?
You could use some maple syrup or brown sugar. Be sure to check that the bread has the right consistency about 10 minutes into the kneading portion of the dough cycle. You may need to add more flour. You’re going for dough that sticks to the side briefly, and then pulls away cleanly.
Hi Paula, thank you so much for such an easy and wonderful recipe! I have followed so many whole wheat bread recipes and also threw away quite a few loaves because they either over proofed or came out too dense! I made the bread today and it came out so fluffy and soft! I only used 5 tbsp of the bread flour from the reserved 1/2 cup and then used about 1 more tbsp for the rolling. However, I did find it hard to roll because the dough was too soft and sticky, not like yours though. Perhaps I should have used more flour or less water? If I wanted to decrease the salt amount, what would you recommend so that it won’t affect the rising and texture of the bread? One more question: I used a 9.5″x5.5″ loaf pan. If I wanted the bread to come out higher, should I used a 8.5 pan with the 3 cups of flour?
Hi Agnes,
Congratulations on your successful loaf. To answer your questions: You could use a little more flour when rolling out the bread if it is too sticky. Using a silicone mat to roll the dough on might allow you to use a little less flour. When the bread was in the pan, did it stick and then pull away cleanly at the end of the kneading portion of the cycle? That’s your goal for this recipe.
Be careful about decreasing the salt amount. Salt is an important partner with yeast. Using yeast without salt is like driving a car without brakes. The yeast will rise too fast and too high, then crash and leave you with a short squatty loaf. If you want to decrease the salt, start by experimenting with a 1/4 teaspoon less each time. When the bread no longer turns out to your satisfaction, you’ll know you have gone too far.
On the loaf pan, you are correct. Using a smaller pan with make the loaf higher, all other things being equal.
Happy Bread-Eating!
@Paula,
Thank you for your prompt reply. I tasted the bread this morning and it was very soft and moist. I was curious about what you put on your rolling pin. In your video, your dough didn’t look sticky at all when you rolled it. I just saw some non stick silicone rolling pin on Amazon. I wonder if it’s a good purchase.
That is a rolling pin cover. I ALWAYS use one.(They usually come with a pastry cloth. Google “rolling pin cover.”) I sprinkle flour on the cover before rolling dough. That way the cloth holds the flour instead of my dough.
Now that you ask, I realize I have never talked about it. I need to. Thanks for writing.
Have you ever doubled your recipe in the bread machine? Does it change the way it tastes or raises? I was wanting to do a double batch in 1 bread machine, then split the loaf between two bread pans to make more bread quicker. I didn’t know if it would mess with the bread at all?
Thank you!
Hi Megan,
You have asked a very good question. I should write an entire post about this subject. Let me try to put this in a nutshell.
It’s normally not a good idea to double a bread recipe for a bread machine. Here are some factors to consider: If you use any recipe containing more flour than the machine was designed for, it may result in bread that isn’t kneaded very well and/or over stress the motor of the machine. You’ll be able to hear it straining. Check your bread machine manual and see how much flour is called for in their recipes. Doubling this particular recipe would require 6 cups of flour which is more than any home bread machine I know about is designed to use. Most have a limit of 4-4 1/2cups, some 3 cups, and some small machines, even less.
Here’s what I do when I want a double batch. Start the first batch and let it run through the kneading portion of the DOUGH cycle (usually around 20 minutes but machines vary). When the machine goes quiet, remove the dough to a greased bowl, cover and set in a warm place to proof. Reset the machine and start with your second batch. Let that second batch stay in the machine until the DOUGH cycle completes or the dough has doubled. Shape both loaves and bake in your conventional oven.
Alternate method for a double batch: Obtain a second machine. Since I only use the DOUGH cycle, I have an old one that works just great when I only use it for mixing and kneading. I know several people who use a garage sale model for this purpose.
And now I’m going to write an entire article about this subject. Thank you for the idea.
Thank you for sharing this recipe. For a few years now, I have made a different whole wheat bread recipe which my family loved but I thought came out a little dense and dry. I tried this recipe on a whim and was pleasantly surprised by how soft and spongy the bread came out. I did not need the 1/2 cup bread flour that was set aside and maybe needed couple more tablespoons of water. I used 8.5 X 5.5 pan and baked for 25 minutes. Next time I will pull this out of the oven a few minutes early since the top was quite brown.
Thank you again for the wonderful recipe.
Edit: 8.5 x 4.5 bread pan
Glad it worked for you. About the too-brown top, can you move it to a lower shelf? Or you might want to throw a piece of aluminum foil over the top when it is as brown as you like. Pulling it out earlier might leave you with a gummy loaf that isn’t done all the way to the middle. Just some thoughts…
Thanks for writing.
Do you think one could apply the tangzhong method to this recipe? I just jumped over from your cheese bun recipe which uses this technique and I was hoping to find a whole wheat bread recipe that I could try it with. The cheese buns were exceptional!
Vivian,
I have not tried it with this particular recipe. Here’s what I would do. Go to this recipe: https://saladinajar.com/recipes/favorite-dinner-rolls-2/ Substitute 1/2 to 1 cup of whole wheat flour for the white flour. Proceed as usual. This recipe also includes the Tangzhong method. It’s actually the very same recipe as the cheese rolls without the cheese. I haven’t actually tried it, but I’m pretty sure this recipe would be fabulous with a some whole wheat flour
@Paula, Love your site. I had given up on my bread machine but thanks to you I am back to making your bread every week.
Hi Debbie,
Comments like these keep me going. Thanks so much for your kind thoughts.
This bread is currently in my oven and I’m so excited for the end result! I LOVE the artesano honey wheat bread but dislike the use of palm oil. (Save the rainforest!) If I master this recipe it will be my family’s weekly bread loaf for all uses. I feel confident in my ability because of your thorough instructions and helpful tips to yield the best results. So thank you for your dedication and time!
Alda,
Thanks for your kind words. Of course, the proof is in the pudding. How did your recipe turn out?
Hi Paula. I am going to make this in my bread machine tomorrow. One question on the yeast. I dont have bread machine yeast, just active dry on hand. My machine says to put yeast on the very top. Should I still go ahead and proof it first and add it as the first layer like you mentioned? Thanks so much. Cant wait to try it. Also, would evaporated milk work instead of regular?
Hi Daisy,
Active-dry yeast and bread machine yeast are now interchangeable. You no longer have to dissolve it. When you’re putting all your ingredients into the machine, add the yeast last on top of the flour just like the directions say. It’s still OK to proof active-dry yeast first if you want to (old habits die hard for some people), but it’s not necessary. One warning, active-dry yeast does not give as fast a rise as bread-machine yeast so you may have to allow extra time. Here is a really good article about this subject.
I’ve never tried using evaporated milk in this recipe, but I can’t imagine why it wouldn’t work. Hope the recipe turns out great for you.
Hi Paula,
What kind of salt do you use in your bread recipes? Kosher,sea,course,table? I have been looking at so many bread recipes lately and everyone has a different idea of which salt is best to use. I also know that different kind of salts require different kind of measurements. I would like your input on this since I highly regard your bread making skills and I use my bread maker a lot for kneeding.
Thanks for your response. ?
Hi PattiAnn,
(I like your name.) That is an excellent question!! I use Kosher these day–Diamond Krystal Kosher salt, to be specific. In past years, I used table salt. I haven’t changed the amount since I switched to Kosher to be honest. Since table salt is more dense, that means my bread is not as salty as it used to be, but that’s OK with me. I might be slightly liberal in my measuring since I know Kosher salt is lighter in density.
@Paula,
Got it. I have been using k-salt in my breads & fine sea salt in my sweet breads & muffins. I actually think k-salt tastes saltier than table salt but maybe that’s just me.
As for my name, I’m really a Patricia Ann. But one day, a college friend yelled out to me “Hey, PattiAnn ” and the name just kinda stuck.
Have a good day ???
I tried this bread yesterday and it was a grand success! The recipe is perfect, the texture and taste were amazing!
I love the fact that you’ve taken so much time to explain the bread machine process. It was very insightful for a newbie bread machine purchaser, such as myself. I made bread using my hands for kneading until it got too demanding on my hands. Realizing my love for baking breads, my parents gifted me a bread machine.I tried couple of breads in the machine and was not satisfied with the results. When I stumbled upon your website, I thought I hit a gold mine!
After yesterday’s success, I am keen to try more recipes from your website!
Hi Prajakta,
I can’t tell you how encouraging your comment is to me. Thanks so much for letting me know. I hope you have many more bread success stories in your future.
@Paula,
I just wanted to pop in and mention that I successfully made following few changes to this base recipe:
1) Replace milk with buttermilk (same quantity)
2) Replace honey with maple syrup (same quantity)
3) Add 2 Tbsp of Milk Powder
Like I said before, your recipe was perfect!
Prajakta,
All of your changes make perfect sense. As I always say, when you make bread yourself, you can tweak it to your own preferences and sometimes, to what you already have in your kitchen. Right? I’m so glad you wrote so that other people can try this if they want to.
I have probably my sixth loaf of this bread proofing now. We have enjoyed this bread, obviously, and your sharing of using the bread machine to do the hard work and then do the final touches and cooking in the oven are a game changer for me in all of my bread making. Thanks for this recipe as well as the others you’ve shared. Your tips, back stories, and blog are fun to read and easy to follow.
Hi Judy,
Thank you for your kind words. I agree with you that learning to use a bread machine along with your oven is a game-changer. Thanks again for the encouraging words. pr
HoHoHo… finally successful after 2nd attempt on this recipe ???
(p/s: with a Divine instruction, I put that pan at 1 level lower from the middle of the oven; in that position, the top brown to perfection throughout the 30mins baking without needing the foil shield)
Divine instruction is the best, don’t you think?
Foolproof and so good! Soft and delicious.
Hi Paula,
Can I just have the bread machine cook the dough instead of take it out and bake it in the oven?
Yes, you can. I used to do it that way but I wasn’t crazy about the results. It is easier. No harm in trying.
What to do if it didn’t rise completely after putting in loaf pan? Is just to the top of pan but not 1 inch above and has been resting for a couple of hours…
Hi Justina,
How big is your pan? How warm is the room where the pan is sitting? If the bread has almost doubled in size, go ahead and bake it. Since this reply is too late for that loaf of bread, I hope it turned out good for you.
I plan to make this bread today and wondered if buttermilk could be substituted for the milk… or would that even be good??? I love buttermilk in baked goods but didn’t know if this combo would work. Thanks!
Jennifer, I have not tried it. I do have some favorite bread recipes that call for buttermilk or yogurt and they are wonderful. Worth a try. Let me know how your bread turns out.
I made this bread today and it turned out great. I didn’t have milk so I bumped the water to 3/4 cup and used 1/4 cup of cream. I also added 1/4 cup of sunflower kernels because I like the extra texture. Thanks for my new go to light wheat bread recipe.
I like both of your variations. I’m thinking the sunflower would add great taste, too.