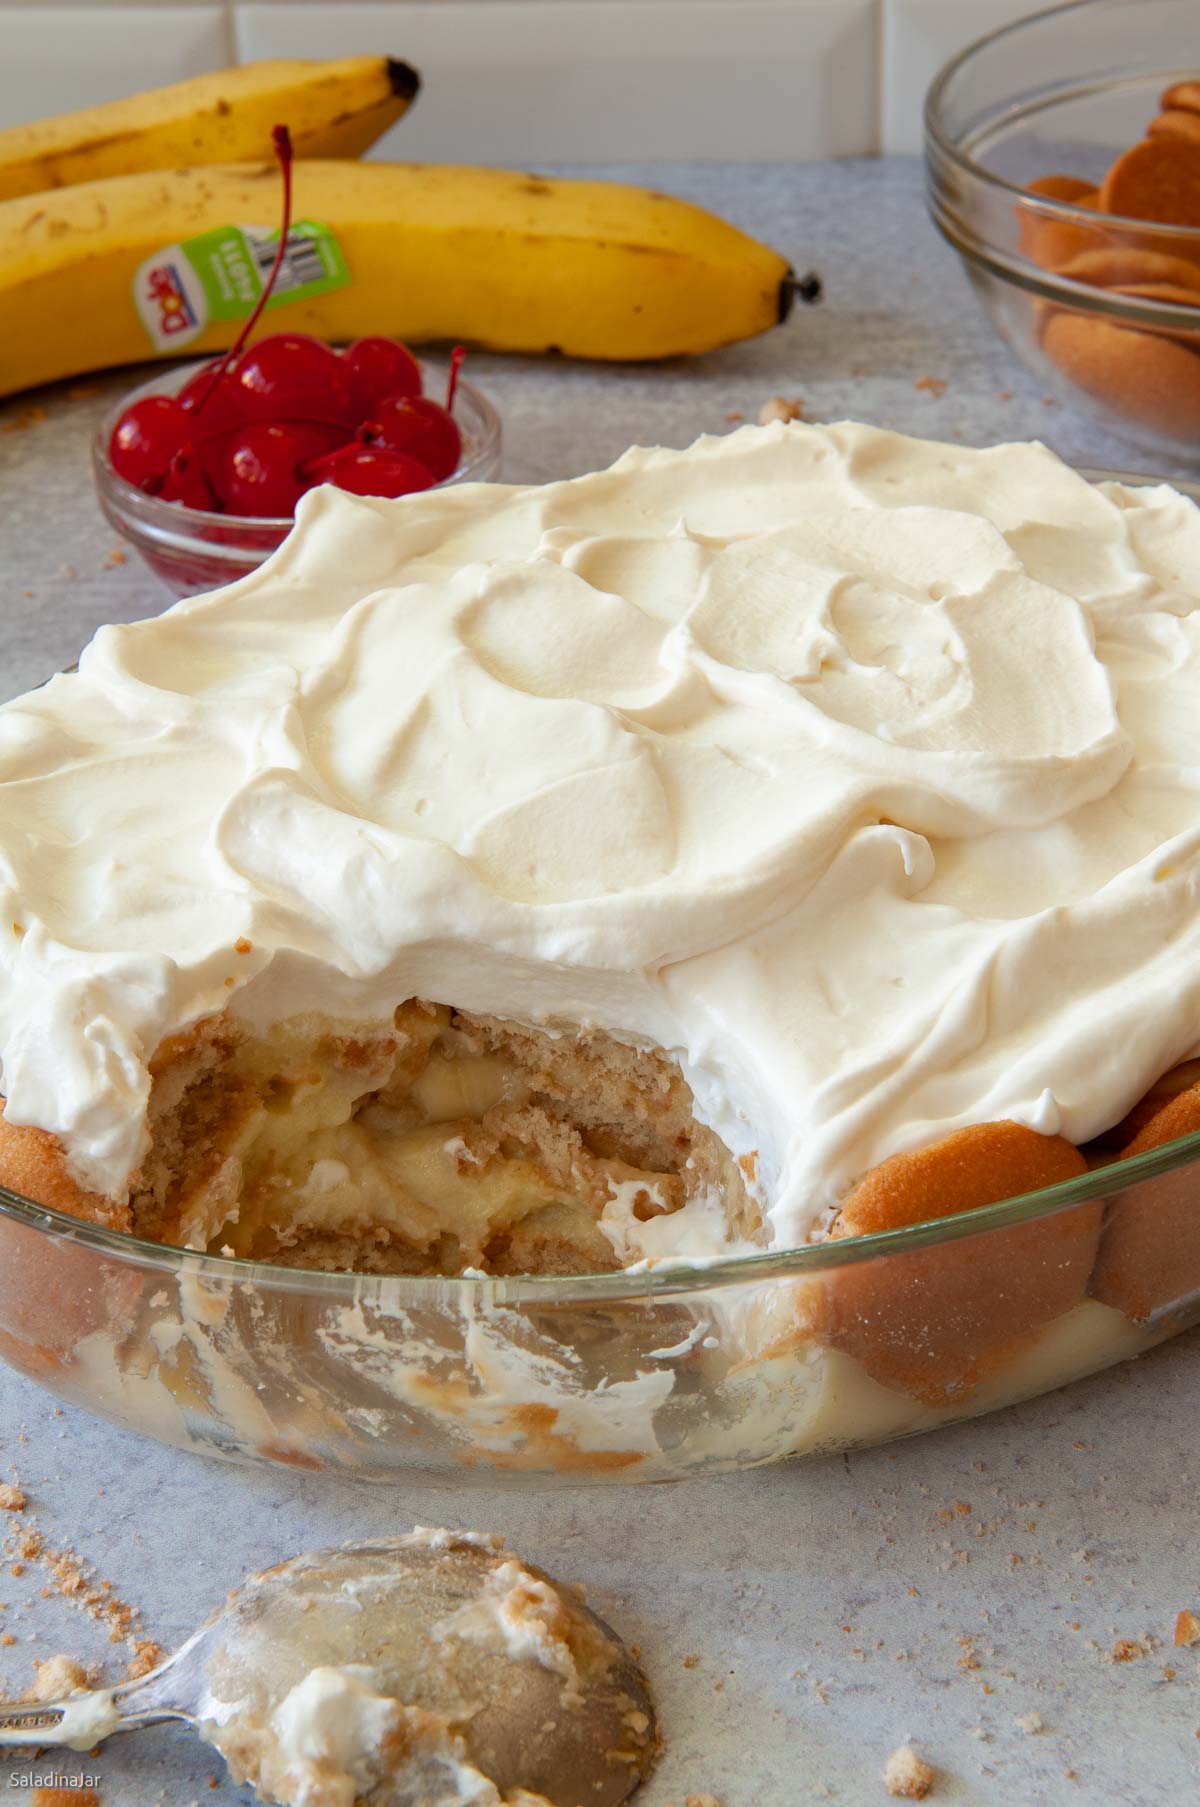
Easy Microwave Banana Pudding
Sneak Peek: This old-fashioned banana pudding starts with a homemade vanilla custard cooked in the microwave. Layered with fresh bananas and vanilla wafers, it’s ready for the refrigerator in about 20 minutes.
This post contains affiliate links. As an Amazon Associate, I earn from qualifying purchases at no extra cost to you.
Love homemade banana pudding but hate standing over the stove stirring custard? This microwave method solves that problem. Instead of babysitting a saucepan, you’ll blend the ingredients, microwave in short bursts, and whisk a few times along the way.
I started making pudding this way when I taught microwave cooking classes in the 1980s. In less than 10 minutes, you’ll have a smooth vanilla custard ready to layer with bananas and vanilla wafers. The result is everything you love about old-fashioned banana pudding—with less fuss and fewer dirty dishes.
Readers Say…
“I love banana pudding, but I hate standing over a hot stove stirring constantly. Thank you for this easier way to make it from scratch. I don’t care for the new, what I call pre-fab banana pudding.” KATHERINE J.
Ingredients & Substitutions
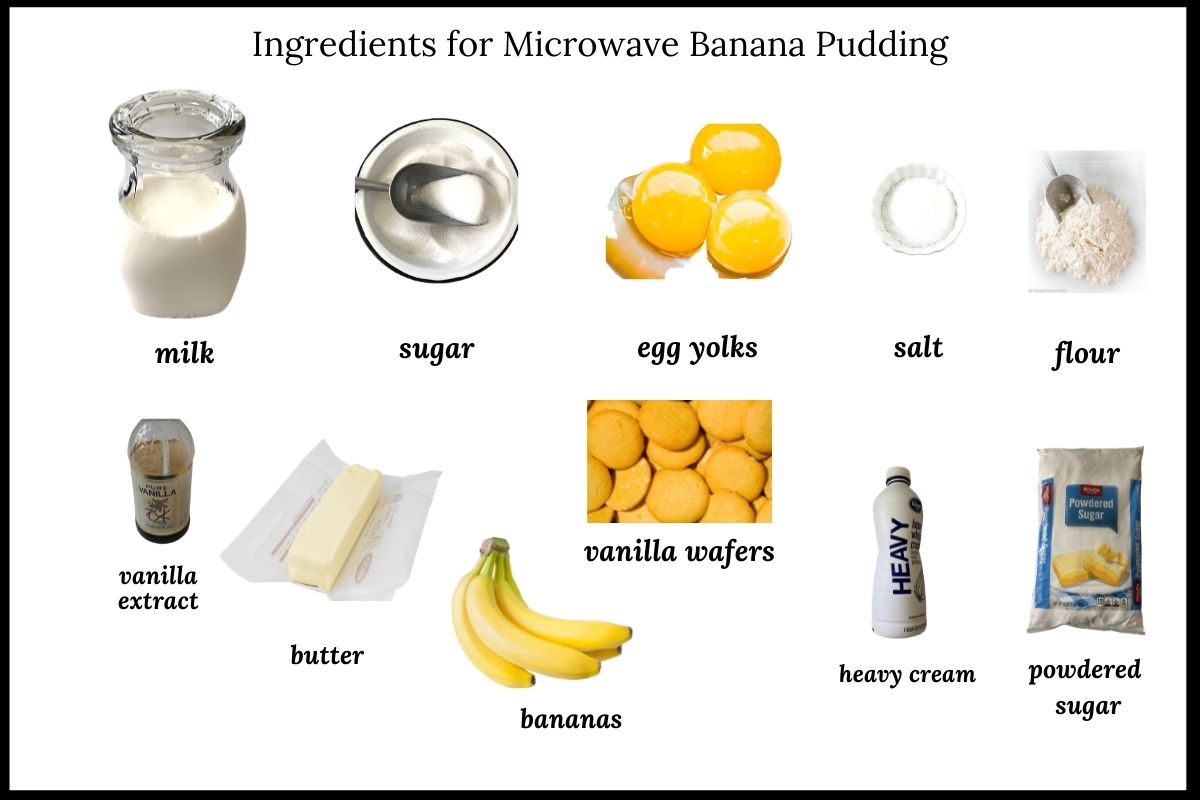
SUGAR: Use white granulated sugar. Alternative sweeteners haven’t been tested.
EGG YOLKS: Large eggs only. Save the whites for this angel food cake
FLOUR: Use all-purpose flour, bleached or unbleached.
MILK: Any dairy milk works. Whole milk makes it richer.
SALT: A small amount enhances the flavor. Sea salt, kosher, or table salt all work.
VANILLA EXTRACT: A must! Vanilla bean paste adds a gourmet twist.
BUTTER: Adds richness and smooths the texture. Use margarine if preferred.
BANANAS: Use bananas that are just ripe—not green, not brown.
VANILLA WAFERS: “Nilla” brand is a classic. Sub with graham crackers or shortbread.
WHIPPING CREAM: Use heavy cream for best results. Cool Whip or canned cream is a shortcut but won’t be as rich.
How To Make Banana Pudding in a Microwave
⬇️ Jump to the recipe below for exact amounts and detailed instructions.


Easy Microwave Banana Pudding
Video
Ingredients
- ⅔ cup (132 g) granulated sugar
- 3 (54 g) egg yolks
- 3 tablespoons (23 g) unbleached all-purpose flour
- 2 cups (454 g) milk (skim, 1%, 2% or whole)
- ¼ teaspoon table or sea salt
- 1½ teaspoons vanilla extract
- 2 tablespoons butter
- 4 medium or 3 large bananas
- 1 11-oz box (312 g) vanilla wafers
Whipped Cream
- 1 cup (240 g) heavy whipping cream 240 gr
- ¼ cup (25 g) powdered sugar 57 gr
- 1 teaspoon vanilla extract
Instructions
Pudding
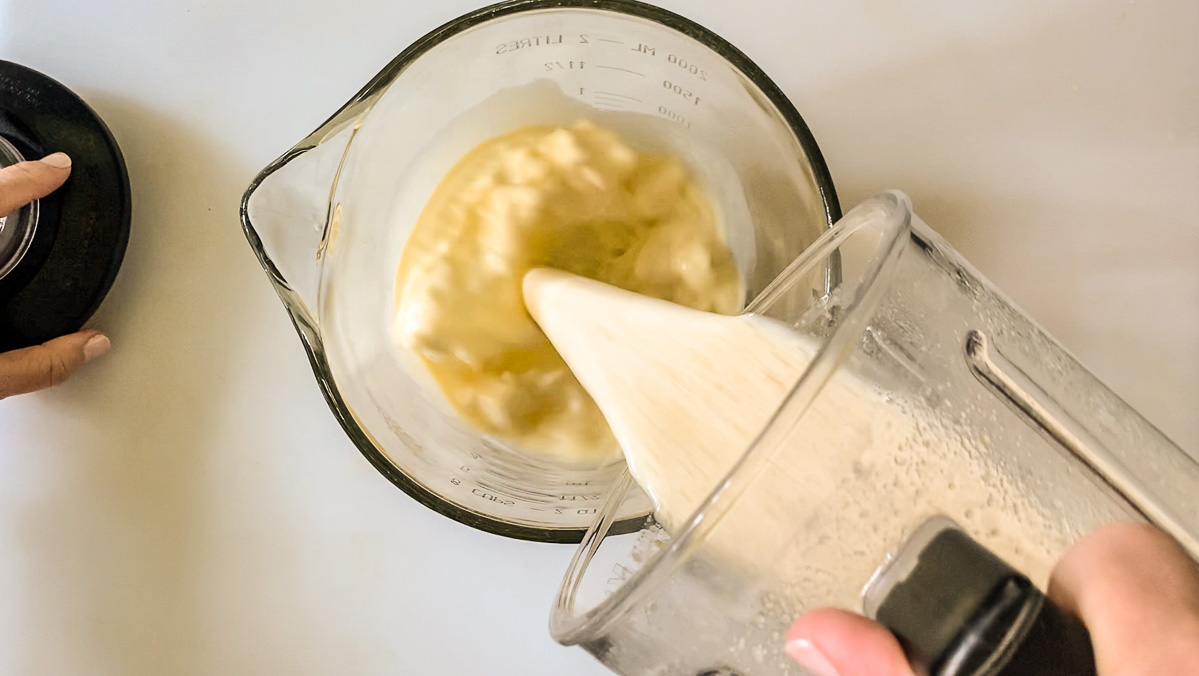
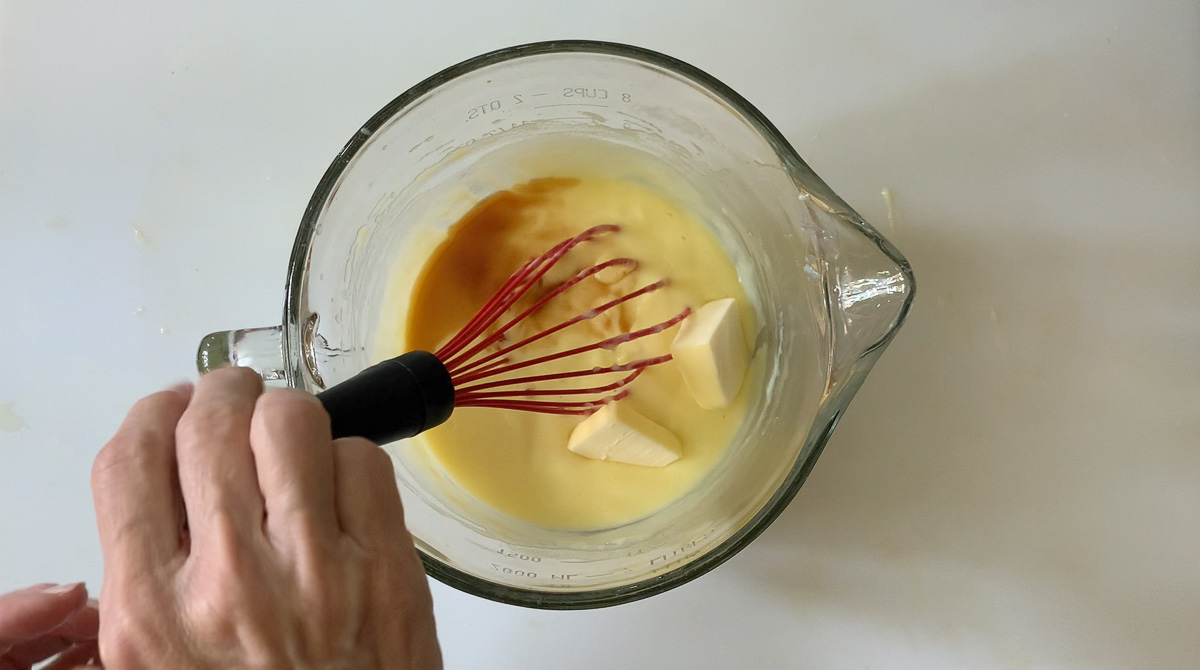
- Blend Ingredients: Add ⅔ cup (132 g) granulated sugar, 3 (54 g) egg yolks, 3 tablespoons (23 g) unbleached all-purpose flour, 2 cups (454 g) milk, and ¼ teaspoon table or sea salt to a blender or food processor bowl. Pulse 5 times until mixed well.
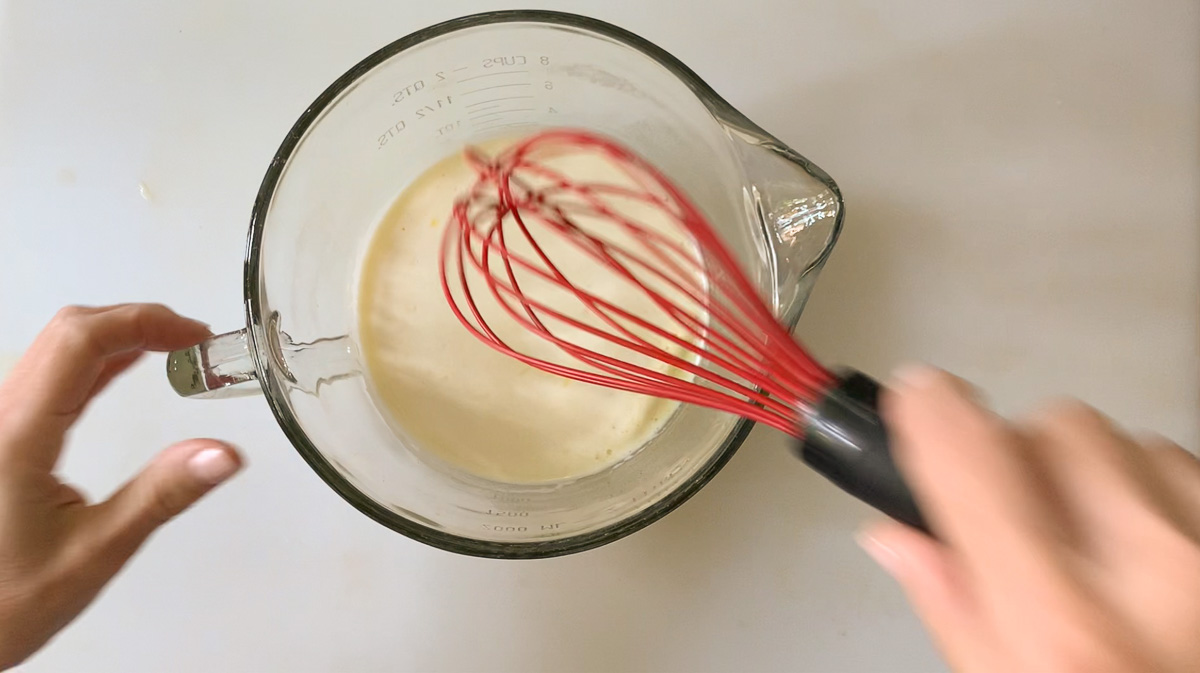
- Cook in microwave: Pour mixture into a 2-quart batter bowl. Microwave on HIGH 4-5 minutes. Whisk. Continue microwaving in 1-minute intervals, whisking each time, until mixture thickens and coats the back of a spoon.
- Finish pudding: Add 2 tablespoons butter and 1½ teaspoons vanilla extract to the pudding. Whisk until smooth.
Assembly
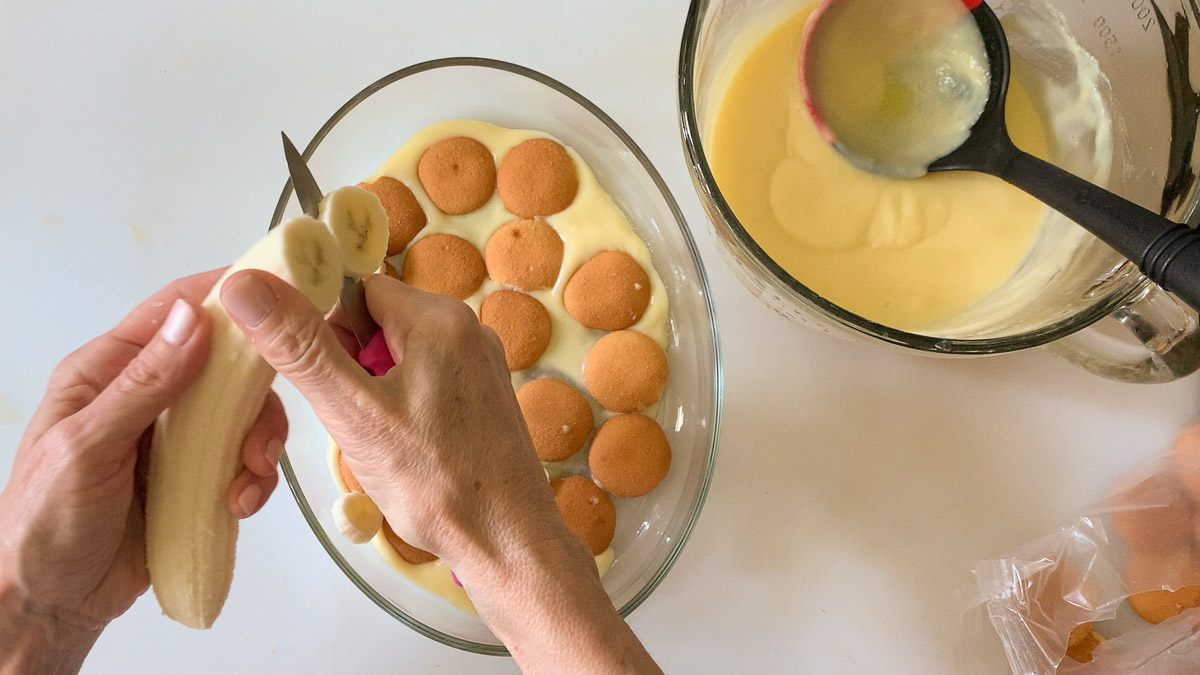
- Layer: In a 1.5-quart dish, spread a small amount of pudding. Add a layer of 1 11-oz box (312 g) vanilla wafers, then 4 medium or 3 large bananas, sliced, then more pudding. Repeat layers and finish with pudding on top.
- Cover and chill: Press plastic wrap directly onto the surface of the pudding. Chill for at least 2 hours.
Whipped Cream
- Whip cream: In a cold bowl, beat 1 cup (240 g) heavy whipping cream. When thickened, add ¼ cup (25 g) powdered sugar and 1 teaspoon vanilla extract.
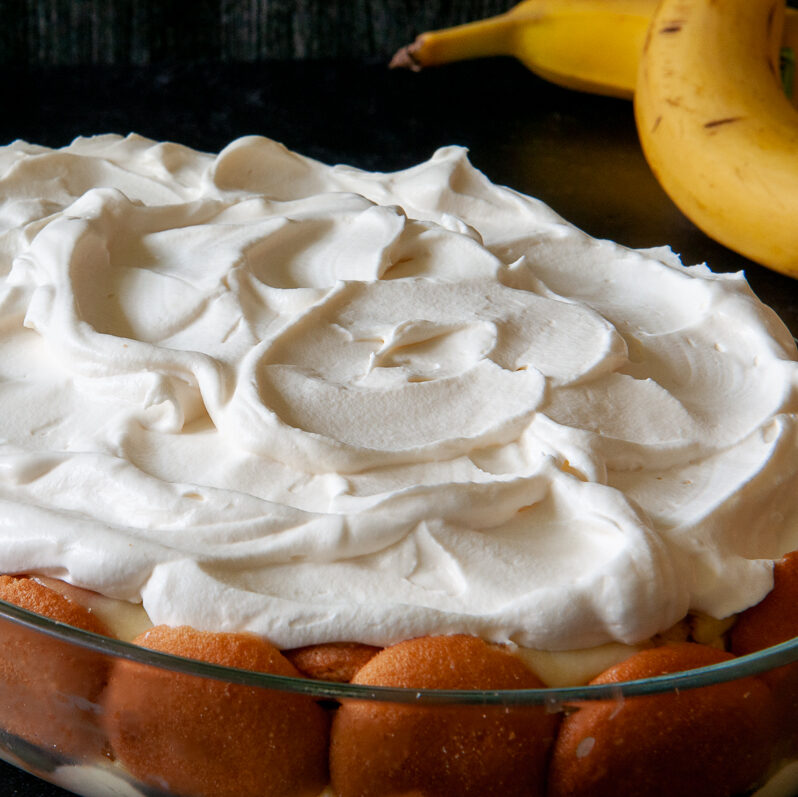
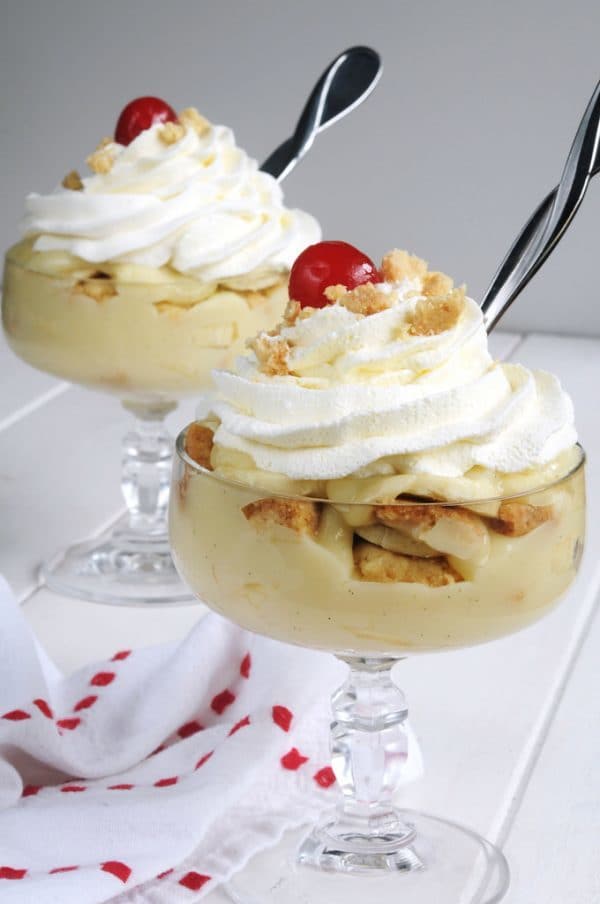
- Top pudding: Spread whipped cream over chilled pudding. Garnish with wafer crumbs, strawberries, or maraschino cherries if desired.
Notes
Equipment
Nutrition
All images and text ©️ Paula Rhodes for SaladinaJar.com
FAQs
Can I make this the night before?
Yes, but it’s best served within 24 hours. The bananas soften and brown over time.
What if I don’t have a blender?
No problem. Whisk the ingredients thoroughly by hand until smooth, then microwave as directed, whisking frequently. If a few lumps develop, strain the pudding through a sieve before cooling.
Can I make this on the stove?
Technically yes, but the microwave is faster and has less risk of scorching.
Final Thoughts
If you’ve avoided homemade banana pudding because you didn’t want to stand over a hot stove stirring custard, give this microwave method a try. It delivers the same creamy, old-fashioned flavor with less effort and fewer dishes to wash afterward.
Once you’ve mastered microwave custard, use it for banana cream pie, chocolate cream pie, fruit tarts, or this fun Zebra Cream Pie.
— Paula, Home Economist
Homemade Food Worth Sharing
Need help troubleshooting?
Email me: Paula at saladinajar.com — photos help!

Made and its yummy and easy! You have some wonderful recipes! I am going to try some of your bread recipes next. I have to admit I am addicted to making bread. I find it relaxing and love the smell of it cooking..I was reading your entry for your bread about most of your bread recipes being made by bread machine. I think this might be a typo error…95% of the yeast breasts are made using a bread machine..Ha!Ha! :-)FYI anyway . I got a laugh out of it.
Hi Kat, Actually, that “typo” is true. I have one recipe that is a tradition in our family that is too big for a bread machine so we make it with a heavy duty mixer. refrigerator rolls I’m not sure the 95% is completely accurate because I’m not a great mathematician, but you get the idea. Thank you for your kind words about my recipes.
I’ve been using this method for the custard for some time now. Also use it for chocolate cream pie. Works great. I substitute shortbread cookies (like Chessmen) for the vanilla wafers and it’s very near the old fashioned teacakes my grandmother used for banana pudding. I also slice the bananas into a Fruit Fresh and water solution to prevent blackening with no change in taste. Pat them dry and use as usual. I enjoy your postings and depend on your recipes. Keep up the good work!
Hi Peggy,
Shortbread cookies would definitely take this up a notch. And your tip about the Fruit Fresh is genius. I’m going to try it the next time I make this.Thank you so much for your kind words and taking the time to share your tips.
I have a recipe similar to this but I add 2 1/2tsp. of Cornstarch to dry pudding mixture to microwave. I also save my whites from my egg yokes and make my own meringue to put on top and brown meringue in oven. Nothing is wasted and it’s delicious.
Hi Deborah,
Sometimes, I use cornstarch, too. Good either way. And good for you–using the egg whites. I save mine for angel food cake, but the meringue sounds sounds delicious and less calories than whipped cream.
I love banana pudding, but I hate standing over a hot stove stirring constantly. Thank you for this easier way to make it from scratch. I don’t care for the new, what I call pre-fab banana pudding. 😀
I agree with you, Katherine. The microwave is awesome for making pudding.
This worked perfectly! I increased measurements by 20% and substituted suregel for the flour so I could make it gluten free. No lumps and the flavor was outstanding! Thank you!
Gluten-free? Impressive. So happy it turned out good for you.
Made your pudding. It was so good!! Love the simpleness of the recipe as well. Thanks for a great recipe. No one would ever believe it was cooked in the microwave!!
I couldn’t agree more. 🙂
For a nice twist on traditional banana pudding, use ginger snaps instead of vanilla wafers.
Alice, What a great idea! Thanks for sharing.
lovely recipe paula!! It was made perfect.
have u got anymore easy recipes like this
Where and what is the shortbread recipe called on your blog!
Steve,
That is a very good question. I usually make just the shortbread base for these toffee bars, then I break it into pieces.
You are my hero…but if you think I’m capable of waiting 24 hours to eat this…. The pudding is in a sink full of ice water and I am standing over it with my spoon in hand.
Thanks MadTyMom, I don’t blame you one bit for your impatience. The next challenge will be trying not to eat it all in one or two sittings. 🙂
You provide very appetizing pictures. Thanks for sharing such detailed directions for the banana pudding.
Hi,
I was searching for a recipe for banana pudding and found yours on foodgawker. I read your entire post and cried. My father too is battling congestive heart failure and I am so glad I live just minutes away. It is so sad when they start telliing your they are finished with things. I wish you and your father the best and know you will enjoy all the days you have with him. Elalne
I just found your blog today and love your food photography. Beautiful and I love your focus on making unhealthy food healthy. I hope your time with your father is a good one. Treasure him as much as you can.
I’m sorry your Dad is not doing well. That is so hard. I love the photos here and think the idea of a quick no cook pudding is brilliant!
Catching up on my reading. Had not heard the computer transfer story. It is very sad and tough to deal with. I hope you can find comfort in knowing this is what he wants, but it is difficult to resign ourselves to that. I hope they make the 70th too! How awesome would that be!!
Recipe looks great. I have no excuse for not cooking more since you make it look so easy with the microwave. Now, just need the time! You are always in my prayers!!
70? Now that IS an accomplishment. I’m right there with you in tears (all the way home). It is so thoughtful that he had the foresight to rid himself of the car (so many people have to yank it away from their parents)! 🙂 And so thoughtful to share another microwave recipe (LOVE your pastry cream – it has saved me)! Thoughts and prayers are with you and your family Paula!
Well, this is the first time your beautiful blog has made me cry:+)
The food looks incredible, as always!!
Aw-w-w-w. It’s sad, I know. And thanks for the compliment.
Blessings to you and your family at this time.
Mmm, banana! pudding.
Sometimes comfort food is one of the few comforts around, isn’t it?
If you are needing another easy dessert, I suggest pudding and strawberry parfaits. Just cook up some Danish Dessert – close to the pudding section if you’re new to this gelatin dessert. Fold in sliced strawberries and layer it with instant cheesecake pudding. Top with whipped topping and a strawberry. It is so cool and yummy.
Hope things improve for your father soon.
It is hard to see parents not as functional as they once were. This is an important time for you to grab the moments and the memories. I am sorry about your Dad and I pray he has an easy time.
Your dessert is wonderful.
Thanks to all of you for your kind sentiments. I agree that my dad is being very thoughtful to make sure all is in order when his time is up–especially since my mom is still living and even older than he is. She’s hopeful they can celebrate their 70th wedding anniversary this coming December.
So hard to see our parents slowing down– your wonderful dad is giving you time to get used to the unthinkable….
Thanks so much for the recipe! Pudding is comfort food indeed, but I never seem to make it anymore–usually such an arduous process. I look forward to trying it this way!
I’m SO sorry to hear about your father. It made my heart pout with sadness to read what you’re going through. I’ll keep him in my thoughts and prayers.
Side note: love your blog!
No matter our age,no matter that we know this day will come, it is painful to lose a parent. How wonderful that your Dad is helping you prepare for his death. Wish I was there to help you too.
Absolutely gorgeous photos! Well done!
Was looking for a easy dessert, and this looks great!
Sorry about your dad not feeling well – from the way you write he must be a special guy, and I can’t imagine how tough this is for you. Big hugs.
Paula, I’m so sorry about your father. I hope things turn around.
But, I love the look of this pudding! It sounds delicious and I love the photos 🙂
Thanks so much Christina. Hope you are doing better yourself.
I’ve gotten several positive comments on my new pictures. Thanks again!
So sorry to hear about your dad not doing well. 🙁
Y’all are in my prayers.
On the upside, this recipe looks great.