Crusty Bread Machine Rolls (Secret Cornstarch Glaze)
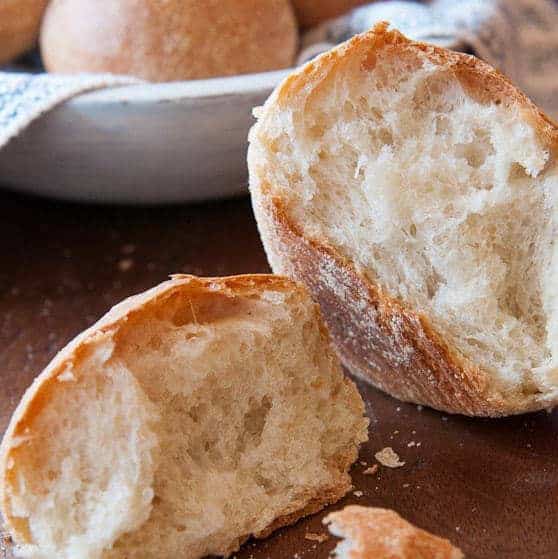
Sneak Preview: These crusty bread machine rolls bake up with a thin, crackling crust and soft interior thanks to a simple cornstarch glaze. Use your bread machine to mix the dough, then shape and bake in the oven. Ready in about 3 hours.
This post contains affiliate links. As an Amazon Associate, I earn from qualifying purchases at no extra cost to you.
If your bread machine rolls keep turning out soft instead of crusty, the solution isn’t a different recipe—it’s a different technique.
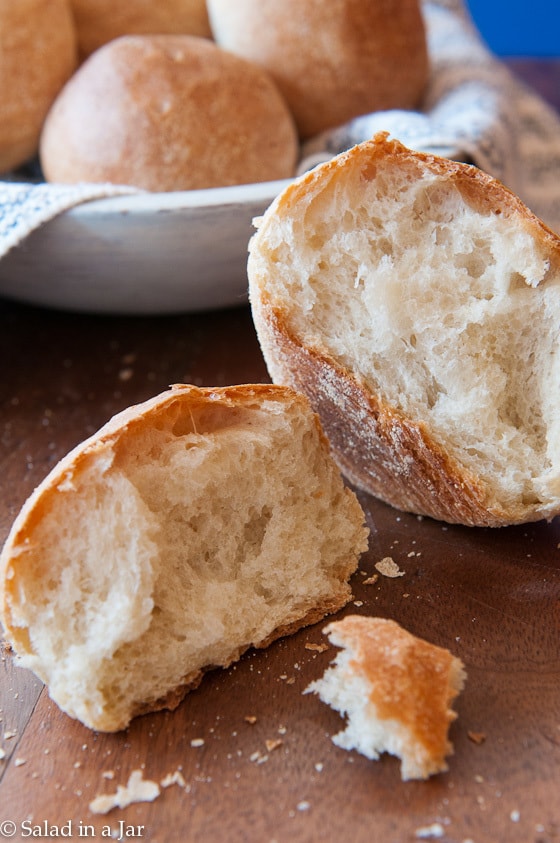
These crusty bread machine rolls get their thin, crackling crust from a simple cornstarch glaze and a hot oven finish after the DOUGH cycle. It’s the method I use when I want rolls sturdy enough for soup or gumbo—but still tender inside and worth sharing.
Ingredients & Substitutions
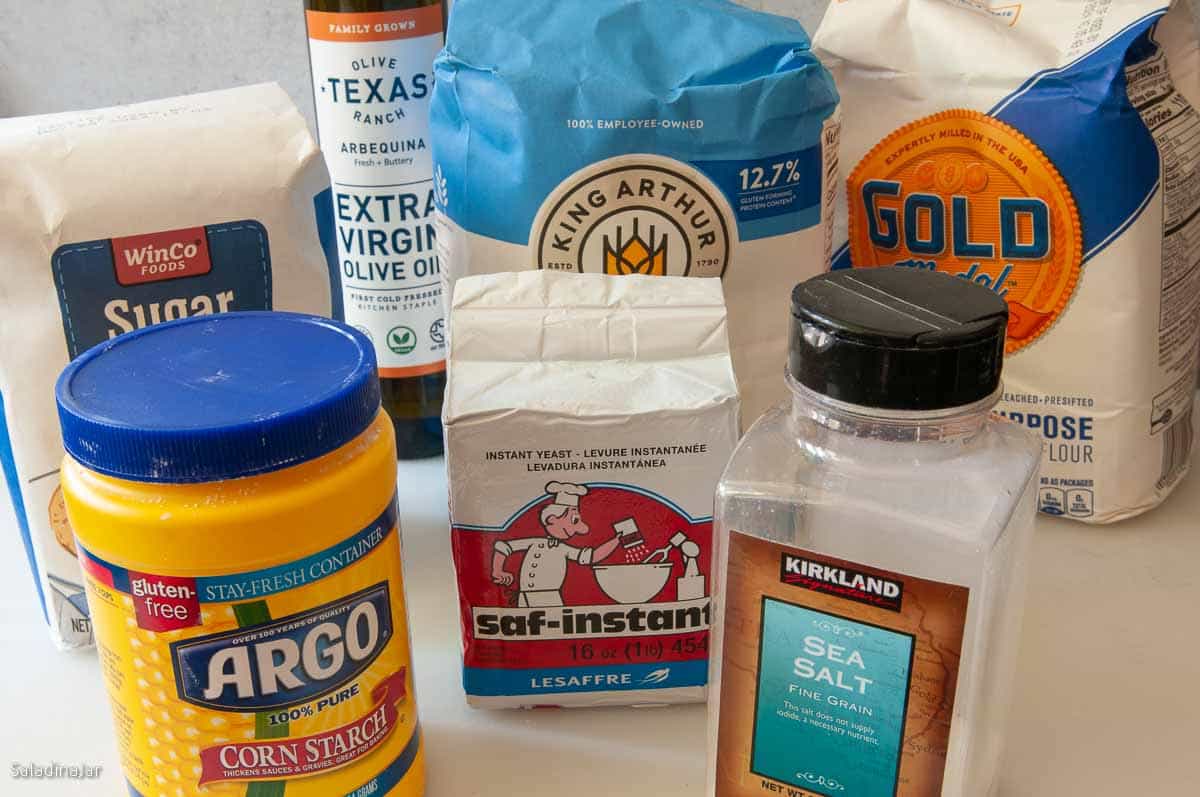
WATER: Tap works. Cool water is fine in a bread machine.
OLIVE OIL: Extra-virgin ideal; any vegetable oil works.
SALT: Use table or sea salt; for kosher, add 1/4 tsp more.
SUGAR: Granulated feeds the yeast; honey works—watch dough moisture.
FLOUR: Mix unbleached all-purpose + bread flour for tender chew.
YEAST: Bread machine/instant preferred; active dry also works.
CORNSTARCH: Key to a crisp crust.
Step-by-Step Guide for Making Crusty Bread Machine Rolls
⬇️ Jump to the recipe below for exact amounts and detailed instructions.
Make Dough in Bread Machine
Shape into Rolls
Bake

Crusty Bread Machine Rolls (Secret Cornstarch Glaze)
Video
Ingredients
Dough
- 1 cup (227 g) water (cool)
- 1 tablespoon (14 g) olive oil
- 1-1/2 teaspoon table or sea salt
- 2 teaspoons granulated sugar
- 1-1/2 cup (180 g) all-purpose unbleached flour
- 1-1/2 cup (180 g) bread flour
- 1 teaspoon bread machine or instant yeast
Glaze
- ¼ cup (57 g) water
- ½ teaspoon cornstarch
Instructions
Prepare the Dough:
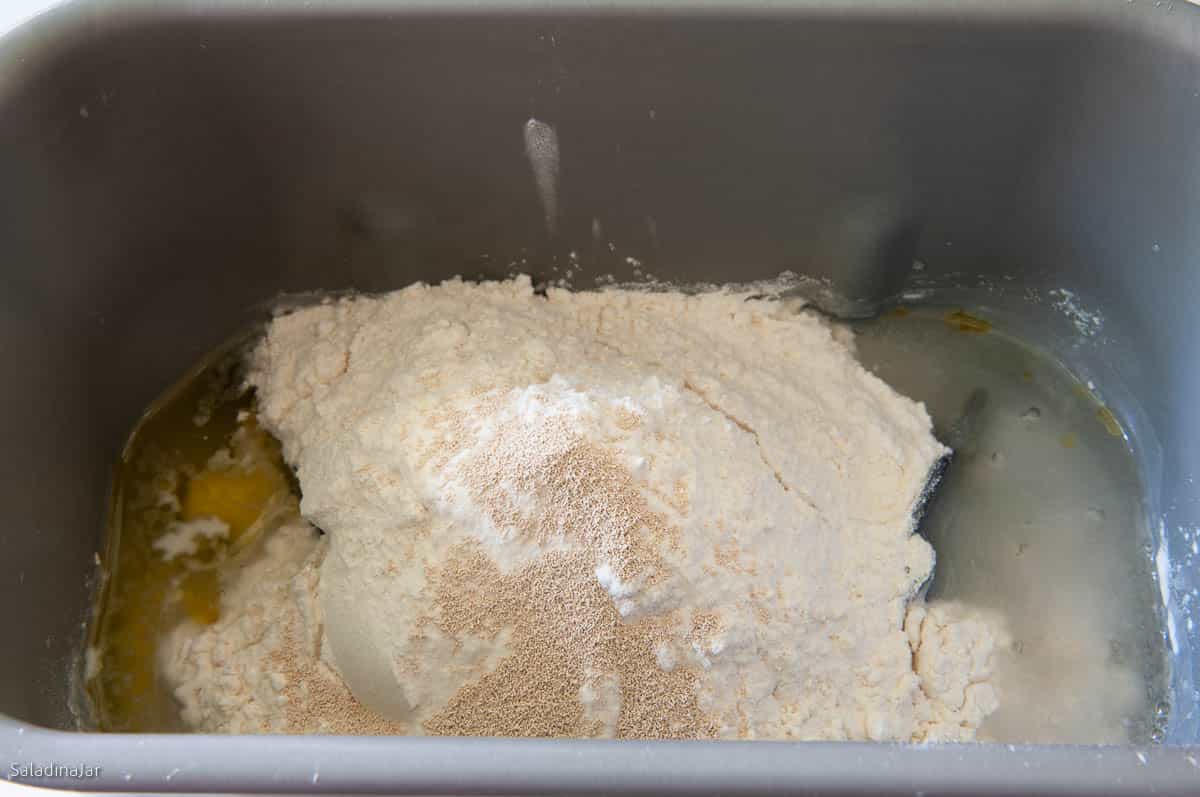
- Add 1 cup (227 g) water (cool), 1 tablespoon (14 g) olive oil, 1-1/2 teaspoon table or sea salt, 2 teaspoons granulated sugar, 1-1/2 cup (180 g) all-purpose unbleached flour, 1-1/2 cup (180 g) bread flour, and 1 teaspoon bread machine or instant yeast to the pan. Select the DOUGH cycle and press START.
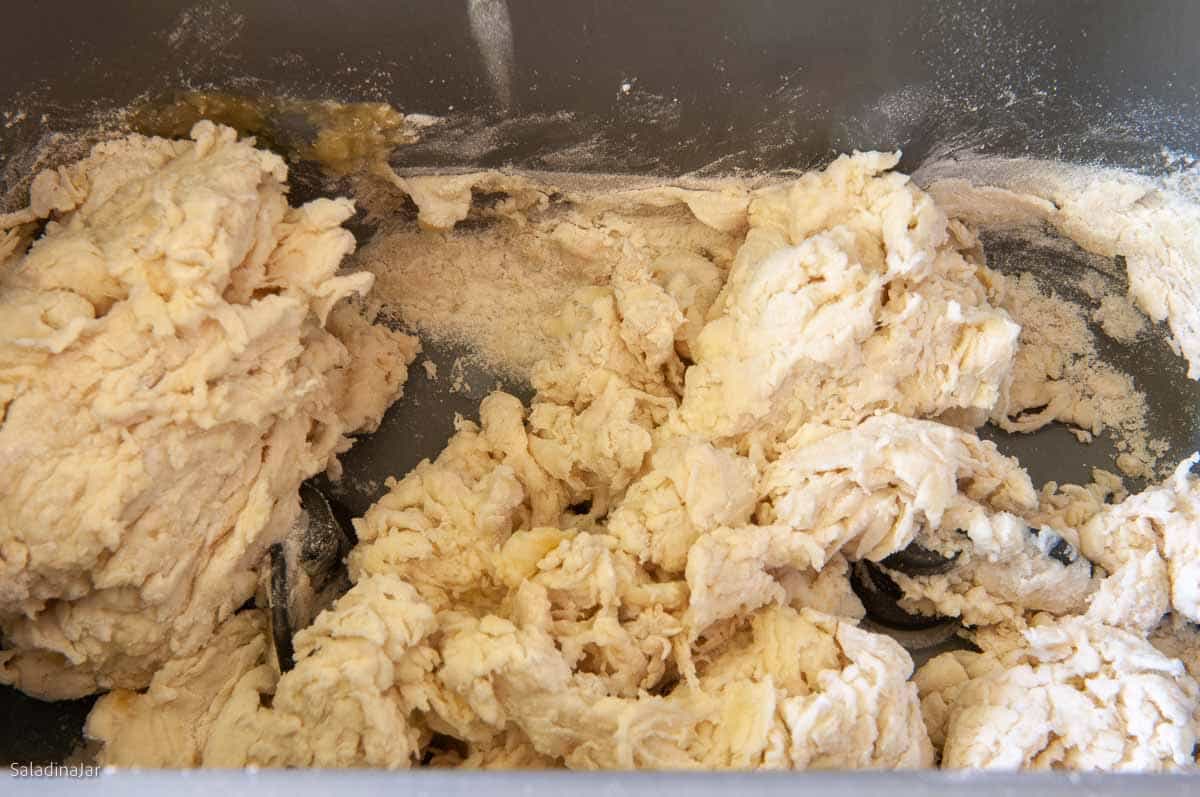
Check the Dough Twice:
- First Peek (1 Minute In): Lift the lid to ensure the paddle(s) are moving and the dough is starting to clump. Second Peek (15–18 Minutes In): The dough should stick to the sides, then pull away cleanly.If it sticks without releasing, add 1 spoonful of flour at a time until it holds its shape.If it’s too dry (bouncing around or riding the paddle), add 1 spoonful of water at a time until it sticks briefly to one side before releasing.Wait 1–2 minutes between additions to let the dough adjust.
Make the Glaze:
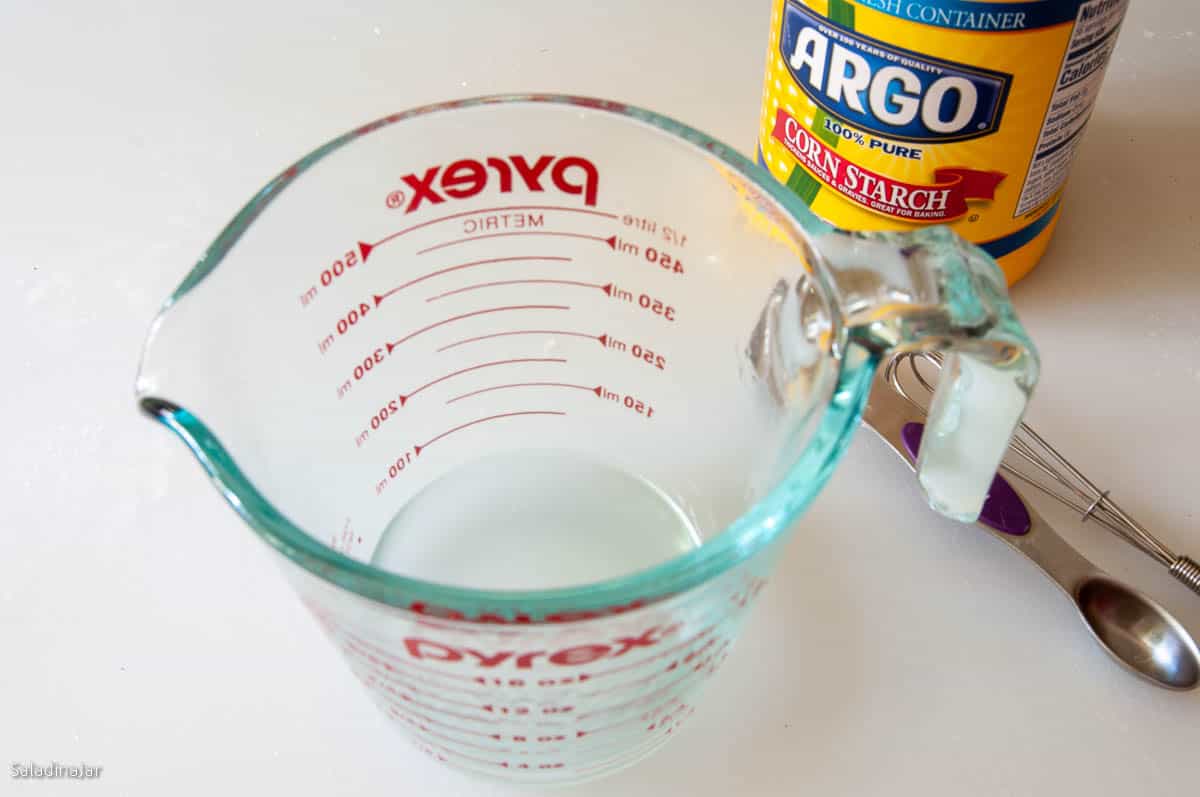
- While the dough is rising, whisk together 1/4 cup (57 g) water and 1/2 teaspoon (½ teaspoon) cornstarch in a microwave-safe bowl.Microwave on high until thickened and translucent, about 2 minutes.Let the glaze cool to room temperature.
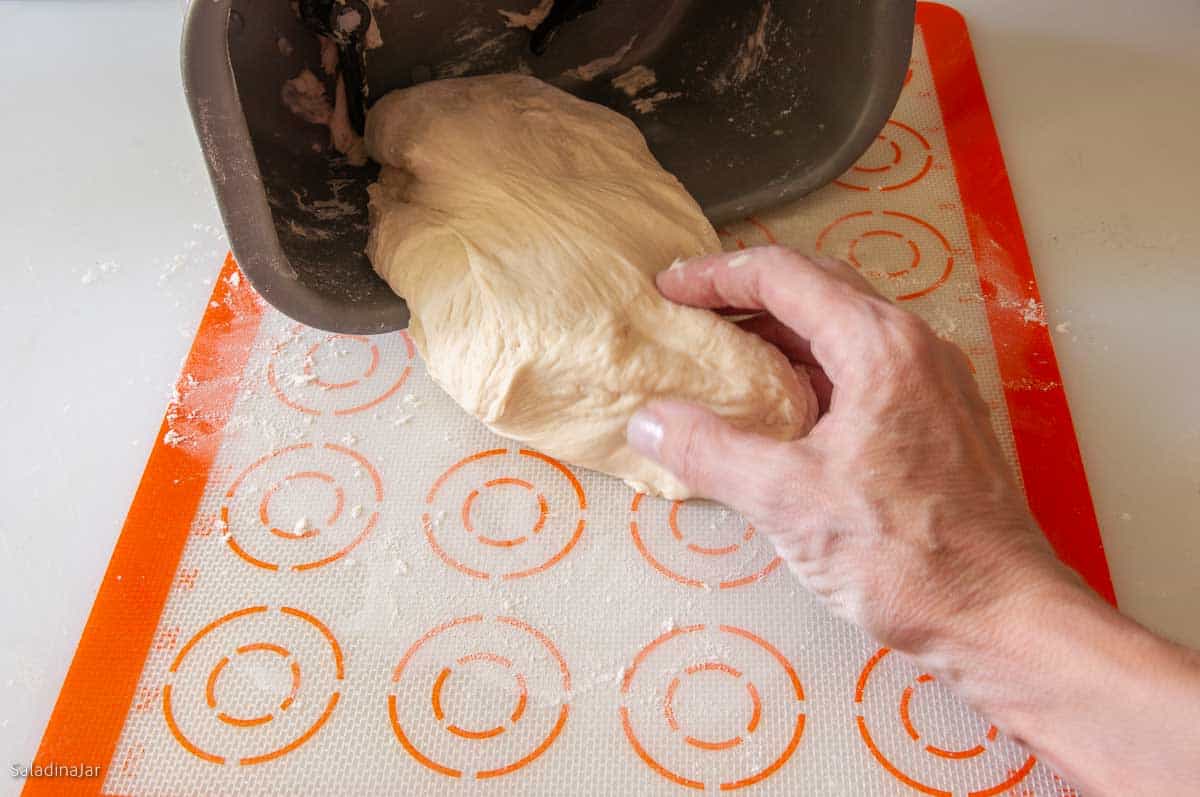
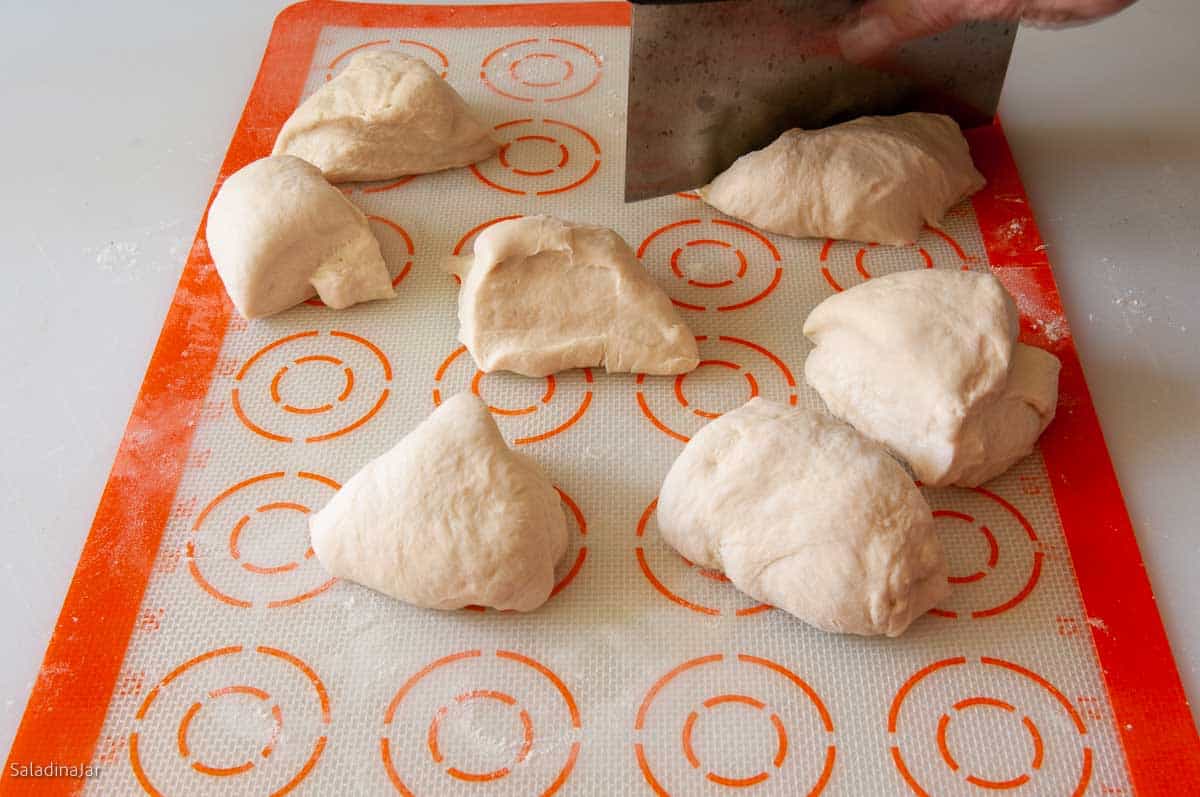
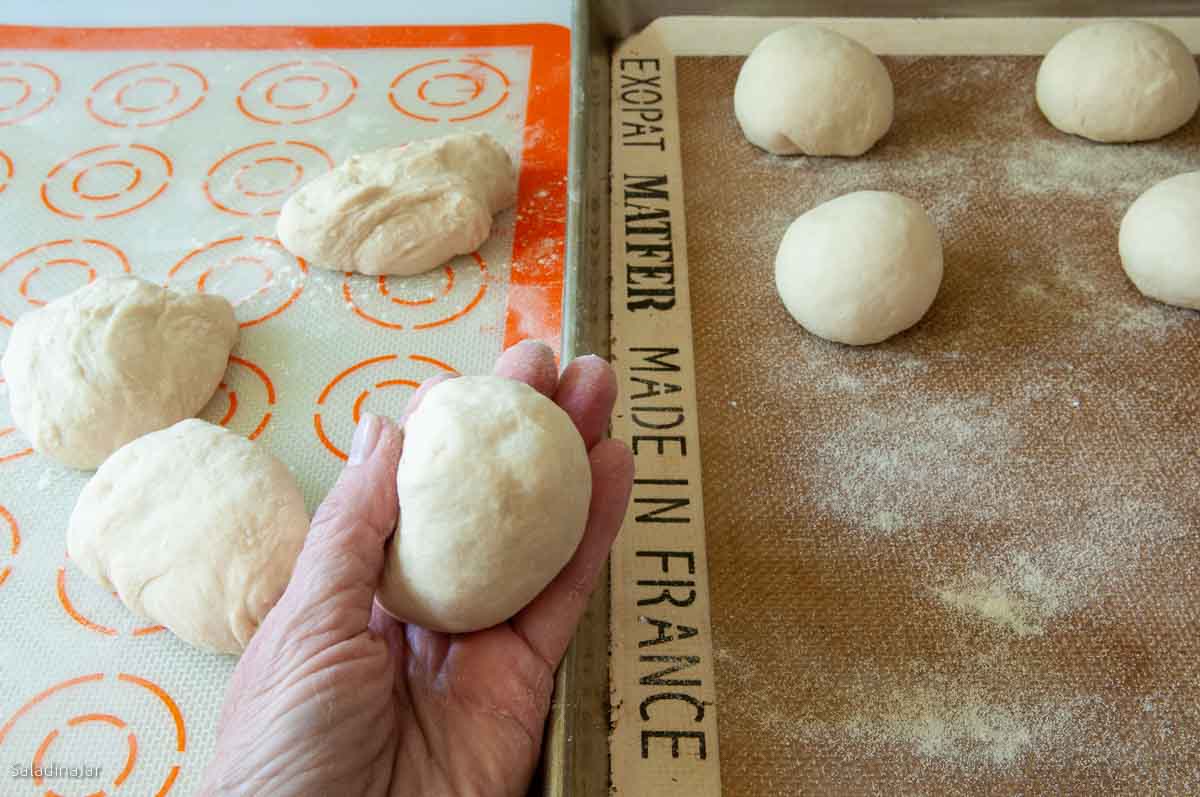
Shape the Rolls:
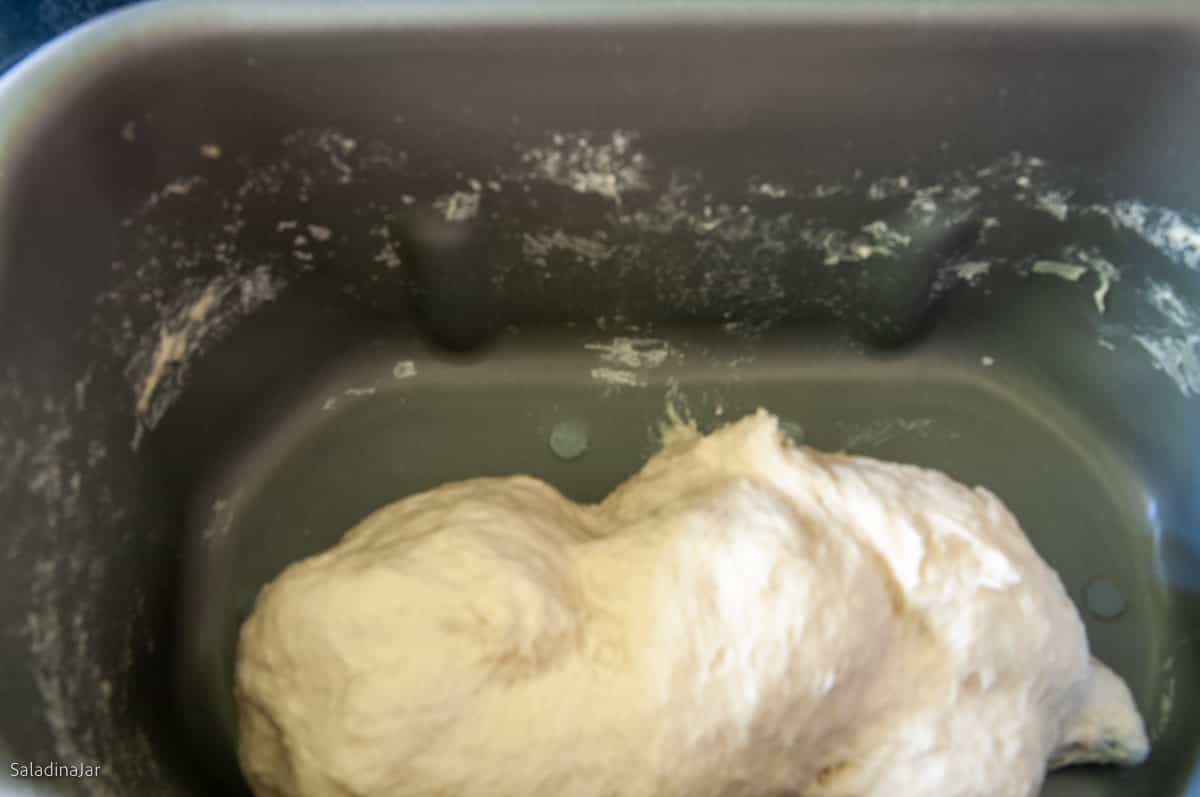
- Once the dough cycle is complete and the dough has doubled in size, transfer it to a lightly floured surface.Divide into 8 equal pieces and shape each into a ball.Place the balls on a baking sheet lined with parchment paper or a silicone mat sprinkled with cornmeal.
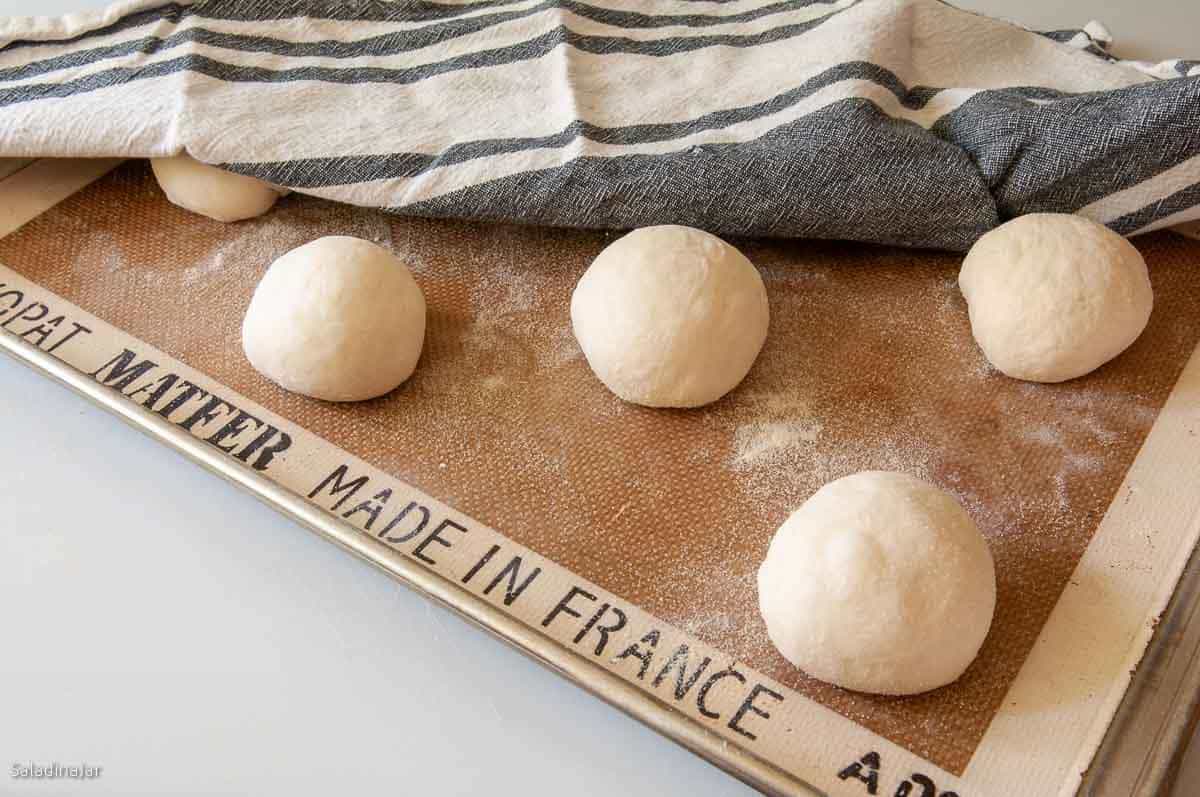
Final Rise:
- Cover dough balls with a tea towel and set them in a warm place for about 45 minutes or until risen almost double.
Bake:
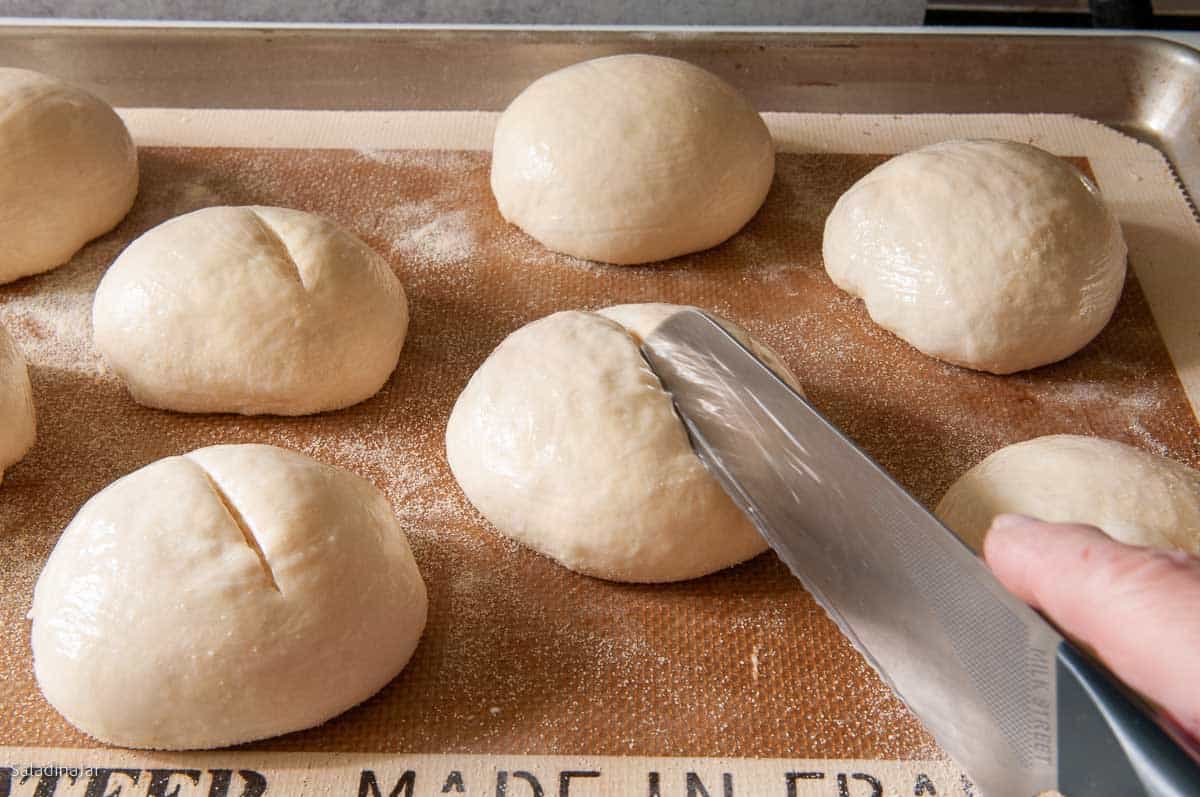
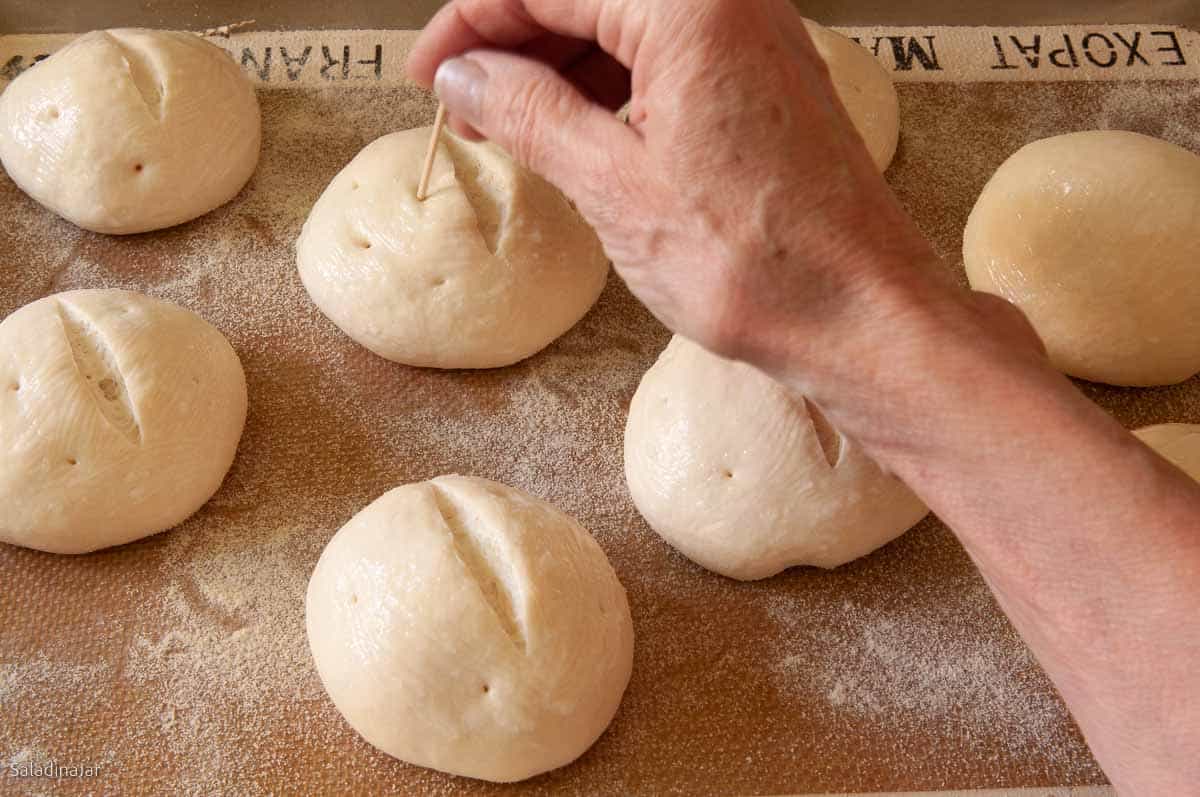
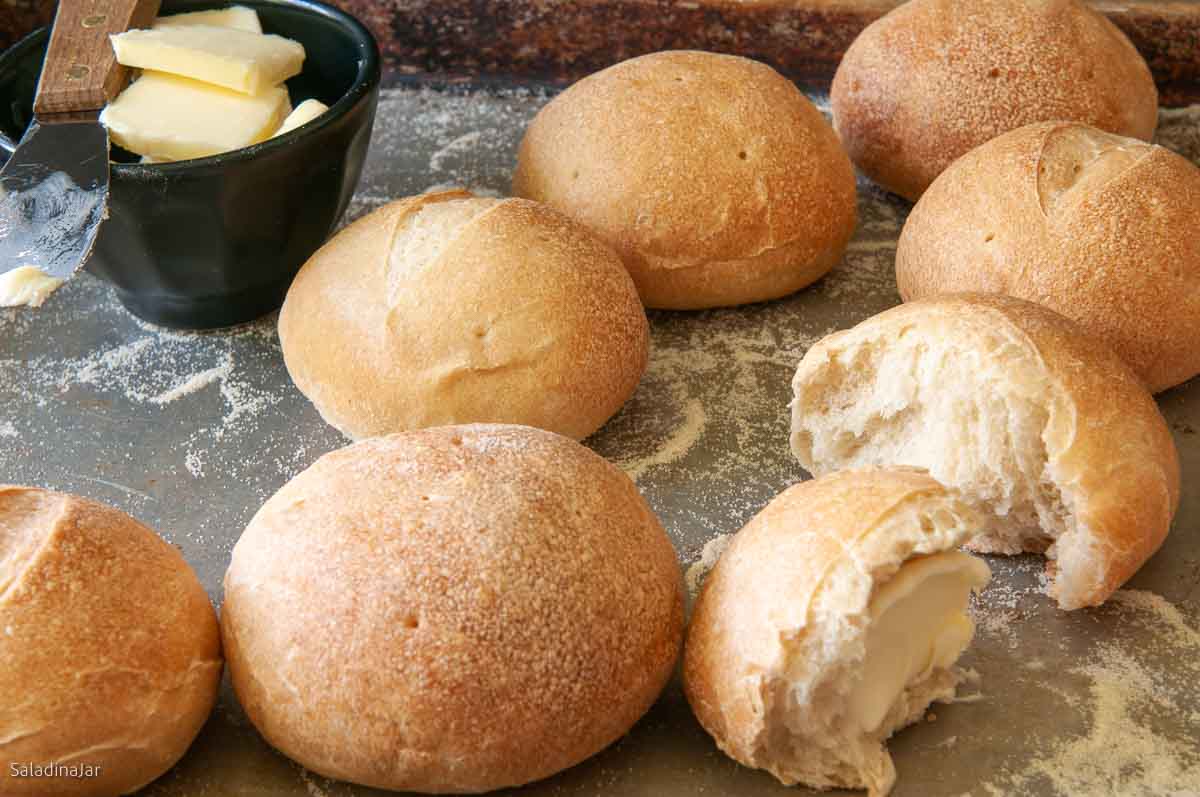
- Preheat your oven to 375°F (190°C).Gently brush the cooled cornstarch glaze over each roll.Optionally, score the tops with a sharp knife and poke a few holes with a toothpick to enhance crispiness. Don't worry if the roll looks deflated. It will pop right back when it hits the oven.Bake for 35 minutes or until golden brown and crispy and the internal temperature reaches 200˚F (93˚C)..
- Move the rolls to a wire rack to cool.
Notes
- Add ingredients to the mixer bowl in the listed order.
- Mix on low speed until everything is moistened.
- Switch to the dough hook and increase speed to 2 or 3.
- Knead until the dough is smooth and elastic (about 5–10 minutes).
- Cover and let it rise in a warm place until doubled.
- Gently deflate, shape, and bake as directed.
- In a large bowl, mix ingredients until you have a shaggy dough.
- Transfer to a floured surface and knead until smooth and elastic (10–20 minutes, depending on experience).
- Place dough in a greased bowl, cover, and let it rise until doubled.
- Once risen, gently deflate, shape, and bake as instructed.
Equipment
Nutrition
All images and text ©️ Paula Rhodes for Salad in a Jar.com
FAQs:
- How can I re-crisp these rolls?
- Briefly warm them in an air fryer or hot oven to restore crispiness.seriouseats.com
- Can I use this recipe to make bread bowls?
- What’s the best way to slice these rolls without making a mess?
- Use a serrated knife and slice on a cutting board to catch crumbs.
Final Thoughts:
These crusty rolls offer an unexpected and satisfying crunch with a tender crumb. Whether you’re serving them with a hearty soup or enjoying them with a pat of butter, they’re sure to impress.
p.s. If you want a simpler receipe, take a look at my very popular French Bread recipe.
— Paula, Home Economist
Homemade Food Worth Sharing
Need help troubleshooting?
Email me: Paula at saladinajar.com — photos help!
This recipe was adapted from my favorite bread machine cookbook, “One Hundred Years of Bread” (paid link) by Sidney Brockman Carlisle.

Can they be frozen after baking? Will reheating them in the oven restore the crunch?
I haven’t given any stars because I am yet to make them
Hi Jean,
I can’t guarantee that the crunch will come back, but I’m guessing it will if you get the oven hot enough (425-450˚F).
The Crusty rolls were delicious!! Thank you for sharing this recipe ?
Thank you for the 5-star rating, Christine. Glad you like them.
Another winner! These were very crusty and perfect with soup/stew or just dipping in marinara sauce. My hubby used them for roast beef sandwiches. I highly recommend this one.
Thanks for the compliment, Sharon. Glad you enjoyed it.
Happy New Year!
I made the dough the night before. Just before lunch I formed the rolls with the cold dough. 60g made about 9 rolls with 2 at 55g. It took about an hour and half to double in size. I baked them for about 25 mins checking the color and then temp. I thought they would take longer to rise so I had to warm them before dinner, and it worked well. I serve these with the steakhouse type bread. Delicious!
Happy New Year to you, too!
Thank you for sharing your experience—it sounds like you nailed the process! I love how you worked with the cold dough and timed everything perfectly. I’m so glad the recipe worked well for you. Here’s to more baking adventures in the year ahead!
I would like to make this into smaller rolls for dinner. I read all the comments and saw where some had raised the oven temp and decreased the baking time. My question is if I made 50/60g rolls would I change the baking time? I am going to make the dough the night before and form the rolls with cold dough for the party.
Thank you! Terry
Hi Terry,
That’s a great idea to make smaller rolls from this recipe. I haven’t tested this recipe with smaller rolls. I would guess they might not take as long. To hit the timing perfectly, use a quick-read thermometer. Be sure to let the rolls come to room temperature and get puffy before you bake them.
I made these half the size to use as meatball sliders.
(They were cute! ☺️) Perfect for a single homemade meatball sandwich w/extra marinara for dipping. That crispy crunchy outside was wonderful! Thank you, Paula!!
Hi Julie,
What a great idea. They sound like a lot of fun to eat, too. Thank you for sharing your idea with us.
We had dinner at Swiss Chalet one night last week and we enjoyed the crusty dinner rolls that they serve with dinners. I went online to find the recipe and lo and behold, you had it right here! I made them for dinner last night – ribs and chicken – for company and they were a big hit. Just like or even better than Swiss Chalet. Thanks again, Paula. Hope you’re enjoying summer.
Hey Stephen,
How are you doing? Glad to hear your rolls were a big hit. Congratulations. And thank you for the 5-star review!!!!
I made these last month and they were wonderful. Today I made a shrimp and corn chowder and thought these rolls would be perfect. They’re in the oven right now. They smell so good, I just popped another recipe in the bread maker. Will surprise my daughter with chowder and crusty rolls.
Hi Carol,
I can’t think of a better surprise than hot rolls from the oven. Your daughter is a lucky gal. Shrimp and corn chowder sounds delicious, too.
Thank you so much for writing. Have a great week.
I skipped the glaze and just brushed the tops with egg whites. Bread and pastry doughs have always been my nemesis. These, however, were perfect and delicious. Just the right amount of crusty on the outside and soft on the inside. I took them to my local baking club and they loved them. I will be making them again!
Hi Kay,
I like your modification. The approval of your baking club is confirmation. So happy to hear you thought they were worth sharing.
Hello Paula,
Thank you very much for this fantastic recipe.
I was just wondering if it would be possible to make the bread rolls shiny as well as crusty. I did consider adding a little water to a lightly beaten egg but then I wouldn’t be able to use the cornstarch and water slurry to make them crusty on the outside.
I would like the rolls to be crusty on the outside but not heavy. It was lovely when I used to be able to buy freshly baked crusty cobs/rolls from the bakery that were crusty on the outside but still light. The insides were light and airy.
If you or anyone else has any suggestions, I would be grateful if you would let me know please.
Thank you very much for your time and help.
Very best wishes,
Olivia
Hi Olivia,
As you may have guessed, bakeries have special ovens that force steam into the oven as their rolls bake, making them crusty and imparting a shine. This is hard to imitate, but you can add a tray of boiling water to your oven when you put the bread in to bake. Some people spritz the walls of their hot oven with water, but you must be careful to avoid hitting the oven light.
Good afternoon Paula, may I know the purpose of poking the risen dough balls with toothpicks before baking? Thanks.
(I have made this recipe many times, but somehow I missed out this step ???)
Hi Ju,
Sometimes, I forget to poke these rolls, and they aren’t that much different. The crust may be slightly crustier. Do as you like.
I’m trying to sign up for your news sheet, nothing happened. Could you do it via this?
Hi Chris,
I signed you up manually. You can unsubscribe if this is not what you wanted.
During proofing then only realised I didn’t have cornflour in the cupboard ? so baked these using the “spraying water into oven” method, bit messy ?… But taste as wonderful – – even when heated up in oven from the freezer ?
Hi Paula, may I know the temperature of the water after being heated? As I don’t have a microwave. Thanks.
Hi Ju,
Let me apologize in advance for all the recipes I use a microwave in. I love microwaves and can’t imagine life without them.
In this recipe, the water will have to come to a boil (212˚F) to thicken the mixture. Use a small pan and it shouldn’t take long.
I am using Panasonic
Will I get fruit bread recipes
Leela,
I’m not sure what you mean by “fruit bread recipes.” If you are talking about traditional banana bread that is a “quick” bread with baking powder and/or baking soda, I don’t have recipes like that on my website. My recipes are strictly for yeast breads, and some of them do have fruit in them. My banana yeast bread is fabulous if I do say so myself, but it’s not a cake-like bread.
Let me make
Hi there Paula!
Just whipping these up and need to confirm the gram discrepancy between the sugar and salt. Both 1.5 tsp, but sugar is 18g, and salt is 9g? Seems like a big difference for 2 substances that are similar in texture?
I’m using rosemary salt for a little variation! Thank you fo all the awesome recipes! My family just loves that I’ve taken up making bread, and I couldn’t have done it without you!!!
Tia,
Thank you for catching this and taking the time to write. The sugar is wrong–should be 6 gr. The salt is correct at 9 grams. I use the conversion table on the King Arthur Baking site if you ever want to check an ingredient for yourself. https://www.kingarthurbaking.com/learn/ingredient-weight-chart
Also, thank you so much for your kind words. You made my day!
What temperature should the microwaved water be.
Thank you.
Hi Tira,
If you’re talking about the cup of water at the beginning of the recipe, room temperature is fine. The water/cornstarch mixture is cooked until it thickens. Have never checked the temperature on that mixture.
This sounds great for hoagies. If this recipe makes 8 buns might it make 6 hoagies?
Hi Vivan,
Sure, I think it would make 6 hoagies, although I’ve never tried it. Do you want your hoagies to be really crusty? If not you could leave the cornstarch glaze off.
These are excellent! I have made them 3 times in the last 2 weeks. The first batch we just couldn’t stop eating. The second was cut up and used for fondue dipping for our annual NYE celebration (just the 2 of us) and the third is being used for small sandwiches. Thank-you so much for such an easy, delicious and consistent recipe.
Hi Nancy,
I like your idea to use it for fondue dipping. What a great tradition! Gotta remember this. Thanks for writing.
I made these yesterday. They were excellent with a tender inside and crunchy crust. I appreciated your tips for troubleshooting the dough’s consistency.
Hi Renee,
Good deal. Always happy to hear when a recipe works out for you. Thank you for writing.
Hi! I’m going to be making these rolls tomorrow- very excited! Was just wondering, if I knead the dough by hand how long should I allow it to rise until it is double in size?
Hi Nicole,
It’s difficult to tell you an exact time as it depends on several factors: the temperature of the dough when you start the rising process, the ambient temperature where the dough is sitting, and the kind of yeast you use. In general, it takes about an hour to an hour and a half. Check it after an hour to see if it has doubled in size.
Do you know how to check if the dough has risen enough? Poke two fingers into the dough and pull them back out. The holes should start to fill in SLOWLY when the dough is ready. If the holes don’t fill in at all, the dough has risen too much already. If the dough bounces back and the holes disappear almost immediately, it needs to rise some more. I hope that helps. Happy Bread-eating!
I tried these for the first time yesterday and I have a second batch proofing in my oven as I write this. These rolls are fantastic and so easy. The recipe is perfect as is. Yesterday, I made the rolls a bit smaller to serve with dinner; today I made the larger size to use as buns with turkey-spinach-feta burgers. This just might be my new favorite bread recipe. I am all Italian and was raised on bread that is very much like yours; my family raved over these and that is high praise indeed coming from a bunch of Italians who have very strong opinions about good food. Thank you so much!
Paula, thank you for answering my questions on refrigerating this dough – it was a great success! I made a biga the night before using 1 cup of the flour and ½ cup whey (instead of water) and ¼ teaspoon yeast. I added it to the recipe reducing your quantities of flour and water by those amounts. After the dough cycle was complete I plopped the dough into a deep greased glass bowl, covered with plastic wrap and refrigerated it overnight. Next morning I divided the dough into 8 equal pieces, formed the buns and placed them on a lined baking sheet to rise for 1 hour 15 minutes in the oven with the oven light on. I find the oven with the oven light on is the perfect proofing environment. After they had doubled in size I placed a shallow bowl of water on the bottom rack of the oven (for steam) and preheated the oven to 425F. I brushed the buns with the cornstarch glaze, slashed them slightly and baked them for almost 20 minutes. The tops are “crackly” and the interiors are soft and chewy. I hope my feedback helps.
Hi Paula! Greetings from Nova Scotia, Canada! Can I refrigerate this dough overnight after the dough cycle ends? If so what would I need to do the next day? Do I need the cold dough to warm up before shaping (like your pizza dough) into rolls or do I shape them cold and allow to rise if so for how long? Any advice would be greatly appreciated as I would love to adapt this recipe into an overnight refrigerated all-purpose dough. Thanks so much!
Hi MJ, I have never tried it with this dough, but in general, you can do it with most dough recipes. Worth a try. I would not think it is necessary to wait for the dough to warm before shaping into rolls. However, if you shape the cold dough into rolls, it might take an additional hour or two for them to proof until almost double in size. I can’t give you a specific time. It will depend on the ambient temperature where your rolls are rising as well as the size of the rolls, how long you took to roll them out, how cold your baking container is, etc. There’s a good chance that refrigerating overnight will improve the flavor of your rolls.
Paula, I have just submitted a 5 star review. Thank you for answering my questions on refrigerating this dough – it was a great success! I made a biga the night before using 1 cup of the flour and ½ cup whey (instead of water) and ¼ teaspoon yeast. I added it to the recipe reducing your quantities of flour and water by those amounts. After the dough cycle was complete I plopped the dough into a deep greased glass bowl, covered with plastic wrap and refrigerated it overnight. Next morning I divided the dough into 8 equal pieces, formed the buns and placed them on a lined baking sheet to rise for 1 hour 15 minutes in the oven with the oven light on. I find the oven with the oven light on is the perfect proofing environment. After they had doubled in size I placed a shallow bowl of water on the bottom rack of the oven (for steam) and preheated the oven to 425F. I brushed the buns with the cornstarch glaze, slashed them slightly and baked them for almost 20 minutes. The tops are “crackly” and the interiors are soft and chewy. I hope my feedback helps.
Thank you, thank you MJ. You’re the best!! I love that you used whey. Yes. Perfection. I’m going to try it myself.
My first time making rolls. Came out perfect! I added poppy seeds to the top before baking.
Can you ever over-proofed these babies?? Because I’ve forgotten to set my timer ?
Yes, Ju, you definitely can over-proof. If that is what happened, push the dough down and let it rise again, just not as much. When your bread is over-proofed, it will usually collapse on top and/or the sides. Hope this helps.
Thanks Paula. They turned out PERFECT! Family requested to make again ?
When I type the fonts so light that I can barely read and so made a spelling error, is it your website or soething wrong on my side! The spelling should read Followed
Thanks
When I type the fonts so light that I can barely read and so made a spelling error, is it your website or soething wrong on my side! The spelling should read Followed
Thanks
This afternoon I folowed your recipe to make the crusty rolls Your Very special hint of the cornflour soloution brushed on the rolls just before putting them in the oven was Brilliant- Earlier I had to put a pan of boiling water in the oven and still did not acheive the reults, but with this method they came OUT just Amazing! THANKS A LOT , really appreciate it
Glad you liked them SS. I think I agree with you that the font is light when you are typing a comment. Will remedy that ASAP. Thanks for letting me know.
I made these for Thanksgiving, with no changes to the recipe. They were a big hit! Easy, and perfect, tender and crusty, as promised.
Thank you for these wonderful bread recipes. I’ve only recently started making bread again and love making the dough in the breadmaker and baking in the oven. We were not fans of the bread baked in the breadmaker so this is exactly what I was looking for. These rolls were great! Next time I will use part whole wheat flour or 12-grain. Have you done that before?
Our favourite so far is the sunflower oatmeal bread – I skip the sunflowers and substitute Whole Wheat flour for part of the white flour. A very much loved bread here. Thank you for making breadmaking so easy!!!
I am making these for my mom. Do you have any freezing suggestions? Should I freeze after cooking, freeze before? If freezing before what about the glaze? I would like to make it as easy for her as possible? I am hoping it will be a taste of home (UK) for her.
I made these last night. They came out perfect and everyone loved them. Thank you for the recipe.
I have been trying out different recipes for crusty rolls, but they never turned out right. Now I will never have to look for one again!!! Thanks Paula for sharing. These rolls were just yummy and the crust on top was just like your picture!!! The cornstarch mixture, as well as the entire recipe was a bomb!!!
They are great, no mistakes in measurements! Really nice trick the cornstarch! Thanks for adding this recipe in one of my favorites of bread making! Real tasty rolls!
Thank you, Paula! We’re going to use them for pulled pork sandwiches tonight. They’re in the oven now and smell amazing! Thank you so much for your recipes. I’m new to bread machines and I’m learning a lot on your site.
I made the glaze with 1/4 cup of water and then realized there are no units on it implying it should be 1/4 teaspoon but that doesn’t seem like enough water. Should it be cup or teaspoon? Anyone know?
Hi Susan,
My mistake–which I have corrected. You were right to assume 1/4 CUP of water. Hope your rolls turn out to your liking.
These are great rolls! I made mine by hand using whey in place of the water. In order to get the nice crust, the rolls definitely need close to 35 minutes, which I initially thought would be too long a baking time. Thank you for sharing this recipe.
made these tonite. So good. I brushed mine with butter and it only took 20 minutes.
Thank you for the Metric measurements ?
You’re welcome, Margaret. Anytime you find one of my recipes without them, send me a message and I’ll covert it ASAP.
I just took these out of the oven. It’s a snow day here and I was looking for a roll to go with the soups (clam chowder and also beef vegetable) I have simmering. Wish I could include a picture but I don’t know if that’s an option. Yes, I took pictures because they are beautiful 🙂 So happy with how they came out!! They look really good, they are crusty on the outside, soft on the inside… and they taste AMAZING. I always come back to your site for bread recipes. Thank you for another fantastic recipe!
Thanks for the testimonial Andrea!
Why do you use 1/2 AP flour and 1/2 bread flour? Why not use all bread flour?
Hi Tricia,
You can use all bread flour if you like. I like the texture of the combined flours in these rolls since they are not meant to be light and fluffy. If you try both, I would love to know your favorite.
My bread machine directions say to put in the yeast first,then flour, etc. ending with the liquid. I’ve noticed your recipes, including this one, start with the liquid and end with the yeast. Does it matter which way I put the ingredients in? Thanks for helping out a novice. I made my first loaf of bread using the combined bread machine and oven. It came out great!
Hi Beaner,
You ask a very interesting question. I generally say to follow the directions for your particular bread machine as far as the order of ingredients. All of machines have specified the flour, then the yeast last. I can’t imagine doing otherwise if you are using the timer because you don’t want your yeast to get wet. If not using the timer, I can’t imagine why it would matter. Glad your loaf came out good. May you have many more happy bread-making experiences.
Yes it matters! You do not want the yeast to get wet initially in a bread machine.
I’m also making these today. So far so good 🙂 however I didn’t have cornmeal so I’m doing without. The cornstarch / water slurry is very interesting. Can’t wait to eat these with my soup. I love this blog. Thank you so much for doing this.
making them today Tuesday jan 28/13 never heard of using cornstarn and water like that idea thanks
diane
Nice rolls, and I love the tip on using cornstarch with water who knew? Thanks for sharing these I must try this out soon.
Wow! I love bread and this recipe looks easy and tempting!
Would be so good with soup but makes me wonder if you have a good bread machine recipe for bread bowls.
What an interesting method for making a nice crust! We love crusty rolls, and this sounds like an easy way to make them. They’d be great with all of the soups we’ve been having in this cold weather! 🙂
These look and sound so good! I can’t wait to try them.
woo, HOO!! I’m running to the kitchen to start this now! I don’t normally save my whey but just did a batch of yogurt and did! I love the thought of the crusty exterior!!! Is the 1 tsp of yeast true? Very excited ! Thank you!!!