Can You Use Any Bread Recipe in a Bread Machine?
Sneak Peek: Wondering if you can use a favorite yeast bread recipe in your bread machine? The answer is yes—most recipes adapt well once you adjust flour amounts, liquids, yeast, and loaf size.
If you are looking for the Soft Garlic Breadsticks recipe that used to be on this post, click here.
This post contains affiliate links. As an Amazon Associate, I earn from qualifying purchases at no extra cost to you.
Yes, most traditional yeast bread recipes can be adapted for a bread machine. Once you understand how to adjust flour amounts, liquids, and yeast, the process becomes predictable and reliable.
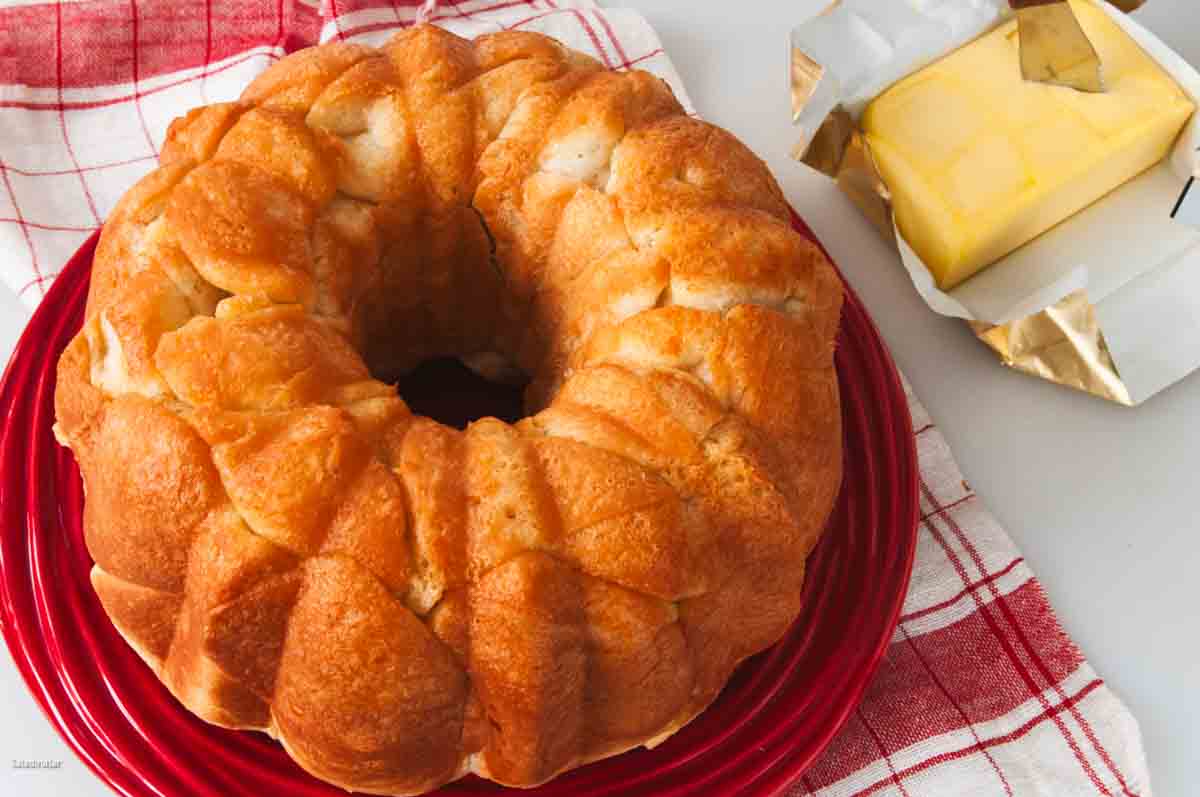
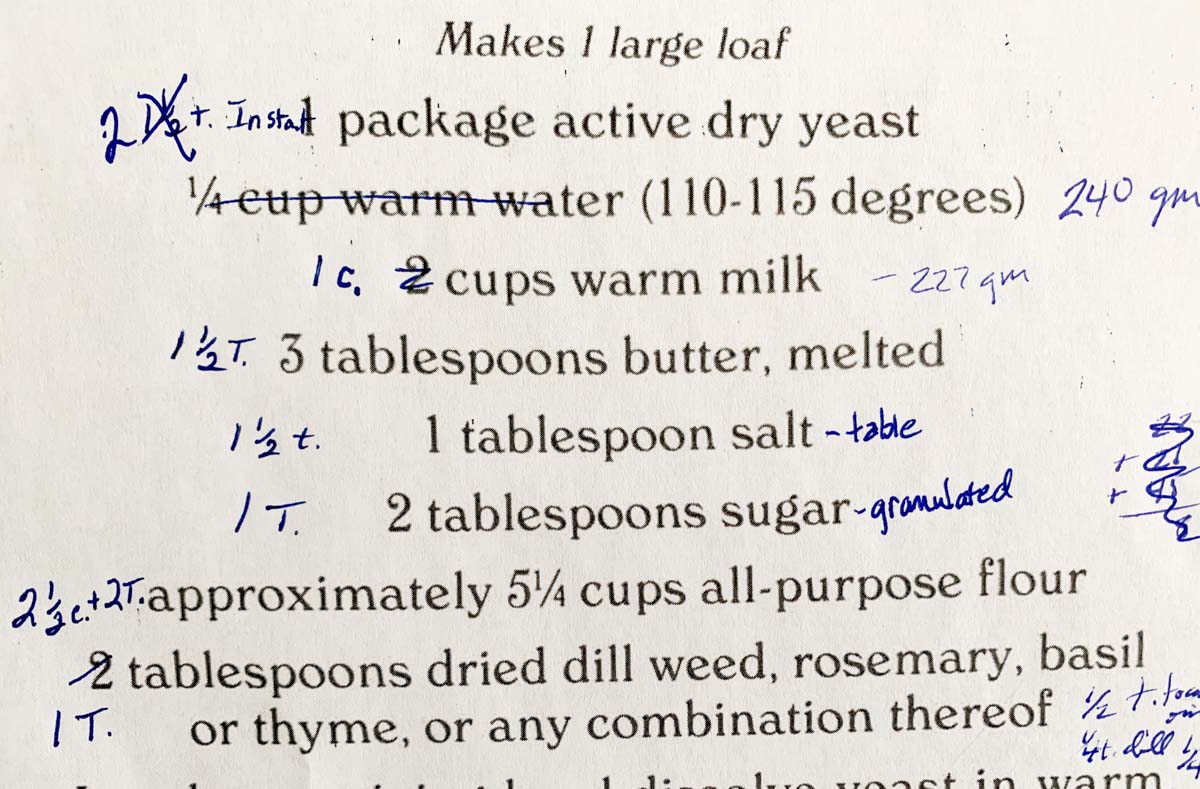
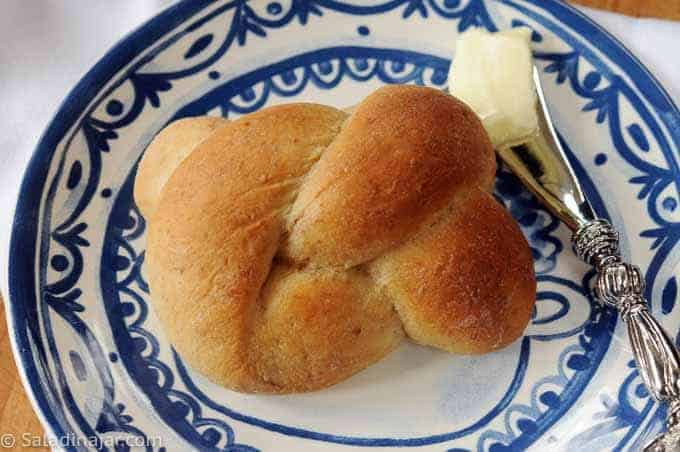
Find that old family recipe (maybe the hardest part of the whole process). Let’s talk about adapting it like I did in the picture above with Helen Corbitt’s monkey bread. Keep a tradition going or start a new one with the help of your bread machine.
Can Any Bread Recipe Be Made in a Bread Machine?
Most traditional yeast breads adapt well to a bread machine—even enriched or sticky doughs that are difficult to knead by hand. Recipes that behave more like batter than dough, such as very loose refrigerator doughs, should not be mixed in a bread machine because they don’t benefit from kneading.
First Steps Before You Begin
Before adapting any recipe, check how much flour your bread machine can handle. Overloading the pan strains the motor and leads to poor kneading.
Typical capacity guidelines:
• 1-lb machine: 2 to 2⅔ cups flour
• 1½-lb machine: 3 to 3¾ cups flour
• 2-lb machine: 4 to 5 cups flour
Not sure what size machine you have? Fill the pan with water, one cup at a time, and count how many cups it holds.
If the recipe is too large, scale all ingredients down proportionally. If it’s too small, the loaf may turn out short and dense—better to increase the recipe or bake the dough in your oven instead.
Adjusting Recipe Size to Match Your Machine
Once the flour amount fits your machine’s capacity, most traditional yeast bread recipes can be adapted successfully.
- Too large? Scale the recipe down. Divide all ingredients proportionally.
- Too small? The loaf may bake shorter and denser. Consider increasing the recipe size or baking in the oven instead.
Step-by-Step Guide to Converting Recipes
1. Calculate the Flour

Start by adding up all the flour and flour-like ingredients in the recipe, including oats, cereal, or vital wheat gluten. Then compare that total to your machine’s flour capacity.
2. Scale the Recipe if Needed
If the recipe is too large, reduce all ingredients proportionally. If it’s too small, the loaf may turn out short and dense, so you may prefer to shape the dough and bake it in your oven.
3. Measure Liquids
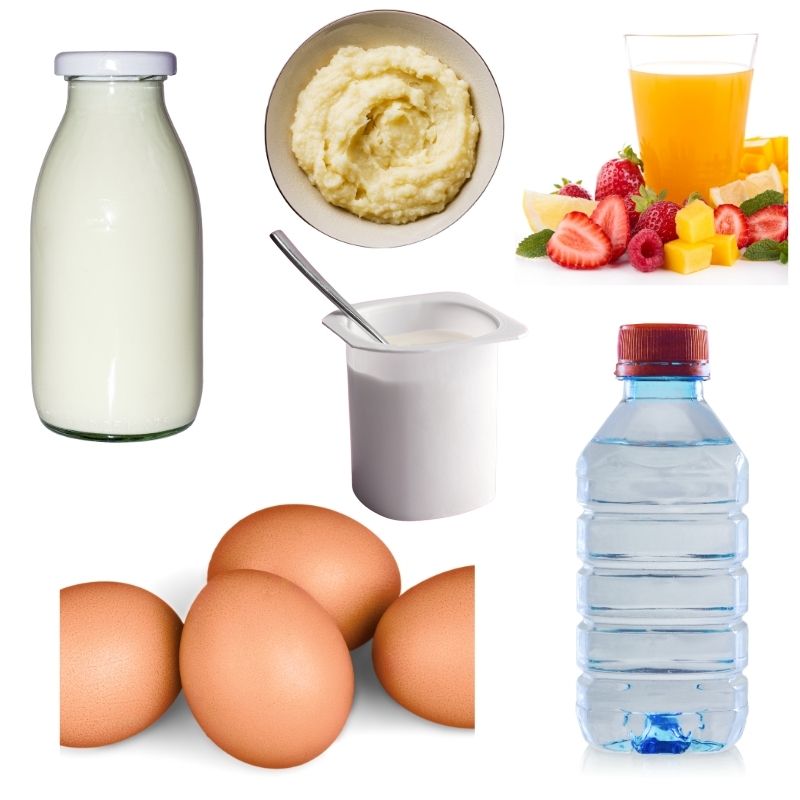
Start with 3/8 cup of liquid per cup of flour as a guideline, then adjust during kneading if needed.
4. Choose the Yeast
Use instant, rapid-rise, or bread machine yeast when adapting older recipes. These don’t require dissolving and work well in most bread machines.
If the original recipe calls for active dry yeast, you can substitute instant yeast by reducing the amount slightly (about ¼ teaspoon less per packet).
Most recipes using 3–4 cups of flour only need 1½ to 1¾ teaspoons of instant yeast. Modern yeast is stronger than older formulas, and using less often improves flavor.
If you prefer to keep using active dry yeast, that’s fine—just add about ¼ teaspoon more than the instant yeast amount.
5. Don’t Skip the Salt
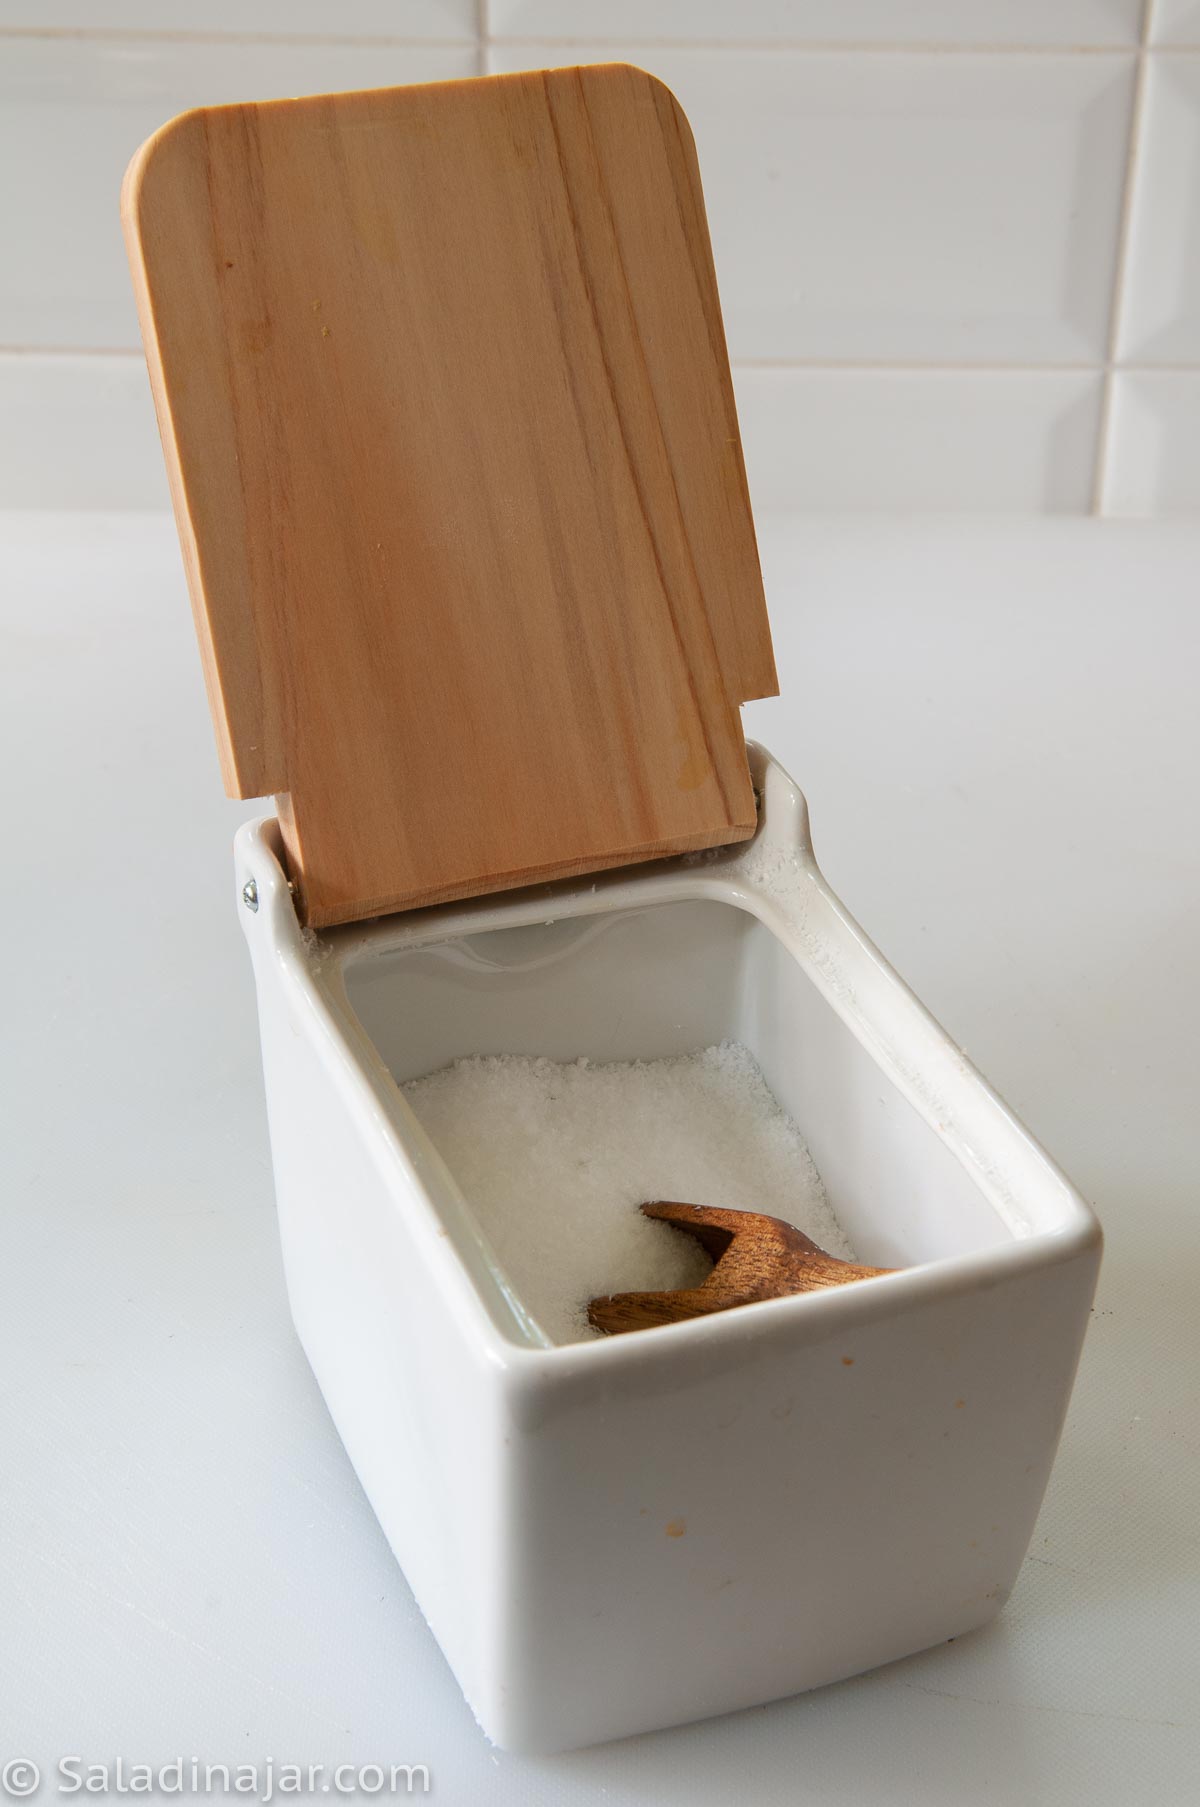
Salt controls yeast activity and strengthens the dough structure. Without enough salt, dough can rise too fast and lose shape. Even sweet dough needs salt for balance and structure.
A good starting point is about ½ teaspoon salt per cup of flour. Add slightly more if using kosher salt instead of table salt.
6. Use the Right Amount of Sugar
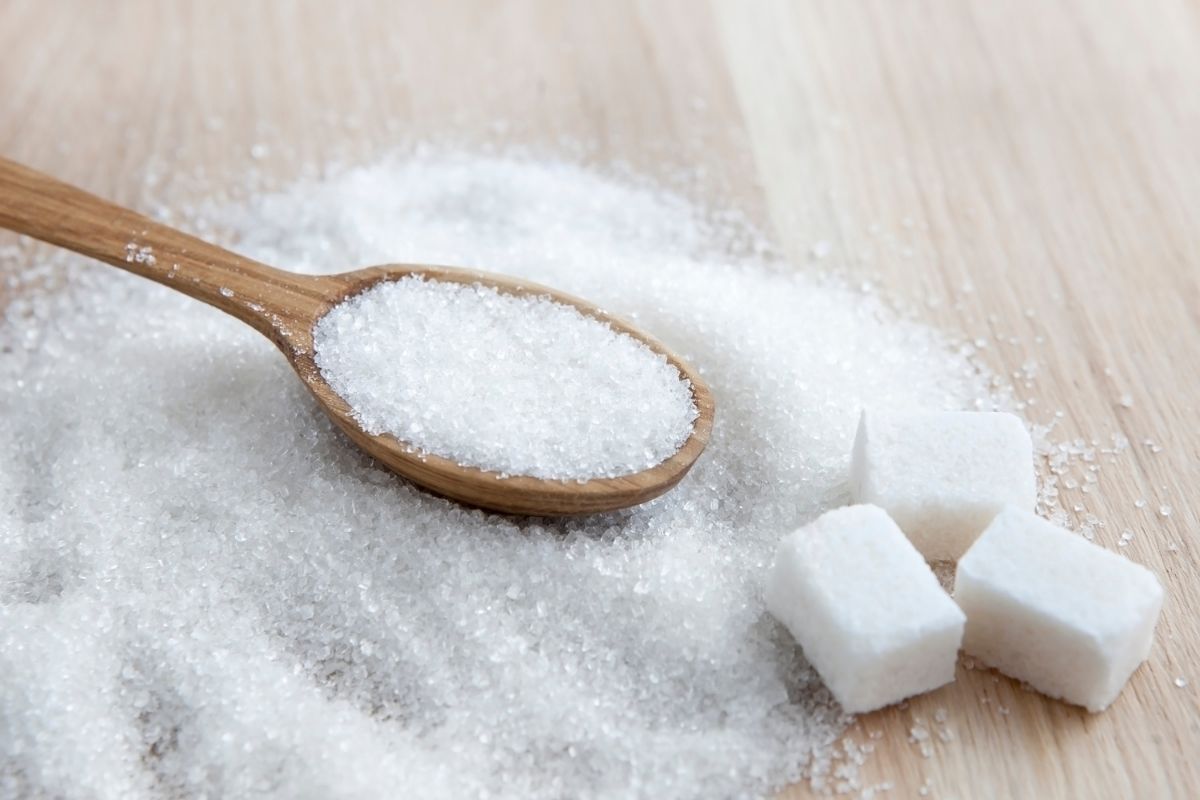
- Yeast thrives on sugar but too much can slow it down. For sweet breads, allow extra rising time.
- Tip: Skip pre-activating yeast with sugar when using instant yeast.
- Read more about the effects of sugar in yeast bread.
7. Handle Fats Wisely
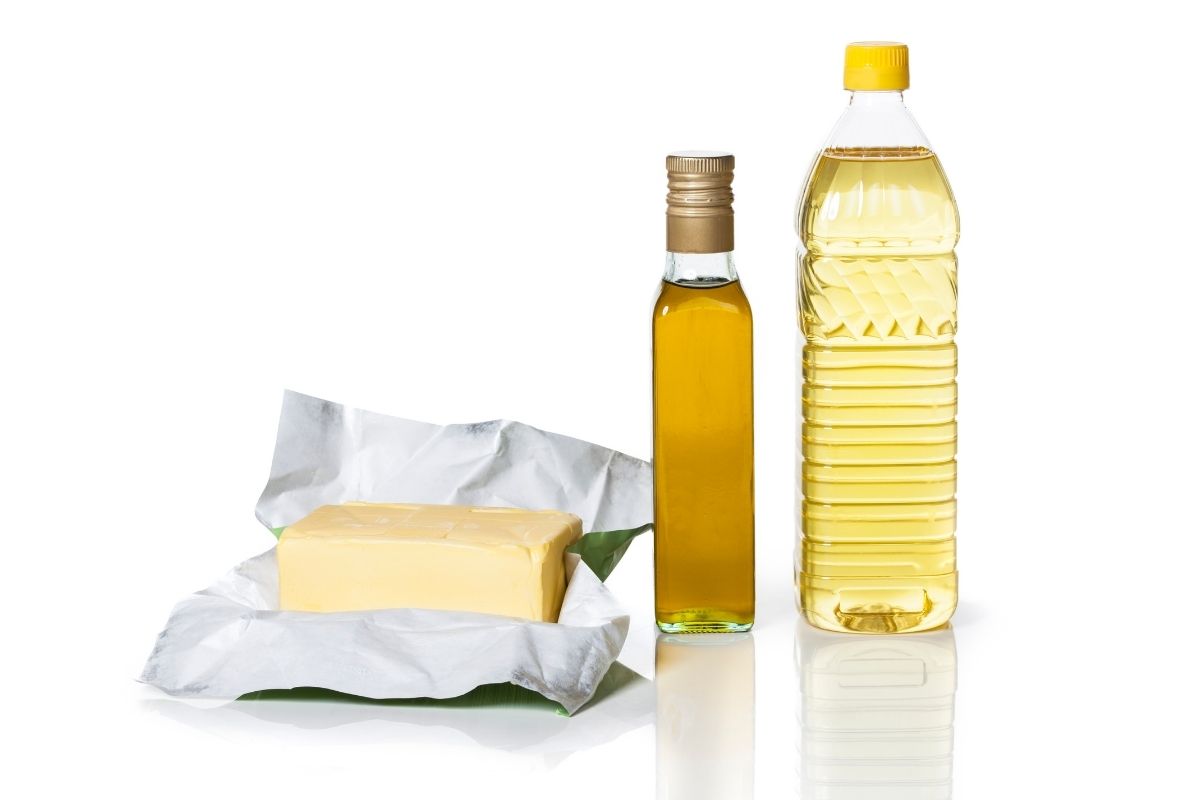
- Substitute butter for shortening or use oil for a slightly different texture.
- Add fats under the flour to prevent coating the yeast prematurely.
8. Add Mix-Ins Carefully
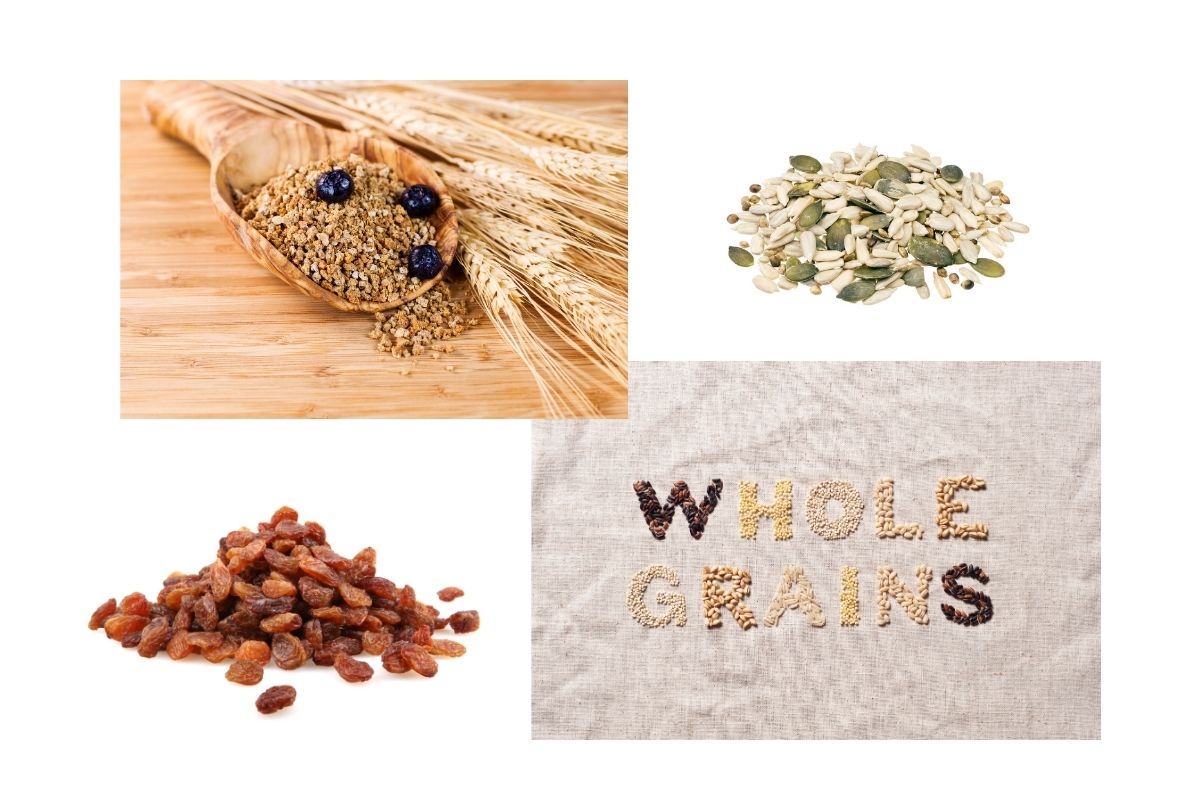
- Limit add-ins (seeds, nuts, dried fruits) to 1/2 cup for a 1 lb. loaf.
- Add them during the machine’s beep or knead them in manually during shaping.

Tips for Assembling Ingredients
- Layer ingredients properly: Liquids first, followed by salt, fats, flour, and yeast.
- Room temperature ingredients: Not necessary for most machines. Kneading friction warms the dough sufficiently.
- Hold back liquid: Reserve about 1/4 of the liquid and adjust as needed during kneading. After making your recipe several times, you may not have to do this.
Troubleshooting Common Dough Issues
- Crumbly dough? Add liquid.
- Dough forming a tight ball too quickly? Add liquid.
- Runny dough? Add flour.
- Sticky dough? Add small amounts of flour until it pulls away cleanly from the sides. (Some recipes like brioche or ciabatta are exceptions.)
Watching the dough during kneading is the most important thing you can do when adapting recipes for a bread machine. Most conversion problems can be solved by adjusting flour or liquid during kneading.
FAQ
Can all bread recipes be adapted for bread machines?
Most traditional yeast bread recipes adapt well to a bread machine. Recipes that behave more like batter than dough (such as many gluten-free breads), or doughs designed for long refrigerator or no-knead rises, should not be mixed in a bread machine because they don’t need kneading.
What if my bread machine has no “add-in” beep?
Manually add extras like raisins or nuts during shaping or before the final rise.
Can I bake directly in the machine?
Yes, but shaping and oven-baking often yield a better crust and loaf shape that you will be proud to share with family and friends.
Final Thoughts
Once you understand how to adjust flour, liquids, and yeast, your bread machine becomes a practical tool for bringing old favorites back to life. It’s a simple way to turn handwritten recipes and family traditions into homemade bread that’s still worth sharing today.
— Paula, Home Economist
Homemade Food Worth Sharing
Need help troubleshooting?
Email me: Paula at saladinajar.com — photos help!
What Would You Like To Read Next?
- 6+ Bread Maker Tips You Need To Make Marvelous Bread
- Why Baking Bread Machine Dough in the Oven is Better and How To Do It
- How to Make Herb Dinner Rolls With Your Bread Machine
- Condensed-Milk Soft White Bread Recipe

How do you figure out the flour conversion from a regular bread to a gluten free bread if your bread machine has a gluten free option?
Hi Becky,
It’s my opinion that bread machines don’t make good gluten-free bread. You can read why here. Maybe a gluten-free website would be more helpful but I can’t recommend one because I haven’t found it yet. 🤷🏼♀️
I love all the recipes you share and the tips!! Oh my .. I spend so much time hanging out here. Thank you so much !
Hi Maryanne,
Thank you for the encouragement. You’re welcome to hang out anytime. Don’t hesitate to write if you ever run into a problem or have a question.
Paula,
Thank you for these tips on adapting bread recipes for the bread machine, especially about adjusting the yeast. I make a lot of regular bread recipes in my bread machine and the yeast measurement is the tricky part, plus, I usually use regular active dry yeast. The small book that came with the bread machine is not very helpful as it always calls for 1 tsp. yeast no matter what the recipe. I think there may be a translation problem. My machine makes 1 1/2 or 2 lb. loaves, I usually do the 2 lb. loaf that uses 3 1/2 cups flour.
I think your tips will help me a lot in getting consistent, better rises. My new favorite recipe is a yeast bread with applesauce, molasses, honey, oats, whole wheat and white flour. It’s dark, tender, lightly sweet, a good breakfast, warmed slightly in the microwave and buttered. I’ve found it doesn’t take much molasses to make bread dark!
Thank you again.
Linda
I think I know the bread machine with difficult instructions. I get questions about it regularly. Sounds like you’ve figured out how to make it work for you, anyway. Good job! Your bread recipe with applesauce and molasses sound like a wonderful breakfast or snack bread. Thank you for writing.
How would you adapt a recipe that calls for hours or days of fermentation/rise?
Hi Gab,
Are you talking about a preferment? Or are you talking about something like sourdough that takes many hours to rise. If it’s a preferment or biga or similar, you can mix it in the bread machine and turn it off. Let it sit overnight or for a few hours. When you are ready to add the rest of the ingredients, add them on top of the preferment.
If you are talking about sourdough or something similar, run the DOUGH cycle to mix and knead the dough. You can leave the dough in the pan for the first rise or remove it to another bowl—it doesn’t matter. Then, shape by hand and bake in your oven.
If this is a no-knead recipe, don’t even use a bread machine. Bread machines are for bread that should be kneaded to develop the gluten. That’s one reason it doesn’t do non-gluten doughs very well. Let me know if you have more questions.
Hi Paula,
Do you have any gluten free roll or bread recipes?
Thanks!
Kathy
Hi Kathy,
The only gluten-free bread recipes I have are a couple of quick-breads for Greek Yogurt Waffles and Almond Flour and Greek Yogurt Dough for Low-Carb Biscuits.
I received a gift of a bread machine. I had been trying to use it the way it said. My dough wasn’t rising enough…so I started mixing the dough on the dough setting and letting it rise in the machine for about an hour. Then I would punch it down and let it rise again. Set it on bake and it all looked good, but the last two times the top of the bread collapsed and the bread had a big hole in the top. (It is a vertical loaf) What am I doing wrong?
Hi Donna,
Glad you wrote. The two main reasons for “volcano bread” is too much yeast or the dough over proofed. Take a look at this post for more information. Sadly, this is very common with bread machines, especially in the summertime. I recommend you sign up for my FREE 7-day email course. If you are open-minded, I will show you a different way to use your bread machine so this doesn’t happen. I’ll teach you how to make dependably fabulous bread that your are proud to share.
Hi, I use both my oven and a bread machine to make my breads, rolls, pizza dough, etc. After reading your article, my question is what size pan do you bake a 1 pound loaf in, a 1 5 pound loaf in and a 2 pound loaf in? For how long on each size and at what temperature? 350? Thanks so much. I have a great honey wheat nd a pumpernickle I make in my machine while camping and would like to convert them. Thanks so much
Karen
Hi Karen,
You can find these guidelines in this post There are no hard and fast rules because some recipes rise more than others. One rule I follow (until proven wrong) is that the dough should not fill more than half of the pan when you first lay the dough in there. Enriched doughs (eggs, milk, butter, etc.) should bake at 350-375˚F. Leaner doughs like French bread should bake at 400-425˚F.
This is an amazing resource. VERY THOROUGH!!!!! Much appreciated. Hubby has taken to making bread in bread machine and was wondering if he could use our regular bread recipes, and you have opened up a new world to him. Thanks
Hi Georgie,
I’m so glad you took the time to leave a comment. Sounds like your husband is getting adventurous. That’s my goal for all of my readers. Don’t hesitate to write back if you have any questions.
Such good information. I use my bread machine for the whole process as my oven uses propane and it’s really expensive. Thank you so much!
Hi Christine,
So glad to hear from you. Glad you found the article helpful. Happy bread-baking.
Hello, This is just what I needed with years of recipes to convert as I’ve pulled out my barely used bread machine. Thank you, Thank you!
Is it just me and my page load, or is Step 4 missing?
Was unable to purchase my regular type of yeast the substitute was fleischmanns traditional how should I use it in a bread machine?
@Carol,
Use it the same way. You don’t have to dissolve it, but you can if you prefer. It can be a little slower to rise in the beginning but will catch up eventually.
Great advice. I admit, my approach was to just check the amount of flour to be sure the machine could handle things, dump and go. This helps explain why the results were not always as expected.
Hi Karen,
Good to hear from you. Yes, unfortunately, bread machines are notorious for producing surprises. But it’s not their fault. It’s almost impossible to program a machine to produce perfect results when we are dealing with live organisms (yeast) that are deeply affected by their environment.
I can’t wait to hear more about your bread-baking adventures.
Well, Paula, your blog, recipes, and advice have helped me forge ahead to being able to convert just about any roll or bread recipe for use in my bread machine. I love being able to put everything in at one time, check in a bit for consistency and get back to my quilting. After shaping and baking in the oven, my home smells wonderful! Kudos to you for teaching the art of machine bread making!
I can just imagine walking into your house and smelling all the good things coming out of your oven. What a welcoming gesture! Your comment made my day. Thanks, Gwynette
I would like to use my Panasonic bread machine on the basic dough setting but bake separately as mentioned. I have a yeast dispenser in the lid of my machine for instant yeast (not sure if other machines have this also). When I make pizza dough the yeast goes in the dispenser to add it at the appropriate time. I notice that the recipes say to put the yeast in the pan with the other ingredients – should I be doing this or put the yeast in my dispenser instead.?
Thanks,
Hi Linda,
The purpose of the yeast dispenser is to add it at the perfect time so the liquid does not touch it and activate the yeast too soon. If there is a rest period built in to the beginning of the bread cycle or you are using the timer to start the bread at a later time, I suppose this is a good idea. Otherwise, you can just dump it all in together and start mixing. As far as I know, Panasonic is the only machine with this feature, but I have not researched all the models out there so could be wrong about that.
Write back if you still have a question.
Good afternoon Paula, may I know if honey ? is to be counted as part of the total amount of liquid when converting a yeast recipe for bread machine?
(I saw you mentioned oil & butter, but didn’t see the mention of honey).
Thanks.
Hmm. That is a good question. I would not count it initially. Then check your dough after it has kneaded about 10-15 minutes. If you always need to add flour to make the dough stick to the side, then pull away cleanly, then probably the honey is making a difference on the liquid side. Does that make sense?
p.s. You always ask the best questions.
Thanks Paula. It made perfect sense ??????
Thank you so much made it. Really good
Thank you so much for the blog. It has inspired me to bake! I have had a bread machine for years and it has been collecting dust. My daughter told me about your website for the dinner rolls and they turned out perfectly. I am now branching out and believe that I have found my inner pastry chef. Thank you again!
You’re welcome, Ann. Thanks for writing. Happy Bread Eating!
This is really useful! I have a ton of recipes I’d like to convert for bread machine use. Thanks a lot!
I love to use my bread machine to try out different recipes. But I found some dough to be really hard to handle, especially if the yeast is not designed for bread machines.
I just bought a new Zojirushi BB-PAC20 and it is a fantastic mixer. I’m looking forward to more posts like these so I can play around with it more often!
This is exactly what I need. I love breads but I hate baking. I only do it in the bread machine. Thanks Paula. 🙂 Very useful post.
Hi Paula, this looks great, can’t wait to try it! I wanted to ask how long your machine’s dough cycle is. Mine is 1.5 hours but I can’t help thinking it’s too long… that maybe I should cut it down so that the second rise can go nicely without the yeast being used it. I wanted to check how long your dough cycle rise is, anyway, before trying this 🙂
My dough cycle runs for 1 hr and 40 minutes. I don’t think yours is too long at all.
Hi! Im definitely a newbie and want to try my bread maker also for baking my bread. My question is can you use regular Fleischmann’s Yeast in my bread machine or do i have to use a special yeast for a bread maker? Also what brand of flour do you recommend?
Thank you
May, Yes, you can use regular yeast in a bread machine but it needs to be dissolved first. Stir the yeast into 1/4 cup of warm water, add a pinch of sugar and water for it start bubbling. Then add to the other ingredients. No need to do that with bread machine yeast or instant yeast. Just dump it in with the rest of the ingredients and it will dissolve as it mixes. Much easier.
Regarding using your bread machine to bake bread, I highly recommend you use only recipes designed for your specific bread machine to ensure the best chance for success. When you get some experience under your belt, or you get tired of those recipes, come back to my website. 🙂
About the best flour, King Arthur is very nice…and very expensive. But you can also make wonderful bread with just about any brand if you know how to adjust the flour and liquid to get the best consistency. See this post for some instruction about that.
Hi Paula. So glad I can find ur website. Its really inspiring. Im new with breadmaker. I tried ur dinner rolls and sweet milky bread. They r wonderful. Anyway I have a question if the recipe contain milk powder. Where I have to put the milk in order? Thank u
It doesn’t really matter much. I would add at the same time I add the flour.
Made this recipe into dinner rolls that were outstanding! The texture was so light and tender.
I accidentally added a full package of active dry yeast into the dry ingredients instead of 2 tsp. of instant. Worked beautifully! The warm milk and water did a great job of activating the yeast as it mixed.
I was afraid the bits of garlic would overbake and become bitter, so I added the garlic and herbs to the butter and melted it all together. I brushed the tops with the now infused butter, not adding the garlic bits. When hot out of the oven, I brushed the rolls again with the butter including the bits of garlic. They were sooo good!! The garlic had lightly cooked when melting the butter and it was majorly delicious!! Ate have the recipe myself in one binge!
Am new to your blog and happy to have found you! Happy New Year!
Thanks for a great recipe that will be enjoyed many, many times!
I’m continuing with my questions about starting bread in a machine and then finishing in the oven… I saw that I should dump it out onto a floured surface and rise again. That would be 4 rises! Can I just dump it out after rise #3 in the machine into a buttered loaf pan?
Thanks
Joyce,
No, you must let it rise after it is placed into the pan. Perhaps you could dump it out of the bread machine pan after the second rise and let the third rise happen in your loaf pan. Failing to let the dough rise properly in the pan will result in a heavy lump of a loaf.
I’m so glad I found your blog! I am new to bread baking. I bought a West Bend machine because I liked the shape of the pan and the fact that it had 2 blades to handle whole wheat better. I made 4 loaves that were okay but today I’m making them for gifts and every one of the loaves rises unevenly. I read that I needed to add 1-2 tsp of water, did that and they were hard. So, after reading your article,I’m going to take it out after RISE 3 and place it in a loaf pan. I can’t seem to find a general time and temp to bake. Can you help. These are basic white loaves for gifts but most of the time, we will be making 100% whole wheat.
Hi Joyce,
You are asking a question that I can’t really answer for a specific recipe I haven’t tried myself. It is a matter of trial and error to some extent. Please check out this post for more details on where to start. You might try looking for a recipe in my index that is similar to the one you are using and follow the baking instructions. Since you are new to bread baking, I highly recommend you get a quick-read thermometer like this one on Amazon http://www.amazon.com/Digital-Cooking-Thermometer-Alarm-3518N/dp/B0001BFJ54. Bread should generally reach 190 degrees before you take it out of the oven.
By the way, 100% whole wheat can be tricky for bread-baking beginners and even more so in a bread machine. Don’t feel too badly if they don’t turn out as hoped in the beginning.
Some recipes work better than others. You just have to experiment. Any with potatoes in it usually work well but you can do it with other doughs, too.
Just curious especially for a recipe like this, could you take the dough from the machine, shape it and possibly refrigerate until you are ready to bake? I like to get a lot of prep done during the day if I can but with dinner rolls I definitely want them hot out of the oven at dinner time.
Hi Paula,
Wow, what a great site you’ve put together! Love the salad in a jar idea and will definitely give it a try. I love salads and I make my own dressings so I’ll really enjoy that.
Secondly, like so many on here, thanks to you, I have pulled out and dusted off my breadmaker. It was a gift years ago and I was just never happy with the results but I now know from your site and others that it really is best to use it “only” for the kneading and rising and to then bake the bread in a conventional oven. I’m doing that today and the machine has 45 minutes to go. Looking forward to trying out the loaf in the oven. I was also intrigued to hear that I’m only one of many people who finds the hole in the bottom of the bread from the paddle quite obnoxious! There you are trying to create this perfect-looking and delicious loaf and there’s a big nasty chunk missing from the bottom. It is off-putting. : – )
Just want you to know that all of your advice and the posts on here continue to be help people enjoy great bread and resurrect their machines. Although they’ve come in price, my Black & Decker one was $260.00 new. That’s a lot of money for a handful of uses to I’m delighted to be back at it. There’s just nothing quite like fresh bread from the oven and it’s a nice thing to bring to a friend or neighbour as well.
Many thanks for all your help,
Derek
Vancouver, BC
Can i make dough for biscuits in a bread machine? I have a bread machine book and it does not have a recipe for biscuits that i can use.
Doris,
No, I would not recommend that. Biscuits need to be mixed very lightly by hand. Those would be some tough ol’ biscuits.
Thanks a lot for the great recipes, Paula. I tried many of them. They were delish thanks to your useful directions.
You’re welcome Safa. Thanks for writing.
I want to give this a try. I have an old family recipe that calls for 10-12 cups of flour. I would reduce that to 3. My concern is the yeast. I use one packet of Fleishmann’s traditional yeast. How much would I use in the machine?
Wow! Only one packet for that much flour? I’m guessing that is some slow-rising dough. If it were me, I would start with 2 teaspoons of bread machine yeast and adjust from there.
Paula,
I want to finish up the huge bag of all purpose flour my husband brought 🙁 How much all purpose four should I use for 3 cups of bread flour
thanks so much
I found the recipe for a refrigerator roll that is made in the bread machine. I am going to try it.
http://whatscookingamerica.net/Bread/ButterRolls.htm
Now only if there was a recipe for people who didn’t have a bread machine!
Jaime, Actually, the original recipe printed in this post is for people who have no bread machine. Enjoy.
I know this is a really old post but it’s so helpful! I just have one question…I’m always confused about yeast. I have a jar of “bread machine yeast”. Is that the same as your “instant yeast”? I’d love to find a tutorial about all the different kinds of yeast and how to convert a recipe from one to the other! Thank you!
I am making these to serve with homemade ratatouille tonight! Thanks for an awesome recipe! Is you bread machine the 1 lb. loaf, or the .5 lb? I have a .5 lb. so I’m not sure if it will all fit… I may make it by hand. But either way I am going to make these DELICIOUS bread sticks tonight!
I have been cooking and baking for over 37 years, and your blog has changed the way I bake. I have used your wonderful recipes for bread machine breads, and converted many of mine. I cannot believe how wonderful tasting and easy everything is. I can’t believe I allowed my bread machine to sit idle for so many years on a shelf in the basement. Thank you again, for all your recipes and suggestions. If anyone out there has not tried this yet. DO!!! You will love it !!!!! I just have to work out extra everyday to keep fit, for all the extra baked goods around here now.
These look great, and since catering is at a stand still and I don’t have a new job yet I have time on my hands to try new things. But there are only two in the house, so can I refrigerate some of the finished dough and bake at a later time, Also enjoy all the recipes, many have given me ideas for new recipes of mine own.
Thanks, Roy
Yes, most recipes can be refrigerated. Some even develop more flavor in the process. Of course it takes much longer for the dough to rise before baking so allow extra time. Thanks for stopping by. Paula
This is super useful. I’ve never made anything in a bread machine, but would love to be able to convert my oven recipes into bread machine recipes (for that day in the not-too-distant future when I have my own kitchen and can buy one!)
Mmm, fresh warm garlic bread sticks sound lovely. I think I’ll try this out.
Thank you so much for posting this! We just started using our bread machine to make all of our bread about 2 months ago, and we haven’t tried a wide variety of recipes because we didn’t know how to adapt recipes. I am bookmarking your page so that I can refer to it often. Thanks!
This is wonderful! Thanks for converting to a bread machine recipe. Lovely picture to.
Great information! I’m going to pull out my bread machine so I can make rolls next week- Those garlic sticks sound yummy!
I just had to say that those photos are beautiful and that I love the shaping of these. I want to try it today! I have some Artisan Bread in Five Minutes dough sitting in the fridge and I’m going to attempt to make mine as pretty as yours. 🙂 Thanks for the inspiration.
Hi Paula,
This receipe looks great, can’t wait to try it. I’m having trouble making my bread come out soft and chewy, almost like the kind you pull apart. What am I doing wrong? I’m ready to give up on my bread machine. Thanks.
Carol
Are you baking it in the machine? I almost never do. The crust is usually too thick and crunchy. I use my machine ONLY for mixing and kneading. Have you tried My Favorite Dinner Rolls? They are soft and chewy–just what you’re looking for. But you have to dump the dough out of the pan, shape, let rise and bake in your oven. Small price to pay for hot, homemade dinner rolls.
that`s a really useful post!
have a nice time,
Paula